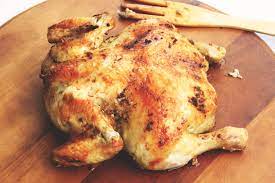
How To Cook Thin Chicken Breast in the Oven
Cooking thin chicken breast in the oven offers a convenient and versatile method to achieve delicious and tender results. Whether you’re a novice cook or a seasoned chef, mastering this technique can elevate your culinary skills and expand your repertoire of flavorful dishes. In this section, we will delve into the art of cooking thin chicken breast in the oven, exploring its benefits and providing detailed guidance on each step of the process.
Point 1: Proper Preparation and Seasoning
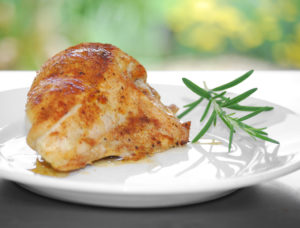
To ensure a delectable outcome, it is crucial to properly prepare and season thin chicken breast before placing it in the oven. Begin by gently patting the chicken breasts dry with a paper towel to remove any excess moisture. This step helps promote even cooking and enhances the browning process.
Next, consider marinating the chicken breasts to infuse them with additional flavor. A simple marinade can be made using ingredients like olive oil, lemon juice, garlic, and herbs. Allow the chicken to marinate for at least 30 minutes, or even overnight, to maximize the flavor infusion.
When it comes to seasoning, be generous with salt and pepper, ensuring that both sides of the chicken breasts are evenly coated. Additionally, you can experiment with various herbs and spices to add depth and complexity to the dish. Popular choices include paprika, thyme, rosemary, or a blend of Italian herbs.
Point 2: Optimal Cooking Temperature and Time
Achieving perfectly cooked thin chicken breast requires careful attention to temperature and cooking time. Preheat your oven to 400°F (200°C) to ensure a hot and consistent cooking environment.
Place the seasoned chicken breasts on a baking sheet lined with parchment paper or aluminum foil. This helps prevent sticking and makes cleanup easier. For even cooking, it is advisable to leave some space between the chicken breasts on the baking sheet.
Cook the chicken breasts in the preheated oven for approximately 15-20 minutes, or until they reach an internal temperature of 165°F (74°C). It is essential to use a meat thermometer to accurately gauge the doneness of the chicken. Overcooking can result in dry and tough meat, while undercooking can pose health risks.
Throughout the cooking process, you can baste the chicken breasts with any remaining marinade or pan juices to enhance their moisture and flavor. However, be cautious not to open the oven door too frequently, as this can cause temperature fluctuations and affect the cooking time.
By following these preparations and cooking guidelines, you can unlock the full potential of thin chicken breast in the oven. The next section will explore additional tips and variations to further enhance your culinary journey.
- Advantages of using thin chicken breast for quick and even cooking:
Thin chicken breast offers several advantages when it comes to cooking:
- Quick cooking time: Thin chicken breast cooks faster compared to thicker cuts. Its reduced thickness allows for quicker heat penetration, resulting in shorter cooking times. This can be particularly beneficial when you’re looking to prepare meals in a time-efficient manner.
- Even cooking: Thin chicken breast cooks more evenly due to its reduced thickness. With a thinner cut, there is less risk of the outer layers becoming overcooked while the center remains undercooked. This ensures a consistent texture and doneness throughout the chicken breast.
- Versatility in cooking methods: Thin chicken breast is well-suited for various cooking methods, including grilling, pan-searing, baking, or stir-frying. Its thinness allows for faster and more efficient heat transfer, making it adaptable to different cooking techniques.
- Suitability for various recipes and flavor absorption:
Thin chicken breast offers versatility in terms of recipe options and flavor absorption:
- Recipe versatility: Thin chicken breast can be used in a wide range of recipes, such as chicken piccata, chicken stir-fry, chicken wraps, or chicken sandwiches. Its thinness allows for easier incorporation into dishes that require quick cooking or layering with other ingredients.
- Enhanced flavor absorption: Thin chicken breast has a larger surface area compared to thicker cuts, which allows for better absorption of marinades, seasonings, and sauces. This means that flavors can penetrate the meat more effectively, resulting in a more flavorful and delicious end product.
- Tender texture: Thin chicken breast tends to have a more tender texture compared to thicker cuts. This can be advantageous when you’re aiming for a tender and juicy chicken dish, as the reduced thickness helps prevent the meat from becoming tough or dry during cooking.
In summary, choosing thin chicken breast offers advantages such as quick and even cooking, versatility in cooking methods, suitability for various recipes, and enhanced flavor absorption. These factors make it a popular choice for those seeking efficient and flavorful chicken dishes.
Thin chicken breast offers several advantages when it comes to cooking. Here are some reasons why you might choose thin chicken breast:
- Quick and even cooking: Thin chicken breast cooks faster compared to thicker cuts. Its reduced thickness allows for quicker heat penetration, resulting in shorter cooking times. Additionally, the thinness promotes more even cooking, reducing the risk of overcooking the exterior while ensuring the interior is fully cooked.
- Suitability for various recipes: Thin chicken breast is versatile and can be used in a wide range of recipes. It is particularly well-suited for dishes that require shorter cooking times, such as stir-fries, sautés, and pan-searing. Its thinness allows for faster cooking, making it convenient for quick weeknight meals or when you’re short on time.
- Flavor absorption: Thin chicken breast has a larger surface area compared to thicker cuts, which means it has more exposure to marinades, seasonings, and sauces. This increased surface area allows for better flavor absorption, resulting in a more flavorful and delicious end product. Whether you’re marinating, seasoning, or coating the chicken, the thinness of the breast ensures that the flavors penetrate the meat more effectively.
Overall, choosing thin chicken breast can save you time in the kitchen, provide even cooking, and enhance the flavor of your dishes. However, it’s important to note that thin chicken breast can be more prone to drying out if overcooked, so it’s crucial to monitor the cooking process closely to achieve the desired level of doneness.
Methods to be followed:
- Method 1: Quick High-Heat Cooking
- Temperature and time recommendations: Preheat the oven to 425°F (220°C). Cook the thin chicken breast for approximately 15-20 minutes or until the internal temperature reaches 165°F (74°C).
- Tips for achieving a crispy exterior and juicy interior: To achieve a crispy exterior, you can lightly coat the chicken breast with oil or melted butter before cooking. Additionally, you can use a baking rack placed on a baking sheet to allow air circulation and promote even browning. To maintain juiciness, avoid overcooking the chicken breast and consider marinating it beforehand to enhance flavor and moisture.
- Method 2: Low and Slow Cooking
- Temperature and time recommendations: Preheat the oven to 275°F (135°C). Cook the thin chicken breast for approximately 30-40 minutes or until the internal temperature reaches 165°F (74°C).
- Benefits of this method for tender and moist chicken: Cooking the chicken breast at a lower temperature for a longer duration helps to retain moisture and tenderness. This method is particularly useful for thin chicken breasts, as it reduces the risk of drying out the meat. It allows the chicken to cook more evenly and results in a juicy and tender texture.
Remember to always use a meat thermometer to ensure the chicken breast reaches the recommended internal temperature for safe consumption. Additionally, feel free to experiment with seasonings, herbs, or spices to enhance the flavor of your chicken breast.
Frequently Asked Questions (FAQ)
- How long does it take to cook thin chicken breast in the oven?
The cooking time for thin chicken breast in the oven typically ranges from 15 to 20 minutes at 375°F (190°C). However, the exact cooking time may vary depending on the thickness of the chicken breasts and your oven’s performance. It’s important to use a meat thermometer to ensure the internal temperature of the chicken reaches 165°F (74°C) for safe consumption.
- Can I use bone-in chicken breast instead of boneless for this recipe?
Yes, you can use bone-in chicken breast instead of boneless for this recipe. However, bone-in chicken breasts may require slightly longer cooking times compared to boneless ones. Make sure to adjust the cooking time accordingly and always use a meat thermometer to ensure the chicken reaches a safe internal temperature of 165°F (74°C).
- How can I prevent thin chicken breast from drying out in the oven?
To prevent thin chicken breast from drying out in the oven, you can follow these tips:
Avoid overcooking the chicken. Remove it from the oven as soon as it reaches an internal temperature of 165°F (74°C).
Consider marinating the chicken beforehand to add flavor and moisture.
Cover the chicken breasts loosely with foil during cooking to help retain moisture.
Brushing the chicken with olive oil or melted butter before cooking can also help keep it moist.
- Can I use frozen chicken breast for this recipe?
It’s recommended to use thawed chicken breast for the best results. If using frozen chicken breast, make sure to thaw it completely in the refrigerator before cooking. Cooking frozen chicken directly from frozen may result in uneven cooking and potentially unsafe internal temperatures.
- How should I store leftover cooked chicken breast?
Leftover cooked chicken breast should be stored in an airtight container in the refrigerator and consumed within 3-4 days. You can also freeze cooked chicken breast for longer storage. Make sure to cool it completely before freezing and use freezer-safe containers or bags. Thaw frozen cooked chicken breast in the refrigerator overnight before reheating and consuming.

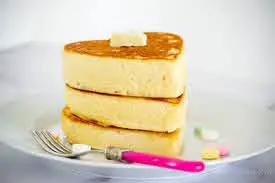
 I like my Toast almost-burnt and my waffles extra-crispy. When I started seeing pictures of impossibly fluffy, soufflé-like Japanese pancakes all over on social network platforms, I knew I needed to work out how to create them at home. After a bit of experimentation and a great deal of sugar consumption, I developed a foolproof recipe. Here’s how to do it.
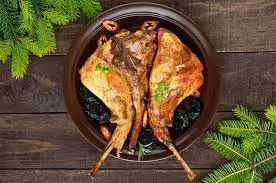
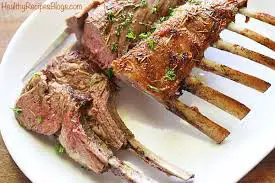
 Are you one of those people who have never tasted lamb? Are you curious about the exact taste of lamb? You may hesitate because the meat is more unusual, but when you taste it, you will find out that lamb tastes like a wonderfully tender and crispy specialty meat.
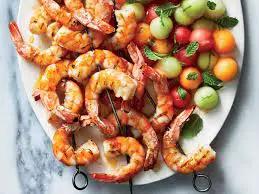
 Nothing is more delicious than fully cooked shrimp. How many times have you been in the kitchen while roasting shrimp? In case you sound like me, cooking shrimp is not something you do from time to time. This article is to a lesser extent a formula, but generally a guide to methods. Cooking shrimp is so natural if you just know how to do it.
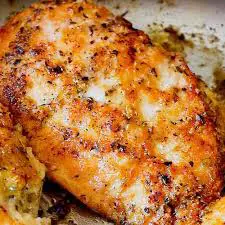
 To begin with, boneless, skinless chicken breasts are a staple in the kitchen, which I offer four times a week for dinner anyway. They can be thrown on the grill for a simple dinner or thrown on the slow cooker on a hectic day. However, like cooking chicken, sautéing it in a pan has never been my forte. I usually end up with an intensely dry chicken breast that no amount of sauce or smooth and creamy side dishes can help.
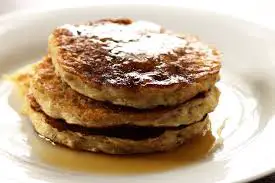
 As for myself, I’m someone who likes the idea of having pancakes on Sunday mornings – and lots of pancakes, so to say. In fact, I’ve been gobbling up all these regular pancakes lazily relaxing on my bed with a few cups of tea or hot coffee around.
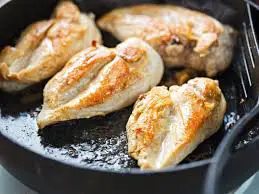
 To begin with, knowing the correct doneness temperature when cooking chicken guarantees juicy results, but what if the meat or juice is pink and there seems to be blood in it? If you’re like many others, the sight of anything other than completely opaque meat with clear juices can make you shiver when chicken is provided on the dinner table in that manner.
 Chicken thighs and all brown chicken meat should be cooked at a higher temperature – 175 to 180 F – because of their greater proportion of connective tissue. Cooking thigh meat at 165° F produces a gummy, soft meat, but at 175 to 180° F it is tender and juicy, while the collagen melts and turns into jelly.
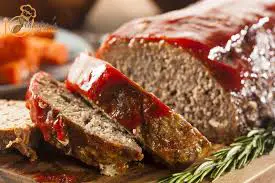


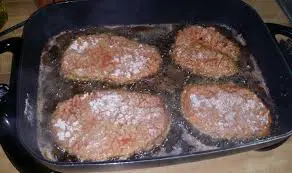
 Steak is one of the favorite dishes of most meat lovers. A well-prepared steak has a rich taste, and it looks tender and aromatic with the smell of well cooked beef. Usually steaks for home use
 Soft and fluffy pancakes give every weekend a special look! Sometimes it’s hard to get those perfect soft pancakes that melt on your tongue and you end up with flat and hard pancakes instead. Here are some helpful tips to make the pancakes softer and fluffier so that you can take your pancake-making skills to the next level.
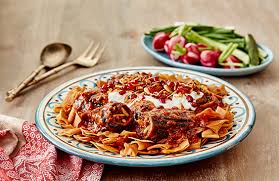
 First, you will have to heat the oven to 200°C/fan 180°C/gas 6. Next, you will have to cut the aubergines lengthwise into quarters and slice them into 1 cm thick slices. Then, you will have to place the slices of aubergine in an oven dish lined with baking paper. Then you should mix with a generous pinch of salt and pepper. Fry for 25 minutes until they are
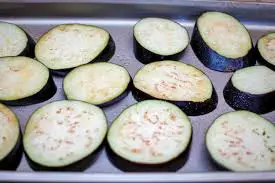
 Do you want to know how to cook eggplant on a griddle? Many among you might be tempted to ask, why should we be cooking
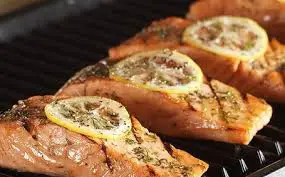
 Today, most people are aware that salmon is not only a tasty food but also an extremely nutritious one. Filled with Omega 3, a serving of salmon is an excellent choice for healthier skin, nails and even improving brain function. However, many people do not know that salmon can be prepared on the griddle as well. In this article we have created a comprehensive and practical guide that enables you to learn how to cook salmon using a griddle.
 Before we found this method, every time I made sausages, they ended up getting charred. Yes, they got burnt on the exteriors while remaining raw on the inside. Or sometimes the casings would break. It has also happened that after I cooked them, they became completely dry.