Best Panini Press Reviews
Are you looking for the best Panini Press available on the market today? If you are, this post should be the one you should go through because here I have listed, after a thorough research online, the best products for you.
To begin with, everyone loves a good meal, especially if it is easy to prepare. A panini, which means bread roll in Italian, is a simple solution that is both delicious and easy to prepare. Little wonder the panini press is gaining popularity all over the world.
You can often find it in sandwich shops and even in bakeries. But the good news is that you can also make Panini at home with a Panini press.
So take a look at the best panini press grills and start making mouth-watering paninis for your whole family today!

Best panini presses on the market today
-
Cuisinart GR-4N 5-in-1, Silver, Black Dials
The Cuisinart GR-4N offers five cooking options. It is perfect as a panini and also for many other dishes. With these multiple options, you can also prepare pancakes, sausages, grilled cheese, steaks and hamburgers.
You can open and reform the GR-4N 5-in-1 according to your cooking needs. These shapes leave more space to cook. Adjust the temperature and you are ready to cook.
This press does not contain BPA, so it can be used safely with food. And with non-stick coated cooking plates that are also easy to clean, the food you cook can’t be healthier than this.
This product helps you to remove the excess fat from your food. Safely collected in your grease trap below, you can eat healthier food all the time.
With its brushed stainless steel structure, it is a great addition to your kitchen. It is also dishwasher safe, and with this product, you will have all the fun cooking your stuff!
Cuisinart GR-4N 5-in-1 Griddle, Silver, Black Dials
Our rating : 4.8 out of 5 stars (4,8 / 5)
CHECK PRICE ON AMAZON
Pros
- Can be used for different types of food – grill/griddle, panini press
- Heat regulation
- Flat opening to create more cooking space
- Automatic drainage and fat collection
- No BPA
- Non stick model
- Good finish
- Dishwasher safe
Cons
- The grease separator is not easy to remove.
-
-
Breville BGR820XL Smart Grill
-
Everything’s getting smarter these days, isn’t it? You have smart phones, smart watches, even smart mobikes. Here’s a grill you can add to your “smart” collection.

Then why is it so “smart”?
The Breville BGR820XL smart grill uses a technology known as Element IQ. This technology works with heat sensors built into the grill plates for regulating the cooking temperature. By performing “intelligent” calculations, it distributes the heat in such a way that consistent results are obtained every time.
The Element IQ also reduces the preheating time. When you place your Panini, the grill takes over!
Look at the screen and see the digital display that guides you.
Underneath, there is a drip tray that collects excess oil and a display that shows the cooking mode and the current temperature.
This versatile panini press can also be used to burn meat, make pancakes and even for cooking eggs. If you need more space searing or sizzling on your barbecue, open the cover to A 180-degree flat mode.
It’s as simple as that.
The BGR820X’s cooking plates are made of titanium-coated cast aluminium with quantanium infusion. This gives it an excellent non-stick surface. The casing is made of stainless steel, while the handle is made of die-cast material that is always fresh.
Dishwasher safe and height adjustable, this product is very popular both in use and function!
Breville Intelligent Grill BGR820XL
Our rating : 4,6 out of 5 stars (4,6/ 5)
CHECK PRICE ON AMAZON
Pros
- Automatic function for even heating
- Shortened warm-up time
- Collecting tray for recovering excess oil.
- Non-stick model
- Ergonomic handle that looks so elegant
- Dishwasher safe
- Six height settings
Cons
- The non-stick layer will peel off after a while.
- It is not suitable for intensive use.
-
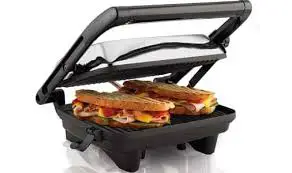
Hamilton Beach 25460A Electric Panini Press Sandwich Maker Grill
This model is available in two sizes: medium and large, there is an electric Panini press, model no: 25460A that will suit you perfectly. This model has a chrome-plated exterior that is both attractive and durable.

The Hamilton Beach 25460A can handle paninis of all strengths. The floating lid fits and rests perfectly and evenly on your sandwiches.
But that’s not all. This press is equipped with a power supply and preheating lamps. So you just have to watch your stove while you do other things. And when you’re done, the cleaning is easy. With a non-stick surface, a few wipes with a piece of cloth and you’re done.
It also requires very little storage space because it can be placed vertically.
An average-sized 25460A can hold two or three sandwiches at a time. So even with this small size, you have enough for all occasions. And in much less time!
Hamilton Beach 25460A Electric Panini Press Sandwich Maker Grill
Our rating: 4.1 out of 5 stars (4.1/5)
CHECK PRICE OF AMAZON
Pros
- Two sizes to choose from
- A durable and attractive look.
- The adjustable lid allows you to press the panini in any thickness.
- Power supply and lamp preheating.
- Non-stick model
- Requires less storage space
Cons
- Uneven heating
- Has a rather fragile appearance
-
DeLonghi CGH912C Indoor grill – Silver
With its five cooking functions, the DeLonghi is a multi-tusker which can be used as a contact grill, panini press, full grill, full griddle and a half grill/half griddle. Thanks to this versatility, it is capable of cooking hamburgers, paninis, meat, fish and also vegetables.

This product is made of scratch-resistant stainless steel, which gives it a more durable appearance. The interior is covered with Durastone ceramic, which is also scratch-resistant. This interior coating is non-stick and distributes heat evenly over the food.
Try it once in a while and you can easily see the difference with other normal models.
\The CGH912C automatically drains and collects excess oil. Equipped with two drain trays, just check it from time to time.
Sit back and enjoy your meal.
With this press, you don’t need kitchen gloves because the handles are always cool to touch. Go to the dishwasher too, and enjoy your food while your cooking plate is being washed in the kitchen!
The package includes a free spatula to use with your best panini press.
DeLonghi CGH912C Indoor Grill – Silver
Our rating: 3.4 out of 5 stars (3.4 / 5)
CHECK PRICE ON AMAZON
Pros
- Versatile, comes five-cooking functions.
- Scratch-resistant inside and out.
- Non-stick model
- Two drip trays to collect excess oil
- Even heat distribution
- Comes with cool handles
- Dishwasher safe
- Free spatula included in the package.
Cons
- The drip cups are separate items. They don’t fit in the press, except after a few manual manipulations.
-
Cuisinart GR-11 Griddler, 3-in-1 Grill and Panini Press

The Cuisinart GR-11 is excellent in three respects. It works as a panini press, a grill, or a griddle. These three functions allows it to function as a more versatile product. Compact and with a well-polished surface, this product is easy to carry thanks to its large handle. This handle never gets hot and the lid can be closed when not in use.
Thanks to the non-stick inner surface on the top and bottom, cleaning this panini machine is a breeze. Even removing the food never poses a problem.
Just what you need for your meals.
In this cooker, there are indicator lamps. They tell you when your press is on and when it’s at the right temperature to place your food. Since no adjustment is necessary, the preset temperature of this press is perfectly suitable for your meals.
Best of all, the floating top allows you to place food of any thickness. It adapts to this size and ensures even pressure on it.
With its drip tray and dishwasher-safe design, this item offers you healthy meals and a simple solution for your stomach!
Need more space? Open this panini press and you’ll have twice the space!
Cuisinart GR-11 Griddler 3 in 1 Grill and Panini Press
Our rating: 3.1 out of 5 stars (3.1/5)
CHECK PRICE OF AMAZON
Pros
- Multifunctional design
- Elegant appearance
- Open floor function to create more cooking space.
- Ergonomically designed handle that is always cool
- Non-stick model
- Pre-heat lights
- Drip tray to collect excess oil
Dishwasher safe
Cons
- Looks rather fragile
- The top plate has been known to fall off during use
- Temperature setting cannot be adjusted by the user
-
Oster CKSTPM6001-TECO Extra Panini Maker And Indoor Grill – Black
The Easter Panini press has been built larger than average in order to respond more quickly to demand. In addition to its size, it is also designed to cook up to 30% faster than other panini machines.

In addition to the panini press function, you can open the cover of this machine (up to 110 degrees) to grill meat, fish and vegetables. The lid is covered with a PFOA- and PTFE-free ceramic coating, which makes it easy to remove the food and guarantees the safety of the food. This coating is scratch-resistant and is very easy to clean.
But that’s not all. There is a drip tray at the bottom. This allows you to collect excess oil from your food. The adjustable feet allow the oil to enter quickly or slowly, depending on your preference.
You can take different thicknesses of sandwiches and cook them evenly. It’s the ideal companion for your next panini!
Oster CKSTPM6001-TECO Extra Panini Maker And Indoor Grill – Black
Our rating: 3.7 out of 5 stars (3.7/5)
CHECK PRICE OF AMAZON
Pros
- Larger size
- Faster cooking time
- Compatible with the grill function
- Chemical-free composition
- Non-stick surface, resistant to scratches
- Retention tray to collect excess oil
- Adjustable feet for more convenience
- Even heating
Cons
- Non-removable grill plates make cleaning a little more difficult.
- There is no on/off button
7.George Foreman GRP4842P Multi-Plate Evolve Grill
Do you want a black one, or a red, or a platinum one? What color preference do you have? George Foreman’s GRP4842P gives you a lot of flexibility in terms of choice. With two sets of removable plates, you get a grill, a panini and a waffle maker, all at once.

With a special cooking feature, you also get 90 seconds of heat (500 degrees Fahrenheit) to give your food a professional finish. It also has a timer and adjustable temperature. Both are displayed on the screen to help you make an exact calculation. This allows to easily make other adjustments for better results.
Foods dissolve easily and are easy to clean. Offers multi-layer non-stick coating. This makes it easy to remove and clean the food easily. The exterior is also easy to clean because the buttons are kept flat against the surface of the panini press. Also, since this product does not contain PTFE or PFOA, it is safe to use. This press can be adapted to any sandwich thickness and also has an adjustable inclination to facilitate the flow of oil.
The dishes are removable for hand washing or dishwashing. The handle also stays cool at all times, so you can have a cool experience with this panini press.
George Foreman GRP4842P Multi-Plate Evolve Grill
Our rating: 4.1 out of 5 stars (4.1/5)
Pros
- Searing Burst function for better results.
- LCD screen
- Adjustable timer and temperature
- Durable multi-layer non-stick feature
- Easy to clean inside and out
- Both PTFE and PFOA free
- Drip tray to collect excess oil
- Adjustable inclination.
- Hot plates are dishwasher safe.Always handle cold
Cons
- The second pair of removable plates is sold separately
- The non-stick function does not last long enough
-
Breville BSG520XL Duo 1500-Watt Nonstick Panini Press
The BSG520XL Breville is robust and durable and is both functional and aesthetically pleasing. With its brushed stainless steel frame, it is a beautiful addition to your kitchenware.

This panini press heats up quite quickly (up and down). Its interior surfaces are non-stick and scratch-resistant. The top plate impresses your dishes with perfect looking sear marks to give them a top class look.
This model works with any thickness of sandwich. The top plate is held in position by a floating hinge. This type of hinge allows you to work with any thickness of sandwich placed on it. There are lights to show you when the machine is on and when it is properly heated for use.
This grill is equipped with effective non-slip feet and will not slip unexpectedly or cause a cooking accident. The handle is thermally insulated and stays cool during use. Best of all, it has an adjustable height control that you can adapt to your needs. It also has a slot for winding up the power cord.
As the first company to manufacture a panini press for home use, the Breville team has always adhered to high product standards and they hardly compromise with the features.
Breville BSG520XL Panini Duo 1500-Watt Panini Press
Our rating: 4.6 of 5 stars (4.6 / 5)
CHECK PRICE ON AMAZON
Pros
- Top class finish
- Fast warm-up time
- Even cooking from top to bottom
- Non-stick, scratch-resistant interior surface
- Power indicator lights and preheating
- Non-slip feet
- Adjustable height control
- Power cable winding slot for safe and easy storage
Cons
- There’s no on/off button
9. Lodge LPP3 Cast Iron Square Panini Press- 8.25 inches

Solid and sturdy, this panini press is made of cast iron kitchen cookware. Safe for cooking food, it’s a material that lasts for years. The handle is shaped like “one with the press”, so it never comes loose.
It provides amazing results all the time. Put this panini press on your stove, and you’ll find that it distributes the heat evenly. Just season it with a little oil and press the panini. You will get excellent results, every time.
Easy to clean, just a simple hand wash will do. The press is ribbed to give your food the best visual finish.
Lodge LPP3 cast iron square ribbed Panini press – 8.25 inches
Our rating: 4.5 of 5 stars (4.5 / 5)
CHECK PRICE ON AMAZON
Pros
- Highly durable
- Made of food grade material
- Uniform heat distribution
- Easy to clean
- ribbed press for a fabulous food finish
Cons
- It’s all manual
- The excess oil spills onto the stovetop
- Rusts quickly if not properly maintained
-
-
Imusa GAU-80102 Electric Panini Press 1400-Watts – Silver
-

The Imusa GAU-80102 is a versatile panini press. Its above average cooking surface allows you to evenly heat the top and bottom of your paninis, sandwiches, meat, and vegetables. The non-stick surface is smooth and much easier to clean.
It is equipped with a heat and power indicator light. The upper part of the floating hinge allows this press to work well with any sandwich thickness.
And, with its polished stainless steel exterior, it will simply look fabulous in your kitchen!
Imusa GAU-80102 large Electric Press Panini 1400 Watt – Silver
Our rating: 4.2 of 5 stars (4.2/5)
CHECK PRICE ON AMAZON
Pros
Large cooking area
It’s a non-stick model
Energy and heat indicator lights
Beautifully polished exterior
Cons
No drip feature
Uneven heat distribution
Leaves no grill marks on your food
No buttons or temperature control switches
Best Panini Press Buying Guide
For your reference, here are the most important considerations you should take note of before buying the best panini press for your home.
Capacity and power
The bigger the device, the faster the paninis are made. You should buy the panini press that best suits your needs. If you have family or friends who drop in often, a bigger press is better for you. However, larger machines consume more energy. So if you need the press for personal use, a small or medium-sized press will be a better choice for you.
Versatility
Although it is rare to find a panini press that has only one function, some are more versatile than others. A versatile panini press allows you to do much more than what is expected. It also means that you don’t have to buy another device to perform a function that the panini press can already do.
Cooking Plate
A long-lasting non-stick product is essential. This facilitates the release of food. It also allows easy cleaning afterwards. You should also prefer a panini press with removable plates. They are even easier to clean and many are dishwasher safe.
Besides, the cooking plate must be able to distribute the heat evenly. This gets rid of hot spots and gives you edible food that is properly golden and safe to eat.
Finally, you must choose a design that matches your needs.There are three types of plates: smooth, ribbed and mixed (they are simple on one side and ribbed on the other). While simple ones are easier to clean, ribbed dishes leave a mark and make food more attractive.
Additional features
A timer and an adjustable temperature are pleasant features that you should consider in your best panini press. A timer makes the operation of your press easier. The temperature setting allows you to experiment with the texture and taste of the food.
A drip tray and hinges are material features to consider. A drip tray automatically catches the oils dripping from your food. If a panini press does not offer this as an automatic function, it will cause even more confusion in your kitchen.
The hinges are used to adjust the top plate. This allows the press to adjust to the thickness of the sandwich you are offering.
Manual or Electric?
Although the electric panini press is generally easier to use, it is up to you to decide which one suits you best, depending on your needs.
The best tips for using the panini press
As with all kitchen appliances, a few tips will help you get the most out of your panini press. So here are a few to turn you into a panini master chef!
Read the user manual
To understand how your device works, first read the instructions in the supplied manual carefully. This is because each model is different and will work differently. So to avoid damage, pay attention to things that should not be done while operating the panini press.
Also follow the instructions in the manual meticulously, so that you don’t have to waste time soving puzzles to make it work properly.
Preheat
Like any pot or oven, your press must be preheated before cooking. Once heated, your panini press can pick up the food directly and cooking can start immediately. Since paninis only need a short time to cook, you will get much better results by heating your press before placing your sandwich on top.
Vary machine use
As already mentioned, one of the best panini presses is dynamic and versatile. Why not add poultry, hamburgers, sausages, seafood or fish and cook that too? Flattening and eating paninis is all well and good, but variety is, as they say, the spice of life.
Clean your machine
Clean your press after each use. Depending on the model you have, there are different methods available. If your model consists of removable plates, remove them and put them in the dishwasher for thorough cleaning. However, if your model does not have this option, you should take a damp sponge and wipe the entire inner surface of the grill.
f the plates are not removable, make sure that the electrical part is not splashed.
Above all, do not forget to empty the drip tray, which collects excess oil from the food. Empty the oil for later use and wash this tray.
What is the best panini press?
Whether you are a professional chef or just a hobby cook, you need a panini press. This machine, which can process many meals, is an indispensable gadget in your kitchen.
So, for our winner, our choice for the best panini press is—
Food processor GR-4N 5 in 1 Griddler
This awesome panini press has myriad features. And because it is compatible with many foods and has an expandable cooking surface, it is simply fantastic. Moreover, this press is safe and easy to use as it comes without chemicals and has a non-stick surface. The ability to drain and collect excess oil automatically means healthy meals for you!
Put it in the dishwasher, sit on your couch with your sumptuous panini in your hand, and your dishwasher will clean it up for you! Get this model right now if you need something versatile that does many things for you at the same time!
Wrapping up
Hopefully, this long post about the best Panini Press available on the market today will help you decide about which one to buy and why one to avoid. After all, you are the best judge to decide which one suits your need most. So, choose one from our selections that matches your requirements completely.
Related Post: Best Small gas Grills


 Steak is one of the favorite dishes of most meat lovers. A well-prepared steak has a rich taste, and it looks tender and aromatic with the smell of well cooked beef. Usually steaks for home use
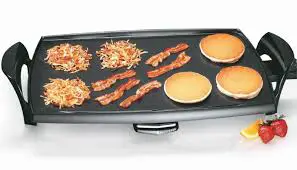
 surface, which adds a lot of heat to the surface for cooking. A griddle has many variations. Some griddles
  The stove top is a modern and conventional way of cooking food. It comprises a heat source that is
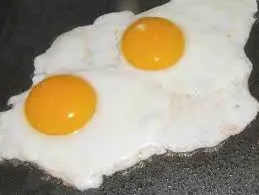
 In order to compensate for the unmovable cooking surface when you are making eggs in an electric frying pan or a griddle, you should be a little careful with your wrist, especially if you want to cook eggs too easily. A large compensating spatula is one of the essential tools for frying eggs on a griddle or a frying pan.
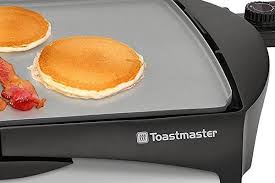
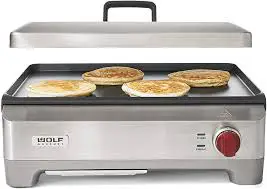
 Soft and fluffy pancakes give every weekend a special look! Sometimes it’s hard to get those perfect soft pancakes that melt on your tongue and you end up with flat and hard pancakes instead. Here are some helpful tips to make the pancakes softer and fluffier so that you can take your pancake-making skills to the next level.

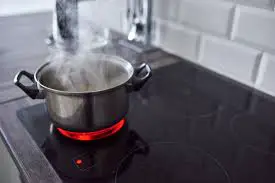
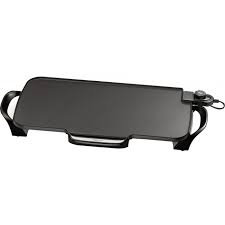
 Yes, you will have to think differently when you consider using your electric griddle for boiling water. An electric griddle has a flat, non-sticky surface that heats to the temperature set by the person who is cooking. Food that is normally prepared in a pan cooks directly on the surface of the cooker without any additional utensils. But in order to boil water you would require a glass pan to hold it without damaging the non-stick surface of the cooker. This method takes longer than heating in a metal pan on a stovetop. Besides, it depends on the model of your griddle and the type of glass used in the construction of your cooking pot.
 Truly, there is nothing better than spending the weekend with a delicious and soothing breakfast
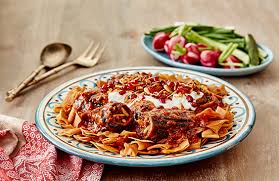
 First, you will have to heat the oven to 200°C/fan 180°C/gas 6. Next, you will have to cut the aubergines lengthwise into quarters and slice them into 1 cm thick slices. Then, you will have to place the slices of aubergine in an oven dish lined with baking paper. Then you should mix with a generous pinch of salt and pepper. Fry for 25 minutes until they are
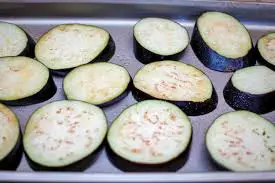
 Do you want to know how to cook eggplant on a griddle? Many among you might be tempted to ask, why should we be cooking
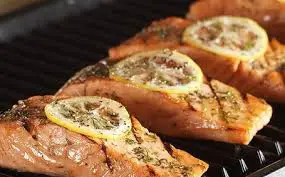
 Today, most people are aware that salmon is not only a tasty food but also an extremely nutritious one. Filled with Omega 3, a serving of salmon is an excellent choice for healthier skin, nails and even improving brain function. However, many people do not know that salmon can be prepared on the griddle as well. In this article we have created a comprehensive and practical guide that enables you to learn how to cook salmon using a griddle.
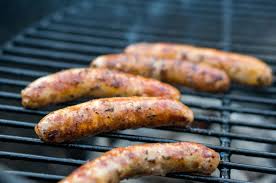
 Before we found this method, every time I made sausages, they ended up getting charred. Yes, they got burnt on the exteriors while remaining raw on the inside. Or sometimes the casings would break. It has also happened that after I cooked them, they became completely dry.
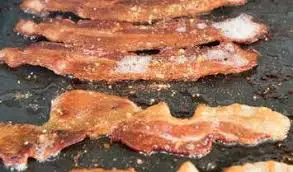
 Some of the more experienced chefs among you may find this list unnecessary.
  During our cooking journey, we came across a little secret about cooking on cast iron surfaces
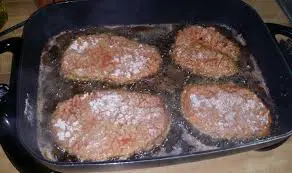
 Cooking a thinner steak and to maintain that smooth and easy melt-in-the-mouth feeling can be quite challenging. That’s why we borrowed an idea we’ve been using for a long time to cook liver, which means cooking the steak with the onions. This method works great all the time! The end result is a very tender and tasty piece of meat, which everyone likes.
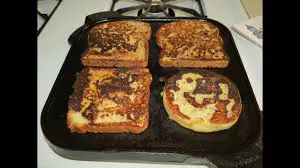
 As early as the 15th century, the Europeans followed the recipes for making a French toast. It was a simple dish made from stale bread soaked in a mixture of egg and milk and baked until golden brown. This recipe is not far from the French Toast we know and enjoy today.
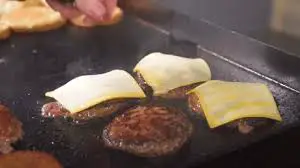
 Do you want to get some tips on cooking burgers on a griddle? Well, Hamburgers are an