Egg Roll Vs Spring Roll—What’s The Difference?

Egg roll vs spring roll–how do you distinguish between the two? Many are really curious to know the actual difference between egg roll and sping roll and this is why it is often seen that food fiends often ask these questions in kitchen  forums in order to find out how to distinguish between the two.

egg roll vs spring rollYou may find some key differences between egg rolls and spring rolls that can help you distinguish between the two. This should be a valuable tip if you’re looking through an appetizer list and is unable  decide which one to buy.

Spring rolls are wrapped in bread or corn foil, while spring rolls are wrapped in a softer, much crispier package that has been dipped in egg for freshness.

Egg rolls are fried, which contributes to their tasty and  crispy appearance. Meanwhile, the spring rolls are fried or baked and sometimes baked with the filling in general. The spring rolls are often filled with fresh vegetables, while the egg rolls are filled with a tasty mix of vegetables and meat.

There are obviously no guidelines when it comes to making good Chinese beers. Just take the different types of spring rolls and egg rolls which we can make at home. In good restaurants you can always find pork and vegetable spring rolls are tastefully packaged and filled with meat and all our spring rolls have a crispy exterior.

What spring rolls and egg spring rolls have in common, however, is that they are super delicious! -both are served with dipping sauces. Hot sauces, hot peppers or even a mixture of both are always a fantastic thing.

What exactly is in a spring roll?

egg roll vs spring rollA garden spring roll, for example, is probably filled with a variety of fresh vegetables such as carrots, bamboo shoots, peppers and cabbage. And spring rolls, which are much juicier, tend to be filled with meat and vegetables, usually pork, poultry or shrimp.

What’s in an egg roll?

As with spring rolls, the filling of an egg roll depends mainly on the chef’s ideas and  interpretation. But there are a few guidelines to follow. Since spring rolls have a softer shell, it is very important to wash them with something that suits both texture and taste. That’s why egg rolls, unlike most spring rolls, almost all the time have tomatoes that are cooked and are almost always beef. However, vegetable egg rolls can be both tasty and healthy because they contain a cooked mixture of hearty vegetables such as celery, cabbage and onions and lots of seasoning.

The exact roots of egg rolls and spring eggs are somewhat opaque, although both have their origins in oriental cuisine. Although the jury is still confused about the details, many food experts believe that spring rolls arrived that were adapted to become what was later called a spring roll. And while others also claim that the spring rolls are far from being a Chinese-American innovation compared to traditional Chinese food, but there is no doubt that they have a quite a strong  Chinese influence.

undoubtedly, there is a lot to appreciate about them, and whatever you choose, you can discover tasty variations of both! Take a look at all types of egg rolls and  spring rolls available on the market, such as Vegetable, and Pork and Vegetable and Chicken Roll, and look for them in grocery stores and restaurants near you , waiting only to be tasted and savoured.

Wrappng up

Hopefully, you will now be able to set them apart now that you know about their differences. So, next time if anyone ask a question like this: Egg Roll Vs spring Rolls –what’s the difference, I am sure you would be able to handle that query like an expert. Now go and enjoy your food at home or in the nearest restaurant!


How To Cook Raw Shrimp: Step By Step

How to cook raw shrimp on the stovetop

Discover how to cook shrimp in the oven, piece by piece, with this easy-to-follow  directions. Yes, you can get incredibly delicious shrimp cooked in a container. You won’t believe how easy it can be. You have to hit the bull’s-eye the first time you do it, and definitely you are going to get it right if you follow my directions.

how to cook raw shrimp
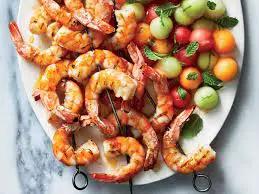
Nothing is more delicious than fully cooked shrimp. How many times have you been in the kitchen while roasting shrimp? In case you sound like me, cooking shrimp is not something you do from time to time. This article is to a lesser extent a formula, but generally a guide to methods. Cooking shrimp is so natural if you just know how to do it.

Most shrimp solidify shortly after being caught. The freshest tasting shrimp is therefore the best tasting shrimp you buy on the road, as opposed to thawed fish on the fish counter at the general store. This is because shrimp have an extremely short shelf life and you usually have no idea how long it has been thawed. Therefore, I NEVER, ever, ever buy shrimp that hasn’t been thawed.

In the unlikely event that you buy frozen shrimp, you can thaw them yourself, shortly before you need them. I never thaw them in the refridgerator at this time because they accumulate an excessive amount of histamine. Histamine is the substance that causes the eyes to get cold and watery, and can also cause serious stomach problems.

I usually take the shrimp out of the package, put them in a bowl or colander in the sink and let cold water run over them for 5 minutes. Turn the shrimp from time to time to make sure they are properly exposed to cold water. You will notice that the shrimp is thawed when they appear soft and slightly translucent. This will only take a few moments. Wipe the shrimp dry with a paper towel.

HERE IS A LITTLE COOKING LESSON ON HOW TO PREPARE SHRIMP PERFECTLY ON THE  STOVETOP

First place the shrimp in a bowl and focus on seasoning the mixture. Mix well to make sure the shrimp are covered with sea salt, Italian seasoning, paprika and pieces of red flakes of pepper. Shrimps have a mild flavor, so they take on the taste of whatever flavor you want them to acquire. Delicious!

Then you will have to turn on the stove and heat the oil or butter over medium  heat. I turn the pan upside down for the most part while the oil heats up to cover the bottom of the pan.

When the spread becomes soft or the oil actually moves around the pan, put the shrimp onto the hot pan. If they don’t sizzle now, heat your pan a little longer next time.

Cook the shrimp for 3 minutes on each side, turning them halfway through once. Depending on the size of the shrimp and the number of shrimp in the container, this usually takes 4 to 5 minutes.

Finally, transfer the shrimp to a serving dish. Serve the cooked shrimp immediately with noodles or rice or pasta.

HOW TO TELL IF THE SHRIMP IS COOKED

Please note that shrimp cooks very quickly, so watch them or they will cook too much. The overcooked shrimp looks like a wide, flexible “U”, while the overcooked shrimp forms an “O”. The perfectly cooked shrimps are pink with a bright red tail and look like a “C” and are ready to eat! One minute they look a little strange and unattractive, and the next minute it’s hard not to eat them directly from the pan. There is absolutely no guess.

HOW TO TURN SHRIMP INTO DINNER

I could probably settle for a bowl of shrimp and nothing else, but most of the time shrimp needs a side dish, usually carbohydrates, to make a complete meal. You can try the shrimp pesto pasta, an amazing mixture of pesto, white wine fettuccine and Italian seasoning. I also like to use red wine to cook the shrimp, as I do with this shrimp paste with garlic. Since shrimp is used in almost every kitchen in the world, you can add it to almost anything! Serve the shrimp in rice or orzo, eat them on a bed of vegetables or with baked vegetables on the side. What is your favorite way to eat shrimp for dinner?

How to cook raw  shrimp on the stovetop

Step-by-step instructions:

Course: Main Course

Cuisine: American

Keyword: How to cook raw shrimp

Preparation time; 10 minutes

Cooking time: 10 minutes

Total duration: 20 minutes

Servings: 4

Calories: 147kcal

 Wrapping up

Hope this post will answer your question—how to cook raw shrimp on the stovetop. Now it’s your turn to make your shrimp comfortably at home adding a a bit of a new twist to suit your palate. I am sure your family members or guests will lap it up.


Presto 07039 22-Inch Jumbo Electric Griddle

Review of the Presto 07039 Professional 22 inch Jumbo Electric Griddle 

This is an honest and unbiaased review of the Presto 07039 Professional 22 inch Jumbo Electric Griddle.

To begin with the Presto 07039 Jumbo Cool Touch Electric Griddle. The huge cooking surface of this appliance measures 22 x 11 inches, so it can prepare enough food for a large group. So, if you have a large family or often invite a lot of guests for lunch or dinner, this model should be an ideal one for you.

However, the focal point of the object’s surface seems to heat up less than the edges, and food placed directly on the heating element can get burnt easily if you are not careful.

This is probably because of the thickness of the plate in the Presto model 07039. Despite the fact that it is made of a thick layer of cast aluminium, the surface is simply not thick enough to distribute the heat as evenly as the customer wants. Overall, it is a kitchen appliance that can work well if the customer likes to take a close look at the food and make a bit more effort.

It would therefore be a good idea to place the food in the middle of this Presto 07039 unit first. By moving the food away from the shape of the heating element, these food burning hassles can be avoided. Ultimately, finding a grill or griddle, including this Presto Jumbo, will give better results in the kitchen if you keep on experimenting with the device you have bought. Experience matters, as they say!

Presto 07039 22-Inch Jumbo Electric Griddle review

On the other hand, the non-stick lid prevents food from sticking and makes this kitchen appliance much easier to clean. When the heating control is removed, the appliance is also completely immersible in hot, foaming water. In addition, the oil plate on this machine helps drain off unwanted grease and can be ejected after use for easy cleaning.

It is important to note that this electric device can take up a lot of space, so it is important to check the measurement of the device as well as your kitchen cabinet before buying.

As with other Presto cookers, this Presto 07039 will not fit in every kitchen cupboard, and this is true of other similar kitchen gadgets that take up large space.

There is another important point to consider: The legs and handles of this item are not thick and can break if the customer is not careful enough. Since well-being is the most important thing, any cooking appliance that can reach such high temperatures must be handled with care, including this particular cooking appliance.

Wrapping up

Presto 07039 22-Inch Jumbo Electric Griddle review

In general, this electric griddle is a modest device that offers easy cleaning and a large surface area. While other Presto cooking appliances can achieve better results in the kitchen, the Presto 07039 jumbo griddle can now be used to cook pancakes, hash browns, eggs, bacon and a lot more. In case you are not comfortable with this special Presto model, don’t worry, for there are different griddles that can work even better at a higher price.

Since Presto 07039 is not available on Amazon at the moment, click below to get the present best-seller in eletric griddle till the product you are looking for is available. We regret the inconvenience.

Buy Presto 07061 electric griddle from Amazon

How To Cook Chicken Breast In a Pan

How To Cook Chicken Breast In a Pan

So, you want to know how to cook chicken breast in a pan. Today, I am going to write a short post on this. Yes, this post is all about how to cook chicken breasts that invariably turn into mouth-watering dishes.

how to cook chicken breast in a pan
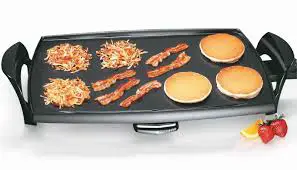
To begin with, boneless, skinless chicken breasts are a staple in the kitchen, which I offer four times a week for dinner anyway. They can be thrown on the grill for a simple dinner or thrown on the slow cooker on a hectic day. However, like cooking chicken, sautéing it in a pan has never been my forte. I usually end up with an intensely dry chicken breast that no amount of sauce or smooth and creamy side dishes can help.

To change my style and have a quick way to cook when it gets too hot to even think about turning on the grill, I went to the Taste of Home test kitchen for their infallible technique of cooking chicken on the stovetop. Let us see what they recommend.

Instructions for pan-frying chicken breasts

How to cook chicken breasts

INGREDIENTS

4 boneless, skinless chicken breast parts (about 6 ounces each)

salt and pepper to taste

2 tablespoons of olive oil

1 tablespoon of margarine

To prevent the light part of a chicken breast from drying out or the thick part from being half-cooked, you must ensure that the chicken breast has a uniform thickness. To do this, place your chicken on a cutting board between two pieces of cling film. Whisk the chicken to 1/2 inch thick with the flat surface of a meat hammer.

Tip for trial cooking: If you don’t have a meat hammer at your disposal, a solid frying pan or skillet will work after you’ve exhausted all other options. Be careful not to beat the chicken too thin.

Season the chicken breast on both sides with salt, pepper and other dry flavours you like. Looking for motivation? Here are our 13 most popular native flavour blends.

 Learn to cook

How to cook chicken breast in a pan

At first, heat olive oil and margarine in a skillet large enough to hold the whole chicken uncovered over medium heat. After that, put the chicken breasts in the pan and cook them for 5-6 minutes. Any movement of the chicken can cause the breasts to stick to the pan and tear, so avoid touching the meat while cooking. Turn the chicken over and cook for an additional 5-6 minutes.

Test this cooking tip: although it can be tempting to turn up the heat, especially if you’re really impatient and famishing for food, leave the burner at medium heat and no higher. If you increase the heat, the outside of the chicken may brown excessively quickly or even burn it, while the inside remains half-cooked.

Measure the temperature

Your chicken breasts are-well prepared and are safe to eat when their internal temperature has reached 165ºF. To verify this, measure the temperature with an instant-read thermometer. Basically, you insert the thermometer into each chicken breast for most of the way until the temperature is displayed.

Test this cooking tip: If your chicken has reached a temperature of 165ºF, but is not brightly brown outside, you can turn up the heat for a few moments to add some browning.

 How to cook chicken breast in a pan

Step 4: Allow the cooked chicken to rest

After boiling, remove the chicken breasts from the container and leave them on a plate for 5 minutes. This allows the juices in the chicken breasts to rearrange, making it easier to set the chicken breasts after cutting.

That’s it for now! Your fully cooked chicken breasts are ready to be eaten.

SOME POINTS TO REMEMBER ABOUT THE RECIPE FOR THE CHICKEN BREAST 

In any case, chicken breasts should be no more than an inch thick. If your chicken breasts are thick, use a meat hammer or a rolling pin to give the chicken a more modest and even thickness before cooking.

Why would we say we use vegetable oil and not our favorite olive oil, you may ask? Since vegetable oils have higher smoke concentrations than olive oil. When you sing a fricassee or frying pan, you need some oil that can withstand the heat.

Cook the chicken breasts over medium heat.

Try not to stir or move the chicken breasts during cooking. Let them cook for 5 minutes or until you can turn them over without any doubt. If you encounter an obstacle when turning them, leave the chicken breasts for a while before trying again.

Chicken breasts are cooked through when the inside temperature reaches 165 F.

Step-by-step instructions for STORAGE of boiled chicken breasts

Keep chicken breasts fully refrigerated in a water and airtight compartment and store in the cooler for up to 4 days.

The most effective way to freeze cooked chicken breasts is to freeze them in the refrigerator.

Wrap the cooled chicken breasts in an aluminum foil for more protection.

You should now put the wrapped chicken breasts in a freezer bag; close the package and keep them in the freezer. It will remain good for up to 3 months.

Wrapping up

Hope this post will answer the question: how to cook chicken breast in a pan. If you follow the instructions carefully, you should have no problem in cooking a sumptuous dish with chicken breasts which your family members will love. Goo cooking!


How To Make Banana Pancakes—Healthy Banana Pancake Recipe

How To Make Banana Pancakes—Healthy Banana Pancake Recipe

How to make banana pancakes? Frankly, when one of my close cronies asked me this question, I was a bit nervous because I had never tried it before. So, I told her to come to my place after a couple of weeks. For one thing, I wanted to try that recipe myself and also wanted to see if I could master that cooking technique before inviting my friends to breakfast or dinner. Yeah, that I think is a sensible practice since it saves you from a lot of social embarrassment! Elementary, Watson, as Sherlock Holmes would have said.


How to make banana pancakes
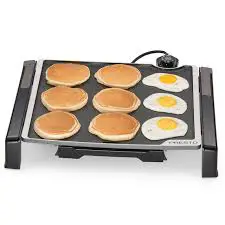
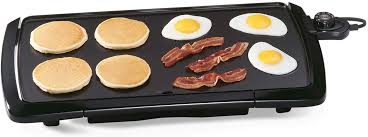
Now I would like to tell you how I entertained a few of my guests with some healthy and sumptuous banana pancake recipes adding my own twist to it. That’s another story, though. Just read on carefully if you want to know all the details.

Truly, this is a very pleasant time of year and it’s time to make some delicious banana pancakes! This banana pancake recipe makes wonderfully moist pancakes, even if they are made with whole wheat flour.

These whole wheat flour pancakes have more substance than the average pancake, which means they can keep you full until lunchtime. I would like to put peanut butter on them to give them more fiber and protein.

I adapted these pancakes from a famous chef’s banana and coconut pancakes. If you haven’t tried them yet, you’ve truly missed something! These are classic banana pancakes, and I was able to add a little more banana puree for maximum banana flavor.

These banana pancakes are great for lazy weekends and are perfect for warming up if you have a big breakfast during the week. You can also double the amount and freeze the extras for later. No doubt they brighten up cold grey mornings like the ones we had recently.

HOW TO MAKE BANANA PANCAKES – STEP BY STEP

You will have to start by mixing the flour, baking powder, sugar and salt in a bowl.

Now beat well and set aside.

Make a  banana puree in a medium bowl until almost smooth.

Add the eggs.

Use a fork to mash.

Add the milk and vanilla extract.

Pour the banana mixture and melted butter into the dry ingredients.

Fold the batter with a rubber spatula. It will be thick and bulky.

Heat the vegetable oil with a cushion of butter on a baking tray or in a non-stick frying pan (the butter gives flavor and the vegetable oil prevents the butter from burning). Place the pancakes on the baking sheet and cook them until bubbles appear at the top and the bottom is golden and crisp.

Turn the pancakes over and let them cook for a few more minutes.

Cover with maple syrup.

Tips for making banana pancakes

Always make the pancakes by hand and not using an electric mixer. Mixing too much dough will result in rubber-like pancakes. Just combine wet and dry ingredients according to the instructions. Stir with a large spoon until no large pieces of powder are left.

Grills are great because you can cook several pancakes at the same time. Electric grills are great because the temperature is kept constant.

If you are cooking on the stovetop, you have to lower the heating a bit over time. The temperature is too high if the pancakes are golden outside but still raw inside.

You should brush your griddle or skillet slightly with butter or coconut oil in the middle. Clean the excess butter/oil with a paper towel so it does not burn. If there is too much butter in the frying pan, it would do more harm than good.

The pancakes are ready to be turned when the external look of the pancakes has gone from bright to matte. It’s better to wait a little longer to be sure than to end up with a mess.

What I like about these banana pancakes

  • Quick and easy to do
  • Light and smooth texture
  • High fiber content

Important tips to remember

After making so many pancakes, I have learned a lot from my mistakes and now I am happy to share my best tips for making awesome banana pancakes.

You should not mix them up too much. If you mix all the ingredients, be careful not to mix them overmuch. And don’t pay attention to some lumps in the batter. Over-mixing promotes gluten development, which makes the pancakes hard and rubbery.

Let the batter rest! This is not a strict rule, and if your time runs out you can skip this part. But the ideal method is to let the batter rest for 5 or 10 minutes before baking it. This ensures a smoother and more uniform texture and also ensures that the gluten development gets checked, making the pancakes lighter and softer.

It is best to grease the pancakes as little as possible. Pancakes should not be fried. If you use a frying pan, rub some vegetable oil on the pan with a paper towel. Butter is also good, but be careful not to burn it.

Grill on top of the skillet. The pancakes need heat, even heat to look delicious golden chestnuts and with a uniform shape. In this respect, an electric skillet or a griddle looks better than an ordinary frying pan because the temperature is kept constant and is easier to control when several pancakes are cooked at the same time.

Professional cooking tip: To check the cooking surface temperature, pour a few drops of cold water over it. The drops should fly and dance before they disappear. If they evaporate immediately, the pan is too hot and the pancakes will burn. If they don’t do it, the pan is too cold and the pancakes will turn pale.

Variations of banana pancakes and serving ideas


healthy banana pancake recipeA simple splash of maple syrup on your pancakes is always a sure thing! That’s why I use very little sugar in the pancake batter. Some cooks would even leave some in the batter, and that would be perfect. For a little extra you can decorate your pancakes with some berries, banana slices, nuts, nut butter (peanut, almond, cashew etc) and/or a few spoonfuls of whipped cream or yogurt.


Another possibility is to make caramelized banana slices! Make sure you have some extra bananas on hand. Then melt one or two tablespoons of salted or unsalted butter in a pan. Add the thickly sliced bananas and a few tablespoons of light or dark brown sugar and cook, stirring frequently, until the bananas caramelize and turn into syrup. This should take about 5 minutes. Serve immediately on your pancakes and enjoy!

What about using chocolate? If you like chocolate with your pancakes like I do, you can always use chocolate chips in the batter before baking. For this recipe, I recommend using 1/3 to 1/2 cup (60-90g) of chocolate chips, depending on your taste.

Wrapping up

Hope you enjoyed reading about how to make banana pancakes. And I am sure you would have no problem now to make a few delicious banana pancakes at home and you can also give them a personal touch to it using ingredients to suit your own taste. Go cooking!


RELATED POST: HOW TO MAKE OATMEAL PANCAKES


How to make oatmeal pancakes –oatmeal pancake recipe

How to make easy and delicious oatmeal pancakes 

I have seen a lot of folks asking this question about how to make oatmeal pancakes at home or what should be an ideal home-made pancakes recipe.

how to make oatmeal pancakesAs for myself, I’m someone who likes the idea of having pancakes on Sunday mornings – and lots of pancakes, so to say. In fact, I’ve been gobbling up all these regular pancakes lazily relaxing on my bed with a few cups of tea or hot coffee around.

But the reality is that every time I allow myself this practice, it only takes me a few hours to run out of energy and get hungry again. So, I had to conjure up a solution to get rid of this food craving.

The solution that I discovered was in oats. I found out that oatmeal pancakes can help me to get rid of this problem. Just mix high-fiber and high-protein oats in your normal pancake batter and you will get amazingly healthier result, much more satisfactory than you could imagine. But don’t worry, they are no less fluffy or worthy of a strong maple syrup drizzle. And the result will be delicious.

Oatmeal solves pancake breakfast hunger

The problem with time-tested and traditional pancakes is that they are usually a combination of refined flour and sugar. This means that although they taste highly delicious, they are a mix of simple carbohydrate that increases blood sugar levels, giving you a quick boost of energy, but making you feel hungry soon after. Adding a whole grain helps counteract this problem. Oats are rich in fiber and are a great source of protein (half a cup, uncooked, contains 4 grams of fiber and 6 grams of protein), which provide long-lasting energy. It also provides some extra vitamins and minerals in each bite, which keeps you healthy.

The best texture is obtained by soaking

To ensure that the oats do not affect the light and fluffy texture of the pancakes, immersion is essential. Simply mix the oatmeal and milk in your bowl and let it rest for 10 minutes while you collect the other ingredients. The oats will soften and begin to disintegrate, so that your pancakes do not taste too strong and the oats are easier to digest and absorb.

How to make Oatmeal pancakes

PRODUCTION

For 4 people, makes 12 pancakes (3 inches)

PREPARATION TIME

15 minutes

COOKING TIME

20 to 24 minutes

 INGREDIENTS

1 cup of old-fashioned rolled oats.

1 cup of milk, regular or non-dairy.

2 large eggs

1 tablespoon of butter, more for cooking

1 tablespoon of granulated sugar

2/3 cup flour for all purposes

2 teaspoons of baking powder

1/4 teaspoon of kosher salt

1/4 teaspoon ground cinnamon (optional)

INSTRUCTIONS

First, whisk a cup of rolled oats and a cup of milk in a large bowl. Leave to stand for 10 minutes to soften the oats. Meanwhile, melt a tablespoon of unsalted butter and let it cool for some time.

Now it is time to add the butter, 2 eggs and 1 tablespoon of granulated sugar to the oatmeal and mix everything. Add 2/3 cup of flour for all purposes, 2 teaspoons baking powder, 1/4 teaspoon kosher salt, and 1/4 teaspoon ground cinnamon, if desired, and stir until well mixed. However, do not stir too much and over-mix. Let it stand for another 5 minutes. In the mean time, heat a large cast iron pan or a non-stick skillet over medium-high heat.

Add one teaspoon of butter to the pan and stir properly. Pour the batter into the pan in 2 tablespoons and cook all the three at a time. Cook for about 3 minutes until bubbles appear on the surface, the ends appear dry and the bottom is golden brown. Turn the pancakes and cook until the other side looks golden brown, for about 2-3 minutes more.

Place the pancakes in a hot oven or a dish. Repeat cooking the remaining batter with a teaspoon of butter for each batch.

Point to remember

Storage: Pancakes can be kept in an airtight container for a maximum of 5 days or frozen for a maximum of 2 months.

Wrapping up

I am sure those of you are looking for an oatmeal pancake recipe or want to know how to make oatmeal pancakes, would be happy to go through this post, for I am sure they will have no problem to experiment with their own brand of oatmeal pancakes, healthful and delicious!


Related post: How to make pancakes on an electric griddle

What temp to cook chicken? Choosing the right temperature

What temperature is chicken done

What temp to cook chicken? This is one question which draws out different answers from different people. This is why I am going to write a detailed article post about it so that you can differentiate between fact and fiction about chicken cooking.

what temp is chicken done
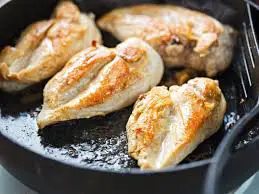
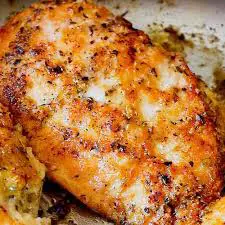
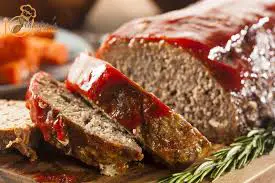
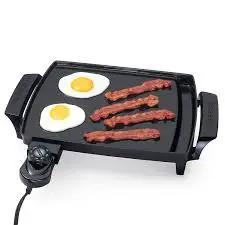
To begin with, knowing the correct doneness temperature when cooking chicken guarantees juicy results, but what if the meat or juice is pink and there seems to be blood in it? If you’re like many others, the sight of anything other than completely opaque meat with clear juices can make you shiver when chicken is provided on the dinner table in that manner.

Read on to find out what causes chicken to be pink and how you can make sure that the chicken your family members is eating is safe and not going to harm anyone.

FOOD SAFETY DEPENDS ON THE TEMPERATURE, NOT  COLOR

Chicken has a creamy white color, unlike the stronger colors of beef, pork or lamb. This white color contrasts much more with the occasional pink tones that can be found naturally in any chicken meat.

Calculating chicken temp

When it comes to cooking chicken, there are many temperatures to consider. There is the temperature at which the oven is set and there is the actual temperature of the chicken itself (the so-called internal temperature), which can be measured with an instant-read thermometer. And then there’s also the minimum safe internal temperature in terms of food safety. In other words, the temperature your chicken must reach to make sure that any harmful bacteria it may harbor, such as salmonella or E. coli, get killed, is more important than anything else.

Lastly, you will have to keep in mind the temperature of the chicken for quality reasons – so that the breast meat remains firm and white, but not dry, and the dark meat remains smooth and soft as gum.

Doneness of white meat

what temp to cook chickenFor quality reasons, a chicken breast is cooked correctly at 145 to 150 F. At this temperature any pinkness will disappear, but the meat will remain firm but still tender. However, according to the USDA, the chicken and poultry should be cooked to an internal temperature of at least 165 F for at least 30 seconds. The problem, however, is that when chicken breast meat is heated to 165 F, it becomes dry and tough and has a chalk like texture.

Fortunately, the USDA recommendation has two dimensions: temperature (165 F) and time (30 seconds). By expanding the time dimension, the target temperature can be reduced.

Doneness of dark meat

what temp to cook chickenChicken thighs and all brown chicken meat should be cooked at a higher temperature – 175 to 180 F – because of their greater proportion of connective tissue. Cooking thigh meat at 165° F produces a gummy, soft meat, but at 175 to 180° F it is tender and juicy, while the collagen melts and turns into jelly.
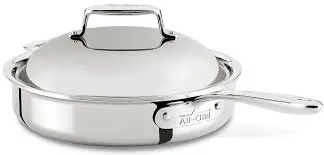
CHICKEN IS MADE WHEN THE JUICE RUNS OUT

A common but erroneous method of checking the condition of chicken is to cut the meat and make sure that all the juices are clear. When we examine the chicken on the grill or in the oven, we often look for some pink patch in the meat. For one thing, we think that it is a clear indication that the meat is not yet properly cooked. The fact is that no matter wherever you test the chicken, the color of the meat or juices will never be free of pink, red or even purple hues.

So why does the chicken meat so often does not seem to be properly cooked?

WHY COOKED CHICKEN CAN STILL LOOK PINK

REASON No: 1: YOUNG CHICKENS ARE USED

The chicks available in the grocery stores that we buy are generally between 6 and 8 weeks old. These young chickens are not yet fully mature and their bones are more porous than being completely calcified. The bone marrow inside the chicken bones appears purple and can often penetrate through the soft, porous bones of the chicken.

The liquid in a chicken mass expands during freezing, as does the bone marrow. The black marrow can penetrate the bone surface as it expands. The bones and adjacent meat become blotchy and retain a deep red/purple color irrespective of the final internal temperature of the cooked chicken.

REASON 2: MYOGLOBIN

Myoglobin is another cause of the violet and red color of poultry. It is an abundantly pigmented protein that transports oxygen from the cells to the muscle fibers. The more active an animal is, the more oxygen it contains in its muscles, which gives its darkish color.

Chickens are birds that cannot fly, so breast meat is never highly oxygenated. Low myoglobin levels are the reason why chicken breasts have such tender white meat. Heavily stressed legs have darker meat due to high myoglobin levels.

Since chicken is packaged and prepared for purchase in a grocery store, myoglobin can accumulate in the fibers of the meat.

REASON 3: HIGH PH VALUES

The acidity of the meat can also influence its color. The higher the pH value, the pinker the meat is. Therefore some cooks use an acidic marinade with citrus fruits or vinegar to reduce the pink color of chicken meat. But marinades do not offer much protection against the pink tones of marrow and myoglobin.

EAT PINK CHICKEN WITH CONFIDENCE

Now that you know why your chicken can sometimes acquire a pinkish hue, it is time to eat chicken with more confidence. And most importantly, you should stop cooking the chicken too much!

With an accurate thermometer like the Thermapen, you can check the safety and quality of your chicken irrespective of its color. A probe inserted into the thermal center of a chicken breast or thigh, should read 165 degree Fahrenheit during the meal.

So, if you are still not sure at what temperature your chicken should be kept so that it can be eaten without making it dry and overcooked, you should pay heed to this. The short answer is that for a juicy and well cooked chicken should be kept at 150 F for at least 3 minutes for white meat and 175 F for dark meat.

Roasting a perfect chicken

The following steps in roasting a whole chicken produce a dark and white meat, tender, juicy and well cooked.

Preheat the oven to 500 F.

Place the chicken in a pan with a grill. Season with kosher salt.

Insert a digital probe thermometer into the deepest part of the breast and adjust it to alert you when the temperature reaches 145 F.

Place chicken in oven and immediately lower temperature to 350 F.

Wait about 90 minutes for the thermometer alarm to sound.

Remove the chicken from the oven and let it rest for 30 minutes, leaving the probe on the breast.

After 30 minutes, cut and serve.

Allowing the cooked chicken to rest

During the rest period, you can see how the temperature on the digital sensor display continues to rise and then falls again. When the temperature rise finally stops and it drops to 120 F, you are ready to carve.

Because the temperature of a roast chicken continues to rise for several minutes after it is removed from the oven, if you remove it to 145 F and let it sit for 30 minutes, the meat on the breast will stay above 145 F for longer than the required 8.5 minutes, making it tender, juicy and completely safe. The same goes for the dark meat, which eventually reaches a maximum of about 200 F. This is more than enough to break down the collagen in the meat, resulting in a dark meat that is tender, juicy and tasty.

Remember that the above times and temperatures only apply to the cooking of a whole chicken. It is the total mass of the whole chicken that allows it to maintain these temperatures during the resting period. If you tried to fry a single chicken breast, it would not work the same way.

Sous Vide Chicken Breast

There is a technique that is very suitable for cooking individual pieces of chicken at a certain temperature and keeping them at that temperature. This is called sous vide cooking.

With this cooking method, it is very easy to heat the chicken breast to 145 F for as long as you intend to. The added advantage of this kind of cooking is that no matter how long you leave your chicken breast in a water bath, it will never be more than 145 F (or whatever temperature you set according to your needs). This allows you to obtain a juicy and tender breast meat with a minimum effort.

Wrapping up

What temp to cook chicken

Hopefully, you would now have enough knowledge about what temp to cook chicken so that next time anyone asks you about this, you will be able to answer with more confidence like a culinary expert. Choose the correct temp for cooking chicken and embark on a cooking journey with chicken.


Related Post- How to cook chicken breasts

Best Saute Pans To Buy In 2022: Top Reviews

saute pan

Best Saute Pans Reviews

Are you looking for the best saute pans? If you are looking to buy one, this review post will serve your purpose. To be gin with, owning the best saute pan will help you to improve your cooking skills and complete dishes. A sauté pan can easily be confused with a pan or a frying pan simply because people do not know the difference or because they do not know in retrospect when to use each pan.

A sauté pan has a larger cooking surface and usually has one side that is vertical and even all around so that a lid can be placed on the pan. A frying pan or a skillet on the other hand has open sides and is much flatter. Yes, both perform some of the same cooking functions,  a sauté pan can perform all of them, depending on its size and design. However, some electric skillets claim to be able to do most of the things a pan can do because their shape and design are very similar. So there are a number of differences and similarities between sauté pans and frying pans.

Sauté pans are perfect for preparing whole dishes with this pan. The pan can probably be placed in the oven, which doubles its function as a baking pan. There are many different methods and techniques used in a sauté pan that most others do not master. There are also some differences between certain models of sauté pans. So, don’t expect that  any sauté pan will do the job of another.

In this longish post, I am going to discuss what you should look out for when buying a new sauté pan, as well as the best type of construction and design that best suits your needs. We will also discuss some of the sauté pan models that are available on the market today.

HOW TO CHOOSE THE BEST SAUTE PAN

You would like to make the sauté pan one of the last ones you have to buy. So, you will want to make sure that it is well built, is made of high quality materials and that it comes with some kind of warranty.

There are many types of sauté pans, but they can be grouped into three categories. Stainless steel, cast iron and non-stick or Teflon- coated. Each of these pans serves a different purpose. You can have all three types to ensure that you are ready for any cooking situation, or you can determine what you need in a sauté pan and make the best decision for yourself.

Pans with non-stick coating are easiest to use as long as you take care of them. They are usually lighter and Teflon-coated to prevent them from sticking all the time. Normally these pans cannot be put in the oven and should be cleaned by hand and not in the dishwasher. You should also only use wooden or rubber utensils for cooking in this pan. Metal utensils scratch the Teflon coating.

A stainless steel pan is a very versatile pan and is also used in most professional kitchens. The pan is heavy and can be placed in the oven and in most cases in the dishwasher. However, the pan is quite heavy and has no non-stick coating.

The cast iron frying pan is also an excellent choice as it is the cheapest of all options and is an amazingly versatile product. This pan is ovenproof and also has a non-stick coating. However, it is very heavy and not dishwasher safe. Cast iron pans need to be cleaned by hand and seasoned again and again to make them last forever.

Construction and design

The design of the frying pan is very important because it has to perform several functions at the same time compared to other pans, such as the wok, the frying pan, the pot, the skillet, the griddle and others. The size of the sauté pan will also make a big difference in the different cooking methods.

The most common sizes are 12- to 14-inch pans. Other sizes are also available, but for a pan used as a whole, this is the correct size. The pan should also have the same design as a saucepan with higher walls. Other “pans”, which are actually frying pans or skillets, have walls that protrude outward and upward like a wok.

Most of them are made of high quality materials, heavily coated with iron and steel, or, by the way, totally made of cast iron.

Some have a copper bottom to create a uniform cooking surface throughout the pan so that everything cooks evenly. However, this copper bottom does not work in an induction burner as it is not compatible. If you have an induction burner, you should ensure that you have a sauté pan that matches it.

Some of the models are also equipped with lids, which are very useful to avoid blockage by confinement. However, make sure that the lid can also be placed safely on the oven. Not all lids are metal and most are glass. So you should also ensure that the lid can withstand this type of heat before using it in the oven.

Warranty

A warranty protects your sauté pan in case of breakage. Most quality manufacturers offer a lifetime warranty on their products because they are convinced that it will last forever. If the product does not come with some sort of warranty, it is clearly a warning sign and should not be considered a reliable product that will stand the test of time.

THE 10  BEST SAUTE PANS AVAILABLE ON THE MARKET

(1) All-Clad 4403 Stainless Steel Saute Pan

The best stainless steel frying pan

Our first sauté pan is a top quality product, so the price is over $200. It is fairly expensive, and there is also no guarantee that it will protect against defects or damage that may occur during use.


(1) All-Clad 4403 Stainless Steel Saute PanThe pan is made of high quality 18/10 stainless steel, which is said to be stick-resistant. The internal structure is combined with iron-coated steel to create a uniform temperature across the entire surface of the pan. This pan works equally well on any induction burner.

The pan is also equipped with a stainless steel lid. Because the pan and lid are made entirely of metal, they are safe to use in an oven or dishwasher. This expands the number of techniques and methods that can be used with the pan.

For

Frying pan made of 18/10 stainless steel, robust and heavy, with an internal iron-coated core for a uniform cooking temperature on the surface of the pan.

Supplied with a metal lid for safe placement in the oven.

The pan is dishwasher safe, but hand washing is recommended.

Against

The frying pan can be very heavy and sometimes difficult to manoeuvre.

This pan is quite expensive, with no guarantee of protection against defects or damage that may occur during use.

CHECK PRICES ON AMAZON

(2) Calphalon Classic Non-Stick Saute Pan

The best non-stick sauté pan

This will be the best choice for a non-stick pan. In addition, this stove only costs a fraction of the price of the previous one, which has many similar features.


Calphalon Classic Non-Stick Saute PanThe pan is made of cast stainless steel with a Teflon-coating on the bottom. This means that nothing sticks to the pan without grease or oil. The pan is also different from most other pans with non-stick coating because it can be placed in the oven at temperatures that reach up to 450 degrees.

The pan is also supplied with a tempered glass lid to prevent splashing or spitting during cooking. The handles are also oven-resistant and remain cool when working with the pan during cooking..

For

The pan is equipped with a tempered glass lid to prevent damage and the handles not only enter the oven but also remain cold on the plate during cooking.

The pan is made of high quality cast stainless steel and is Teflon coated to ensure that nothing sticks to the pan during cooking.

The pan can also be baked up to 450 degrees.

Against

There is no warranty to protect the product from defects or damage that may occur during use.

The lid does not fit in the oven.

The pan is not dishwasher safe.

CHECK PRICES ON AMAZON

(3)  Tramontina 80116/058DS Gourmet Stainless Steel Saute Pan

The second best stainless steel sauté pan

This pan is, with few exceptions, almost identical to the first one we talked about, so it is number 2 among the stainless steel sauté pans.


Tramontina 80116/058DS Gourmet Stainless Steel Saute PanAlmost all saute pans have the same characteristics, except that this model costs half as much as the other one we mentioned earlier and also has a lifetime warranty to protect it from damage or defects that may occur during use.

However, this pan is much heavier and is not made of top quality materials than the other one. The other is also two quarts larger than this one and allows for the use of many more cooking techniques.

For

The lid is made of metal, which allows it to be placed safely in the oven.

This saute pan is dishwasher safe, but it is recommended that you should wash it by hand.

The pan has a lifetime warranty to protect it from defects or damage that may occur during use.

Against

The saute pan can be very heavy and sometimes can be fairly difficult to manoeuvre.

CHECK PRICES ON AMAZON

(4)    Cooks Standard Multi-Ply Clad Deep Saute Pan

Saute pan made of durable Stainless Steel with Even-Heating Aluminum Core

This pan is also almost exactly the same as the runner-up model we mentioned before. All the same statistics and functions are there, but with only one or two small differences.


Cooks Standard Multi-Ply Clad Deep Saute PanThe sauté pan is made of the same high quality materials as the others, but this pan is only coated with two layers of iron, while the other saute pans are coated with three layers of iron on the bottom and sides. In addition, there is no warranty to protect it from defects or damage that may occur during use.

The saute pan is cheaper than the other two we have studied and is also the largest size with the capacity to cook up to 5 quarts. Everything is dishwasher and oven safe, with little or no problems. A great buy for any homemaker.

For

It has the largest surface area and the largest collection volume of any jumper available on the market.

It is equipped with a metal lid that allows it to be placed safely in the oven.

The pan is dishwasher safe, but hand washing is recommended.

Against

The frying pan can be very heavy and sometimes difficult to manoeuvre.

The pan is built with only two layers of iron instead of three like most other pans.

There is no guarantee that the sauté pan will be protected against damage or defects that may occur during use.

CHECK PRICES ON AMAZON

(5) Anolon Advanced Covered Sauté Pan

Not quite a top deal in terms of quality and pricing

The next sauté pan may look like a big deal with all its self-proclaimed features and tall claims, but it turns out to be a disappointment since it is an expensive product. This saute pan is quite costly and says it can do more than the average non-stick frying pan, but we disagree.


Anolon Advanced Covered Sauté PanThe pan is very large, holds 5 quarts and is covered with a non-stick Teflon layer to prevent food from sticking when cooking. The pan also has a tempered glass lid, but it doesn’t fit in the oven. The pan is designed to be ovenproof up to 400 degrees, but the Teflon can wear out and the synthetic rubber handles may not withstand the heat. Although the frying pan is rather expensive, there is no guarantee that it will be protected from damage or defects that may occur during use.

For

The saute pan is very large and has a capacity of up to 5 quarts.

The pan is covered with Teflon to prevent it from sticking during cooking.

The pan is equipped with a glass lid to store the contents and has synthetic rubber handles for convenience.

Against

The pan is not dishwasher safe and cannot be placed in the oven at high temperatures.

The pan is not protected against damage or defects that may occur during use.

CHECK PRICES ON AMAZON

(6) Cuisinart 733-30H Chef’s Classic Saute Pan

The best stainless steel saute pan for money

This saute pan is really very affordable and can be the right thing for you and your kitchen.


Cuisinart 733-30H Chef’s Classic Saute PanThe pan is much larger than the others that are available in 5 ½ quarts size. The saute pan is made of two-layer cast stainless steel and also has a steel lid. The pan and lid are also dishwasher safe and can also be placed together in the oven.

The pan, elegant and shiny, may seem the best choice because of its low price, but also because it arrives with a lifetime warranty to protect it from damage or defects that may occur during use.

For

A very affordable saute pan that is guaranteed for life to protect it from damage or defects that may occur during use.

The pan is very large with 5 ½ quarts and is also fitted with a stainless steel lid to prevent damage.

The pan and lid are dishwasher safe and can be placed together in the oven.

Against

The pan is made of only two instead of three layers of cast stainless steel, which makes it a bit lighter but also less durable and with a less even heat distribution.

CHECK PRICES ON AMAZON

(7) Calphalon Classic stainless steel saute pan

The best deal in the sauté pan category

It offers great value for money so far as the all stainless steel sauté pans are concerned and slightly cheaper than the last one as well. It also has a warranty to protect it, but it comes with only 10 years instead of a lifetime warranty like the previous one.


Calphalon Classic stainless steel saute panThe sauté pan has the same construction and the same features as the previous one, except for one thing. The lid is made of tempered glass instead of stainless steel, which means that it is dishwasher safe but cannot be placed in the oven at high temperatures.

For

A very affordable sauté pan that comes with a 10-year warranty to protect it from damage or defects that may occur during use.

The pan is very large with 5 ½ quarts and is also fitted with a stainless steel lid to prevent damage.

The pan and the lid are dishwasher safe and the pan can be placed in the oven.

Against

The pan is made of only two instead of three layers of cast stainless steel, which makes it lighter but also less durable and with a less even heat distribution.

The lid is not suitable for placing in the oven at high temperatures.

CHECK PRICES ON AMAZON

(8) Emeril Lagasse Dishwasher-safe Nonstick Hard Anodized Covered Deep Saute Pan

Perfect non-stick pan for braising, stewing, or cooking one-pot meals for a crowd

This pan that holds the eighth position on our list is from a famous chef who makes all his pans with a copper-coated base to distribute the heat evenly over the surface.

Emeril Lagasse Dishwasher-safe Nonstick Hard Anodized Covered Deep Saute PanThe pan is well-constructed with double layer cast steel and coated with non-stick Teflon to prevent sticking during cooking. The sauté pan has a heated lid and is dishwasher and oven safe up to 350 degrees. The pan comes with a limited warranty, but only against possible shipping defects, but the good news is that the pan is very affordable.

For

A very affordable saute pan with a limited warranty to protect against defects that may occur during transport.

The pan is very large in 5 quarters ½ and is also equipped with a stainless steel lid to prevent damage.

The pan and lid are dishwasher safe and the pan can be placed in the oven.

Against

The lid does not look very safe for the oven.

There is no guarantee to protect it from damage that may occur during use.

CHECK PRICES ON AMAZON

(9) Ozeri All-in-One Stone Earth Saute Pan

Stands apart in the crowd for its sophisticated features and design

Ozeri ZP9-5L is an awesome sauté pan because it is virtually a workhorse with multitasking ability. It is a stone earth sauce pan because it uses a stone-derived coating from Germany, 5 L (5.3 quarts) in size, and it has a coconut brown look.


zeri All-in-One Stone Earth Saute PanCustomers who love natural products say the Ozeri All-in-One sauté pan is perfect for them. The pan is covered with a non-stick coating and has a fake earthenware look which matches any modern kitchens.

The pan has a capacity of 5.3 quart. According to verified reviewers, it can hold complete sauté dinner and breakfast or lunch recipes for families of four to six people.

Ozeri attracts environmentally-conscious buyers. It is made of German stone, which is free of a number of known chemicals. According to users, it offers a natural non-stick performance.

For added safety, the handle is made of heat-resistant silicone. The high-end pan is available in three colors: coconut brown, granite gray or lava black. Each choice comes with its own lid. All in all, this is one sauté pan you should genuinely take a close look at as it has 87% 5 star reviews in Amazon and stands out in the crowd because of its elegant looks.

For

Genuine ceramic

Environmentally friendly construction

Three sophisticated color selections

Natural non-stick coating

Delivered complete with cover

Comfortable silicone-handle

Against

The lid has metal edges and can wear out the non-stick coating

CHECK THE PRICE ON THE AMAZON

(10) Cooker King Non-stick Saute Pan

Top quality  saute pan with 3 layers of PFOA free and TOXIN free healthy nonstick coating 

COOKER KING non-stick sauté pan can work in any type of heat which includes induction oven, gas ranges, electric ranges and ovens. This product is dishwasher safe, ovenproof, multi-purpose frying pan with stainless steel handle.


Cooker King Non-stick Saute PanThe non-stick coating consists of three PFOA-free layers. Food release is effortless, and cleaning is easy and scratch-free according to verified tests.

The sturdy handle is riveted for a good grip and heat resistant for added safety. There’s also a convenient tempered glass lid so you can cook your favorite dishes comfortably.

According to Cooker King, the pan can be used in the kitchen and the stove tops that can be used up to 480℉. The lid is also suitable for this temperature range and will not warp or break. Verified buyers say they like the pan as a welcome gift.

For

Ideal for all types of stoves and ovens

The perfect gift for a housewarming party

Triple PFOA-free non-stick coating

Heat resistant safety handle

Tempered glass cover

Against

The bottom is not perfectly flat

CHECK PRICE ON AMAZON

Wrapping up

Best saute pans

Whichever sauté pan you intend to buy, you must make sure it is a safe product and quite reliable. Also make sure that you are familiar with the product. It makes no sense to buy something you don’t know much about and have no idea how to use it. If you have an induction stove, make sure that it is compatible with the burners. If not, make sure that the pan is made of high quality materials and is properly constructed to ensure durability and strength. Get out now and get the best saute pans for the money and start cooking!


Related Post: Best Electric Griddle


Meatloaf in Electric Skillet

Electric Skillet Meatloaf


electric skillet meatloaf

Do you want to make a meatloaf in an electric skillet? Well, who doesn’t like a good meatloaf? Nothing sounds more American than a traditional meatloaf with potatoes on the side. The advantage of meatloaf is that there are many variations and, although the general concept is the same, everyone prefers to add something to make it their own.

This special recipe is for the electric skillet meatloaf! If the concept of cooking the meatloaf in an electric frying pan is new to you, then you’ve come to the right spot!

Using the electric skillet not only reduces the extra heat in your kitchen, but also allows you to cook the vegetables next to the meatloaf for improved flavor.

In this special recipe, button mushrooms are added around the meatloaf and covered with a ketchup mixture.

It may seem a daunting task at first to cook meatloaf in an electric skillet instead of an oven, but you’ll probably be hooked once you start doing it!

Using an electric skillet may help you to keep your house cool during the hot summer months, save electricity by heating a much smaller gadget and free up your oven for other dishes if necessary.

Plus, the electric skillet keeps the meatloaf warm while it’s being served. In the end, preparing meatloaf doesn’t differ much from a typical recipe, but there are other benefits you can enjoy.

So, do you want to cook the meatloaf in the electric skillet? What other ground beef recipes have you tried in your electric skillet? We’d love to hear about your experiences.

Meatloaf in an electric skillet

The advantage of meatloaf is that there are a whole lot of variations and although the general concept is the same, everyone chooses to make some additions to make it different and give a personal touch to it. This special recipe is for an electric skillet meatloaf.

PREPARATION TIME: Fifteen minutes.

COOKING TIME: One hour

TOTAL TIME REQUIRED: 1 hour and 15 minutes.

COURSE: Main dish

CUISINE: American

SERVICES: For 8 persons

CALORIES: 259 kcal

Ingredients

  • 1 ½ pounds of lean ground meat1 ½ pounds of lean ground meat
  • 1 egg
  • 1 tablespoon of Worcestershire sauce
  • 1 onion, chopped
  • 1 cup of milk
  • 1 cup of dry and spicy Italian bread crumbs
  • ½ teaspoon garlic powder
  • 1 ½ teaspoon salt
  • 1 teaspoon of pepper
  • ⅓ Ketchup cup
  • 2 tablespoons of mustard
  • 2 tablespoons of brown sugar
  • 1 tablespoon of margarine
  • 1 pound of sliced mushrooms

INSTRUCTIONS

In a bowl, mix the ground meat with the egg, Worcestershire, onion, milk, breadcrumbs, garlic powder, salt and pepper.

In a small bowl, mix the ketchup, mustard and brown sugar.

Set the temperature of the electric skillet to 250°F. Melt the margarine in the pan.

Form a meatloaf and place it in the skillet. Surround the meatloaf with the sliced mushrooms. Pour the ketchup mixture over the meatloaf and mushrooms.

Cover and cook for 1 hour or until the meat is cooked to your liking.

How to prepare electric skillet meatloaf and vegetables

Prepare your favorite meatloaf mixture or take 2 pounds of lean ground beef, about 1/4 cup of ketchup or barbecue sauce (according to your taste), 1 egg, about 1/4 to 1/2 cup of bread crumbs, 1 sm. of chopped onion, 1/2 cup of chopped green pepper and 1-2 cloves of garlic. You can season to taste with garlic powder, salt, pepper and rosemary. To make it taste stronger and hotter, you can add 1/4 teaspoon of red pepper. Stir to combine. Give it a round shape. I only use the mixing bowl to do that.

Now it is time to prepare the potatoes, carrots and onions. You should melt the butter in a large electric skillet at 250 degrees. When it is hot, put the meatloaf in the middle of the skillet. Surround it with vegetables. You can season the vegetables generously with salt, pepper and garlic powder.

Put the lid on the skillet. Then go. Let the meatloaf cook for about 50 minutes or until it is cooked to the desired state.

Wrapping up

This also works well with a bowl of sliced green beans. Hope this recipe for meatloaf in electric skillet will help you make your own delicacies for your own family and guests. Go cooking!


Click here if you want to take a look at the best electric skillets of 2020!


How To Make Crepes On a Griddle

How To Make Crepes On A Griddle

Making Crepes On A Griddle

How To Make Crepes On A GriddleCrepes are very thin French pancakes that are immensely versatile. They are delicious in both sweet and savory recipes. Traditional French crepes are good, but personally I think the following recipe is much better. There are three reasons for this. First of all, they are not technically French crepes, but a variation of Swedish pancakes. Therefore, they are richer, sweeter and more extravagant than French pancakes. Secondly, it’s my father-in-law’s recipe. I learned to make these crepes when I was barely 10 years old and have been making them ever since. My children also learned how to make them when they were very young. Third, I have made this recipe for people all over the world and it always brought smile in their face and they highly appreciated this recipe of mine.

Maple Syrup Crepes

You will notice that the amount of sugar used in this recipe is variable and depends on your individual choice. If you intend to prepare a savory crepe to be filled with cheese, ham, sautéed vegetables or different types of meat or seafood, just add a small amount of sugar. If you want to serve it for breakfast or for dessert with fruit, honey or just sugar, just add sugar according to your taste.

Crepe batter

Although crepes are traditionally made in a small pan, they also work very well on the SABER EZ stainless steel grill. The reason is simple: the surface of the griddle is so smooth that it is perfect for making something as fine and delicate as pancakes or crepes. Plus, the hot plate is hot enough to make crepes or pancakes very easily.

You will need a cake spatula, or a silicone spatula, which works but requires a bit more practice, to spread the crepe batter on the griddle. Otherwise, the crepes will become too thick. However, it should be noted that even if they are too thick, they are still quite delicious. Call them Swedish pancakes instead, if you so desire. They’re a great way to prepare a special breakfast or brunch outside – or really, at any time of day. Eating hot crepes outside with family and friends will indeed be a memorable event.

Making crepes on a griddle

Ingredients

3 eggs

3/4 cup all-purpose flour

3 tablespoons of sugar for sweet crepes or 1 teaspoon for savory pancakes

1/4 teaspoon of salt

1 cup of milk (preferably whole milk)

3 tablespoons of melted butter (Note: it is important to melt the butter and let it cool down while it remains liquid)

More melted butter is needed to cook the crepes on the griddle.

What you should do

In a bowl, beat the eggs well with an eggbeater.

Add flour, sugar and salt. Beat with a whisk until dry ingredients are well incorporated. Be careful not to mix too much, as this will make the crepes harder.

Add the milk and stir to obtain a smooth mixture.

Add the butter and stir until incorporated. Let it stand for 15 minutes before using.

Pour a small amount of crepe batter (about 1/4 cup at first) on the griddle. If you work quickly, use a cake spatula (ideally an offset spatula) to spread the batter on the griddle to make paper-thin crepe.  When the pancake or crepe is golden on the first side, turn it over and finish cooking and before that just check whether the crepe is light brown on the other side as well.

When the cooking is done, take out the crêpe from the griddle and eat it as soon as it is finished.  For the subsequent crêpes, please note that is not necessary to butter the griddle each time.

Wrapping up

How To Make Crepes On a Griddle

Hope this recipe of how to make crepes on a griddle will serve your purpose and help you make pancakes or crepes on your griddle like a pro. Eat and enjoy and thank me later!


If you want to know about the best electric griddle, click here


Waring Commercial WGR140 Electric Countertop Griddle Review

Waring Commercial WGR140 Electric Countertop Griddle Review

If you are looking for an unbiased Waring Commercial WGR140 Electric Counter top griddle review, you should not go anywhere else. For, in this post, I am going to catalog all the top features, the advantages and disadvantages of buying this product. If you go through this post, I am sure you will be able to take the right decision about whether to get this one for your home or reject it for a better one.


Waring Commercial WGR140 Electric Countertop Griddle Review
To begin with, one of the greatest things that was invented and introduced to the world of home cooking would certainly be the kitchen counter-top griddle.

Check latest price on Amazon

If you are looking for ways to make it easier to cook simple things on a relatively large scale, or if you are looking for a versatile appliance that can cook many different types of food in many different ways, then the counter top griddle is precisely the product you should be looking for.

It is important to note, however, that not all counter top griddles are made in the same way. If you are looking for one, the Waring Commercial WGR 140 Electric Counter top Griddle should be one of your top choices because it has all the ideal features for any home cooking counter top griddle. With it, you can cook different types of food without any hassle or extra equipment.

Features

The Waring Commercial WGR140 Electric Counter top griddle measures 9.75 inches by 17 inches, with a tray that measures 11-inches. This makes it small enough to carry around since it is just over 41 pounds. Installation is as simple as you can place it on a flat counter with an electrical outlet nearby. No more, no less. Just make sure there are no people around.

Equipped with a grease tray

Unlike other household griddles, the Waring Commercial WGR140 electric counter top griddle is equipped with a grease tray. This is because some counter top griddles simply let the oil disperse and remain on the surface of the griddle.

While this can help prevent food from sticking together, it is certainly not good to have too much oil in your food, given the negative health effects associated with an oil-rich diet.

Reduced energy consumption

As it is made for the home kitchen, expect that its power, i.e. 15 amps, 120 volts AC, 1800 watts, will not have a drastic impact on your electricity bill. This allows you not only to cook your meals without worrying about general safety, but also without worrying about your electricity bill.

Pros

Promotes healthy cooking for the entire family

This is possible thanks to the grease tray, which is placed directly under the main cooking tray.

With a size of 11 inches, besides being fully removable for easy cleaning, it is also much easier to remove the fat that comes out during the heating process, since all you have to do is scrape the fat removed from the cooked food directly into the groove that leads to the tray.

The Waring Commercial WGR140 Electric Countertop Griddle prevents your food from swimming in oil during cooking. Furthermore, it only requires a small amount of oil because the griddle is made of stainless steel.

Uniform heat distribution

The Waring Commercial WGR140 Electric Countertop Griddle allows uniform distribution just as it is expected of a good griddle. This reduces the presence of temperature “islands”, ensuring that food is cooked no matter where it is placed on the griddle.

Provides an extra safe cooking experience

This is made possible by the presence of splash guards on the sides of the griddle. The presence of these high metal splash guards on the Waring Commercial WGR140 Electric Countertop Cooktop prevents the oil from splashing and spilling when cooking is being done.

I am sure you are aware of the fact that this should be avoided because oil splashes, once in contact with the skin, can cause severe burns, while coming into contact with the eyes, can create blindness. In addition, it is NSF and UL certified, which gives you the guarantee that it is a good quality product.

Enables you to cook different types of food

The Waring Commercial WGR140 electric griddle also has a stainless steel surface for even heat distribution.

It is an excellent tool for cooking a wide variety of foods such as hamburgers, sausages, vegetables, roasted chicken as well as for cooking semi-solid products such as eggs and pancakes because its surface is uniform and does not drip. This saves you having to install other appliances to cook different meals.

Cons

Cannot be used in case of power failure.

This is a drawback that is present in all types of electric griddles, and Commercial Waring’s WGR140 electric griddle is no different. However, this would not be a problem if, on the contrary, a power failure at your place does not occur regularly.

There is no appropriate “Power off” switch

The “Power” and “Ready” lights remain on even though the thermostat knob is set to the lowest level. If you really don’t want the appliance to consume energy, the only option is to unplug it directly from the socket, which can be quite uncomfortable for anybody.

Needs a fairly long heating period

This is another common disadvantage of electricity griddles. The WGR140 electric table grill from Waring Commercial would take several minutes to evenly distribute the heat.

Wrapping up

Waring Commercial WGR140 Electric Countertop Griddle Review

If you are looking for professional-quality kitchen appliance that do not consume much energy, the Waring Commercial WGR 140  Electric Counter top Griddle is one of the best options on the market. Although it can be expensive, it is one of the most durable and therefore an excellent purchase for home use.

If you want to go for lighter products in terms of weight and price, there are several other griddles that cost only a fraction of the WGR140 Commercial Waring Griddle, such as the Oster  CKSTGRFM18W-ECO DuraCeramic Griddle and the Hamilton Beach 38546 3-in-1 Grill/Griddle.

At any rate, even though the price seems to be on the higher side, if you want to have a large cooking gadget in the comfort of your own home and are not afraid to spend some hard cash, the WGR140Waring Commercial WGR 140 Electric Counter top Griddle should be an ideal choice for you.

Check latest price on Amazon


Related post: Best Stainless Steel Electric Griddle


Presto 07071 15-inch Electric Tilt-n-fold Griddle review

Presto 07071 15-inch Electric Tilt-n-fold Griddle review

I’m sure you’ve come here because you’re looking for an honest review of the Presto 07071 15 Tilt-n-fold  electric griddle review. First of all, this model is suitable for all meals: breakfast, lunch and dinner. It can easily be changed from a flat surface for eggs and pancakes to a sloping surface for meat products.

The legs fold up and the drip tray can be put in place for easy and compact storage. The product rests on a heavy cast aluminum base with a large 184 square inch cooking surface.
Presto 07071 15-inch Electric Tilt-n-fold Griddle review
The high quality non-stick surface ensures residue-free cooking and easy cleaning. The Master heat control automatically maintains the desired cooking temperature.

The sliding drip tray is easy to empty. It is very easy to clean and is fully submersible when the heat control is removed.

You can tilt this griddle for drainage. You can also bend the levers to tilt the grill plate when cooking meat. Finally, you can easily fold the grill plate for storage. And it fits in most standard 18-inch kitchen cabinets.

This griddle is perfect for pancakes and French toast. I can put in 12 slices of French toast at a time and probably more if I put them closer together. The middle part doesn’t look as hot as the rest of the grill plate (things don’t brown as quickly there), but the rest makes up for it. The surface is very nice, and I really like the fat collection bottle.


Click here if you want to know more about other Presto griddle models

Wrapping up

Presto 07071 15-inch Electric Tilt-n-fold Griddle review

All in all, it’s a great buy! This electric griddle is well-priced, works well and comes with lots of space! We make a great breakfast at the weekend and this thing helps us a lot. You can hold a whole package of bacon and a whole tube of sausage at once. I wish I’d bought one sooner. It’s also a great way to keep the tortillas warm. Plus, it’s big enough to bake two large tortillas together. Some Amazon reviewers have complained that it cooks unevenly. This can happen at very high temperatures, but I usually hold it lower and turn it frequently, and it cooks very well. It is difficult to cook a whole package of bacon and cook everything at the same time and evenly, but with this griddle I can do it. I wish the cord was a little longer, but otherwise it’s perfect. I recommend this model to anyone who asks for my suggestion.

Presto 07030 Cool Touch black Electric Griddle Review

Presto 07030 Cool Touch black Electric Griddle Review

This review page focuses on the black 20-inch Presto 07030 cold touch electric griddle.

Most people would be very happy with the size of this product – its non-stick cooking surface measures 10-1/2 by 20-1/2 inches. Although this surface area is much larger than the small electric griddles available on the market (such as the popular Presto Liddle Griddle model), there are many cookers that can rival the size of this cooker, so it is not unusually large. However, the 07030 can easily accommodate large pieces of food.

As with any electrical appliance, it is important to read the supplied manual and follow the instructions. It is recommended that the surface be seasoned with cooking oil before the first use – this will make the non-stick coating more effective overall (and for proper maintenance of this model, you will also need to season it from time to time).Presto 07030 Cool Touch black Electric Griddle Review

Presto 07030 Cool Touch 20-inch Electric Griddle Black review

Thanks to the fact that this item can be completely submerged when the heating control is removed, it is much easier to clean the unit than griddles that cannot be submerged in water. The non-stick coating also prevents food from sticking to it, but you must clean the non-stick surface carefully and with the proper tools that will not damage or scratch the cooking surface.

On the other hand, this Presto design tends to slip on the countertop, which can be dangerous if you are not careful. The lack of rubber feet is probably the reason why the appliance slips, and whatever the reason or cause, Presto should address this problem. However, this problem can be solved by placing a towel under the unit, or you may find other items/ideas that prevent this product from slipping.

If you want to learn more about the Presto electric griddles, click here!

Apparently, not only does the Cool-Touch 07030 tend to slide, but the drip tray also tends to slide. Every time you move this electrical appliance, you must be careful (especially if there is grease inside) and be aware that the drip tray can easily slip. A good idea would be to separate the drip tray from the Presto grill when the appliance is stored or not used (you can place the drip tray on top of the clapper).

Most griddles on the market, especially large ones, have problems with uneven heating, and this cool-touch model 07030 is no different. It is not uncommon for one side of the surface to get hotter than the other, and Presto should design this unit so that the heat is distributed more evenly over the surface. But overall, the heat distribution in this unit is good, and you probably won’t have any serious problems with most foods.

There is no doubt that this Presto Cool Touch product is far from perfect and can be improved, but considering its low cost, it is not so bad. The large non-stick surface of this product does a good job if taken care of properly, and it’s relatively easy to clean this product. However, care should be taken when using the 07030 unit – for both the unit and the drip tray have a tendency to slip.

Buy Presto 07030 Cool Touch 20-inch Electric Griddle Black from Amazon

Presto 07211 Liddle Griddle Review

Review of the Presto 07211 Liddle Griddle

The Presto Liddle Griddle is not large enough to meet the needs of many individuals. It has an 8.5 x 10.5 inch cooking surface and it weighs about 2 pounds. Its size makes it look like a conservative version of other Presto griddles. This makes the Presto 07211 griddle perfect for small homes and families and for people who use it occasionally.

You can certainly mPresto 07211 Liddle Griddle Reviewanage cooking two or three steaks or a few eggs and bacon on this griddle. The cooking surface has a non-stick coating that reduces the amount of oil, which should allow food to be cooked safely without sticking. Copper should not be used as it scratches and removes the non-stick coating.

The body of the Presto griddle is made of cast aluminum, which is light and very rigid, but is also suitable for heating. The owners are very satisfied with the quality, but some think that the plastic handles are not sufficiently strong and can break quickly.

This electric griddle is part of the basic equipment and is essentially a flat electric frying pan. It has an estimated power of 1000 watts and works with any 120 V socket. The temperature can be regulated by a knob, which makes it possible to retain the heat up to 400ºF even when the “heat” is uncertain.

Click here to learn more about the Presto Liddle Griddle

At one end there is a channel that absorbs the oil drops during cooking. Although it is not large enough to cook for a large family, many have had no trouble preparing pork chops, hamburgers and steaks. The heat is surprisingly easy to control and the owners feel wonderfully happy.

This Presto Electric griddle heats and cools faster than most other griddles, probably due to its size. The Presto 07211 not only heats up quickly, but also maintains the temperature longer than the other models. In addition, this is an important factor in the possibility that you may have to use a different food group to prepare.

The Liddle Griddle is anything but difficult to store due to its size. It does not take up much space, either on the kitchen counter when in use or in the cupboard when stored. You can store it in one of your kitchen cabinets with little effort. Its legs and handles can be unscrewed, and this feature makes capacity much easier.

Like its capacity, the cleaning process is equally simple. If you isolate the temperature measurement, you can immerse everything in hot, foaming water to clean it. Some owners have put their Liddle griddle in the dishwasher and do not complain. Unlike other electric griddles, this griddle leaves plenty of room in the dishwasher for various dishes.

Since the oil channel is part of the machine and cannot be insulated, you have to turn everything upside down to unload it. You prefer not to do this while the griddle is still hot, but if you grab it to cool down, some of the fat will harden. This is the most basic observation when cleaning the griddle.

The robust cast aluminum body prevents deformation and transfers heat evenly across the cooking surface, keeping away from problem areas. Most electric griddles on the market offer uneven heating. With the exception of areas where the heating component sizzles a little more, the 07211 offers an equivalent heating surface that can surpass many of the superior models on the market without overstretching, especially the larger models that take longer to heat up.

It is not just easy to use, but also very moderately priced compared to other electric griddles. It is modest like the other Presto griddles, which boast of the most attractive price on the market. It is perfect for singles, couples,  and people who need an additional practical device for occasional use.

It does exactly what is expected of it. It is anything but difficult to clean and easy to store. There are not many objections to it, and most owners say it is a “big little griddle”. It can easily replace electric pots and pans or gas barbecues, with the only disadvantage being its small size.

If you live alone or with your partner and don’t have to cook for a larger group, this Presto Liddle Griddle may be right for you. However, if you are looking for a griddle with an open cooking surface, you should look for different models.

Check out the latest price on Amazon

The highlights:

Durable cast aluminum

8.5 “x10.5” cooking surface.

Maintains a wide temperature rise, up to 400ºF

Power – 1000 Watt

Completely low

1 year warranty

Pros

Cast aluminum resists torsion for a long time

Programmable temperature control

Drainage work releases oil and grease

Easy to clean

Easy to store

Cons

Best for small quantities

Heats up a lot

The handles can be released

The transmission channel is part of the equipment.

Wrapping up

Customers love this griddle because it can be used regularly to cook bacon, burgers, grilled cheese, pancakes, eggs and more. Whether you live alone, with a partner or with a small family, this is the ideal size you want! It doesn’t take up all the space in your closet and fits perfectly 4 hamburgers or 3 large pancakes. It heats up evenly and the side drip tray collects the fat from the bacon. This is my second model and I’m still addicted to it. I bought it as a backup, but I love this brand and size!

Buy Presto 07211 Liddle Griddle from Amazon


Presto 07045 Family-Size Cool-Touch Tilt’N Drain Electric Griddle Review

If you want to buy the Presto 07045 Family-Size Cool-Touch Tilt’N Drain Electric Griddle Review, you should go through this post carefully since I have cataloged here all the noteworthy features of this popular Presto model.

The size of the Cool-Touch Tilt ‘N Drain electric griddle of the Presto 07045 family is its most remarkable feature. Although the square area doesn’t look very large, its dimensions are anything but small or even average at 19.25×15.8×3.9 inches. This Presto griddle offers a spacious cooking surface of 14.25 “x15.5” and also looks great.

Check price on Amazon

Presto 07045 Tilt ‘N Electric Griddle Family Size

Like many other griddles, this model also has a non-stick coating on its cooking surface. The other element includes, as the name suggests, thePresto 07045 Family-Size Cool-Touch Tilt'N Drain Electric Griddle Review tilting drainage element. This feature allows you to tilt the griddle to remove unwanted fat and oil during cooking, or simply use the appliance in a horizontal position, depending on what you are cooking.

This tilt drain function can be useful in many situations, but can also be problematic if you are not careful when moving the entire unit. Simply pull the handle to tilt it and push it back to create a flat cooking surface.

The body of the griddles is made of cast aluminum, which is light, quite stiff and even easy to heat. And it is practically very stable and warp-proof. The cooking surface has a high-quality non-stick coating that reduces the amount of oil needed and makes food healthier. Safety precautions must be taken to avoid scratching the surface, and metal tools should not be used, as they will scratch and chip the non-stick coating.

If you want to learn more about the Presto griddles, click here

This Presto electric hob model has a fresh base for safe handling during cooking. But even in this case, as with any other electrical appliance, it is important to read the manual that comes with the product and follow the instructions given.

The non-stick coating on the cooking surface prevents food from sticking and makes cleaning easier. Although its size may make the cleaning process somewhat more difficult, not all sinks can hold it. The heating control is removable, and once removed, the top is completely immersed in hot soapy water for cleaning. This model is also dishwasher safe.

A main heat control automatically maintains the appropriate cooking temperature. However, some users have complained about its irregular heating when needed. The area near the heating element is hotter than the rest of the cooking surface. In addition, the griddle tends to deform when high heat is used for cooking.

As easy as it is to clean, it is not easy to store. Due to its size, it takes up a lot of space on the kitchen counter as well as in the cupboard. If you do not have enough space to store it, do not think about buying this model. It is useful for cooking food for crowds, but on the other hand, its storage can be a problem. Before you buy, make sure that you have enough space to store it, because not all kitchen cupboards can hold the Presto 07045 model and not all kitchen counters.

Another good thing about this Presto cool-touch griddle is its price. Compared to other griddles on the market, it is really cheap and attractive. But you can always opt for higher quality and more expensive griddles if you wish.

The efficient square shape of the hob allows you to accommodate more pancakes, eggs and bacon. However, some users have complained about the uneven cooking surface and the uneven heating. In addition, the inclined drain function is optimal because it keeps the appliance free of grease.

Features

Efficient square cooking surface

Power – 1500 Watt

Unique tilt and drain function

The cold floor surrounds the grill surface

Digital heat control

Fully submersible

1 year warranty

Pros

Large cooking area

Non-stick coating

Tilt and drain function

The Cold-Touch base enables safe maneuvering

Cons

Uneven Warming

Warping

 Wrapping up

Presto 07045 Family-Size Cool-Touch Tilt’N Drain Electric Griddle Review

This purchase was made as a gift for a close friend of mine. She wanted a griddle that was big enough to cook at least two types of food at once (i.e. eggs and pancakes). But it should not be so big that it would be difficult to carry it to the boat on the weekend outings. She loves this gift. She likes the tilt, which allows you to drain the bacon drippings before cooking another kind of food. She says it’s quick to clean up as well. . It was a good find and a great gift. In addition, the cost was reasonable. This griddle, my friend, says, has been a fantastic choice for her, and hence I have no hesitation in recommending this griddle to my readers.

Check price on Amazon

Presto 07046 Tilt ‘n Drain Big Griddle Cool-Touch Electric Griddle Review

Presto 07046 Tilt ‘n Drain Big Griddle Cool-Touch Review

Are you looking for an honest Presto 07046 Tilt ‘n Drain Big Griddle Cool-Touch electric griddle review? Go through this post right now.The Presto electric griddles are specially designed for light commercial and domestic cooking. The large Presto 07046 Tilt ‘n Drain Big Griddle Cool-Touch Griddle represents the best of the old and new generation. It is made from “new generation” construction materials and maintains the aesthetics of “old school” design, making this Presto electric griddle the best value for money.

Presto 07046 Tilt ‘n Drain Big Griddle Cool-Touch

Although it is not the biggest electric griddle on the market, it is big enough, as the name suggests. It offers a huge 18.5 x 15 inch cooking surface and is one of the largest grills available.

The body of the griddle is mPresto 07046 Tilt 'n Drain Big Griddle Cool-Touch Electric Griddle Reviewade of cast aluminium, which is light, stiff enough and good for even heating. Like many other grills, this Presto model has a non-stick coating on the cooking surface. The cooking surface has a high-quality non-stick coating that reduces the amount of oil needed and makes food healthier. Safety precautions must be taken to avoid scratching the surface and metal cookware should not be used as it would scratch and peel the non-stick coating.

The other feature, as the name suggests, is the tilt and drain function. This function allows you to tilt the griddle to remove unwanted fats and oils during cooking, or simply use the appliance in a horizontal position, depending on what you are cooking.

This tilt and drain function can be useful in many situations, but it can also be problematic if you are not careful when moving the entire unit. Simply pull the handle to tilt it and press it to obtain a flat cooking surface.

Read more about presto electric griddles

This model is equipped with a cool touch base for safe maneuverability when cooking. However, as with any other electrical appliance, it is important to read the manual that comes with the product and follow the instructions provided.

The non-stick coating on the cooking surface prevents food from sticking and makes cleaning easier. The heating control is removable, and once removed, the plate can be fully immersed in hot water and soap for cleaning. This model is also dishwasher safe.

A main heat control automatically maintains the correct cooking temperature. It has an output of 1500 watts and cooks your food perfectly in no time at all. However, some users have complained about uneven heating when needed.

You can prepare excellent eggs, soft pancakes and delicious French toast, but this appliance can also be used to prepare a variety of other breakfasts, lunches and dinners.

As easy as it is to clean, it is not so easy to store. Due to its size it takes up a lot of space on the kitchen counter and in the cupboard. If you do not have enough space to store it, do not think about buying this model. It is useful for cooking food for a group of people, but on the other hand, storage can be a problem.

With very little inconvenience, this grill has impressed many of its users and is recommended for ownership. If you are willing to take the trouble to clean it, you can get this for your kitchen. This will save you time and energy when preparing many dishes for your family and guests.

Check price on Amazon

Features

Large cooking surface 18,5 “x15”.

Heavy cast aluminum

Temperature resistant from 200ºF to 400ºF

Power – 1500 Watt

Unique drainage system

Main heat control

Fully submersible

1 year warranty

Pros

Large cooking area

Convenient tilt and drain function

Durable cast aluminum base

Heat control

Cons

It can create problem because of the large size

The dripping area is difficult to clean

Short power cable


Wrapping up

Presto 07046 Tilt ‘n Drain Big Griddle Cool-Touch Electric Griddle Review

In short, it’s a big electric griddle. I read a lot of reviews about other griddles before buying this product. I was really apprehensive of having problems like the ones others had mentioned, like hot and cold spots on the surface. But I would like to say without hesitation that so far I have had no complaints about this product. The tilt and drain function for cooking bacon is excellent. The drainage area is quite large. It is quite easy to store, very easy to clean and nice to see! This grill is really worth the few extra dollars it costs.


Check price on Amazon

Reviews Of The Best Presto Griddle

Best Presto electric griddle reviews

The Presto brand is the first name of a brand that comes to one’s mind when one thinks of electric griddles. This should not come as a great surprise, especially considering the status and popularity of the company. The average Presto product is quite an inexpensive one when you compare it with other griddles. However, the Presto products are so exquisitely crafted that the end results can easily outmatch more expensive products. Presto’s standard kitchen appliances are aimed at catering to the comfort of the users and hence these models are highly recommended by people all over the world.

This company presently offers a large number of models that can compete for spots on the top 10 electric griddles. Among the appliances of this brand, whose prices are quite attractive, there are a few large models and a small model intended for use by one or two people.presto electric griddle

The list of uses contains brief reviews on Presto’s various griddles. Please note that currently not all types of products of this brand are included in this list, but only the most popular ones.

1. Presto 07046 Tilt n Drain Big Griddle

The Presto 07046 Tilt n Drain Big Griddle Cool Touch Electric Griddle has a nonstick feature and has a  surface measurement  of 15 by 18.5 inches. As such, this product  offers a spacious cooking space. This unit has a Tilt ‘n Drain built-in feature that help to drain the grease more easily if you compare it with other electrical griddles.

However, the center of the 07046 Big griddle seems to get less hot than the rest of the surface, and hence require more user attention with regard to  temperature control and monitoring of the food.

Read review of the product

2. Presto 07071 15-inch Electric Tilt-n-fold Griddle, Black

Let’s now talk about the Presto 07071 Electric Tilt-n-fold Griddle.

This product is suitable for all meals: breakfast, lunch and dinner. It fits easily from a flat cooking surface for eggs and pancakes to a sloping surface for meat. The legs can be folded up and the drip tray snaps into place for easy and compact storage. it has a heavy cast aluminium base with a large 184 square inch cooking surface.
presto electric griddle
The high-quality non-stick surface ensures non-stick cooking and easy cleaning. The Control The Master heat control automatically maintains the desired cooking temperature. The sliding drip tray is easy to empty and also easy to clean. The model is fully submersible without the heat control. Just Lower the levers to tilt the frying surface when cooking meat. This product is also foldable for storage and fits most standard 18″ kitchen cabinets.

All in all, this model can be a great addition to your kitchen.

Read review of the product

3. Presto 07030 Great Touch 20 inch Griddle Black

Presto 07030 Cool Touch 20″ Electric Griddle Black. This electric appliance is big enough to allow the whole family to cook at the same time, but not as big as other models like the Big griddle, so it takes up less space and is easier to manoeuvre.

Like the additional griddles of the same brand, it is inexpensive, heats up quickly and is designed to be easy to clean. Despite all its positive features, the 07030 tends to slip a little, probably due to the lack of a rubber base. However, it can be solved with little effort for the user.

Read review of the product

 4. Presto 07211 Liddle Griddle

The Presto Liddle Griddle is designed for a presto griddlesmall group of people, usually one or two, and this appliance offers some really interesting features which users like very much. As this type of appliance is dishwasher safe, it can also be easily put in the dishwasher.

Unlike other griddles, which are made by this company (and other brands), this griddle is incredibly compact and does not take up much space in your cooking area. Its heat distribution can also be more precise, probably because of its small size.

Read review of the product

5. Presto 07045 Cool-Touch Tilt ‘N Strain, family model

The Presto 07045 family size electric grilddle Cool-Touch Tilt ‘N Drain is also a very p[opular product.  Like many Presto griddles that offer a large non-stick surface for food preparation, the design and shape of the 07045 has some related features. These features include a “tilt and drain” function, a new dishwasher and a number of other things that might be of interest to the average consumer. However, the larger size of this product may make cleaning and storage difficult, and the heat distribution is not very sound in this model.

Read review of the product

Wrapping up

Reviews of the best Presto griddle

Hope this general review of the best Presto electric griddles has given you some idea about this company if you haven’t heard about it before. In general, the electric griddles of this company are quite well-known, in addition to this , they also manufacture other products, which include propane gas grills, pressure cookers, electric grills and a whole lot of kitchen gadgets.

Best Stainless Steel Electric Griddle Of 2022: Top Reviews

Best Stainless Steel Electric Griddle

Are you looking for the best stainless steel electric griddle? I am sure you would do well to take a close look at this post where I have done enough to find out the best stainless steel electric griddle on the market.

Anyway, let’s begin. Why settle for less in this modern world of comfort and convenience when you can get the very best for yourself? For years, men and women have fought for survival on difficult machines. We can’t but wonder what went wrong when we find ourselves in front of a plate of burnt eggs. Even if you have been as careful as possible, your vegetables have a charred taste that may not be appetizing or healthy.

Cooking should not be such an unpleasant task! Fortunately, with the right equipment this is no longer the case. If you are searching for a cooking surface that gives you a fast and perfect cooking time, then stay here. With a bit of luck, you’ll find everything you want on this list of the best stainless steel electric griddles.

But one thing at a time!

Why should I buy a stainless steel griddle?

Perhaps you have discovered that many of today’s items are made of stainless steel. One of the main reasons is that metallic steel is incredibly strong and durable. Stainless steel products have a long life span and are in excellent condition.

Another reason why it is so popular is that stainless steel has an elegant look in any room. By using stainless steel worktops or perhaps panels, you always get a clean and fresh look.

But one of the main reasons why a person should get a panel is usually the value of cleanliness. Oil can be sprayed into stainless steel or drowned in the sauce: it will resist all attacks and wear and tear.

Professional kitchens use metallic steel for their cooking products because it is very easy to maintain. When cleaned properly, the metal looks new and fresh.

Our Recommendation No. 1

Cuisunart GR-4N 5- in-1 Griddler

Cuisunart GR-4N 5- in-1 Griddler
The Cuisinart special stainless steel griddler is an excellent product from the typical high-end manufacturer of kitchen appliances –Cuisinart. It is of exquisite quality, with an affordable price and is also appreciated by many people. It is easy to use and much easier to clean, which makes it perfect for people who are so busy that they do not have time to stand over the stove for hours, or for people who want to feed a large family and hence would like to make it as easy as possible.

This special electric stainless steel griddle has a brushed stainless steel housing. So, it fits almost any style of kitchen style and you don’t have to worry about breaking or damaging a new product.

The cooking surface is eleven and a half by nine inches. The temperature can be set individually for each side. There are a couple of buttons clearly marked with indicator lights that help reduce guesswork about them.

This product has a panini style handle for ease of use. It also allows you to move the lid to set the desired food preparation mode.

One person can use this system to cook in many different ways. This product or service works as a contact with a grill, a panini press, a full grill, a full grill as a half grill, and a half griddle. The hot plates are removable and reversible and have a large built-in drip tray for storage.

This unit is backed by a three-year limited warranty, so owners don’t have to worry about anything for the first three years of use. With the warranty, someone cares about a problem and can count on the customer service team to be there when you need them.

It is not recommended to grill chicken with bone as it will not cook evenly and cannot be cooked continuously.

This stainless steel electric grill, however, has received a few customer complaints like it certainly does not cook well and the eggs drip through the drainage hole like grease.

Why is this product more recommendable than others?

This special frying pan is highly recommended and is appreciated by almost all users who have purchased it. The special controls are simple and easy to use. This product also has the ability to cook almost anything you want, allowing you to prepare part of your meals off the stove. If you have this cooking device, you won’t have to look around for pots and pans to cook what you prefer. This product is the only one that comes with a limited warranty of 3 years, as I have already mentioned, so you don’t have to be afraid and last but not least, it will look great in any kitchen.

Buy the Cuisunart GR-4N 5- in-1 Griddler on Amazon

Our recommendation No:2

Cuisinart GR-5B Electric Griddler

If, as an individual, you enjoy making snacks for family and friends, you need the Cuisinart GR-5B (or Griddler Five) special, a kitchen product with interchangeable plates that you can use for grilling, barbecuing or whatever. It’s electric and it’s a 5-in-1 product.
Cuisinart GR-5B Electric Griddler
But here’s typically the big question: Does you need to buy one for yourself?

Well, let’s take a close look at the model. Following in Cuisinart’s footsteps, they have redesigned the Griddler to give it a sleek, contemporary style while maintaining its widely praised functionality. The final outcome of this research is the Griddler Five.

It features a multi-functional appliance that offers 5 different cooking options, including Contact Grill, Panini-Click, Full Grill, and Half Grill/Half Griddle.

For grilling or barbecuing, the Griddler Five comes with a removable and replaceable non-stick cooking plate.

The Cuisinart GR-5B has an LCD screen, an on/off button and a validation knob. The control dial is normally used to set the respective temperature and to increase the temperature and time period.

Below is a list of the functions you can do, adjust and change as well as the information shown on the display.

The Cooking Power: Appears when the Grill or the griddle function is selected.

Temperature: Select in the range 175-450 degrees Fahrenheit (f), increase by 25 degrees

Timer: count up or countdown timer

Pre-heating bars: Displays the heating-up progress

What are the advantages?

Performance: The general consensus is that this type of “Griddler Five” delivers the promised results in terms of food preparation capabilities. In fact, it could grill or help prepare a variety of foods such as meat, pork chops, bacon and even sandwiches. However, some customers typically reported of some problems. For example, one man or woman reported that the plates were not 100% smooth. They’re actually much deeper in the middle, so when you’re frying scrambled eggs, it can be a bit of a bother.

Cleaning: Since especially the dishes are coated with non-stick material, these kinds of products are easy to clean. Although one person found that they “clean themselves very well with soap and a cloth”.

The size: Although it’s not necessarily the smallest grill available, the Cuisinart GR-5B doesn’t take up as much space on your kitchen countertop. It’s compact, quick to install and, as one person put it, “the perfect size”.

What are the disadvantages?

Unfortunately, you can’t control the temperature on each side separately.

Furthermore, there is no automatic switch-off function. You have to turn the device manually. Nevertheless, it is better to keep in mind that this particular device is not a new “ready-to-use” and set-and-forget kitchen gadget.

Waffle plates or accessories are not included. They have be purchased separately if you need them.

Is it necessary to buy the Griddler Five? Here are our tips.

The Cuisinart GR-5B is undoubtedly perfect for people who live with one or two children. It is simple, quick and easy to clean. However, a major drawback is the lack of an automatic shutdown function, which is kind of ironic, as it has a recommended timer function! Nevertheless, this type of product is quite popular and people love it.


Buy the Cuisinart GR-5B Electric Griddler on Amazon

Our recommendation No:3

Broil King PCG-10 professional portable non-stick griddle

Thanks to its impressive non-stick material, this special product from Broil  King is one of the best stainless steel electric griddles. The non-stick coating of this electric griddle is both durable and environment-friendly. You don’t have to worry about using this electric griddle by flying over the strong substances used to make the typical old non-stick material. This special non-stick coating used here is completely safe when cooking.
Broil King PCG-10 professional portable non-stick griddle
One of the best features of this electric griddle could be the removable parts. This electric griddle comes with a practical non-stick stainless steel backsplash. When you are out and about, this backsplash can protect your walls from oil splashes!

When it comes to the perfect construction, the sturdy legs of this stainless steel electric griddle are worth mentioning. These legs fully support the respective heating plates and at the same time facilitate the drainage of grease.

Excess grease is collected in the easily removable grease tray. This is undoubtedly another part that can be easily removed when it is cleaning time.

The cooking area of this product is wide. You can fry a lot of food on this type of 21″ x 12″ electric griddle. And the best part is that you can get rid of the temperature sensor and immerse the hot plate completely in the kitchen sink to soak it.

With the temperature control you can set the temperature in up to 400 degrees. This electric griddle offers a perfect cooking temperature that you can adjust to suit your needs.

All these wonderful features make this stainless steel electric griddle one of the best on the market. If you are still not convinced, this electric griddle has stainless steel handles with a cool touch. This means more convenience for you.

Buy Broil King PCG-10 electric griddle on Amazon

Our own recommendation N0: 4

The Belovedkai Electric Countertop griddle

Overall, the overall design of this electric griddle makes it one of the best stainless steel electric griddles on the market today. This Belovedkai electric griddle is made of high quality stainless steel.

The stainless steel construction of this electric griddle makes it attractive and easy to use. In addition, the compact shape of this griddle makes it a prBelovedkai Electric Countertop griddleactical and very useful kitchen device that you can easily place on your counter.

This type of electric griddle is perfectly prepared in terms of temperature control. The temperature setting can be adjusted according to your wishes. You can rely on an evenly heated preparation surface to help you prepare an ideal meal. The latest technology is used in the controls to consume as little energy as possible when cooking the food.

On this electric griddle, a person can expect the most efficient system to drain the oil. An easily removable oil tray collects excess oil that drains directly through a convenient overflow hole. The drainage tray that can be removed for cleaning can make cleaning easier.

This electric griddle can be used to cook a wide variety of foods. Combined with the commercial design, one person can safely carry it to your own restaurant or catering organization.

The large preparation area can easily be used to bring out the large amount of well-cooked food in a very short time.

Buy the Belovedkai Electric Countertop griddle on Amazon

Our recommendation No: 5

The WYZworks WYZ-STEAK-OVEN electric counter griddle

The WYZworks WYZ-STEAK-OVEN electric counter griddle is made of smooth stainless steel. Its grease drainage funnels collect extra liquid, which can be easily removed when taken out of the drawer. Then, the stainless steel splashguards integrated into the back and sides prevent grease from escaping. The thermostatic temperature regulator makes it easy to control the temperature of the griddle. The grease drainage opening makes cleaning the area very easy. This special product is suitable for almost all tasks that arise in the context of short-term orders.

Overall, the WYZworks commercial electric grill griddle is an excellent addition to homes of all sizes. It is ideal for virtually any mid-size counter, mobile food conveyor or even a regular restaurant. This stainless steel electric griddle is perfect for eggs, bacon, hot cakes, French toast, baked potatoes, hot sandwiches, steaks and a lot more.WYZworks WYZ-STEAK-OVEN electric counter griddle

Make sure to look inside of the appliance regularly to check that there is no grease drainage. As with food preparation, be sure to use an adequate amount of oil, spreader or non-stick cooking spray to prevent food from sticking or burning on the griddle plate.

The cleaning process is also super easy. When you’re done cooking, remove debris and leftovers from the griddle and clean it with a damp cloth. Don’t forget to wear protective gloves since the griddle will still stay hot.


Buy WYZworks WYZ-STEAK-OVEN electric counter griddle on Amazon

Wrapping up

Best Stainless Steel Electric Griddle

Many people find that cooking is quite a personal activity. It’s a time when you can find your creative juices flowing and let them go. At the same time, it can be frustrating to get appliances that don’t work as you want them to.

If you want to make the most of your time, it is absolutely necessary to get a stainless steel electric griddle that performs well. The products I have mentioned here are among the best stainless steel electric griddles and will serve you well.


Related Post: Best Electric Griddle

How Does An Air Fryer Work? Read This Before You Buy One!

How does an air fryer work? People have them at home and yet few know how it works. Well, the whole concept of frying in the air looks like a magical thing. Frying without fat? Is that possible? Like many things that seem mysterious, it actually has a very logical explanation. But before revealing,  it should be made clear that air-frying is not really frying. To really fry, you have to dip the food in oil. There is no other way. But what a deep fryer can do is to give you the crunch that makes southern fried chicken or a potato chip so delicious. You get the point now?

All right, let’s get on with it.

How does an air fryer work?

An air fryer is actually very similar to a countertop convection oven. It’s a small electrical appliance with a heating element and a fan that blows air into a cooking chamber. In an air fryer, however, the air is very quickly swirled in a circular pattern. This is why, it reaches all food surfaces better and produces a crispy crust. In addition, the food is placed in a perforated basket that keeps the food in contact with the hot, moving air. Is there anything else that makes a big difference? You should take into account that there is not much space between the walls of the chamber and the basket increases the heating effect.

Buy Philips Avance Collection XXL Digital Twin TurboStar Air Fryer from Amazon.com

Are all fryers the same? No, not really. Among many brands, I can say that some machines cook better and more evenly. Almost all of them brown and chop the food above and below, although some do it more evenly. In the best kind of fryers, the food is also “fried” in the middle of the basket. The difference lies in the construction of the oven, and as you would expect, and, needless to say, the best are the most expensive. (The best I have using for years is shown above!) However, you can help by preheating these fries and shaking and turning them while cooking.

Can I do without the oil altogether?

Most manufacturers of air fryers and recipes recommend spraying it with some oil. However, I have discovered that this is unnecessary. The food remains just as crispy without a thin layer of oil. If you want to add a little butter or olive oil for flavor, I suggest that you do this after cooking to maximize the effect.

Can I use my air fryer for purposes other than frying?

You can use your air fryer for grilling and baking, but do not expect to get the same results as in a conventional oven. If you have no other kitchen appliances, yes, satisfy your hunger for freshly baked blueberry muffins, but be aware that they will not become as even or brown as they would in a normal sized oven or a countertop oven.

What foods can be prepared in an air fryer?

It depends on your creativity! Meat, vegetables and even baked goods can work in your air fryer.

Here are some popular choices:

You can cook vegetables like potatoes, carrots, squash– basically anything that can be fried or roasted on a baking tray.

Meat dishes like chicken nuggets, bacon, hamburgers and hot dogs in an air fryer at home.

Frozen foods like chicken nuggets, mozzarella sticks, onion rings and French fries can also be cooked in an air fryer.

Baked goods such as doughnuts, doughnuts and funnel cakes can be done as well.

Tips for using your air fryer

It takes a little practice to achieve good results with an air fryer.

Since air fryers are a relatively newer piece of kitchen equipment, many models simply fail to keep up so far as performance is concerned. Therefore, you need to make sure that you are using a quality air fryer to get the most desired results. If you do not yet own an air fryer, our guide to the best air fryers will help you find one that suits your needs and works well, no matter how you prepare your food. However, I have already mentioned the best air fryer available on the market today according to performance and quality, and I have used this model personally. So, I presume I am qualified to recommend it. Click the image above or the link below:


 Buy Philips Avance Collection XXL Digital Twin TurboStar Air Fryer from Amazon.com

You will also find some tips that you should follow when you start using your air fryer.

  1. Preheat before cooking

Your air fryer needs time to reach its desired temperature before you use it, just like your oven or stove. Even if your appliance indicates that it does not need to be preheated, you will probably get better results if you let it heat up first. Fortunately, preheating an air fryer doesn’t take long, usually one to three minutes, instead of the eight minutes or more when you go to deep-fry something.

  1. Do not overdo it!

As with conventional frying, overloading the air fryer does not produce the best results. If you put too much food in the fryer, the food may soak or cook unevenly. It can also prolong the time it takes to cook the food completely.

  1. Turn over when frying

You may fry in the open air, but you should not throw away everything you know about frying. You should bread the items well before you drop them, and you should remember to flip the food in the middle of cooking.

And don’t be ashamed to monitor your progress while frying – it will help you get the desired results, especially the first few times you use the appliance.

  1. Clean thoroughly after use

Do not miss this important step! Food particles can get stuck in the corners of your fryer, accumulate over time and cause problems in the future. We recommend that you clean your appliance at least partially after each use. Allow the fryer to cool after use and follow the manufacturer’s instructions as given in the brochure/manual for proper cleaning.

Wrapping up–how does an air fryer work

Hopefully, this post has answered the question: how does an air fryer work? You should really have some basic knowledge about the way it functions and about the advantages and disadvantages of buy one for home. Otherwise, chances are that you end up buying the wrong one for yourself and waste your money.


How to make cookies on an electric griddle

How to make cookies on an electric griddle or electric skillet

One of my readers recently shared with me memories of her mother baking cookies on a griddle on the stove. What an awesome idea to save energy on a hot summer day, when your family members are looking for freshly-baked cookies, but you don’t want to pollute the house with the heat of the oven.

how to make cookies on an electric griddle
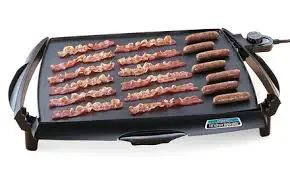
This cookie baking method is also the answer when you only need a few cookies. You don’t have to bake a whole batch of cookies. You just need to make the dough, cut the cookies and put a layer between the pieces of wax paper. Now store them in the freezer and then take out the amount you need for making cookies. Let them defrost for about 20 minutes, then place them on the hot griddle. You will have a small amount of cookies in no time!

You can also use an electric griddle and get the exact same results. This method makes these griddle cookies so easy and delicious! It would be very easy to take a frying pan or an electric griddle or skillet with you when you go camping or for an outdoor activity as long as electricity is available. Make your dough at home or freeze it in advance and take it to your destination.

I have made some changes to the recipe from the one I found in a cookbook. When I made the cookies, I replaced the sugar with Splenda. They tasted good, but I left the sugar in the recipe below for you to decide what kind of sweetener you want to use. As indicated below, I used cinnamon instead of the nutmeg that was recommended in the original recipe. I like the blend of raisins and cinnamon together, which create a different flavor. Make them the way your family likes them best. That’s what good cooks do. After all, you are cooking for your family or guests, so you will have to keep in mind the kind of cookies they would enjoy.

Cooking time

Preparation time: 25 minutes Cooking time: 45 min. The cookies will be ready in : 1 hour and 10 minutes : Depends on the size of the cookies, though.

Ingredients

3 1/2 cups all-purpose flour, sifted

1 cup of sugar

1 1/2 teaspoons baking powder

1 teaspoon of salt

1/2 teaspoon baking soda

1 teaspoon cinnamon

1 cup of butter

1 egg

1/2 cup of milk

1 1/4 cups raisins

Instructions

In a large bowl, sift the dry ingredients.

Cut the butter. (any brand will do).

In another bowl, beat the eggs well. Add milk and mix.

Add the egg mixture to the flour. Mix well.

Add raisins and stir until dough is firm.

Roll out the dough on a lightly floured surface to a thickness of one-quarter inch. Cut with a round cookie cutter if you have one or use a small glass upside down.

Lightly grease the griddle (either kitchen or electric). Heat it until a few drops of water sizzle on it. You may have to experiment with the right temperature, but remember that it is better for the iron not to be hot enough than to overheat and burn your cookies.

Place the cookies on the griddle. As the bottom of the cookies browns, the top swells. Then, turn the cookies over and brown the top.

Cool them down on a wire rack.

Ideas for Additions and Experiments

Add nuts to make it different

I tried this recipe again and this time I added nuts. The nuts made them even more delicious. Be careful when adding nuts to a recipe as many people are allergic to them. If you are serving your own family, you should be aware of the problems. However, if you’re making cookies to share at a party, it’s probably best to leave them out of the recipe.

Substitute golden raisins for regular raisins.

I also substituted golden raisins and the taste was the same for me. However, I liked the look of the regular raisin cookies better than the golden raisin cookies and they were cheaper in my grocery store.

Try this method with other cookie recipes

I don’t know why this cooking method wouldn’t work on a variety of cookies. I like the idea of using all the dough prepared in your refrigerator so that you can use it whenever you need. I plan to try a package of chocolate chip cookie dough soon!

Wrapping up

I am sure you would love this post that tells you how to make cookies on an electric griddle or an electric skillet and your family members, especially the small children would love to have these mouthwatering cookies. The electric griddle is a versatile kitchen gadget and you can make so many useful things with its help and yet we seldom use them for other purposes. Go cooking cookies!


Related Post: How to make pancakes on an electric griddle