Does Tiramisu Have  Caffeine?
Does Tiramisu have caffeine? No clue? Well, if you are looking for an authentic answer to this, you should go through this blog post which will clear all your doubts. Now read on.
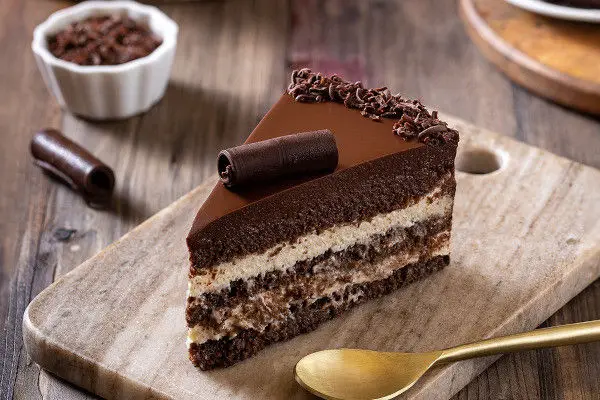
There’s nothing better than a slice cake with a cup of coffee, unless of course it’s created with coffee. Traditional tiramisu originates from Veneto, Italy, and is a delicious combination consisting of delicate ladyfinger biscuits, creamy mascarpone cheese and espresso. You might be wondering if tiramisu contains espresso is that it’s a caffeinated cake?
Generally, traditional tiramisu recipes do contain caffeine. However how much caffeine is present contained in the tiramisu is dependent on the recipe and the kind of coffee used to make the cake. For instance, if you make use of the traditional coffee that is espresso, you should expect 65-80 milligrams caffeine per serving. Keep in mind that a 12 ounce glass of coffee is 120 milligrams or more of caffeine. So the slice of tiramisu isn’t as caffeine-rich as the coffee.
Tiramisu is traditionally a Caffeinated Dessert
The primary basis of the caffeine used in tiramisu comes from dark coffee. But, a lot of recipes substitute regular instant or drip coffee in place of espresso.
It’s not baked, instead the cake is soaked in espresso, which means that the caffeine soaks right through the dessert. Since coffee is naturally caffeine-rich so you can anticipate that most tiramisu to have a certain amount of caffeine in every serving.
How Much Caffeine Tiramisu Has Depends On Recipe
When you hear espresso is mentioned, you’re probably thinking of tiramisu. It is full of caffeine. In the average, a cup of espresso is about 65 milligrams caffeine.
The majority of recipes require an ounce or two of espresso. That means an eight-person cake could contain between 520 and 1040 milligrams caffeine in the whole cake.
However, it doesn’t mean that you’ll drink all the caffeine. If you’d like to eat the whole tiramisu, you may do so. However, you should consume the cake in smaller portions. The majority of tiramisu recipes can serve 8 to 10 people servings, each with 65-50 milligrams caffeine per slice.
But, it’s difficult to find a precise measurement of caffeine levels in retail tiramisu products. The FDA mandates that companies selling beverages provide caffeine levels, but there is no requirement to provide caffeine levels in food products.
Therefore, you’ll need to examine the place that the coffee is on on the food label. Food labels provide ingredients in order of decreasing importance according to weight and prominence in the food. If the coffee is on the lower end of the listing, it means that it’s probably not an essential ingredient.
Tiramisu Flavored Yogurt
Many tiramisu flavored yogurts, like Light + Fit’s Tiramisu Greek yogurt, contain coffee. In general, yogurts contain coffee powder. For Light + Fit, less than one percent of coffee powder is present in the food.
Tiramisu Flavored Ice Cream
A wide variety of Tiramisu-based ice creams include coffee, like the well-known Ben and Jerry’s Topped Tiramisu. But, coffee is used to create the flavor of tiramisu. Therefore, it’s not the primary ingredient. There is no an espresso after eating Ben and Jerry’s.
Olive Garden Tiramisu
Olive Garden uses straight espresso for their tiramisu. If you think about it you can be sure that the tiramisu they serve will contain at the very least 50 milligrams caffeine in each slice.
Costco Tiramisu
Costco’s tiramisu isn’t explicit enough to mention the caffeine content of the dessert. However, it does mention that coffee is included within the dessert. Since the dessert is an 85-gram glass jar there’s probably not enough coffee to create any kind of buzz. Be aware that each jar contains 1.5 percent ABV which means you don’t wish to give this to your children.
Tiramisu for Pregnant and Kids Women
Traditional tiramisu is not recommended for children or pregnant women to consume. Traditional tiramisu could be as alcohol-laden as beer, you shouldn’t serve it to your children.
In addition, the amount of alcohol may be harmful for unborn babies, which is why pregnant women should refrain from drinking traditional tiramisu.
However, non-alcoholic tiramisu can be generally safe for children or pregnant ladies to indulge in smaller portions. Although caffeine will not harm your child or the unborn baby but it may make them feel jittery. They may also be hyper, so think about the possibility of giving them a caffeine-infused dessert.
Best Substitutes for coffee in Tiramisu
If you’re sensitive to caffeine, or simply would prefer to not include the coffee flavor in your tiramisu, you are able to. There are plenty of options which provide the same taste in your tiramisu.
Decaffeinated Coffee
If you’re not a coffee drinker but like the flavor of coffee, you can make use of decaffeinated espresso or drip coffee to make your tiramisu. Simply substitute the decaff in a one-to-one ratio to the espresso.
Choffee or Cacao
Choffee, or ground cacao, has a similar flavor like coffee, but tends toward a more delicate chocolate taste. It’s rich in antioxidants and creates a similar color and texture as tiramisu. It is possible to replace a cup or two of cacao that is strong in an all-in-one proportion using a recipe’s espresso coffee.
Frangelico Liqueur
If you’re not afraid of substituting coffee for alcohol or tea, you can make use of Frangelico Hazelnut Liqueur to create the most delicious, smooth, and nutty tiramisu. Be aware that you’ll need to test the flavors since Liqueur usually has stronger flavors than coffee (and higher liqueur levels mean a greater alcohol amount within the dessert.)
I suggest that you should be mixing Frangelico with decaffeinated or traditional espresso. The caffeine content will be reduced in the cake, but not lose any flavor. You can also avoid adding excessive alcohol to the cake.
Chocolate Syrup with Amaretto Extract
If there is chocolate syrup stored in your refrigerator, you can make use of it to make a similar flavor to coffee for the tiramisu. Mix one cup of chocolate syrup with 6 to 10 drop of extracts from amaretto for an nutty, rich taste which is a great match with the other components in tiramisu.
Chicory
The chicory root is a well-known alternative to coffee in the Louisianna region and other states in the southern region. It is similar in flavor and color as coffee and can be used as a decaffeinated variant of tiramisu. It is possible to use it to replace coffee or espresso.
Chicory can be a good choice to make a decaffeinated version tiramisu.
Traditional Tiramisu Isn’t Child-Safe Because It’s Full of Alcohol
The majority of tiramisu has less than 5 percent alcohol per portion depending on the type of alcohol within the dish. For instance, a typical tiramisu that contains Marsala wine is typically 1.5 percent alcohol per slice. So, two pieces of tiramisu could contain the same amount of alcohol like beer.
Since the amount of alcohol in tiramisu is comparable to that of an actual alcohol drink and therefore, children shouldn’t eat it. Adults also need to be aware, since eating excessive quantities of tiramisu can raise the levels of blood alcohol similar to wine or beer.
The types of alcohol used in Tiramisu
Traditional tiramisu recipes use some type of alcohol to complete the dessert. You can adjust how much alcohol is used used in the recipe by using less concentrated alcohol to make the tiramisu. Simply look for less amounts in ABV (Alcohol by Volume) on the label. Most recipes will contain one of the following choices:
Marsala Wine
Fortified wine such as Marsala is the best option for tiramisu. It’s from Sicily, Italy and the white grapes give a delightful rich, nutty flavor to tiramisu. Marsala wine typically has 15% to 20 percent ABV.
Rum
If you like a richer tiramisu, try using rum that is dark or spiced as opposed to wine. But, remember that the alcohol levels of rum vary widely, with some brands offering just 15 percent ABV while others, such as Bacardi offer options of 75 percent ABV. Use darker or spicy rums for an even richer tiramisu
Amaretto Liqueur
Amaretto liqueur is a delightfully sweet, nutty taste that complements the tiramisu’s ingredients perfectly. Most amaretto liqueur contains about 20-25% ABV.
Coffee Liqueur
Coffee liqueurs are chock-full of alcohol and caffeine, which is why you’ll need to check your dosage when making tiramisu. Most coffee-based liqueurs are around 31 percent ABV and are able to provide an equivalent amount of 5 cups coffee in each bottle.
Substitutes For Alcohol In Tiramisu
If you’d like to cut out any alcohol from your tiramisu you’re left with a few choices:
Strong Espresso
The first step is to just add espresso strong into your tiramisu. It’s a great flavor, without adding alcohol into the tiramisu.
Amaretto Extract
If you’d like to add a nuanced layer that will add flavor cake without the liqueur, add a couple of drops of amaretto in the coffee or espresso you’re drinking for the cake to absorb it.
Simple Tiramisu Easy Tiramisu Recipe (With Caffeine and Alcohol Alternatives)
Tiramisu is delicious and is also easy to prepare. It is, however, different from most cakes. Tiramisu is made by assembling, not baked. Here’s a simple recipe for tiramisu to prepare at your home.
Ingredients:
- A cup or two of dark, strong roasted espresso or coffee (you may use subs like Choffee or decaff to remove caffeine)
- Half cup of sugar
- 1/3-1/2 cup Marsala, Rum, or Amaretto Liqueur (omit for alcohol recipe that is alcohol-free)
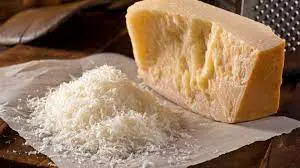
- 8oz jar of Marscapone Cream
- 3 large eggs
- Half cup of thick cream
- Package of 24 pieces of Lady Fingers
- Espresso powder, powdered chocolate, or espresso sugar, to top the cake
Steps:
Prepare coffee and place it aside until the coffee is cool.
Then, put a pot that is filled with water and cook it up to the point of boiling.
Mix eggs, sugar and alcohol choice in a stainless steel bowl, and then place it over boiling water. Bring to a boil until bubbling and then doubled in volume. Set aside.
In a different bowl make the cream and mix it until it is fluffy and stiff.
Whisk the Marscapone mixture into the egg, sugar along with the mixture of alcohol. After that, fold in the whipping cream slowly, so as so as to avoid deflating the cream.
Half of the Ladyfingers, and dip each one into the coffee waiting mixture. Place the cookies on baking dishes.
Layer half of the mixture over the Ladyfingers.
Dip and layer the rest of the Ladyfingers over the cream layer first.
Layer your second cookie layer with rest from the cream.
Dust it with espresso powder coffee sugar, or cocoa.
Chill for between eight and ten hours, or up 24-hours. Serve chilled.
Things To Note About Tiramisu
When you’re making your tiramisu it is important to keep couple of facts and bits of information in your head to ensure the safety of food.
Tiramisu Is Not Shelf-Stable
Tiramisu is made with raw eggs as well as dairy products. since it isn’t baked the ingredients aren’t stable and can easily become contaminated when exposed to temperatures of room temperature.
The FDA recommends that tiramisu should not remain at temperatures of longer than 2 hours. In addition, at temperatures higher than 90°F, tiramisu shouldn’t be left outside for more than one hour.
Tiramisu that is left out for in excess time at room temperature or even hotter, can form a curd, cause bacterial growth and ruin. Additionally, eating it may lead to food poisoning.
Tiramisu Requires Refrigeration
If you’re not eating the tiramisu within an hour, you should store it in the refrigerator. The cooler temperatures can stop bacteria from growing within the tiramisu as well as prevent it from curdling. It is possible to keep the tiramisu chilled for up to three days before you’ll be ready to dispose of it.
Freezing Tiramisu
Should you wish to save tiramisu for desserts to come You can store it in the freezer. Be aware that tiramisu doesn’t keep well in the freezer due to its high dairy content. To freeze tiramisu, you must follow these steps:
- Use plastic Wrap
Cover the tiramisu with plastic wrap or saran wrap to keep air from entering the tiramisu. If the tiramisu has been placed in an freezer-safe container you can cover it with saran wrap, without removal of the cake to reduce mess. Two layers of saran wrap in order to stop freezing burn.
- Make use of Tin Foil
Cover the saran wrap with tin foil. saran wrap.
- Make sure to date the Tiramisu
Because of its dairy-rich ingredients Because of its dairy-rich contents, you can only store the tiramisu frozen for a maximum of two months before it begins losing its texture and taste. You should date the tiramisu to ensure that you know precisely when you’ll have to consume it.
- Place it in the Freezer
Keep the tiramisu in a safe place within the freezer. Avoid storing it under food items that are heavy, as they could cause the cake to fall apart.
Defrosting Tiramisu
To defrost the tiramisu safely remove it from the freezer and then defrost in the frig. It takes between 24-48 hours for the tiramisu to cool in the fridge however it stops bacteria from growing or the tiramisu from losing its flavor.
FAQs
What does Tiramisu consist of?
Tiramisu is one of the desserts that originates from Italy. It is made of ladyfingers, covered in coffee cream and covered by chocolate mousse. It is typically served warm, however it can be served cold, too. It is extremely popular in Italian eateries.
Is Tiramisu Halal?
No, tiramisu does not count as Halal since it is a source of alcohol. Alcoholic drinks are banned in Islam.
Does Tiramisu Have Cinnamon?
Cinnamon is commonly used in desserts like apples, cinnamon roll as well as pumpkin pie. It can also be added to pancakes, muffins and breads waffles, waffles and Ice cream. It is also added to baked goods like biscuits cakes, scones, and muffins.
Does tiramisu contain coffee?
Tiramisu is dessert made up of ladyfingers in coffee liqueur, and Mascarpone cheese. It is usually served at dinner; however, it can be enjoyed anytime. A typical serving is 1 cup of coffee 2 tablespoons of sugar 3 pounds of mascarpone cheese as well as 6-8 ladyfingers.
Can a child consume tiramisu?
The food is not cooked or baked off. There are a variety of versions made with very little alcohol and some are extremely alcohol-based. It’s an excellent idea to try it yourself before deciding which one is suitable for your child. Consider if you’d allow your child to have one or two tablespoons of coffee or Rum.
Does tiramisu go bad?
The tiramisu can last for up to 4 days in the refrigerator when stored in an airtight container that is kept at or below 40 degrees F. It is advised to eat it within two days to get the best quality and taste of tiramisu. In addition, you must preserve the tiramisu with aluminum foil, or wrapped in plastic.
How can you fix a soggy tiramisu?
Making a perfect tiramisu or cream can be difficult when it is watery. If you’ve not assembled the dish, then pour the excess liquid away and chill the dessert to firm it up. Include a small amount of unflavored gelatin that has been softened by warm water. If you want to serve a watery dessert, simply wipe it down with paper towels, and then keep it cool.
Wrapping up
Does Tiramisu have caffeine? Well, I think you have already got your answer.
Tiramisu is the classic dessert that’s easy to prepare at home. Sure , there are numerous updated variations of this timeless dessert: tiramisu cakes, tiramisu pancakes and tiramisu ice cream, but I still love the traditional one.
Tiramisu is spiked with only the slightest amount of espresso. It’s not enough caffeine, however, to keep you awake at midnight. Therefore, you won’t need to be concerned about insomnia.
As this dessert contains quite a bit of alcohol, I would not recommend serving it to small children. If you have little kids running around the house it is best to leave out the liquor or you can dilute it with espresso before giving it to kids.

 Can you eat undercooked potatoes? If you don’t have any idea, I suggest that you go through this post for further details.