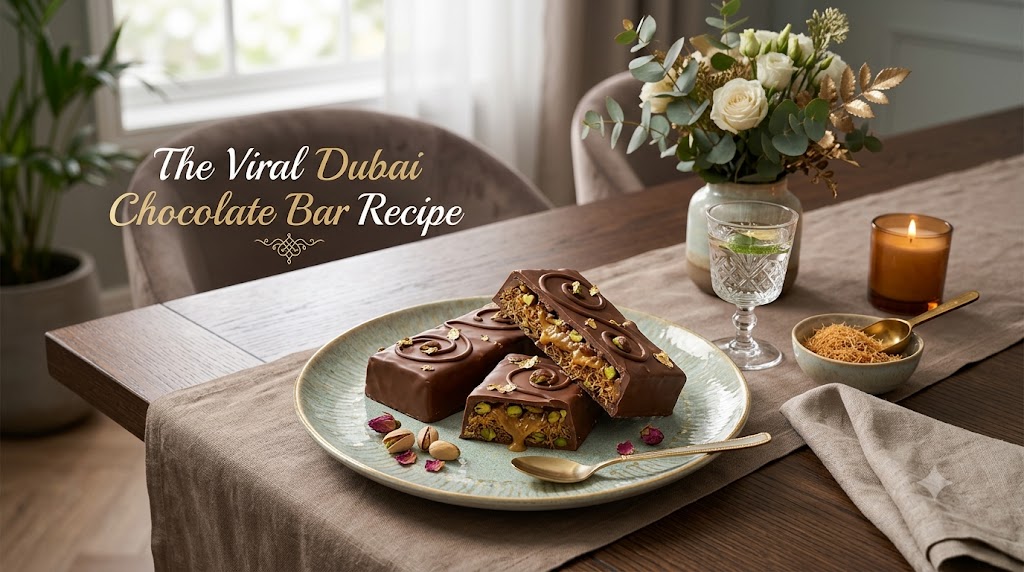
The Viral Dubai Chocolate Bar Recipe
I burned my first batch of kunafa. Badly. Like, “open every window in the kitchen” badly. That was back in December when I cam across the viral Dubai chocolate bar recipe on Youtube and that really blew up my mind. I was so eager to try it that I cranked the heat way too high and walked away to answer a phone call. Rookie mistake. Three minutes later my kitchen smelled like a campfire and my kunafa looked like tiny black twigs instead of golden strands.
I tell you this because I want you to know something before we start: this Dubai chocolate bar recipe is not hard, but it does have one step that will humble you if you’re not paying attention. And I’d rather you learn from my burnt kunafa than repeat it yourself.
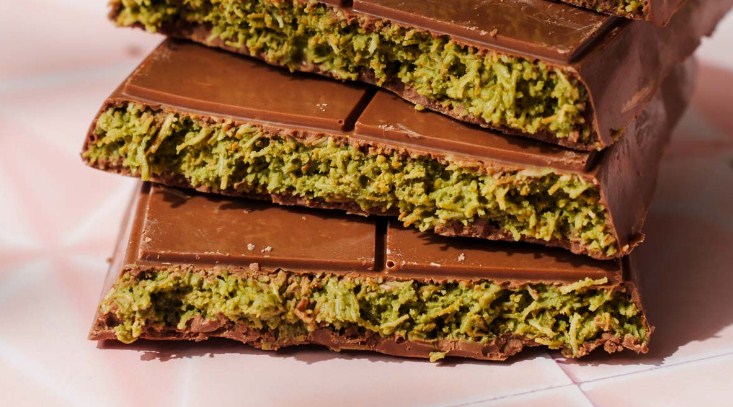
If you haven’t seen this viral dessert yet, here’s the quick version. It’s a thick chocolate bar filled with crispy toasted kunafa (a shredded pastry, kind of like really thin phyllo noodles) mixed with pistachio cream and tahini. The original went viral out of a chocolate shop in Dubai, and the internet basically lost its mind over the crunch-meets-gooey texture. I get why. I made it four times last month and I’m still not tired of it.
The best part for those of us who live in our skillets? The kunafa toasting step happens right there on the stovetop, in a regular skillet, no fancy equipment needed. That’s the whole magic of this Dubai chocolate bar recipe — a hot pan, some butter, and about eight minutes of your attention.
Why You’ll Love This Recipe
This isn’t one of those trendy recipes that looks cool on video but tastes like cardboard in real life. The texture contrast is genuinely addictive.
Here’s what sold me on making it again and again:
- The crunch factor is unreal. Toasted kunafa stays crispy even inside melted chocolate, which sounds impossible until you taste it.
- It uses simple pantry-ish ingredients. Once you track down kunafa pastry and pistachio cream (both easy to find online now), everything else is basic baking stuff.
- It looks fancy but takes maybe 35 minutes of actual hands-on work.
- You can make it in a loaf pan, a small tray, or honestly a muffin tin if you want individual bars.
- It’s a genuine conversation starter. I brought a batch to my sister’s book club and three people asked for the recipe before they’d even finished a bite.
My husband, who claims he “doesn’t really like sweets,” ate four pieces in one sitting and then pretended he only had two. I counted the wrappers. Men are so predictable.
Ingredients
For the kunafa pistachio filling:
- 100g kunafa pastry (shredded phyllo), roughly chopped into small pieces
- 3 tablespoons unsalted butter
- 1/3 cup pistachio cream (or pistachio butter)
- 2 tablespoons tahini
- Pinch of salt
For the chocolate shell:
- 300g milk chocolate, chopped or in chips
- 200g white chocolate (optional, for the marbled look — skip if you want a solid milk chocolate bar)
- 1 tablespoon coconut oil (helps the chocolate set with a nice snap)
Optional garnish:
- Crushed pistachios
- A light drizzle of extra pistachio cream on top
That’s genuinely it. No eggs, no flour, no oven needed for the filling part, which is honestly a relief on a busy weeknight.
Step-by-Step Instructions
Step 1: Toast the kunafa in your skillet.
Melt the butter in a medium skillet over medium-low heat. This is the step where I burned mine, so trust me — medium-low, not medium, not medium-high. Add the chopped kunafa pastry and stir constantly with a wooden spoon or spatula. You’re looking for a deep golden color, not brown, not dark. This takes about 6 to 9 minutes depending on your stove. Keep stirring the whole time. Do not walk away. I mean it.
Step 2: Cool it down.
Pour the toasted kunafa onto a plate and spread it out so it stops cooking. Let it sit for about 5 minutes. It needs to be room temperature before the next step or it’ll melt your pistachio cream into soup.
Step 3: Mix the filling.
In a bowl, combine the cooled kunafa with pistachio cream, tahini, and a small pinch of salt. Stir gently. You want the strands coated but still visibly crispy and separate, not mashed into a paste.
Step 4: Melt your chocolate.
Melt the milk chocolate with the coconut oil, either in the microwave in 20-second bursts or over a double boiler. Stir until smooth. If you’re doing the marbled white chocolate look, melt that separately in a small bowl.
Step 5: Build the bottom layer.
Pour about half the melted milk chocolate into a lined loaf pan or small baking tray, tilting it to coat the bottom evenly. Pop it in the fridge for 5-7 minutes until just set.
Step 6: Add the filling.
Spread the pistachio kunafa mixture evenly over the set chocolate layer. Press down gently so it’s compact.
Step 7: Seal it up.
Pour the remaining melted chocolate over the top, spreading to cover completely. If using white chocolate, drizzle it now and swirl with a toothpick for that marbled Dubai bar look everyone loves on camera.
Step 8: Chill and slice.
Refrigerate for at least 2 hours, or until fully set. Slice into bars or squares. Store the extras (if there are any) in the fridge.
Cooking Tips
A few things I learned the hard way, so you don’t have to:
First, don’t rush the toasting step. I know I already said this, but it deserves repeating because it’s genuinely the one part of this Dubai chocolate bar recipe that can go wrong. Low and slow, constant stirring, golden not brown.
Second, room temperature filling matters more than you’d think. Warm filling against a thin chocolate shell causes cracking later, and nobody wants their beautiful bar falling apart the second they pick it up.
Third — and this one’s a bit random, but stick with me — tap your loaf pan gently on the counter after each chocolate pour. It knocks out air bubbles and gives you that clean, glossy top layer you see in all those viral videos.
I skipped this step my second time making it and ended up with weird little craters on top. Still tasted amazing. Just looked like the moon.
Substitutions & Variations
No kunafa pastry near you? Angel hair pasta, believe it or not, works in a pinch if you toast it the same way in the skillet. It’s not traditional, but it’s close enough texturally that I’ve used it twice when I couldn’t get to a Middle Eastern grocery store in time.
No pistachio cream? A mix of almond butter and a few drops of green food coloring gets you close in a flavor-adjacent, slightly-cheating way. It won’t be quite the same, but it’s a decent stand-in on short notice.
Want it dairy-free? Use dairy-free chocolate and swap the butter for coconut oil in the toasting step. Works surprisingly well.
Some people add a layer of Nutella under the kunafa filling. I tried it once. It was good, but honestly it muddied the clean pistachio flavor that makes this dessert special in the first place.
What to Serve With It
This is rich, so I usually serve small slices with something to cut through the sweetness. A cup of unsweetened black tea or plain Turkish coffee works beautifully alongside it.
If I’m serving it after dinner for guests, I’ll pair it with fresh strawberries or a small scoop of vanilla ice cream on the side. The cold, plain ice cream balances that dense chocolate really nicely.
Storage & Reheating
Keep the bars in an airtight container in the fridge for up to 10 days. They actually get better after a day or two, once the flavors settle in.
You don’t need to reheat this at all — it’s meant to be eaten cold or at room temperature. If you leave it out too long on a hot day though, the chocolate will start to soften and get messy fast, so I keep mine refrigerated until right before serving.
Freezing works too, for up to 2 months. Just wrap each piece individually so they don’t stick together in one giant chocolate block. Ask me how I know.
Why this one actually works
The whole trick behind this Dubai chocolate bar recipe is contrast. Crunchy against smooth. Salty tahini against sweet chocolate. Cold, dense bar against your warm mouth. It’s not one flavor doing all the work — it’s texture doing half the job, which is honestly why so many “copycat” versions online fall flat. People skip the toasting step or use soggy pastry, and the whole point disappears.
Small changes that made a big difference
Adding tahini was the single biggest upgrade from my first attempt. My very first batch used just pistachio cream, and it was good, but a little one-note sweet. The tahini adds this subtle nutty bitterness that makes the whole filling taste more grown-up.
If I were making this again tomorrow
I’d double the batch. Every single time I make this, it disappears within two days, and I always end up wishing I’d made more. I’d also probably use a slightly bigger pan so the bars come out a touch thinner — easier to bite into without shattering chocolate everywhere.
What I skip when I’m short on time
The marbled white chocolate swirl is purely decorative, and honestly, when I’m in a rush, I skip it completely. A solid milk chocolate top tastes exactly the same and takes half the time. Nobody at my dinner table has ever complained about the lack of swirls once they’ve taken a bite.
FAQ
Can I make this Dubai chocolate bar recipe without a stovetop?
Not really, since the skillet-toasting step is what gives the kunafa its signature crunch. An oven can technically work at a low temperature, but it’s harder to control and easier to burn.
Is kunafa pastry the same as regular phyllo dough?
No, it’s shredded into thin noodle-like strands rather than sheets. You can find it frozen at most Middle Eastern grocery stores or order it online.
Why did my chocolate shell crack when I sliced it?
This usually happens if the chocolate layer is too thick or too cold straight from the freezer. Let it sit at room temperature for 5 minutes before slicing with a warm knife.
Can I use dark chocolate instead of milk chocolate?
Absolutely, and honestly it balances the sweetness of the filling really well if you prefer a less sugary dessert.
Prep and Cook Time
- Prep time: 20 minutes
- Cook time: 10 minutes (mostly the skillet toasting step)
- Chill time: 2 hours
- Total time: about 2 hours 30 minutes
- Yield: 12 small bars
Nutrition Facts (per bar, approximate)
- Calories: 245
- Fat: 16g
- Carbohydrates: 22g
- Sugar: 17g
- Protein: 3g
These numbers will shift depending on which chocolate brand and pistachio cream you use, so treat this as a rough estimate rather than gospel.
Final Thoughts
I went into this Dubai viral chocolate bar recipe expecting a one-and-done viral trend, the kind you make once for a photo and never touch again. That’s not what happened. This one earned a permanent spot in my regular rotation, burnt first attempt and all.
If you make it, don’t skip the tahini, don’t rush the toasting, and please, for your own sake, don’t answer the phone while your kunafa is in the skillet. Learn from me on that one.