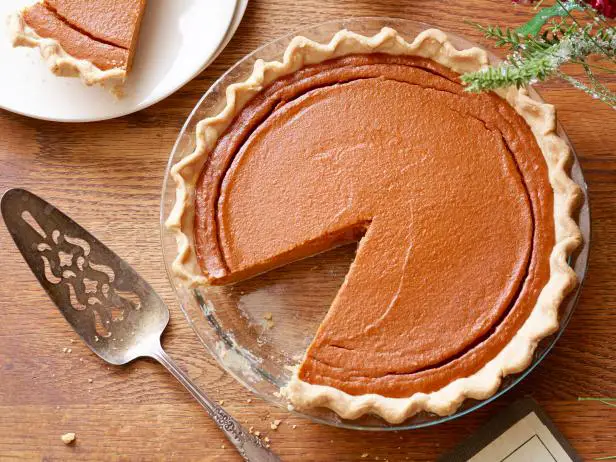
Easy Pumpkin Brownies (Rich, Fudgy & Perfect for Fall)

Easy Pumpkin Brownies

Easy Pumpkin Brownies

Easy Pumpkin Brownies

If you’ve been searching for easy pumpkin brownies that actually taste like something worth making twice, I think you’re going to like this one. I made a batch of these on a rainy Tuesday in October, mostly because my neighbor Debbie dropped off half a can of pumpkin puree she wasn’t going to use, and I hate wasting good pumpkin. These brownies came out so fudgy and rich that my husband asked if I’d added extra chocolate. I hadn’t. That’s just what pumpkin does to a brownie batter when you get the ratio right.

This isn’t one of those recipes that dances around the point for ten paragraphs before getting to the actual food. You want fall baking that’s simple, chocolatey, and doesn’t require a stand mixer or a trip to a specialty store. That’s exactly what this is.

Why You’ll Love This Recipe

These pumpkin brownies hit that sweet spot between a classic fudgy brownie and something a little more autumn-appropriate. The pumpkin adds moisture without making things taste like pie, which honestly surprised me the first time I tried it. You get deep chocolate flavor, a soft chewy center, and just a whisper of warm spice in the background.

They’re also stupid simple. One bowl, no fancy equipment, and you can have them in the oven in under fifteen minutes. My friend Karen, who claims she “can’t bake,” made these on her first try and texted me a photo an hour later looking pretty smug about it. Fair enough — she earned that.

And because this is a genuinely easy pumpkin brownie recipe, it works whether you’re baking for a school function, a potluck, or just because it’s Tuesday and you want chocolate. No judgment here.

Ingredients

  1. 1 cup pumpkin puree (not pumpkin pie filling)
  2. 1/2 cup unsalted butter, melted
  3. 1 cup granulated sugar
  4. 1/3 cup brown sugar, packed
  5. 2 large eggs
  6. 1 teaspoon vanilla extract
  7. 3/4 cup all-purpose flour
  8. 1/2 cup unsweetened cocoa powder
  9. 1 teaspoon baking powder
  10. 1/2 teaspoon salt
  11. 1 teaspoon pumpkin pie spice
  12. 1 cup semi-sweet chocolate chips (plus a few extra for the top)

Equipment Needed

You’ll need an 8×8 or 9×9 inch baking pan, parchment paper, a large mixing bowl, a whisk, and a rubber spatula. That’s genuinely it. No mixer required, which is one of my favorite things about this recipe.

Step-by-Step Cooking Instructions

  1. Preheat your oven to 350°F and line your baking pan with parchment paper, leaving some overhang on the sides so you can lift the brownies out later.
  2. In a large bowl, whisk together the melted butter, pumpkin puree, granulated sugar, and brown sugar until smooth.
  3. Add the eggs one at a time, whisking well after each addition, then stir in the vanilla extract.
  4. Sift in the flour, cocoa powder, baking powder, salt, and pumpkin pie spice. Fold gently with a spatula until just combined — don’t overmix, or you’ll lose that fudgy texture.
  5. Fold in the chocolate chips, saving a small handful to sprinkle on top for looks.
  6. Pour the batter into your prepared pan and smooth the top with your spatula.
  7. Bake for 28 to 32 minutes, until the edges look set and a toothpick inserted in the center comes out with a few moist crumbs, not wet batter.
  8. Let the brownies cool in the pan for at least 20 minutes before lifting them out and slicing. I know that’s hard. Do it anyway.

Cooking Tips

Don’t skip the parchment paper overhang — I used to skip this step to save two seconds, and it always ended with half a brownie stuck to the pan. Turns out that was a mistake every single time. Also, resist the urge to bake these until a toothpick comes out completely clean. That means you’ve overbaked them, and pumpkin brownies dry out faster than you’d think because of the extra moisture from the puree.

One more thing: measure your pumpkin puree by weight if you have a kitchen scale handy, since canned pumpkin varies more than you’d expect between brands. It’s a small detail, but it made my batches way more consistent once I started doing it.

Substitutions & Variations

You can swap the semi-sweet chocolate chips for dark chocolate if you want a deeper, less sweet flavor, or use white chocolate chips if you’re feeling like a plot twist. Gluten-free all-purpose flour works fine here too, one for one, though the texture gets slightly more delicate. If you don’t have pumpkin pie spice, just mix cinnamon, a pinch of nutmeg, and a pinch of ginger — it’s basically the same thing without the fancy label. Some people add a swirl of cream cheese on top before baking, and honestly, that’s not a bad idea if you’ve got extra cream cheese sitting around.

What to Serve With It

A scoop of vanilla ice cream on a warm brownie is hard to beat, especially if you drizzle a little caramel over the top. These also pair nicely with coffee or a spiced chai if you’re going for that full autumn afternoon vibe. My sister-in-law Amanda likes to serve these with a dollop of whipped cream and a sprinkle of cinnamon, which honestly makes them look a lot fancier than the five minutes of effort they actually required.

Storage & Reheating

Store leftover brownies in an airtight container at room temperature for up to four days, or in the fridge for about a week if you want them to last longer. They also freeze really well for up to three months — just wrap individual pieces in plastic wrap first. To reheat, pop a piece in the microwave for about 10 to 15 seconds. It brings back that fresh-baked, gooey texture like nothing happened.

Cook and Prep Time

Prep time: 10 minutes Cook time: 30 minutes Total time: 40 minutes Yield: 16 brownies

Nutrition Facts (per brownie)

Calories: 165 Total Fat: 7g Saturated Fat: 4g Carbohydrates: 24g Sugar: 17g Protein: 2g Fiber: 1g

This nutrition information is provided as a courtesy and is an estimate only. Actual values may vary depending on the specific brands and measurements used, so please consult a registered dietitian or use your own calculations if you require precise nutritional data.

Why This Recipe Actually Works

The trick with pumpkin brownies is that pumpkin puree is mostly water and fiber, so it adds moisture without diluting the chocolate flavor the way, say, extra butter would. That’s why these come out fudgy instead of cakey. The brown sugar helps too, since it holds onto moisture better than white sugar alone. Little things, but they add up to a much better brownie.

The Small Change That Made a Big Difference

I used to add the pumpkin puree straight from the can without patting it dry with a paper towel first, and my brownies were always a little too wet in the middle. One day I got impatient waiting for a batch to set and tried blotting the puree beforehand. Total difference. It sounds like a silly extra step, but it genuinely fixed a texture problem I’d been blaming on my oven for months.

What I’d Do Differently Making It Again Tomorrow

Honestly? I’d probably toast the pecans if I added any, since I tried a version with chopped pecans on top once and forgot that step, and they tasted kind of flat compared to when I’ve toasted nuts for other recipes. Small fix, but it’s the kind of thing I always remember right after I’ve already poured the batter into the pan.

What I Skip When Short on Time

When I’m in a rush, I skip sifting the dry ingredients and just whisk them together in a separate bowl instead. It’s not quite as smooth a texture, but nobody at my kitchen table has ever complained, and it saves a good five minutes of cleanup.

FAQ

Can I use fresh pumpkin instead of canned? Yes, as long as you cook it down and drain excess liquid first. Canned puree is more consistent, though, so I’d lean toward that if this is your first time making the recipe.

Why are my pumpkin brownies too cakey? That usually means they were overbaked or overmixed. Pull them out a couple minutes earlier next time and fold the batter gently instead of stirring vigorously.

Can I double this recipe? Absolutely. Use a 9×13 pan and add about 10 extra minutes to the bake time, checking with a toothpick starting around the 35-minute mark.

Do I need to refrigerate these? Not right away. They’re fine at room temperature for a few days, but the fridge extends their life if you’re not planning to eat them quickly.

Final Thoughts

At the end of the day, these easy pumpkin brownies are the kind of recipe you’ll come back to every October without really thinking about it. They’re simple, they’re rich, and they taste like fall without turning into a whole production. I still think about that rainy Tuesday with Debbie’s leftover pumpkin can sitting on my counter, and honestly, I’m glad it happened. Sometimes the best recipes come from not wanting to waste half a can of something.

Give these a try this weekend. Trust me, your kitchen is going to smell incredible.

Apple Cinnamon Muffins: The Recipe I Make Every Time the Weather Turns

apple cinnamon muffins

Apple Cinnamon Muffins

apple cinnamon muffins

I make apple cinnamon muffins the second the air gets that first real chill in it, usually late September, right when my neighbor Denise starts complaining about her allergies and blaming it on “ragweed season” like she does every year. There’s something about apples and cinnamon baking together that just smells like fall decided to move into your kitchen. This recipe isn’t fussy, it doesn’t need a stand mixer, and you probably have most of the ingredients sitting in your pantry right now.

I’ve made a version of this recipe for almost nine years, ever since my son Cole was in second grade and needed something for a class bake sale that wasn’t going to fall apart on the drive to school. That first batch was honestly a little dry — I overbaked them by about four minutes because I was on the phone with my sister and lost track of time. Lesson learned. These days I set a timer, I actually watch it, and the muffins come out soft in the middle with a little crunch of cinnamon sugar on top.

Why You’ll Love This Recipe

These apple cinnamon muffins hit that sweet spot between a treat and something you can justify eating for breakfast. They’re moist, not too sweet, and the chunks of real apple give every bite a little texture instead of just tasting like cinnamon bread. You don’t need any special equipment, and the whole thing comes together in one bowl, which matters a lot on a Tuesday morning when nobody has time for three dirty bowls in the sink.

They also freeze really well, which I didn’t realize for the longest time. I used to think freezing muffins ruined them — turns out that was completely wrong, and now I always keep a stash in the freezer for school mornings when my daughter Maya insists she’s “not hungry” until she smells something baking.

Ingredients

  1. 2 cups all-purpose flour
  2. 1 teaspoon baking soda
  3. 1/2 teaspoon baking powder
  4. 1 teaspoon ground cinnamon, plus more for the topping
  5. 1/2 teaspoon salt
  6. 1/4 teaspoon ground nutmeg
  7. 2 large eggs
  8. 3/4 cup packed brown sugar
  9. 1/2 cup vegetable oil (or melted butter)
  10. 1/3 cup plain yogurt or sour cream
  11. 1 teaspoon vanilla extract
  12. 1 1/2 cups peeled and diced apples (I like Honeycrisp or Granny Smith)
  13. 2 tablespoons granulated sugar, for the topping

Equipment Needed

You really just need a muffin tin, a couple of mixing bowls, a whisk, and a rubber spatula. A 12-cup muffin tin and paper liners make cleanup easier, but greasing the tin works fine too if you’re out of liners like I was last Thursday.

Step-by-Step Cooking Instructions

  1. Preheat your oven to 375°F and line a 12-cup muffin tin with paper liners, or grease it well with butter or nonstick spray.
  2. In a large bowl, whisk together the flour, baking soda, baking powder, cinnamon, salt, and nutmeg until everything’s evenly combined.
  3. In a separate bowl, whisk the eggs, then add the brown sugar, oil, yogurt, and vanilla extract. Whisk until the mixture looks smooth and a little glossy.
  4. Pour the wet ingredients into the dry ingredients. Stir gently with a spatula until just combined — a few streaks of flour are fine, and overmixing is honestly the number one way people end up with tough, rubbery muffins.
  5. Fold in the diced apples, being careful not to overwork the batter.
  6. Divide the batter evenly among the muffin cups, filling each about three-quarters full.
  7. Sprinkle the tops with granulated sugar mixed with a pinch of cinnamon for a little crunch.
  8. Bake for 18 to 20 minutes, or until a toothpick inserted in the center comes out clean or with just a few moist crumbs.
  9. Let the muffins cool in the tin for 5 minutes, then transfer them to a wire rack to finish cooling.

Cooking Tips

Don’t skip patting your diced apples dry with a paper towel before folding them in — I learned this the hard way when a batch turned out gummy in the middle because the apples released too much extra moisture into the batter. Also, room temperature eggs mix into the batter more evenly than cold ones straight from the fridge, so if you remember, pull them out about twenty minutes before you start.

One more thing: check your muffins a couple minutes early the first time you make this recipe, since ovens run differently and you don’t want to guess wrong on a fresh batch.

Why This Recipe Actually Works

The combination of brown sugar and yogurt is doing more work here than people realize. Brown sugar keeps the crumb moist because of the molasses in it, and the yogurt adds a slight tang that balances out the sweetness so the muffins don’t taste like dessert dressed up as breakfast. It’s a small thing, but it’s the difference between a muffin that tastes flat and one that actually has depth to it.

The Small Change That Made a Big Difference

For years I used melted butter exclusively, and the muffins were good, don’t get me wrong. But swapping in vegetable oil for half the fat made them noticeably more tender the next day, since oil stays liquid at room temperature and butter doesn’t. That one swap fixed the “muffins taste dry by day two” problem I’d been dealing with for ages without really understanding why.

What I’d Do Differently Next Time

Honestly? I’d probably toss in a handful of chopped walnuts, since my husband keeps asking for them and I keep forgetting until the batter’s already in the oven. I’d also consider brown butter instead of melted butter for an even richer flavor, though that adds an extra step, and some mornings I just don’t have it in me.

What I Skip When I’m Short on Time

When mornings are chaotic, I skip peeling the apples. Nobody’s ever noticed or complained, and the skin adds a little extra fiber anyway. I also skip the cinnamon sugar topping when I’m rushing out the door for Maya’s soccer practice at 6:40 in the morning, though I’ll admit the muffins do lose a little of that bakery-style charm without it.

Substitutions & Variations

If you want a slightly healthier version, you can swap half the all-purpose flour for whole wheat flour, though the texture will be a bit denser. Greek yogurt works just as well as regular yogurt or sour cream, and if you’re dairy-free, unsweetened applesauce is a decent substitute, though it changes the texture slightly. Pears work in place of apples if that’s what you’ve got on hand, and a handful of chopped pecans or walnuts folded into the batter adds a nice crunch. Some people like adding raisins too, though my kids consider that a personal attack, so I leave those out entirely.

What to Serve With It

These muffins are great on their own with a cup of coffee, but they’re also good alongside scrambled eggs and bacon if you’re putting together a full breakfast spread. A little butter melted on top of a warm muffin is basically non-negotiable in my house. For an afternoon snack, they pair nicely with a mug of tea or hot apple cider, especially once the weather actually cools down.

Storage & Reheating

Store leftover muffins in an airtight container at room temperature for up to three days, or in the fridge for about a week if you want them to last longer. To freeze, wrap each muffin individually in plastic wrap, then place them in a freezer bag for up to three months. To reheat, microwave a muffin for about 15 to 20 seconds, or warm it in a 300°F oven for around 8 minutes if it’s coming straight from the freezer.

Cook and Prep Time

Prep time runs about 15 minutes, and baking takes 18 to 20 minutes, so you’re looking at roughly 35 minutes total from start to finish. This recipe makes 12 standard-sized muffins.

Nutrition Facts

Per muffin (approximate): 210 calories, 8g fat, 32g carbohydrates, 3g protein, 1g fiber, 16g sugar, 190mg sodium.

Nutrition information is calculated using standard nutritional databases and should be considered an estimate only. Actual values may vary depending on the specific brands and ingredients used. Please consult a registered dietitian or nutritionist for precise dietary needs.

FAQ

Can I make these muffins ahead of time? Yes, you can bake them a day in advance and store them in an airtight container. They actually taste even better the next day once the spices have had time to settle in.

Why did my muffins turn out dense? Overmixing the batter is usually the culprit. Stir just until the dry ingredients disappear into the wet ones, and stop there, even if it looks a little lumpy.

Can I use canned apple pie filling instead of fresh apples? You can, though the texture and sweetness will be different. Fresh diced apples give you more control over sweetness and a firmer bite.

Do I need to peel the apples? Not necessarily. I skip it plenty of mornings, and the skins soften up fine during baking.

Final Thoughts

Apple cinnamon muffins are one of those recipes that feel a little bit like a hug, especially on a cold morning when you need something warm and simple. This recipe has been through a few rounds of trial and error in my kitchen, from overbaked disasters to the oil swap that finally fixed the texture, and I think it’s landed in a really solid place now. Give it a try this weekend, maybe with a cup of coffee and someone you like talking to, and see if apple cinnamon muffins don’t become a regular thing in your house too.

Red White and Blue Fruit Salad For Summer Celebrations

Red White and Blue Fruit Salad for Summer

Red White and Blue Fruit Salad for Summer

Red White and Blue Fruit Salad for Summer

Okay, so I made this red white and blue fruit salad salad three times in one week last summer. Not exaggerating, three times. First one was for a backyard barbecue that got rained out halfway through (of course). Second time was because my neighbor Carla texted me at 9pm asking for “that red white and blue fruit thing” and I wanted to test the recipe again before actually writing it down for her. Third time was just me, a fork, standing at the counter, no plate involved, don’t judge me. That’s the kind of recipe this is. A red white and blue fruit salad might be the single easiest thing you can bring to a Fourth of July cookout, a Memorial Day thing, or really any summer get-together where you need something fresh and don’t want to touch the oven.

This is not one of those fussy fruit arrangements you see on Pinterest where someone arranged blueberries in a perfect star pattern with a ruler. It’s fruit, cut up, tossed in a bowl, with a little something to tie it together. Red strawberries, white banana or coconut, blue blueberries — the colors line up with the holiday, and honestly I think that’s more of a happy accident than some grand design. I’ll walk you through how I make mine. What I’ve gotten wrong. And a couple tricks that keep it from turning into soup by hour three of a picnic.

Why You’ll Love This Recipe

It’s patriotic without being tacky, for one. No flag toothpicks required. No red dye 40. The fruit does the work by itself.

It also takes about fifteen minutes, tops, which matters a lot when you’re grilling burgers AND keeping three kids out of an unsupervised pool AND pretending you’re not stressed about hosting eleven people. I’ve thrown this together barefoot in my kitchen while two other dishes were going at once. It doesn’t ask much of you.

And kids eat it. Actual kids, at an actual party, where there’s also cake sitting six feet away. That right there should tell you everything. This bowl empties out fast every single time I bring it, and at this point I’ve lost count of how many cookouts that’s been.

Ingredients

Here’s what I use. I like a light glaze — lemon juice, a touch of honey — to keep the colors bright, but honestly you can skip that step if you’re in a rush. More on that later.

  • 2 cups fresh strawberries, hulled and sliced
  • 1 1/2 cups fresh blueberries
  • 1 cup fresh raspberries (optional but they add another shade of red, and they’re pretty)
  • 2 cups cubed fresh pineapple
  • 1 banana, sliced — or swap it for vanilla marshmallows or coconut flakes if you want
  • 1 cup halved white grapes
  • 2 tablespoons honey
  • 1 tablespoon fresh lemon juice
  • a small handful of fresh mint, torn (optional, but it smells incredible, so)

That’s the whole list. Nothing weird in there, no specialty store run required. Every bit of it is sitting on a shelf at whatever regular grocery store you already go to.

Step-by-Step Instructions

Step 1: Wash and prep your fruit. Rinse it all, even the stuff that says “pre-washed” on the bag. I don’t trust that label and neither should you, honestly. Pat the berries dry with a towel — wet berries water everything down and you end up with a puddle at the bottom of the bowl, which nobody wants.

Step 2: Slice the strawberries and banana. Halves or quarters for the strawberries, whatever size feels right. Slice the banana right before you mix — bananas go brown fast and there’s no saving one once it starts turning that grayish color. Trust me, I’ve tried.

Step 3: Cube the pineapple. Whole pineapple: cut the top and bottom off, slice the skin away, cube up the flesh. If that sounds like too much effort today (fair), canned pineapple chunks work fine, just drain them well. I won’t tell if you use canned.

Step 4: Make the light glaze. Whisk the honey and lemon juice together in a small bowl. Ten seconds, maybe less. This one tiny step is the difference between a fruit salad that tastes like someone tried and one that tastes like fruit that happened to end up in the same bowl.

Step 5: Combine everything gently. Big serving bowl. Strawberries, blueberries, raspberries, pineapple, grapes, banana — all in. Drizzle the glaze over top and fold it together gently with a large spoon. You’re not trying to bruise anything here, just coat it.

Step 6: Garnish and chill. Scatter the mint over top. Chill it for at least 20 minutes so the flavors settle and everything gets properly cold. That waiting part? Genuinely the hardest step for me, every time.

Cook and Prep Time

Prep time: 15 minutes Chill time: 20 minutes Total time: about 35 minutes, give or take Servings: 8, or 6 if people are being greedy about it (fair)

No actual cooking here, which is half the reason I lean on this so much in July. My oven has enough going on in summer without me adding to its workload.

Cooking Tips

Buy your berries a day or two ahead, not the morning of. I learned this one the hard way — showed up to three different grocery stores looking for raspberries on the third of July one year and came home with exactly zero raspberries. Just strawberries and regret.

Save the banana for last, always. Mentioned it above but it’s worth saying twice because it’s the mistake that wrecks the whole presentation. A brown banana slice next to bright red strawberries just looks sad. Like it gave up on life.

Want the fruit to hold up for a few hours outside at a party? Toss the banana slices in extra lemon juice before adding them in. Slows the browning down noticeably. Not forever — nothing stops a banana forever — but enough to get you through the afternoon.

Substitutions & Variations

This recipe bends easily, which is honestly half of why I keep making it.

No pineapple? Mango works, similar sweetness, holds its shape fine. Want it whiter and fluffier looking — swap the banana for coconut flakes or marshmallows, which is actually what I do when I want it looking extra festive for a crowd. A splash of orange juice instead of lemon makes the glaze a bit sweeter if that’s your thing. Want it a little boozy for the grown-ups table? A tablespoon of triple sec stirred into the glaze works surprisingly well — would not recommend for the kids’ bowl, obviously, learned that lesson socially rather than literally thank god. And Greek yogurt on the side turns the whole thing from a side dish into something that could pass for dessert, or even breakfast, depending on how your morning’s going.

What to Serve With It

Grilled chicken, burgers, hot dogs — that’s my usual lineup. It’s light enough to cut through heavier grilled food without stepping on it. Works next to a cheese board too, if the whole thing is more of a relaxed hangout than a full-on cookout.

For dessert tables I’ve put it next to a plain pound cake or angel food cake and let people spoon fruit over the top themselves. That combo alone has gotten more compliments than some actual from-scratch desserts I’ve made, which, sure, is a little humbling if I’m being honest with myself.

Storage & Reheating

Fridge, airtight container, up to 2 days. After that the texture goes soft and a bit watery, mostly from the berries breaking down.

Nothing to reheat here — it’s meant to be cold or room temp. If anything the opposite problem shows up: leave it sitting out on a hot day too long and it gets warm and mushy fast. Keep it on ice if you’re outdoors a while, especially in July heat.

Nutrition Facts (per serving, approximate)

  • Calories: 95
  • Carbohydrates: 24g
  • Fiber: 3g
  • Sugar: 18g
  • Protein: 1g
  • Fat: 0.5g

These will shift depending on your substitutions, especially with marshmallows or the boozy glaze thrown in. Worth knowing if you’re tracking anything.

Why This Combination Actually Works

Red white and blue sounds like a gimmick until you taste it side by side, honestly. The tartness in the blueberries, the sweetness of ripe strawberries, the mellow banana or coconut sitting in between — that balance is something a single-fruit salad just doesn’t have. It’s not really about matching a flag. It’s contrast. And contrast is what makes food interesting instead of just fine.

The Small Change That Made the Biggest Difference

For years I skipped the honey-lemon glaze. Felt unnecessary, like an extra dish to wash for no real reason. Big mistake, it turns out. Adding that ten-second glaze changed the whole thing from “fine, fresh fruit” into something people actually asked me about at parties. Sometimes the smallest step does most of the heavy lifting and you don’t notice until you skip it by accident and everyone comments.

If I Were Making This Again Tomorrow

Double the mint. I always cut it back thinking it’s just garnish, and every single time I wish I’d added more. It’s not decoration, not really — it changes the smell of the whole bowl the second you dig a spoon in.

What I Skip When I’m Short on Time

Fresh pineapple prep goes first. Canned, well-drained, does the job fine when I’m running late for a party, which happens more than I’d like to admit. Mint garnish is usually the second thing to go. Nobody has ever once complained about missing mint. People complain about missing dessert. Nobody complains about missing mint.

FAQ

Can I make this the night before? Prep the sturdier stuff — pineapple, grapes, blueberries — the night before, keep it separate from the banana and glaze. Combine everything morning-of for the best result.

Will the banana turn brown? Yeah, eventually, even with the lemon trick. That’s just bananas being bananas. Skip the issue entirely by using coconut flakes or marshmallows instead.

Can I use frozen fruit? Wouldn’t recommend it here. Frozen fruit dumps out too much liquid as it thaws and you end up with something closer to soup than salad.

How far ahead can I chill it? An hour or two is fine. Past that the fruit starts releasing juice and things get softer than you’d want.

Final Thoughts

A good red white and blue fruit salad for summer doesn’t need to be complicated — that’s kind of the whole point of it. It’s fresh, it comes together fast, and it fits into a summer table without asking much of you. I’ve lost track of how many cookouts I’ve brought this to at this point, and it never once came home untouched. Give it a shot for your next celebration. I think it’ll earn a spot in your rotation the same way it did in mine.

20 Easy Labor Day Menu Ideas And Recipes For a Crowd

Easy Labor Day BBQ Menu Ideas And Recipes

20 Easy Labor Day BBQ Menu Ideas And Recipes

I’ve hosted Labor Day BBQ for my extended family for six years running, and I still remember the year I tried to grill for 22 people with one propane tank that was, unbeknownst to me, already half empty. Lesson learned. If you’re looking for 20 easy Labor Day menu ideas and recipes for a crowd, you’ve landed in the right spot, because I’ve made pretty much every mistake there is to make and I’m happy to save you the trouble. This isn’t some fussy, restaurant-style spread. It’s the stuff that actually works when you’ve got forty burgers to flip, three kids asking when the food’s ready, and your brother-in-law hovering by the cooler asking if you need “help” (translation: he wants a beer).

Labor Day sits at this weird spot in the calendar — summer’s basically over, but nobody wants to admit it yet. So the food should feel like one last hurrah, and having options matters when you’re feeding a crowd with wildly different tastes. I’m going to walk you through 20 dishes I actually make, split into mains, sides, desserts, and drinks, so you can mix and match based on your crowd size and how much energy you’ve got left after mowing the lawn and setting up folding chairs.

Why You’ll Love This List

Honestly? Because it’s forgiving. You can prep most of these the day before, which matters a ton when you’re also trying to clean the house, find enough folding chairs, and pretend you didn’t forget to buy ice again. This list scales up easily too — I’ve fed 8 people off it and 35, and the ratios barely change, you just buy more meat and double the coleslaw.

There’s also something nice about a menu list that doesn’t require a single fancy technique. No sous vide, no smoker if you don’t own one (though if you do, great, use it). Just a grill, some sheet pans, and a cooler full of drinks. My neighbor Pete, who has strong — and frankly annoying — opinions about “authentic” barbecue, actually asked for my potato salad recipe last year, which felt like a personal victory given how much grief he gives me about using a gas grill instead of charcoal.

Ingredients

Across these 20 Labor Day recipes, the ingredients repeat a lot, which makes shopping way simpler than you’d think. For the mains, you’ll lean on ground beef (80/20, don’t go leaner, trust me), bratwurst or Italian sausage, baby back ribs, chicken thighs, and hamburger and hot dog buns — buy more buns than you think you need, I always run short by exactly four, every single time, it’s uncanny. For sides, stock up on cabbage, red potatoes, corn, watermelon, canned beans, and pasta. For dessert and drinks, keep brownies, ice cream sandwiches, lemons, and sweet tea bags on hand. Beyond that, pantry basics like mayo, mustard, BBQ sauce, brown sugar, apple cider vinegar, and Worcestershire sauce cover most of what these recipes need.

Step-by-Step Instructions

Here’s how the 20 ideas break down, grouped by course, with a short note on how each one comes together.

1. Classic Cheeseburgers. Form patties the night before, season with just salt and pepper, and press a thumb dimple into the center of each one so they don’t puff up on the grill. Cook 4 minutes per side over medium-high heat, adding cheese in the last minute. Simple, but this is the one people actually remember.

2. Grilled Bratwurst. Grill these first since they take longest and hold well at the edges of the grill. About 20 minutes total, turning every 5 minutes, serve with mustard and grilled onions.

3. Baby Back Ribs. Season with a dry rub the night before, then slow-cook on indirect heat for about 2 hours, brushing with BBQ sauce in the last 15 minutes. Worth the extra effort maybe twice a summer.

4. BBQ Pulled Pork. Toss a pork shoulder in a slow cooker with your favorite sauce and let it go 8 hours on low. Shred it, pile it on buns, and it feeds a shocking number of people off one cut of meat.

5. Marinated Chicken Thighs. Marinate in Italian dressing for a couple hours, then grill 6 to 7 minutes per side. This one’s my go-to when I’ve got picky eaters who don’t love beef or pork.

6. Grilled Portobello Burgers. Brush mushroom caps with olive oil and balsamic vinegar, grill 4 minutes per side, and serve on a bun with the same toppings as the burgers. Covers your vegetarian guests without a separate menu.

7. Foil-Wrapped Corn on the Cob. Wrap husked ears with a pat of butter inside, toss on the grill for about 15 minutes, turning occasionally. Nobody skips this one.

8. Classic Coleslaw. Toss shredded cabbage and carrots with mayo, apple cider vinegar, sugar, and celery seed. Make it the day before so the flavors blend together properly.

9. Potato Salad. Boil red potatoes, then mix with mayo, mustard, celery, dill pickles, and hard-boiled eggs. Also better after a night in the fridge, and this is the one Pete keeps asking me about.

10. Baked Beans. Doctor up canned beans with brown sugar, mustard, and chopped bacon, or make them from scratch if you’ve got the patience. Either way, bake at 350 for about 45 minutes.

11. Watermelon Wedges. Cut a whole watermelon into wedges. That’s genuinely the whole recipe, and it’s mandatory at every Labor Day table I’ve ever set.

12. Pasta Salad. Toss cooked rotini with Italian dressing, cherry tomatoes, mozzarella balls, and salami. Holds up well at room temperature, which matters when it’s sitting outside for hours.

13. Green Garden Salad. Mixed greens, cucumber, red onion, and your dressing of choice, for the one cousin who insists she’s “eating healthy this weekend.” She’ll still have two burgers, but the salad makes her feel better about it.

14. Grilled Vegetable Skewers. Skewer zucchini, bell peppers, and red onion, brush with olive oil, and grill 10 minutes, turning once. A good middle-ground side that pleases almost everyone.

15. Onion Dip and Chips. Mix sour cream, mayo, and dried onion soup mix, set out with chips before the main food’s ready. Keeps hungry people from hovering around the grill asking when it’s done.

16. Fudgy Brownies. Bake a simple boxed or homemade brownie batter at 350 for 25 minutes. Easier than cake, and honestly just as popular.

17. Sheet Cake. A basic yellow or chocolate sheet cake with buttercream frosting feeds a huge crowd off one pan, and it travels well if you’re bringing it somewhere.

18. Ice Cream Sandwiches. Buy a box, keep it in the cooler. This is the dessert for kids who won’t sit still long enough for cake, and honestly, half the adults sneak one too.

19. Fresh Lemonade. Squeeze lemons, mix with sugar and water, chill. A big pitcher of this next to the sweet tea keeps you from refilling glasses all afternoon.

20. Sweet Tea. Steep tea bags in hot water, sweeten while warm, then chill over ice. The Southern staple that somehow ends up in every cooler by 2pm regardless of where you live.

Cooking Tips

Don’t flip your burgers more than once. I know it’s tempting to keep poking at them, but every flip lets juice escape and you end up with a hockey puck instead of a burger. Also, resist pressing down on patties with your spatula — I see people do this at every single cookout, and every single time I want to gently take the spatula away from them. That sizzle sound is juice leaving the meat, not some kind of cooking magic.

Keep a spray bottle of water nearby for flare-ups. Fat drips, flames jump up, it happens. A quick spritz calms things down without you needing to panic or move the food around too much.

Substitutions & Variations

If your crowd skews vegetarian this year, lean harder on the portobello burgers and vegetable skewers, and maybe add a bean burger option too. Chicken sausages or veggie dogs slot right into the bratwurst cook time without much fuss if that’s more your speed. You can swap the ribs for the pulled pork option entirely if you’d rather use a slow cooker and skip babysitting the grill for hours. And if bratwurst isn’t available at your store, Italian sausage works in exactly the same way, no adjustments needed.

What to Serve With It

Beyond what’s already on this list, a big cooler stocked with canned drinks keeps people from waiting on you to refill glasses all afternoon. Pickles, sliced onions, jalapeños, and extra condiments round out the burger bar nicely. A cornhole board or some lawn games keep the kids — and honestly the adults too — occupied while the grill does its thing.

Storage & Reheating

Leftover burgers, sausages, and pulled pork keep in the fridge for about 3 to 4 days in an airtight container. Reheat them in a skillet over medium heat rather than the microwave if you can, since it keeps the outside from getting rubbery. Coleslaw and potato salad also last 3 to 4 days, though the slaw gets a little watery by day three, so just drain off any extra liquid before serving again. Corn reheats fine wrapped in foil in a 350-degree oven for about 10 minutes, and baked beans freeze surprisingly well if you’ve got leftovers you know you won’t eat in time.

Here’s the thing about a list like this that took me embarrassingly long to figure out: it works because nothing on the table needs to be piping hot the second it hits the plate. Cookout food is built for standing around, talking, going back for seconds an hour later. A fussy dish that falls apart at room temperature just doesn’t belong on a Labor Day table, no matter how good it tastes fresh out of the oven.

The small change that actually made the biggest difference for me was dry-brining the burger patties — salting them and letting them sit uncovered in the fridge for an hour before grilling. It sounds like a tiny thing, barely worth mentioning, but the texture difference is real. I stumbled onto this by accident one year when I seasoned patties too early and forgot about them, and now I do it on purpose every time.

If I were making this list again tomorrow, I’d add a second folding table to the plan, since 20 dishes take up way more counter space than I ever expect, and every year I’m shuffling plates around like some kind of food Tetris while people are already standing in line. I’d also double the lemonade, because it always runs out about twenty minutes before I want it to.

When I’m short on time, the first things I skip are the homemade baked beans and the from-scratch sheet cake. Canned beans doctored up with brown sugar and bacon taste 90 percent as good and take 8 minutes instead of an hour and a half, and a store-bought cake frees up an entire afternoon I didn’t realize I needed back.

Cook and Prep Time

Prep time runs about 45 minutes the day before for slaw, potato salad, and forming patties, plus another 30 minutes of prep the day of for skewers, dips, and drinks. Total cook time across the grill, oven, and slow cooker runs anywhere from 1 to 3 hours depending on which of the 20 items you’re making, since ribs and pulled pork take far longer than burgers or corn. All told, plan for about 2 to 3 hours of active work spread across two days, which honestly isn’t bad for feeding a crowd this size off 20 different dishes.

Nutrition Facts

Nutrition varies a lot across 20 different dishes, but a typical plate — one burger, a scoop each of coleslaw and potato salad, and a serving of beans — runs around 650 calories, 38 grams of fat, 42 grams of carbohydrates, and 34 grams of protein. Lighter choices like the grilled vegetable skewers or green salad sit much lower, closer to 120 calories per serving. Treat these as ballpark figures, since nobody’s counting calories too carefully at a Labor Day cookout anyway.

FAQ

How much food do I need per person for a Labor Day cookout? Plan for about half a pound of meat per adult and a bit less for kids. For sides, figure a half-cup serving of each dish per person, though people always take more of the potato salad than you expect.

Can I make these Labor Day recipes ahead of time? Yes, and honestly you should. The sides all improve with a day in the fridge, and forming patties or starting the pulled pork the night before saves you time and stress on the actual day.

What’s the best way to keep 20 different dishes warm outside during a cookout? A couple of slow cookers set to warm work great for beans, pulled pork, and dips. For grilled meats, a foil-covered tray keeps things reasonably warm for 20 to 30 minutes, which is usually enough time.

Do I need to make all 20 recipes for a good spread? Not at all. Pick 2 mains, 3 or 4 sides, one dessert, and both drinks, and you’ve got a solid, well-rounded Labor Day menu without overwhelming yourself.

Final Thoughts

At the end of the day, 20 easy Labor Day menu ideas and recipes for a crowd don’t need to be complicated to feel special. It’s really about picking a mix of dishes that travel well, hold up at room temperature, and let you actually sit down with your family instead of manning the grill the entire afternoon. I still think about that half-empty propane tank every single year, right before I check it twice, then check it again just to be safe. Some lessons stick. Whatever combination you end up picking from this list, I hope your holiday’s got good weather, plenty of napkins, and at least one person who goes back for thirds.
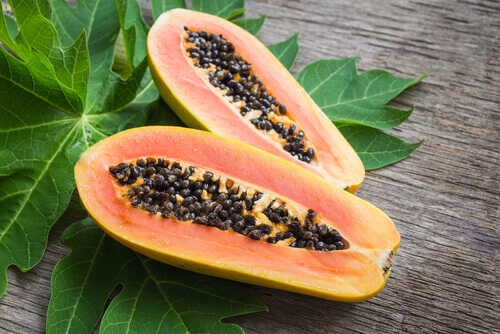
What Does Papaya Taste Like? (An Honest Answer)

So, what does papaya taste like? Let me be real with you for a second — the first time I tasted papaya, I had no idea what I was eating. And I’m a food writer. Someone handed me a slice at a farmers market, and I just… stood there. Just because it was unlike anything I’d tasted before. Which sounds like a cop-out, but I promise it’s not.

what does papaya taste like


Papaya is one of those fruits that makes you stop mid-chew and think. It’s sweet, yeah. But it’s also got this musky, almost funky depth underneath the sweetness that catches people off guard. Some folks love it immediately. Others — and I was one of them — need a few bites to come around.

The Flavor, Broken Down Like a Real Person Would

Okay so let’s actually talk about what papaya tastes like in a way that makes sense.

The first thing you notice is sweetness. It’s a gentle sweetness though, not like biting into a mango or a ripe peach where the sugar almost knocks you back. Papaya is softer than that. Quieter. The sweetness is there but it’s not showing off.

Then comes the funk. This is the part people argue about.

Some people call it musky. Some call it tropical. Some call it… well, not their favorite thing. The musky note in papaya comes from an enzyme called papain, and it’s most concentrated near the seeds and the skin. Once you know that, you can actually work with it — like, if you want less of that earthier flavor, you slice away more of the flesh near the rind and avoid getting too close to the seed cavity.

Ripe papaya also has this almost floral quality. Honey-like but not sugary. Kind of like if cantaloupe and mango had a baby that also spent some time near jasmine. Actually — wait, that sounds too poetic. Let me just say it’s tropically sweet with a slight savory-musky undercurrent. That’s the honest version.

What Does the Texture Feel Like?

This matters a lot with papaya, maybe more than the flavor itself.

A perfectly ripe papaya is buttery. Almost custard-soft. It gives to a spoon like good avocado, without any of the watery slipperiness you get from something like watermelon. When you scoop it, it holds together. It doesn’t fall apart or turn to mush.

An underripe papaya? That’s a completely different thing. It’s firm, almost crisp, and barely sweet. The flavor is more neutral — actually closer to a mild cucumber or a green squash. This is why green papaya is used in salads in Thai and Vietnamese cooking. It’s not a mistake. It’s a totally different ingredient that just happens to come from the same fruit.

Overripe papaya is… look, it happens. The texture gets slimy, the musky smell intensifies to something almost fermented, and the sweetness turns in a direction that most people don’t enjoy. If your papaya smells like it’s already been through a compost bin, it’s past its moment.

The Smell Tells You Everything

I always smell papaya before I cut it. This is one of those things experienced home cooks do that nobody really teaches you — you just learn it.

A ripe papaya smells sweet and faintly tropical near the stem end. Press gently on the skin; it should give a little, like a ripe peach. If it smells like nothing, it needs more time on the counter. If it smells overwhelmingly funky or fermented, you’ve waited too long.

The smell intensifies dramatically once you cut it open. That’s when the papain enzyme really hits the air. Some people describe it as tropical and exotic. Others call it unpleasant. Honestly? It can smell a little like vomit to people who are sensitive to it. That’s the papain doing its thing. It’s the same enzyme used as a natural meat tenderizer — which tells you something about how powerful it is biochemically.

A squeeze of lime juice changes everything here, by the way. More on that in a second.

Why So Many People Think They Don’t Like Papaya

I’ve had this conversation at least a dozen times. Someone says they don’t like papaya. I ask when they had it. Usually it was from a grocery store fruit cup, or a hotel breakfast buffet where it had been sitting out for two hours.

That’s not papaya’s fault. That’s just bad papaya.

The ripe-window for good papaya is surprisingly short. A day or two at peak ripeness, and you’ve got something genuinely lovely. Past that window and you get the version most people remember and don’t enjoy. Grocery store papaya often gets picked early for shipping, which means the flavor development gets stunted. It never quite reaches what it’s supposed to be.

If you’ve only ever had papaya from a plastic container, I’d ask you to give it one more shot. Find a ripe one at a Latin grocery store or an Asian market. Those places turn inventory faster, which means you’re more likely to get fruit at actual peak ripeness.

Lime Juice Is Not Optional

This is the tip that genuinely changes things. Lime juice on papaya isn’t just a garnish choice. It does something chemically — the acidity cuts through the musky papain funk and brightens the natural sweetness of the fruit. It’s the same reason salt makes caramel taste more like caramel. Contrast.

A squeeze of fresh lime, a tiny pinch of salt, and some chili powder if you’re into it — this is how papaya is eaten across Mexico, Colombia, and much of Central America. It completely transforms the experience. If you’ve been eating papaya plain and feeling uncertain about the flavor, try this. I mean it.

How Papaya Compares to Other Tropical Fruits

People often ask me to put the flavor of papaya into context, so here’s where I’d place it on the tropical fruit spectrum.

Mango is bolder, more acidic, and intensely fruity — more straightforward sweetness. Guava has a similar musky depth to papaya but is earthier and more aromatic. Cantaloupe is probably the closest familiar comparison for most people in the US — mild, honeyed, a little floral — but papaya is softer and funkier than cantaloupe.

Papaya flavor is also different depending on the variety. Hawaiian papaya (the small, pear-shaped kind most common in US stores) is sweeter and less intense. Mexican papaya (the big, oblong ones you see at Latin markets) is larger, more watery, and has a milder flavor overall. Some people prefer the Mexican variety precisely because the musky quality is more subdued.

Questions I Get Asked a Lot About Papaya

A few things come up constantly when I talk about this fruit, so let me just work through them.

Does papaya taste like medicine? Kind of, if it’s overripe or improperly stored. The papain enzyme has a slightly medicinal, almost floral quality in high concentrations. Fresh ripe papaya shouldn’t taste like medicine — it should taste like sweet, tropical fruit.

Why does my mouth tingle when I eat papaya? That’s the papain again. It’s a proteolytic enzyme, meaning it starts breaking down proteins — including the proteins in your mouth’s soft tissue. It’s the same reason pineapple can make your tongue feel weird. It’s totally normal and harmless. The lime juice trick helps here too.

Can you cook papaya? Yes, absolutely. Green papaya is used in stir-fries and salads. Ripe papaya can be blended into smoothies, stirred into salsas, or used in marinades (the papain makes it an incredible meat tenderizer). When you cook ripe papaya with heat, the sweetness concentrates and the musky notes mellow significantly. It’s actually more approachable cooked for some people.

Does papaya go with savory food? Better than you’d expect. Shrimp, grilled fish, spicy sausage — papaya works alongside proteins in a way that mango sometimes doesn’t. The musk balances well against salty, umami-forward ingredients.

Picking Papaya at the Store: What Actually Works

Skip the squeeze test at first — most people squeeze too hard and bruise the fruit. Instead, look at the color. You want a papaya that’s gone from green to mostly yellow-orange on the outside. Some green patches are fine. Fully green means it needs days. Fully soft and deeply orange means check it first.

Once home, let it ripen on the counter. Don’t refrigerate an unripe papaya — cold temperatures stop the ripening process and the flavor never develops properly. Once it’s ripe, eat it within two days or refrigerate it briefly.

One Last Thing Before You Go

I’ve spent a lot of time thinking about papaya — maybe more than is entirely reasonable. But here’s what I keep coming back to: this is a fruit that rewards patience and context. You need to catch it at the right moment, prepare it with a little intention, and maybe try it somewhere besides a plastic fruit cup.

What does papaya taste like at its actual best? It tastes like something between honey, butter, and a warm tropical breeze with just enough earthiness to keep it interesting. It tastes like summer somewhere warm, eaten outside, with lime on your fingers.

That’s the version worth looking for. And once you find it, I don’t think you’ll go back to wondering.

Loquat Vs Kumquat: What’s The Difference?

 Loquat Vs Kumquat

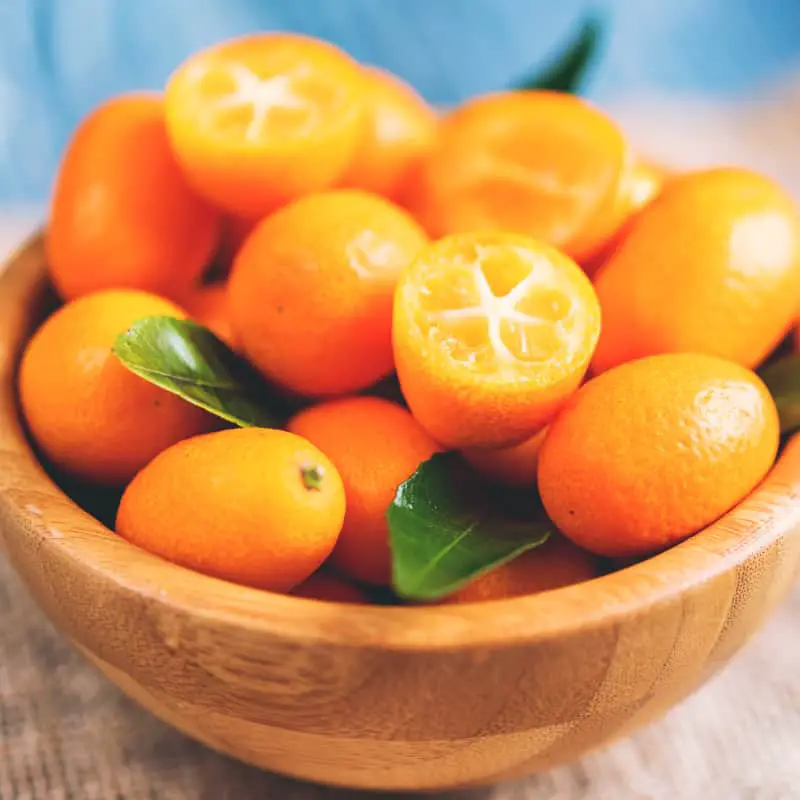
 Loquat Vs KumquatLoquat vs Kumquat–What’s the difference? If you have no idea, I suggest that you go through this post for all the details. It’s become clear that over time there has been a growing interest in vegetables and fruits as well as their distinct characteristics and similarities. We’re going to embark on a new experience when we go research more about these two fruits.
They belong to the family of citrus. It is possible to distinguish them according to the climate in which they’re cultivated and the size of their fruit. The Loquat is more prone to cold and can attain the heights of more than 7 meters in contrast to the Kumquats that can thrive in colder climates, and can grow to 4 meters.

What are the differences between them?

Loquat and Kumquat Both of these words sound like each other; However, they are not twins. The difference is:

Loquats are part of the Rosacea family that includes pears, apples, nectarines and peaches. It has a sweet tropical taste with an underlying bitterness. As a subtropical berry, they thrive in areas with citrus production. They can be grown in places where citrus can’t be grown. However, Kumquats are a fruit of citrus that has a classic citrus-like flavor, and need sunlight.

Contrary to Kumquats which require greater work, Loquats require minor upkeep during all of the season. Locating a tree with good root health is essential when working with Kumquats. They should be provided with an average of six to as much as seven hours direct sunlight each 24 hours. This can help root growth in the beginning . Eight to ten hours duration is an ideal time to have a healthy, happy plant as it develops. And it’s safe to affirm that Kumquats are a lot more maintenance-intensive in comparison to Loquats.

After we’ve identified the distinctions, let’s begin discovering more about the different fruits.

Loquat

The Loquat is medium-sized tree that has round crown, small trunk and twigs with woolly young twigs that can extend from 20-30 feet (6-9 inches). The tree is native to China, where its fruit, which is sweet and citrus-like, is adored.

Loquats are round, small fruits that are cultivated in clusters of between 4 and 30.

They’re oval, rounded or pear-shaped. They are long smooth or smooth skin. Its color ranges from between orange and yellow, occasionally red-blushed, white or orange, succulent, and sweet with an acidic taste. Their color is a mix of red and yellow.

The seeds, fruit, as well as the leaves on the tree are rich in solid plant chemicals. They have been used in traditional medical practices for thousands of years.

Origin

The Loquat is a fruit that has been grown in Japan for more than a thousand years, is probably from China’s cooler hill regions. The Loquat has been grown to be ornamental plants in California for several years and are particularly popular in those of the coastal plains to the south. However, they flourish in a range of climates and soils.

What does Loquat taste like?

Each one of the trees is distinct in its flavor. The general flavor recalls a blend that includes apricot, mango and Tangerine. Certain varieties have a pear like flavor. However, others have distinct pineapple flavors. If we could pick one word to describe the flavor– it is tropical, with hints of citrus, and mango that has an apricot-like taste.

Is Loquat Skin Edible?

Loquats can be consumed in raw form, like other fruits. The skin is edible. Keep in mind that the inside of the fruit contains seeds. The loquat is eaten as a plum, by cutting off the stem, then removing the skin. The flesh is edible, but tasteless.

How to cultivate?

There are anywhere from 1 to three seeds inside every loquat. Remove the meat of the seeds by breaking them in pieces. The drying process of loquat seeds out could hinder the germination process It is therefore recommended to plant them immediately.

The seed’s growth is best accomplished in a warm, bright space. Keep the seeds in a moist place until they begin sprouting. Seedlings can be transferred into pots once they’re around six inches high. Let some of the roots exposed when you transplant.

Health Benefits

Loquats are rich in antioxidants

Antioxidants are the molecules that guard cells from injury and diseases. According to studies its leaves have an increased antioxidant capacity than other medicinal plants.

The loquat seed, leaf and fruit have proven to decrease inflammation. It can also help treat cancer, diabetes ageing, bacterial infections allergies, pain and other ailments.

Culinary uses

Loquats

Loquats can be used in a variety of ways. Here are some of their culinary applications.

Consume them all

Loquats are a great snack since you can eat them whole. While the skin is edible , but, as I I mentioned, you will find it to be tasteless which is why I prefer to remove the skin of my loquats prior to eating them. The seeds in loquats aren’t edible, therefore, it is important to remove them before eating.

Blend them into your smoothie

Loquats can be added in your smoothie. It will not only taste better but it will also be healthier.

Include them in your salad of fruits

Fruit salads taste better when there are loquats. I love loquats since they are a great complement to other fruits.

Include them in baked items

Loquats can be baked into cakes, muffins pie, or other baked items. You’ll be pleased by the results you’ll get.

Make jam

The loquats are a great ingredient to make jam at home. The jam is delicious and is a perfect spread.

Loquat vs Kumquat–What’s the difference?

Kumquat

Kumquats are small fruit-bearing trees that belong to the Rutaceae family of flowers. The edible fruit has a similar appearance and color to oranges (Citrus sinensis) but is significantly smaller, averaging an olive-sized. Kumquat is an orange that is able to withstand cold temperatures.

Origin

Certain studies suggest Kumquats originate from China. Around the year 1178 A.D., the first official acknowledgment of the Kumquat was found in Chinese writings.

In 1646 in 1646, one European writer wrote about the fruit he was told by an Portuguese Missionary that had been working in China for 22 years.

Kumquats were added to the list of cultivable plants within Japan from 1712. In the late 19th century, they’ve been blooming in Europe in Europe and North America, mainly beautiful backyard trees as well as potted specimens that are planted in greenhouses and patios. They’re mostly found within California, Florida, and Texas, and, to a lesser degree, in Puerto Rico and South America.

What does Kumquat taste like?

The Kumquat is a fruit with a distinct citrus-like flavor. Although the fruit is a bit sweet, it also has an intense tangy and sour taste. Kumquats can be eaten in the same way as you would eat an orange after it’s clean: peel it and then eat it. It is possible to consume the seeds, or pull them out — the choice is yours!

Is Kumquat Skin Edible?

You can indeed take it in! The kumquat’s peel is delicious. The peel of the fruit is by far the most delicious ingredient.

How to cultivate?

Kumquat plants require minimum six hours of sunlight every day. This is the ideal time to plant. If you supply your Kumquat with light, it will flourish.

Kumquats can thrive in any soil, but soils that are slightly acidic are the best.

Kumquats can be planted in pots with cactus and citrus-potting soil. However, any general-purpose soil would suffice.

A very essential aspects when it comes to cultivating any plant, and especially those that are planted in pots, is the proper watering. The initial several years of the plant’s existence are essential to keep the roots hydrated. Mulch on the root zone will aid in keeping soil moisture but it should be kept at least a few inches away from the tree to prevent fungal diseases.

Kumquat is a plant that can be sensitive to frost. Plants in pots should be brought indoors during the winter season in zones eight and lower.

Apply a liquid fertilizer that is diluted such as liquid fish emulsion, kelp seaweed, or a fish emulsion, on your tree every day during the growing time. To ensure that your tree is not burned make sure you water the plant thoroughly before and after fertilizer application.

As kumquats are available for a limited time, I recommend you buy them whenever you find them available. Here are some ways that make use of the kumquats.

Consume them all

Kumquats can be eaten right out by hands. The good thing is that there is no requirement to peel them prior to eating. The peel of kumquats is sweeter than the pulp.

When eaten together, the taste is perfect. Kumquats contain edible seeds, too However, if you would prefer not eating them , you can always throw them out. I generally keep an kumquat bowl on my counter top for my family to eat.

Before eating kumquats, wash them well and then pat them dry. I prefer the organically-grown kumquats.

Include them in your salad of fruits

If you love fruit salads with the tanginess of a sweet, you can add kumquats into the next salad of fruits you prepare. They go well with many other citrus fruit and pair especially well with Kiwis.

It is possible to add a hint of mint to the salad. It’ll give your salad the much-needed freshness as well as a boost of brightness.

Serve them with salads and greens

Kumquats are an excellent option to serve alongside green salads. Their tart tang is a great complement to the flavor of most salad greens that are in season during winter. It is recommended to thinly slice, chop, or chop kumquats prior to including them in your salad.

Bake them and make a cake

You can add kumquats to cakes. This has been my practice for quite a while but the result has been fantastic.

There are two options to make it happen. You can either purée the kumquat and then add it to the batter, or you can use the kumquats to make toppings for your cake.

Make Marmalade

Since I learnt making kumquat marmalade, I’ve not ever looked back. When I spread it on toast, it is a wonderful start to my day. The making of this jam is also simple.

Simply chop kumquats, oranges, and kumquats in small pieces, add sugar and cook until they turn into an extremely thick paste. If stored in the refrigerator, this marmalade should keep for at least two months. If it is frozen, it will last for up to six months.

Health Benefits

The fruit is rich in antioxidant vitamins like vitamin A, Vitamin C, Vitamin E as well as B-complex vitamin. They also contain minerals such as potassium, copper, calcium manganese and iron, zinc and selenium along with flavonoid antioxidants like carotenes, Zeaxanthin, lutein as well as tannins.

Kumquats offer numerous advantages for health, such as the ability for digestion regulation, build immunity, as well as boost hair, skin dental, and eye health. They also reduce cholesterol, enhance bone health, and increase nerve function. All of which lower the chance of developing diabetes.

Interesting facts about Loquat and Kumquat

We’ve identified the differences between them, and we’ve covered every one of its flaws. Here’s an interesting list of facts about these fruits:

The blossoms of the loquat flower take place in autumn and winter.

Bees are the primary pollinators.

The fruit of the loquat is used to make plum wine.

The traditional Chinese medicine that make use of loquat is to treat respiratory and digestive ailments.

Loquat is an annual plant that is able to survive outdoors for over 50 years.

Kumquats were first mentioned in Chinese texts dating from the 12th century.

The term Kumquat is derived from the Chinese”gam-gwat” Jin Ju , which means “golden orange” or “golden Tangerine.”

Saint Joseph is a town located in Florida. It was once The World’s Kumquat Capital. While the kumquat tree is indigenous in South Asia and the Asia-Pacific region, it’s located in Saint Joseph, Florida, where the majority varieties are grown, and the largest variety.

Kumquats come in more than 20 different varieties; there are 20 distinct varieties of kumquats that range from oval to round such as Jiangsu, kumquats from China, and Centennial Variegated Kumquats. They all taste similar as they all contain the same amount of the fruit.

Loquats can be kept at room temperature, or in the refrigerator. At temperatures at room temperature, they’ll last for seven days . However, when stored in the refrigerator, they’ll keep fresh for up to one month.

Kumquats are not able to have a long shelf-life Therefore, it is best to consume them as soon as you can. If you have to store them for couple of days, put them in an airtight bag and place it in the drawer with the crisper compartment of your refrigerator. They should last around seven days.

Can you substitute each of them for the other?

Kumquats and loquats are utilized interchangeably in a variety of recipes. You may need to alter the method of preparation.

Where can I buy loquats and Kumquats?

If they’re in bloom the most convenient location to buy kumquats farmers market. Food stores that are well-stocked and specialty stores will also have the fruits.

They can also be difficult to locate. If you are in California, you can locate the fruit at farmer’s markets.

If you are in the East Coast, you can get these at premium supermarkets. Loquats found on the East Coast are normally imported from Spain, so they can be somewhat expensive.

Wrapping up

Loquat vs Kumquat–What’s the difference?

Kumquats and Loquats have some similarities, but they also have a few distinctions as well. Both are wonderful fruits that you should test out.

I hope this article answered any question you may have had regarding loquats and Kumquats.

If we were to put together the two kinds of fruits, it comes down to understanding the physical differences between them and the amount of care each one requires, as well as their flavor and color.

One thing is certain, though. The fruits may not belong to the same class. But both are packed with minerals and vitamins which are extremely beneficial to your health since they help prevent illness and keep you healthy.


What color is Butter? All You Need To Know!

yellow butter

What color is Butter? 

What color is Butter? 

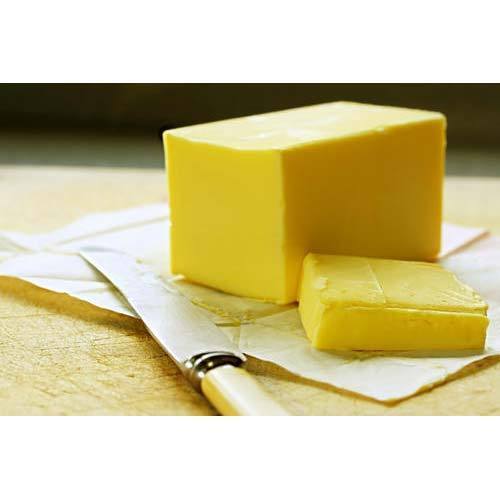
What color is butter? The different color is mostly due to the fat content that is higher in butter. Cows that consume flowers and grass keep the beta carotene pigment, a yellow color naturally present in the plants and within their fat. The pigment is carried into the fats in their milk. The majority of milk is water, and there is only 3 percent fat in total milk. It is around 30-40 percent fat. Butter has at least the equivalent of 80 percent fat.

The fat globules in cream or milk are enclosed by a thin layer of membrane that effectively ends with the pigment beta carotene. The structure reflects light in such a way that milk appears white.

Making butter requires churning of cream in which during the process of agitation, it breaks the membrane and fat globules are clumped together. That’s the aim of butter production– to tear down that membrane. By breaking it you expose beta carotene, she explained. When you separate the buttermilk following churning the milk, you’ll find a lot of butterfat which has the highest amount of yellow.

However, you may observe the butter made from goat’s, sheep’s milk, or water buffalo’s milk is white. Animals don’t store beta carotene as cows do. Instead they convert it into vitamin A. It’s not colorless.

If the cows are raised on pastures, their milk tends to be more yellow when milk is harvested in the late spring or early summer, because cows have plenty of beta carotene-rich grasses to chew. In winter, even those that are raised on pastures are kept inside and fed grains which isn’t a great source of beta carotene. Some dairy farms can are able to freeze butter in order to sell it in the year round.

But, in reality the majority of industrial dairy producers keep cows in their pens without ever putting them out in the open and, therefore, the season doesn’t matter. Butters that are often found in the grocery stores, aren’t extremely yellow at any time throughout the year.

In the agricultural community, each spring, their butter was attractive: more yellow. It’s fascinating that we’ve become used to butter that is pale. With the advent of butters made by artisanal producers that are more yellow and golden Chefs want it at the table, and it’s interesting to see if the companies are beginning to sneak in more colors.

Certain commercial dairy producers include color, typically the annatto color, which is occasionally added to cheeses in order to give them a yellow-orange tint. Annatto is an ancestor of seeds from the achiote tree that is indigenous to Central and South America and grows in tropical areas.

“Seeing the color could affect how our brains perceive the taste,” explained J. Kenji Lopez-Alt. He is the culinary director of Serious Eats. If you’ve got this association, it may increase your enjoyment of butter greater.

Why Is Butter Yellow? Here’s the reason.

Butter is known as being a lovely soft yellow color. It’s the color we think of when we hear the words “rich”, “delicious”, as well as ‘decadent’. It just adds that much more flavor and substance to whatever you cook (sweet or spicy). However, when you consider the fact that butter made of milk, which is it’s actually cream.

Milk is white therefore why is butter colored yellow? What’s the reason why all butter isn’t yellow, while some are near white? It turns out that there’s an explanation for why butter is generally yellow and let’s take another look.

Why is butter yellow?

Butter is yellow due to the fact that it is a source of beta-carotene, which is an orange-yellow pigment that comes from the diet of cow’s grain and grass. A higher proportion of hay and grass usually is a sign of the presence of yellow butter. Beta-carotene is a fat-soluble pigment. It can easily move through and then show in fat molecules similar to butter.

In the days when butter was only produced on farms, the cattle were fed mostly grass as well as hay. Butter was always a soft yellow, but it was not so strong as you would think. After commercial dairy farms started popping up, the diets of cows changed and their diets began to include more grain, with less grass.

The result was the lighter-colored butter that many associate with poor quality butter. Nowadays, a little of food coloring can be added mostly through beta-carotene or Annatto (like used in cheddar).

What do cows eat?

Grass-fed cows produce naturally yellow-colored butter, however it’s never going to be an edgy deep yellow, without additional coloring. The butter that was yellow in the past wasn’t that bright, but fair enough. Butter can oxidize and the outside gets darker, which can contribute to the hue we all expect from it.

What colors are used?

So if the diet of a cow is so important and the majority of cattle today aren’t put out in fields to graze, why is butter so yellow? Food coloring, in tiny amounts, is added. We have come to believe that the color of butter as a beautiful hue of creamy yellow even if it’s different from the original color. By original butter color, we’re talking about the kind of off-white cows could produce if it were to eat only grass.

Why is butter made at home white?

Butter made at home can be pretty white if it doesn’t include any color. It’s not pure white, but it will be whiter than any butter you purchase at supermarkets, with a guarantee.

The whiteness is a result of in the quality of the milk used, the amount of fat that is present, and the diet that the cows were given. Skimmed milk – such as 1.5 percent or less is not the best choice to make cream. Even 3.5 percent is not enough since you require actual cream. If you buy pasteurized or homogenized milk at the store, the cream will not be separated.

Therefore, you require fresh raw milk that is pure, not skimmed, and then let it sit in the refrigerator for a few days to let the cream separate. If the cows who provided their milk were given predominantly grass and hay diet, the butter will probably turn out soft yellow.

When they were given primarily grains, they will have lighter in color. In certain instances, even the genetics of the cow could influence how much pigment gets into fat molecules.

Don’t worry if your home-made butter doesn’t look yellow! It’s always possible to include a little color and here are two options. You may add:

A small amount of turmeric, enough to create a golden hue but won’t alter the taste

A small amount of annatto, just for the color

Permissible Food coloring—a mix of orange and yellow

Even if you don’t decide to include any color and you’ll see that one teaspoon of salt can do wonders for flavor. It’s not enough salt to transform this into a salty butter. But that is enough to let you taste the flavor of butter.

You might want to consider the possibility of browning your butter

If you’re in search of oil that is darker in color and is more flavorful you should consider the process of browning it. It can be done in three directions: clarified butter or brown butter. There are some slight differences however, the procedure is exactly the same.

You will require butter or any other butter including the white home-made one is fine. Take a pan and put the butter in then turn the heat to low. Let the butter melt, and begin to bubble. Be sure to keep in mind that it is bubbling and continue stirring it. The milk solids will settle at the bottom, toasted and making the butter darker in color and nutty taste.

The foam is just the resulting product of evaporation. Try to remove it as far as you can. When the foam over the top starts to form in smaller bubbles there is an option:

Stop cooking, strain into a container. The milk solids must separate, however they should not be torn. The result is clarified butter.

Continue cooking for another 2 to 3 minutes. The milk solids will be toasted and golden brown. The result is Brown butter.

The brown butter is strained, and you’ll have Ghee (Indian clarified butter).

Here is a note on brown butter and ghee. The main difference between them is whether they’re made of dairy solids, or otherwise. However, when you’re making these and they’ll be burning within a few seconds, so you should not look away from the skillet. It is better to shut down the cooking process sooner rather and not wait until later.

The three butters (clarified brown, clarified Ghee) will harden when heated to room temperatures, however not as quickly as regular butter.

What is it that makes British as well as Irish butter yellow?

British and Irish butter are very yellow due to the fact that cattle are fed almost exclusively grass. When Ireland was initially made one of UK in the early years, it was used for raising cattle. The lush, rolling hills and lots of grass for raising cattle would have provided good meat as well as good milk.

Ireland is now divided into two sections: Northern Ireland (part of the UK) and The Republic of Ireland, a self-governing state. This means that British butters from the UK and Northern Irish butters are still darker in color, with a more creamy yellow because they have access to Irish grass. The butter made in Republic of Ireland Republic of Ireland has access to the same grassy hills and can make the same high-quality butter.

The quality of the butter does not depend on its color. However, consumers still interpret a yellow butter as one that is that is high in fat, so a high-quality butter.

Which butter more effective—white or yellow?

A color-coded piece of butter is not a determinant of its quality, but the amount of butterfat contained within the stick. When comparing the yellow and white varieties of butter, we must consider the origin of the milk.

It is possible that both are created out of the same milk batch, and in this case the yellow milk has more fat and therefore, it is more flavorful. This implies that the whiter version is whey-based milk which means it has less fat which means it is less flavorful.

However, it could also happen that the dairy used didn’t contain as much beta-carotene as it did so the 82% butter will remain pretty white.

Wrapping up

So, what color is butter? I think by going through this post, you have already come to know why butter looks s yellow. Indeed, one should be aware of the amount of butterfat rather than the color. Color can be easily altered and it may result in mediocre-tasting butter that has been artificially dyed yellow.


I


How to Tell If Lamb is Bad?

How to Tell If Lamb is Bad 

How to Tell Whether Lamb is Bad?

Lamb, one of the most popular meats, is tasty and packed with rich flavor. It also has been a staple for a long period of time. And it has been consumed during festivals of religious, cultural and seasonal celebrations. However, before you purchase the entire rotisserie lamb and roasting leg, you should be aware of whether the meat is safe to consume. Yes, how can you tell if lamb is bad? You must have some idea about it. For one thing, if you eat poor meat, you’re likely to get sick.

This article will go over everything on the indicators to determine the difference between a good lamb and a bad one as well as review storage techniques and shelf life of lamb.

How to Tell If Lamb is Bad?

There are numerous methods to determine whether or not the lamb is turning or turned bad. However, these indicators could be confusing based on the condition of the lamb or the process that the meat has gone through.

Most shoppers buy their lamb from a grocery store. The most important guideline is a ‘Use By or Best Before date. While these are not a guarantee of guidelines, they do provide an accurate indication of when the meat was prepared and packaged and also the estimated shelf life for the product.

However, do not completely rely on these guidelines.

Many are surprised to learn that the meat you buy in the grocery store is much fresher than the meat bought by our grandparents and parents. Over the past 20 years, the methods of butchering have drastically changed. And this has resulted in an increase in demand for lamb meat.

Therefore, the meat we purchased on Friday was probably still in the fields on the day before, this less time to process can result in confusion when comparing meat from supermarkets against the meat you purchase at traditional butchers.

How can you know if the lamb is rotten or even safe to purchase? Here are the most effective ways to determine if this lamb is suitable to buy or eat.

Appearance

If you are buying at the grocery store, look for brightly colored meat that is red-pink. There shouldn’t be too many liquids on the tray when purchasing cut-to-size meats – the meat shouldn’t be swimming in juices.

If you buy an animal from an authentic butcher shop, you can anticipate that the lamb will be presented and you can choose the cuts or pieces you prefer.

Because the meat will not necessarily be vacuum sealed and therefore, it is possible for it to have a dry appearance. It could also appear darker, which is acceptable.

In no case at the traditional butcher or a grocery store the meat should show shades of green or grey coloration of the white fat. These are indications that the meat is beginning to turn, or is going bad.

Smell

It’s true that lamb has a distinctive smell and an aroma that’s not for everyone’s taste. The smell may also change over the course of the year. This can be due to various kinds of grasses or grains that the animal could be eating before processing.

If the lamb is sulphuric in smell, such as eggs that have gone rotten, it’s not acceptable. Lamb must smell clean and fresh, nearly gamey, with a distinctive herby scent combined with the normal smell of meat. If it smells similar to something else, then you need to be very cautious.

Texture

Even if it’s not being thrown around in fields doesn’t mean that your meat isn’t in great condition! This is the perfect time to be a bit more personal with the lamb you’ve purchased.

If you’re in the grocery store or at the butcher’s shop make sure you give the tray a good poke in the film. Any cutlets or lamb legs will revert to their original form.

You may also scratch the surface if you believe the glossy sheen isn’t real. If it is real, the gloss will remain present, even if the meat is contaminated by suspect butchers, the gloss will wear off.

Taste

Lamb has a distinct flavor unique to itself and you won’t be able to distinguish it with the other three major names (beef pork, chicken and beef), but some restaurants will serve lamb that is with a strong spice.

This is done to enhance the flavor of the meat, however, it could be used to hide the meat turning. Therefore, if you’re at the restaurant and take the lamb dish and you are not sure, don’t be afraid even if the flavors are strong.

If you do take a bite and you don’t like the find or suspect that the lamb is going bad, you must put it down and then inform the restaurant of the attention.

Mold

There will be no mold on freshly cooked or aged (the traditional method to tenderize meat cuts. If you notice any signs of growth on your meat, don’t buy or cook using it. The meat should be removed immediately.

Be aware that eating any meat product that has been damaged will likely cause severe illness and possibly hospitalization. Don’t eat any meat that displays any of the signs mentioned above. You should consult a doctor if you think you’ve consumed food products that are rotten.

Impact on Health

It is possible to get sick when you eat spoiled lamb. If you eat rotten lamb and you’re likely to develop the typical foodborne illness, since the presence of fungus, mold, and dangerous insects were not present.

Indigestion, colds, Diarrhea, Nausea, vomiting, and many other foodborne diseases are most likely to develop. There is a risk of contracting parasitic diseases if the lamb is infected and it is suggested to consult with a doctor immediately.

Doctors prescribe probiotics. They also advise that you eat soft food with the hope of curing the ailments you suffer from.

How Long Do Lambs Last?

When properly stored, lamb will last for quite a long time, much longer than chicken, pork or fish.

However, it does not mean it’s a good idea to hold lamb past its peak or to maintain the animal in circumstances that aren’t optimal or secure.

If you do this, after you’ve purchased your lamb, the supermarket or from the butcher you prefer it is best to enjoy the meat as quickly as you can.

However, if you want to keep it in your possession, there are some suggestions and tricks for keeping it safe.

How to make lamb last longer in the fridge?

The same way you bought it from the store and probably sealed in a vacuum tray or bag The lamb will last for about 3-5 days. You can also make sure you check the Best Date for Use Before.

If you purchase direct from the butcher shop, be sure to inquire about what time the meat was placed in display or removed from the cold room. You should get the answer “today”, because this implies that the meat was cut fresh and displayed on the day of purchase. If the butcher isn’t able to provide you with the information that, you might want to think about a different option.

If you do choose to buy from this vendor, make sure you thorough inspection of the meat, and refer to the guidelines in the previous paragraphs for suggestions.

When storing lamb in the fridge, it’s recommended to store it between 35 and 40 degree F for a minimum of three days. Place the meat in the back of the refrigerator as much as possible, away from any heat which could be emitted through the opening of the door. This will allow the meat at a proper temperature.

How long does lamb last In the Freezer?

In the majority of cases lambs are kept between 6 to 12 months prior to home use. It is possible to store the lamb in whole, larger joints or cut or cut into pre-made cut pieces, i.e. diced, strips, etc.

It is important to keep in mind that cutting smaller the smaller the cut, the less time. When the number of surfaces exposed increases the length of time or months of storage is reduced.

NOTE: As per the USDA guidelines, lambs that are kept at 0°C or lower can last for a long time. However, the lamb needs to be stored correctly to achieve this. Check out the section on storage below.

How long will lamb last in the Countertop

If left on the kitchen counter at room temperature, lamb will only survive for a short time should it be kept in a closed container.

This is only suitable in the immediate time of marinating and cooking in no more than an hour or two. It is recommended to store this lamb inside the coldest area of your kitchen in a temperature as near to 4°C/40°F as is possible during this process.

Storing Lamb

How to store Lamb inside the Fridge

Lamb that’s been cut into strips or dice will likely go bad quickly and is therefore better to use the meat sooner making sure to keep them as cool as is possible. Ideally, you should store meat in an airtight container. Typically, the rear of your refrigerator is the most consistent temperature regulator.

Like we said the idea of placing meat in the refrigerator is a fantastic way to ensure that it is in your fridge prepared to prepare. However, if you aren’t able to take the cooked meat out quickly then it’s a good idea to freeze it.

How to store Lamb in the Freezer

The process of freezing lamb cuts that have been prepared will also benefit the way you’d like to prepare the lamb. Freezing the lamb as cubes or strips with marinades is a fantastic method to add flavor and softening the meat for a longer amount of time. It also helps cut the time spent cooking later.

Simply place your lamb in sturdy plastic bags or reusable containers, and put them in the freezer until you need. Lamb that is kept at or less than 0°C/32°F in the freezer will last for years and is completely safe to consume, as per the USDA.

How to store lamb on the Countertop

When you are making the preparations for cooking your lamb, it is important to ensure that it has the least amount of contact with air as you can in order to minimize airborne contamination.

Do not take the meat out of any container until you are prepared to cook the meat and then cook according to instructions. Also, be sure to follow the food safety instructions.

Wrapping up

How to tell if lamb is bad?

So, how to tell if lamb is bad? I believe that I have provided you enough details about lamb meat and how long it lasts. I’m sure that you would be easily be able to detect if anything is wrong with the meat.

Lamb can be versatile and full of flavors, but choosing and storing the best lamb isn’t easy. Pick the best lamb using these identifiers such as smell texture, appearance and the taste (if already prepared) to determine whether the lamb is good or not.

In this post, we examined four fundamental methods to determine whether lamb is gone bad. By examining the color it is possible to identify if the lamb is rotten. The gray tone could indicate that the lamb has become to rotten.

If the texture feels slimy or you notice a distinct of smell of decay, this means that the lamb is spoiled. Consuming rotten meat can trigger various health issues such as nausea stomach pain, vomiting and stomach pains to name a few. If you notice that your symptoms are getting worse, consult a physician promptly.


Will Overcooked Hard Boiled Eggs Hurt You?

overcooked hard boiled eggs

Will Overcooked Hard Boiled Eggs Hurt You?


Will Overcooked Hard Boiled Eggs Hurt You?

Quick Answer:

Will overcooked hard boiled eggs hurt you? No, on the contrary, it’s fairly safe to consume cooked eggs, even though you have overcooked them. No matter what green hue surrounding the yolk, as long that the egg was still fresh after it was cooked, it’s safe to consume once you’ve completed cooking it. Don’t be concerned about overcooking eggs. However, there’s a caveat: don’t take too many eggs in one sitting.

Hard-boiled eggs are an excellent sources of protein! Many people prefer to have them for breakfast, or for a protein-rich breakfast or snack during the course of their day.

Certain people prefer to make them into deviled egg and some prefer to crumble them on salads or make an egg salad from them.

We all love our egg boiled in a variety of ways. You may even like different kinds of boiled eggs such as soft, medium and hard-boiled. It’s a fine art of boiling eggs exactly to perfection!

We are aware that eggs that are raw are a risk to eat due to salmonella. There are some worries about eating eggs cooked over too.

Do hard-boiled eggs that have been cooked too long harm you?

It’s generally not recommended to consume hard-boiled eggs cooked over because it is likely to be poisonous. They’re likely to not taste good in the event that they’re overcooked and if you consume excessive amounts of them you could get sick.

In this article we’ll walk you through the process of whether hard-boiled eggs can harm you.

We will go over what you can think, what that you should be aware of, how they can cause you to become sick if you take too many and more!

Read on to find out more about the possibility that the hardboiled eggs that you boil over the stove can harm you.

Short Explanation of hard boiled Eggs

Let’s begin by discussing hard boiled eggs. This is the most effective method of understanding what might happen when it comes to an egg that has been cooked to perfection.

Typically, you prepare an egg that is hard-boiled by boiling eggs that are fresh inside their shell with boiling water. The cooking time varies.

An egg cooked hard is the most long-cooked egg to make the yolk to be hard. Like the fried egg, an egg yolk that is hard, it cooks until “over hard” isn’t it?

The longer eggs are cooked and the longer they are cooked, the more the yolk inside is cooked. If you are cooking a hard-boiled eggs, it is the aim to get both the yolk and egg white to become hardened inside the shell.

The way you like your eggs is largely based on your personal preferences. An egg that is hard-boiled is excellent for protein and lower in calories, and less likely to be exposed to salmonella at the end of the day.

Are you familiar with cooking a boil egg, then opened it to the color of green or gray? Perhaps you noticed the smell of sulfur when you opened it up? This is the reason why the issue is when a hardboiled egg is overcooked.

Can overcooked hard boiled eggs make you sick?

It’s generally not recommended to consume eggs cooked over because of the sulfur levels. It is possible to eat them and, in fact most likely, you won’t be sick if you consume only one or two eggs.

But, it is important to be aware of the ingredients in them, and the likelihood of being sick if were to consume too many.

If your egg has been overcooked it is usually evident by the appearance of a green or gray color on the exterior inside the egg. It’s usually only a little discoloration. However, if your eggs are cooked to a high degree the entire yolk may change hue.

A slight discoloration shouldn’t be too worrying unless you intend to eat lots of eggs in one go.

There are some risks for eating them and that’s why we’re discussing here. It’s essential to be aware of what you’re getting yourself into.

Iron Sulfide

If you cook your boiling egg to the point that it is overcooked, its yolk begins to produce iron sulfur. This is the reason it’s grey or green in appearance. It is possible to smell the smell of sulfur too.

Iron sulfide, a mineral, is found and although it’s typically sourced out of rocks, it may be found in an overcooked, boiled egg. It’s an interesting idea, isn’t it?

What happens is that iron contained in the egg gets combined with hydrogen sulfide when it cooks.

As we said earlier as it is cooked for longer, the more the yolk gets cooked. This is what also causes the start of compounding iron sulfide.

The longer egg is cooked the longer iron sulfide will be formed within the egg’s yolk.

Iron sulfide has been specifically identified to be poisonous if consumed. This is why it’s not recommended to consume eggs that contain iron sulfide present in them.

Also, it’s not advised to eat eggs that are cooked to hard. If you decide to eat eggs, it’s best to take only one bite and not more than the amount.

It is also possible to make your choice based on the amount of iron sulfide they contain.

If, for instance, you only notice a small amount of gray appearing on the yolk, it’s an extremely low amount of iron sulfur. If the entire yolk appears greenish-gray, it’s significantly more elevated levels.

The dangers of eating iron Sulfide

Shortly, one can say that you should not eat hard-boiled eggs that have been cooked for too long. But, if you decide to take the risk, we want people to understand potential negative consequences.

The positive side is that there have been no reports of deaths due to eating overcooked hard-boiled eggs. Indeed, in some cases, you may even be able to consume only a tiny amount and not have a negative side effect!

The problem lies in knowing what is considered to be too much. You should think about whether it’s worth the risk eating a couple of eggs that contain a small amount of iron sulfide, or not.

The potential danger associated with eating an egg that has been overcooked is that you’re ingesting iron sulfide in your body. It is a risk to cause illness because it is classified as an extremely toxic compound.

You’ve been enjoying boiling eggs that were overcooked all the time and never experienced any problems you’re doing great! However, it does not mean you will not experience an issue in the future after consuming iron sulfide.

As we have mentioned that there haven’t been any deaths that have been reported due to eating eggs, however there is a chance of sickness as well as other adverse effects that could cause more harm than the tiniest bit of protein.

What should you do?

We suggest to throw the eggs away when you’ve cooked them too long. It’s safer to do this.

If you do decide to take your eggs for breakfast, make sure that you don’t consume too many eggs and then get food poisoning. It’s not worth it!

When making eggs that are hard-boiled We recommend to time them precisely so that they boil precisely without overcooking. There are many recipes available on the internet that can be followed for cooking eggs properly.

Keep in mind that a hint of gray is fine but you should be extremely cautious about the amount you are drinking and be aware of the dangers associated with doing so.

Related Questions

We hope you find this guide on understanding if eggs that have been cooked too long can cause harm to be a valuable source.

There are definitely some points to be aware of, however when you have an egg or two and you’re not worried about it, you’ll be okay.

Check out these frequently asked questions and their answers for additional information that might be helpful!

How long are boiled eggs good for?

After you’ve cooked your boiled eggs, they’ll most likely remain fresh for one week. It is important to be sure to store eggs properly in the refrigerator, however, if you keep them in the refrigerator the eggs will last for many days.

Why do my hard-boiled eggs smell?

If you’re experiencing an unusual smell emanating from the egg you’ve hardboiled, this is likely a sign that the egg has been cooked to over.

It is typical for it to possess a mild sulfurous smell when it’s cooked too long. It may also show some discoloration. This is due to the release of iron sulfide into the yolk.

Why do eggs that have been cooked too long become green?

The gray or green coloration occurs because of iron sulfide, which has taken root within the yolk. Eggs that are severely overcooked may become dark gray or even green.

It’s an chemical reaction that occurs because iron reacts with hydrogen in the egg and causes it to change hues.

Be aware that this discoloration could be an indication that your egg has been cooked too long and has iron sulfide in it. It might not be healthy to consume as iron sulfide is thought to be harmful when inhaled.

Are there any disadvantages of overcooking boiled eggs?

If there aren’t any issues with health that arise from cooking eggs that have been boiled, what is the point that you cook them too long? In reality, overcooking an egg can negatively impact its flavor and texture and can make it a less appealing food.

A boiled egg that has been overcooked is typically rubbery, based on how much overcooked. If you’ve put it in for an additional few minutes Don’t worry, it’s okay. If however, you left your eggs unattended for a couple of hours and discovered them later, you might discover that the eggs’ whites have become hard.

Inhaling a boiling egg may be a sour and “bouncy” experience, and you may be trying to figure out your texture and the egg’s white. The yolk too can be damaged. It is more likely to become chalky when cooked too long and may turn dry and tasteless, regardless of regardless of whether it is green.

The flavor of an egg that has been cooked too long is also unpleasant. A majority of people feel that the sulfur is more apparent in eggs that have been cooked too long which could lead to a sour experience. If you’re planning to attempt eating an egg that you have forgotten to boil You may have to mask the taste by using sauce or some seasoning.

A few people also report eggs that have been cooked for too long are difficult to digest. It could be due to the fact that cooking damages proteins and makes them more difficult to digest. This can make it difficult the body’s ability to breakdown the egg into smaller pieces.

Wrapping up

Overcooked eggs aren’t harmful in terms of health However, they’re less appealing when compared to eggs cooked properly. cooked in the right duration. They can degrade in terms of flavor or texture. Additionally, some are unable to digest them. When you can, utilize an accurate timer and be careful not to overcook your eggs.

How Long Do Candy Canes Last?

How Long Do Candy Canes Last? 

There are definitely not a lot of people who dislike candy canes! Candy canes in the shape of a cane are not just Christmas symbols. They are also extremely delicious and are available in a variety of flavors!

Yes, candy canes are considered to be one of the greatest symbols of Christmas. They’re a cane-shaped hard candy with stripes of barber-pole on the sides. The original flavor is peppermint, but nowadays there is a wide variety of flavors.

Candy canes can be used as decorations for your Christmas tree, or you can treat them as real candy. It’s acceptable to only eat candy canes on particular occasions throughout the year, but not all year all.

Due to the large quantity of sugar on the ingredients list, and the absence of important nutrients in it the sweets are thought to be harmful to our overall health. So, how long do Candy canes keep? Let’s discover.

How Long Do Candy Canes Last?

Because this is a kind of hard candy, their shelf life is fairly long, especially when you store them following the storage guidelines and guidelines. It is important to avoid keeping them in direct sunlight or near to heat sources like ovens microwaves or stoves.

Also, letting the candy become moist isn’t an ideal idea as it can reduce its longevity. It also is crucial to keep them wrapped or in their original packaging.

In general, candy canes remain edible for up to three years with no quality loss due to their extremely high sugar content. However, this is only possible when they are packaged in the original container which is sealed and not opened.

If you’ve already cut the canes of candy opened, then you could anticipate them to last another year quickly. Like we said earlier, this kind of candy can last quite a long time!

It will remain safe, when opened, for up to 1 year.

Unopened, it will last for 2-3 years

For the best storage space, you can store candy canes in the fridge or even in the freezer however if you leave them in the pantry or the kitchen cabinet it won’t make the confection deteriorate faster. However, even in the event that the expiry date is expired, candy canes are still safe to consume as this date is only a sign that the candy is of the highest quality and flavor.

This is the reason people tend to purchase candy canes in huge quantities to store them for the holidays and Christmas. Because of their longevity, they can last for a lengthy amount of time!

How Long Do Candy Canes Last When They Are Open?

As we all know, the majority of our food products tend to degrade and spoil more quickly after opening the container. This is because air gets inside the package and accelerates the degrading process for food.

But when you think of sweets, things are a bit different. Candy canes (like many other sugary treats) contain a substantial amount of sugar, the component prevents their spoilage from happening too quickly.

That’s why when you crack the box of these confections You can be sure that they’ll remain for a long time as they are safe to eat and keep their flavor.

How Long Do Candy Canes Last If Individually Wrapped?

Sometimes candy canes can be offered in individual wraps. If you do purchase too many of them, you’ll be wondering the length of time you can keep the candies. Fortunately, the shelf life of these types of sweets is quite long.

Candy canes that have not been opened and wrapped individually can be eaten for a minimum one year. If you store the canes properly according to storage guidelines, make sure that your treats will be delicious and flavorful for up to three years!

How Long Do Unopened Candy Canes Last?

They are a delight not only because of their many colors and flavors but also because of their attractive appearance. Their long-lasting life span is another reason candy canes are usually bought in large quantities particularly before the holidays!

Therefore, if you decide to purchase them ahead of time to indulge in candy canes during the holiday season, make certain that your sweet treats will last for as long as three years when they are stored properly.

Can Candy Canes Go Bad?

Because candy canes are made up of lots of sugar, they’ll not be spoiled to the point of causing any significant negative effects on your body. However, they do decay, making the flavor less appealing. This is why it’s crucial to be aware of the time when your candy canes should be removed.

The most straightforward way to test the safety of your candy is to chew it up or press it using your fingernail. If you notice that it’s too soft, this means that the candy is old. This doesn’t mean that you shouldn’t eat it however, it’s certain to not be as solid and delicious as the current version.

Also, candy canes from the past should be removed as they are prone to draw bugs and insects in the course of time. If the candy is not properly sealed, these insects can infect them, making them hazardous for your health.

What Are Candy Canes Made Of?

Because these sweets are robust, you may be wondering why they last for so long. Well, the primary ingredients that make these sweets are sugar as well as corn syrup. This means that candy canes cannot be described as healthy sweets. Also, this excessive amount of sugar is what makes them able to last the longest life span.

 Top Four Signs That Your Candy Canes May Have Expired

Candy canes last for five years, but certain candy may not last up to 5 years due to problems with storage and degradation. Here are some indications to keep an eye on to identify when your candy is deteriorating.

  1. Flavorless: Candy canes are renowned for having a mild, or moderate peppermint flavor It’s an enormous disappointment when you take the wrapper off and put the candy into your mouth only to find it’s flavorless.

If you’re eating an unflavored candy cane, then the candy canes could be reaching their five-year expiration date for shelf life. Consuming this candy cane with no flavor will not cause an illness, but it’s not going to be a pleasant experience.

2.  Sticks to a wrapper:  a candy cane should be able to slide off with ease. If you’re having trouble taking the wrapper off your candy, this is an indication that you shouldn’t consume it.

The reason behind a sticky wrapper that doesn’t break away from the candy is likely to be because of the heat. In the event that the candy is heated during storage in its container or bag the candy inside the wrapper released some of its moisture and turned sticky.

3.  Exposure to humidity: Do not take a bite of a candy stick. Candy canes must be crisp and dry. A candy cane that is wet indicates that heat and moisture are mixed, which may influence the sugar amount.

4.  Plastic has been damaged or cut: unless accidentally cut the candy cane in the process of pulling it from the container and putting it out on the table don’t consume it if it has an untidy wrapper. The candy cane wrapped in an untidy wrapper has been exposed to bacteria, air, and even bugs.

Can you take a bite of an old candy cane you have just come across?

Don’t consume a candy cane you found on the couch. It’s not worth it. It is impossible to know what bugs have chewed through the plastic and feasted on this deliciously sweet and addicting treat. Additionally, there could be a tiny puncture in the wrapper which let bacteria get into the wrapper over the last two weeks. Even if it appears good, discard it.

Can You Freeze Candy Canes?

Yes, it is possible to freeze candy canes. They last, however, all day, there’s only one reason you should make this a priority. The sole reason you should store candy canes in the freezer instead of your cupboard or the pantry is in the event that those areas are subject to significant temperature fluctuations.

Like many other items that sit on the shelves of supermarkets, keeping candy in a dry, cool area will enable them to attain their five-year shelf lifespan. If your home is not properly insulated then the continual warming and cooling may compromise the integrity of the candy cane.

How do I thaw candy canes?

Be aware that temperatures can make candy canes dry and melt, therefore you must ensure that your candy doesn’t need to face this situation you can simply let them thaw in the fridge for a few hours, and then take pleasure in your sweet treat.

If you do not freeze all candy canes and opt for the second method that crushes candies and freezes them, you can then make them into toppings on warm chocolate or cake or ice cream, without having to thaw them.

How to Store Candy Canes

Since candy canes are packaged in a wrapper of their own, they are very simple to keep in storage. When you return them you can keep them in their container or bag, and then store them inside the cover or in your refrigerator. If you are storing their food in your cupboards, be sure the container is securely closed to prevent insects from getting in. consume the plastic wrapper, ruining the delicious snack.

The majority of the ingredients of the candy cane are sugar, and it is extremely appealing to cockroaches, ants, rats, mice etc. If your home is plagued by bugs it is better to keep the candy canes in the fridge.

If there are no shelves in your fridge, put the candy canes inside a sturdy zipper bag. This thick freezer-grade ziplock will stop the insects from inhaling the scent of sugar, and also from chewing on the plastic.

Frequently Asked Questions

Does the texture and taste of candy canes alter after cooling?

Yes, they’ll change slightly.

What is the best method to keep candy canes in storage?

The best option is to store them dry within a sealed plastic container that has all the air sucked out.

Are there any well-known uses of candy canes?

It is possible to consume them or use them as decorations on your tree for Christmas. Candy canes are frequently used to decorate cups using hot beverages like cacao.

Wrapping up

Candy canes boast a long shelf life. They keep fresh for up to five years! Candy canes have a long shelf life due to their high sugar content as well as the absence of ingredients that will decay quickly. In the event that the wrapping isn’t damaged as well as they aren’t exposed to sunlight or heat, the candy canes can last five years inside the wrapper.

Candy canes can be frozen, but there is no reason to freeze them as long as you wish. If the wrapper of a candy cane is stuck to the candy cane, then the candy is not edible anymore. A tasteless candy cane signifies that it is getting close to its five-year expiration date for shelf life.

The wrapper of the candy cane is small enough to let bugs go through, which is why you should put the candy canes inside a box or sturdy Ziploc bags. Even if you discover candy canes in some place at home, left unattended for quite some time, you should never eat them!

Does Red Wine Make Your Poop Dark?

red wine

Does Red Wine Make Your Poop Dark?


In this brief article, we’ll give the answer to the question “does red wine make your poop dark?” and the reason for this.

Does red wine cause black stool?

It is true that red wines could cause black stools at times. Many drinkers of red wine have reported experiencing black (fecal) substances in their stools the following morning.

It could result from the pigments and tannins found in the skins of red grapes that could be the reason for the phenomenon.

The changes are based on the wine, the variety of grape used, as well as the farming practices employed. These changes may not be applicable to all red wines.

Again, it is a condition that affects a small portion of people and not the entire population. It is possible for people who consume red grape-based wine like cabernet sauvignon and shiraz and other red grapes to develop the disease.

In the event that this occurs it is likely to be minimal. Of course, you must avoid alcohol for a few days. If the issue persists then it could be an indication of something more serious.

Bowel Movements that are triggered by Alcohol

To understand how alcohol impacts the gastrointestinal system, it’s crucial to know exactly how GI tract functions in healthy people.

By the stomach or the upper in the intestine, the vast majority of alcohol is in circulation. If food is present inside the stomach and in the small intestine, absorption of alcohol can be slowed significantly. Alcohol can also cause irritation in the stomach and has been linked to the formation of gastritis, an illness that is caused by irritation within the stomach’s wall.

Constrictions of the Large Intestine Occurs Frequently

It could be that some alcohol that was not absorbed by the upper GI tract could get into the large intestine in which case it could cause the large intestinal tract to expand (squeeze) more quickly than it normally does.

Since the large intestine happens to be located in the tract of the stomach that water is typically returned to the body through slow squeeze motions, the more rapid contractions of the large intestine prevent it from absorption of the amount of water it is capable of taking in. The result is that the large intestine stores more water, leading to diarrhea and watery stool.

Absorption of Nutrients Gets Reduced

Due to alcohol consumption causing the intestinal tract to move more quickly than usual, the nutrients absorbed from food items are usually not properly absorbed because of this. The results of this should be controlled, for if it is left uncontrolled for a long period of time, it can result in nutritional deficiencies or malnutrition, which requires the supplementation of nutrition with medical care.

How can you prevent alcohol from harming your poop?

In moderation, drinking alcohol is among the most effective methods to lessen the adverse consequences of alcohol. Most people cannot have alcohol cause an effect on their bowel movements if they restrict their consumption of alcohol to a manageable amount.

The safety limits for drinking alcohol are set in the Centers for Disease Control and Prevention (CDC). Women are allowed to drink this is just one drinking per day, at maximum. Males are allowed to drink 2 drinks of alcoholic beverages every day.

How do you develop a personality that remains balanced?

It is recommended to eat a meal prior to drinking alcohol to lessen the impact of alcohol on the stomach and the intestines. Food is beneficial in slowing down the absorption of alcohol as well as keeping it out of the stomach’s internal walls and walls.

Foods that are acidic, spicy, or fried could cause irritation to stomachs when consumed in conjunction with alcohol. The possibility is that having sufficient food in the stomach could aid in reducing some of the negative effects that alcohol has on your body.

What is the right time to speak with an expert in medicine?

If you drink excessive amounts of alcohol, you might experience diarrhea for as long as 48 hours. It is anticipated that alcohol has no effect on your body once it is metabolized.

If diarrhea lasts longer than 48 hours it can cause dehydration as well as other health issues. Treatment and medical advice might be required for an individual. It is possible to rehydrate through the oral route to replenish electrolytes and sodium lost.

Constipation can be relieved through drinking lots of fluids or eating meals that are high in fiber as well as engaging in physical exercises as well as other methods. Constipation that persists can be addressed with a mild laxative that can be purchased from a pharmacy with no difficulty.

If you notice bloody stools or if you notice that bright red blood is present in your stool longer than two days, you must see an emergency physician immediately. These symptoms and signs could indicate an illness that is more serious.

Are there other possible consequences of drinking red wine to your body?

Red wine is produced by extracting the juice of dark-colored whole grapes before making it ferment. It may have an excellent or negative impact on your body dependent on the amount you’ve consumed.

A few such effects can be described below.

A healthy digestive system is due to its antibacterial qualities that can treat any digestive problem you might have. According to the US National Library of Medicine, the polyphenols found in wine may even slow or slow the progress of inflammatory bowel diseases within the colon and small intestinal tract.

Regulator of blood sugar – A substance of Resveratrol which is also located on the outside that is found on the grape is thought to regulate blood sugar, cholesterol and systolic blood pressure levels.

It slims you down– It’s also an effect on your body that is visible just like the black urine. This is why the compound called piceatannol needs to be used in conjunction with it since it acts to reduce the amount of fat cells that are in your body. A study conducted in 2014 on overweight people has demonstrated the beneficial effects that red wines have on the human body.

Healthy heart – US National Library of Medicine is also confirming with other studies that the substance the wine’s resveratrol resulted in significant reductions in heart conditions like hypertension, coronary artery diseases, and arteriosclerosis when consumed regularly tiny amounts of wine red.

Despite the numerous benefits previously mentioned, however, it is important to be careful to consume only moderate quantities of red wines if you’re a regular drinker since excessive consumption of red wine can have a negative impact on your body.

The black stool isn’t the sole concern If you drink often. Drinking large quantities of red wine may cause vomiting, seizures blackouts, or issues with staying on track.

It may also trigger liver as well as heart and pancreas-related issues. If you continue to use it, it can cause cancerous growth. This is why you must be aware of your limits.

Other causes that could be responsible for black Poop

We’ve now covered the relationship between black piss and red wine it’s time to discover different reasons why your stool could become black.

Although black stool as a result of drinking red wine is not a problem, if you find that it’s not the case, then it might be pointing to a critical issue within your body.

Bowel ischemia, which is a limitation of blood flow to the intestines, could cause your stool to become black and tarry. It could also indicate that there is a problem with blood circulation in your digestive tract that requires medical attention.

In these cases, particularly when your poop appears distinct from the normal color, it’s recommended to talk to your doctor.

Another possibility is that of ulcers or another name that you are familiar with gastritis could be. Gastritis that is mild is treatable but if it progresses into an ulcer, and then causes bleeding, the blood can mix with your digestive fluids, and alter your stool too.

If, for any reason you notice that your stools appear bloody, seek medical attention right away. Most of the time, bleeding in the upper portion of your digestive tract is the reason for black stool.

In addition, if you’ve noticed that the black poop you’ve been experiencing has begun happening recently after you’ve started taking medication, it could be the cause.

Certain medications, including bismuth-based medicines and iron supplements, could make your poop more dark than normal as determined by the Department of Pharmacy Services in California.

If this is the case, don’t worry too much.

How can I treat and prevent black stool?

The answer will naturally depend on the reason for your stool being black. The treatment according to what color your stool is could be beneficial, however, should you have an underlying illness, it could cause a lot of problems.

If you think your stool’s black is the result caused by drinking red wines, then you must do the following:

Drink plenty of water- Water can not only aid in helping the poop to return to its original color but it will also aid you in getting rid of your stool easily.

Consume fibrous food – Fiber can improve the texture and color of the stool. Fiber-rich foods include numerous fruits such as mangoes, citrus fruits, raspberries, and pears or you can even try vegetables like artichokes and beans or whole grains.

If you’re suffering from another illness, or if drinking red wine isn’t the reason, the most effective way to manage your stool issue is to first treat your illness with the help of the doctor.

If you’re not seeing stool as a consequence of drinking red wine this could be the reason:

Seat baths are extremely warm and shallow baths that will purify your perineum. It’s advised if you have hemorrhoids. It is done under medical supervision.

Antibiotics– When ulcers could be the root cause of the problem, your physician may recommend that you use antacids that reduce acidity and immunosuppressant medications.

Surgery – A surgical repair may be required if the cause of digestive issues system is the only choice.

Wrapping up

In this post, I’ve offered answers to “does red wine make your poop dark?” and the reasons for this.

You’re probably wondering whether you should consume alcohol or wine. And also how much should you consume?

The American Heart Society clearly states that although the moderate intake of red wines can provide health benefits, excessive consumption can be harmful.

A moderate amount is about 2 to 3 small glasses a day. Keep an eye on the fact that it’s recommended to consume it at a minimum of one to two days every week to ensure you are not overdoing it. Too much of anything is bad, as they say!


What Does Ratatouille Taste Like?

Ratatouille

What does Ratatouille taste like?

What does Ratatouille taste like?

What does ratatouille taste like? Does it taste good? If you want know the actual answers to all these, you should go through this post now.

To begin with, perhaps the aroma of ratatouille makes you think of the Pixar animated film Ratatouille! The film was the first time for many people to learn about this delicious dish, and also its pronunciation.

If you’re not familiar about it, ratatouille can be described as a kind of stew made from vegetables that was developed in France. The dish is made up of only vegetables and is delicious which is why it’s a match to be a perfect meal for vegans.

It is also perfect for anyone who is on an exercise program to lose weight since it is loaded with nutrients and is low in calories. What is ratatouille’s flavor like and what exactly is this delicious dish? Ratatouille is actually the name of a stew made from coarse ingredients that originates from Nice, France.

The recipe comes in many variations, but usually has lots of tomatoes, onions, zucchini as well as garlic and capsicum. The vegetables are usually cooked in olive oil and are seasoned with thyme and oregano, marjoram, bay leaf, and basil.

Ratatouille is a scrumptious recipe that is enjoyed as a complete meal by pairing it served with bread, or as a sauce for pasta. It is also used as a dish to accompany eggs or chicken. The ingredients are mixed together in the pot along with garlic and olive oil prior to serving over rice or spaghetti for the main dish.

But what does ratatouille taste like? To learn more about this recipe that is perfect for evening meals at home continue reading.

What is Ratatouille?

Ratatouille is a food item of France, having a Provencal origin.

The name is derived from the word “ratte” meaning “rattail,” which means throw in this context.

Though it’s to be one of the Spanish national meals, the ratatouille recipe was developed in the hands of French chefs who came from Provence and Nice while working with Italian recipes that they learned from the local chefs.

In France the traditional ratatouille dish is eaten as hot dish during summertime, served with bread, boiled potatoes or green salad.

Similar to other dishes that simmer for long periods (such like Cassoulet). It is made of the staples of your kitchen: onions, tomatoes, garlic fresh herbs such as basil leaves and thyme leaves and olive oil.

Additionally, you’ll require zucchini and eggplant to compensate for the fact that you left out the other half of its classic ingredients, which is sausages and peppers.

Ratatouille is also delicious cold in the summer months. It is consumed as a main meal or as a side dish.

It is often served with cheese, which is either sprinkled over the hot ratatouille just before serving or added while the cooking.

Why is Ratatouille famous?

Ratatouille is a cult Disney film about a curious Rat named Remy who finds himself in love with food.

The dish and the movie are named in honor of the French Provencal stew, often served with “ratatouille,” or vegetables and eggplant.

It was nominated to win the Academy Award in 2007 for Best Animated Feature Film of the Year. It also earned Pixar their first Oscar since the time it was first launched.

Since the film was made public in 2007, the animated film has been making waves.

The dish became well-known on the streets of the actual world. The plates are now available in Disney World, Disneyland Paris and Tokyo Disneyland.

It’s also an option on the menu at many restaurants across America which includes Denny’s along with Le Pain Quotidien.

Are you a fan of Ratatouille?

While it isn’t clear if ratatouille can be beneficial for you, this dish sounds delectable.

This easy recipe, from The Kitchn includes zucchini and eggplant as its primary ingredients, with garlic tomatoes, onions and thyme completing the list of ingredients that give it a delicious flavor.

The ingredients in this recipe are all healthy for you.

Eggplants are high in nutrients and antioxidants such as vitamins A and E , as well as an adequate amount of B-complex vitamins which aid metabolism.

Zucchini is low on calories, and does not contain cholesterol or saturated fats.

It does, however, have lots of fiber (making it more nutritious than potatoes) If you’re trying to control the weight you put on, zucchini can be helpful in that regard too.

The tomatoes are a great source of vitamin C and lycopene which are both known to prevent cancer.

In addition it has antioxidant properties and iron, calcium, and omega-3 fatty acids, along with other nutrients.

Ratatouille is beneficial for your health since it is healthy and packed with vitamins which a diet based on must-have vegetables. However, if you’re not interested in all the veggies that are in it, you can substitute with whatever that best suits your tastes.

What does Ratatouille smell like?

To answer your question, the dish is a fragrant mixture of various vegetables.

Ratatouille smells like garlic, onions tomatoes, herbs, and onions which have been sautéed in olive oil to the point that they become soft or slightly browned along with herbs like thyme or parsley.

The dish is sweet in flavor from the juices of tomatoes and onions along with a spicy flavor because of black peppercorns.

There are also smell of bay leaves making ratatouille by itself and will impart an earthy smell of the bay into your kitchen.

Does Ratatouille Have Meat?

Ratatouille is a dish that is vegetarian and is not made with meat. As I have already mentioned, it is the name of a French recipe that is made of stewed veggies, generally consisting of onions, tomatoes garlic, bell peppers.

There’s not a mention of meat anywhere in this vegetarian meal.This means that there’s no animal products in the ingredients list.

What is Ratatouille Smell Like?

Ratatouille is a French food that is made up mostly of vegetables. The literal translation of ratatouille is “to mix” as well as “toss.”

Ratatouilles are generally eaten as an appetizer along with bread; however, they are also eaten by themselves.

Ratatouille is a distinct flavor and is difficult to define.

It’s composed of an acidic mixture that contains zucchini, eggplant and tomato sauce that are cooked until full of flavor.

The food is typically served warm so that the flavors to mix and get more intense.

While ratatouille may have a distinct flavor than other cuisines, it is very well-loved around the world due to its distinctive taste.

It’s a great source of veggies that contain vitamin A and C like broccoli and spinach as an example.

This makes it a fantastic choice for those looking to eat healthy food while tasting new foods.

What is the relationship between Ratatouille and couscous rice?

To make a traditional French dish, ratatouille pairs well with couscous, or rice or potatoes.

Ratatouille is typically served as a dish to accompany meat dishes such as roast lamb or beef stew.

Ratatouille is a great dish to serve as a stand-alone dish with bread that can be used to scoop up the veggies to serve as an appetizer.

Ratatouille is also delicious when transformed into sauces, soups and dips like tapenade, gazpacho, or the baba the ghanoush.

How do you make Ratatouille?

If you’ve not had the chance to cook ratatouille you can try it as some variety.

It’s a simple and delicious recipe made from zucchini, eggplant and tomatoes simmered with olive oil and herbs.

This is how you can make Ratatouille:

Set your oven’s temperature to 190°C (375 degreeF). Cut the tomatoes, eggplant, zucchini, and squash into 1/16-inch round pieces. Tip: Don’t stress about perfect slices; any pieces that are uneven will be fine.

A 12-inch oven safe skillet at medium-high heat, add olive oil and followed by the onions, garlic and peppers. Then stir for 10 mins or until they are tender Then sprinkle salt and pepper. Mix in tomato sauce on the heat to a low. Stir in basil and keep stirring until the sauce is poured onto an uncluttered surface to form an even layer.

Lay the cut vegetables in different patterns over sauce, starting from the outer edges towards the middle. Season them using salt and pepper. To season your herb Mix basil, garlic parsley, thyme salt pepper olive oil, and salt in small bowl.

Spread the veggies over before wrapping the pan in aluminum foil. Bake for about 40 minutes with the foil uncovered (for another 20 minutes) until the vegetables soften.

Ratatouille is a great choice for the main dish or as a side. It’s delicious the next day when it is served warm with foil, then and then reheated in the oven at 350F for approximately 15 minutes or heated up in microwaves until the temperature you prefer.

Wrapping up

What does Ratatouille taste like?

So, what does Ratatouille taste like? Well, I have already talked about it in details, so will not repeat it again. At any rate, Ratatouille, an iconic French dish ,can be prepared with numerous ingredients and tastes.

Famous food writer John T Edge, in a recent article says, “Ratatouille isn’t about eating or tasting; the focus is on cooking.”

Ratatouille comes in many styles and flavors that are based on the regional cuisines and ingredients. So, it is a good idea to make your own version something that suits your personal taste and preference..


How Long Do Sprinkles Last?

sprinkles

How Long Do Sprinkles Last? Do Sprinkles Go Bad? 

How long do sprinkles last

How long do sprinkles last? Do sprinkles go bad? I am sure such questions crop up in your mind before you go to buy or cook a dish with these ingredients. Read on if you have no idea.

Sprinkles might not be the best, but they definitely created desserts that looked vibrant and enjoyable. And that’s what matters!

If you’re an amateur baker, you’re likely to include them in your list of dessert-related add-ons.

If you’re a responsible baker, among the initial issues to ask is how long can sprinkles keep?’ Well, sprinkles are typically more durable than the majority of other dessert additives.

However, they can also spoil, so you should be aware of what you should be looking for to tell if you need to throw away a batch of sprinkles.

The most crucial thing to do with any food is knowing the components of its food as they influence the shelf-life. For sprinkles, they’re basically attractive confectionery pieces which is made from sugar, cocoa, cornstarch and an emulsifier.

Sprinkles get their color thanks to the aid by food coloring substances. This, along together with sugar that gives sprinkles their longevity.

How Long Do Sprinkles Last? Do Sprinkles Go Bad?

Like any food item that is packaged sprinkles will come with an expiry time which can last for months or even a one or more years. If stored correctly you are able to make use of this sweet treat until the date the manufacturer claims that they are safe to use.

However, even when the date is passed, there’s a good possibility that the old batch of sprinkles are still edible. It’s all about the proper storage of them and that too in a sealed container.

Sprinkles are said to be useful for up to 3 years beyond their expiry date If you seal them correctly and keep them in a safe place.

There are food critics who affirm sprinkles (like any other sweets) are not rotten for any reason. This is certainly true to an extent.

If the sprinkles are composed with poor quality sugar or other low-quality ingredients, it’s likely that they’ll spoil faster than later.

But, if they’re made from top-quality materials is likely to can be used for many years provided they are stored properly.

The idea that sprinkles do not go bad even if you don’t use them is our argument. Sprinkles are probably safe to consume for a long time (again it depends on whether you store them in ideal conditions).

But, they’ll begin to lose flavor with time, regardless of whether they are actually rotten. Sprinkles will also change their texture when stored in a prolonged manner.

As I have been harping on about how crucial it is to properly store this sweet treat, here’s the reality. Sprinkles don’t do well in a place which is humid, hot, or if you let them sit at ambient temperatures following refrigeration.

Food items generally can last longer when kept refrigerated or frozen. The same can be done with sprinkles; however this doesn’t extend their lifespan.

However, refrigerating them causes them to melt more quickly when you open them and place them on desserts which are to cool. Sprinkles frozen in the freezer may be more suitable.

But, the best environment for storing sprinkles, so that they don’t spoil, is at room temperature (preferably in a dry and cool area).

How to Tell if Sprinkles are Bad?

It is essential to recognize the signs of spoiling or bad sprinkles, because if you don’t, you could be at risk of health issues. A few signs to look for include:

Sprinkles are a source of oil. This causes them to develop a strange smell after they’ve gone bad.

The easiest way to determine that sprinkles aren’t performing of the highest quality is to observe variations in the color. As time passes, they’ll tend to lighten. Some wrinkles may appear to be spots.

Another method to detect good sprinkles is to be able to feel their texture. Sprinkles that are of good quality appear firm and crisp when you bite them. If they get rotten they become soft and spongy feel.

Sprinkles stored for too long will have dry-looking appearance. If you chew on the sprinkles, you’ll see that their taste has diminished.

The signs above suggest that the sprinkles are rotten. But, as bad as the contents of this confectionery may be, they might not be enough to trigger any major health concerns.

You are nevertheless advised to avoid using sprinkles that aren’t in their best health.

Can you refrigerate sprinkles?

You can indeed store sprinkles in a refrigerator. Sprinkles have a decent shelf-life when stored in the pantry. It isn’t recommended to keep them refrigerated unless the pantry is an option. Place your sprinkles inside a zip lock bag or air-tight container in the refrigerator.

To keep your baked goods refrigerated or desserts with sprinkles, cover them in a plastic sheet. This prevents the sprinkles from taking on unpleasant odors and also prevents them from melting once they leave the refrigerator.

Can you freeze sprinkles?

Sprinkles can be frozen however it is not advised. The reason is that freezing temperatures affects the texture of the sprinkles upon thawing.

If you’re planning to store your sprinkles in a freezer ensure that you place them in a sealed air-tight container or zip-lock bag. To let them thaw, place the bag or container with frozen sprinkles in the fridge.

Do sprinkles expire?

Like all other food products sprinkles expire, too. Sprinkles, if stored in a shelf-stable state, can last for up to three years after their expiration date if they are stored properly. The stability of the shelf is due to the large percentage of sugar contained in the sprinkles.

So, sprinkles will not easily end up rotting or rotting until you take care of the process. After the sprinkles reach their expiration date, the quality may not be the same. Sprinkles of high-quality have a longer expiry time than sprinkles of poor quality. In the event of exposure to moisture, it can trigger the degradation of sprinkles.

What is it that makes sprinkles susceptible to expiration?

The fluctuation in temperature and the exposure to moisture makes the sprinkle susceptible to decay. If you are storing sprinkles in the pantry be sure to keep them away from sources of heat, such as direct sunlight as well as the stove top.

How do you prepare sprinkles from scratch?

Ingredients

  • 1 1/2 cups sugar powder split
  • 1 Tbsp cornstarch
  • 1 1/2 Tbsp of water, not hot water
  • 1 Tbsp of light corn syrup
  • 1/2 teaspoon vanilla extract (or any flavor you like)
  • Food coloring gel

Instructions

In a bowl mix 1 cup powdered sugar corn syrup, water as well as vanilla extract. Stir well until homogenous.

Add the remaining the sugar that has been powdered. Stir until well combined.

Add the food coloring and mix. Add more food coloring until desired hue is obtained. Colors in food have their distinct flavor, so ensure that you don’t go overboard with it.

Use a piping bag with an #4 Wilton tip using dyed dough.

Create elongated lines of sprinkle-width horizontal across two sheets of cookie that are lined by parchment or wax. Also, you can draw tiny dots or whatever shape you prefer for versatility.

The dough should be dried for at minimum 12 hours.

After drying, remove the drawn shapes of sprinkles off the papers and slice them to size for sprinkles with the sharp edge of a knife.

Sprinkle these sprinkles on baking, or for decorating cakes. Transfer them to an airtight container to store.

Wrapping up

How Long Do Sprinkles Last?

This article has addressed this question “How long do sprinkles last?” and “can sprinkles go bad? And I am sure, equipped with this information, you should be able to handle sprinkles in a much better way.

There’s a lot to learn using sprinkles, beginning with their form. The most well-known kinds of sprinkles include Nonpareils (available in the form of small balls), dragees (usually larger than regular sprinklers) and Jimmies (best known as sugar-based strands) as well as quins (in different shapes in a variety of colors, shapes, and sizes).

Sprinkles are about giving bakers an opportunity to enjoy themselves with their baked goods. Then, you can splash a lot of sprinkles onto the cupcakes you bake if you would like!

How Long Does Cookie Dough Last in the Fridge?

How long does cookie dough last in the fridge? 

How long does cookie dough last in the fridge? 

How long does cookie dough last in the fridge? 

I presume that the question  you want to ask right now is: How long does cookie dough last  in the fridge? If you’re not sure what the correct answer is, you will either give an incorrect answer, or mumble an apology saying that you don’t know. Embarrassing, isn’t it?  Yes, there is every possibility that the dough might get a little moldy, or go bad, but you can still enjoy delicious cookies for many months if you store it properly.

This question is likely to have been asked more than once if you are a baker. The answer is simple. Cookie dough can last for 3-5 days in the fridge and in the freezer for 2 months. It can also be damaged by freezing if it is too cold. To prevent this, add a lot more flour to the dough.

What is Ripening Cookie Dough?

Ripening simply refers to the process of putting cookie dough in the fridge before baking. Some recipes require a quick scary, while others call for 72 hours of rest before draining the dough. Two things are important for biscuits:

It allows the biscuits’ fat to cool down and become firm. Scary recipes often contain a lot of fat. This is because cold fat melts during baking and prevents your cookies from being too thin.

Second, and most importantly, the resting time allows the flour to fully absorb the soup liquids.

Cookie dough, unlike other baked goods, is quite dry. The majority of the liquid material comes from the eggs. Also, eggs are thick so it takes some time for the bread to eat them.

This is solved by allowing the flour to dry for a long time so that it can hydrate fully and moisten the dough.

It is similar to the autolyze method in bread baking, where you allow the bread and water to sit, but it’s about completely drying the flour. This results in biscuits that are more evenly browned and with a slightly more complex taste.

What makes cookie doughs go bad?

My mother never allowed me to eat a lot of it eggs. The main ingredients of cookie dough are the raw eggs. They keep the dough together and ensure that each ingredient is in its proper place.

Raw eggs can cause diseases such as salmonella or e-coli that can be very harmful to your health. You might be able to avoid eating a lot of cookie dough. Uncooked eggs, however, are not as dangerous once the dough has been cooked.

However, eggs can become stale over time. This makes cookies and dough bad for you. If you are aware that your cookie dough is not good, it’s time for you to make a new batch.

What is the Shelf Life of Cookie Dough?

It is a great question, but let’s get to the bottom of it. It is important to note that not all cookie dough is created equal and that there are many forms of it.

You’ll find them using different components and serving slightly different functions in your cookie dough recipes. Their shelf lives can be very different and it’s difficult to compare them.

We’ll simplify it by dividing it into three main types of cookie bread: regular frozen cookie dough, mass-produced cookie dough (believe Pillsbury), and homemade cookie dough.

You’ll be unable to answer all your questions in these three classes. However, it is possible to give you a general idea.

Keep in mind, however, that cookie contents, dimensions, tastes, and other features can alter these time periods marginally to sometimes significantly.

Past Due Date

You would expect that the date on your cookie dough would tell you when it was due.

It is a fact that cookie dough and sausages contain a lot of cookie dough, so the expiry date will be “best by” rather than “use by” or “expiry”, which can sometimes be slightly different.

. Let’s look at different instances when cookie dough can go bad.

You should know how to store it

You should also remember that cookie dough, as with most foods, can last longer if stored properly. It is best to keep your cookie dough in a small, airtight container in the refrigerator or freezer depending on whether you want to eat it.

A rule of thumb is that any cookie bread left out at room temperature for more than 2 hours will be fine. However, if it’s past its “best before” date, it might go bad.

To maximize the shelf life of your cookie dough, it is best to store it in a dark, cool place.

 Frozen Cookie Dough

It’s likely to be regular frozen cookie dough. This will be the one you buy from your child’s school fundraiser, or any other freezer section that has commercially manufactured cookie doughs.

You can usually expect the cookie dough to last for about one to two months if it is kept in the refrigerator. Frozen uncooked cookie dough can be stored in your freezer for up to 9-12 months. This gives you plenty of time to use it before it turns bad.

Pillsbury Cookie Dough

Pillsbury cookie dough is different from other cookie doughs in the sense that they are meant to be stored in the fridge for a little longer than other frozen raw cookie doughs.

You can safely keep the dough in the refrigerator for up to two weeks, even after the “best before” date. This dough is not recommended for freezing, and can last approximately 6 to 9 month in the freezer.

This type of dough will always be available to you, but it’s not necessary to freeze it.

FAQs

How can Cookie Dough be preserved to extend its shelf life?

Refrigerating cookie dough in tightly sealed containers can help retain its freshness. Place your cookie dough in the smallest possible container to ensure that air can’t escape.

If you have an airtight freezer, you can freeze your cookie dough to preserve its flavor and allow it to suspend for a longer time.

Proper food storage can help you eat well, cut down on food costs, and save the environment by reducing waste.

Why can’t you chill the cookie dough before baking?

To prevent flat cookies, chill your cookie dough prior to baking. To allow the butter to solidify, use melted butter.

This will help the cookie keep its shape during baking. You can also chill your cookie dough if it feels sticky. This will help the cookie retain its shape while baking.

What does “Aging the dough” mean?

Resting your dough is the same thing as aging it. This helps develop complex flavors. Your dough’s consistency and color will also change with age. The dough becomes more sticky and darker.

Cookies made with aged dough will be more flavorful and have a better shape. Your dough can be left to rest for 24 hours, or it can be kept for up to 2 days. Cookies made with fresh dough have a distinct texture, flavor and color difference.

Wrapping up

This article answers the question, “How long does homemade cookie dough last in the fridge?” and also explains how to store cookie dough.

Because it doesn’t contain fancy preservatives, homemade cookie dough is more susceptible to being spoiled quickly. However, freshly baked cookies melt in your mouth and are much healthier than store-bought cookie dough. Now that you know how to store cookie dough properly, you can bake cookies for your family at home. Get going!


How Long Does Pumpkin Pie last In The Fridge? 

How Long Does Pumpkin Pie last In The Fridge? 

How Long Does Pumpkin Pie last In The Fridge? 

How long does pumpkin pie last in the fridge? Is it necessary to refrigerate pumpkin pie? Can you freeze pumpkin pie? These are questions that you might ask your friends or relations during the holidays. Let’s now discuss how to freeze pumpkin pie. It will solve some of your cooking problems related to pumpkin pie.

Do you plan to make a pumpkin pie from scratch this holiday season or bring a pre-made one? It is always the highlight of a dinner when I bring it out. The pie plate is usually clean.

This year, with people still socially distancing and large holiday dinners not being held, or at least the large number of guests like other holidays, perhaps this will be my year to have dessert leftovers. Is there anyone up for pumpkin pie for breakfast?

How do you store pumpkin pie? Does it need to be refrigerated? Can you freeze pumpkin pie, if necessary?

Continue reading to learn how to keep pumpkin pie fresh and delicious.

HOW TO STORE PUMPKIN PIE

Pumpkin pie’s longevity is one of its best qualities. If stored properly, this dessert can be kept for many days. How can I make sure my dessert stays as delicious as the first time I tried it?

Before you store pumpkin pie, it must be completely cooled in the oven. Because this dessert contains ingredients that need to be kept safe from the elements, it must be covered in the fridge. I don’t want to spend the time to make or buy a pumpkin pie that is ruined.

Pumpkin pies are a custard dessert. They are made from thickening cream, milk and eggs. Pumpkin pie should be covered and kept in the refrigerator in an airtight container.

A good home cook must know how to preserve food. It would be a shame that these delicious treats don’t last for another day, especially if you have spent so much time creating beautiful recipes and baking wonderful desserts. Properly wrapping your pumpkin pie and keeping it in the refrigerator for up to 4 days will ensure its nutritional and flavor integrity.

WHAT LONG DO PUMPKIN PIE LASTS ON THE COUNTER?

Pumpkin pie must be kept in a refrigerator, unlike cookies and cakes that can stay on the counter for extended periods. Pumpkin pies, which are typically made of custard, can be left on the counter for as long as two hours.

Most pumpkin pies purchased from large grocery stores are packaged with some preservative to prolong their shelf life. Your pie can be kept on the counter for up to the expiration date if it was not refrigerated at the store. You can treat your pie like a homemade one if it came from a family-owned bakery, farmer’s market, or other local establishment.

Vegan pumpkin pies, like all of our Vegan Pumpkin Recipes have fewer safety hazards than pies made with sweetened condensed milk or eggs. However, they must be properly stored for food safety. Your vegan pumpkin pie should be treated the same way as a traditional recipe.

HOW LONG DOES PUMPKIN PIE LAST IN THE FRIDGE?

Pumpkin pie is a traditional, dairy- and egg-based dish that must be kept in the refrigerator. A pie, like any other perishable food, will last only as long as it’s stored properly and protected from the dry cold air.

The same delicious taste will be preserved for up to three days in the refrigerator. Although I limit my pumpkin pie storage to four days, some people suggest that you can keep it for up to five or six days in the fridge. It is best to consume it within the three-to four-day limit.

The Pumpkin Pie Decorations won’t last, so don’t add them to your pumpkin pie.

CAN YOU TELL A PUMPKIN PIED IS SPOILED?

It is the safest way of keeping track of the quality and freshness of pumpkin pie. This is a safe food safety practice that all commercial kitchens use to keep track of the many ingredients.

Bacteria and other pathogens that could make us sick are not visible to the naked eye. My family is safe by not taking any risks with their food. I also recommend keeping an eye on the cooling times and making sure leftovers are properly stored.

Spoiled pumpkin pie will usually first show signs in the filling. This is known as mold. If the pie smells strange or has no visible signs of being bad, it’s likely past its best before date.

CAN PUMPKIN PIE BE KEPT IN THE FREEZER?

What do you do if your pumpkin pie is in the freezer and not in my refrigerator? I save space in the freezer.

You can freeze pumpkin pie, it’s true! Pumpkin pie can be frozen for up to one year. To save time, I make several pies when baking pumpkin pie. After the pie is completely cooled, which usually takes between one and a quarter to two hours, I wrap it in food-grade plastic wrap so that it can be stored in the freezer for later.

You can also use aluminum foil or reusable wax wraps. It is important to prevent the refrigerated air from coming in contact with the pie. You can preserve the freshness of your dessert by using two layers of plastic wrap or aluminum foil.

HOW TO STORE PUMPKIN PIE IN THE FREEZER

Custard-filled pie crusts can be stored in the freezer for a long time. The pie crust is sturdy and rich with the custard fillings. They will keep their texture and shape under freezing conditions.

Make half a dozen pumpkin pie recipes and freeze them in advance to save time during the holiday season. You’ll be able to enjoy this favorite dessert anytime you want!

You can either store the pie in the pan or transfer it into a container with a lid to keep it in the fridge. You want to ensure that the pie doesn’t come in contact with the air. This will keep it fresh and moist until you are ready to eat it again.

If you wish, you can cut the pumpkin pie into smaller pieces.

I have done this before. I wrapped each slice individually in foil and frozen them separately. If you live alone, or have a small family, you can take out one or two slices at once to defrost. These won’t keep their shape as well as a cut pie, but this is not a problem if you don’t care about how they look.

My method of keeping my pumpkin pie fresh is double wrapping it. My pie is best left in its pan until it has defrosted. Then it can be put into the oven to heat up again. However, cold pumpkin pie can be just as delicious!

HOW TO THAW  PUMPKIN PIE

You might be wondering how to properly thaw pumpkin pie. It’s easy and a simple task.

I always make sure to take my pumpkin pie out from the freezer the day before I plan to eat it. After that, I move the pumpkin pie to a shelf in my fridge and let it rest. That’s it!

It will take approximately twelve hours for the frozen pie to fully defrost in your fridge. This is why it is so important to plan ahead. You won’t be able to defrost individual slices of pie unless you have frozen them separately.

If you find that your pumpkin pie has not fully defrosted, or if you are unable to see the face of the pie, you can decorate it with pie crust decorations, or add sweet Chantilly Cream.

Pumpkin pie tastes great cold, as well as warm. If you are wondering how long pumpkin pie should be kept in the fridge, it can last for up to 4 days, and up to 3 months in the freezer. However, pumpkin pie is best enjoyed as soon as possible.

DELICIOUS PUMPKIN PIED RECIPE – ENJOY

INGREDIENTS

  • 1 unbaked pie crust
  • 1 tbsp (15 oz.) Pumpkin puree (about 2 cups).
  • 1/2 cup granulated Sugar
  • 1/2 c light brown or deep brown sugar
  • 1/2 teaspoon salt
  • 2 teaspoons ground ginger
  • 1 cup ground ginger
  • 14 teaspoon ground nutmeg
  • 1/8 cup ground cloves, allspice
  • 3/4 c whole milk
  • 3/4 cup heavy cream
  • 3 large eggs
  • 1 teaspoon vanilla extract

EQUIPMENT

  • Food processor
  • 1 9 1/2 to 10-inch deep dish pie plate
  • Pie weights
  • Saucepan
  • Parchment paper
  • Baking sheet
  • Whisk
  • Cooling rack

INSTRUCTIONS

Prepare the pie crust. To bake the pie crust, heat the oven to 425°F.

Blind bake the crust.

Make the puree. Mix the pumpkin puree, brown Sugar, granulated sugar, salt and cinnamon ginger in a food processor. Blend it until all of the brown sugar is incorporated.

Combine the mixture and heat in a saucepan. Heat on medium heat. Once the steam has formed, mix the puree. Continue stirring the mixture until it turns steamy. Keep stirring the mixture until it becomes steamy.

Mix the milk with the eggs. Mix in the pumpkin mixture. Then, slowly whisk together the eggs with the pumpkin mixture in a bowl until they are smooth.

Make the pie dough. Bake the pie dough. Use the leftover pumpkin mixture to fill the pie shell.

Bake the pie.

Let the pie cool. As it cools down, it will set more quickly.

RECIPE NOTES

This pie can be made ahead. It can be wrapped in plastic wrap until it is ready to serve. Leftovers are safe to keep in the fridge for at least four days.


Top Substitute For Edamame 

Substitute For Edamame 

 Edamame Substitute

Substitute For Edamame 

Looking for the best substitute for edamame? Well, a meat-free, fiber-rich recipe with sufficient nutrition must always contain amazing beans, ranging from black beans to Edamame. But, Edamame is not the most well-known bean around the globe, which means it is possible that you won’t be able to locate this bean in your local grocery store.

If that happens to you, what Edamame substitutes can you choose to use in your recipe? This is what I have tried to answer below so that you have no trouble in finding your best substitute for edamame.

What Kind Of Bean Is Edamame?

Edamame might sound odd initially to many but it’s actually common belonging to the family of beans. Its name “Edamame” is a Japanese term for soybeans that have been ripe. It is a very popular kind of bean in Japan which is offered with stems. So, what kind beans are Edamame?

Because it is an immature soybean, Edamame beans have a smaller size, while the shape of soybeans is round. But, instead of the yellow hue of mature soybeans, fresh Edamame is bright green with a vibrant green exterior enclosed in its pod.

Regarding taste, there is an important difference between soybeans and Edamame.

Edamame generally has a nutty flavor and it is sweet because of its large levels of sucrose and amino acids during their maturation. It could be due to their early stage. Edamame is, just like the black bean provides numerous health benefits such as an abundant source of protein which is ideal for healthy eating. It also has a low level of the glycemic index which boosts your energy levels.

Additionally, there are numerous vitamins, dietary fibers and minerals within these beans.

Edamame is typically available in frozen portions in a variety of U.S. stores. The frozen Edamame is an excellent ingredient for pan-frying, boiling and steaming meals. It is possible to sprinkle salt over them and serve them in stews, salads and noodles. You can also have them for snacks in numerous Japanese eateries.

Most Popular Vegetables Used As A Edamame Substitute

Edamame is a great legume that can be a great source of fiber. But, it’s not always in your local supermarket. Let’s see what Edamame substitutes you can get to make your own simple dish with Edamame.

  1. Mukimames

The first name that appears in our list is Mukimames. This is a name that is somewhat jarring but it does have the same roots as Edamame.

Mukimames is an alternative name for Edamame, which are actually soybeans that have been taken from their pods, and then sold in smaller bean quantities. If you compare Mukimame against Edamame, you’ll see that they have many things in common.

The Mukimames are bright green in color and a small size of immature soybeans. They are firm in texture and a refreshing delicious nutty taste. They are easily found within the freezer section of freezer bags made of plastic. In contrast to Edamame, they are great to boil over the stove or steam inside the bag straight away, without the need for many steps.

  1. Fava Beans

One of the most effective substitute beans that can be used in place of Edamame is a long-lasting bean known as Fava bean, also known as Broad beans. The origins date back to the year 6,000 B.C.E., fava beans are a staple throughout the globe, including Europe, Africa, America as well as in the Middle East.

When it comes to comparing Fava beans and Edamame, both of the fantastic beans also have similar texture and flavor.

Like Edamame, Fava beans are grown in pods of green. They have a slightly oval shape and they have a light green skin. Fresh Fava beans have a light and smooth texture. Their flavors are a blend of sweetness, bitterness as well as have a slight hint of cheese.

There are two kinds of fava beans, dry and fresh fava beans. The dried beans are less flavorful. taste and texture, with grainy texture.

Fava beans can be used in a variety of Edamame recipes, including soups, stews and salads.

  1. Garbanzo Beans

Garbanzo beans, also known as chickpeas, are an excellent alternative to Edamame due to their texture. The taste of Garbanzo is quite diverse and can be substituted for the ranch-style beans. It is important to note that Garbanzo beans could have an ecru color, which is distinct to Edamame green skin, which is why it is possible to put the beans into salads.

For stews and soups, Garbanzo is a great source of fiber and protein. Garbanzo beans can provide additional flavors to your dishes by bringing out the earthy and nutty and lively taste. You’ll find it smooth and lightly grainy after you take a bite, which will fill your mouth with the same flavor as Edamame.

  1. Sugar Snap Peas

This pea variety that has a catchy name is a fantastic Edamame alternative due to its similar appearance. However, are snap peas exactly like Edamame? Not really. Actually, they’re two beans that have their distinct characteristics.

The snap peas can be described as a mixture of garden peas as well as snow peas. In the case of comparing sugar snap peas against Edamame, snap peas can be a great substitute for Edamame in dishes that are savory because of their similar taste.

Snap peas are sold in green pods, with the shape of a round, thick pod walls. As with Edamame, sugar snap peas appear also green and tiny, with a distinct sweet taste.

Comparing snap peas with Edamame, once cooked sweet peas tend to be crisper and juicier, and they make a “snap” sound when you take them in. They can be used for snacks like Edamame or cook in soups and stews.

  1. Lima Bean

Are Edamame similar to Lima beans in terms texture and flavor?

If you are a fan of the creamy as well as soft feel of the roasted Edamame and want to try it, examine Lima beans. Also called buttery beans, this kind of bean, with high levels of amount of fiber and protein, is bigger than a smaller soybean. They are often green when they are young but turn white once they reach maturation.

Lima beans are regal and earthy flavor which you will not get in other bean types. When you crush it with the teeth, the creamy and smooth texture fills your mouth and makes them a possible Edamame substitute.

Due to its texture they can be used as a meat-free option as well as stews, soups and soups together with other veggies.

  1. Green beans

If you are looking for a bean that has a green appearance, it is also possible to use green beans in your roasted Edamame dishes. They’re typically available in their yellow and green skin.

Fresh green beans usually are firm and can be cut into half. If they become slimy, you must keep them in the refrigerator. Green beans are bright green in color, which is suitable for salads. They are crunchy and starchy, making them perfect for steaming and sautéing recipes.

FAQs

  1. Snow Peas Vs Edamame: Are They Same?

Soybeans and snow peas are legumes that have edible seeds in the pods. This is why they are difficult to distinguish. But, both legumes come from different species and environments. The hard peas have more of a crisper texture in comparison to Edamame.

  1. Can You Use Edamame As A Broad Bean Substitute?

As we’ve learned, Broad beans, also known as Garbanzo beans share a distinct flavor like Edamame. There is no reason not to make use of broad beans as a substitute for Broad beans. They are perfect for various stews and soups which call for the use of endamame.

  1. Is Edamame beneficial or harmful to your health?

It is an excellent source of protein from soya. Edamame is also rich in antioxidants, healthy fiber and vitamin K. The plant’s compounds can lower the risk of developing heart disease and boost blood lipid profile, which is a measure of fats, including cholesterol as well as triglycerides.

  1. Is there any alternative name for edamame?

Endamame is actually a Japanese term for baby soybeans either fresh or frozen.

  1. Where can you find edamame in a the grocery store?

The most frequent place to find edamame is the frozen section in the supermarket. You can look in the freezers alongside the other vegetables, or in the natural food section that is frozen.

  1. How can you tell the differences between edamame and broad beans?

Edamame beans are completely unripe, vegetal-type soybeans (Glycine max) while the Faba (fava) beans also known as broad beans (Vicia faba) which are cream-colored with flattened and colored beans.

  1. How can you tell the differences between soybeans and edamame?

The distinction in soybeans and edamame lies in the maturity level at the time when the bean is harvested. The mature soybeans have a cream color whereas edamame can be harvested when the beans are fresh, soft and green.

  1. What does edamame taste like?

What Does It Taste Like? Although edamame is the exact soybean that makes tofu, it is more flavorful as opposed to the plain bean curd. It’s a little reminiscent of peas, and it is creamy with some sweetness and some nuttiness. Its texture is more firm than peas, but soft but still with a bit of bite.

  1. How do you cook frozen edamame?

Six cups of water should be brought to boiling in a large saucepan with 1 tablespoon of Kosher salt. When the water has reached the point of boiling, add 2 cups of frozen or fresh edamame. Cook for five minutes (you do not have to wait for water to come back to the point of boiling before you begin timers) until they are tender, and the pods release easily out of the shell.

  1. Do rabbits consume Edamame?

Rabbits are fond of edamame. They consume the beans from the pods.

Wrapping up

Substitute for edamame

Edamame is green pod beans with great taste and texture. However, they’re not always readily available in many countries. If your recipes call for Edamame, you can easily check out the best substitute for edamame to pick the most suitable ingredient for your fiber-rich dishes.


Where To Find Ladyfingers In The Grocery Store?

Where To Find Ladyfingers In The Grocery Store?

Where To Find Ladyfingers In The Grocery Store?

Where to find ladyfingers in the grocery store? If you have no idea, you should go through this post carefully, as I have detailed everything in this blog post for your benefit.

Ladyfingers are among the most important ingredients used in the making of tiramisu, can be difficult to locate in the grocery shops. The good news is that this article is going to give you information on how you can find ladyfingers at your local grocery stores. The article will also provide a list of the most well-known stores that sell ladyfingers. You can buy ladyfingers from any one of them close to your home.

What is a ladyfinger?

Ladyfinger is also referred to as sponge fingers are dry, low-density egg-based sweet sponge cake that has the shape of finger. Ladyfingers from Italy are called Savoiardi and in French terminology they are referred to as Boudoirs. Ladyfingers are typically used as an ingredient in desserts such as trifles, tiramisu, and Charlottes.

Which aisle or section should I find ladyfingers in the grocery store?

In the first place, ladyfingers can be found in a the supermarket is in the section for bakery.

If you can’t find ladyfingers in the previously mentioned spot, the next area that you will find ladyfingers in the grocery store is in the aisle for snacks. This is due to the fact that many people consume ladyfingers as snacks.

Which grocery stores carry ladyfingers?

Amazon is a great place to find various brands of ladyfingers available on Amazon. The benefit of shopping through Amazon is that it’s an online retailer, so you can shop for everything at the convenience at home.

Kroger–Ladyfingers can be available at Kroger and the brands they typically carry are Delallo Savoiardi and Alessi. Kroger also offers an online store where you can purchase ladyfingers in the comfort of your home.

Walmart–There are ladyfingers at Walmart and other well-known brands you’ll find comprise Goya as well as Balocco. If you don’t know the location of a Walmart stores in your vicinity, then make use of their online store finder to locate the closest grocery store that stocks ladyfingers.

Whole foods market – you will also find ladyfingers in the Whole Foods market where they are sold in different stores.

They have their Ladyfingers from their own store that you must try out.

Ethnic markets- If there are any markets of ethnic origin, especially those that offer Italian as well as French ingredients, there’s a possibility that you’ll find ladyfingers in the market. It is due to the fact that ladyfingers are often utilized when making Italian and French desserts.

Publix–If there’s an Publix store near you, then you can purchase ladyfingers from there. They typically carry brands like Alessi and you can shop there.

Safeway–If there’s an Safeway store in your neighborhood, then you can purchase ladyfingers there. They generally carry brands such as Vicenzi and others, however you can get other brand at the store.

King Soopers— ladyfingers can be purchased on King Soopers. If you’re in search of a specific brand , go to their website. They typically provide the options available.

H-E-B– You can find ladyfingers at H-E.B. The brands typically are available comprise Vicenzi as well as Bonomi Savoiardi.

Vons–At Vons, you can buy ladyfingers. They occasionally have them in their stores.

Piggly Wiggly- ladyfingers can be purchased on Piggly Wiggly and one of the brands you’ll encounter are the Alessi brand. However, they generally carry a variety of brands on display.

Hannaford —You can get ladyfingers in Hannaford they will usually offer them in the store.

Ralphs- ladyfingers are available at Ralphs and usually they offer a range of brands available.

Fred Meyer- you can find ladyfingers at Fred Meyer, they usually carry ladiesfingers from the Alessi as well as Delallo Savoiardi brands of ladyfingers.

Wegmans–The Wegmans ladyfingers can be purchased in Wegmans and if you’re looking for a particular brand, simply go to their website to see what choices are available.

Albertsons –typically have ladyfingers in stock and you can buy at the store.

How do you use ladyfingers?

Make use of lady fingers to make tiramisu.

A lot of people buy ladyfingers in order to make tiramisu. It dessert is an Italian dessert made with ladyfingers that have been coated in coffee and then layered with whipped mix consisting of eggs, Mascarpone, cocoa and sugar. For tiramisu ladyfingers are the most important ingredient, so when you next have left over ladyfingers, you can make this well-known Italian dessert.

Make use of ladyfingers to make trifles.

If you are making a trifle at home, don’t forget to include ladyfingers. They can give flavor and consistency to your trifle. Ladyfingers are a great ingredient to incorporate into making desserts. This is due to the taste of ladyfingers is a great blend when it is paired with sweet ingredients.

Make use of ladyfingers when decorating an ice cream cake.

For decorating your ice cream cake , you can just use the ladyfingers. To do this, you need to place the ladyfingers on the edges and on near the base of the cake. The next step is to pour the Ice cream in the pan, or into the tin prior to placing it in the freezer. When the ice-cream cake is done then the ladyfingers will be firmly been stuck on the cake and shaped an attractive shape.

Use ladyfingers to make the cake

If you’re short of time to whip up a quick cake then use ladyfingers. To make this cake, just line them around and on the bottom in the pan. The next step is to put layers of whipped cream or any other filling you like. You could also add fruits like strawberries prior to placing another layer of ladyfingers. Repeat this process until your cake is at your desired size. Let the cake cool in the refrigerator for a short time before serving it.

Wrapping up

So, where to find ladyfingers in the grocery store? Well, I have already answered that. Ladyfingers are available in a variety of supermarkets as mentioned above.

It is important to mention that many of the stores listed in this article are an online store. This means you can determine if the brand you like best of ladyfingers is sold prior to actually visiting the shop.


Where Is Quinoa In Grocery Store?

where is quinoa in grocery store

where is quinoa in grocery store

Where is quinoa in grocery store? And you have no clue? Are you scouring the shelves of your local grocery store for the quinoa? We’ll help you find the aisles to look through so that you can get it in a hurry.

We’ll also let you know the stores that carry it.

Which grocery store aisle is quinoa in?

Different stores will be able to place quinoa in different locations. It’s best to start in the rice aisle before moving into the shelves for blended rice mixes that are seasoned, as well as other alternatives like Couscous.

If you aren’t able to discover it there, the next place to search is the aisle for gluten-free products. Some grocery stores have gluten-free sections outlined by aisle signs and because quinoa is an ingredient that is gluten-free is often stored in those aisles.

If your local grocery store offers a bulk-buy it is possible that quinoa will be available as well. The purchase of quinoa in bulk will make it easier to save money, which is beneficial for those who incorporate quinoa into your diet regularly.

Some grocery stores even have the “health food” section and include quinoa in that section. Wherever you discover specialty diet items could be the place where quinoa is stored.

Also, it’s possible to find quinoa that has been cooked on the shelves of frozen. Most often, these kinds of quinoa are paired with vegetables and spices however, sometimes they’re just pure.

In addition, there are prominent places to sell quinoa. We’ve listed them below.

What stores sell quinoa?

Amazon If you’re looking for shopping online for bulk pantry products, Amazon is your source. You can purchase a 4-pound bag of quinoa, search for special blends and varieties and even shop around for the best prices.

Walmart offers quinoa products under the Great Value brand. You can locate Great Value Organic White Quinoa and several other brands within the shops (use the store finder found on the website to verify that the product you are looking for is available at the Walmart close to your location).

You can find it at your Local Health Food Store — The mom-and-pop natural food stores almost all the time offer the quinoa. They might also have this in bins in the bulk.

Whole Foods – Whole Foods certainly has quinoa, with the exception of the brand 365 Everyday Value Organic White Quinoa and frozen Quinoa (plus different brands).

The Trader Joe’s – the Trader Joe’s is another grocery chain retailer that has its own quinoa product, including Organic Sprouted Tricolor Quinoa.

Target— If you own an Target in your vicinity the rice and pasta aisles are in which the Simply Balanced Quinoa varieties are. There is also prepared quinoa in the freezer here.

Safeway— The store Safeway sells Quinoa from brands like O Organics and Bob’s Red Mill.

Costco –the customers can purchase Kirkland Signature Organic Quinoa.

Stop & Shop – There are many dry quinoas available on sale at Stop & Shop from TruRoots, Eden Organic and other brands.

Kroger – The natural food department of your Kroger supermarket should have the quinoa.

Publix offers Ancient Harvest and GreenWise quinoas. Check out the store locator online to check out what’s in the grocery shop.

Quinoa Varieties

It is in South America where it grows naturally. The colors most often available are black, white and red, as shown here.

Each species has a wonderful nuanced taste. However, red quinoa is the one that is the best, and that black variety can be a bit sweet. The texture is also different. White is soft, black is crunchy and chewy, while red is a bit more dense and chewy.

Enhancing Flavor

Toasting quinoa deepens its flavor. To do this, put your seeds into a clean pan on the stove, and set the temperature to low. Mix the seeds for approximately five minutes until they begin browning and popping. Remove them from the stove as a nutty scent is sprayed throughout your kitchen.

To cut down on preparation time and to speed up the process, toast a large quantity and store it until you are it is ready for use. After toasting, let for the seeds to cool. After that, store the seeds in an airtight container within your refrigerator, and use them within six months.

Removing bitterness

Quinoa is coated with a protective layer of saponin, a bitter tasting substance that has a soapy taste. Scientists believe that saponin hinders birds from eating the quinoa. In the same way, if you don’t get rid of saponin before cooking and cook it, the flavor is bitter.

Fortunately, getting rid of saponin isn’t a problem. Place the seeds into a fine mesh sieve and place it in the kitchen faucet. After that, thoroughly wash the quinoa in cold water. Use your fingers to separate the seeds. Place them in the faucet for about a minute until the seeds are free of its soapy layer. Then shake the sieve to eliminate any excess water.

Cooking Quinoa

Quinoa cooks quickly it takes about 15 minutes in total. Make it the same way as pasta, with the exception for one key difference. Don’t include salt in the water that is boiling. If you don’t, the salt will hinder the seeds from fully expanding. If that happens the quinoa will appear like half-popped kernels.

To cook the whole grain, begin by measuring the amount of water and the seeds in the ratio of 2:1. Place the water in the large pot on the stove and heat it up to a boil. After that, add it and allow it to simmer at a low temperature for approximately 15 minutes.

Once the kernels have started to pop off, you can take a small spoonful of them to determine if the cooking process is finished. The first step is to look for clear rings of white and “tails” around the cores. Take one bite. If the meat is soft, take it off the stove.

This is a second crucial step. After removing the pot off the cooker, place it on top of it and allow it to rest for approximately 10 minutes. In this way, steam will increase the size of the kernels. Then, using a fine mesh filter, remove any remaining water. Then, you can fluff it and then separate the seeds using the aid of a fork.

If you’re squeezed for time, you could go for Quinoa flakes, which are seeds that have been flattened. Quinoa flakes are cooked in about 2 minutes, resulting in an extremely creamy and smooth in texture and texture similar to instant oatmeal.

Quinoa Cuisine

Include this cooked grain in meals and snacks, such as breakfast lunch or dinner. It’s great with casseroles, salads vegetables, pilafs, vegetable dishes as well as soups, plant-based patties, stews, tacos, and tacos. Quinoa is a great choice for breakfast, and serve it with fruits. It can also be added cooked or milled to breakfast and baked goods like waffles, pancakes and muffins pizza crusts, cookies and bread. Here’s a selection of tasty recipes.

Precautions

In a bag of uncooked quinoa, even the smallest saponin residue could smudge the contents. Even if a label that says it’s washed and rinsed, make sure to rinse it again prior to cooking. This ensures that saponin doesn’t ruin your taste buds.

As previously stated earlier, it contains significant amounts of fiber. Therefore, you shouldn’t overdo it with a cup of cooked rice for each meal. If you don’t your digestive tract could be irritated by cramping, bloating or constipation. If you’re someone who doesn’t consume lots of fiber, begin with half-cup portions of it for approximately two weeks.

Top Ways to use quinoa

Make Veggie Burgers

The greatest feature of veggie burgers is they provide vegans with an unending menu. They can be made of any type of plant, grain, or even vegetable. Try the black beans and quinoa recipe in this video. You can also make pan-fried Quinoa cakes (equally delicious) and then smother them with your favorite vegetable hamburger sauces.

Make Pancakes

We all know that pancakes can make any breakfast unique However, did you have the knowledge that quinoa flour could create some of the lightest and fluffiest pancakes you’ve ever had? These delicious blueberry pancakes are sure to start your weekend off with a bang.

4 Special Quinoa recipes

VEGGIE LOADED QUINOA DRIED RICE

This deliciously simple and healthy cooked quinoa rice is loaded with vegetables and full of flavor. A quick and easy dinner for a weeknight that everyone will appreciate and enjoy. It is probably one of the most nutritious quinoa recipes!

CANNELLINI BEAN QUINOA KALE SOUP

Warm, comforting, hearty, this soup made of kale with cannellini beans and quinoa will keep you satisfied for many hours. Gluten-free, vegan, and most importantly, you’ll only need one pot to clean! The addition of quinoa to the soup can make it into a full-bodied dish.

SPINACH SALAD with QUINOA and BLACK BEANS

This tasty spinach salad made with the quinoa and black beans and roasted delicata squash brings together tastes that are as delicious as they are healthy. The nutritious green salad comes alive with delicious, tangy dressing made of cumin!

CAULIFLOWER QUINOA MEATLESS MEATSBALLS IN COCONUT TURMERIC SAUCE

Cauliflower Quinoa Meatless Meatballs with Coconut Turmeric Broth – A delicious vegetarian meal idea that is an excellent way to experiment with different spices. This is among the most popular Quinoa recipes.


Related post: What Does Quinoa Taste Like?


How Much is 4 Quarts of Water?

How Much is 4 Quarts of water?

How Much is 4 Quarts of water?

If we are cooking regardless of what the dish is, there will be an application for water. It can be a bit complicated at times when we don’t know exactly the amount of water needed. It could be that the recipe originates from a different nation or has been translated badly and you’re confused about how much water you’re supposed to make use of.

In all likelihood, I would also have asked the same questions: what amount of drinking water will I actually require? What is four Quarts of water? How do I determine the quarts of water?

How much is 4 Quarts of water?

Find out how to measure your water next time and never have to deal over this issue again.

How much is 4 four quarts of water? What is the best way to measure Quarts?

The first thing to remember is that a quart is made up of two pints. Each pint weighs two cups, or sixteen ounces meaning that one quart contains four cups, or 32 ounces.

Are you ready to learn the math? It’s simple. If 1 quart equals 2 pints 4 cups, 32 ounces then 4 quarts is 8 pints 16 cups, or 128 ounces.

It’s possible to keep this information in your kitchen or even write it down on your smartphone or make use of an online converter the next time.

Why should I use water when cooking?

It may seem like a ridiculous question however, it’s actually an interesting one because water is, often vital to cook-off. However, it can also be a supplement to other ways.

A few examples of water cooking are mixing, boiling, steaming, making a broth, or cleaning.

Boiling

It is typically used to cook food items such as pasta noodles, grains potatoes, as well as the meats such as chicken. The boiling temperature of water is 212°F but it can be lower at higher elevations as well as when sugar or salt are added to it.

4-quarts-of-water

If water is heated and then held for about 10-minutes, the microorganisms get destroyed, and it is considered to be a safe method to protect against microbe-borne illnesses.

It’s not always advisable to boil your food because it may reduce the amount of soluble vitamins found in food as well as be slower cooking method in certain situations.

Mixing

When mixing food items, water acts as the “mixer” between them, so it is the first ingredient to be used. This method of mixing water is typically used to keep food moist and to prevent drying in the case of an oven or a special sauce.

Making broth

It is an example of one of the popular applications–apart from boiling– of water in cooking. Broth is a dish that involves the simmering of bones or meat, veggies and fish can be simmered with water.

The resultant liquid is the broth that is used in other liquids for eating, like gravy, sauces, or soup. The broth can also be an excellent option to enhance the flavor of certain food items like meats, rice, or other grains. You can make your own broth and enjoy the taste.

Here are a few ways that you can make use of broth in your everyday cooking:

Stir-fry to add flavor

Replace oil used in sautéed dishes

Sprinkle the meat or poultry with sauce while baking in the oven for the meat to remain moist.

Moisten leftovers prior to reheating in the oven

Steaming

This is accomplished by placing water in a pan, or pot and letting it simmer. After it boils continuously and then it turns into steam. The steam then flows into the food, and the heat will cook it.

When you steam your food, it isn’t directly in contact with water, but is in direct contact with steam. The types of food that you can cook using steam include meat, veggies, and rice.

Steaming has many benefits, including getting rid of overcooking, avoiding excessive fat and less losses of nutrients as compared to boiling.

When should I use water and when should I use the Broth or Stock?

Water is often beneficial in terms of time savings and cooking foods more quickly. But there are occasions where you’ll prefer replacing water with something that is more delicious and nutritious, such as soup or stocks. I’ve already explained the definition of broth, but stock is the same but it is made with chunks of bone or meat in it.

Here’s a list of food items that are sure to taste better when paired with water:

Pasta

Don’t use stock or broth in pasta dishes, as it would in the end be wasted. Instead, use water and add flavor once the pasta is cooked.

Beans

It’s a possible scenario for stock or broth, as most beans, including black beans, already have plenty of flavors. Adding the extra flavor from your liquid can cause them to become too thick. They cook well in water without creating a mushy texture.

Pureed Foods

This is a tricky one. Many people say that stock or broth improves flavor however the reality is that a lot of these puréed foods contain numerous ingredients and the use of water won’t make the flavor more pronounced.

Now, here’s the list of foods that benefit from using stock or broth when making:

Braises

If you are cooking the pot of roast, or cut ribs dish, adding the stock will give your dish greater flavor and provide nutrients to your meat. Try cooking short ribs in stock to test it out!

Soups

It’s a simple one. However, making soups is definitely a method where you’ll need to make use of broth – and maybe even stock to enhance the flavor of your dishes. Soups tend to be more watery and can therefore benefit from the flavor of broth.

Broth

Pan Sauces

If you prepare sauces in pans, you only use few ingredients, which is why all of them add up. The use of stock can provide an extra flavor to the final product.

Rice and other grains

You might be aware but maybe not but when you cook rice and other grains, it is recommended to opt for broth. The bulk of the liquid used in is cooked into the rice/grains will be taken up by the broth and the broth will enhance the food’s taste at the end.

Whatever you decide to do, you should bear in mind that the process of making broth or stock will require water at the time. For one thing, water is the main ingredient here.

Okay, I’m confident about the use of water. What next?

You are ready to start cooking? Make sure you check the measurements in your recipe, and ensure that you have the proper conversion. Don’t forget that 4 quarts equivalent to 8 pints, or 16 cups. This is a significant amount of water, yet it’s actually quite common in many recipes.

Wrapping up

How Much is 4 Quarts of water?

Hopefully, this post about how much is 4 quarts of water has given you enough information about how much water you need while cooking. This certainly will make you a lot more confident about using the right amount of water in cooking.


How Much Alcohol Is In Twisted Tea?

How Much Alcohol Is In Twisted Tea ?

How Much Alcohol Is In Twisted Tea ?

In the article, I’ll address the question people often as, “how much alcohol is in Twisted Tea?’ I would take a look at the two varieties of Twisted tea as well as their alcohol content.

I would also talk about certain features that are associated with Twisted Tea such as chemical components and their effects on the health of specific individuals.

How much alcohol in Twisted Tea?

The alcohol content of the twisted tea is 5 percent, and in Twisted Tea Light it’s 4 percent alcohol per volume. The alcohol content in beer is identical to that of tea twisted, which means that twisted tea gets you drunk just as fast as beer.

With just one percent increase over the standard Twisted Tea, the lighter version can take a little longer to get you drunk like beers.

What is Twisted Tea?

Twisted Tea is a type of hard ice tea. It can be enjoyed chilled or with ice in hot summer. Apart from alcohol, it also contains natural flavors and tea.

Twisted tea is produced in the US and sold in 750ml (12 Fluid Oz) bottles or cans. It’s sweet, syrupy, and is great with meat dishes of all kinds.

Twisted Tea is available as a pure tea, brewed tea, and with the same quantity of lemonade and tea. It’s different from beer in that it’s not carbonated as beer is.

It is also available in strawberry, raspberry mango, and peach flavors. Twisted tea contains approximately 30 grams sugar, and freshly extracted tea leaves.

The hard Iced Tea Malt Beverage is perfect for an ideal drink to watch games at a party.

History of Twisted Tea

It made its first appearance in the United States back in the year 2001. Twisted Tea is considered to be the first malt-brewed hard-iced tea.

The parent company of Twisted Tea, The Boston Beer Company  has a long-standing and extensive tradition of making high-quality alcohol beverages like ciders, beers, and hard seltzers, most particularly Samuel Adams Boston Lager.

Twisted Tea Brewing Company  began with a belief that hard iced tea ought to taste similar to the taste of iced tea.

Since its beginning the company has been true to this belief, enhancing their Twisted Tea original lemon tea with a variety of different flavors. This includes halves and half (a perfect mix of half the lemonade and iced team) as well as raspberry and peach, over the course of its 20-year existence that is up to the highest standards.

Twisted Tea Brewing Company has always been on the lookout for new flavors in order to offer their customers exciting and new drinks.

Twisted Tea is free from allergens and many other ingredients.

Of course, considering that it is malt derived from beer and that it’s brewed with tea leaves Twisted Tea is definitely not gluten-free, or caffeine-free. It does contain any components that contain fish, milk, crustaceans, fish or tree nuts, peanuts and the like.

How do you make Twisted Tea?

Malt drinks are produced by the fermentation of grains. Alcohol is the result of the process of fermentation. The principal result is the ethanol (alcohol).

It is not the sole end result from this reaction. Organic acids are also produced including succinic acid and acetic acid as well as other organic compounds.

Malted Cereal grains like hops, barley and water are to be added. When yeast is present fermentation is permitted to take place. The malt base is alcohol and only its color and smell is removed to allow for the addition of additional flavors and ingredients.

The malt is mixed with flavors such as mango, lemon or peach. The most important ingredient, tea, is blended with the fermented beverages. Other ingredients, like sugar are also added.

What are the reasons to avoid drinking Twisted Tea frequently?

Twisted The tea you drink is acidic, just like beer, whereas tea contains caffeine, as well as other chemicals that could be harmful in the long run if you drink frequently.

A high-Acid Content

Alcohol-based drinks may contain high levels of acid. In addition to alcohol, other factors can influence acidity.

Tea also contains acids, including the chlorineogenic acid, tannic acids and Malic acid, making them an acidic drink. Lemon flavorings, for instance, can boost the acidity of Twisted Tea.

All values which are lower than 7.7 are acids. The lower the pH, the higher the acidity. Beer’s pH sits at about 4, which is a bit acidic. The acidity of Twisted Tea would be similar to the beer’s acid content.

The acidic pH of alcohol drinks and tea is believed to cause GERD symptoms in those who drink often. Both genders who participated in a research showed symptoms that were associated with GERD.

Certain people may experience pain gastrointestinal symptoms when they drink drinks that are acidic regularly. Even if you don’t notice any adverse side effects, it’s recommended to limit intake of caffeine and alcohol.

This GERD can be extremely painful and unpredictable, however it is manageable if you make the right decisions. Certain drinks and foods can trigger this condition, including acidic, caffeinated, and high-fat food items.

Caffeine in Tea

Caffeine causes you to feel refreshed and alert because of its stimulant effects. Caffeine increases the activity of the nervous system, which can have negative effects as well. A frequent urination cycle, anxiety and increased blood pressure are all normal.

The caffeine’s stimulant effect lasts only a few minutes and can cause individuals to fall into a state of crash. A crash caused by caffeine is characterized by a sudden feeling of fatigue and tiredness.

Do not drink Twisted tea if you’re less than 18 years old pregnant or nursing. Be sure to not operate or drive heavy equipment since twisted tea could put you feel drunk.

Keep Twisted Tea in a dry and cool location away from direct sunlight. When you have opened the bottle, drink it as quickly as you can because oxidation can result in the drink losing its quality.

Where to Buy Twisted Tea?

It can be found in the liquor stores in your area or courses. It is a given that you have to be 21or older to buy this beverage. You can also purchase Twisted Tea on Amazon.

It’s not difficult to argue with this fact. Twisted Tea is a nice and refreshing drink. Even those who aren’t keen on iced tea may consider this to be a great option. If you’re in the market for frozen tea that has twists, Twisted Tea is hard to miss.

How Many Twisted Teas to Get Drunk?

When you consider that Twisted Tea contains with 5% alcohol, it’s safe to drink a few each evening. I’m not sure if it’s beneficial for your health, but it’s isn’t bad neither.

The ceiling recommended by the government guidelines for daily alcohol consumption will be 2 units per woman and 3 for males and if you’re within the guidelines, it’s nevertheless worth stopping in after work or at the weekend to be safe!

Consuming excessive alcohol can cause a variety of health issues, including cancer, liver damage as well as heart diseases. However, there are plenty of other ways you can drink intoxication without placing your body in danger.

One method is to drink excessive amounts of Twisted Teas! When you’re next looking to be drunk, but don’t want negative side consequences, you can try some of these strategies instead.

It’s often difficult to estimate the amount of Twisted Teas needed to get someone drunk. There are a myriad of factors that could contribute to this, like the kind of alcohol that is used in the beverage, the amount of food was consumed prior to the drink and if other drugs are taking place simultaneously.

To be able to be able to answer this question with greater accuracy We need a more detail regarding you and your circumstances.

It’s a tough answer. There are many factors which determine how quickly one can be drunk, including weight or height, gender and tolerance. But, an average person needs about 5-6 drinks within one hour to attain the .08 Blood alcohol level (BAC).

Wrapping up

How Much Alcohol Is In Twisted Tea ?

So, in this blog post, as I promised at the outset, I have tried my best to answer the question, ‘how much alcohol is in Twisted Tea?’ I am sure all these relevant information will be of help to you.

In the world of commercial beverages, one would think that they’d have the Tea without alcohol – but no, it’s just too much of an excellent opportunity to miss out on.

Twisted Tea is just one of many “hard iced tea” brands that contain a low amount of alcohol (like light beer) that makes drinking the iced Tea just a bit more interesting –and exciting–than usual. If you are in the habit of drinking both iced Tea and also enjoy stuff like Smirnoff Mule ginger beer, you’re going to appreciate beverages like Twisted Tea. There is indeed a lot of fun in the can!