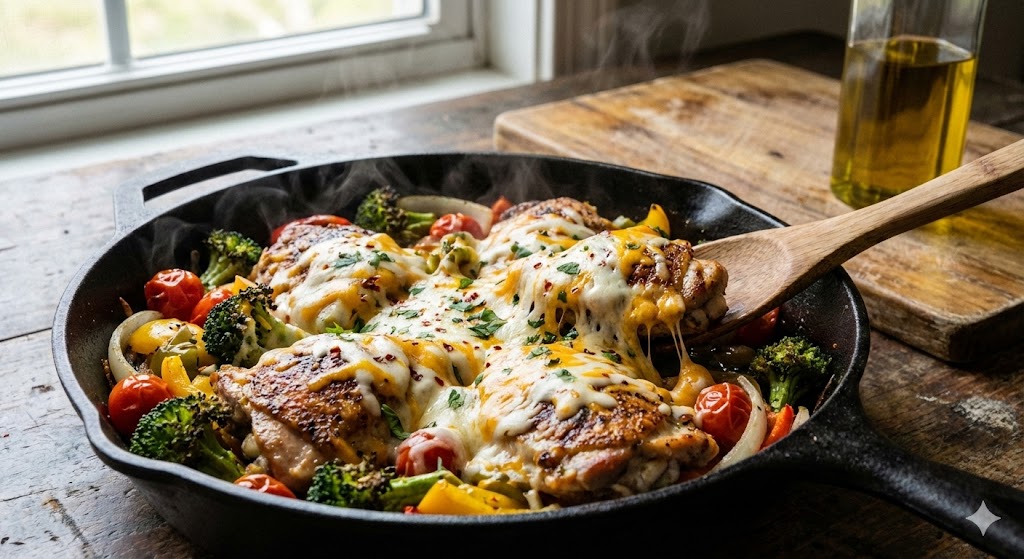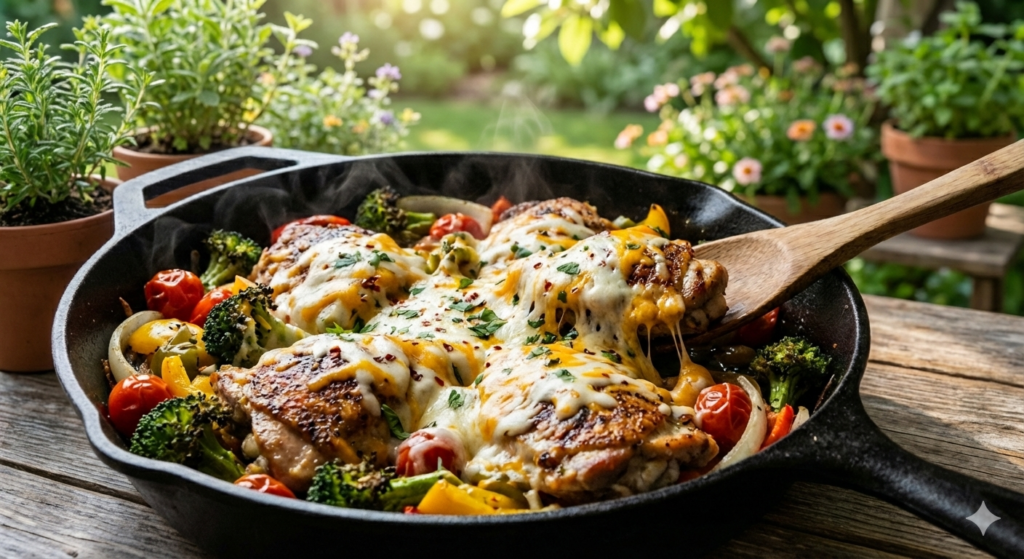
Jump to RecipeSkillet Beef with Roasted Broccoli and Cheese Recipe
A Simple Skillet Dinner That Comes Together Fast—Skillet Beef with Roasted Broccoli and Cheese Recipe
Some of the best weeknight meals don’t start with a plan. They start with opening the refrigerator and realizing that a few ingredients need to be used sooner rather than later.
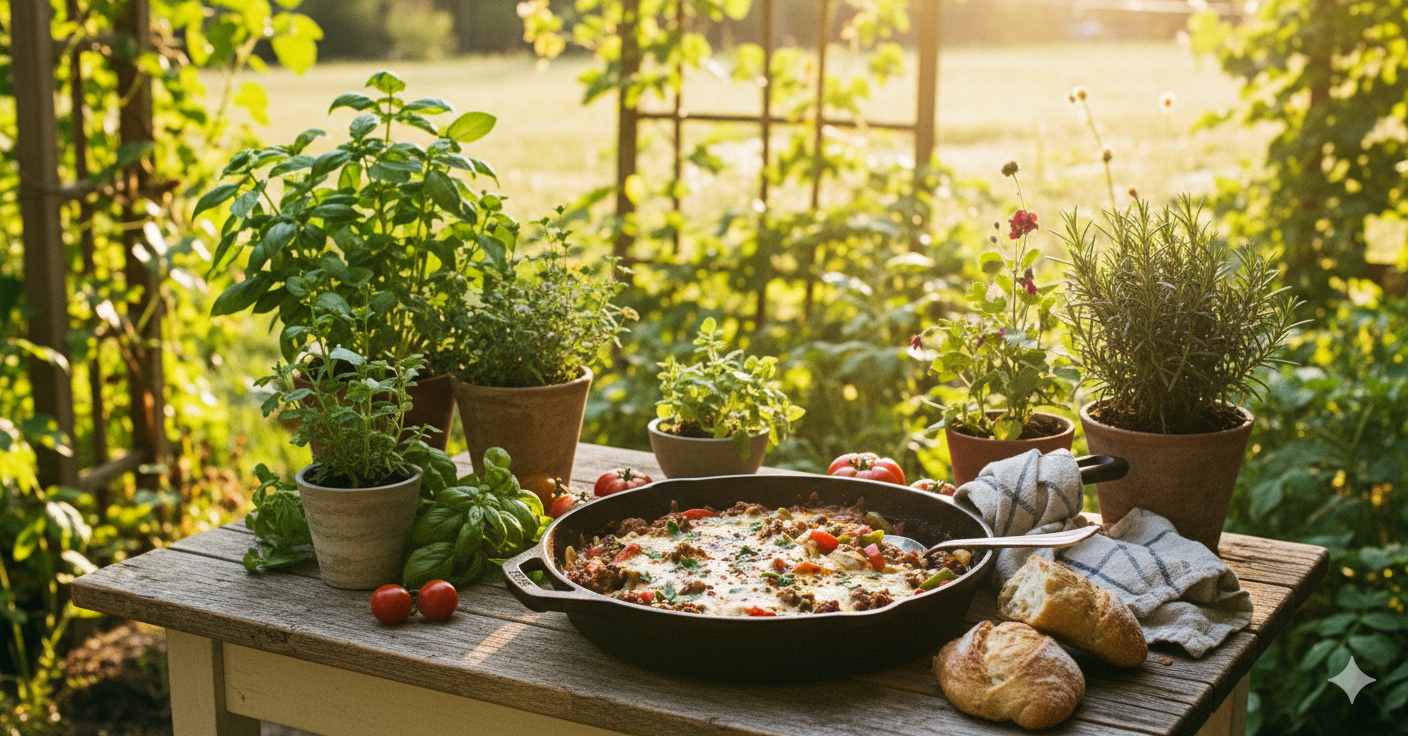
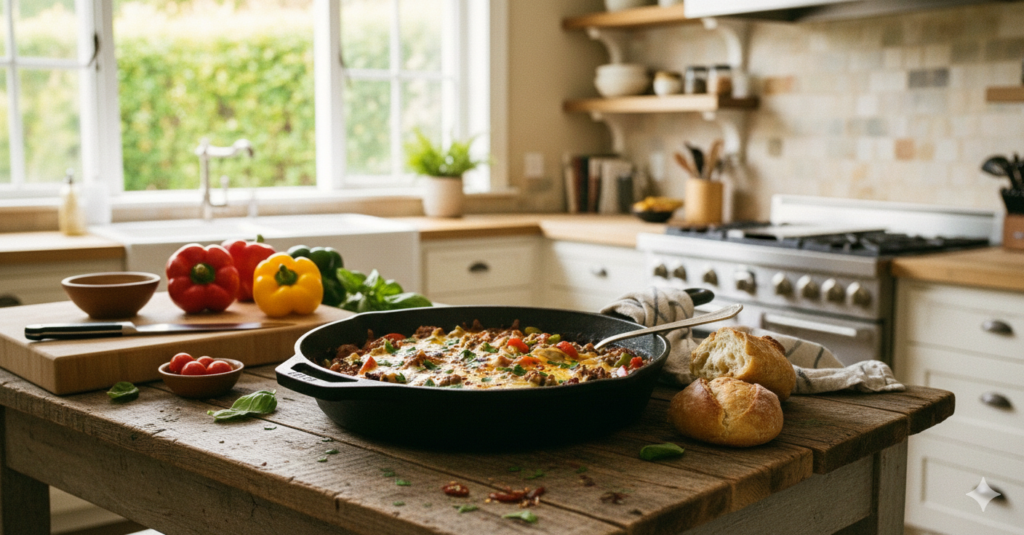
That’s usually how this skillet beef with roasted broccoli and cheese ends up on the stove in my kitchen.
There’s often a piece of steak that should probably be cooked today. A head of broccoli that’s still crisp but won’t last much longer. And somewhere in the fridge, a block of cheese waiting to be grated.
Put those three together in a hot skillet and something satisfying happens.
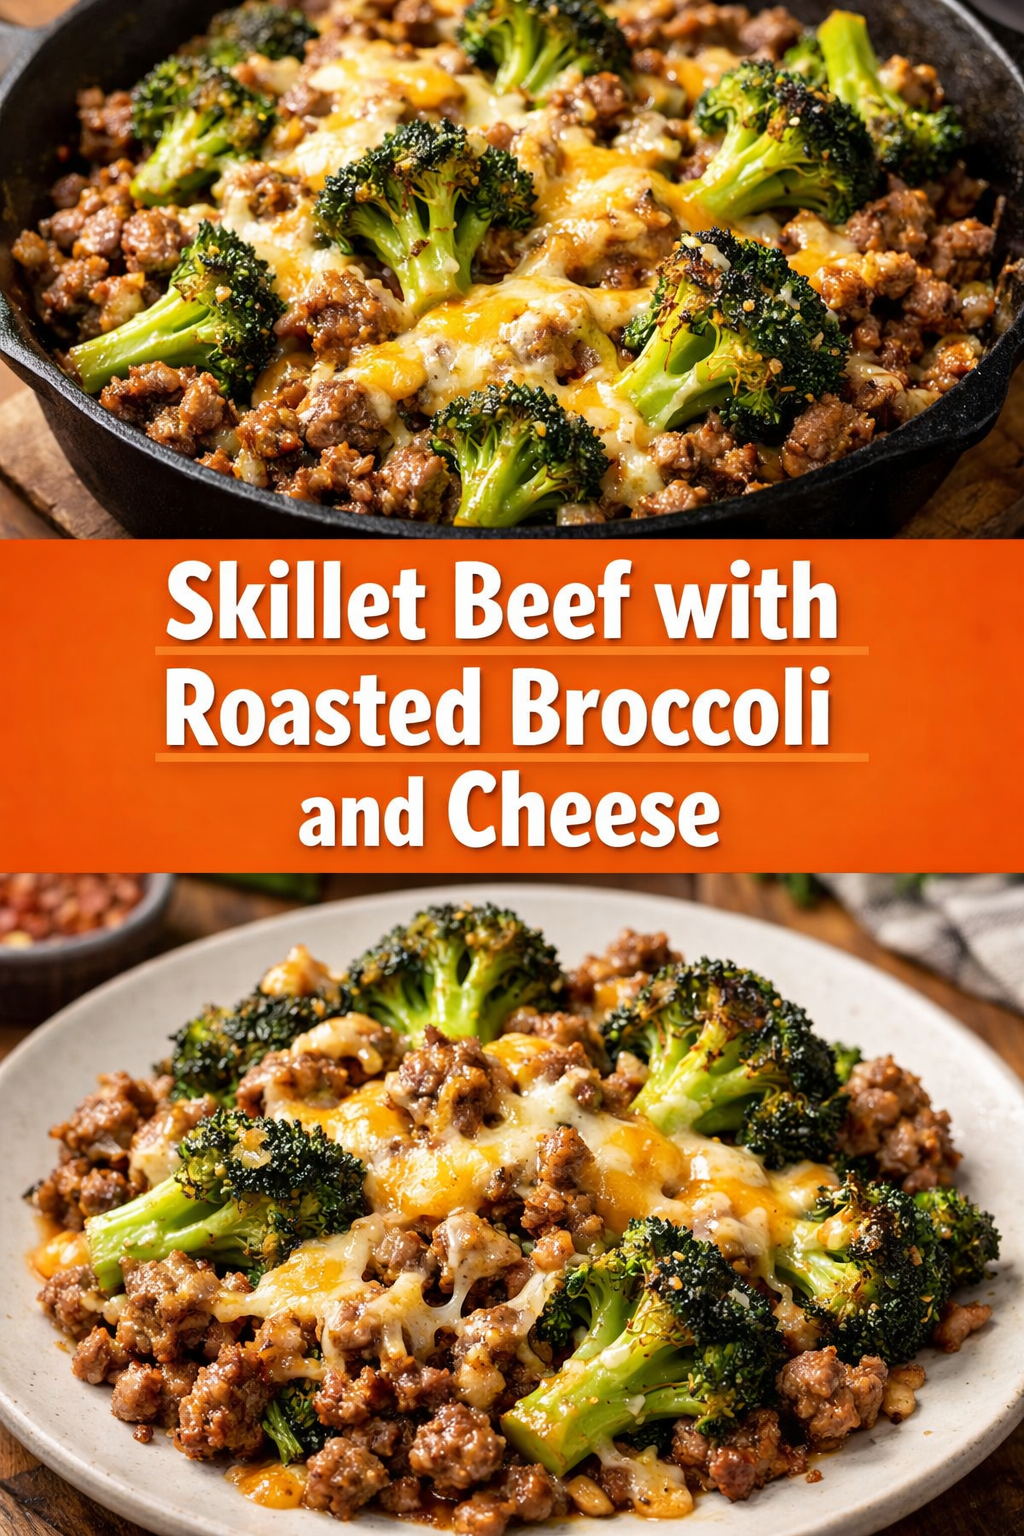
The beef browns and develops that deep savory flavor. The broccoli roasts until the edges turn slightly crisp and nutty. Then the cheese melts into everything and ties the dish together.
It’s not complicated food, but it’s dependable — exactly the kind of dinner that works on busy nights when you still want something warm and satisfying on the table.
-
Why You’ll Love This Skillet Beef Recipe
This dish has become a regular in my rotation for several reasons.
It cooks quickly.
Once the broccoli is roasting, the rest of the meal comes together in about fifteen minutes.
It uses simple ingredients.
Beef, broccoli, cheese, and a few basic seasonings are really all you need.
It’s filling without feeling heavy.
The combination of protein, vegetables, and a little cheese makes the dish satisfying without turning it into something overly rich.
It works for weeknights.
Everything cooks in one pan, and cleanup is easy.
-
Ingredients You’ll Need
This recipe keeps the ingredient list simple.
1 pound sirloin or flank steak, thinly sliced
1 large head broccoli, cut into florets
1 cup shredded cheddar or Monterey Jack cheese
1 tablespoon olive oil or butter
½ teaspoon salt
½ teaspoon black pepper
Optional additions:
2 cloves garlic, minced
½ teaspoon smoked paprika
pinch of chili flakes
These optional ingredients add flavor, but the dish works perfectly well without them.
-
Ingredient Notes and Cooking Tips
A few ingredient choices can make the recipe turn out even better.
Choose a tender cut of beef.
Sirloin and flank steak both work well. If the meat seems slightly tough, slicing it thinly against the grain helps a lot.
Fresh broccoli roasts best.
Frozen broccoli can be used in a pinch, but it tends to release more moisture and won’t brown as deeply.
Use a cheese that melts well.
Cheddar adds flavor, while Monterey Jack melts more smoothly. Mixing the two works nicely.
Don’t overload the cheese.
A moderate amount keeps the dish balanced instead of heavy.
-
How to Roast the Broccoli
Roasting the broccoli first gives the dish much better flavor.
Preheat the oven to 425°F (220°C).
Cut the broccoli into bite-sized florets and toss them with a little olive oil and a pinch of salt. Spread them out on a baking sheet so the pieces aren’t crowded together.
This part matters more than people expect. If the broccoli is packed too tightly on the pan, it steams instead of roasting.
Place the tray in the oven and roast for 15–20 minutes, until the edges start to brown and the stems are tender.
Once the broccoli is roasted, set it aside while you cook the beef.
-
Cooking the Beef Properly
Good skillet beef depends on two things: high heat and patience.
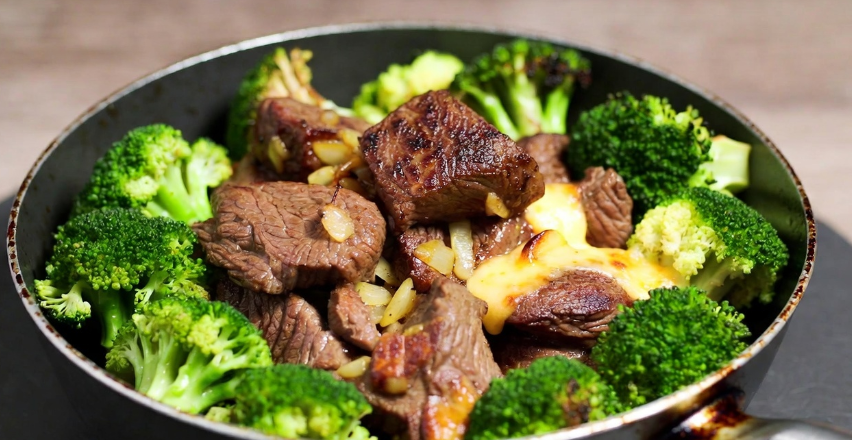
Heat a large skillet over medium-high heat and add the oil or butter. Once the pan is hot, add the sliced beef in a single layer.
If the pan looks crowded, cook the beef in batches. Overcrowding prevents the meat from browning properly.
Let the beef sit undisturbed for a minute or two so it develops a nice sear. Once the bottom browns, flip the pieces and cook briefly on the other side.
At this stage you’re mainly building flavor, not fully cooking the meat.
Transfer the browned beef to a plate and leave the flavorful bits in the pan.
-
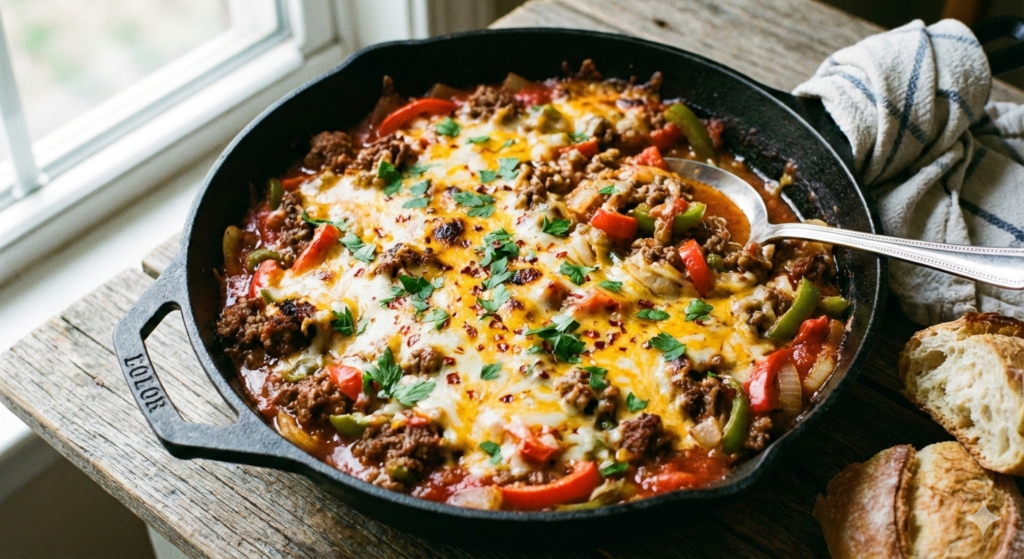
Bringing the Dish Together
If you’re using garlic or spices, add them to the skillet now and cook briefly until fragrant.
Return the roasted broccoli to the pan and stir it around so it warms through.
Add the cooked beef back into the skillet along with any juices that collected on the plate. Stir gently to combine everything.
Lower the heat to medium-low.
Sprinkle the shredded cheese evenly over the mixture and cover the skillet loosely for a minute or two.
The cheese will melt and coat the beef and broccoli without turning the dish greasy.
Once the cheese looks melted and creamy, turn off the heat.
-
Tips for the Best Flavor and Texture
A few small techniques make a noticeable difference.
Dry the beef before cooking.
Excess moisture prevents proper browning.
Use a hot skillet.
Beef sears best when the pan is already hot.
Avoid stirring constantly.
Letting the meat sit for a moment allows a crust to form.
Roast the broccoli instead of steaming it.
Roasting develops deeper flavor and better texture.
-
Making the Recipe Even Better
Choosing the Right Cut of Beef
One thing that can quietly change the outcome of this recipe is the type of beef you use.
I usually reach for sirloin because it’s widely available and cooks quickly. It has enough fat to stay tender without becoming greasy in the skillet.
Flank steak is another excellent option. It has a stronger beef flavor and works especially well when sliced thinly against the grain. If you’ve ever ended up with chewy flank steak, it’s usually because it wasn’t sliced correctly.
For this dish, the slices should be thin — almost stir-fry style.
If the steak you have feels a little firm, placing it in the freezer for about 15 minutes before slicing makes it much easier to cut thin strips.
Even inexpensive cuts can work if they’re sliced properly and cooked quickly.
Why Roasting the Broccoli Changes the Dish
Broccoli behaves very differently depending on how it’s cooked.
When it’s steamed, it stays soft and mild. That’s perfectly fine for a side dish, but it doesn’t add much personality to a skillet meal.
Roasting transforms it.
The high heat caramelizes the edges slightly, giving the florets a deeper, nutty flavor that balances the richness of the beef and cheese.
Another small detail that helps is not cutting the florets too small. Larger pieces develop better texture and stay slightly crisp even after being added back to the skillet.
If the stems are thick, I sometimes peel the outer layer and slice them thinner. They roast beautifully and add extra crunch.
Getting the Cheese Just Right
Cheese is what ties this dish together, but it’s easy to overdo it.
A light layer of melted cheese creates a creamy finish without turning the skillet into something heavy.
I usually grate the cheese myself rather than using pre-shredded cheese. Pre-shredded varieties often contain anti-caking agents that prevent smooth melting.
If you want the best texture, shred the cheese just before adding it to the skillet.
Another small trick is lowering the heat before adding the cheese. Cheese melts best gently. If the heat is too high, it can separate and become oily instead of creamy.
Covering the skillet loosely for a minute helps trap enough heat to melt everything evenly.
Small Flavor Boosts That Work Well
Once you’ve made this recipe once or twice, it’s easy to adjust it depending on what you’re in the mood for.
A squeeze of fresh lemon right before serving brightens the whole dish.
A dash of smoked paprika adds warmth and depth without overpowering the beef.
If you enjoy spice, a small pinch of red pepper flakes brings just enough heat to keep things interesting.
Sometimes I also add a spoonful of the pan juices over the finished dish right before serving. It’s a small detail, but it makes everything feel more cohesive.
When This Recipe Works Best
This skillet meal fits nicely into the kind of evenings when cooking needs to stay simple.
It’s quick enough for weeknights but still feels satisfying enough to serve when friends stop by unexpectedly.
Because the ingredients are flexible, it’s also the kind of recipe that works when the refrigerator isn’t fully stocked.
A little beef, a vegetable, and some cheese can go a long way when they’re cooked properly.
And once you’ve made it once, the process becomes second nature.
-
Easy Variations to Try
This recipe adapts easily depending on what you have available.
Spicy version
Add chili flakes or a dash of hot sauce before serving.
Creamy version
Stir in a splash of cream before adding the cheese.
Different vegetables
Cauliflower or Brussels sprouts work well in place of broccoli.
Leftover steak option
If you already have cooked steak, add it at the end just long enough to warm it.
10. What to Serve with Skillet Beef and Broccoli
This dish is satisfying on its own, but a few sides make it feel like a complete dinner.
Good options include:
steamed white or brown rice
roasted potatoes
crusty bread
a simple green salad
Rice is probably the easiest pairing and soaks up any juices left in the skillet.
-
Storage and Reheating
Leftovers keep well for a short time.
Store the cooled dish in an airtight container in the refrigerator for up to two days.
To reheat, warm it gently in a skillet over low heat. Adding a small splash of water helps loosen the mixture.
The microwave works as well, though the texture of the beef can become slightly firmer.
-
Frequently Asked Questions
Can I use ground beef instead of steak?
Yes. Ground beef works, although the texture will be different. Brown it first, drain excess fat, and continue with the recipe.
Can frozen broccoli be used?
It can, though it won’t roast as deeply. Pat it dry and expect a slightly softer texture.
What type of skillet works best?
A wide, heavy skillet works best. Cast iron or stainless steel both provide excellent browning.
Is this recipe low-carb?
Yes. As written, it’s naturally low in carbohydrates.
Recipe Card
Skillet Beef with Roasted Broccoli and Cheese Recipe
Ingredients
Method
Final Thoughts
Skillet beef with roasted broccoli and cheese is one of those meals that quietly proves you don’t need complicated recipes to make a satisfying dinner.
A few simple ingredients, a hot pan, and a little attention while cooking are really all it takes.
The beef brings richness, the roasted broccoli adds texture and balance, and the melted cheese ties everything together.
It’s not fancy food — and that’s exactly why it works so well. On busy evenings when dinner needs to be straightforward and dependable, this is the kind of recipe that keeps finding its way back onto the stove.