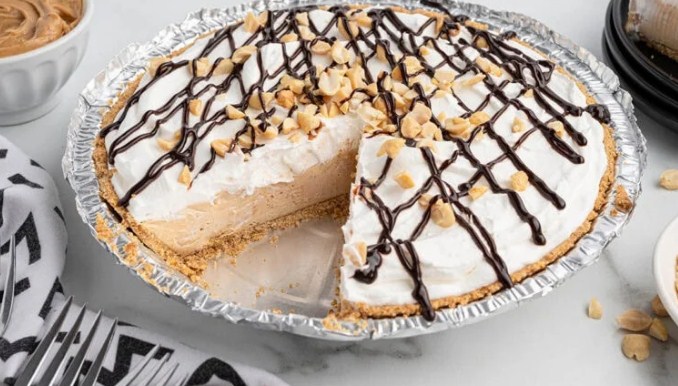
Best Ever Peanut Butter Pie Recipe: The One I Bring to Every Potluck
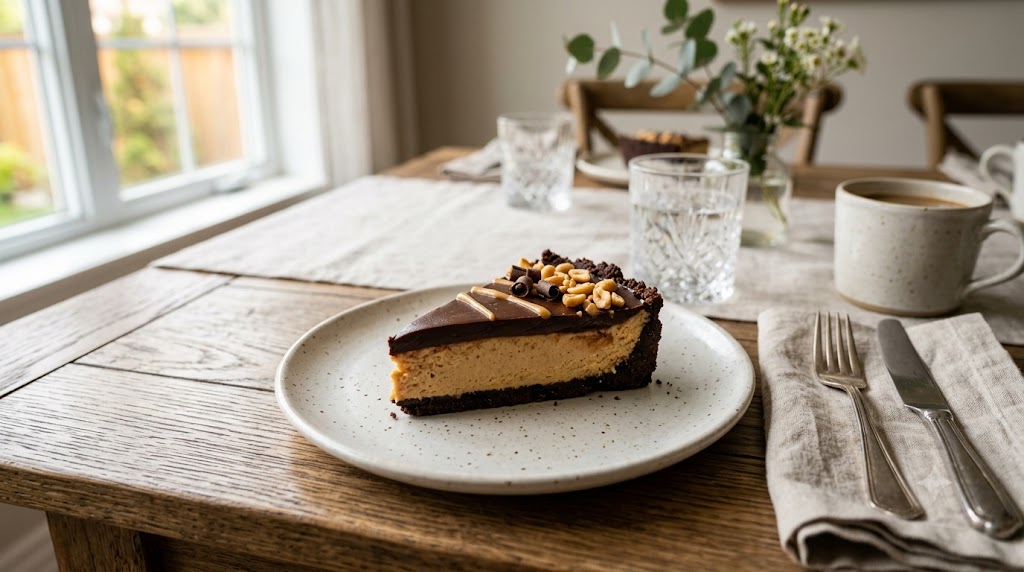
I’ll say it straight out: this is genuinely the best ever peanut butter pie recipe I’ve made in fifteen years of baking, and I don’t say that lightly. It’s no-bake, it’s creamy, and it disappears faster than anything else I bring to a potluck. One of my best friends, Carol, asked for the recipe the second time I brought it over, then admitted she’d already eaten two slices standing at her own kitchen counter before her husband even got home from work.
This pie started as a happy accident. I was out of graham crackers for a cheesecake I’d planned, found an old Oreo package instead, and just went with it. That one swap turned into the base of a recipe I’ve made more times than I can count since. It’s rich, it’s a little bit ridiculous, and it never once let me down at a family gathering.
Why You’ll Love This Recipe
First off, there’s no oven involved, which matters a lot in July when turning on the stove feels like a personal attack. You mix the filling, pour it into the crust, and let the fridge do all the work. That’s it. That’s the whole labor commitment.
It also tastes like peanut butter cups got turned into a pie, which, if you ask me, should’ve happened decades ago. The filling is smooth and a little tangy from the cream cheese, which cuts through the sweetness so it doesn’t feel like a sugar bomb. My dad, who claims he doesn’t like “fancy desserts,” went back for a second slice without saying a word about it.
And here’s the thing — it’s forgiving. I’ve swapped ingredients mid-recipe more times than I’d like to admit, and it still turns out great every time. Once I ran short on powdered sugar and used half granulated instead, texture got slightly grainy, but nobody at the table noticed or cared.
Ingredients
- 1 1/2 cups crushed Oreo cookies (about 16 cookies, cream filling included)
- 5 tablespoons melted butter
- 8 ounces cream cheese, softened
- 1 cup creamy peanut butter
- 1 cup powdered sugar
- 1 teaspoon vanilla extract
- 1 1/2 cups heavy whipping cream, whipped to soft peaks (or 8 ounces thawed whipped topping if you’re short on time)
- Chocolate syrup and chopped peanuts, for topping
Equipment Needed
You don’t need anything fancy for this one. A 9-inch pie dish, a large mixing bowl, a hand mixer (a stand mixer works too, but I’ve never bothered pulling mine out for this), a rubber spatula for folding and smoothing, and measuring cups and spoons will cover you. If you’re crushing the Oreos by hand instead of in a food processor, grab a zip-top bag and a rolling pin.
Step-by-Step Cooking Instructions
- Mix the crushed Oreo crumbs with the melted butter until it looks like wet sand, then press it firmly into the bottom and sides of a 9-inch pie dish.
- Chill the crust in the fridge for at least 20 minutes while you make the filling.
- In a large bowl, beat the softened cream cheese until smooth, about 1 to 2 minutes with a hand mixer.
- Add the peanut butter, powdered sugar, and vanilla extract, then beat again until fully combined and creamy.
- Gently fold in the whipped cream (or whipped topping) in two batches, so you don’t deflate all that air you just worked for.
- Pour the filling into the chilled crust and smooth the top with a spatula.
- Refrigerate the pie for at least 4 hours, though overnight is better if you can swing it.
- Right before serving, drizzle chocolate syrup over the top and scatter chopped peanuts across it.
Cooking Tips
Room-temperature cream cheese is non-negotiable here — cold cream cheese leaves lumps no amount of mixing will fully smooth out, and I learned that the hard way at 9 pm the night before my sister’s baby shower. I used to microwave it for ten seconds to speed things up, turns out that partially melts it in one spot and leaves the rest cold, so now I just set it out an hour early and walk away.
Whip your cream just to soft peaks, not stiff ones. Overwhipped cream turns grainy and butter-ish when you fold it into the peanut butter mixture, and that’s a texture nobody wants in a pie. If you’re using whipped topping instead, thaw it in the fridge overnight rather than on the counter, since counter-thawing makes it weepy and thin.
Substitutions and Variations
You’ve got some room to play here. Swap the Oreo crust for a classic graham cracker crust if you want something a little less sweet, use crunchy peanut butter instead of creamy for texture in every bite, or go with a natural peanut butter if that’s what your pantry’s stocked with, though it does make the filling slightly looser. Some people add a thin layer of chocolate ganache under the filling, which turns it into something closer to a peanut butter cup in pie form. I’ve also tried it with almond butter once, out of pure curiosity, and it worked fine, though it lost that classic PB-cup flavor everyone expects.
What to Serve With It
This pie is rich, so a small slice goes a long way. I usually serve it alongside fresh coffee or cold milk, since both cut through the sweetness nicely. If you’re doing a bigger spread, it pairs well next to something lighter and fruity, like a bowl of fresh strawberries, since the contrast keeps the whole dessert table from feeling one-note.
Storage and Reheating
Keep this pie covered in the fridge, and it’ll stay good for about 4 to 5 days. Don’t leave it out at room temperature for more than an hour or so, since the whipped cream filling doesn’t hold up well in heat. You can also freeze it, wrapped tightly, for up to a month — just thaw it in the fridge overnight before serving, and skip the chocolate drizzle until right before you eat it.
There’s no reheating involved here, since it’s a cold pie start to finish. That’s one of the best parts.
Cook and Prep Time
Prep time runs about 20 minutes of actual hands-on work, plus at least 4 hours of chilling time, so plan ahead if you’re making this for a same-day event. I usually make mine the night before, which takes all the pressure off.
Nutrition Facts (Approximate, Per Slice)
Based on a pie cut into 10 slices, each one runs roughly 430 calories, 32 grams of fat, 28 grams of carbohydrates, and about 8 grams of protein. These numbers will shift depending on whether you use whipped topping versus real whipped cream, and whether you go light or heavy on the toppings.
Nutrition information is calculated automatically and should be considered an estimate only. It isn’t intended as medical or dietary advice. If you’re tracking nutrients for health reasons, I’d recommend running the exact ingredients and brands you use through your own calculator.
Why This Recipe Actually Works
The combination of cream cheese and peanut butter is really what makes this pie hold its shape without needing gelatin or any baking at all. The cream cheese firms up in the fridge just enough to give the filling structure, while the whipped cream keeps everything light instead of dense like a straight peanut butter fudge would be. It’s simple chemistry, but it’s the reason this pie slices cleanly instead of collapsing into a puddle on the plate.
The Small Change That Made a Big Difference
For years I folded the whipped cream in all at once, dumping the whole bowl in and stirring until it looked combined. That knocked most of the air right out, and the filling came out denser than I wanted. Once I started folding it in two separate batches instead, gently, the texture turned noticeably lighter and fluffier. Such a small change, but it made the pie feel almost like a mousse instead of a dense peanut butter block.
What I’d Do Differently Making It Again Tomorrow
I’d toast the chopped peanuts before scattering them on top next time, since a quick dry toast in a pan brings out way more flavor than raw peanuts do. I’d also chill the crust a little longer, maybe 30 minutes instead of 20, because mine cracked slightly last time I rushed it. Small tweaks, but they’d make a good pie even better.
What I Skip When I’m Short on Time
When I’m in a hurry, which is most weeknights, I skip whipping my own cream and just use thawed whipped topping instead. I also skip making a perfectly smooth crust edge and just press it in roughly with my fingers, since nobody’s grading me on presentation at a backyard barbecue. The pie still tastes exactly the same either way.
Frequently Asked Questions
Can I make this peanut butter pie recipe ahead of time? Yes, and I’d recommend it. Making it the night before improves the texture, since the filling firms up more and slices cleaner.
Why is my pie filling runny? This usually happens if the cream cheese wasn’t fully softened before mixing, or if the whipped cream got overwhipped and started separating before you folded it in. Give both steps a little extra attention next time.
Can I use a store-bought crust instead of making my own? Absolutely, a pre-made Oreo or graham cracker crust works fine and saves you a few minutes, though homemade does taste slightly fresher.
Does this pie need to be baked at any point? No, this is a fully no-bake pie from start to finish, which is half the reason I make it so often in summer.
Final Thoughts
At the end of the day, this best ever peanut butter pie recipe earns its name because it’s simple, it’s rich without being sickly sweet, and it comes together with almost no effort compared to how impressive it looks on a dessert table. It’s the kind of pie people ask about before they’ve even finished their first bite. Give it a try before your next potluck or family dinner, and trust me, you’ll be writing the recipe down for someone before the night’s over.