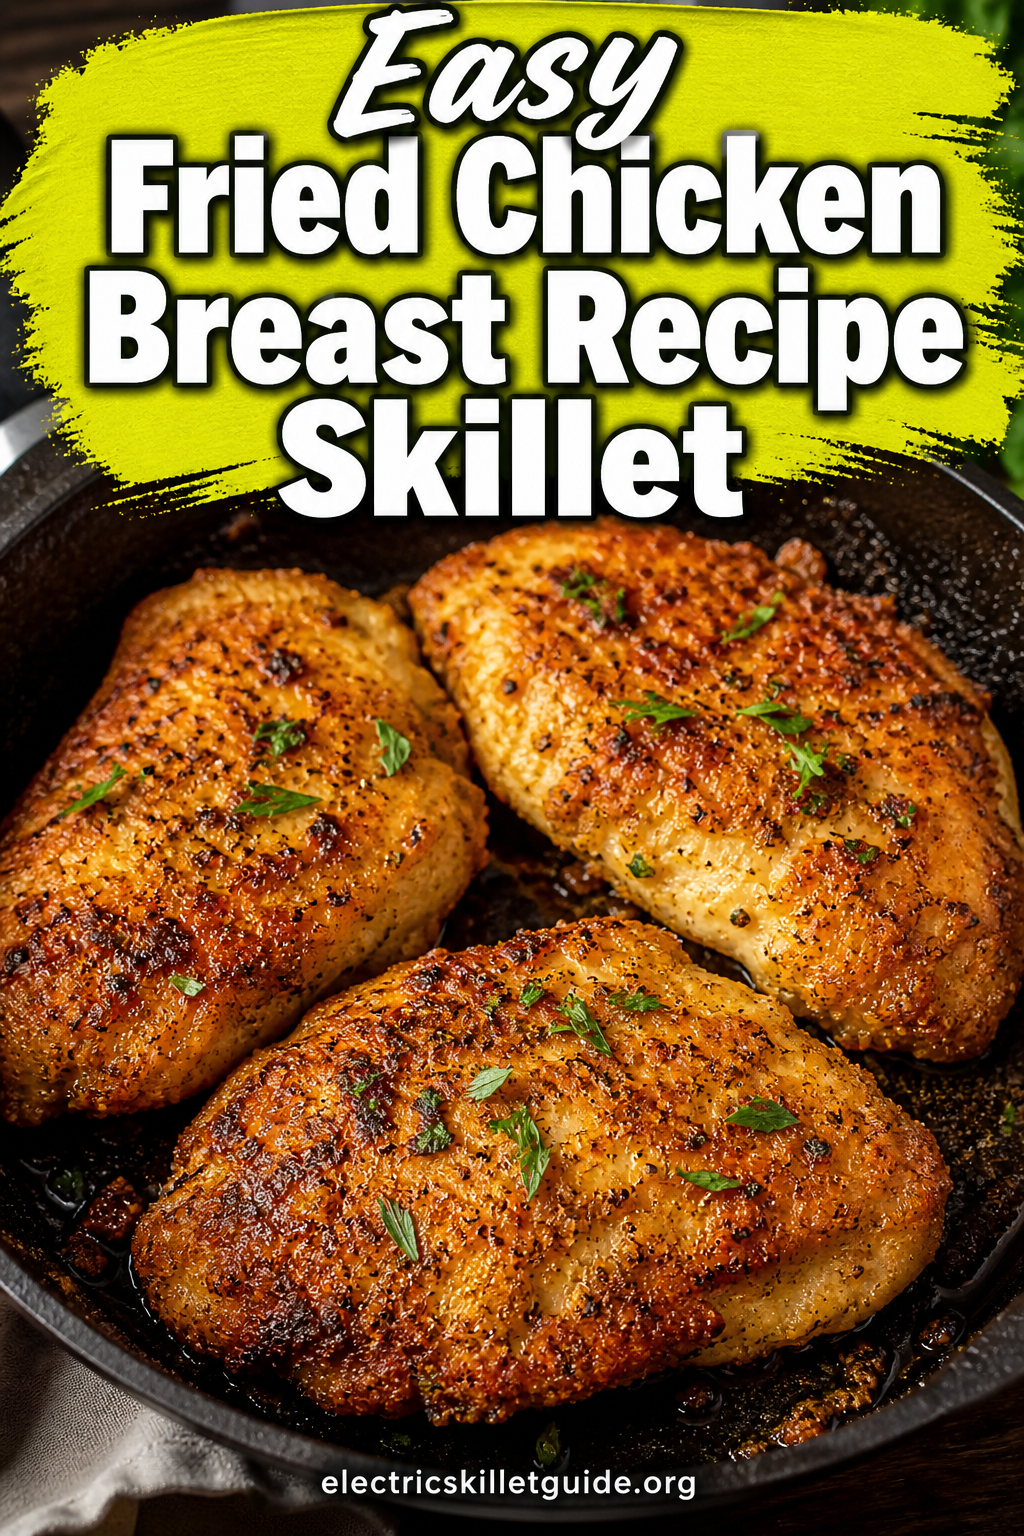
Easy And Simple Fried Chicken Breast Recipe Skillet
Let me be honest with you — I’ve ruined more chicken breasts than I care to admit. Overcooked them into sad, chewy slabs. Under-seasoned them into flavorless gym food. Tried to bake them “healthy” and… yeah, that didn’t go well either.
There was even a phase where I convinced myself dry chicken was just “how it’s supposed to be.” Not my finest moment.
Then one evening, out of frustration (and mild hunger-induced impatience), I threw a chicken breast into my cast iron skillet with some oil and whatever seasoning was nearby… and something clicked. Not perfectly, but enough to make me try again the next day.
The easy fried chicken breast recipe skillet I’m sharing today comes from that moment—plus a lot of small adjustments after. Some intentional, some accidental.
This is not fancy food. It doesn’t need to be.
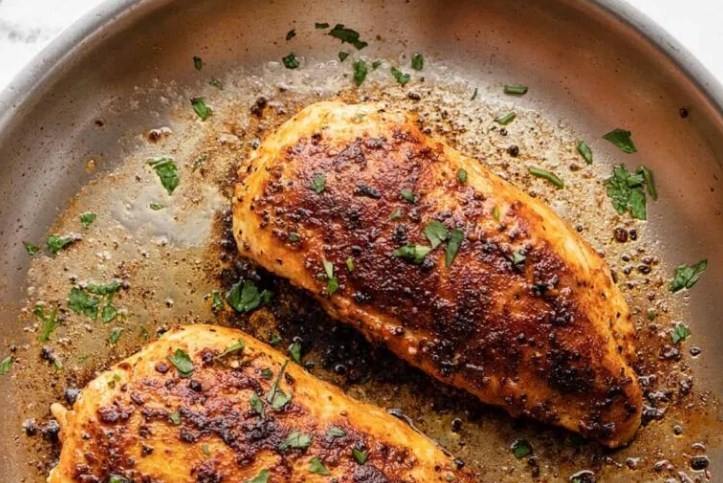
What it is, though, is the kind of dinner that makes you forget takeout exists for a second. Golden crust on the outside, juicy inside, all done in one pan. No deep fryer, no oven juggling, no “why is this taking so long” energy.
Why You’ll Love This Recipe
First: it’s fast. Around 30 minutes from start to finish. Maybe a bit less if you’re already hovering in the kitchen waiting for it to be done (which… happens).
Second: minimal cleanup. One pan, a couple of bowls, maybe a fork you forgot you used.
Third—and this is the part that took me a while to trust—the skillet really does most of the work. You don’t need to keep flipping, poking, adjusting every 20 seconds. In fact, doing less usually works better here.
That said, I still sometimes check too early. Habit, I guess.
Also—and this matters more than it should—this fried chicken actually stays crispy for a few minutes after cooking. Not forever, obviously, but long enough that you’re not racing the clock to eat it before it goes soft.
Which is… surprisingly rare.
Ingredients
Here’s what you need. Nothing complicated, nothing that sends you to three different stores.
For the Chicken:
2 large boneless, skinless chicken breasts
1 teaspoon garlic powder
1 teaspoon onion powder
1 teaspoon smoked paprika
½ teaspoon cayenne pepper (optional, but I’d keep it)
1 teaspoon salt
½ teaspoon black pepper
½ cup all-purpose flour
1 egg, beaten
½ cup breadcrumbs (panko works best)
3–4 tablespoons neutral oil
Optional Add-ons:
1 tablespoon butter (for the end)
Fresh parsley
Lemon wedges
A quick note—if your chicken breasts are thick (and they usually are), slice them into thinner cutlets.
I used to skip this step because it felt unnecessary. It’s not.
Thinner pieces cook more evenly and give you more crispy surface area, which is kind of the whole point.
Step-by-Step Instructions
Step 1: Prep the chicken
Pat the chicken dry with paper towels.
And I mean dry-dry, not “that should be fine.” Moisture is the fastest way to lose crispiness.
Season generously with salt, pepper, garlic powder, onion powder, smoked paprika, and cayenne.
Let it sit for about 10 minutes.
This step feels small, but I’ve skipped it before and the seasoning never quite hits the same.
Step 2: Set up your dredge
Three bowls: flour, egg, breadcrumbs.
Dredge the chicken in flour first—shake off the excess (seriously, shake it more than you think).
Then egg.
Then breadcrumbs. Press them in.
Not gently. Not politely. Press them like you actually want them to stick.
I used to just roll the chicken through and hope for the best. It didn’t work.
Step 3: Heat the skillet
This part is where things usually go wrong.
Heat your pan over medium-high for about 2 minutes before adding oil.
Then add oil and wait for that shimmer—not smoke.
If you’re unsure, give it another 30 seconds. I still second-guess this sometimes.
Add the chicken.
If it doesn’t sizzle right away, the pan isn’t ready. Take it out, wait, try again.
Annoying, yes. But it matters.
Step 4: Cook and flip
Cook for 5–6 minutes on the first side.
Don’t touch it.
This is the part where patience actually affects the result. If you move it too early, the crust won’t set properly.
I still catch myself wanting to check underneath “just in case.” It’s almost always too soon.
Flip once. Cook another 4–5 minutes.
If using butter, add it now and spoon it over the chicken.
Also—there’s always that moment where you wonder if flipping early would somehow help. It doesn’t. I’ve tested that theory enough times.
Internal temp should hit 165°F.
Step 5: Rest before cutting
Let the chicken rest for 3–5 minutes.
This step is… hard to respect when you’re hungry.
But cutting immediately just lets all the juices run out, and then you’re left with dry chicken wondering what went wrong.
Give it a few minutes. It pays off.
Why This Recipe Actually Works
The flour, egg, and panko create a kind of layered structure.
Flour sticks to the chicken. Egg sticks to the flour. Breadcrumbs stick to the egg.
Simple in theory.
But I didn’t really think about that the first few times—I just followed the steps and hoped it worked. It only started making sense after a few attempts when things didn’t work.
The panko is what gives that crisp texture. Regular breadcrumbs just don’t hold up the same way.
The skillet matters too.
Cast iron holds heat well, which helps the crust set quickly instead of steaming.
Although, to be fair, I’ve used a regular pan before and still gotten decent results. Just… less consistent.
Cooking Tips
Don’t crowd the pan.
I know it’s tempting to cook everything at once, but that drops the temperature and creates steam. Steam = soft crust.
Room temperature chicken cooks more evenly.
It still feels slightly wrong leaving it out on the counter, but 10 minutes makes a difference.
Panko over regular breadcrumbs.
Always.
Oil temperature matters more than anything else.
Too low = greasy.
Too high = burnt outside, undercooked inside.
Somewhere in between is where things work.
Also—this might just be me—but I tend to double-check the heat more than necessary once the chicken is in the pan. Probably because I’ve messed it up before.
Small Changes That Made a Big Difference
Skipping the flour layer used to be my go-to shortcut.
Didn’t work. The crust would slide off halfway through cooking.
Adding even a thin layer fixed that completely.
Moving some of the seasoning into the breadcrumbs (instead of just on the chicken) also helped. It spreads the flavor out more evenly.
And the butter at the end?
That wasn’t planned the first time. It just… happened.
Now I do it every time.
Substitutions & Variations
This skillet chicken breast recipe is pretty forgiving, which is probably why I keep coming back to it.
No panko? Regular breadcrumbs work. The crust won’t be quite as crisp, but it’s still good—just a bit softer. Crushed cornflakes, though… surprisingly great. I tried that once out of pure curiosity and now I kind of keep it as a backup option.
Crushed Ritz crackers also work. Maybe a little too well.
Gluten-free? Swap the flour for rice flour or a GF blend, and use gluten-free breadcrumbs. The process doesn’t really change, which is nice.
Want it spicier? Double the cayenne, or add chili flakes to the breadcrumbs. You can also mix a little hot sauce into the egg wash. Sounds slightly questionable at first, but it actually works without making things soggy.
Dairy-free? You’re already good to go unless you add butter at the end. Just skip it or use a bit of olive oil instead.
Bone-in chicken is doable, but it complicates things a little. You’ll need to finish it in the oven after searing. I’ve done it before… it works, but I usually stick to boneless for simplicity.
If you want more of a Southern-style version, skip the panko and go with seasoned flour only. Double dip if you want a thicker crust. Different texture, still very satisfying.
What to Serve With It
Honestly, this chicken works with almost anything.
My default is mashed potatoes and something green. It’s simple, it works, and I don’t overthink it.
Coleslaw is another easy win—the cold crunch balances the hot chicken in a way that just makes sense. I don’t really question it anymore.
For something lighter, slice the chicken and throw it over a salad with lemon and olive oil. It ends up looking like you planned something fancy, even if you didn’t.
Rice, roasted vegetables, mac and cheese, buttered corn… all solid.
And if you turn it into a sandwich—brioche bun, pickles, maybe a bit of honey mustard—it’s the kind of thing you randomly think about later.
At least, I do.
What I Skip When I’m Short on Time
When I’m in a rush, I don’t always do the full dredging process.
Sometimes it’s just seasoning + a light flour coat straight into the pan. No egg, no breadcrumbs.
It’s not the same. The crust is thinner, less crunchy. But it still works, and it’s fast.
I also sometimes skip the resting step.
I know that’s not ideal.
But when you’re hungry, logic doesn’t always win.
Storage & Reheating
Leftovers keep in the fridge for about 3–4 days.
The skin softens overnight. That part is unavoidable.
But you can bring it back.
Reheat in the oven at 375°F for about 10–12 minutes, preferably on a rack. That helps it crisp up again instead of steaming.
The microwave… works, technically.
But the texture takes a hit. It’s not terrible, just not what you want after putting in the effort to get it crispy in the first place.
Freezing works too. Wrap pieces individually and store for up to 2 months.
Reheat straight from frozen in the oven. Takes longer, obviously, but it holds up better than expected.
Cook and Prep Time
Prep Time: 10 minutes
Cook Time: 12–15 minutes
Rest Time: 5 minutes
Total Time: about 30 minutes
Servings: 2
(These are rough estimates. It can shift a bit depending on how thick your chicken is, or how distracted you get halfway through.)
Nutrition Facts (Per Serving, Approximate)
Calories: ~420 kcal
Protein: 42g
Carbohydrates: 22g
Fat: 16g
Saturated Fat: 3g
Fiber: 1g
Sodium: 680mg
These are estimates. They’ll vary depending on oil, portion size, and how generous you are with everything.
If I Were Making This Again Tomorrow
I’d probably brine the chicken first.
Even 20–30 minutes in salted water makes a difference. It’s one of those things I don’t always do because I’m trying to keep things simple, but when I do, I notice it.
I’d also add a bit of lemon zest to the breadcrumbs.
It’s a small thing, but it changes the flavor just enough to make it feel a little more interesting.
And maybe—this is random—I’d prep everything a bit earlier so I’m not rushing the heating step.
Because that’s where I tend to cut corners, and it shows.
FAQ
Can I use chicken thighs instead of breasts?
Yes. They’re actually more forgiving since they have more fat. Cook time is similar for boneless, slightly longer for bone-in.
Do I need a cast iron skillet?
Not strictly, but it helps. A heavy stainless pan works too. Non-stick… not ideal for this.
Why does my crust fall off?
Usually because the chicken wasn’t dry enough, or the coating wasn’t pressed in properly. Or it was flipped too early.
Sometimes it’s a mix of all three.
Can I make this ahead of time?
You can bread the chicken and leave it in the fridge for a bit before cooking. It actually helps the coating stick.
Just don’t leave it too long or it starts to get a bit… weird.
How do I know it’s done without a thermometer?
Press it. If it springs back, it’s done.
But honestly, a thermometer just removes the guesswork completely.
Final Thoughts
This easy fried chicken breast recipe skillet is one of those meals that quietly becomes part of your routine.
It’s not complicated. It doesn’t try to be.
It’s just reliable, fast, and consistently good once you get the hang of it.
The skillet does most of the work—you just have to let it.
And maybe not overthink every step, which… is easier said than done.
If you try it and it’s not perfect the first time, that’s normal.
It definitely wasn’t for me.