No-Bake Oreo Cheesecake Recipe – Creamy and Perfect for Parties  

No-Bake Oreo Cheesecake Recipe 

No-Bake Oreo Cheesecake Recipe 

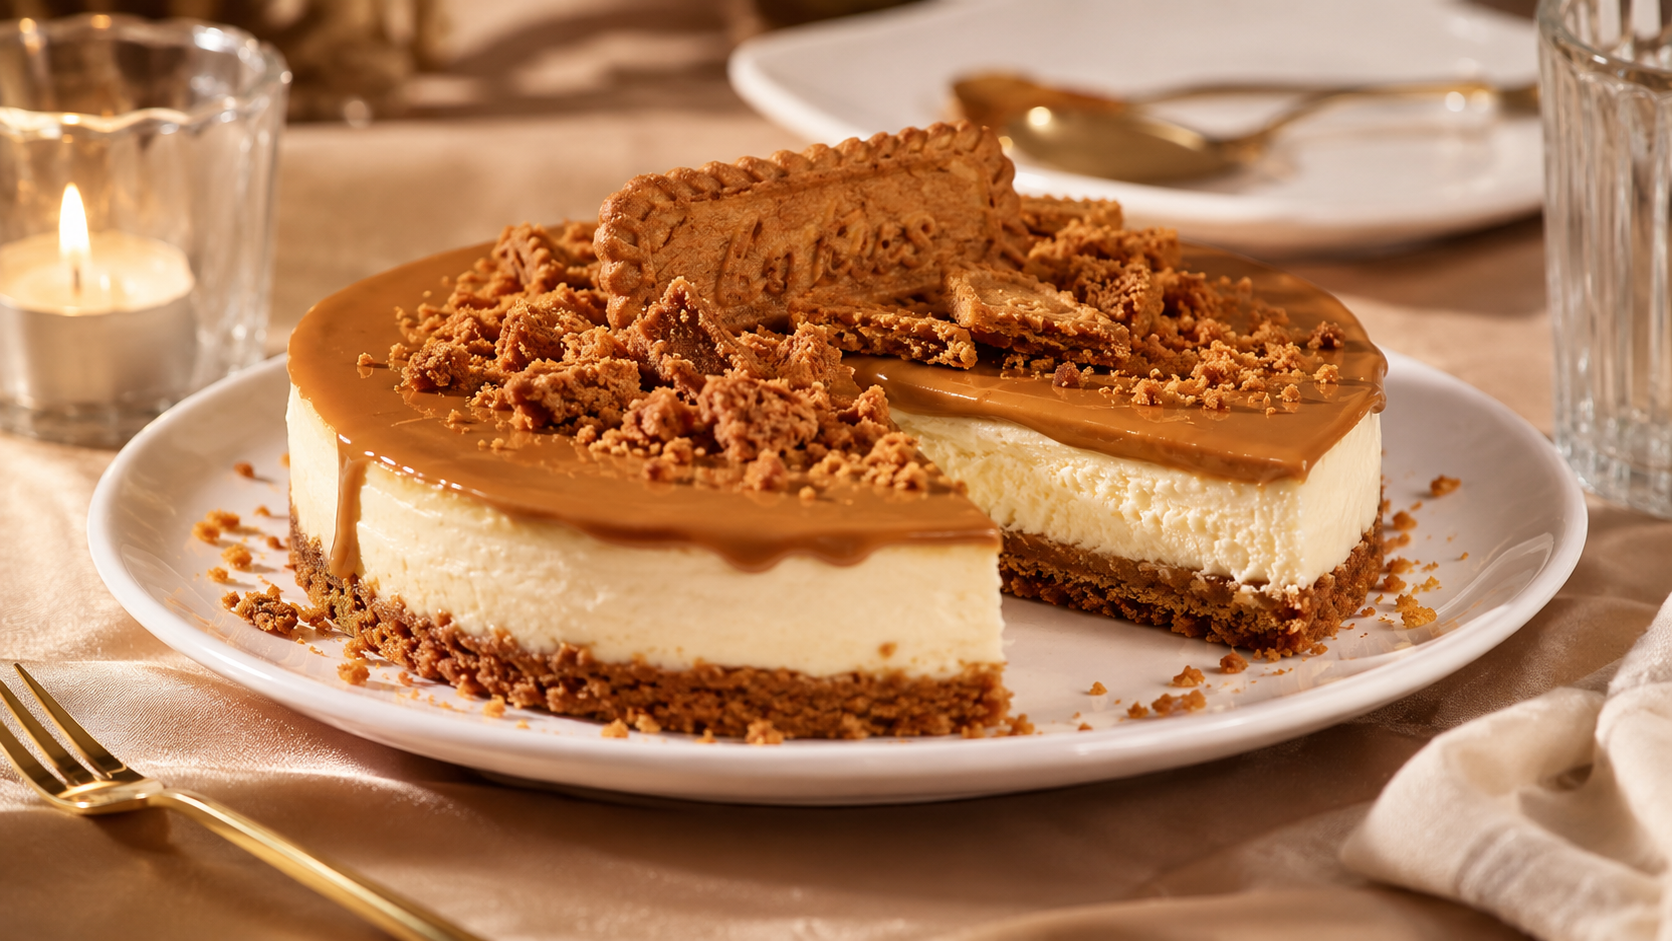
It is not that I often dabble with the no-bake cheese cake recipe quite often. In fact, I made my first no-bake Oreo cheesecake on a Tuesday afternoon last March, mostly because my oven had picked that exact week to die on me. My neighbor Mrs Dyson had asked me to bring dessert to her daughter’s engagement get-together that Saturday, and I panicked for about two days straight. Turns out, a no-bake Oreo cheesecake saved the whole thing, and now it’s the one dessert people specifically ask me to bring. It’s cool, it’s creamy, it comes together without touching your oven, and honestly, it tastes like something way fancier than the fifteen minutes of actual effort it takes.

This isn’t one of those fussy cheesecakes that crack down the middle or need a water bath and a prayer. You mix, you press, you chill, and you’re done. If you’ve got a crowd coming over and zero patience for baking drama, this recipe fits right in.

Why You’ll Love This Recipe

Here’s the thing about this cheesecake — it doesn’t ask much of you. No oven, no springform pan drama, no worrying about cracks or overbaking. You crush some cookies, whip some cream cheese, fold it all together, and let your fridge do the heavy lifting.

It’s also stupid easy to make ahead, which matters a lot when you’re hosting. I usually make mine the night before a party so I’m not stuck in the kitchen when guests show up. And the taste? Rich, tangy-sweet, with that unmistakable Oreo crunch running through every bite. My cousin Peter, who claims he “doesn’t really like cheesecake,” ate three slices at my sister’s baby shower and then asked for the recipe. So, take that for what it’s worth.

Kids love it, adults love it, and it holds up fine at room temperature for a couple hours if your party runs long — which, let’s be honest, they always do.

Ingredients

You’ll need two packs of Oreo cookies, about 30 total, split between the crust and the filling. Here’s exactly what goes into this no-bake Oreo cheesecake:

For the crust:

  1. 24 Oreo cookies, crushed into fine crumbs (I just toss them in a zip bag and go at it with a rolling pin — oddly satisfying, try it after a bad day)
  2. 6 tablespoons unsalted butter, melted

For the filling:

  1. 16 ounces full-fat cream cheese, softened properly
  2. 1 cup powdered sugar
  3. 2 teaspoons vanilla extract
  4. 1½ cups heavy whipping cream
  5. 10 Oreo cookies, roughly crushed (chunky, not fine — you want bite here)
  6. A pinch of salt (optional — I skipped it for years without noticing a huge difference, so don’t stress if you forget it)

Step-by-Step Cooking Instructions

  1. Make the crust. Mix your crushed Oreo crumbs with the melted butter until it looks like wet sand, then press it firmly into the bottom of a 9-inch springform pan. Use the bottom of a glass to really pack it down — this step matters more than people think, because a loose crust just crumbles apart when you slice into it later.
  2. Chill the crust. Pop the pan in the fridge while you make the filling, so it firms up a little.
  3. Beat the cream cheese. In a large bowl, beat the softened cream cheese until it’s completely smooth, no lumps hiding anywhere. Add the powdered sugar and vanilla, and beat again until it’s fluffy and pale.
  4. Whip the cream. In a separate bowl, whip the heavy cream until stiff peaks form; this usually takes me around 4 minutes with a hand mixer, though it depends on how cold your cream is.
  5. Fold it together. Gently fold the whipped cream into the cream cheese mixture in two batches — don’t dump it all in at once, or you’ll deflate all that air you just worked to build.
  6. Add the Oreo chunks. Fold in the crushed Oreo pieces last, saving a small handful for topping.
  7. Assemble. Pour the filling over the chilled crust, smooth the top with a spatula, and sprinkle the reserved Oreo crumbs on top.
  8. Chill and set. Cover it and refrigerate for at least 6 hours, though overnight really is better if you can manage it.
  9. Slice and serve. Use a warm, dry knife for the cleanest edges — run it under hot water and wipe it dry between cuts.

Cooking Tips and Substitutions & Variations

A few things I’ve learned the hard way. First, your cream cheese has to be actually soft, not just “sitting on the counter for ten minutes” soft. Cold cream cheese leaves lumps no amount of beating will fix, and trust me, biting into a lump mid-slice is not the texture anyone signed up for. Second, don’t rush the chilling time. I once tried serving this after only 3 hours because guests arrived early, and it was more of a thick pudding than a cheesecake — still tasted fine, looked like a mess.

If you want variety, swap regular Oreos for the mint or peanut butter kind and the whole flavor shifts completely. You can also use a store-bought graham cracker crust if you’re really pressed for time, though I’ll admit the Oreo crust brings something graham crackers just can’t match. For a lighter version, swap in reduced-fat cream cheese and light whipped topping, though the texture gets slightly less rich — worth it if you’re watching calories, not worth it if this is a special occasion. Gluten-free Oreo alternatives exist now too, and they work almost identically in the crust.

What to Serve With It

I usually serve this alongside fresh berries, strawberries especially, because the tartness cuts through all that richness nicely. A drizzle of chocolate or caramel sauce over each slice makes it feel restaurant-worthy without any extra effort on your part. If it’s a summer gathering, iced coffee pairs shockingly well with a slice of this — something about the bitterness balancing the sweetness. For kids’ parties, a scoop of vanilla ice cream on the side turns it into a proper sundae situation.

Storage & Reheating


This keeps beautifully in the fridge, covered, for up to 5 days — not that it usually lasts that long in my house. You can also freeze individual slices wrapped tightly in plastic wrap for up to a month; just thaw them in the fridge overnight before serving. There’s no reheating involved here obviously, since it’s meant to be served cold, which honestly is half the appeal when it’s hot outside.

Cook and Prep Time

Prep time runs about 25 minutes, no actual cooking involved, and then a mandatory chill time of 6 to 8 hours, or overnight if you can plan ahead. Total hands-on time is short; the waiting is the hard part.

Nutrition Facts (Per Slice, Approx.)

Calories: 410, Fat: 29g, Carbohydrates: 33g, Protein: 5g, Sugar: 22g, Sodium: 260mg. These numbers shift a bit depending on which Oreos and cream cheese brand you use, so treat this as a rough guide rather than gospel.

Here’s something I didn’t expect when I first started making this no-bake Oreo cheesecake regularly — the texture actually depends more on how well you whip the cream than on the cream cheese itself. I used to think cream cheese quality was everything. It’s not. Properly whipped cream is what gives this whole dessert its lightness, keeping it from turning into a dense, heavy brick of sugar.

The one small change that made the biggest difference for me was folding the Oreo chunks in by hand at the very end instead of mixing them in with the beater. I used to just throw everything in the mixer together — turns out that was a mistake, because it pulverized the cookie chunks into dust and you lost that satisfying crunch entirely. Folding gently by hand keeps real bite-sized pieces intact, and that texture contrast is honestly half of why people love this dessert.

If I were making this again tomorrow, I’d probably double the crust. I always end up with slightly too much filling for the amount of crust I make, and the last bite or two of each slice ends up crust-less, which feels like a small tragedy. I’d also chill the mixing bowl beforehand next time — it helps the cream whip up faster and holds its structure longer once it’s in the fridge.

When I’m genuinely short on time, I skip making the crust crumbs by hand and just pulse everything in a food processor instead, cookies, butter, all together in one go. It’s not quite as evenly textured, but nobody at a party has ever complained, and frankly, most people are too busy going back for seconds to notice.

FAQ

Can I make this without a springform pan? Yes, a regular pie dish works fine, though slicing gets a bit messier since you can’t release the sides.

Why is my filling runny? Usually it means the cream wasn’t whipped to stiff peaks before folding, or the cheesecake didn’t chill long enough.

Can I use low-fat cream cheese? You can, though the texture turns slightly less rich and a bit more prone to weeping liquid over time.

How far ahead can I make this? Up to two days ahead works great, and honestly the flavor deepens a little by day two.

Final Thoughts

At the end of the day, this no-bake Oreo cheesecake recipe earns its spot as a go-to dessert because it’s forgiving, quick, and genuinely delicious without demanding much from you. It’s saved me more than once when plans changed last minute, and it’ll probably do the same for you. Give it a try before your next gathering — I really think it’ll become one of those recipes you keep coming back to, oven trouble or not.


Carrot Cake Overnight Oats Recipe (The One I Make Every Sunday Night)

carrot cake overnight oats reciperecipe

Carrot Cake Overnight Oats

Carrot cake Overnight Oats Recipe

I started making this carrot cake overnight oats recipe because I was tired of eating actual carrot cake for breakfast and then feeling weird about it by 10 a.m. True story — for about three weeks last spring, I had a leftover carrot cake in my fridge from my sister-in-law’s birthday, and I just kept slicing into it every morning like a raccoon with a day planner. Eventually I figured, why not just turn the flavors I love into something that’s actually meant to be breakfast? So that’s what this is. It tastes like carrot cake, spoonful for spoonful, but it’s oats, yogurt, shredded carrot, and warm spices instead of butter and frosting.

This recipe has become the thing I prep on Sunday nights for the whole work week, usually around 8:30 while some true crime documentary plays in the background that I’m not really watching. It takes maybe ten minutes of actual effort, and then the fridge does the rest of the work overnight. If you’ve made overnight oats before, you know the drill. If you haven’t, don’t worry, I’ll walk you through every bit of it, including the mistakes I made getting here.

Why You’ll Love This Recipe

Here’s the thing about carrot cake overnight oats — they hit that dessert-for-breakfast craving without the sugar crash that comes an hour later. The carrots add natural sweetness and a little bite, the cinnamon and nutmeg do the heavy lifting on flavor, and the oats turn creamy and almost pudding-like by morning. It’s genuinely satisfying in a way that a lot of “healthy” breakfasts pretend to be but aren’t.

I also love that this recipe is basically foolproof. You can’t really overcook oats that aren’t being cooked at all, which takes a lot of pressure off a Sunday night when you’re mostly just trying to get to bed. And it holds up well for four, sometimes five days in the fridge, so one prep session covers almost the whole week. My neighbor Jennifer (yes, the same Jennifer from the tamarind conversation — she’s become something of a recurring character in my kitchen life) started making a batch after trying mine at a brunch, and she said her kids ask for it by name now, which I think says something about how far this recipe has come from “sad breakfast substitute” to genuinely craveable.

Ingredients You Will Need

You’ll need a handful of pantry staples plus one produce item, and none of it is exotic or hard to find. Here’s what goes into a single jar of carrot cake overnight oats:

  • 1/2 cup old-fashioned rolled oats (not instant, not steel-cut — trust me on this one)
  • 1/2 cup milk of your choice, dairy or plant-based both work fine
  • 1/4 cup plain yogurt, Greek or regular
  • 1/2 cup finely shredded carrot, about one medium carrot
  • 1 tablespoon maple syrup or honey
  • 1/2 teaspoon ground cinnamon
  • 1/4 teaspoon ground nutmeg
  • A pinch of ground ginger, optional but I always add it
  • 1 tablespoon chopped walnuts or pecans
  • 1 tablespoon raisins or chopped dates
  • 1/2 teaspoon vanilla extract
  • A small pinch of salt, because oats without salt taste flat, no matter what anyone tells you

Step-by-Step Cooking Instructions

  1. Grab a mason jar or any container with a lid — I use old pasta sauce jars because I refuse to buy special jars for this, it feels unnecessary. Add the oats first.
  2. Pour in the milk and yogurt, then stir well so the oats are fully coated and nothing’s clumping at the bottom. This step matters more than people think; skip it and you’ll get a dry pocket of oats hiding at the base of the jar in the morning.
  3. Add the shredded carrot, maple syrup, cinnamon, nutmeg, ginger if you’re using it, vanilla, and salt. Stir again until everything’s evenly mixed and the mixture looks uniformly speckled with orange and brown.
  4. Fold in the walnuts and raisins last, just so they don’t get too soggy sitting in the wet mixture all night.
  5. Put the lid on, pop it in the fridge, and just leave it alone for at least six hours, though overnight (eight to ten hours) gives you the best texture.
  6. In the morning, give it a good stir, since some separation is totally normal. Add a splash more milk if it’s thicker than you’d like, and top with a few extra walnuts or a dollop of yogurt if you’re feeling fancy.

Cooking Tips and Special Notes

The single biggest change I made to this recipe, and I mean this changed everything, was switching from grating the carrot coarsely to shredding it really fine, almost like confetti. I used to just grate it the regular way, the way you’d do for a salad, and the texture ended up weirdly stringy and kind of chewy in a bad way. Once I started using the fine side of my box grater, the carrot practically melts into the oats overnight and you get that classic carrot cake texture instead of, well, oat soup with carrot ribbons floating in it.

Also, don’t skip the resting time even if you’re in a rush. I tried eating this after only two hours in the fridge once, on a morning I was running late for a dentist appointment, and it was fine, not amazing — the oats hadn’t fully softened and the whole thing tasted more like wet cereal than cake. Give it the full overnight soak whenever you can. It really is worth the wait.

Substitutions and Variations

This recipe bends pretty easily depending on what’s in your kitchen or what you’re craving. Swap the walnuts for pecans, or skip nuts entirely if you’ve got an allergy in the house, use unsweetened applesauce instead of maple syrup for a lower-sugar version, throw in a tablespoon of cream cheese instead of yogurt if you want that actual cream-cheese-frosting vibe (this one’s a little indulgent but so good), or use grated apple alongside the carrot for extra natural sweetness and a slightly different texture. Steel-cut oats don’t work well here since they stay too firm even after an overnight soak, so stick with rolled oats unless you’re willing to experiment with soak time.

What to Serve With It

I usually eat this on its own since it’s pretty filling as is, but a side of fresh fruit rounds it out nicely, think sliced banana or a handful of berries. If you’re serving this for a brunch spread, small dessert-style glasses with a sprinkle of extra cinnamon on top make it look a lot more put-together than the effort actually required.

Storage and Reheating

These oats keep well in the fridge for up to five days, sealed in their jar or container. I wouldn’t recommend freezing this one, honestly — the texture gets grainy and a little sad after thawing, and the carrots turn mushy in a way that’s not pleasant. No reheating needed either; this is meant to be eaten cold or at room temperature, straight from the fridge. If you really want it warm, a quick 20 seconds in the microwave works, though I think it changes the texture for the worse.

Cook and Prep Time

Prep time is about ten minutes, and there’s zero actual cook time since nothing gets heated. Total time before it’s ready to eat is roughly eight hours, mostly hands-off overnight resting.

Nutrition Facts (per serving, approximate)

Calories: 310, Protein: 10g, Carbohydrates: 42g, Fiber: 6g, Sugar: 16g, Fat: 11g. These numbers shift a bit depending on which milk and sweetener you use, so treat this as a general guide rather than gospel.

Why This Recipe Actually Works

The combination of oats and yogurt does two jobs at once — the oats soak up liquid and turn creamy, while the yogurt adds tang and protein that plain milk alone can’t give you. Carrots bring natural sugar and moisture without needing much added sweetener, and the warm spices do the job that frosting usually does in regular carrot cake, giving you that same cozy flavor without needing a whole stick of butter involved.

What I’d Do Differently Next Time

If I’m being honest, I’d probably toast the walnuts first next time instead of adding them raw. I used to think it wasn’t worth the extra step for something this simple, but a friend convinced me to try it last month and the flavor difference was bigger than I expected — toasted nuts have this deeper, almost caramelized taste that raw walnuts just don’t have. Small thing, big payoff, and now I feel a little guilty for skipping it all those years.

What I Skip When I’m Short on Time

I’ll admit it, I skip the fine grating step sometimes when I’m exhausted and just running the carrot through the food processor’s shredding attachment instead, even though it comes out a bit coarser. It’s not quite as good, texture-wise, but it’s still perfectly edible and honestly most mornings I’m too busy drinking coffee to notice the difference anyway.

FAQ

Can I make carrot cake overnight oats without yogurt? Yes, just use extra milk in its place, though you’ll lose a bit of the tang and creaminess yogurt adds.

Do I need to cook the carrots first? No, raw shredded carrot softens naturally overnight as it sits in the liquid, so there’s no need to cook it beforehand.

Can I double or triple this recipe for meal prep? Definitely, and I do this most weeks. Just multiply everything evenly and store individual portions in separate jars so they’re grab-and-go ready.

Why are my oats too thick in the morning? This usually means the oat-to-liquid ratio was a bit off, or your oats are older and drier than usual. Just stir in a splash more milk until it loosens to the texture you like.

Final Thoughts

This carrot cake overnight oats recipe turned what used to be an actual slice of cake into something I can eat guilt-free on a random Tuesday morning, and honestly, that swap has stuck around longer than most of my breakfast experiments. It’s easy, it barely takes any effort the night before, and it genuinely tastes like dessert while still keeping me full until lunch. If you try one overnight oats recipe this year, let it be this one — trust me, your future groggy self will thank you.

Zucchini Carrot Cake Recipe (My Garden-Overflow Fix)

zucchini carrot cake

Zucchini Carrot Cake Recipe

Zucchini Carrot Cake Recipe

This zucchini carrot cake recipe exists because of one very specific problem: my garden decided to produce roughly nine zucchinis in a single week last August, and I ran out of ways to hide them in pasta sauce. My neighbor Tom, who grows tomatoes two houses down and likes to remind me his zucchini plants “never get out of hand” (rude), suggested I just bake something with the extra. So I grabbed my usual carrot cake recipe and figured, why not throw some shredded zucchini in there too? Turns out that combination is kind of magic — moist, a little dense, and packed with just enough veggies that I don’t feel bad having a second slice.

If you’ve made regular carrot cake before, this one’s going to feel familiar but noticeably better in the texture department. The zucchini adds moisture without watering down the flavor, and honestly, most people can’t even tell it’s in there until you mention it. I’ve brought this cake to two potlucks now, and both times someone asked for the recipe before they even finished their first bite, which I take as a pretty good sign.

Why You’ll Love This Recipe

This cake solves two problems most carrot cakes have. First, it’s rarely dry — the zucchini keeps things moist for days without needing extra oil or butter to compensate. Second, it’s a sneaky way to use up garden zucchini or those grocery store ones that seem to multiply in your crisper drawer no matter how few you bought. It’s also just genuinely delicious, with warm spices, a hint of tang from the cream cheese frosting, and a crumb that’s tender without falling apart when you slice it.

I’ll admit, I was skeptical the first time I made this. Adding two vegetables to one cake felt like I was maybe trying too hard, like I was overcompensating for something. But the texture won me over almost instantly, and now I actually prefer this version to plain carrot cake, which felt like a strange thing to admit to my own mother, who’s been making the “original” for thirty years and takes her carrot cake very seriously.

Ingredients

Here’s what you’ll need for one 9×13 cake or two 8-inch round layers, depending on how you want to serve it. For the dry stuff, grab 2 cups all-purpose flour, 1 1/2 teaspoons baking soda, 1 teaspoon baking powder, 1/2 teaspoon salt, 2 teaspoons ground cinnamon (I sometimes sneak in a little extra, don’t tell my mother), 1/2 teaspoon ground nutmeg, and 1/4 teaspoon ground cloves.

For the wet ingredients, you’ll need 3 large eggs, 3/4 cup vegetable oil, 3/4 cup granulated sugar, 1/2 cup packed brown sugar, and a teaspoon of vanilla. Then there’s the good stuff — 1 1/2 cups shredded carrot, about two medium carrots, though mine are never quite “medium,” they’re always weirdly huge or tiny, no in-between. Add 1 cup shredded zucchini that’s been squeezed dry, 3/4 cup chopped walnuts or pecans with a little extra saved for topping, and 1/2 cup raisins if you’re a raisin person. I go back and forth on the raisins, honestly.

For the cream cheese frosting: 8 ounces softened cream cheese, 1/2 cup softened butter, 3 cups powdered sugar, and a teaspoon of vanilla extract. Nothing fancy there.
Step-by-Step Cooking Instructions

Alright, here’s the actual process, and I promise it’s less fussy than the ingredient list makes it look.

1. Preheat your oven to 350°F and grease your pans well, or line them with parchment if you’re worried about sticking — this cake is moist enough that it clings a bit. I’ve forgotten to grease a pan exactly once and spent ten minutes chiseling cake out with a butter knife, so, learn from me.
2. In a large bowl, whisk together the flour, baking soda, baking powder, salt, cinnamon, nutmeg, and cloves until everything’s evenly combined.
3. In a separate bowl, beat the eggs, oil, granulated sugar, brown sugar, and vanilla together until smooth and slightly lightened in color, about two minutes with an electric mixer.
4. Fold the wet mixture into the dry ingredients, stirring just until no dry streaks remain. Don’t overmix here, or the crumb turns tough instead of tender.
5. Gently fold in the shredded carrot, squeezed zucchini, walnuts, and raisins if you’re using them, until everything’s evenly distributed throughout the batter.
6. Pour the batter into your prepared pans and bake for 30 to 35 minutes for round layers, or 40 to 45 minutes for a 9×13 pan, until a toothpick inserted in the center comes out clean or with just a few moist crumbs.
7. Let the cake cool in the pan for about 15 minutes, then transfer to a wire rack to cool completely before frosting. This part takes patience, and I know that’s not everyone’s strong suit, mine included.
8. For the frosting, beat the cream cheese and butter together until smooth, then gradually add powdered sugar and vanilla, mixing until fluffy. Spread over the cooled cake and top with extra chopped walnuts if you like a little crunch on top.

Cooking Tips and Special Notes

Squeeze the zucchini dry. Seriously, don’t skip this. I used to just toss the shredded zucchini straight into the batter without wringing it out, figuring the extra moisture would just make the cake moister, right? Wrong, and I don’t say that lightly — it made the middle gummy and slightly underbaked-tasting even when the toothpick came out clean, and it took me three separate attempts over two weekends before I figured out where I’d gone wrong (it was always the zucchini, every single time). Wrap the shredded zucchini in a clean kitchen towel or a few paper towels and squeeze hard, like you’re wringing out a wet sponge, until barely any liquid drips out. It feels like overkill. It’s not.

Grate the carrots and zucchini finely too, not coarsely. Big shreds don’t cook down evenly, and you end up with weird crunchy bits scattered through an otherwise soft cake — a texture mismatch nobody asked for, and one I didn’t even notice until my mother pointed it out at Thanksgiving, in that way mothers do.

Substitutions and Variations

Anyway. This recipe bends pretty easily if you need to swap things around — half whole wheat flour and half all-purpose gives you a slightly nuttier flavor and more fiber, chopped dried apricots or cranberries work fine in place of raisins if raisins aren’t your thing (they’re not everyone’s thing, I get it), and coconut oil instead of vegetable oil adds this subtle undertone that I honestly didn’t expect to like as much as I do. Skip the nuts entirely if there’s an allergy in the house. You can also turn the batter into cupcakes, just cut the bake time to about 20 minutes and watch them closely, since ovens are all a little different and mine runs hot for reasons I’ve never fully understood.

What to Serve With It

I usually serve this cake plain with just the frosting, but a scoop of vanilla ice cream alongside a warm slice is genuinely wonderful, especially if you microwave the slice for ten seconds first. For a brunch or afternoon tea setting, a simple cup of chai or plain black coffee pairs really nicely, since the spices in the cake echo a lot of what’s already going on in a good chai blend.

Storage and Reheating

This cake keeps well in the fridge, covered, for up to five days thanks to the cream cheese frosting, which needs refrigeration anyway. Let slices sit at room temperature for about 15 minutes before eating for the best texture, since cold cream cheese frosting can taste a little flat straight from the fridge. You can also freeze the unfrosted cake layers for up to three months, wrapped tightly in plastic wrap and foil, then thaw overnight in the fridge before frosting.

Cook and Prep Time

Prep time runs about 20 minutes, and bake time is 30 to 45 minutes depending on your pan size. Total time, including cooling before frosting, lands around two hours, though most of that is hands-off waiting.

Nutrition Facts (per slice, based on 12 servings)

Calories: 420, Protein: 5g, Carbohydrates: 48g, Fiber: 2g, Sugar: 34g, Fat: 24g. These numbers will shift depending on how generous you are with the frosting, and honestly, I’ve never once measured my frosting layer precisely, so treat this as a ballpark.

Why This Cake Actually Works

The zucchini’s high water content does something the carrots alone can’t quite manage, it keeps the crumb soft for days without turning the cake soggy or dense. Carrots bring natural sweetness and a bit of chew, while zucchini brings pure moisture and almost no flavor of its own, which means it disappears into the batter instead of announcing itself. Together, they balance each other out in a way that makes this cake noticeably better than either vegetable working alone.

The Small Change That Made a Big Difference

I keep coming back to the grating thing, and yeah, I already mentioned it once, but it’s worth repeating because it genuinely moved this cake from “pretty good” to “people ask for the recipe before they’ve finished their first bite” territory. Fine shreds melt into the batter instead of sitting there as distinct little strands. That’s really it. That’s the whole secret, and it took me embarrassingly long to figure out.

What I’d Do Differently Next Time

I’d probably add a touch more cinnamon next time, maybe an extra half teaspoon. I kept the spice level fairly moderate on purpose so it wouldn’t overpower newcomers to the recipe, but every time I’ve made it since, I’ve found myself reaching for the cinnamon jar again right before it goes in the oven, like some part of me knows it needs just a little more.

What I Skip When I’m Short on Time

I skip making my own frosting sometimes and just doctor up a store-bought cream cheese frosting with a splash of vanilla and a tiny pinch of salt. Don’t judge me. It’s not quite as good, but it gets the job done on a busy weeknight when I want cake without the full production.

FAQ

Can I make zucchini carrot cake without frosting?
Yes, it’s still good plain or with a light dusting of powdered sugar, though the cream cheese frosting really does complement the spices well.

Do I need to peel the zucchini before shredding?
No, the skin is thin and soft enough to blend right into the batter, and peeling just adds an unnecessary step.

Can I use this recipe for muffins instead of a cake?
Absolutely, just fill muffin tins about two-thirds full and bake for around 18 to 22 minutes, checking with a toothpick a little early.

Why did my cake turn out dense or gummy in the middle?
This usually means the zucchini wasn’t squeezed dry enough before mixing, so extra liquid weighed down the batter. Wring it out more thoroughly next time.

Final Thoughts

This zucchini carrot cake recipe turned an overwhelming garden problem into one of my most requested desserts, and honestly, I don’t think I’ll go back to plain carrot cake anytime soon. It’s moist, well-spiced, and a genuinely clever way to use up extra vegetables without anyone noticing they’re eating something semi-healthy. If you’ve got zucchini piling up on your counter right now, or even if you don’t and you just want a better carrot cake, give this one a try — trust me, it’s worth the extra grating.

Easy Banana Bread Recipe: The One I Make Every Sunday  

easy banana bread

Quick And Easy Banana Bread Recipe

easy banana bread recipe

 I’ve made this easy banana bread recipe so many times I don’t even need the card anymore, and honestly, that’s the whole point of it. It started because I had four bananas going brown on my counter and a toddler who refused to eat them plain (fair enough, kid, they were pretty mushy). So I threw together this loaf, half expecting it to flop, and it came out so good my husband asked if I’d bought it from the bakery down the street. That was three years ago. I’ve tweaked it maybe twice since then, and both times I regretted messing with something that already worked.

This isn’t a fancy recipe. There’s no stand mixer required, no weird ingredient you have to hunt down at a specialty store. It’s the kind of thing you can make on a random Tuesday with stuff already sitting in your kitchen, and that’s exactly why it’s stuck around in my rotation longer than most recipes do.

Why You’ll Love This Recipe

Let’s get the obvious stuff out of the way first: it’s fast. One bowl, one loaf pan, done in under 15 minutes of actual hands-on work. You don’t need to cream butter and sugar for five minutes like some recipes demand — I just mash, mix, and pour. If you’ve got a whisk and a fork, you’re basically set.

It’s also incredibly forgiving. I’ve made this with three bananas instead of four because I ate one standing at the counter (don’t judge me), and it still turned out fine, just slightly less sweet. I’ve swapped oil for melted butter, added chocolate chips when my kids were being difficult about eating breakfast, and once — accidentally — used self-rising flour because I grabbed the wrong bag. It still worked, though I wouldn’t recommend doing that on purpose.

And it smells incredible while it bakes. There’s something about warm banana and cinnamon filling up a kitchen on a cold morning that just feels like home. My neighbor Denise smelled it through her kitchen window once and literally texted me asking what I was baking. That’s the kind of loaf this is.

Ingredients

Here’s what you’ll need, and none of it should require a special trip to the store. You’ll want 3 to 4 very ripe bananas (the browner and spottier, the better — I know it looks gross, but that’s where the flavor lives), 1/3 cup of melted butter or neutral oil, 3/4 cup of granulated sugar (you can go lower, I’ve done 1/2 cup with no complaints), 1 large egg, 1 teaspoon of vanilla extract, a pinch of salt, 1 teaspoon of baking soda, and 1 1/2 cups of all-purpose flour. That’s it. Nine ingredients, most of which are probably already in your pantry right now.

I sometimes throw in a teaspoon of cinnamon too, mostly because my mom always did, and old habits die hard. It’s optional, but I’d call it a strong suggestion.

Step-by-Step Cooking Instructions

Preheat your oven to 350°F and grease a 9×5-inch loaf pan, or line it with parchment paper if you’re lazy about scrubbing pans later (I am). In a large mixing bowl, mash your bananas with a fork until they’re mostly smooth — a few small lumps are fine, actually kind of nice in the final bread.

Stir the melted butter into the mashed bananas. Then mix in the sugar, egg, and vanilla until everything’s combined and looks glossy. Sprinkle the baking soda and salt over the top and stir it in — I learned the hard way that dumping it in one spot without spreading it around gives you weird bitter pockets in random bites. Not fun.

Add the flour last, folding it in gently. Don’t overmix here; a few flour streaks are okay, and honestly overmixing is the number one reason banana bread turns out dense and rubbery instead of soft. Pour the batter into your prepared pan and bake for 55 to 65 minutes, checking around the 50-minute mark with a toothpick. When it comes out clean, or with just a few moist crumbs (not wet batter), you’re done. Let it cool in the pan for about 10 minutes before turning it out onto a rack.

Cooking Tips and Special Notes

The single biggest tip I can give you: use bananas that look almost too far gone. If they’re just yellow with a couple of brown spots, wait a couple more days. You want them soft, sweet, and honestly kind of ugly. I used to toss bananas the second they got spotty — turns out that was a mistake, and I was throwing away the best baking bananas without knowing it.

Room-temperature eggs blend in more smoothly, though I’ll admit I forget this half the time and use a cold egg straight from the fridge anyway. It still works, it just takes a few extra seconds of stirring. Also, don’t skip greasing the corners of the pan. I did that once at 6:40 in the morning, half asleep, and spent ten minutes fighting with a stuck loaf that tore apart when I flipped it. Tasted fine. Looked like a crime scene.

Substitutions and Variations

You’ve got room to play around here, which is honestly one of my favorite things about this recipe. Swap the all-purpose flour for a gluten-free 1:1 blend if that’s what your kitchen needs, use coconut oil instead of butter for a slightly different flavor, or cut the sugar down to 1/2 cup if you’re serving it with something sweet on the side already. Walnuts, pecans, chocolate chips, a swirl of peanut butter, even a handful of blueberries — I’ve thrown all of these into the batter at different points, and the base recipe holds up every time. My sister-in-law adds shredded coconut and calls it her “tropical version,” which sounds fancier than it actually is, but hey, it works.

If you want it a little healthier, you can replace half the flour with whole wheat flour, though the texture gets a bit denser. I did that for a while when I was trying to sneak more fiber into my kids’ snacks, and nobody noticed except my husband, who noticed everything.

What to Serve With It

I usually eat a slice plain, still slightly warm, with just a smear of butter melting into it. That’s the gold standard, in my opinion. But if you want to make it feel more like a proper breakfast, pair it with a bowl of Greek yogurt and some fresh berries, or a mug of coffee if it’s morning and a glass of milk if it’s, say, 9 pm and you’re eating dessert (no judgment, I do this too). It also holds up surprisingly well next to a scoop of vanilla ice cream if you’re serving it as an after-dinner treat.

Storage and Reheating

This loaf keeps well at room temperature for about 3 days if you wrap it tightly in plastic wrap or keep it in an airtight container. After that, I move it to the fridge, where it’ll last close to a week. It also freezes beautifully — slice it first, then wrap individual pieces so you can pull one out whenever a craving hits, which for me is usually around 3 pm on a Wednesday for no particular reason.

To reheat, a few seconds in the microwave brings it right back to that fresh-baked softness. If you’re doing it from frozen, give it about 20 to 25 seconds, check it, and add more time if needed.

Cook and Prep Time

Prep time runs about 10 to 15 minutes, and baking takes 55 to 65 minutes, so you’re looking at just over an hour total, most of which is hands-off oven time. It’s the kind of recipe you can start before hopping in the shower and have ready by the time you’re dressed.

Nutrition Facts (Approximate, Per Slice)

Based on a loaf cut into 10 slices, each one runs roughly 210 calories, 7 grams of fat, 34 grams of carbohydrates, 3 grams of protein, and about 18 grams of sugar. These numbers shift depending on which substitutions you use, so treat this as a rough guide rather than gospel.

Why This Recipe Actually Works

The magic here really comes down to ripe bananas and not overmixing the batter. Overripe bananas bring natural sugars and moisture that you just can’t fake with underripe ones, and that moisture is what keeps the crumb soft instead of dry and crumbly. Meanwhile, folding the flour in gently, rather than beating it, keeps the gluten from developing too much, which is the difference between a tender loaf and a chewy, tough one. It’s simple chemistry, but it makes a real difference you can taste.

The Small Change That Made a Big Difference

For years, I followed recipes that had me whisk the baking soda, salt, and flour together in a separate bowl before adding them to the wet ingredients. One rushed morning, I skipped that extra step and stirred the baking soda and salt directly into the banana mixture before folding in the flour. The loaf turned out just as soft and tender as always, and I realized I’d saved myself one less bowl to wash without sacrificing the result. Ever since then, that’s been my routine. It’s not a game-changing baking trick, but it’s one of those small shortcuts that makes homemade banana bread feel even easier on busy mornings.

What I’d Do Differently Making It Again Tomorrow

Honestly? I’d measure my sugar more carefully. I tend to eyeball it, and sometimes that means my loaf comes out a touch sweeter than I meant it to be. I’d also toast my walnuts first if I’m adding them, since raw walnuts folded straight into the batter get a little soft and lose that nice crunch. Small stuff, but it adds up.

What I Skip When I’m Short on Time

When mornings are chaotic, and let’s be real, most of mine are, I skip toasting nuts, skip measuring the cinnamon precisely, and just eyeball it. I also skip lining the pan with parchment and just grease it well instead, because who has time to cut parchment paper into a neat rectangle at 7 am. The bread still turns out great. Nobody’s ever complained about a slightly less photogenic loaf.

Frequently Asked Questions

Can I make this banana bread recipe without eggs? Yes, you can swap the egg for a flax egg (1 tablespoon ground flaxseed mixed with 3 tablespoons water) or a quarter cup of unsweetened applesauce. The texture will be slightly denser, but it still works fine.

Why did my banana bread sink in the middle? This usually happens from underbaking, opening the oven door too early, or too much banana relative to flour. Give it the full bake time and resist the urge to peek before the 50-minute mark.

Can I double this recipe? Absolutely, I’ve made a double batch for a bake sale before, using two loaf pans rather than one giant one, since a single over-sized loaf tends to bake unevenly.

Do I have to use ripe bananas? For the best flavor, yes. If yours aren’t ripe enough, roast them in their peels at 300°F for about 15 minutes, then let them cool before mashing. It’s a decent shortcut when you’re impatient, like I usually am.

Final Thoughts

At the end of the day, this easy banana bread recipe earns its spot in my kitchen because it’s simple, it’s flexible, and it never lets me down, even on the mornings I’m half asleep measuring things wrong. It’s not the fanciest bread out there, and it doesn’t need to be. Give it a try next time your bananas start looking a little too spotty for snacking, and trust me, your kitchen is going to smell amazing.


Banana Desserts I Make When They are too Brown to Eat

banana Dessert I make at home

Overripe Banana Desserts: Easy Recipes to Make with Brown Bananas


I don’t know how bananas move from “perfect” to “absolutely not” in about six hours — but they do. One day they’re yellow and cheerful. Next morning they look like they’ve seen things.

For a long time I threw those away. Which now feels slightly tragic, because overripe bananas are basically pre-made dessert sweetener with a built-in flavor boost.

These days, when my bananas go too brown to slice and eat normally, I don’t see failure. I see dessert options.

Not fancy bakery projects. Real kitchen desserts. The kind you make in an old bowl with a fork that bends a little.

Some of these came from good planning. Most came from me refusing to waste food on a tired evening.

Here’s what I actually make — repeatedly — when the bananas cross that line.

First — The Brown Banana Rule I Learned the Hard Way

If the banana smells fermented, it’s gone. No heroics.

But if it’s:

very spotted

soft

dark yellow to brown

sweet-smelling

It’s dessert-ready.

In fact, the uglier ones often make better banana desserts because you need less added sugar. They’re already halfway to caramel in spirit.

I used to ignore that and dump sugar in anyway. Results were… loud. Now I taste the mash first.

My Default Rescue: One-Bowl Banana Snack Cake

This is the thing I make most often because it’s hard to mess up and easy to scale.

Two or three very ripe bananas. Mashed roughly — not perfectly smooth. I like a few small lumps.

Add:

egg

oil or melted butter

brown sugar (not much — the bananas carry a lot)

flour

pinch of salt

cinnamon

baking powder

Stir like you’re not trying to impress anyone. Pour into a small pan.

It bakes into a soft, slightly dense cake that sits somewhere between banana bread and dessert. I rarely frost it. Sometimes I dust powdered sugar. Sometimes I don’t bother.

Best eaten slightly warm, standing at the counter the first time. That’s tradition now.

The 10-Minute Banana Pan Dessert

This one happened by accident when I didn’t want to turn the oven on.

Slice overripe bananas into a pan with a little butter. Cook them slowly. They soften, darken, and go glossy.

Add cinnamon and a small spoon of sugar. Let it bubble a bit.

Spoon over:

toast

pancakes

yogurt

vanilla ice cream

leftover cake (yes, really)

It tastes like the inside of a pie without making a pie. Which is my favorite category of dessert.

 Banana Oat Cookies (The Lazy Batch Version)

Not the fitness-cookie kind. The actually-good kind.

Mashed banana + oats + peanut butter + salt + chocolate chips.

That’s the base. Sometimes I add vanilla. Sometimes chopped nuts. Depends what’s open.

Drop rough mounds on a tray and bake.

They come out soft and chewy — not crisp — and they keep well. Good for late-night dessert without committing to cake.

Important: salt matters here. Without salt they taste flat and oddly serious.

Brown Banana Mug Cake (My Emergency Dessert)

This is for when:

the bananas are dying —

I want dessert

energy level is near zero

Mash half a banana in a mug. Add flour, sugar, cocoa, oil, pinch salt, splash milk. Stir badly. Microwave.

It comes out uneven. One side higher than the other. I consider that part of the charm.

Sometimes I push chocolate chips into the center before cooking so there’s a melted pocket. That was a good discovery day.

Freezer Banana Ice Cream — But Fixed

Everyone talks about frozen banana “nice cream.” Most versions taste like cold banana paste. Let’s be honest.

Here’s how I make it actually dessert-like:

Freeze banana slices. Blend with:

peanut butter or almond butter

cocoa powder or vanilla

pinch salt

tiny drizzle honey

The fat + salt change everything. Texture improves too.
Still banana-forward — but now it feels intentional, not like a substitute assignment.

Best eaten right away. It does not age gracefully.

Banana Bread — But Smaller and Better

Full banana bread loaves are dangerous because they linger.

I make mine in:

loaf halves

mini pans

muffin tins

Same batter, smaller formats. Faster bake. Built-in portions.

I also swirl something into the batter now — peanut butter, Nutella, cinnamon sugar — instead of keeping it plain. Plain banana bread gets ignored after day two. Swirled banana bread disappears.

The Banana Crumble Bowl

This is my “I want dessert but not baking” move.

Mashed banana in a small baking dish. Sprinkle oats, brown sugar, butter, cinnamon, salt on top. Bake until bubbling.

It becomes a soft-bottom, crisp-top dessert bowl.

Eat warm with a spoon. Add cream or yogurt if you want. Or not.

Feels bigger than the effort involved, which is my favorite ratio.

Banana Pancake Dessert Stack

Leftover pancakes + brown bananas = dessert stack.

Warm pancakes. Add mashed banana mixed with honey and cinnamon. Layer. Add nuts or chocolate chips.

Cut like cake. Eat with a fork.

It sounds silly. It works every time.

 When I Add Chocolate — and When I Don’t

Banana + chocolate is popular, but I don’t always use it.

Chocolate makes banana desserts richer but also heavier. If it’s late at night, I sometimes skip it and go cinnamon-forward instead.

Daytime banana desserts → chocolate okay

Late banana desserts → spice better

I didn’t plan this rule. It formed itself.

The Texture Choice That Changed My Results

I stopped over-mashing bananas.

Slight texture — tiny soft bits — makes desserts feel more natural and less processed. Smooth banana batter tastes more uniform but also more forgettable.

Rustic wins here.

Also — fork mash beats blender mash for most banana desserts. Less cleanup, better texture.

My Brown Banana Storage Habit Now

I freeze peeled bananas when they cross the line.

Not neatly. Just peeled and thrown into a container. Future me never complains about past me doing this.

Frozen bananas are perfect for:

smoothies

banana ice cream

blended batters

quick breads

Zero waste, instant dessert base.

The Smell Factor Nobody Mentions

Overripe bananas smell stronger when baked — in a good way.

Banana desserts make the kitchen smell warm and sweet fast. Faster than cookies, honestly.

That smell alone increases how satisfying the dessert feels. Which probably explains why I make them so often when I’m tired.

Scent counts as an ingredient. I stand by that.

 When Banana Desserts Fail (Because It Happens)

Let me save you a few mistakes I made repeatedly:

Too many bananas → wet, heavy center

Too little salt → dull sweetness

Too hot oven → burned outside, raw middle

No spice → flat flavor

Too much sugar → sticky texture

Balance matters more with banana desserts because the fruit brings both sugar and moisture already.

Why I Like Banana Desserts More Than I Expected

They’re forgiving.

They don’t demand precision. They don’t collapse dramatically if you eyeball measurements. They accept substitutions without attitude.

Also — they make me feel resourceful instead of wasteful. That adds a small, quiet satisfaction layer I didn’t expect to care about — but I do.

FAQ — Brown Banana Dessert Questions

How brown is too brown for banana desserts?

If it smells alcoholic or sour, toss it. Dark and soft is good. Bad smell is not.

Can I reduce sugar in banana desserts?

Yes — often by a lot. Taste the mash first. Very ripe bananas are already sweet.

Do frozen bananas work the same?   

For blended or baked desserts, yes. For sliced uses, not really — texture changes.

Best spice with banana besides cinnamon?

Nutmeg and cardamom both work surprisingly well. Use lightly.

Can I make banana desserts without eggs?

Usually yes — banana itself helps bind. Texture will be slightly softer.

Do banana desserts keep well?

Most keep 3–4 days covered. Banana breads and cakes freeze well too.
Apple Cake You Would Love to Bake at Home

Apple Cake You Would Love to Bake at Home–the delicious bites you would never forget!


Let us talk about Apple cake you would love to bake at home! Okay, let me start by saying, there’s just something about it. Not the kind from a fancy bakery, all shiny and perfect, no. I mean the kind you bake at home, maybe a little batter dripped on the counter, the smell of baked apples filling the kitchen, making you sneak a tiny bite before it’s even cooled. That kind. That’s the one I love.

I’ve baked a lot of apple cakes over the years. Some were dry. Some too sweet. Some were basically bread with apples glued in. And then a few were really good — soft, tender, and moist, with apples that actually shine through. I think I’ve finally landed on a version that works almost every time. Mostly. Sometimes I tweak things depending on the apples I have, or how lazy I feel, or whether I want a little extra cinnamon in there.

Apples — Or How Not to Mess Up

First things first, starting with apples. I usually grab two kinds — tart Granny Smith, sometimes Honeycrisp if I feel fancy. Honestly, you can use whatever’s in your fridge. Just don’t pick the mushy ones… they make the cake too wet. I’ve done it before. Disaster. Dense, heavy, slightly soggy… not fun.

Peel or not? I used to peel everything. Now, sometimes I leave the skins on. Rustic, yes, but kind of pretty and adds texture. Tiny bits left behind? Fine. Cake’s still good. Humans mess up. Cake doesn’t care. I once had a tiny piece of peel sneak into the batter… and honestly, I didn’t notice until the first bite. Didn’t ruin it. Maybe added a little character.

I also like to think about the apple’s smell. Sweet, bright, slightly tangy. Smell them before you cut them. Seriously, it makes a difference in how excited you get to bake. I sometimes just sniff them for a minute… maybe that’s weird, but whatever.

Butter, Sugar, and My Little Debates

Butter, salted. Always. Oil is okay, but butter feels cozy. Brown sugar mostly, sometimes half white if I’m feeling experimental. Makes the flavor warmer, deeper… like the apples themselves.

I sometimes argue with myself about sugar. Should I use a little less? More? Sometimes I taste the batter before baking — yes, raw, don’t judge — to see if it’s sweet enough. Once I added a little extra cinnamon sugar on top at the last minute… that was a happy accident.

Creaming — Or Me Being Impatient

Mix butter and sugar until it’s light, fluffy… kind of airy. Scrape the bowl once or twice. Sometimes I don’t, and it’s… okay. But it’s better if you do. Five minutes seems forever, yes, but trust me, it makes a difference.

Sometimes I get impatient. I start mixing too fast, thinking, “meh, it’ll work.” Usually it does, but that fluffiness really does help the cake rise a bit better. And honestly, scraping the bowl feels like a mini victory in the middle of baking chaos.

Eggs — Slowly, Don’t Panic

Add eggs one at a time. Some people toss them in all at once. I’ve tried it. Works sometimes, sometimes not. Room temp eggs blend smoother, but cold eggs? Fine, just mix a bit longer. I debate this every time, honestly. Probably doesn’t matter, but I like to think it does.

And sometimes I get distracted mid-beat. Look at my phone, check the oven (even though it’s not on yet), glance at the counter… then realize I haven’t added the last egg. Humans, right? Cake forgives.

Flour, Spices, and Folding

Flour, baking powder, pinch of salt… sift if you want, skip if lazy. Fold gently. Don’t overthink. Overmixing = tough cake.

Spices — cinnamon, maybe a touch of nutmeg. Sometimes I even add a hint of cloves if I’m feeling bold. Apples are the star; spices are the backup singers. I sometimes sprinkle a bit more on top before baking. Gives little bursts of warmth in each bite.

Apples Meet Batter — The Fun (or Messy) Part

Cube, slice, or grate the apples. Cubes = soft bites, slices = texture, grated = moist. Toss them in with a pinch of cinnamon or sugar sometimes… sometimes not. Mood-dependent. Fold them in… gently, or sort of gently. I’ve overmixed before. Cake still tasted fine.

Sometimes I get distracted here too. I start tasting a piece of apple, then realize I haven’t added half the flour yet. Whoops. Still works. Kitchen chaos is part of the process.
Baking — The Waiting Game

Butter the pan. Maybe line with parchment. Oven at 175°C (350°F), middle rack. Smaller cake? Peek at 25 minutes. Loaf? 40–45. Poke with a skewer… wet batter = bad. Crumbs sticking = good.

I pace. Peek too often. Knock on the oven… like that helps. Smell fills the kitchen — butter, apples, sugar… half the fun is just standing there, imagining everyone fighting for the first slice. Sometimes I even do a little dance, celebrating in advance. Don’t judge.

Cooling and Toppings

Cool 10–15 minutes, then wire rack. Don’t slice yet… patience.

Topping? Optional. Powdered sugar, glaze, cinnamon sugar, apple slices… sometimes I do it, sometimes I don’t. Depends if I’m feeling fancy. Honestly, both ways work. I once added thin apple slices on top and they caramelized beautifully… looked fancy, tasted even better.

Serving and Storage

Room temp is fine. Actually, sometimes it tastes better the next day — flavors meld, cake softens a bit. Leftovers? Wrap, freeze, thaw overnight. Warm lightly if you want. You might eat half before it even makes it to storage… not that I’d do that.

I sometimes cut tiny slices and eat them with tea while the cake is still slightly warm. Pure bliss.

Mistakes I’ve Made

Dense cake = overmixing, old baking powder

Soggy bottom = didn’t grease pan well

Too sweet / bland = wrong apple choice, mix tart + sweet

Spices overpowering = less cinnamon next time

Honestly, baking is forgiving. Mistakes happen. Cake still tastes amazing.

Optional Variations

Sometimes I add walnuts, sometimes raisins. Occasionally a swirl of caramel or a drizzle of honey. Sometimes I skip everything extra. Depends on mood, honestly. It’s nice to experiment a little, see what works, and sometimes fail spectacularly… but cake is forgiving.

Why This Cake Feels Like Home

There’s a little ritual here — peeling, chopping, scraping bowls, pacing, tasting batter too often. First slice, uneven edges, maybe a little caramelized apple sticking out… perfect, because it’s yours. Not perfect, but real. Warm, cozy, forgiving.

You don’t need perfect layers, frosting, or presentation. Just butter, apples, sugar, patience… and maybe a little extra taste-testing along the way. Definitely a little extra taste-testing.

So, if you want an apple cake you’ll actually love baking at home… this is it. Slightly messy, forgiving, delicious… really just a little slice of happiness in every bite.

Skillet Peach Cake: It smells like late afternoon Summer! 

Skillet Peach cake--Top summer Delight

Skillet Peach cake: The way it is created in the kitchen

Alright. Let us talk about skillet peach cake.

This one feels different already.

Peaches don’t behave like apples. They collapse faster. They go from firm to almost syrupy in what feels like ten minutes. And when you cook them in a skillet, something happens at the bottom — the sugars caramelize just enough to make you feel like you did something clever, even if you didn’t.

Skillet peach cake is not dramatic. It’s soft. It leans slightly rustic. It smells like late afternoon in summer when the light turns warmer and everything feels slower.

And I’ve made it enough times now to know exactly where it can go wrong.

So let’s do this properly. Slightly messy. Still readable. The way it actually happens in my kitchen.

Skillet Peach Cake (The Soft Summer One That Never Lasts Long)

I don’t wait for perfectly firm peaches for this.

In fact, I prefer the ones that are almost too soft. The ones you bought with good intentions and then forgot about for two days. Those are ideal.

If they’re rock hard, they don’t melt into the cake. If they’re too far gone, you’ll know. There’s a line. You learn it.

I slice them thick. Not paper thin. I like visible fruit in cake.

Sometimes I peel them. Sometimes I don’t. The skin softens during cooking. If it bothers you, peel. If not, leave it. I’ve done both. No complaints either way.

First: The Peach Base

Before batter even enters the picture, I warm the skillet.

About 325°F. Not higher.

Add a small knob of butter. Let it melt slowly, not brown aggressively. Sprinkle a little brown sugar directly into the skillet — maybe two or three spoonfuls. Not measured precisely. Just enough to coat the bottom lightly.

Then the peach slices go in.

They sizzle quietly. Not loudly. If they’re loud, your heat is too high.

I let them cook for maybe five minutes. They release juice. The sugar melts into syrup. The peaches soften slightly but still hold shape.

At this point, your kitchen smells like caramel and fruit. It’s distracting.

Turn the heat down just a little before adding the batter. This helps prevent over-browning underneath.

The Batter (Simple and Soft)

I keep this cake base straightforward.

Butter and sugar creamed together. Not whipped into oblivion. Just lightened.

One or two eggs, depending on size.

A splash of vanilla.

Flour. Baking powder. Salt.

And a little milk to loosen everything.

The batter should be thick but spoonable. Not runny. Not stiff like cookie dough. Somewhere in between. If it feels too tight, I add a tablespoon of milk. If it’s too loose, a spoon of flour.

I don’t overmix. Once the flour disappears, I stop. Overmixed peach cake becomes slightly rubbery, and that’s disappointing.

Pouring Over Peaches (Trust the Process)

Spoon the batter gently over the warm peaches.

It will look uneven. That’s normal. I use the back of the spoon to nudge it toward the edges. Some peaches will peek through. Leave them.

Put the lid on.

This is where skillet baking feels different from oven baking. The heat comes from below and around the sides, so the bottom caramelizes first. The top cooks more gently under the lid.

After about 12–15 minutes, I crack the lid slightly so steam escapes. Otherwise the top stays too pale.

Total cook time? Usually around 25–35 minutes.

I check by gently pressing the center. It should spring back. Or insert a knife — it should come out mostly clean. A few moist crumbs are fine.

If the bottom smells too deeply caramelized, lower the heat immediately and give the top more time. Electric skillets can run hot without warning.

Mine does. I don’t fully trust it.

The Flip (Optional, Slightly Dramatic)

Sometimes I flip the cake onto a plate so the peaches end up on top like a rustic upside-down cake.

Sometimes I don’t.

If you flip, let it cool for at least 10 minutes first. Loosen the edges with a spatula. Place a large plate over the skillet. Take a breath. Flip confidently.

If a peach sticks, just press it back on top. No one needs to know.

If you don’t flip, just serve straight from the skillet. Spoon it warm. It’s less theatrical but equally good.

Texture Notes (Because This Matters)

The bottom should be slightly caramelized but not hard.

The cake should be soft and tender, not dense.

The peaches should feel almost jammy but still identifiable as slices.

If the cake feels dry, you probably overcooked it. Lower heat next time and check earlier.

If the center sinks slightly after cooling, it might have needed a few more minutes — but honestly, warm cake with ice cream hides small flaws.

What Makes This Different From Oven Peach Cake

The skillet gives you deeper caramelization underneath.

It also keeps the cake slightly more moist because of the trapped heat under the lid.

And — this matters in summer — you don’t have to heat the entire kitchen.

Peach season already comes with warm weather. Turning on a full oven feels aggressive.

The skillet feels manageable.

Small Variations I’ve Tried

A pinch of cinnamon in the batter.

A splash of almond extract instead of vanilla.

A handful of raspberries scattered among the peaches.

Coarse sugar sprinkled on top before cooking for slight crunch.

All worked. None required.

Peach and butter do most of the heavy lifting here.

When I Make This

Late afternoon. When peaches are soft and the light is golden.

It feels like a dessert that doesn’t demand a celebration but quietly becomes one.

Serve it warm. With vanilla ice cream if you have it. Or just as it is.

There’s something about the softness of peach cake that makes people go quiet for a moment while eating.

Then someone always asks for another slice.

And that’s usually the end of it.

10 Quick Dessert Recipes With Pantry Ingredients

chocolate cornflake clusters

10 Quick Dessert Recipes With Pantry Ingredients (When the Good Stuff Is Already in the Cupboard)

Are you looking for 10 quick Dessert recipes with pantry ingredients? There’s a certain kind of confidence that comes from making dessert without going to the store. Not the chef kind — the survival kind.

These are the days when the weather is wrong, the clock is loud, or guests are “almost there,” and all you have is a cupboard with oats, cocoa, sugar, a half packet of biscuits, and something that might be peanut butter if you stir it enough.

Most of my dependable sweets came from exactly that situation — quick dessert recipes with pantry ingredients — built from what was already there, not what a recipe demanded.

No dramatic techniques. No specialty items. Just bowls, spoons, and practical decisions made in real time.

Let’s open the cupboard and see what actually works.

1. Chocolate Oat Pan Bars (The Stir-and-Press Classic)

This one starts in a saucepan and ends in the fridge.

Butter, sugar, cocoa, a splash of milk — heat until glossy. Add oats and stir until it thickens into something that feels halfway between porridge and fudge. First time I made it, I thought I’d gone too far. Turns out that thickness is the structure.

Press into a tray. Chill. Cut.

They come out slightly chewy, slightly fudgy, never perfectly straight-edged. Excellent pantry staple dessert bars because oats and cocoa are almost always around.

Cut small. They’re richer than they look.

2️⃣ Biscuit Truffle Bites (No Oven, No Drama)

Crushed biscuits + condensed milk + cocoa. Mix, roll, coat.

The mixture usually feels too crumbly for the first 30 seconds and then suddenly turns workable. I don’t question it anymore — I just keep mixing.

Roll in:

  • coconut
  • powdered sugar
  • cocoa

They look like you planned them. You didn’t. That’s fine.

Reliable no bake desserts from pantry ingredients with almost zero measuring precision required.

3️⃣ Peanut Butter Sugar Fudge Squares


Peanut butter and powdered sugar are a dangerous combination — they set fast and disappear faster.

Warm peanut butter slightly so it loosens. Stir in powdered sugar until thick. Press into a lined container. Chill and slice.

The first time I skipped lining the container and had to excavate it with a spoon. Now I line everything. Learned behavior.

Texture: soft fudge, slightly sandy, deeply satisfying. A true 2-ingredient pantry dessert if you ignore the salt pinch I always add.

4️⃣ Chocolate Cornflake Clusters

Melt chocolate. Stir in cornflakes. Spoon onto tray.

That’s the full blueprint.

The only real decision is ratio. Too much chocolate = heavy lumps. Enough flakes = crunchy, jagged clusters that look bakery-made.
The sound when you stir is half the pleasure — crackle and scrape.

Perfect quick chocolate desserts with pantry ingredients because cereal keeps forever and chocolate usually hides somewhere in the house.

5️⃣ Microwave Cocoa Mug Cake

This is the dessert equivalent of a quick note instead of a letter.

Flour, sugar, cocoa, baking powder, milk, oil — stirred directly in a mug. Microwave just until set. Not fully firm — that leads to dryness. I stop when the top looks barely done.

Every microwave lies slightly. Yours will too. Watch, don’t trust the seconds.

Best served warm with:

  • sugar dusting
  • chocolate chips
  • a spoon of peanut butter melting on top

A dependable 5 minute pantry dessert recipe for one or two people without plates or planning.

6️⃣ Sweet Toast Crunch Squares

This one surprised me the first time it worked.

Toast bread. Butter it. Sprinkle sugar and cinnamon. Cut into squares.

Optional upgrade: quick chocolate drizzle.

It eats like a shortcut churro-toast hybrid. Crisp edges, soft middle. Good last-minute dessert from pantry staples when bread is the only obvious base.

Serve warm. Always better warm.

7️⃣ No Bake Cocoa Peanut Oat Balls


Oats + peanut butter + cocoa + honey or sugar syrup. Mix and roll.

If too dry — add a spoon of warm water. If too sticky — more oats. I adjust every single time. It has never been identical twice.

They’re sturdy, portable, and oddly filling. A strong healthy-ish pantry dessert option that doesn’t feel like diet food.

Also — they travel well in paper cups, which I started using after one batch glued itself to a steel plate.

8️⃣ Instant Cocoa Fudge Sauce Over Anything

Cocoa + sugar + water + butter. Boil briefly. Done.

This sauce rescues plain foods:

  • biscuits
  • toast
  • bananas
  • plain cake
  • even plain yogurt

It thickens as it cools — I always forget that and think it failed. It didn’t. It just needed two minutes.

A useful quick pantry dessert sauce when you don’t have time to build something — just upgrade something.

9. Jam Crumb Dessert Cups

️⃣ Crush biscuits. Mix with a little melted butter or peanut butter. Spoon into cups. Add jam on top.

That’s the structure. Chill if possible.

Sweet, crumbly, slightly sticky — like a deconstructed tart that skipped the hard part.

Jam choice changes everything. Sour jams balance better. I learned that after using very sweet mixed fruit jam and needing water afterward.

Great no bake desserts using pantry ingredients that require no cooking at all.

10. Sugar-Roasted Nuts (Dessert Disguised as Snack)

Nuts + sugar + pan heat.

Stir continuously while sugar melts and coats. It clumps, then dries, then turns sandy-crisp around the nuts. The transformation looks wrong midway. Keep going.

I burned one batch because I answered a call. Now I don’t multitask with sugar.

They cool into crunchy, sweet clusters — excellent quick dessert snacks from pantry staples that people keep picking at long after dessert is “over.”

What I’ve Learned About Pantry Desserts (The Non-Theory Version)

Pantry desserts succeed because:

They rely on structure ingredients — oats, sugar, nut butter, chocolate.

They forgive measurement drift.

They scale easily.

They don’t require perfect timing.

They taste familiar and comforting.

Also — they remove the “I should go buy something” delay. Action beats intention when guests are coming.

Most of these started as backup plans. Now they’re repeat recipes.

Casual FAQ — From Real Pantry-Only Attempts

Can pantry desserts really impress guests?

Yes — especially bite-sized ones. Small portions look deliberate.

Most useful pantry dessert staples?

Cocoa powder, oats, biscuits, peanut butter, sugar, condensed milk, cereal.

Best no-oven pantry desserts?

Clusters, truffles, oat bars, peanut butter fudge, jam cups.

Do they store well?

Most keep 3–5 days refrigerated. Nut and oat ones even longer.