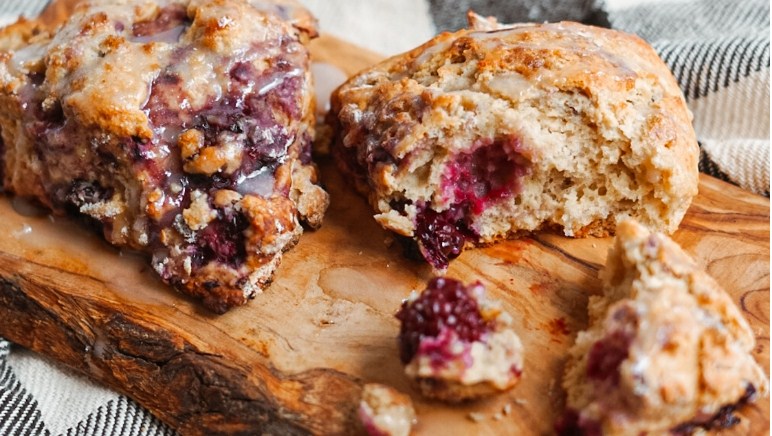
Brown Sugar Blackberry Scones Recipe
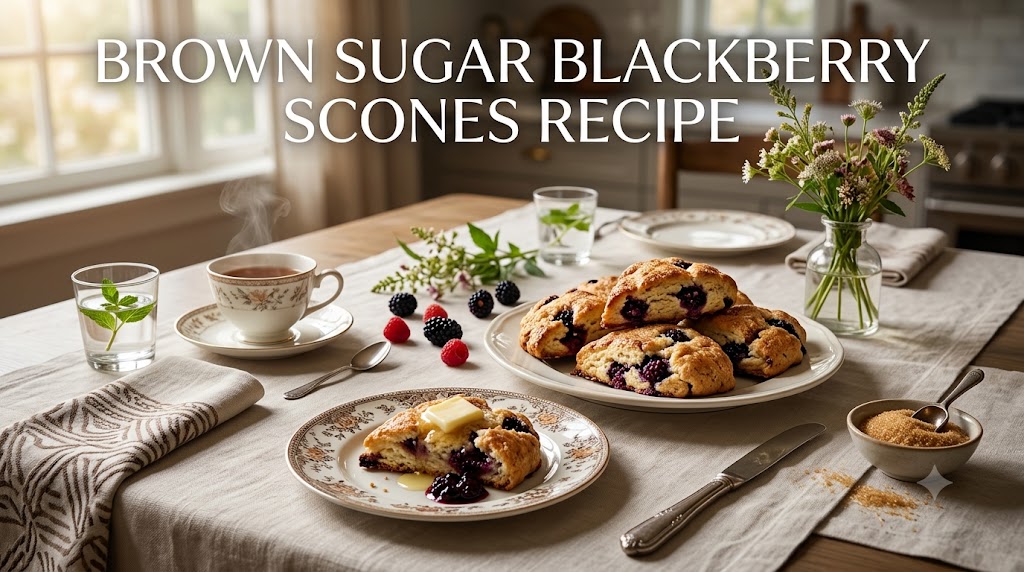
I make these brown sugar blackberry scones with maple glaze more often than I’d like to admit, and honestly, I’m not sorry about it. It started three summers ago when, one of my neighbors, Carol dropped off a grocery bag full of blackberries from her backyard bush that had basically taken over her fence line. I had way too many berries and not enough of a plan, so I started messing around with a basic scone recipe I’d had scribbled on an index card since college. A few burnt batches later (we’ll get to that), this version stuck. It’s the one I make on lazy Saturday mornings, the one I bring to my sister’s house when I don’t want to show up empty-handed, and honestly, the one my husband requests more than birthday cake. If you’ve been looking for a scone that’s tender instead of dry, a little sweet instead of cardboard-bland, this is it.
Why You’ll Love This Brown Sugar Blackberry Scones with Maple Glaze Recipe
There’s a lot to like here, but let me hit the big stuff first. The brown sugar gives these scones a deep, almost caramel-like sweetness that plain white sugar just can’t touch — it’s subtle, not cloying. Then the blackberries burst here and there while baking, leaving these little jammy pockets that make every bite slightly different. And the maple glaze on top? It’s not one of those thick, sugary glazes that hardens into a shell. It’s thin, it soaks in a bit, and it adds this warm, cozy flavor that makes the whole thing taste like fall even in July.
These scones also come together fast. We’re talking maybe 15 minutes of hands-on work before they go in the oven, which matters a lot to me on mornings when I haven’t had coffee yet and my patience is basically nonexistent. They freeze well too, so you can make a double batch and stash half for later — trust me, future-you will be thrilled. And they’re forgiving. If your butter’s a little too soft or your berries are a bit smashed, it’s fine. These aren’t finicky.
Ingredients
For the scones:
- 2 cups all-purpose flour
- 1/3 cup packed brown sugar
- 1 tablespoon baking powder
- 1/4 teaspoon baking soda
- 1/2 teaspoon salt
- 1/2 cup cold unsalted butter, cubed
- 3/4 cup fresh blackberries (frozen works too, don’t thaw them)
- 1/2 cup heavy cream, plus a little extra for brushing
- 1 large egg
- 1 teaspoon vanilla extract
For the maple glaze:
- 1 cup powdered sugar
- 2 tablespoons pure maple syrup
- 1–2 tablespoons heavy cream or milk
- 1/4 teaspoon vanilla extract
Equipment Needed
You’ll want a large mixing bowl, a pastry cutter (or just your fingers, which is what I actually use most of the time), a baking sheet, parchment paper, a small whisk or fork for the glaze, and a bench scraper if you have one — it makes cutting the dough into wedges so much easier. A box grater works in a pinch if your butter’s too soft to cube neatly, by the way. I learned that trick from my mother-in-law, Diane, who swears by it for pie crust too.
Step-by-Step Cooking Instructions
- Preheat your oven to 400°F and line a baking sheet with parchment paper.
- In a large bowl, whisk together the flour, brown sugar, baking powder, baking soda, and salt.
- Add the cold cubed butter and cut it into the flour mixture using a pastry cutter or your fingertips, until the mixture looks like coarse crumbs with some pea-sized bits of butter still visible.
- Gently fold in the blackberries, being careful not to crush them too much (a little crushing is fine — it actually helps the flavor spread).
- In a separate small bowl, whisk together the heavy cream, egg, and vanilla extract.
- Pour the wet ingredients into the dry ingredients and mix gently with a spatula or wooden spoon just until the dough comes together. Don’t overmix — stop as soon as you don’t see dry flour.
- Turn the dough out onto a lightly floured surface and shape it into a round disc, about 8 inches across and an inch thick.
- Cut the disc into 8 wedges, like a pizza, using a sharp knife or bench scraper.
- Place the wedges on the prepared baking sheet, leaving a couple inches between each one so they have room to spread.
- Brush the tops lightly with extra heavy cream, which helps them turn that deep golden color.
- Bake for 18–20 minutes, until the tops are golden brown and a toothpick inserted in the center comes out clean.
- Let the scones cool on the baking sheet for about 10 minutes before transferring them to a wire rack.
- While they cool, whisk together the powdered sugar, maple syrup, cream, and vanilla for the glaze until smooth.
- Once the scones have cooled to just slightly warm, drizzle the maple glaze generously over the top.
- Let the glaze set for about 5 minutes before serving, if you can wait that long.
Cooking Tips
Keep your butter cold. I mean really cold — like, straight from the fridge, maybe even pop it in the freezer for ten minutes if your kitchen runs warm. Cold butter is what gives these scones that flaky, layered texture instead of a dense, hockey-puck situation. I also like to chill the shaped dough for about 10 minutes before baking if I have the time, though I’ll be honest, I skip this step probably half the time and they still turn out fine.
Don’t overwork the dough. I know I already said this in the instructions, but it’s worth repeating because it’s the single biggest reason scones turn out tough. The second you see the dough holding together, stop mixing, stop kneading, just stop. Overworked dough develops gluten, and gluten is great for bread, terrible for tender scones.
One thing that took me embarrassingly long to figure out: use a sharp knife, not a dull one, when cutting your wedges. A dull blade drags through the dough and seals the edges, which stops the scones from rising properly. A clean cut lets them puff up nice and tall in the oven. Small detail, big difference.
Substitutions & Variations
You’ve got some room to play here, which I like. Swap the blackberries for raspberries or blueberries if that’s what you’ve got on hand — the ratios stay the same. If you want a slightly nutty undertone, add a half teaspoon of almond extract along with the vanilla, it pairs surprisingly well with the maple glaze. For a dairy-free version, use cold vegan butter and a plant-based cream substitute; I’ve tested this with oat-based cream and it worked, though the texture was a touch less rich. Whole wheat pastry flour can replace up to half the all-purpose flour if you want more fiber, but don’t go beyond that or the scones get dense and a little sad. And if you’re out of brown sugar, white sugar plus a tablespoon of molasses gets you close enough that most people won’t notice.
What to Serve With It
These scones are honestly great on their own with a cup of coffee, but if you want to round out breakfast, a bowl of vanilla Greek yogurt with a drizzle of honey works well alongside them. Scrambled eggs and crispy bacon make it feel like a full spread if you’re hosting brunch. I’ve also served these at a baby shower for my friend Rachel with a fruit salad and mimosas, and they disappeared faster than anything else on the table — faster than the mimosas, even, which is saying something.
Storage & Reheating
Store leftover scones in an airtight container at room temperature for up to two days. After that, they start to dry out a bit, so I’d move them to the fridge, where they’ll keep for about four to five days. To reheat, pop one in the microwave for about 15 seconds or in a 300°F oven for 5 minutes — the oven method keeps the texture better, in my opinion, though the microwave is faster when you’re in a hurry and don’t care about perfection.
You can also freeze the unglazed scones for up to three months. Just wrap them individually in plastic wrap, then toss them in a freezer bag. Thaw at room temperature and glaze fresh, or reheat straight from frozen in a 350°F oven for about 12 minutes.
Cook and Prep Time
Prep time: 15 minutes Cook time: 20 minutes Total time: 35 minutes Yield: 8 scones
Nutrition Facts
Per scone (approximate): Calories: 310, Fat: 14g, Saturated Fat: 8g, Carbohydrates: 42g, Sugar: 20g, Protein: 4g, Fiber: 1g, Sodium: 220mg
Nutrition information is provided as a courtesy and is calculated using standard ingredient databases. Actual values may vary depending on specific brands and measuring techniques used, so please consider this an estimate rather than an exact figure, especially if you’re tracking for medical or dietary reasons.
Why This Recipe Actually Works
The magic here is really about temperature contrast. Cold butter cubes melt slowly in a hot oven, releasing little pockets of steam that push the dough apart layer by layer as it bakes. That’s what gives you that flaky bite instead of a dense one. Meanwhile, the brown sugar isn’t just for sweetness — its molasses content adds moisture, which keeps the crumb from drying out the way plain white sugar scones sometimes do. Combine that with berries that release a little juice as they bake, and you get scones that stay tender for days instead of turning into rocks by the next morning.
The Small Change That Made a Big Difference
For the longest time, I mixed my wet ingredients directly into the flour-butter mixture without whisking the egg and cream together first. Turns out that was a mistake — the egg would sometimes streak unevenly through the dough, leaving weird pale patches after baking. Once I started whisking the egg, cream, and vanilla together in a separate bowl before adding them, the dough came together so much more evenly, and the scones baked up with a more consistent color and texture. It’s such a small step, maybe adds 30 seconds, but it genuinely changed the outcome.
What I’d Do Differently Making It Again Tomorrow
If I made these again tomorrow, I’d probably chill the cut wedges for a full 15 minutes before baking instead of my usual “eh, good enough” approach. I’ve noticed the scones that get a proper chill hold their shape a little better in the oven and don’t spread quite as much. I’d also maybe cut the wedges slightly smaller — my last batch came out a bit oversized, more like scone-and-a-half territory, and while nobody complained, exactly, I think a slightly more modest size would bake more evenly all the way through.
What I Skip When Short on Time
When I’m rushing — which, let’s be honest, is most weekday mornings — I skip chilling the dough entirely and just go straight from mixing to shaping to baking. I also skip measuring the glaze ingredients precisely and just eyeball it until it looks like the right consistency, thick enough to coat the back of a spoon but thin enough to drizzle. It’s not perfect every time, but it’s close enough, and honestly nobody at my breakfast table has ever noticed the difference.
FAQ
Can I use frozen blackberries? Yes, and you don’t need to thaw them first. Toss them into the dry mixture straight from the freezer — this actually helps keep them intact and prevents the dough from turning purple all over.
Why did my scones turn out flat? This usually means your butter got too warm before baking, or the dough sat out too long before going in the oven. Cold ingredients and a hot oven are the two things that keep scones tall.
Can I make the dough ahead of time? You can shape the wedges and refrigerate them overnight, covered, then bake straight from the fridge in the morning. Just add a minute or two to the bake time.
Is the glaze necessary? Not at all, but I’d argue it’s worth it. If you skip it, a light dusting of powdered sugar or a drizzle of plain honey works as a simpler alternative.
Can I double the recipe? Yes, this recipe doubles well. Just use two separate baking sheets rather than crowding everything onto one, since the scones need space to bake evenly.
Final Thoughts
At the end of the day, these brown sugar blackberry scones with maple glaze are the kind of recipe I keep coming back to because they’re simple enough for a Tuesday and special enough for company. They don’t require fancy equipment or rare ingredients, just a little patience with cold butter and a willingness to not overmix. Carol’s blackberry bush is still going strong, by the way, and I still owe her a batch of these — I keep meaning to bring some over and keep forgetting, which says more about my memory than my intentions. If you give these a try, I think you’ll find they earn a permanent spot in your baking rotation too.