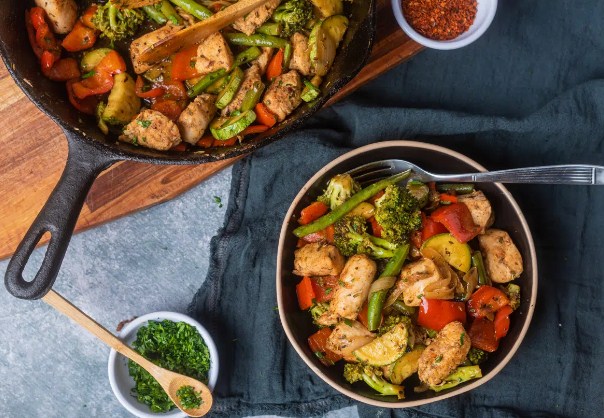
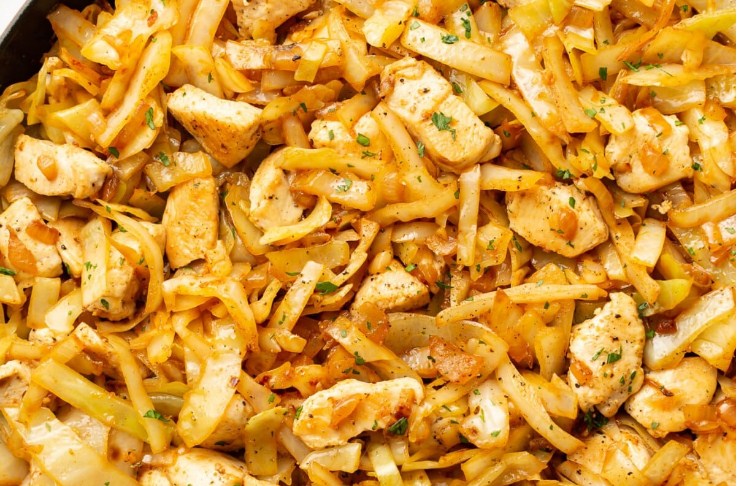
Cozy Skillet Chicken with Buttered Brussels Sprouts

Cozy Skillet Chicken with Buttered Brussels Sprouts

There’s a certain kind of evening when I don’t want to cook, but I also don’t want to give up and eat something random. That’s usually when Cozy Skillet Chicken with Buttered Brussels Sprouts shows up. It’s not flashy. It doesn’t look impressive halfway through. But it smells right, cooks quietly, and ends up feeling like dinner actually mattered.

This is the kind of meal I make when the kitchen light feels too bright and the day has already used up most of my patience. One skillet. Familiar ingredients. No rush. Or at least, no unnecessary rush.

Why this one sticks around

Some dishes earn a place just by being dependable. This is one of them.

Everything happens in one pan, which already makes it more likely I’ll cook it again. The timing isn’t fragile either. Brussels sprouts don’t fall apart if they sit a little longer, and chicken — especially thighs — can handle a minute or two of distraction.

It’s also quietly seasonal. Nothing about it screams winter, but it feels right when it’s cold out. Warm food. Steady flavors. No tricks.

Ingredients (nothing complicated)

Here’s what I use most nights:

  • 4 bone-in, skin-on chicken thighs (boneless works too)

  • 1 pound Brussels sprouts, trimmed and halved

  • 2 tablespoons olive oil

  • 2 tablespoons unsalted butter

  • 3 cloves garlic, minced

  • Salt and freshly ground black pepper

  • Optional: a pinch of thyme or paprika

  • Optional: a squeeze of lemon at the end

That’s really it. Nothing fancy hiding in the background.

How I think about the ingredients (on a normal day)

Chicken first. I almost always reach for thighs here. They stay juicy, even if I misjudge the heat or look away longer than planned. Breasts work too, but they make me slow down, and some days I don’t want to slow down.

Brussels sprouts are the obvious partner. I trim them, slice them in half, and don’t try to make them uniform. Some end up thicker, some thinner. They cook differently, and I like that.

Butter matters more than I expect every time. I’ve tried leaning harder on olive oil alone, and it’s fine, but butter gives the sprouts that soft, nutty edge that makes the whole dish feel calmer.

Garlic shows up most of the time. Sometimes shallots instead. Salt and pepper always.

That’s the whole story.

Starting without making it complicated

I prep the Brussels sprouts first. Trim, halve, quick rinse, then dry them properly. Wet sprouts don’t brown, and I’ve learned that lesson more than once.

Chicken gets patted dry and seasoned simply. Salt and pepper. Occasionally paprika. I don’t marinate for this. The skillet does enough on its own.

Everything stays close to the stove. Fewer bowls means less irritation later.

Cooking the chicken (and resisting myself)

The skillet goes on medium-high heat. A little olive oil goes in first.

Chicken goes in smooth side down, and then I make myself stop touching it. This is still the hardest part. If I move it too soon, it sticks. If it sticks, I get annoyed. If I wait, it releases on its own.

Once both sides are nicely browned — but not cooked through — I pull the chicken out and let it rest. The pan looks messy. That’s good. That’s where the flavor is sitting.

The Brussels sprouts take their turn

I lower the heat slightly before adding butter. It melts, foams, and smells like it’s doing something useful.

Brussels sprouts go in cut-side down. They sizzle. I let them sit longer than feels comfortable. Stirring too early ruins the color.

After a few minutes, I stir, add a pinch of salt, and let them cook again. Some pieces brown deeply. Others soften more. I don’t try to fix that.

Garlic goes in near the end. Just long enough to lose its bite. Burnt garlic doesn’t belong here.

Bringing everything back together

Chicken goes back into the pan, tucked in among the sprouts. Any juices from the plate go in too. I don’t waste those.

I lower the heat, cover the skillet, and let steam do the quiet work. A few minutes is usually enough to finish the chicken and soften the sprouts just right.

I uncover, taste, and adjust. Maybe more salt. Maybe pepper. Occasionally a squeeze of lemon if everything feels a little heavy. Sometimes I skip it.

By now the kitchen smells settled. Like dinner is actually happening.

Mistakes I’ve already made so you don’t have to

I used to crowd the pan because I didn’t want to wash a bigger skillet. Everything steamed instead of browning. It still tasted okay, but it wasn’t the same.

I once added butter too early and burned it while browning the chicken. That bitterness never left the dish. Now I wait.

And I learned not to oversalt at the beginning. Brussels sprouts release moisture, and seasoning intensifies as they cook.

Variations I actually use

If I want extra richness, I finish with a small dusting of Parmesan. Not much. Too much changes the whole tone.

A splash of balsamic vinegar at the end works when I want contrast. I don’t always want that, but sometimes it’s perfect.

If I want it heavier, I add cooked potatoes to the pan. Not every time. Only when I know I want something more filling.

I’ve tried adding bacon. It’s good, but it takes over. I don’t reach for it often.

Storage and leftovers

Leftovers keep well in the refrigerator for up to four days.

I reheat them in a skillet over medium-low heat with a small splash of water if needed. The sprouts soften a bit more the next day, but the flavor holds.

Microwaving works too, though the chicken skin won’t stay crisp. I’ve frozen it before, but Brussels sprouts lose some texture after thawing, so I usually just make what I’ll eat within a few days.

Final thoughts

I keep making Cozy Skillet Chicken with Buttered Brussels Sprouts because it fits real evenings. It doesn’t rush me. It doesn’t demand precision. It just rewards paying attention when I can.

It’s quiet food. Reliable food. And on most nights, that’s exactly what I’m cooking for.

Grilled Chicken Skillet with Summer Vegetables

Grilled Chicken Skillet with Summer Vegetables

Grilled Chicken Skillet with summer vegetables

There’s something about a grilled chicken skillet with summer vegetables that feels like pure warm-weather cooking. Simple ingredients, bright colors, sizzling sounds from the pan—nothing fancy, just good food done right.

I make this recipe a lot when the farmers’ market starts filling up with zucchini, sweet corn, and bell peppers. Everything tastes better when vegetables are in season. The skillet does most of the work, and dinner ends up looking way more impressive than the effort involved.

And honestly? Some nights I start cooking without much of a plan. Chicken in the fridge, vegetables that need using up. A hot skillet later—boom. This dish.

It’s juicy grilled-style chicken, lightly charred vegetables, and that little smoky aroma you only get when everything hits a hot pan at the right moment.

Actually—wait, let me explain the best part.

You only use one skillet, which means cleanup is blessedly minimal.

Why You’ll Love This Recipe

I’ve cooked chicken in about a hundred different ways over the years. This one keeps finding its way back into my rotation.

Here’s why.

It’s fast but still feels like real cooking.

The entire meal comes together in around 30 minutes, but it tastes like something you spent much longer preparing.

Everything cooks in one skillet.

Chicken first, vegetables next, then everything finishes together. No juggling multiple pans.

The vegetables stay vibrant.

They don’t turn mushy because we cook them hot and quick.

You can change it based on what’s in the fridge.

Zucchini, squash, peppers, tomatoes—summer vegetables are forgiving.

It smells incredible while cooking.

Garlic, olive oil, lightly charred veggies… that smell drifting through the kitchen is the moment I know dinner will be good.

Ingredients

This recipe doesn’t rely on complicated ingredients. In fact, it’s better when everything is simple and fresh.

For the chicken

2 large boneless skinless chicken breasts (or 4 small ones)

2 tablespoons olive oil

1 teaspoon smoked paprika

1 teaspoon garlic powder

½ teaspoon onion powder

½ teaspoon dried oregano

Salt and black pepper to taste

Juice of half a lemon

For the summer vegetables

1 zucchini, sliced into half moons

1 yellow squash, sliced

1 red bell pepper, sliced

1 cup cherry tomatoes

½ red onion, thinly sliced

2 cloves garlic, minced

1 tablespoon olive oil

Salt and pepper to taste

Optional finishing touches

Fresh basil or parsley

Extra lemon wedges

Crumbled feta cheese

Sometimes I add feta, sometimes I don’t. Depends on the mood—and whether there’s any left in the fridge.

Step-by-Step Instructions

Step 1: Season the chicken

Start by patting the chicken dry with paper towels. This step matters more than people realize. Dry chicken browns better.

Rub the chicken with olive oil.

Then sprinkle the paprika, garlic powder, onion powder, oregano, salt, and pepper over both sides. Finish with a quick squeeze of lemon juice.

Let it sit for about 10 minutes while the skillet heats.

Not long. Just enough for the seasoning to wake up a little.

Step 2: Heat the skillet

Place a large skillet over medium-high heat.

Cast iron works beautifully here, but any heavy skillet will do.

Add a small drizzle of olive oil and let it heat until the oil shimmers. You’ll see tiny waves forming on the surface—that’s the signal.

If the oil starts smoking heavily though… yeah, that’s too hot.

Step 3: Cook the chicken

Lay the chicken breasts into the skillet.

You should hear a sharp sizzle the moment they touch the pan. If you don’t, the skillet probably isn’t hot enough.

Cook for about 5–6 minutes per side.

Don’t move them around constantly. Let them sit so the surface develops that golden grilled crust.

When they release easily from the pan and the internal temperature reaches 165°F, they’re done.

Transfer the chicken to a plate and loosely cover with foil.

Step 4: Cook the vegetables

In the same skillet—don’t wash it, those browned bits are flavor—add another tablespoon of olive oil.

Toss in the red onion first.

Cook for about 2 minutes, just until it softens slightly.

Then add:

zucchini

yellow squash

bell pepper

Stir everything around and let it cook for 4–5 minutes.

You want the vegetables tender but still a little crisp. Overcooking makes them watery.

Right near the end, add the minced garlic and cherry tomatoes.

Garlic only needs about 30 seconds. If it cooks longer, it turns bitter.

Step 5: Bring everything together

Slice the rested chicken into strips.

Add it back into the skillet with the vegetables.

Toss everything gently so the juices coat the veggies.

Taste and adjust salt or pepper if needed.

Sometimes I squeeze another bit of lemon over the top at this point. Brightens the whole dish.

Cooking Tips: Green Chicken Skillet Summer Vegetables

After making this grilled chicken skillet with summer vegetables more times than I can count, a few small tricks make a big difference.

Don’t overcrowd the skillet

Vegetables release moisture as they cook. If the pan is too full, they steam instead of sear.

Cook in batches if needed.

Slice vegetables evenly

Different sizes cook at different speeds. Roughly uniform pieces help everything finish together.

Let the chicken rest

Five minutes of resting keeps the juices inside the meat instead of running all over the cutting board.

I used to skip this step. Bad idea.

Use high heat—but not scorching

You want quick browning, not burnt garlic or shriveled vegetables.

Cooking is a little bit about listening too. When the pan gets quiet, the heat might be too low.

Substitutions & Variations

This dish adapts beautifully depending on what’s available.

\Swap the chicken cut

Chicken thighs work wonderfully here. They stay extra juicy and tolerate higher heat.

Try different vegetables

Other great options include:

asparagus

green beans

mushrooms

corn kernels

baby spinach (added at the very end)

Make it Mediterranean

Add olives, feta cheese, and extra lemon.

Add grains

Serve the skillet mixture over quinoa, couscous, or rice to stretch the meal further.

Actually—one night I spooned leftovers into a warm pita with yogurt sauce.

Unexpectedly amazing.

What to Serve With It

This grilled chicken skillet with summer vegetables is already a full meal, but a few simple sides can make it even better.

I usually keep things light and fresh.

Warm crusty bread

Perfect for soaking up the juices left in the skillet.

Lemon rice

Fluffy rice with a squeeze of lemon pairs beautifully with the smoky chicken.

Simple green salad

Arugula, olive oil, lemon juice, salt. That’s it.

Sometimes the simplest salad is the one that balances everything else on the plate.

Garlic yogurt sauce

Mix Greek yogurt, garlic, lemon juice, and a pinch of salt. Drizzle over the chicken.

It cools down the warm skillet flavors in a really satisfying way.

Storage & Reheating

If you happen to have leftovers, they keep surprisingly well.

Refrigerator

Store in an airtight container for up to 3 days.

The vegetables soften slightly, but the flavor stays great.

Freezer

Technically possible, though I rarely freeze it. Zucchini tends to get watery after thawing.

If freezing, store up to 2 months.

Reheating

The best way is back in a skillet over medium heat.

Add a small splash of olive oil and warm everything gently for about 4–5 minutes.

Microwaving works too, but the skillet keeps the texture better.

A Few Questions I Get About This Dish

Over the years, readers and friends have asked a few things about this recipe.

So let me clear them up.

Can I grill the chicken instead of using a skillet?

Absolutely.

Grill the chicken outside and cook the vegetables in the skillet indoors. It actually adds even more smoky flavor.

How do I know when the chicken is done?

The safest method is a thermometer. Chicken should reach 165°F internally.

If you slice into it and the juices run clear, you’re usually good—but the thermometer removes the guesswork.

Can I prep this ahead of time?

Yes

Slice the vegetables and season the chicken earlier in the day. Then cooking takes barely 15 minutes at dinner time.

What if my vegetables release too much water?

Turn the heat up slightly and let the liquid cook off.

Sometimes summer zucchini just holds more moisture than expected. It happens.

Final Thoughts

A grilled chicken skillet with summer vegetables is one of those meals that proves simple cooking is often the best kind.

Fresh vegetables, well-seasoned chicken, a hot skillet—that’s really all you need.

The flavors are bright, the cleanup is easy, and the whole dish feels like something you’d happily eat on a warm evening with the windows open and the kitchen smelling amazing.

Honestly, recipes like this remind me why I love skillet cooking so much. One pan, real ingredients, and dinner that feels both effortless and satisfying.

Healthy 30-Minute Honey Garlic Chicken

Healthy 30-Minute Honey Garlic Chicken Recipe

If you’ve been searching for a healthy 30-minute honey garlic chicken recipe that actually tastes like something you’d order at a restaurant — not a sad diet version of it — this is the recipe you’ve been waiting for. I make this probably once a week at this point. Sometimes twice.

It started as one of those “clean out the fridge” dinners. I had chicken thighs, a sad little head of garlic rolling around in the produce drawer, and a bottle of honey I’d been meaning to use. Twenty-eight minutes later, I had the most glossy, fragrant, sticky-sweet pan sauce clinging to perfectly cooked chicken, and honestly — I’ve never looked back.

What I love most about this dish is that it doesn’t compromise. You get that deep savory-sweet flavor from the honey and garlic, the chicken stays juicy and tender, and the whole thing comes together in one skillet. Cleanup is easy. Weeknight stress is nonexistent. And it genuinely feels like a treat, not a chore.

Whether you’re cooking for your family, meal prepping for the week, or just trying to put something decent on the table on a Tuesday night, this recipe shows up for you. Every single time.

Why You’ll Love This Recipe

Okay, let me give you the real reasons — not the usual “it’s easy and delicious” nonsense you read everywhere.

First: it’s genuinely quick. Not “quick” in the way that means 45 minutes if you’re efficient. I mean 30 minutes start to finish, including the time it takes to mince the garlic and wonder briefly if you should use a garlic press instead. (You shouldn’t. Just mince it.)

Second: the flavor is layered. Honey brings sweetness and a little floral depth. Garlic — and you want real garlic here, please skip the jarred stuff just this once — brings that savory, slightly sharp bite that mellow out beautifully in a hot skillet. Add a splash of soy sauce and a tiny hit of apple cider vinegar, and suddenly you’ve got something that tastes like it took actual effort.

Third: it’s genuinely healthy. We’re using lean chicken breast (or thighs if you prefer more flavor), minimal oil, and a sauce that’s sweetened naturally with honey rather than anything processed. You can serve it over cauliflower rice, zucchini noodles, or regular rice depending on where you’re at.

And fourth — and this one really matters to me — the texture is right. The chicken gets a gorgeous golden-brown sear on the outside, stays moist inside, and the sauce reduces into this almost lacquered coating that clings to every piece. That’s the thing you want. That glossy, clingy sauce.

Ingredients

Here’s what you’ll need. Nothing fancy, I promise.

  • 5 lbs boneless, skinless chicken breasts (or thighs — more on that later)
  • Salt and black pepper, to taste
  • 1 tablespoon olive oil (or avocado oil)
  • 6 cloves garlic, minced (yes, six — don’t be shy)
  • 1/3 cup raw honey
  • 3 tablespoons low-sodium soy sauce (or coconut aminos for gluten-free)
  • 1 tablespoon apple cider vinegar
  • 1 teaspoon fresh ginger, grated (optional but genuinely worth it)
  • 1/2 teaspoon red pepper flakes (optional, for heat)
  • 1 teaspoon cornstarch + 2 teaspoons cold water (to thicken the sauce)
  • Fresh parsley or sesame seeds, for garnish

Quick note on the honey: raw, unfiltered honey gives you the best flavor here. It’s slightly earthier, less one-dimensionally sweet. Regular honey works fine too, but if you have raw honey on hand, use it.

Step-by-Step Instructions

Alright. Let’s cook.

Step 1: Prep the Chicken

Pat your chicken dry with paper towels. This sounds like a minor detail but it really isn’t — moisture on the surface of the chicken will steam it instead of sear it, and you want that golden crust. Season generously on both sides with salt and black pepper.

If your chicken breasts are thick (more than an inch), butterfly them or pound them slightly to even out the thickness. This helps them cook through at the same rate so you don’t end up with overcooked edges and a raw center.

Step 2: Sear the Chicken

Heat your skillet — cast iron is ideal here, stainless steel works too — over medium-high heat. Add the oil and let it shimmer. When you see that shimmer, you’re ready.

Add the chicken and don’t touch it. Seriously, just leave it alone for about 5–6 minutes. You’ll hear it sizzle confidently. Resist the urge to peek or move it — you want it to release naturally from the pan. When it lifts easily and is golden-brown underneath, flip. Cook the other side for another 4–5 minutes.

Remove the chicken from the skillet and set it on a plate. It doesn’t need to be fully cooked through at this point — it’s going back in the sauce.

Step 3: Build the Honey Garlic Sauce

Reduce heat to medium. In the same skillet — don’t wipe it out, those brown bits are flavor — add the minced garlic. Cook for about 60 seconds, stirring constantly. The garlic should smell incredible but not turn brown. The line between fragrant and burnt garlic is about 30 seconds, so watch it.

Add the honey, soy sauce, apple cider vinegar, ginger (if using), and red pepper flakes. Stir to combine. The sauce will bubble up pretty quickly — that’s fine. Let it cook for 1–2 minutes, stirring occasionally, until it smells like the best thing in your kitchen.

Step 4: Finish the Chicken

Return the chicken to the skillet, nestling each piece into the sauce. Spoon the sauce over the top. Reduce heat to medium-low, cover, and cook for another 5–7 minutes until the chicken is fully cooked through (internal temperature should hit 165°F).

In the last 2 minutes, mix your cornstarch and cold water into a slurry and pour it into the sauce while stirring. This thickens everything up into that gorgeous, glossy consistency. Watch the sauce go from thin and watery to thick and lacquer-like — it’s genuinely satisfying to watch.

Step 5: Serve

Slice or serve whole. Spoon the extra sauce over everything. Garnish with fresh parsley or a scatter of sesame seeds. Serve immediately while the sauce is still sticky and fragrant.

Cooking Tips

A few things I’ve learned from making this more times than I can count:

  • Don’t rush the sear. Medium-high heat and patience are your friends. If the chicken is sticking, it’s not ready to flip yet.
  • Watch your garlic. Burnt garlic ruins the whole sauce. If it starts to brown too fast, pull the pan off the heat for a few seconds.
  • Honey can burn. Once the sauce is in the pan, don’t crank the heat. Medium to medium-low is the sweet spot.
  • If your sauce gets too thick, add a tablespoon or two of water or chicken broth to loosen it up.
  • Rest the chicken for a few minutes before slicing. You’ll lose less juice that way.

Substitutions & Variations

One of the reasons this recipe has become a weekly staple for me is how flexible it is. Actually — wait, let me explain what I mean. It’s not flexible in a “you can use anything” way. It’s flexible in the specific, smart-swap way where changing one or two things shifts the entire flavor profile without breaking the recipe.

  • Chicken thighs instead of breasts: More forgiving, more flavorful, slightly higher in fat. If you’re less worried about keeping it ultra-lean, thighs are honestly the better choice here.
  • Coconut aminos instead of soy sauce: Makes it gluten-free and adds a slightly sweeter, more mellow base. Works beautifully.
  • Maple syrup instead of honey: A solid substitute if you’re out of honey. The flavor is slightly more caramel-forward but still delicious.
  • Add orange juice: A splash (about 2 tablespoons) of fresh orange juice in the sauce gives it a bright citrus note that cuts through the sweetness. My go-to variation in summer.
  • Add vegetables: Throw in sliced bell peppers, snap peas, or broccoli when you add the chicken back in. They’ll cook in the sauce and absorb all that flavor.
  • Make it spicier: Double the red pepper flakes, add a teaspoon of chili garlic sauce, or a squeeze of sriracha to the sauce.

What to Serve With It

This is one of those dishes that goes with almost everything. My personal favorite is a simple bowl of steamed jasmine rice — nothing fancy, just the fluffy white stuff that soaks up the extra sauce at the bottom of the pan. It’s perfect.

For a lower-carb situation, cauliflower rice is genuinely great here. So is roasted broccoli — the char on the florets plays really well against the sweetness of the sauce. Zucchini noodles work too, though they release a fair bit of water so serve immediately.

A simple green salad on the side keeps things fresh and light. If you want to go a bit more substantial, roasted sweet potatoes are an excellent pairing — the earthiness balances the sweet-savory sauce in a way that feels almost intentional.

Storage & Reheating

Leftovers keep beautifully, which is why this is such a great meal prep dish. Store in an airtight container in the refrigerator for up to 4 days. The sauce thickens a lot when cold — that’s normal. It loosens right back up when you reheat it.

To reheat: add the chicken and sauce to a small skillet over medium-low heat with a splash of water or chicken broth. Heat gently for 4–5 minutes, turning once or twice, until warmed through. Microwave works in a pinch — medium power, 90 seconds, covered — but the skillet method keeps the texture better.

For freezing: let everything cool completely, then transfer to a freezer-safe container or bag. Freeze for up to 2 months. Thaw overnight in the refrigerator before reheating.

Questions People Ask About This Recipe

Can I use chicken thighs instead of breasts?

Absolutely, and honestly? I prefer them. Thighs are more forgiving — they’re harder to overcook and have more natural fat, which means more flavor. The cook time is about the same; just check for that 165°F internal temperature.

Is this recipe gluten-free?

Not quite as written, because regular soy sauce contains wheat. But swap it for coconut aminos or tamari (certified GF) and you’re completely good.

Can I make this ahead of time?

Yes — it actually gets better on day two as the flavors meld together. Make the full recipe, let it cool, refrigerate, and reheat gently the next day. Just keep the garnishes (parsley, sesame) separate until you serve.

My sauce is too thin. What happened?

Two possibilities: either the cornstarch slurry wasn’t added, or the sauce needed another minute or two to reduce. If it’s still thin after the slurry, just let it cook uncovered on medium heat for 2–3 more minutes while stirring. It’ll come together.

Can I double the recipe?

Easily. Use a large skillet or work in batches for the sear so you don’t crowd the pan — crowding causes steaming, not browning. Everything else scales directly.

30-Minute Honey garlic Chicken

If you've been searching for a healthy 30-minute honey garlic chicken that actually tastes like something you'd order at a restaurant — not a sad diet version of it — this is the recipe you've been waiting for. I make this probably once a week at this point. Sometimes twice.
Prep Time 10 minutes
Cook Time 20 minutes
Total Time 30 minutes
Servings: 4
Course: Main Course
Cuisine: American/Mediterrranean

Ingredients
  

  • 5 lbs boneless skinless chicken breasts (or thighs)
  • Salt and black pepper to taste
  • 1 tablespoon olive oil or avocado oil
  • 6 cloves garlic minced
  • 1/3 cup raw honey
  • 3 tablespoons low-sodium soy sauce or coconut aminos
  • 1 tablespoon apple cider vinegar
  • 1 teaspoon fresh ginger grated (optional)
  • 1/2 teaspoon red pepper flakes optional
  • 1 teaspoon cornstarch + 2 teaspoons cold water
  • Fresh parsley or sesame seeds for garnish

Method
 

  1. Pat chicken dry, season both sides with salt and pepper.
  2. Heat oil in skillet over medium-high. Sear chicken 5–6 min per side until golden. Remove and set aside.
  3. Reduce heat to medium. Add garlic to same skillet, cook 60 seconds, stirring constantly.
  4. Add honey, soy sauce, apple cider vinegar, ginger, and red pepper flakes. Stir and simmer 1–2 minutes.
  5. Return chicken to skillet. Spoon sauce over each piece. Cover and cook on medium-low for 5–7 minutes until internal temp reaches 165°F.
  6. Stir cornstarch slurry and pour into sauce. Stir gently and cook 1–2 more minutes until glossy and thickened.
  7. Garnish with parsley or sesame seeds. Serve immediately.

Notes

  • Pat the chicken completely dry before searing for a proper golden crust.
  • Don't walk away from the garlic — it burns in under a minute at high heat.
  • For gluten-free: use coconut aminos or certified GF tamari.
  • For a citrus variation, add 2 tablespoons fresh orange juice to the sauce.
  • Leftovers keep in the fridge up to 4 days; freeze up to 2 months.
 

Final Thoughts

There’s something genuinely satisfying about a recipe this simple doing so much. Healthy 30-minute honey garlic chicken has become one of those dishes I fall back on when I want to eat well without overthinking it — when I want real flavor, not diet food, and I want it done before the hunger headache sets in.

It’s the kind of dinner that makes the kitchen smell incredible, that gets actual compliments from whoever’s at the table, and that takes less time than ordering takeout. That’s the dream, right?

So yes — make this on a weeknight. Make it for meal prep. Make it when you’re tired and you need something that just works. I promise it won’t let you down.


Easy Spicy Chicken Fajitas in a Skillet

Easy Spicy Chicken Fajitas in a Skillet

Few meals deliver the same level of excitement as a hot skillet of sizzling fajitas arriving at the table. The aroma alone—garlic, chili spices, onions, and peppers mingling with juicy chicken—has a way of gathering everyone around the kitchen before the meal is even ready.

Easy spicy chicken fajitas in a skillet bring that restaurant-style experience into a home kitchen without much fuss. Everything cooks in a single pan, the ingredients are easy to find, and the cooking process moves quickly. Within about half an hour, you can have a flavorful meal that feels vibrant, colorful, and satisfying.

One of the biggest reasons skillet fajitas remain popular is their balance of flavor and simplicity. A quick marinade of spices and citrus builds depth, while the skillet heat sears the chicken and vegetables so they develop those lightly charred edges that make fajitas so appealing.

Meals like this are also perfect for busy evenings. Instead of juggling several pots, you focus on one pan and let the ingredients do most of the work. That simplicity is why skillet cooking has gained such a strong following among home cooks and food bloggers alike, especially in communities centered around

This recipe stays true to the spirit of traditional fajitas while keeping the process simple enough for weeknight cooking. The result is tender chicken coated in smoky spices, vibrant peppers, and onions that soften just enough to become sweet and savory.

Why You’ll Love This Recipe

Quick and Weeknight Friendly

This entire meal comes together in roughly 30 minutes. The ingredients cook quickly in a hot skillet, making it ideal for evenings when you want something flavorful without spending hours in the kitchen.

Bold, Smoky Flavor

The spice blend—paprika, chili powder, cumin, and garlic—creates that classic fajita taste. A squeeze of lime adds brightness that balances the heat.

One-Pan Simplicity

Because everything cooks in a single skillet, cleanup stays minimal. This style of cooking is exactly why skillet meals are so popular with busy households.

Easy to Customize

You can easily adjust the spice level, add extra vegetables, or switch the protein. The recipe adapts nicely depending on your taste.

Ingredients Overview

The beauty of fajitas is that the ingredient list is short but flavorful.

Chicken

Boneless chicken breast or chicken thighs both work well. Chicken breast cooks slightly faster, while thighs tend to stay juicier.

Bell Peppers

Use a mix of red, yellow, and green peppers for color and flavor. The natural sweetness of peppers balances the spices nicely.

Onion

A large onion sliced into strips adds both sweetness and texture as it cooks.

Lime Juice

Fresh lime juice brightens the spices and enhances the flavor of the chicken.

Olive Oil

Used for cooking and helping the seasoning coat the chicken evenly.

Fajita Spices

The spice mix typically includes:

  • chili powder
  • smoked paprika
  • cumin
  • garlic powder
  • oregano

This combination creates the signature fajita flavor.

Preparing the Chicken

Start by slicing the chicken into thin strips. Cutting the pieces evenly helps them cook quickly and ensures they absorb the seasoning evenly.

Place the chicken in a mixing bowl and add:

  • olive oil
  • lime juice
  • chili powder
  • paprika
  • cumin
  • garlic powder
  • oregano
  • salt and pepper

Stir everything together until the chicken is evenly coated. Let it sit for about 5–10 minutes while you prepare the vegetables.

Even a short marinade allows the spices to penetrate the meat and intensify the flavor.

Preparing the Vegetables

While the chicken rests, slice the onion and bell peppers into long strips. This shape is traditional for fajitas and allows the vegetables to cook quickly while still keeping some texture.

If you enjoy extra heat, thinly slice a small jalapeño and add it to the vegetable mix.

Once the vegetables are ready, the cooking process moves quickly.

Step-by-Step Cooking Instructions

Step 1: Heat the Skillet

Place a large skillet over medium-high heat and add a small drizzle of olive oil.

Allow the pan to become hot before adding the chicken. A properly heated skillet helps create that slightly charred fajita flavor.

Step 2: Cook the Chicken

Add the seasoned chicken strips to the skillet in a single layer.

Cook for about 5–6 minutes, stirring occasionally, until the chicken is fully cooked and lightly browned on the edges.

Once done, transfer the chicken to a plate and set aside.

Step 3: Sauté the Vegetables

In the same skillet, add the sliced onions and peppers.

Cook them for about 4–5 minutes, stirring occasionally. The vegetables should soften slightly while still keeping a bit of crunch.

The goal is to achieve a light char that enhances the natural sweetness of the peppers.

Step 4: Combine Everything

Return the cooked chicken to the skillet with the vegetables.

Stir everything together and cook for another 2 minutes, allowing the flavors to blend.

A final squeeze of fresh lime juice brightens the entire dish.

At this point, the skillet should be filled with tender chicken, vibrant peppers, and the unmistakable aroma of fajita spices.

The mixture is now ready to be served in warm tortillas or enjoyed as a low-carb bowl with rice or salad.

Easy Spicy Chicken Fajitas in a Skillet

The moment everything comes together in the skillet, the colors alone make the dish irresistible. Golden-browned chicken strips mingle with vibrant peppers and tender onions, all coated in warm spices. It’s the kind of meal that looks just as good as it tastes.

One of the nicest things about fajitas is how interactive they are. Instead of plating a rigid dish, you bring the skillet to the table and let everyone assemble their own wraps or bowls.

How to Serve Skillet Chicken Fajitas

Once your fajita mixture is ready, there are several easy ways to serve it.

Classic Tortilla Fajitas

Warm flour or corn tortillas and fill them with the sizzling chicken and vegetable mixture. Add toppings like:

  • sour cream
  • shredded cheese
  • avocado slices
  • fresh cilantro
  • salsa or pico de gallo

The combination of warm tortillas, smoky chicken, and fresh toppings creates the classic fajita experience.

Fajita Rice Bowl

If you want something heartier, serve the chicken mixture over steamed rice or cilantro-lime rice. This version works wonderfully for meal prep lunches.

Low-Carb Fajita Bowl

Skip the tortillas and serve the mixture over:

cauliflower rice

shredded lettuce

sautéed zucchini

You still get all the flavor without the extra carbs.

Tips for the Best Skillet Fajitas

Even though fajitas are simple, a few small techniques can dramatically improve the flavor.

Use High Heat

Fajitas taste best when the skillet is hot enough to slightly char the ingredients. That bit of browning creates a smoky flavor similar to restaurant fajitas.

Avoid Overcrowding the Pan

If too much chicken is added at once, the meat will steam instead of sear. Spread the strips evenly so they cook properly.

Slice Against the Grain

Cutting the chicken against the grain keeps the meat tender instead of chewy.

Don’t Overcook the Vegetables

Peppers should remain slightly crisp. Overcooking them makes the fajitas feel mushy.

Variations You Can Try

One reason fajitas stay popular is how easily they adapt to different ingredients.

Steak Fajitas

Swap the chicken for thinly sliced flank steak or sirloin.

Shrimp Fajitas

Shrimp cook extremely fast and absorb spices beautifully. Reduce cooking time to avoid overcooking.

Extra Veggie Fajitas

Add more vegetables such as:

  • mushrooms
  • zucchini
  • corn
  • poblano peppers

These additions bring even more color and flavor.

Creamy Fajita Skillet

For a richer version, stir in a few spoonfuls of cream cheese or sour cream at the end of cooking.

Storage and Reheating

Leftover fajitas store surprisingly well.

Refrigeration

Place the cooled chicken and vegetables in an airtight container.

They will keep well in the refrigerator for up to 3 days.

Reheating

Reheat in a skillet over medium heat for about 5 minutes. Add a splash of water or broth if needed to keep the mixture from drying out.

Microwave reheating also works, though skillet reheating preserves texture better.

Freezing

While possible, freezing is not always ideal because peppers can become soft after thawing. If you do freeze them, consume within 1 month.

Nutrition Overview

While exact values vary depending on toppings and tortillas, this dish is generally balanced and protein-rich.

Approximate nutrition per serving (without tortillas):

Calories: 260

Protein: 28g

Carbohydrates: 8g

Fat: 12g

Adding tortillas and toppings will increase these values.

Easy Spicy Chicken Fajitas in a Skillet

A quick and flavorful skillet dinner made with juicy chicken strips, bell peppers, onions,and smoky fajita spices. Perfect for busy weeknights and ready in about 30 minutes.
 
Prep Time 10 minutes
Cook Time 20 days 20 minutes
Total Time 29 minutes
Servings: 4
Course: Dinner
Cuisine: Tex-Mex

Ingredients
  

  • 1 pound boneless chicken breast or thighs sliced into strips 2tablespoons olive oil 1tablespoon lime juice, 1teaspoon chili powder, 1teaspoon smoked paprika ½teaspoon cumin ½teaspoon garlic powder ½teaspoon dried oregano ½teaspoon salt ¼teaspoon black pepper 1large onion, sliced 2bell peppers, sliced (any color) 1small jalapeño, thinly sliced (optional for extra heat) Freshcilantro for garnish, Limewedges for serving

Frequently Asked Questions

Can I make chicken fajitas ahead of time?

Yes. Cook the chicken and vegetables, store them in the refrigerator, and reheat in a skillet before serving.

What type of skillet works best?

A wide skillet—cast iron or electric—works best because it distributes heat evenly and allows the ingredients to sear.

Are chicken thighs better than chicken breast?

Both work well. Chicken thighs tend to be juicier, while chicken breast cooks slightly faster.

Can I make this recipe less spicy?

Absolutely. Reduce the chili powder and omit the jalapeño if you prefer a milder flavor.

Conclusion

Few meals capture the spirit of easy weeknight cooking quite like easy spicy chicken fajitas in a skillet. With just a handful of ingredients and one pan, you can create a meal that feels vibrant, flavorful, and satisfying.

The sizzling combination of seasoned chicken, colorful peppers, and caramelized onions creates a dish that feels both comforting and exciting. It’s the type of recipe that quickly becomes part of the regular dinner rotation because it’s so simple to prepare.

Whether you wrap the filling in warm tortillas, pile it onto rice, or enjoy it as a low-carb bowl, skillet chicken fajitas bring bold flavor and flexibility to the table. And once you’ve made them a few times, you’ll find yourself experimenting with different spices, vegetables, and toppings to make the recipe uniquely your own.

Comfort-Style Skillet Beef with Cream Sauce 

Comfort-Style Skillet Beef with Cream Sauce 

I didn’t plan to make this the first time. That’s usually how it goes with the meals that stick. I had beef out because it needed to be used, a half-carton of cream lingering in the fridge door, and the kind of evening where you’re hungry but not inspired. The stove was already warm from boiling pasta for someone else. I figured I’d just sear the beef, splash something creamy in there, and see where it landed.

Somewhere between the sound of the meat hitting the pan and the smell of garlic warming in butter, it turned into this—comfort-style skillet beef with a cream sauce that doesn’t pretend to be elegant. It’s cozy, filling, and forgiving. The kind of food you eat from a bowl if you’re tired, or from a plate if you’re pretending the day wasn’t long.

This isn’t a recipe I follow line by line anymore. It’s more like a shape I recognize. Beef, heat, cream, patience in small doses. And a pan you don’t want to scrub too hard afterward because all the flavor lives there.

The beef matters, but not in a fancy way

I’ve made this with different cuts, and honestly, some worked better than the ones I thought would. Thin-sliced sirloin is great if you want something quick. Chuck works too, but only if you’re willing to slow down and let it soften. I’ve even used leftover roast beef once, sliced thin and reheated gently in the sauce, which felt a little wrong at first but turned out surprisingly good.

What matters more than the cut is how cold the beef is when it hits the pan. Straight from the fridge, it steams. You don’t want that. Let it sit out while you prep everything else. Not forever—just long enough to lose that chill. Dry it well. Really well. I forget this step sometimes and regret it every time.

Salt early. Not aggressively, just enough that it doesn’t feel like an afterthought later.

The pan sets the mood

I always reach for my heaviest skillet here. Cast iron if it’s clean. Stainless if it’s not. Nonstick works, but you lose some of the little browned bits that make the sauce taste like it took more effort than it did.

Heat matters more than people admit. Too hot and the butter burns before you even get started. Too low and the beef releases liquid, sulks, and refuses to brown. Medium-high usually gets me there, but I still wait for the pan to tell me it’s ready. A flick of water should dance, not sit there thinking about life.

Butter first, then a touch of oil so it doesn’t scorch. I’ve tried just oil. It’s fine. But butter makes it feel like comfort food instead of just dinner.

Searing without fussing (this is harder than it sounds)

Once the beef goes in, leave it alone. This is where I mess up when I’m impatient. I poke, stir, flip too early. Don’t. Let one side brown properly. If it sticks, it’s not ready. That’s annoying advice, but it’s true.

Work in batches if you need to. Crowding the pan ruins the whole thing. I know it feels like extra work. It is. But it’s also the difference between beef that tastes rich and beef that tastes… boiled.

When it’s browned, pull it out. All of it. Put it on a plate and don’t worry that it’s not cooked through. It’ll finish later, gently, in the sauce.

The quiet middle part (where the flavor builds)

Turn the heat down a notch. This is not the moment to rush.

I usually add chopped onion here—sometimes shallot if I’m feeling a little fancy, but onion is more honest. Let it soften in the leftover fat and browned bits. Scrape gently. The pan should look messy in a good way.

Garlic goes in next. Briefly. I count to maybe fifteen in my head. Burnt garlic kills the mood faster than almost anything.

This is where I sometimes hesitate. Do I add mushrooms? Sometimes yes. If I have them and they’re not slimy. They soak up the sauce beautifully, but they also make the dish heavier. On nights when I want something simpler, I skip them and don’t miss them.

A small spoon of flour can go in here if you want a thicker sauce. Not always necessary, but helpful if your cream is on the thin side. Cook it out for a minute so it doesn’t taste raw.

Cream sauce without overthinking it

Pouring in the cream always feels dramatic, even though it’s not. The pan hisses, everything loosens up, and suddenly it smells like something you’d order instead of cook.

Heavy cream is safest. It won’t split, even if you get distracted. I’ve used half-and-half in a pinch, but you have to be gentler. Lower heat, more patience. If it looks like it might break, pull it off the burner for a second and whisk like you mean it.

I add a splash of broth sometimes, especially if the sauce feels too thick too fast. Beef broth makes sense, but chicken works too. I wouldn’t tell anyone if you didn’t.

This is where seasoning starts to matter more. Salt, yes. Pepper, definitely. Sometimes a little Dijon mustard sneaks in—not enough to announce itself, just enough to sharpen the cream. A pinch of paprika or thyme if I’m in the mood. Not every spice cabinet needs to be involved.

Let the sauce simmer gently. Not boil. Boiling makes it grainy and impatient.

Bringing the beef back, carefully

The beef goes back in once the sauce looks settled. Not watery, not gluey. Somewhere in between. Stir it in and let it warm through.

This part is quiet. The pan barely bubbles. The beef finishes cooking, relaxes, and takes on the sauce instead of fighting it.

Taste. Adjust. This is usually when I realize it needs more salt than I expected. Cream hides salt the way mashed potatoes do.

If it tastes flat, a tiny splash of acid helps. Lemon juice, a few drops of vinegar, even a little white wine if there’s some open. You don’t want it sour. Just awake.

What to serve it with (or not)

I’ve spooned this over mashed potatoes more times than I can count. That’s the classic move, and it works. Egg noodles are a close second, especially when they catch the sauce in their curves.

Rice is fine. Crusty bread is better. Sometimes I eat it straight from a bowl with a fork and tear bread with my hands. No regrets.

If there’s something green on the plate, it’s usually an afterthought. Steamed beans, a quick salad, maybe broccoli if I remembered. The dish doesn’t demand balance. It just accepts it if you offer.

Cleanup thoughts (because they matter)

If you did it right, the pan shouldn’t be terrible. A soak while you eat helps. Don’t scrub too hard—you want to remember this meal next time you cook in it.

The sauce thickens as it sits, which makes leftovers even better. Reheat gently. Add a splash of cream or broth if needed. High heat will break it and make you sad.

Why this one stays in rotation

I think I keep coming back to this comfort-style skillet beef with cream sauce because it doesn’t pretend. It’s not trying to be light or impressive or clever. It’s just good, in a way that feels earned but not exhausting.

It forgives substitutions. It forgives distraction. It even forgives a slightly overcooked piece of beef now and then. On nights when cooking feels like one more thing, this dish meets you halfway.

I’ve made it while tired, distracted, and once while slightly annoyed at everyone in the house. It still worked. That counts for a lot.

And every time I think I’m done tweaking it, I change something small. Different cut. Different herb. No mushrooms. Extra pepper. It adjusts. Like comfort food should.

If you make it once and then never exactly the same way again, that feels right. That’s how it started for me, and honestly, I hope it ends up that way for you too.

One-Pan Lemon Herb Chicken and Rice Recipe

  One-Pan Lemon Herb Chicken and Rice

Some dinners are planned days in advance. Others come together on a quiet evening when you want something warm, filling, and uncomplicated. That’s where the one-pan lemon herb chicken and rice recipe quietly earns its place in the weekly rotation.

It’s the kind of meal that feels both comforting and practical. Chicken browns in a skillet, rice slowly absorbs broth and lemon, and herbs bring a gentle freshness that keeps the dish from feeling too heavy. By the time everything finishes cooking, the kitchen smells bright and savory at the same time.

What makes this dish especially appealing is its simplicity. Everything cooks in one pan, which means fewer dishes and a cooking process that feels relaxed rather than rushed. Many home cooks rely on this style of dinner because it balances flavor with convenience—something that has long been valued in everyday cooking traditions.

Meals like this also work well with the principles often discussed in Search Engine Optimization when applied to recipe blogging: clear structure, practical instructions, and useful tips that readers can actually follow in their own kitchens.

But beyond blogging strategies and techniques, the real appeal of this recipe is much simpler. It’s just good food made from ingredients most people already have.

Why You’ll Love This Recipe

1. Everything cooks in one pan

Cooking the chicken and rice together allows the flavors to blend naturally. The juices from the chicken season the rice while it cooks, creating a dish that tastes richer than the ingredient list might suggest.

2. The lemon keeps it light

Chicken and rice can sometimes feel heavy, especially when cooked with creamy sauces. A bit of lemon juice and zest changes that completely. The citrus brightens the entire dish without overpowering it.

3. Perfect for weeknight dinners

This recipe doesn’t require complicated steps. Once the ingredients are in the skillet, most of the cooking time is hands-off.

4. Easy to adjust

You can easily add vegetables like peas, spinach, or diced carrots. It’s the kind of recipe that adapts well depending on what’s already in the refrigerator.

Ingredients (Overview)

The ingredient list is refreshingly straightforward. Nothing unusual, nothing difficult to find—just familiar kitchen staples working together.

Chicken

Boneless chicken thighs or breasts both work well. Thighs tend to stay juicier during the longer cooking time, but breasts can be used if that’s what you have.

Rice

Long-grain white rice works best because it cooks evenly and stays fluffy rather than sticky.

Lemon

Fresh lemon juice and zest add brightness and balance to the savory elements of the dish.

Chicken Broth

Broth provides flavor and ensures the rice cooks properly while absorbing the seasoning from the chicken.

Garlic

A couple of minced cloves add depth without making the dish overly garlicky.

Olive Oil

Used for browning the chicken and building the base flavor.

Herbs

A mix of dried oregano, thyme, and parsley works beautifully here. If fresh herbs are available, they can be added near the end for even more aroma.

Seasonings

Salt and freshly ground black pepper keep everything balanced.

Ingredient List

Servings: 4

  • 4 boneless chicken thighs or breasts

  • 1 cup long-grain white rice

  • 2 tablespoons olive oil

  • 3 cloves garlic, minced

  • 2 cups chicken broth

  • 1 tablespoon lemon juice

  • 1 teaspoon lemon zest

  • 1 teaspoon dried oregano

  • ½ teaspoon dried thyme

  • ½ teaspoon dried parsley

  • ½ teaspoon salt

  • ¼ teaspoon black pepper

  • 2 tablespoons chopped fresh parsley (for garnish)

Equipment

  • Large skillet or sauté pan with lid

  • Cutting board

  • Sharp knife

  • Wooden spoon or spatula

  • Measuring cups and spoons

A wide skillet helps ensure the chicken browns evenly before the rice is added.

Prep Time and Cooking Details

Prep Time: 10 minutes
Cook Time: 30 minutes
Total Time: 40 minutes
Servings: 4
Course: Dinner
Cuisine: American / Mediterranean-inspired
Diet: Gluten-free

Preparing the Ingredients: (one-pan lemon herb chicken and rice recipe)

Before cooking begins, it helps to have everything ready.

Start by patting the chicken dry with paper towels. Removing excess moisture helps the chicken brown properly when it hits the hot pan.

Next, mince the garlic and measure the rice. If you’re using a fresh lemon, zest it first before squeezing the juice. This small step makes the preparation smoother once the cooking process starts.

The herbs can be mixed together in a small bowl so they’re ready to sprinkle in when needed.

Cooking often feels easier when the ingredients are organized in advance. Professional chefs call this mise en place, but in a home kitchen it simply means being prepared so the process flows naturally.

Step-by-Step Instructions (Cooking the Dish)

Step 1: Brown the Chicken

Heat the olive oil in a large skillet over medium heat. Once the oil is hot, place the chicken pieces in the pan and season them lightly with salt and black pepper.

Cook for about 4–5 minutes per side, until the chicken develops a golden brown crust. The goal here is not to cook the chicken completely but to build flavor.

Once browned, remove the chicken from the pan and set it aside.

Step 2: Cook the Garlic

In the same skillet, add the minced garlic. Stir it gently for about 30 seconds until fragrant.

Garlic cooks quickly, so it’s important not to let it burn.

Step 3: Add the Rice

Pour the rice into the skillet and stir it for a minute so it becomes lightly coated in the flavorful oil left behind by the chicken.

This quick step helps the rice develop a slightly nutty taste once it cooks.

Step 4: Add Broth and Seasonings

Pour in the chicken broth, then add:

  • lemon juice

  • lemon zest

  • oregano

  • thyme

  • parsley

Stir everything together gently.

Step 5: Return the Chicken to the Pan

Place the browned chicken back into the skillet, nestling the pieces into the rice mixture.

Bring the liquid to a gentle simmer.

Step 6: Cover and Cook

Reduce the heat to low and cover the skillet with a lid.

Allow the dish to cook for 20 minutes, or until the rice becomes tender and most of the liquid has been absorbed.

Avoid lifting the lid too often, as the steam helps cook the rice properly.

At this stage, the chicken finishes cooking while the rice absorbs the broth and lemon flavor. When everything comes together, the result is a skillet filled with tender chicken, fluffy rice, and the subtle aroma of herbs.

Tips for the Best Flavor

Even a simple skillet dinner benefits from a few small cooking habits.

Don’t rush the browning stage

The golden crust that forms on the chicken during the first step adds a lot of flavor to the entire dish. Let the chicken sit undisturbed in the pan so it develops that color properly.

Use fresh lemon if possible

Bottled lemon juice works in a pinch, but fresh lemon juice and zest bring a brighter flavor. The zest especially adds a gentle citrus aroma that blends nicely with herbs.

Keep the heat low while the rice cooks

Once the liquid starts simmering, reduce the heat and keep the skillet covered. Rice cooks best with steady, gentle heat.

Taste before serving

Different broths have different salt levels. After cooking, taste the rice and adjust seasoning if needed.

Substitutions and Variations

One reason this recipe stays popular is how flexible it can be. Small ingredient changes can create a slightly different version each time.

Add vegetables

A handful of vegetables can turn the skillet into a more complete meal.

Good additions include:

  • peas

  • spinach

  • chopped zucchini

  • diced carrots

Stir them in during the last 5–10 minutes of cooking.

Try brown rice

Brown rice can be used instead of white rice, though it requires more cooking time and additional broth.

If using brown rice, add about ½ cup extra broth and allow roughly 40 minutes of cooking.

Use different herbs

The herb combination can easily change depending on what’s available.

Some options include:

  • rosemary

  • basil

  • dill

Each herb creates a slightly different character in the dish.

Make it slightly creamy

If you prefer a richer texture, stir in a small splash of cream or a tablespoon of butter just before serving.

What to Serve with Lemon Herb Chicken and Rice

This skillet dinner is fairly complete on its own, but a few simple sides can make it feel more balanced.

Light salad

A crisp green salad with vinaigrette complements the lemon flavor nicely.

Roasted vegetables

Roasted asparagus, broccoli, or Brussels sprouts work well alongside the dish.

Warm bread

A slice of crusty bread helps soak up any remaining broth and adds a comforting touch to the meal.

Storage and Reheating

Like many skillet meals, this recipe stores well and can be enjoyed again the next day.

Refrigeration

Place leftovers in an airtight container and refrigerate for up to 3 days.

Reheating

Reheat gently in a skillet or microwave. If the rice feels slightly dry, add a tablespoon or two of broth or water before warming.

Freezing

While the dish can technically be frozen, rice sometimes changes texture after thawing. For the best results, enjoy it fresh or within a few days.

One-Pan lemon herb chicken and rice recipe

Prep Time 10 minutes
Cook Time 30 minutes
Total Time 40 minutes
Servings: 4
Course: Dinner
Cuisine: American Mediterranean inspired

Ingredients
  

  • 4 boneless chicken thighs or breasts
  • 1 cup long-grain white rice
  • 2 tablespoons olive oil
  • 3 cloves garlic minced
  • 2 cups chicken broth
  • 1 tablespoon lemon juice
  • 1 teaspoon lemon zest
  • 1 teaspoon dried oregano
  • ½ teaspoon dried thyme
  • ½ teaspoon dried parsley
  • ½ teaspoon salt
  • ¼ teaspoon black pepper
  • 2 tablespoons chopped fresh parsley for garnish

Equipment

  • Large skillet or sauté pan with lid, Cutting board, Sharp knife, Wooden spoon or spatula, Measuring cups and spoons. A wide skillet helps ensure the chicken browns evenly before the rice is added.

Frequently Asked Questions (FAQs)

Can I use bone-in chicken?

Yes. Bone-in chicken works well but may require a few extra minutes of cooking time to ensure it is fully cooked.

Can I substitute vegetable broth?

Absolutely. Vegetable broth will slightly change the flavor but still works nicely in the recipe.

How do I prevent the rice from becoming mushy?

Use the correct rice-to-liquid ratio and avoid stirring the rice repeatedly while it cooks.

Can this dish be made ahead of time?

Yes. It reheats well, though the rice may absorb more moisture as it sits. Adding a small splash of broth during reheating helps restore the texture.

Final Thoughts

Some recipes become favorites not because they are complicated but because they reliably deliver comfort with minimal effort.

One-pan lemon herb chicken and rice fits that description perfectly. The ingredients are familiar, the cooking process is straightforward, and the result feels both hearty and fresh thanks to the citrus and herbs.

On busy evenings when cooking needs to be simple yet satisfying, a skillet meal like this often proves that good food doesn’t have to be complicated.

Skillet Beef with Roasted Broccoli and Cheese Recipe

Jump to RecipeSkillet Beef with Roasted Broccoli and Cheese Recipe

 A Simple Skillet Dinner That Comes Together Fast—Skillet Beef with Roasted Broccoli and Cheese Recipe

Some of the best weeknight meals don’t start with a plan. They start with opening the refrigerator and realizing that a few ingredients need to be used sooner rather than later.

That’s usually how this skillet beef with roasted broccoli and cheese ends up on the stove in my kitchen.

There’s often a piece of steak that should probably be cooked today. A head of broccoli that’s still crisp but won’t last much longer. And somewhere in the fridge, a block of cheese waiting to be grated.

Put those three together in a hot skillet and something satisfying happens.

The beef browns and develops that deep savory flavor. The broccoli roasts until the edges turn slightly crisp and nutty. Then the cheese melts into everything and ties the dish together.

It’s not complicated food, but it’s dependable — exactly the kind of dinner that works on busy nights when you still want something warm and satisfying on the table.

  1. Why You’ll Love This Skillet Beef Recipe

This dish has become a regular in my rotation for several reasons.

It cooks quickly.

Once the broccoli is roasting, the rest of the meal comes together in about fifteen minutes.

It uses simple ingredients.

Beef, broccoli, cheese, and a few basic seasonings are really all you need.

It’s filling without feeling heavy.

The combination of protein, vegetables, and a little cheese makes the dish satisfying without turning it into something overly rich.

It works for weeknights.

Everything cooks in one pan, and cleanup is easy.

  1. Ingredients You’ll Need

This recipe keeps the ingredient list simple.

1 pound sirloin or flank steak, thinly sliced

1 large head broccoli, cut into florets

1 cup shredded cheddar or Monterey Jack cheese

1 tablespoon olive oil or butter

½ teaspoon salt

½ teaspoon black pepper

Optional additions:

2 cloves garlic, minced

½ teaspoon smoked paprika

pinch of chili flakes

These optional ingredients add flavor, but the dish works perfectly well without them.

  1. Ingredient Notes and Cooking Tips

A few ingredient choices can make the recipe turn out even better.

Choose a tender cut of beef.

Sirloin and flank steak both work well. If the meat seems slightly tough, slicing it thinly against the grain helps a lot.

Fresh broccoli roasts best.

Frozen broccoli can be used in a pinch, but it tends to release more moisture and won’t brown as deeply.

Use a cheese that melts well.

Cheddar adds flavor, while Monterey Jack melts more smoothly. Mixing the two works nicely.

Don’t overload the cheese.

A moderate amount keeps the dish balanced instead of heavy.

  1. How to Roast the Broccoli

Roasting the broccoli first gives the dish much better flavor.

Preheat the oven to 425°F (220°C).

Cut the broccoli into bite-sized florets and toss them with a little olive oil and a pinch of salt. Spread them out on a baking sheet so the pieces aren’t crowded together.

This part matters more than people expect. If the broccoli is packed too tightly on the pan, it steams instead of roasting.

Place the tray in the oven and roast for 15–20 minutes, until the edges start to brown and the stems are tender.

Once the broccoli is roasted, set it aside while you cook the beef.

  1. Cooking the Beef Properly

Good skillet beef depends on two things: high heat and patience.

Heat a large skillet over medium-high heat and add the oil or butter. Once the pan is hot, add the sliced beef in a single layer.

If the pan looks crowded, cook the beef in batches. Overcrowding prevents the meat from browning properly.

Let the beef sit undisturbed for a minute or two so it develops a nice sear. Once the bottom browns, flip the pieces and cook briefly on the other side.

At this stage you’re mainly building flavor, not fully cooking the meat.

Transfer the browned beef to a plate and leave the flavorful bits in the pan.

  1. Bringing the Dish Together

If you’re using garlic or spices, add them to the skillet now and cook briefly until fragrant.

Return the roasted broccoli to the pan and stir it around so it warms through.

Add the cooked beef back into the skillet along with any juices that collected on the plate. Stir gently to combine everything.

Lower the heat to medium-low.

Sprinkle the shredded cheese evenly over the mixture and cover the skillet loosely for a minute or two.

The cheese will melt and coat the beef and broccoli without turning the dish greasy.

Once the cheese looks melted and creamy, turn off the heat.

  1. Tips for the Best Flavor and Texture

A few small techniques make a noticeable difference.

Dry the beef before cooking.

Excess moisture prevents proper browning.

Use a hot skillet.

Beef sears best when the pan is already hot.

Avoid stirring constantly.

Letting the meat sit for a moment allows a crust to form.

Roast the broccoli instead of steaming it.

Roasting develops deeper flavor and better texture.

  1. Making the Recipe Even Better

Choosing the Right Cut of Beef

One thing that can quietly change the outcome of this recipe is the type of beef you use.

I usually reach for sirloin because it’s widely available and cooks quickly. It has enough fat to stay tender without becoming greasy in the skillet.

Flank steak is another excellent option. It has a stronger beef flavor and works especially well when sliced thinly against the grain. If you’ve ever ended up with chewy flank steak, it’s usually because it wasn’t sliced correctly.

For this dish, the slices should be thin — almost stir-fry style.

If the steak you have feels a little firm, placing it in the freezer for about 15 minutes before slicing makes it much easier to cut thin strips.

Even inexpensive cuts can work if they’re sliced properly and cooked quickly.

Why Roasting the Broccoli Changes the Dish

Broccoli behaves very differently depending on how it’s cooked.

When it’s steamed, it stays soft and mild. That’s perfectly fine for a side dish, but it doesn’t add much personality to a skillet meal.

Roasting transforms it.

The high heat caramelizes the edges slightly, giving the florets a deeper, nutty flavor that balances the richness of the beef and cheese.

Another small detail that helps is not cutting the florets too small. Larger pieces develop better texture and stay slightly crisp even after being added back to the skillet.

If the stems are thick, I sometimes peel the outer layer and slice them thinner. They roast beautifully and add extra crunch.

Getting the Cheese Just Right

Cheese is what ties this dish together, but it’s easy to overdo it.

A light layer of melted cheese creates a creamy finish without turning the skillet into something heavy.

I usually grate the cheese myself rather than using pre-shredded cheese. Pre-shredded varieties often contain anti-caking agents that prevent smooth melting.

If you want the best texture, shred the cheese just before adding it to the skillet.

Another small trick is lowering the heat before adding the cheese. Cheese melts best gently. If the heat is too high, it can separate and become oily instead of creamy.

Covering the skillet loosely for a minute helps trap enough heat to melt everything evenly.

Small Flavor Boosts That Work Well

Once you’ve made this recipe once or twice, it’s easy to adjust it depending on what you’re in the mood for.

A squeeze of fresh lemon right before serving brightens the whole dish.

A dash of smoked paprika adds warmth and depth without overpowering the beef.

If you enjoy spice, a small pinch of red pepper flakes brings just enough heat to keep things interesting.

Sometimes I also add a spoonful of the pan juices over the finished dish right before serving. It’s a small detail, but it makes everything feel more cohesive.

When This Recipe Works Best

This skillet meal fits nicely into the kind of evenings when cooking needs to stay simple.

It’s quick enough for weeknights but still feels satisfying enough to serve when friends stop by unexpectedly.

Because the ingredients are flexible, it’s also the kind of recipe that works when the refrigerator isn’t fully stocked.

A little beef, a vegetable, and some cheese can go a long way when they’re cooked properly.

And once you’ve made it once, the process becomes second nature.

  1. Easy Variations to Try

This recipe adapts easily depending on what you have available.

Spicy version

Add chili flakes or a dash of hot sauce before serving.

Creamy version

Stir in a splash of cream before adding the cheese.

Different vegetables

Cauliflower or Brussels sprouts work well in place of broccoli.

Leftover steak option

If you already have cooked steak, add it at the end just long enough to warm it.

10. What to Serve with Skillet Beef and Broccoli

This dish is satisfying on its own, but a few sides make it feel like a complete dinner.

Good options include:

steamed white or brown rice

roasted potatoes

crusty bread

a simple green salad

Rice is probably the easiest pairing and soaks up any juices left in the skillet.

  1. Storage and Reheating

Leftovers keep well for a short time.

Store the cooled dish in an airtight container in the refrigerator for up to two days.

To reheat, warm it gently in a skillet over low heat. Adding a small splash of water helps loosen the mixture.

The microwave works as well, though the texture of the beef can become slightly firmer.

  1. Frequently Asked Questions

Can I use ground beef instead of steak?

Yes. Ground beef works, although the texture will be different. Brown it first, drain excess fat, and continue with the recipe.

Can frozen broccoli be used?

It can, though it won’t roast as deeply. Pat it dry and expect a slightly softer texture.

What type of skillet works best?

A wide, heavy skillet works best. Cast iron or stainless steel both provide excellent browning.

Is this recipe low-carb?

Yes. As written, it’s naturally low in carbohydrates.

Recipe Card

Skillet Beef with Roasted Broccoli and Cheese Recipe

Some of the best weeknight meals don’t start with a plan. They start with opening the refrigerator and realizing that a few ingredients need to be used sooner rather than later.
That’s usually how this skillet beef with roasted broccoli and cheese ends up on the stove in my kitchen.

Ingredients
  

  • 1 pound sirloin or flank steak, thinly sliced
  • 1 large head broccoli, cut into florets
  • 1 large head broccoli, cut into florets
  • 1 cup shredded cheddar or Monterey Jack cheese
  • 1 tablespoon olive oil or butter
  • ½teaspoon salt
  • ½teaspoon black pepper
  • 2 cloves garlic, minced
  • ½teaspoon smoked paprika
  • pinch of chili flakes

Method
 

  1.  

Final Thoughts

Skillet beef with roasted broccoli and cheese is one of those meals that quietly proves you don’t need complicated recipes to make a satisfying dinner.

A few simple ingredients, a hot pan, and a little attention while cooking are really all it takes.

The beef brings richness, the roasted broccoli adds texture and balance, and the melted cheese ties everything together.

It’s not fancy food — and that’s exactly why it works so well. On busy evenings when dinner needs to be straightforward and dependable, this is the kind of recipe that keeps finding its way back onto the stove.

Creamy Mushroom Skillet (Vegetarian Winter Dinner)

Creamy Mushroom Skillet –simple dinner you would love to cook

There are dinners you plan for, and then there are dinners you fall into because the weather turns sharp and quiet all at once.

This creamy mushroom skillet belongs to the second category. It’s the kind of winter dinner that starts with good intentions — something warm, something simple — and slowly turns into a pan you don’t want to stop hovering over.

I’ve made versions of this more times than I can count, usually when the sun disappears early and the kitchen feels colder than it should. Mushrooms, cream, a little fat, a little patience. That’s really it. But somehow it never tastes exactly the same twice.

Why mushrooms make sense in winter (even if you’re not trying to be virtuous)

I didn’t always cook mushrooms like this. For a long time, they felt like filler — something you added when you weren’t sure what else to do. Winter changed that for me. Mushrooms behave differently when it’s cold outside. Or maybe I just notice more.

They brown slower. They release water when you least expect it. They smell deeper than they look. When you give them space and don’t rush, they turn into something closer to comfort than substitution.

This skillet isn’t pretending to be meatless for moral reasons. It’s just honest about what mushrooms can do when you stop pushing them.

Choosing mushrooms (this is less about rules and more about mood)

I usually grab whatever looks decent that day. Button mushrooms work. Cremini work better. If there are oyster mushrooms that don’t look tired, I’ll grab those too.

What matters more than variety is how dry they feel when you pick them up. If they’re already slick in the store, they won’t behave well later. I learned that the annoying way — by standing over a pan that never browned.

I slice them unevenly on purpose now. Some thick, some thin. It gives the skillet a mix of textures that feels accidental, even though it isn’t.

The pan matters more than the ingredient list

I use the widest skillet I own. Not because it’s fancy, but because crowding ruins this dish faster than almost anything else. Mushrooms piled on top of each other don’t brown — they steam, sulk, and leak.

Butter goes in first. Sometimes olive oil too, depending on how indulgent the day feels. I let it heat longer than I think I should. Long enough that I start wondering if I’ve overdone it.

That hesitation is usually the right moment.

Cooking the mushrooms (and learning when not to interfere)

Once the mushrooms hit the pan, I leave them alone. This took practice. The instinct to stir is strong, especially when nothing seems to be happening.

For a few minutes, it looks like a mistake. Pale mushrooms. Wet patches. No drama. Then, slowly, the edges begin to darken. The pan sounds change. The smell turns nutty instead of raw.

Sometimes I salt early. Sometimes I forget and salt later. Both versions work, which surprised me the first time I noticed.

If the mushrooms release too much liquid, I don’t panic anymore. I let it cook off. Rushing only makes it worse.

Aromatics come second, not first (I learned this backward).

Garlic and shallots come in after the mushrooms have already decided who they want to be. I used to start with them, thinking flavor needed a head start. Instead, they burned while the mushrooms lagged behind.

Now I push the mushrooms aside, drop the garlic into the empty space, and let it warm gently before everything meets again. It smells calmer this way.

A sprig of thyme usually finds its way into the pan, mostly because winter makes me reach for herbs without thinking too hard about it.

Cream is not the star, even though it looks like it is.

I don’t drown the skillet in cream. I pour just enough to coat the mushrooms and then stop. The pan always looks too dry at first. That’s normal.

As it simmers, the cream thickens and picks up color from the pan. If it reduces too far, I add a splash of milk or broth. If it stays thin, I wait longer than feels comfortable.

Waiting fixes more problems than adding things.

Sometimes I grate in a little cheese. Sometimes I don’t. Both versions disappear at the same speed.

Small adjustments that change everything (and nothing).

A pinch of nutmeg can make this feel deliberate.

A squeeze of lemon at the end can make it feel lighter than expected.

Black pepper matters more than salt here, which surprised me the first time.

There are nights when I add spinach at the end, just to watch it collapse into the sauce. Other nights, I don’t want green anywhere near it.

The skillet doesn’t care. It adapts.

What I usually serve it with (and when I don’t bother)

Most often, this ends up over toast. Thick slices, not delicate ones. Something sturdy enough to soak without surrendering.

Sometimes it goes over pasta, though I rarely plan that ahead. If there’s cooked rice in the fridge, that works too. On lazier nights, it’s eaten straight from the pan with a spoon, standing up, the stove still warm.

Those are usually the best versions.

Ingredients

  • 1 lb (450 g) mushrooms (button, cremini, or mix)

  • 1 large leek, white and pale green parts only, washed thoroughly

  • 2–3 garlic cloves, minced

  • 2 tbsp butter (or butter + olive oil mix)

  • 1/4 cup heavy cream

  • 1–2 tbsp chicken or vegetable stock (optional, to loosen pan)

  • Pinch of nutmeg (optional)

  • Salt and black pepper to taste

  • Fresh thyme sprigs or parsley for garnish (optional)

  • Optional: spinach or other greens

Instructions

1. Prep the vegetables
Clean mushrooms and slice unevenly. Trim and wash the leek, slice thinly. Mince garlic.

2. Heat the pan
Add butter (and optional olive oil) to a wide skillet. Let it heat long enough that it hesitates before sizzling.

3. Cook the mushrooms
Add mushrooms in a single layer, leaving space. Don’t stir immediately. Let edges brown slowly. Salt as desired.

4. Add the leeks
Push mushrooms aside. Add leeks to the empty pan space. Lower heat slightly. Stir occasionally until soft and silky.

5. Add aromatics
Drop in garlic and thyme. Stir gently. Cook 30–60 seconds, just until fragrant.

6. Build the sauce
Add a splash of stock to loosen the pan fond. Then add cream gradually. Simmer gently, not boiling. Adjust seasoning with salt, pepper, nutmeg, or a squeeze of lemon.

7. Combine & finish
Mix everything together. Add optional spinach, cook until wilted. Let rest off the heat a few minutes before serving.

8. Serve
Over toast, pasta, rice, or straight from the pan. Garnish if desired.

FAQs

1. Can I make this dairy-free?
Yes, coconut cream works, though the flavor changes slightly. You might also try cashew cream.

2. Can I cook mushrooms ahead?
You can, but it’s best to finish with cream and aromatics fresh. Mushrooms reheat fine gently with a splash of stock.

3. What mushrooms work best?
Cremini are ideal for depth of flavor. Button mushrooms are fine. Oyster mushrooms add a delicate texture. Mix if you like.

Leftovers behave differently (not better, not worse)

The sauce thickens overnight. The mushrooms soften. The whole thing becomes quieter. I reheat it gently, sometimes with a splash of water, sometimes not.

It’s less dramatic the second day, but still comforting. Like a conversation you don’t need to repeat word for word.

When this skillet fails (and what I stopped blaming)

If it tastes flat, it’s usually because I rushed the mushrooms.
If it feels heavy, I added cream too early.
If it looks dull, I didn’t let the pan get hot enough at the start.

I used to blame ingredients. Now I blame timing.

A note I didn’t expect to learn from this dish

This creamy mushroom skillet taught me that winter cooking isn’t about richness alone. It’s about letting things take the time they ask for, even when dinner feels late.

Some nights, that’s the whole point.

And when it’s done, I don’t garnish it. I don’t clean the edges of the pan. I just turn off the heat and let it sit for a moment longer than necessary — mostly because it feels like it deserves that pause.