Carbon steel cookware pros and cons
 Carbon steel cookware may be the best alternative to Teflon cookware because it is safe and non-sticky. It is protected because it does not contain dangerous toxins or plastic coating like Teflon. Like cast iron cookware, carbon steel cookware also has a characteristic non-stick coating. In addition, these kitchen utensils reduce the necessity for using unwanted butter or oil to prepare your meals. However, in spite of some positive features and certain distinct advantages, carbon steel cookware nevertheless faces a few negative sides as well. Here are the pros and cons of carbon steel cookware, which will help you clear up the ambiguity about these cooking utensils.
A brief review of carbon steel cookware
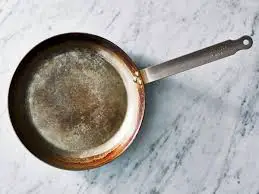
Carbon steel cookware has components comparable to iron cookware. It is composed of about 1% carbon and 98% or 99% iron. This cookware is ideal for stir-frying, burning and grilling. In addition, this type of cookware is resistible when heat is maintained. This cookware can heat evenly and withstand all temperatures. Therefore, this cookware can be used in burners, microwaves, electric and gas ovens.
In addition, this type of cookware releases iron into the food. You should know that iron is a solid mineral that the human body needs. These cookware are lighter and a little thinner, making them comfortable to use, especially if you use large bowls or pans. In general, carbon steel cookware has a long handle that helps to steer or lift the pan. In addition, carbon steel cookware is suitable not only for home cooking, but also for experienced cooks.
Pros and Cons of Carbon Steel Cookware
Carbon steel is probably the best known cookware for a long time. That doesn’t mean, however, that these cookware have no drawbacks. There are pros and cons of these cookware or like any other cookware for that matter. Take a look at them to get a general idea of this type of cookware.
Pros of carbon steel cookware
There are several reasons why you should consider adding a carbon steel wok or frying pan or a skillet to your cookware assortment.
Regular non-stick properties
One of the extraordinary advantages of using carbon steel kitchen utensils is their usual non-stick property. These kitchen utensils are generally non-sticky when prepared properly. However, carbon steel utensils may require a few steps of preparation before they become completely non-sticky. Unlike some other standard nonstick cookware, the nonstick properties of these utensils improve after a period of time and under normal use.
Incredibly durable
Carbon steel is really strong and durable. Carbon steel is 99% iron, which makes it less brittle than cast iron. If you use and maintain it properly, the carbon steel pan will last you a long time. If you don’t use your carbon steel cookware properly, it may bend, but it won’t break.
Amazing thermal conductivity
Another incredible advantage of using carbon steel cookware is its high thermal conductivity. This cookware has an amazing temperature response and excellent thermal conductivity. Unlike cast iron cookware, carbon steel cookware heats and cools much faster. When you change the heat setting on your stove or burner, the cookware takes the heat in a flash.
High Heat Tolerance
Unlike non-stick Teflon coated cookware, carbon steel cookware can tolerate extremely high cooking temperatures, making it ideal for baking. In addition, you can heat the carbon steel pan without breaking it, and it doesn’t release toxic fumes when exposed to high heat (such as a Teflon-coated pan).
Reasonable and relatively inexpensive
Compared to other high-quality kitchen utensils, cookware made of carbon steel are inexpensive and, as a rule, modest. Since these cookware can usually be made without much preparation, no extra effort is needed for non-stick coating.
Light and easy to handle
One of the extraordinary strengths of carbon steel kitchen utensils is their lightness and the fact that they are pleasant to follow. These cookware are lighter and easier to shake, lift and turn. This feature makes these cookware very comfortable for more experienced people and those with weak hands.
Cons of carbon steel cookware
In addition to these advantages, carbon steel cookware also has some disadvantages. A brief overview of the disadvantages of these cookware can be found directly below.
Cannot be cleaned in the dishwasher
Perhaps the most well-known disadvantage of carbon steel cookware is that it is not dishwasher safe. This is because the harsh plastics in the dishwasher could damage its usual non-stick coating. For this reason, you should keep a strategic distance from any type of dishwasher or coarse cleaner when cleaning this cookware. It is wiser to clean your carbon steel bowl or wok or skillet with a cleaner and water.
Reacts with acidic foods
Exceptionally acidic foods like vinegar could separate normal non-stick preparations from carbon steel cookware. These utensils cannot be used to prepare exceptionally acidic foods such as tomato paste. This does not mean that acidic foods cannot be cooked with this container. Just keep a strategic distance from highly acidic foods to ensure non-stick coverage. If you have the misfortune of cooking particularly acidic foods, you will need to clean and re-season your pan.
Requires proper seasoning
The carbon steel pan or skillet is certainly not a non-stick right out of the container. It requires proper flavoring and support to achieve an ideal level of cooking and non-stick finish.
Susceptible to bending or warping
Cheaper and thinner carbon steel kitchen utensils are bent into shape until they are wrapped. A wrapped bottom does not rest on the level of the oven. If you have an oven in your kitchen, try to get an excellent carbon steel roasting pan.
Are carbon steel cookware safe?
Many of you may be wondering if carbon steel is safe or toxic.
You should keep in mind that carbon steel cookware has a characteristic non-stick surface that is not from Teflon. As a result, the cookware is free from toxic fumes or hazardous plastics. Also, the cookware prevents toxins from getting into your food. In addition, these utensils are useful for preparing solid meals with less unwanted margarine or oil.
Preparation of carbon steel or cast iron
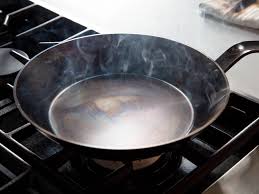
As with cast iron, preparation is fundamental with carbon steel cookware. Fortunately, since carbon steel is less permeable than solid metal, it quickly takes on a particular flavor. The terrible news is that it can also quickly lose its preparation ability. In commercial kitchens, it’s not out of the question for food experts to prepare a carbon steel container several times overnight.
Another thing to keep in mind when buying a new carbon steel is that manufacturers usually use a beeswax or mineral coating to prevent the cookware from rusting on its way from the produce to your kitchen. Be sure to remove this coating before cooking, as your flavor won’t stick anyway. Beeswax and different coatings can be removed by scrubbing with a steel fleece and heated water. You must season at this point as you would a cast iron pan. Prepared foods are eatable, but these flavors are often unpredictable and should still be served at home.
Carbon steel is a very inexpensive material, unlike the various types of cookware. The new carbon steel cookware is so easy to use that it can be used in many ways.
Wrapping up
In general, if you already have cast iron pots and pans and are satisfied with them, it’s probably not a good idea to buy carbon steel cookware. However, if you are replacing other types of cookware or moving cast iron to the next generation and want slightly lighter pots and pans, carbon steel cookware is a great eco-friendly option.
However, these cookware do require a small amount of oil or butter to prevent food from sticking, but this is not detrimental to health. Also, these cookware can heat and cool much faster, which prevents food from overcooking. Anyway, weighing all pros and cons of carbon steel cookware, it can be said confidently that carbon steel cookware is completely safe for healthy cooking. So, get ready to do some shopping!

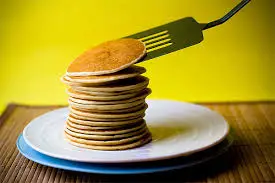
 How long it takes to cook a pancake on each side is certainly not an exact science , generally speaking, given the constant variations from pan to pan – but you can definitely look for a clear visual clue to show you when everything is going well and when it is ready. By looking carefully at your pancakes and using your preferred method of flipping them, you can prevent your breakfast from being undercooked or burned.
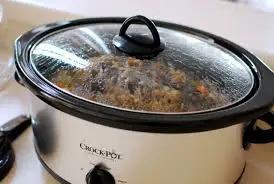
 It offers a comfort that didn’t exist before, but can you put a slow cooker in the oven? We will address this and many other questions in this article.

 You should prepare the orange juice by peeling them first. Then, chop them into smaller parts to fit your juicer chute.
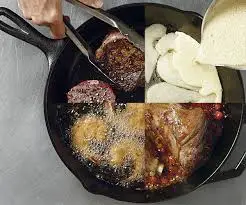
 Can you put a cast iron skillet in the oven? This is one question that people frequently ask in question answer forums, especially in quora or reddit.com. The answer is yes. You can put cast iron skillet in the pan and there is no problem. Moreover, cast iron skillets are absolutely oven-safe. Anyway, if you are one of those readers who want a definite answer, just go through this post carefully.
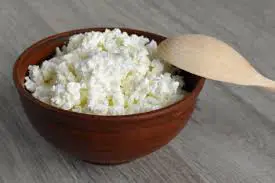
 But, since the late 70s, the popularity of cottage cheese has been on a steady decrease. Due to the growing prominence of new high quality pasta manufacturers and weak marketing related to the different aspects of cottage cheese, it plummeted down to become one of the very unpopular products in the dairy section of stores–but is the world ready to appreciate cottage cheese once more?
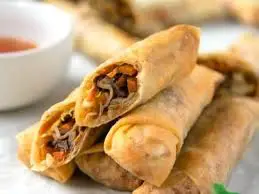
 A garden spring roll, for example, is probably filled with a variety of fresh vegetables such as carrots, bamboo shoots, peppers and cabbage. And spring rolls, which are much juicier, tend to be filled with meat and vegetables, usually pork, poultry or shrimp.
 Now I would like to tell you how I entertained a few of my guests with some healthy and sumptuous banana pancake recipes adding my own twist to it. That’s another story, though. Just read on carefully if you want to know all the details.
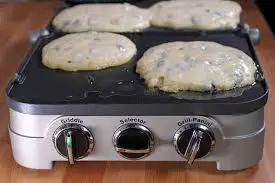
 This cookie baking method is also the answer when you only need a few cookies. You don’t have to bake a whole batch of cookies. You just need to make the dough, cut the cookies and put a layer between the pieces of wax paper. Now store them in the freezer and then take out the amount you need for making cookies. Let them defrost for about 20 minutes, then place them on the hot griddle. You will have a small amount of cookies in no time!
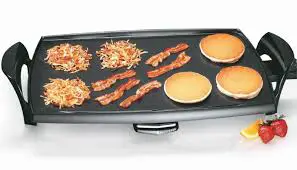
 surface, which adds a lot of heat to the surface for cooking. A griddle has many variations. Some griddles
  The stove top is a modern and conventional way of cooking food. It comprises a heat source that is
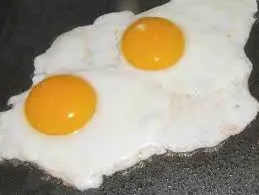
 In order to compensate for the unmovable cooking surface when you are making eggs in an electric frying pan or a griddle, you should be a little careful with your wrist, especially if you want to cook eggs too easily. A large compensating spatula is one of the essential tools for frying eggs on a griddle or a frying pan.

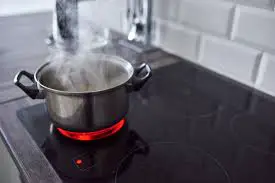
 Yes, you will have to think differently when you consider using your electric griddle for boiling water. An electric griddle has a flat, non-sticky surface that heats to the temperature set by the person who is cooking. Food that is normally prepared in a pan cooks directly on the surface of the cooker without any additional utensils. But in order to boil water you would require a glass pan to hold it without damaging the non-stick surface of the cooker. This method takes longer than heating in a metal pan on a stovetop. Besides, it depends on the model of your griddle and the type of glass used in the construction of your cooking pot.
 Truly, there is nothing better than spending the weekend with a delicious and soothing breakfast
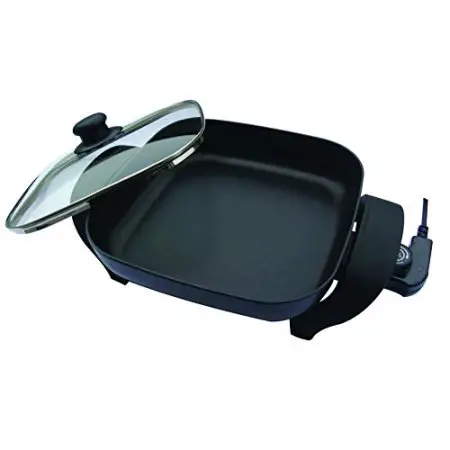
 The electric skillet is available in several shapes, such as round and square. The pan can only measure 12 x 12 inches to 18 x 18 inches, giving a larger heating surface. Its size makes it more advantageous than stoves, as it offers large areas for heating and frying. However, more space is needed to accommodate large frying pans or skillets.
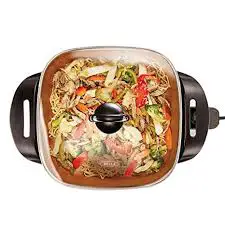
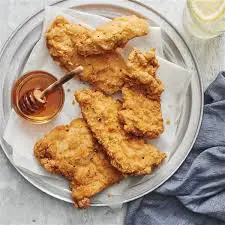
 Electric skillets can cook boneless chicken breasts quite like a conventional skillet on top of the oven, but the electric skillet can better adjust the desired temperature and keep it from boiling too much. At the top of the oven, the skillet can be at the correct temperature if you add the chicken, but the skillet can still get heated, which can burn the outside of the chicken breast before the inside boils well. Instead of estimating the temperature with inaccurate settings such as “medium” or “medium-high”, you can use electric skillets to establish a precise cooking temperature, similar to that of your oven’s temperature controls.
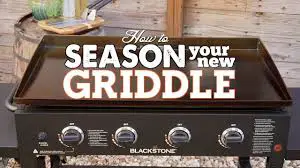
 Do you want to know how to season a griddle? Do you you like the beauty of a blackish griddle? We love it too, and we want you to do it right with this guide. Follow these steps to completely coat the griddle plate and make your Blackstone last a lifetime. And why do you need to season your griddle? For one thing: your food won’t stick to the metal plate and won’t cause any damage. Also, a dirty griddle full of crumbs and sticky stains is not pleasant to see. Remember that spices add a layer of oil to flavor every meal. It helps capture the flavor of confiscated meat and vegetables. So take out the oil and blacken and season your griddle perfectly!
 A griddle has a smooth, flat surface, perfect for cooking breakfast foods such as bacon, sausages, pancakes, fries, French toast and eggs. You can also use a grill to make grilled cheese sandwiches, quesadillas, and anything else you normally cook in a skillet. Most electric stoves or griddles are rectangular and offer more cooking surface than a conventional round pot.