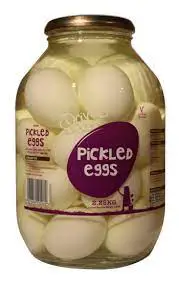
How Much Does a Gallon Of Milk Weigh?

How Much Does a Gallon Of Milk Weigh?

FAQ: How much does a gallon of whole milk weigh

How Much Does a Gallon Of Milk Weigh?

Here in this post, I am going to give an answer to the question, “How much does a gallon of whole milk weigh?” and discuss various methods of measuring milk as well as the types of milk available for human consumption.

So, how much does a gallon full of whole milk weigh?

A gallon of milk weighs 8.6 pounds or 3.9 kilograms at room temperature in the USA, while a gallon weighs 10.32lb (or 4.68 kg) in the UK. Variation in milk fat percentage and cow breed are the main factors.

What are the different types of gallons?

Every country around the world uses a specific standard system to measure its citizens. The US and UK are the most commonly used standards. The amount of liquid that a gallon can hold will vary depending on which measuring system it is. These are the facts:

  1. One gallon in the US is equivalent to 3.785 Liters (231 cubic inches).
  2. In the UK, the British imperial gallon is equivalent to to 4.546 liters or 277.4 cubic inches
  3. The US dry gallon equals 4.405 liters (268.8 cubic inches)

These measurements can be used to determine the weight of milk around the globe. It can be measured based on calculations made by the system that you are using.

US measurement system:

1-liter milk = 1.03 Kg

37854 = 1 US gallon

So milk in 1 US gallon

3.7854*1.03 = 38989 Kg

Measurement system in the UK:

1 UK gallon = 1.201 US gallon

So what is the measurement now?

1 UK gallon of milk equals 1.201*3.8989

= 4.682 Kg

You can also adjust the units depending upon the system you’re using. 3.90 kg is approximately equivalent to 8.6 pounds or 137.6 ounces according to the US measurement system.

What is the difference of weight between a Gallon of Water and a Gallon of Milk?

You will also see a difference in the weight of a gallon depending on how much liquid is present. This means that you might get different results when you compare milk and water. A gallon of UK milk weighs 10.32 pounds. The same gallon water weighs 10.02 pounds. The US measurement system is that the same gallon water weighs 8.35 lbs, which is 8.6 lb of milk.

What does a gallon of 2% milk weigh?

The fat content of milk with 2% fat is retained and weighs 2%. Fat-free milk has fats that are 2% or less. The effect on weight is therefore not significant. Whole milk contains 126.75g of fats, while fat-free or 2% milk only 117g. This is a small change and may not have an impact on the gallon’s overall weight.

How much does a gallon of 1% Milk weigh?

If the milk contains 1% fat, we have 39 grams of fat per gallon. A gallon of whole milk weighs the same as a gallon of milk, which is 126.75 to195 grams. The 1% fat milk may weigh as much as 87.75 to 157 grams.

How much does a half-gallon of milk weigh?

A full US gallon of milk weighs 8.6 lbs or 3.90 kilograms. Half of the milk volume is removed and we get 4.3 lbs or 1.95 kg, which is half a gallon in the US.

The British imperial gallon is 10.322 pounds, or 4.682 kilograms. Half of it will equal 5.161 pounds, or 2.341 kilograms, respectively. It is equal to half a gallon of milk if it is weighed according the UK system.

How much does a gallon skim milk weigh?

Skim milk is milk with a 0.2% fat content. As the fat content drops, it affects the whole milk’s weight. It is measured the same as the weight of 2% and 1% milk. One gallon may contain anywhere from 1 to 78g of fat. It is a significant amount of fat, but it does not cause a significant change in total weight.

How much does a gallon worth of cow milk weigh?

Different breeds, weights, and areas of cow’s milk will have an impact on how different their milk tastes. The weather and the feed of the cows can also be affected by milk. It is impossible to accurately measure how much one gallon cow milk will weigh. There are different fat percentages in cow milk. It can be anywhere from 3.25% up to 5%. A weight scale can be used to measure the fat and measurement system.

What are the different types of milk available?

  1. Whole milk

Whole milk has 3.25% more fat than other types of milk. Whole milk contains 150 calories and 8g of fat.

Low-fat and skim milk may be a good choice for those with slow metabolisms and who are following a diet.

Whole milk might be a better choice if you are active and have no underlying conditions.

According to a study on the effects of full-fat dairy foods and dairy products, people can consume these products without experiencing adverse effects on their ‘cardio-metabolic risk profile. Researchers recommended that further research be done to arrive at a definitive conclusion.

When deciding which milk to drink, you should take into account your food metabolism rate, lifestyle, and other factors. Consult your doctor or another health professional before you decide what type of milk to drink.

Whole milk is approximately 9 pounds per gallon. Because skim milk has less fat, it weighs less.

  1. Low-Fat Milk

Low-fat milk contains 1% fat per weight. 100 calories per glass of low fat milk has 2.5 grams of fat.

The low levels of saturated fats help to regulate blood cholesterol and reduce your risk of developing heart disease.

Low-fat milk is not recommended for you if you have an underlying condition. Instead, consider vegetable and fish oils. These fats are healthy because they are good fats (high density lipoprotein – HDL).

They help eliminate bad fats from your body by transporting them to the liver for metabolism or excretion.

A gallon of low fat milk weighs in at 8.5 pounds (3.85kg). Because skim milk has less fat, it weighs less.

  1. Skim Milk

Although non-fat or skim milk only has 80 calories, this milk is rich in vital nutrients such as phosphorous, calcium, selenium and vitamins A, B12, D.

Skim milk may be preferred by people who are obese or have heart conditions due to its low-calorie count.

If you have any health concerns, it is best to speak with your doctor about the type of milk that you should be drinking.

A gallon of skim milk weighs in at 8.5 pounds (3.85kg). Because skim milk has less fat, it weighs less.

  1. Almond milk

Almond milk has 30-50 calories and 3.58g of fat per glass. People who are looking to lose weight will love almond milk.

Milk is also rich source of vitamin E and D. These nutrients are essential for bone growth and good overall health. Because it is lactose-free, the milk is great for those with lactose intolerance.

  1. Reduced-Fat Milk

Reduced-fat milk contains 2% milk by mass. A glass of reduced fat milk has 110 calories and 2.5g of fat.

This milk is a favorite of health-conscious milk drinkers. It is low in calories, has enough vitamins and nutrients, and tastes great.

Pay attention to the sugar content of reduced-fat milk as it could have more sugar than whole milk. Before purchasing milk, always read the label.

It is important to determine if this milk type suits your metabolism. Whole milk may be better for some people. Whole milk may be the best option for you if your metabolism is fast.

  1. Oat Milk

Gallon of milk weight

Oat milk has 130 calories and 2 g of fat per glass. Almond milk and oat milk are preferred by vegans and those with dietary restrictions because they are made from fruits and grains.

Oat milk is usually fortified with calcium and vitamins B, B2, B2, and B12 and hence regarded as good for health and well-being.

Wrapping up

To conclude, I have given an answer to the question, “How much does a gallon of whole milk weigh?” and discussed various methods of measuring milk as well as what kinds of milk are available for human consumption. Hopefully, all these information will satisfy your curiosity and add to your knowledge.


How long do beyond burgers last in the fridge?

How long do beyond burgers last in the fridge?

How long do beyond burgers last in the fridge?

In this post, I am going to answer the question, “How long do burgers last in the fridge?”. This is an important question since any wrong notion will lead you in trouble. A few of my friends also asked me about the chemicals used in beyond meat to make them last.

So, how long do the beyond burgers last in the fridge?

Burgers can be kept in the fridge for up to 10 days if they are not opened. The shelf-life of burgers that have been refrigerated is only 3 days. Before eating, inspect the burger for signs of spoilage. Food poisoning can be caused by eating burger patties that are not cooked properly.

What chemicals are there in Beyond meat?

Beyond meat claims to be free of cholesterol, GMO-free and hormone-free. The manufacturers also claim that beyond meat is completely cruelty-free having 20 gms of plan-based protein.

A lot of chemicals are used to mimic the taste of real meat. These chemicals include potassium phosphate and potassium chloride as well as titanium dioxide and maltodextrin.

It is important to note that processed meats are highly processed in order to replicate the taste and texture of real meat. Any refined or processed food is harmful for your long-term well-being.

Is it possible to eat meat beyond its expiration?

Beyond Burgers can be frozen once you have decided to thaw.

Is it possible to eat leftovers other than meat?

You can heat Beyond burgers in the microwave. It is safe to eat as long as it reaches 74° Celsius (165° Fahrenheit) internal temperature.

Beyond Meat can cause food poisoning

Eating plant-based meats like Beyond Meat can lead to food poisoning. Cross contamination and food handler hygiene are both food safety risks in restaurants and at home. Beyond Meat is most often cited for nausea and diarrhea.

They are loved by many people. We recommend that they be pan-fried, but can also be microwaved. While health concerns are off-topic, most food that can be cooked on a stovetop can be heated in a microwave. Whether the food is still edible is another matter.

Can you eat a Beyond burger Raw?

Beyond Meat recommends that you do not eat the meat raw for your own safety and satisfaction. Beyond Burger, however, is free from soy, gluten, and tree nuts.

How long can burgers keep in the fridge?

The most perishable ingredient determines the shelf life of burgers. In general, burgers can be kept in the refrigerator for between 5-6 days.

What’s the difference between Impossible Burger & Beyond Burger?

It is impossible to make a gluten-free hamburger. This burger is made mostly from soy protein concentrate, sunflower oil, and coconut oil. Beyond Burger is made mostly from pea protein, coconut oil, expeller-pressed canola oil, and seasonings.

What is the maximum time that uncooked hamburger meat can be kept in the refrigerator?

Uncooked or raw hamburger meats will last for 1-2 days in the refrigerator and 3-4 months in freezer if stored properly. This is true for uncooked turkey, veal and pork as well as lamb and other combinations of these meats.

How do you store raw ground beef?

You can store your meat anywhere within the temperature range of 4.4-60°C. This creates a favorable environment to support bacterial growth.

Keep meat at a temperature below 4.4 degrees Celsius. Keep your meat away from the danger zone.

It is best to cook meat at 71.7 degrees Celsius. This is the USDA Food safety guidelines’ minimum safe limit.

What is the shelf-life of ground beef in the fridge?

Raw ground beef can last for 3 days, while cooked ground beef can keep fresh for up to four days in the refrigerator. For the following periods, the meat will be at its best. It might be safe for longer periods, but it will not be of prime quality.

Raw ground beef in the freeze: 3 to 4 days

Ground beef cooked in a variety of ways: From 4 days to up to 3 months

How to tell if your ground beef is spoiled?

Color

It is best to throw away ground beef that has become grey, green or brown on the surface. This is an indication of spoilage. Oxymyoglobin is the ingredient that gives fresh meat a bright red color. You can eat raw ground beef that appears greyish or brown from the inside.

Texture

Fresh meat should be firm and juicy. Discard any meat that feels dry or has a slimy texture.

Smell

The smell of spoilage bacteria such as Lactobacillus or Pseudomonas will be evident if the meat is beginning to rot.

Expiration date

You should keep track of expiration dates so that you don’t eat ground beef after its expiry. If the meat was frozen, it is safe to eat after its expiry.

How to thaw ground beef?

Don’t thaw meat at room temperature. Instead, plan ahead and place the meat in the refrigerator for at least one night. Avoid refreezing thawed ground meat as it can significantly reduce its quality.

Each time there is a freeze-thaw cycle, larger ice crystals will form. Each time they melt, these crystals disrupt the texture of the meat and take away essential nutrients.

While it’s not recommended, if you are in a real hurry to cook the meat right after  thawing, you may be able to thaw it under cold running water.

You can also microwave it. It is not recommended as it can damage the meat’s quality and cause partial cooking. Ground beef can be thawed by placing it in a bowl of warm water.

Wrapping up

I hope this article has answered  the question: “How long do beyond burgers last in the fridge?” and I am sure I have been able to clear all your doubts related to this issue. Let me know if you have any other question. Now go cooking!


Can Turkey Burgers be Pink?

Can Turkey Burgers be Pink in the Middle?

can turkey burgers be pink


It’s okay if the turkey burgers have some pink in their middle. The main concern should be to cook the meat to an internal temperature of 165 degrees Fahrenheit. The bacteria that causes food-borne illnesses is destroyed when the meat reaches this temperature. To ensure that turkey burgers are cooked to perfection, use a calibrated meat thermometer.

Ground Turkey

Ground turkey is often considered healthier than ground beef. Ground turkey is a great source of protein, vitamins and minerals. It’s also lower in saturated fat.

There are many types of ground turkey that can be used for their fat content. A mixture that is marketed as 93 per cent lean will likely contain all white meat. An 85 to 15 percent ratio of lean-to fat indicates a mix of dark and white meat.

If you are looking for better health, leaner options may be a better option. Be aware that lean turkey can be difficult to hold its shape when grilled. This problem can be overcome by adding a few raw eggs to the meat before you form it into patties.

Turkey’s mild flavor profile makes it a great base for bolder ingredients like olives and capers. To make a full-flavored burger, you can add minced shallots, herbs, Dijon mustard, Worcestershire sauce, and Tabasco.

What Makes Ground Turkey so Sticky?

Making patties from ground turkey can be difficult, especially for the beginners. It can also fall apart when you handle the meat, and break up on the grill. It can also stick to your hands from raw turkey, which can be rather annoying. Why does that happen?

Experts believe that myosin is released during the grinding process. Myosin, a sticky substance that naturally occurs in meat, makes it fairly hard to handle it.

All raw meat will stick to surfaces when exposed to heat. Before putting any food on the grill, we must oil our cooking grates. This step is crucial when you make turkey burgers. Otherwise, it could cause problems when you flip them.

Can Turkey Burgers Be A Little Pink?

Let’s say you have grilled your turkey hamburgers for the recommended time. They are browned as well as crispy on the outside. You will see pink hints in the meat when you cut into it. Is this a sign that the burgers have been undercooked?

Not necessarily. It’s possible to see pink shading in fully cooked turkey burgers, even though you want it to be completely opaque. It is more important to ensure the meat has reached the right internal temperature (see below), than to rely solely on color to indicate doneness.

Smoked turkey burgers will naturally turn pink if you cook them. Smoke causes a chemical reaction which results in a reddish-colored meat. This chemical reaction is called the smoke ring and can often be seen just below the surface.

Can you eat medium-rare turkey burgers?

No. No. It is permissible to cook ground beef burgers medium or medium-rare but it is not safe to do so with ground turkey.

What is the reason for this difference? It all has to do the meat’s natural characteristics. Salmonella, a dangerous bacteria, can be found on the skins of many animals. However, the meats from chickens and turkeys are not as dense as beef. This means that bacteria can penetrate further into the meat, so it is important to cook the meat at a temperature above 105 degrees in order to kill the bacteria.

It is best to cook ground meat at least medium-well. The bacteria in the meat becomes distributed throughout the food. The only way to eliminate these bacteria is to heat the meat at a safe temperature.

What happens if you eat undercooked turkey?

Salmonella can be contracted by eating undercooked poultry. The symptoms include abdominal cramping, fever, diarrhea, and colic. It can be apparent as early as 12 hours after the initial symptoms occur or it may take up to three days for the illness to develop. Symptoms usually last between 4 and 7 days.

Contact a doctor if you think you have salmonella or other food poisoning. Most symptoms will go away within a few days. In extreme cases, however, emergency medical care may be required.

Is it longer to cook turkey burgers than beef?

Turkey and other poultry have lower saturated fat and calories that beef and other red meats. The most popular methods are pan-fried turkey hamburgers, broiled turkey patties, and grilled turkey burgers. Baked turkey burgers take around 20 to 25 mins.

Are turkey burgers to be cooked to the point of being uncooked?

Make sure to cook your burgers thoroughly. Turkey burgers must be cooked thoroughly, unlike its beefy cousin that is delicious when served medium-rare.

How can you tell if turkey burgers have been cooked without a thermometer

Even if you don’t have a thermometer you can still learn how to tell when turkey burgers are cooked. You can simply slice the burger or pierce it with a knife or fork and then take a look at the juices. Your burger is done if the juices run clear.

How can frozen turkey burgers taste more delicious?

Vegetables: After your burger is grilled, you can cook your vegetables in the pan. When making a frozen turkey burger, you should add tomatoes, onions, peppers and mushrooms.

How can I prevent my turkey burgers falling apart?

Before you form the patties, add some breadcrumbs to your turkey mixture. The breadcrumbs, along with the egg will absorb moisture and act as glue to help your burgers retain their shape on the grill.

How to tell if a turkey burger is done

Raw poultry should be cooked before you eat it. A calibrated meat thermometer is the only way to know for sure.

It’s safe for you to eat turkey burgers that have reached 165 degrees Fahrenheit. To ensure the burger is cooked through, you should insert the probe into the thickest part of the burger. You should not rely on the temperature of the edges to cook the center. Otherwise, you might end up with burgers that are too rare in the middle.

You can also perform a few tests to determine doneness. However, it is best to use them with the thermometer and not as a substitute. You can first press your thumb against the middle of a patty with your thumb. You can check if the meat is warm to the touch.

When putting the burgers onto the grill, you can also check the time. Over medium heat, the patties should be cooked for 5-6 minutes each side. If the burgers have been frozen, you can cook them for an additional 2 to 3 minutes. The outsides should be golden brown with crisp edges.

You can also try to poke the patties using a fork, or insert a small knife into the center. Even if the juices are still pink, they should be clear. It’s best to return the burgers back to the grill if the juices remain reddish.

Wrapping up

You don’t have to worry as long as your turkey burgers are cooked to at least 160 degrees. Even if the meat is still a little pink in the middle, bacteria that can cause food poisoning will be killed at these temperatures.

Enjoy your grilling experience!

How To Cook Hot Pockets In The Oven?

How to cook Hot Pockets in the oven 

How to cook Hot Pockets In the Oven

Hot Pockets are designed so that a hungry person can simply pop them in the microwave and have a meal ready within a few minutes. A Hot Pocket is convenient for anyone who needs something to eat on the go. However, if you have time or don’t have a microwave available, you can also prepare a Hot Pocket in the oven. It may take longer to bake a Hot Pocket in the oven than in the microwave, but the result is excellent crispiness that not even a crock pot can match.

Step 1: Preheat the oven.

Preheat the oven to 350 degrees Fahrenheit. If you are using a regular oven, leave the Hot Pocket in the freezer until the oven is preheated. If you are using a convection oven, defrost the Hot Pocket in the refrigerator before baking.

Step 2: Bake the Hot Pocket

Remove the packaging from the Hot Pocket. You will have to place the Hot Pocket directly on a baking sheet or on a baking tray lined with aluminum foil. The exact frying time will depend on the size of the Hot Pocket you are going to make. It may also vary depending on the oven in which it is baked. You should refer to the information on the package for the exact baking time.

If you are using a conventional oven, note the baking time. For a 1/4 kg Hot Pocket it is about 24 minutes, while the baking time for a 1/2 kg Hot Pocket is longer, which takes about 34 minutes.

If you are using a convection oven, 1/4 kg Hot Pocket should bake for about 12 minutes, while  1/2 kg Hot Pocket should be allowed to bake for about 15 minutes.

As the recommended cooking time on the package approaches, you should check to make sure the Hot Pocket is cooked through. You must place a digital thermometer in the center of the Hot Pocket to determine if it is done and for that you will have to check whether the internal temperature has reached 165 degrees Fahrenheit. If the Hot Pocket takes longer than the recommended cooking time, you should cook it a few minutes longer.

Step 3: Cooling and eating

Now it is time to remove the Hot Pocket from the oven and you must allow it to cool for at least a couple of minutes before eating.

Tips you should pay attention to

You actually don’t need a crispy shell when baking a Hot Pocket in the oven. However, you can place the finished Hot Pocket in the shell to make it easier to eat with your hands.

Watch the following video to understand how to make hot pockets at home:

FAQs

Are Hot Pockets better in the oven?

If you don’t have the time or a microwave, you can cook Hot Pockets in the oven, which is handy for those who need food on the go. Hot Pockets take longer to cook in the oven than in the microwave, but the end result is a crispiness that even a crisping sleeve can’t match.

How to heat a Hot Pocket in the oven?

Preheat the oven to 350 degrees, unroll the rolls and place them on a baking sheet. Do not use crisping sleeves in the oven. Carefully remove from the oven and enjoy!

How do I get my Hot Pockets crispy?

Making Hot Pockets in a toaster Preheat toaster oven to 350°F. Remove Hot Pocket from package and place on baking sheet in toaster oven. You should bake the Hot Pockets in the toaster for about 25 minutes or until the pockets appear crisp and golden brown.

How long should the Hot Pocket be heated?

There is a general instruction for all types of Hot Pockets which include placing the Hot Pockets in its crisping sleeve, placing on a microwave-safe plate, and microwaving for 1 minute to 2 minutes to 15 seconds. This, however, depends on the power of the microwave.

How long do you cook the Hot Pocket in the oven?

Regular oven: heat the oven to 350 degrees, open the sandwich and place it on a baking sheet. Do not use a rack in the oven. Bake for 28 minutes and carefully remove from the oven. Ovens vary, and you may need to adjust baking times.

Are Hot Pockets unhealthy?

These frozen pockets are usually marketed for children, but they are hardly health food. In addition to sugar and saturated fat, which account for about 300 calories per bag, they also contain some amount of preservatives, along with additives and modified substances.

Can Hot Pockets be made in a toaster?

Unwrap a Hot Pocket cake and place it on a baking sheet in a toaster oven. Do not bake Hot Pocket dough in a crisping sleeve if you are using a toaster oven; for the wrapper will only help crisp up the Hot Pocket dough in the microwave.

Have the Hot Pockets been ever pulled back?

According to the US Department of Agriculture (USDA), more than 750,000 pounds of pepperoni Hot Pockets have been recalled nationwide because they reportedly  contained  glass shards and hard plastic.

How long should you cook 2 Hot Pockets?

Unwrap the sandwich, place it in a crispy wrapper and place on a microwave-safe plate. Warm it. Now bake at the highest temperature (1100 watt oven) 1 sandwich will 2 minutes 2 sandwiches will take  3 minutes, 30 seconds. You can cook 1 sandwich for 3 minutes 10 seconds on high power.

Are the Hot Pockets already cooked?

For those who don’t know yet, a Hot Pocket is a frozen Pop-Tart filled with a nasty meat and sauce instead of fruit. You heat it up in the microwave for a few minutes and let it cook. Though it seems edible, but in reality it is not. For, it is still frozen and hence need to be properly cooked before you could eat.

Can Hot Pockets be air-fried?

Heat a frying pan to 350 degrees. Place the Hot Pockets in a deep fryer without the crispy coating and bake for 11-13 minutes, until completely warm. Carefully remove the Hot Pockets from the skillet, place the crispy crusts on top and let cool. Enjoy your meal!

Why do Hot Pockets explode?

The most likely cause is that the microwave is simply overloaded or not running at an average speed. If your Hot Pockets are not only a little too hot but also exploding, you should shorten the time.


Can You Eat Koi Fish?

Can You eat koi fish? 

can you eat koi fish

Can you eat koi fish? This question is frequently asked in the several forums. Recently, one of my close friends also asked me about it. This is why I thought I should write something about this and clear all the doubts that we have in our mind.

To begin with, people have been keeping koi fish in their homes for ages since it is widely seeen as a symbol og good luck.  Koi fish are colorful varieties of the Amur carps  that are kept in a garden pond or aquarium.

People from different regions eat koi fish and some reject them. Since koi fish is a species of carp, it is very common in the Asian food market.

People face a dilemma when they ask the question “Can we eat koi?” So, let’s dwell on the subject and answer your question.

Can you eat koi fish?

The answer, yes, of course, you can eat koi, for, after all, it is a species of carp. But before  you try koi, you need to consider a few important issues.

In Japan and Southeast Asia, especially in temple areas, koi fish are considered sacred. If you are sensitive to this, you should consider eating something that is sacred to some people.

Koi meat is different from other carp because it is a bit tough. These fish spend most of their time in shallow, stagnant water, so there is a risk of bacterial infection if you eat them raw. In fact, you should never eat raw fish.

If you want to eat koi fish, you must cook it properly and over high heat.

Koi fish are ornamental fish and are kept as pets. To make them as colorful and attractive as possible, they are sometimes fed with chemical ingredients that may be harmful to the human body. So you should avoid eating such koi, but if they are raised on natural food that is not harmful to the human body, you can try them.

Koi fish also come at a price because of their attractiveness, and you have to spend hundreds of dollars to buy them from farms or stores.

Many restaurants regularly serve koi fish. In local Asian markets and restaurants, you can find a large number of koi fish that are raised for human consumption.

Koi is a freshwater fish. And we all know that almost all freshwater fish are edible. Hence, there is nothing much to prevent you from eating Koi fish. Many people, however, can’t stand the smell of them, and the aftertaste is also a major reason why they don’t eat them. In Southeast Asia, on the other hand, koi fish is often prepared with many spices, which are sometimes very tasty and of course edible.

If you are still thinking about the same thing and feel like asking, “Do humans eat koi fish?”, I have already given the answer. I do not advise you to eat koi fish because they can be harmful to your body. It is very likely that the koi you eat were fed with ingredients that are not suitable for the human body. There are other types of koi that can be eaten. You can try them and they also taste much better than koi fish. Besides, you don’t want to spend so much money on koi fish if you are going to eat them.

Koi fish are very attractive. In Japan, you can see colorful Koi fish in many places, which enhance the beauty of the environment and match the place. Koi fish also have a high economic value.

Facts about Koi fishing

I will explain some facts about koi fish that will help you learn more about koi fish and help you get answers to important questions.

The Chinese farmers had developed a habit of raising  carps  in rice fields in the 1600s. Later on, this practice was transferred to Japan. In Japan, strange color variations were noticed in some carp and they were bred, resulting in the koi fish. It is the koi fish that brighten up our outdoor ponds and aquariums with their attractiveness and provide farmers with a little extra income.

Koi fish are very popular all over the world. You can find them wherever you live. Most of the fish in the koi family come from commercial farms in the United States, Europe and Asia. They are readily available at local pet stores and cost between $5 and $15 per koi, depending on the color you want.

Koi are quite large fish that can grow to two to three meters in length if properly cared for, with some species of Koi being even larger. Koi weigh an average of 35 pounds and should be kept in a large tank, as small tanks shorten their lifespan. They need fresh, clean water to live well and can live up to 20 years with optimal care.

Koi fish are very social and can easily live in pairs or groups. If you are considering adding other fish to your koi tank, make sure that both types of fish fit their environment and feeding habits, and that you have a large tank where all fish can move freely. Koi fish are very friendly and will not eat other fish they live with.

Frequently asked questions

Do koi fish taste good?

The flesh of koi is slightly harder than that of other carp, and they are freshwater fish. People are often skeptical about the taste of koi fish. Colored koi or wild gray koi taste the same.

Koi that are farmed for consumption sometimes smell strongly of mud and appear to be inedible. However, the taste depends very much on the preparation.

Koi fish must be properly cooked and prepared with sufficient seasonings to be palatable.

Are koi fish dangerous to humans?

Koi are very friendly and will not bite if you try to pet them. But koi meat can be dangerous to the human body.

Koi fish are very colorful, and to make them so colorful, they are fed with food that can be harmful to human health.

But all over the world, especially in Southeast Asia, people eat koi fish every day. They are not poisonous, and if cooked properly, they are edible and tasty.

Do koi eat other fish?

Koi are generally very gentle and friendly fish. They like to live in pairs or groups with other species of fish. However, some koi are opportunistic omnivores and will eat smaller fish.

If the pond is overcrowded with fish or if there is not enough food for the fish present, koi may eat other smaller fish or their siblings to feed on them and reduce competition for food.

Therefore, you should provide adequate care and nutrition for your koi fish. Many koi foods are available online and at local pet stores.

Is it illegal to eat koi fish?

In most parts of the world, it is legal to own and eat koi. However, in many places, it is not popular.

In Japan and in many parts of Southeast Asia, koi fishes are considered good luck and eating them is considered quite unlucky, something augurs ill for a person or a whole family.

Interestingly, in the U.S. state of Maine, it is illegal to import or possess koi fish.

But even in Maine, there don’t seem to be any laws explicitly prohibiting the consumption of koi.

In the rest of the world, there are no laws prohibiting the importation, possession or consumption of koi fish.

Are koi fish expensive?

Besides the texture and taste, there is another reason why people do not eat koi fish: they are expensive.

Koi fish are considered ornamental, almost like decorative showpieces and are often considered very special and sacred. This means that they are quite costly and not all people can buy them.

Good quality koi can be purchased for anywhere from $10 to $100, depending on their size, but even that is pretty expensive for something you can eat.

Of course, there are the so-called prize or show koi, which are sold for very high prices. Yes, these big fishes can be worth several thousand dollars on an average, the costs fluctuating between $5,000 and $10,000.

And there are also koi that are worth millions of dollars.

Yes, you read that right: millions. The most expensive koi ever sold was worth no less than $1.8 million. This is why koi are generally considered too expensive to eat.

A good quality koi that you really want to eat, and can even tolerate the taste of, is certainly expensive.

Koi are expensive not only because they are considered valuable ornamental fish, but also because of the simple laws of supply and demand.

Many people want koi, but supply is limited and this drives up the price.

How do you prepare Koi fish?

Although we do not necessarily recommend eating koi fish, they can be quite edible if prepared properly.

However, there is little guidance on how to prepare these fish for human consumption, mainly because few people do.

But if you want to raise your own koi for human consumption, one of the most important tips we can give you is to make sure that the tank they live in is big enough.

You should also make sure that the koi pond is always very clean and well maintained.

Remember that fish take on the taste of the water they live in. So, if you want your koi to taste good, give it a good quality koi food.

It is also said that it is helpful to put a Koi in a separate freshwater tank for a few weeks before feeding it, to remove some of the cloudy taste from the pond.

When the fish is then prepared for human consumption, it is no different from any other fish.

The first thing to do is to use a descaler to remove all the scales from the skin, as you certainly don’t want to eat them.

Then, using a sharp fish fillet knife, make a vertical cut just behind the gills from top to bottom, run the knife along one side of the backbone to loosen the flesh from the backbone, then repeat on the other side.

How to Cook Koi Fish: Recipes

Okay, we’re not saying that koi are not edible at all. We are assuming that the way these fish are cooked contributes significantly to their palatability.

Let’s take a look at some koi recipes that you might like.

Texas Koi Fish Tacos with Wasabi

Here is a great recipe from Texas, delicious fish tacos. These tacos can be made with koi and other hearty white fish.

It takes about 30 different ingredients, which takes a lot of time to prepare, but people say it is very good.

The koi is fried with a variety of spices, herbs and batter, then topped with a variety of toppings, homemade pico de gallo and a delicious tequila-lime aioli.

Grilled Koi Fish

Here we offer a much simpler recipe that has its roots in India and Western Asia and incorporates delicious Asian ingredients such as masala, red chilies, garlic, etc.

This is a quick and easy dish in which koi is marinated in aromatic herbs and spices and then grilled over an open fire. Grilling is considered a good way to eat koi.

Koi Tel Jhal

Koi Tel Jhal is a dish that originated in Bangladesh, as well as west Bengal in India, where people regularly eat koi fish, having a lot of delightful recipes to boast of.

Wrapping up

All over the world, people have been eating carp fish as well as koi for years. In summary, it is possible to eat koi fish. You just have to make sure that it is not fed with ingredients that are harmful to humans and that it is cooked properly before eating. At the end of the day, it is your choice whether you would eat koi fish or keep it in your home or backyard pond as a living decorative piece of item that poeple love to see  when they are at play.


How Long Does Tiramisu Last?

How Long Does Tiramisu last? All your queries answered

How long does tiramisu last

How long does tiramisu last? People ask this question pretty often in cuisine forums, especially those who have a penchant for Italian cuisine. Many, however, haven’t even hard of tiramisu. Well, for the uninformed, in short, Tiramisu is a traditional Italian layer cake made with sugar, coffee-soaked ladyfingers dipped in an egg-based coffee mixture or liqueur.

It is a special occasion dessert that is soft, creamy and sweet with a hint of coffee flavor. If you want to enjoy this dessert for a long time, you should store it very carefully.

What is the shelf-life of tiramisu? Tiramisu will keep for at least 4 days if stored properly in the refrigerator. You can also freeze it for  3 months.

There are many factors that determine how long your tiramisu will keep. For example, the ingredients, the vessel and method used and much more. So read on!

What is tiramisu?

Tiramisu is a traditional Italian dessert. The literal meaning of tiramisu is “to cheer me up,” which makes sense, not only because of its mood-enhancing flavor, but also because of the presence of espresso.

It is a typical combination of a velvety zabaglione cream with mascarpone cheese and firmness of ladyfingers. It may also contain liquors such as rum, brandy or wine to which alcohol has been added.

Sometimes it is also sprinkled with grated dark chocolate which give it a delightful taste.

Although tiramisu is delicious, it is highly perishable at room temperature. You can prevent tiramisu from becoming soft and spoiling by placing it in the refrigerator.

What is the shelf-life of tiramisu?

Because tiramisu is an airy and moist dish, it can easily spoil if not stored properly.

If stored in the refrigerator, tiramisu can stay fresh for up to 3 days. But the complexity of tiramisu requires perfect storage.

In the refrigerator

Tiramisu can be prepared 2 days in advance and kept in the refrigerator. Although the egg custard is edible on the fourth day, tiramisu tends to spoil after three days at most.

This is because the ladyfingers are in the cream, giving it a soupy consistency. After 3 days, it can become bad, even when properly refrigerated.

On the counter

Tiramisu is a temperature-sensitive dessert and hence you should not keep it for long  at room temperature. Egg custard or zabaglione can spoil and increase the risk of food poisoning.

The texture of the dish will also be disturbed, making it unappetizing. Therefore, let the tiramisu stand at room temperature for 20 minutes before serving.

How do you store tiramisu?

Refrigeration is an important step. It prevents spoilage or bacterial growth and helps preserve the creamy texture.

Proper storage is also a very crucial aspect we must pay attention to  pay attention when we talk about t tiramisu. Storage, however,  is fairly simple.

Find an airtight container that will protect your tiramisu from air and bad bacteria. Once you have transferred your tiramisu, seal the container tightly and label it with the date it was stored.

If you prepared your tiramisu in cups, you have several options. You can cover the cups with cling film and store them that way, or you can put them in an airtight container afterwards to protect them extra well.

You can also wrap each cup in cling film, place them on a tray and cover the entire tray with cling film. Be sure to seal the tray as tightly as possible.

Leftover tiramisu should not be stored in the refrigerator for more than 4 days. When it comes out of the refrigerator, the quality deteriorates.

For example, the ladyfingers become soft. After 2 days, it becomes unpalatable as it falls apart and becomes mushy.

Tips for storing tiramisu for a longer period

You can store tiramisu for about 3 months. It may sound gross to eat a 3-month-old tiramisu, but it is possible if you freeze it.

The term “frozen tiramisu” refers only to homemade tiramisu or already packaged tiramisu that has not been opened. So if you want to freeze it, here are some tips for you.

Packing individual pieces

To keep your tiramisu frozen, you should cut it into individual pieces. This will preserve the original flavor and consistency.

After cutting, wrap them tightly in plastic wrap. Wrap the plastic or foil several times to prevent air from entering the product. For added protection, it is always advisable to store them in an airtight container.

Never pack a sloppy tiramisu without a cup or textured base or you will spoil it.

Put it in a bag

If you don’t have a container, you can wrap your tiramisu in a paper plate or other container and place it in a reusable freezer bag. To be safe, be sure to note the freezing date on the label.

Store toppings separately

Save the toppings for later, because the more ingredients you add, the less likely your tiramisu will regain its original quality, flavor and texture. Fresh toppings are always the best choice!

Do not forget to thaw

Tiramisu should be served cold, not frozen. Frozen tiramisu should always be removed an hour before serving. For the best and safest results, thaw it in the refrigerator.

There is no other way to thaw it other than to turn it from frozen to cold. Also remember that you can’t refreeze tiramisu, so it’s important to cut the right amount of slices to avoid waste!

How do I know if tiramisu is bad?

Tiramisu is a very temperature and environmentally sensitive dessert. Therefore, the risk of spoilage is very high.

It should be noted that though tiramisu contains many non-dairy products that include ladysfingers, coffee and a low alcohol content, it cannot  prevent spoilage.

Some people erroneously think  that pasteurization is enough to keep desserts fresh and edible. But that is not quite the case.

Well, tiramisu contains mascarpone cheese, which is similar to fresh cream and can be compared to cream cheese.

The mixture with the zabaglione is the reason for the firmness of the tiramisu. Like all other cheeses in the USA, this cheese is pasteurized.

This prevents the growth of bacteria that can cause foodborne illness. However, it has been shown that pasteurization does not prevent the cheese from spoiling at room temperature, especially in hot and humid weather!

Here are some clues you can use to tell if your tiramisu is spoiled:

Texture

If the texture of your tiramisu is too soft, mushy and moist, it is spoiled. This is why refrigeration is an important step when making tiramisu.

This way, the mascarpone will keep its consistency and not become mushy.

Smell

Tiramisu is a dessert that consists mainly of dairy products. Therefore, it can go bad within a few minutes at room temperature.

If your tiramisu has gone bad, it smells bad, which is a sure sign that it has gone bad.

Taste

So far as tiramisu is concerned, a sour taste is definitely a tell-tale sign of spoilage. The taste should be smooth and creamy, with hints of coffee and liqueur. It should not be sour or rancid.

If the taste is not good, it means that bacteria have spoiled the dessert.

Mold

If you store the tiramisu in the freezer, be sure to keep it in an airtight container. This will isolate the food from the air, which could contain mold spores.

If you see mold on your food, it is always advisable to throw the dish away completely as soon as possible. Don’t try to cut off the mold or the entire dish will be contaminated, even if you can’t see it.

Wrapping up

Tiramisu is dessert that everyone loves and appreciates, but not everyone knows its expiration date. The only way to find out is to watch the temperature and keep it in the refrigerator.

If you keep the tiramisu in a proper refrigerator and packaging, it will keep up to 2-4 days. But if it is not stored properly, it may spoil in an hour or two. Therefore, it is best to keep the tiramisu in the refrigerator before serving. I am sure after going through this post, you would at least have the confidence to give a prompt reply to anyone who asks this question again: how long does Tiramisu last? Enjoy your favorite Italian dessert now with a big smile!


Related Post: How to steam Tamales with a steamer

How To Blanch Sweet Potatoes–Tips And Tricks

How long do you blanch sweet potatoes? 

How to blanch sweet potatoes


How to blanch sweet potatoes? This is one question that hovers in the minds of most newbie chefs when they think of making some sweet potato doshes. Well, you should better know it now, or else you will mess with the whole thing sooner or later. Read on if you are interested.

To begin with, sweet potatoes are a well-known superfood. If you like to eat healthy, you’ll understand why this root vegetable is so attractive. For one thing, it is is a very important  source of complex carbohydrates.

The abundant vitamin C helps reduce flu and cold symptoms, and vitamin D promotes healthy bone development and maintains bone density. If you eat a lot of sweet potatoes, you’re probably constantly looking for new and creative ways to add sweet potatoes to your meals. One method we all can use is blanching.

But you’ll have one question in your mind: How long do I have to blanch sweet potatoes?

There’s a lot to know about blanching and how to do it correctly, but the answer is between 3 and 5 minutes. Now let’s see what blanching is and how to do it. I will also tell you why I prefer to blanch sweet potatoes. And it’s delicious.

What is blanching?

Blanching means turning something white, but in cooking it is not. In the kitchen, food is usually blanched with vegetables. Basically, you cook the vegetable (sometimes called boiling) in boiling water for a few minutes.

When it’s partially cooked, take it out of the boiling water and “shock” it by running it under cold water or putting it in ice water.

Why should you blanch?

This allows you to extend the shelf life of the sweet potato, making it great for salads and even freezing. Although 3-5 minutes is a good rule of thumb, the blanching time depends on how many potatoes you have.

As I mentioned above, the time it takes to blanch potatoes varies depending on how much you have in the pot, the type of slices you’ve made, and the size of the slices. For example, thick slices of sweet potatoes need more time in boiling water than julienne slices. And if you have a lot of potatoes in the pot, it will take longer than if you only have a few potatoes.

How to blanch sweet potatoes

Blanching is a cooking method that every cook (professional or amateur) should learn. It’s a great way to pre-cook your potatoes so they can be finished later, and it’s a good first step to freezing them. To blanch your sweet potatoes, you’ll need a few things:

  • Ice water
  • A jar
  • Salt
  • A large bowl
  • Knife and cutting board
  • Plate and paper napkins
  • Chopping and cooking

The first step is to bring the water in the pot to a boil. While waiting for the water to boil, start chopping the potatoes. Make sure they are equal in size so they fry evenly.

This RSVP blanching basket from Amazon makes it easy for you!

RSVP Endurance 9 inch wide edge Mesh BasketView on Amazon

Salt to preserve flavor and color

Just before adding the potatoes to the boiling water, add plenty of salt to the pot (this prevents the potatoes from discoloring and adds to the flavor). Leave the potatoes in the boiling water for 3-5 minutes.

This Farberware pot from Amazon is one of our favourites for blanching vegetables. Farberware Classic Series 11 quart pot with glass lid

View on Amazon

Testing and dipping

After 3 minutes, taste how tender they’ve become. When partially cooked, i.e. soft but not spongy or tender, quickly remove from boiling water and place in a bowl of ice water.

These top-quality Pyrex bowls from Amazon should serve your purpose.

Pyrex glass mixing bowl set (3-piece set, interlocking, microwave and dishwasher safe)

View on Amazon

This step stops the cooking process. If you fail to shock the potatoes, they will continue to cook for several minutes after you remove them from the boiling water.

Cooling and drying

When they are completely cool, you can remove them from the ice water and place them on a plate with dry kitchen paper. Dry them and you’re done blanching your sweet potatoes.

I love these Pyrex containers to store blanched veggies in the freezer.

 Why blanching is great

If you’re like 90% of the population, you’re busy all week, whether it’s at work, school or with the kids, you always have something to do. This lack of time probably keeps you from preparing balanced meals for you and your family (an overwhelming number of Americans say the reason they eat out so often is convenience).

Blanching vegetables is a great way to drastically reduce cooking time. In general, vegetables are the most time-consuming part of a meal. Try blanching your sweet potatoes on one of your days off. It doesn’t take long and can save you a lot of prep time when you get home to make dinner.

Anyone want some sweet potato fries?

My favorite use of the blanching technique is sweet potato fries. It’s done a little differently.

 Don’t have a fryer? Amazon has a fabulous one  from T-Fal. This T-fal fryer with basket, which is made of stainless steel, is quite  easy to clean, having oil filtration( 2.6 pounds, silver, model FR8000).

View on Amazon

You should set your fryer to 260º and place your sweet potato pieces in for 5 minutes. However, you must make sure to let the oil warm up to 260º first. Once you’ve removed them from the oil, turn your fryer to 360º and finish the fries. It’s easy to tell if your fries are done, because if they float, they are done.

Wrapping up

How to blanch sweet potatoes

Blanching vegetables can be a great way to incorporate vegetables into your daily meals. For example, you can prepare them to freeze for later use. And if you blanch potatoes earlier in the week, they will be ready to cook in no time on busy weekday evenings.

 Sweet potatoes are an obvious candidates for blanching, so it’s easy to combine the convenience of preparing blanched vegetables with the many benefits of sweet potatoes, not to mention their awesome flavor. So, now that you know how to blanch sweet potatoes, I am sure you will be able to do your job more confidently and make your family happy with your  sweet potato dishes.


Why Do My Burgers Fall Apart? Tips And Tricks To Fix The Problem

why do my burgers fall apart

Why Are My Burgers Falling  Apart? 

why do my burgers fall apart

For burger lovers everywhere, the most common problem when cooking burgers is obviously the patty. Even if you cook your burger with ham, chances are you’ll end up with a dry, flaky beef crust. This makes your burger almost inedible. That is quite disappointing, isn’t it? So, you are perplexed: you keep asking yourself one single question. Why do my burgers fall apart all the time and how should I fix it?

If your burgers are falling apart, it could be due to several reasons. The usual suspects are problems such as improperly ground beef, cooking temperature that is too low, overworking the meat, and the starting temperature. You definitely need to eliminate these factors to get a good juicy burger.

Not sure which factor is the culprit? Let’s look at each factor to see which part it is. I always try to make the best burgers here at home, so let’s make yours great too.

  1. Your ground meat is bad

If you’re wondering “Why are my burgers falling apart?” it’s perhaps because of the ground meat you’re using to make the burgers. Good ground beef and good quality ingredients are essential for perfect burgers. Of course, taste preferences differ, but you should have a good starting point.

A common problem is the choice of beef. Some people choose ground hamburger for their patties, which is not a good choice. But why is that?

By definition, ground beef is beef that comes from different parts of the cow. The problem is that each muscle group in beef has a different cooking time, which depends on the fat content. Ground hamburger results in a dry, slightly charred product.

Another problem is the list of ingredients. Some burger makers tend to add too many ingredients to their patties. They add soy, marinates, liquid seasonings. Not to speak of salt long before they make the patty.

All of these extra ingredients make the patty too moist and this will make the burger fall apart. Some people also use binders like breadcrumbs or eggs. It’s a matter of preference, but it can change your burger dramatically.

Preparing the ground meat

When buying ground beef, always use fresh ground beef or short ribs. Ground beef has a good lean-to-fat ratio that allows it to cook well without drying out. Short ribs are similar, but more expensive, but they have that extra beefy flavor everyone loves.

Always use 80-20 ground beef, which is 80% lean meat and 20% fat. This is enough to capture all the juices and flavors without drying out the meat. If the meat is too lean, the texture may be dry and crumbly, while if it is too fatty, the meat will be very greasy, which you may not like.

Coarse grinding is also helpful in keeping the patty together. With finely ground beef, the meat particles are too small. The proteins get mixed up and the result is a sticky, tough piece of meat that shrinks and dries out when eaten.

Avoid using binders, extenders and additional liquid ingredients, which are totally unnecessary. Use dry herbs and powders if you want to give your burger extra dimension. If you are looking to make  a classic American burger, add salt and pepper just before frying.

  1. The cooking temperature is too low

Some people cook their burgers at too low a temperature, which is common enough to cause a problem. If you cook at too low a temperature, your patty will not be cooked. You will thaw or sweat the burger, which removes moisture from it.

The crucial heat for the burger is essential to accomplish two things:

a)   to form a crust

b)   Get the Maillard reaction going.

Why do you want this on your burger patty? A crust provides a certain crispness that retains the juices and flavor of the meat. This crust brings out many of the smoky aromas and well-developed protein flavor.

However, the Maillard reaction in the meat is the key. For many, it is the alpha and omega of their meat, including steaks. And why?

The Maillard reaction refers to the chemical change that proteins and sugars undergo when heated. It adds complexity to the flavor of the meat and creates new taste sensations.

If this reaction does not occur, your meat will taste much less than it could. It also gives your meat a delicious browning.

Setting the cooking temperature

When you are cooking the patties, start on high heat. It only takes 3-4 minutes per side to fry the burger and then turn it over. You should do  the same with the other side of the patty.

You must limit the number of turns to prevent further breakdown of the protein. To check if your patty is cooked, you can touch the surface of the patty. It should feel elastic and firm to the touch.

  1. You “over-bake” your hamburger patty

A common misconception about beef patty is that it should be firm. Many newbies try to over-bake the ground beef. This is really the worst thing one can do. Why?

In the middle of the meat, the juices begin to evaporate. This creates large amounts of steam, which then tries to escape. With a very firm patty, you can expect the excess steam to crack your burger.

Dealing with perfect patties

It’s hard to overcook the burger unless you squeeze it really tight. Even then, make sure you press your burger down well. Here’s how.

Take 4-6 ounces of meat in your palms and fold it into a ball. Turn it into a disk by flattening two opposite sides.

Here’s a trick that will give you a juicy hamburger every time. Make a depression or a volcano in the middle of the patty instead of leaving a flat disk. This will regulate the moisture content of the burger and allow the steam to escape without causing gas in the burger.

It is also important to let your burger rest for 5-10 minutes, depending on the thickness of the meat. This allows the burger to absorb all the juices and bind the proteins in the crust. Just as you rest a steak, you will get a juicy but firm result when you rest the burger patties.

  1. Your hamburger meat is perhaps not chilled

If a hamburger patty keeps falling apart, one of the most common causes is the temperature of the meat. One of the biggest problems with ground beef is that it falls apart at room temperature.

Why is that?

Ground beef doesn’t have much room to stay together because it is made up of smaller particles. Unlike chicken or pork, beef contains a lot of moisture and can fall apart if you don’t largely remove it. Since you still need the meat juices for flavor, don’t over-dry the meat. That would create more problems for you.

What can you do about this?

Chill the burgers before cooking

Allow the burger patties to cool before baking. Do not start freezing them, as this will burn the outside of the meat before it is thawed. Excess ice crystals can also cause the patty to crack when it melts.

Place the burgers in the freezer for 20 minutes just before cooking them. Once thawed, they should rest in the refrigerator. The beef patty should be firm and not soft.

To make the patty stand longer, use a piece of wax paper to support the bottom of it. This way you can also make a soft stack until you are ready to eat the burger.

Some myths about separating burgers debunked

People often mistakenly think that burgers can be separated. This can be a problem because they don’t address the real issues. Here are a few of them.

One misconception is that the burger collapses and falls apart due to body heat. This is not true and it is even biologically impossible.

Your core temperature is between 36.5 and 37.5 °C, and your skin temperature is 33 °C. The melting point of beef fat, on the other hand,  is 36-113 °C. This means that your body heat cannot change the physical composition of the patty in any way.

But what makes the patty softer is time. All oils melt at room temperature. If your patty stands too long, it will begin to break down. Therefore, you should let your patty cool down first and bake it as soon as possible.

Another misconception is the use of binders. Many online tips recommend using eggs or other binders when the burger breaks apart. This comes from recipes for meatloaf or meatball where the egg holds the beef together.

Egg-like binders are not suitable for burgers.

Why?

You’re not making a meatloaf. You only use eggs to homogenize the meat and breadcrumbs together. This should not happen with burgers.

Binders also use a liquid to create a seal on the ground beef itself. This in turn adds unnecessary moisture to the patty and brings about changes in the flavor profile of the burger. The crust has a meatball flavor and texture similar to a meatball, which can be rubbery.

The problem of burger spoilage or falling apart is a common problem that can have many causes. Whether it is ground beef, undercooking, overcooking patties, or not chilling the beef, it’s easy to cook a hamburger incorrectly. With the right guidance, you can get all the elements of your burger in the best possible order and with some experience, you will be able to make the perfect burger without any hassle.

Wrapping up

Why do my burgers fall apart?

Now that you know what to do, you can try these quick fixes for yourself and learn by trial and error what to do and what not. I am sure you want the juiciest, best burgers that won’t fall out of your hand. There are many ways to do this, so stay tuned for more tips. Of course, you will no longer need to run about with a perplexed look with the question hovering in your mind: why do my burgers fall apart all the time? Learn the tips and tricks and cook your burgers perfectly with super aplomb.


Related Post: How many burgers in a cow?

How To Steam Tamales Without  a Steamer

How To Steam Tamales Without  a Steamer

how to steam tamales without a steamer

Do you want to know how to steam tamales without a steamer? If you are interested in knowing more aabout this, here is something that might catch your attention. So, just read on.

Well, let me begin by asking one question: do  you like to travel? If the answer is  yes, you should also know that  traveling around the world will allow you to get in touch with many societies and cultures. You will also learn about  different types of cuisines and how to prepare them. If you visit Mexico, for example, you can try one of the most common dishes there, which is known as tamales. It is such a delightful food that it tastes heavenly. And it is also rich in nutrients and minerals. What more do you want?

Proper preparation is crucial, because you won’t like tamales that are half-cooked or overcooked. A half-cooked tamale is sticky and pale and can cause food-borne illness. You can make a tamale from a dough or masa, so you can either boil it or even steam it.

Many people steam tamales because they retain so much moisture. The main reason people steam tamales is to make them tender and moist. To get the masa fully cooked, you need to steam the tamales for 30 to 60 minutes. If you bought the tamales frozen at the store, steam them for only 15-30 minutes. The time depends on whether they are hot, cold or even frozen. While steaming, do not let the tamales come in direct contact with water, or they will become sticky. Considering  the possibility that you have no steamer, what would you do and how would you steam them?

Here is a step- by-step instruction for steaming tamales without a steamer

  1. Aluminum foil

If you don’t have a steamer, you can make one from aluminum foil. Start by crumpling the foil into a piece two inches wide and tall. When you are done with the main ball, make two more of similar size. Arrange the three in a triangular shape in a large pot. The pot should be large enough to hold a plate, and should also have a lid. That is, when you put the plate in the pot, there should be a one-inch hole left. Make sure that the balls are well-pressed against the edge of the pan, so that the plate is completely held.

Remember that the plate to be used should be heat-resistant, as some plates will liquefy if they get too hot. A ceramic plate or a plate made of thick glass is fine. Pour some water into the pot, an inch below the plate. This will keep your tamales from getting wet when the water bubbles. Check that the plate is level and make the necessary changes if it is not. Now you will have to take the tamales and spread them evenly on your plate. Make sure the open side is facing up. If you are preparing several tamales, you can stack them on top of each other.

Place the pot carefully on your oven without shaking it. Cover it with a lid to let the water bubble. When bubbles appear, you will have to  reduce the heat to a bare minimum. The top of the pan will retain moisture and heat, promoting steaming. The tamale should be prepared in 60 minutes, and you should have a timer. When the water has evaporated before 60 minutes, add a little more water, according to one inch under the plate.

Check the tamales an hour later and use tongs to remove them from the pan and place them on a plate. They are usually exceptionally hot, so you should let them sit for about five minutes before eating them. Be sure to open the corn or plantains before eating them. Some people prefer to use a fork and knife, while others just grab it and enjoy the delicious flavor. There is no limit to the most skillful method of enjoying tamales. You can eat it alone or accompany it with different luxury products.

  1. Metal sieve

You can use a mesh sieve or even a metal strainer. Unlike the sieve, the metal one can be more difficult to use. Heat up some water and hang the sieve/strainer over it. The top of your pan may not fit snugly over the handles of your strainer. This means that some heat will be lost and you will have to add extra minutes to your cooking time.

The most effective way to steam tamales without a steamer

  1. Bowls and chopstick

Heat water in a saucepan, then take a bowl slightly smaller than the circumference of the pan. Place the bowl in the bottom part of your pot. Place 3-4 chopsticks on the bottom of the bowl. Along with these chopsticks, master your tamales without stacking them.

  1. Steaming in an oven

You will need a Dutch oven and a casserole dish with a lid. Make sure the temperature of the stove is on the lowest setting. This is to make sure the water in your makeshift steamer will not dry up easily as it will cook or dry your tamale. Watch your formula carefully and adjust your tamale if necessary. Open the dutch oven and place a steam rack. Relax if your home does not have a Dutch oven. A large casserole dish with a lid may be another option.

Now you  need to put the steam rack in it. At the top of your steam rack, orchestrate your tamales and make sure the folded end is facing down. Take some bubbly water and pour it into your Dutch oven/goulash dish, depending on which one you’re using. At this point, place a lid on your Dutch oven.

Put the Dutch oven in the cooker and let it steam for 40 minutes without raising the temperature. The heat from the cooker will allow the water to evaporate while your tamales stay warm. Remove your tamales from the cooker. Finally, gently remove the lid to allow the steam to escape.

Arranging the Tamales

There are two different ways to master your tamales. You can lay them down and stack them if that suits you. You can lay them vertically, so that the beginning points up. If you can lay them evenly, you will have to make sure the opening of the corn husk is pointing up. Remember that tamales are cooked faster at the end than in the middle. So check them regularly to make sure they are not overcooked.

Step-by-step instructions: How to steam tamales without a steamer

Wrapping up

There is no denying that you have an assortment of choices for steaming tamales without a steamer. You can steam in a grill, a metal colander, a heat-proof plate or bowl and a chopstick. Tamales are rich in supplements that contribute to healthy body function. Do not try to put the tamales in water. Use whatever technique you prefer to steam them. Hopefully, everything will go fine. And when you have the delicious tamales ready, you can enjoy the exotic food with your whole family.


Related post: How to cook white castle burgers in an oven

Can Blackstone Griddle Be Used Indoors?

Can a Blackstone griddle be used indoors?

can blackstone griddle be used indoors

Oftentimes, I have been asked by my readers whether I can use a Blackstone griddle indoors. I have also see people asked this question in cuisine forums? can Blackstone griddle be used indoors? So, I have decided to write a detailed post on this issue and I have drawn my own coclusion after doing a bit of reserach in the internet. Read on if you are interested.

 Blackstone is one of the topmost manufacturers of griddles and grills. If you’re a grilling enthusiast, you may have heard of griddles or grills earlier.

These terms are often used interchangeably, although they are very different. For example, grills are usually grooved, while griddles are usually flat.

But that’s just a small detail. Grills are usually large and flat, and they have a rectangular shape. They are usually made of stainless steel or cast iron and have a connected wooden or PVC handle.

The cooking surface receives the heat from below and diffuses it. Thus, food is cooked by the oil spread on the plate, while the meat is cooked often with its own juice.

Griddles are also known as hot plates and you may have seen them in restaurants. Popular items such as sandwiches and hamburgers are cooked on a griddle. Using a conventional cooking method, these items can be fried quickly and easily.

Many cookers and grills also come with griddle accessories. However, the underlying principle is always the same: gas-fueled flames provide heat to the metal surface so that you can cook the food in whatever way you like.

If you are so inclined, you should also consider adding a griddle pan to your home kitchen. They are usually not very large and are a great replacement for large cooktops. This way, you can make restaurant-quality burgers from your home kitchen!

The griddles made by Blackstone, however, are a little different. They are larger and you will need a lot of experience to use them to their full potential.

The company itself states that their griddles are not intended for indoor use. Their answer is pretty succinct, though. For, they don’t mention why these griddles shouldn’t be used indoors.

Some people will tell you that their 17-inch griddle (a popular choice) is perfectly fine for indoor use.

Cooking with a griddle indoors

You should keep in mind that this is a complete griddle, not just a grill pan, so it’s not recommended for indoor use. It uses propane gas, just like the stove in your home. But the similarities aren’t so obvious.

First of all, you need to take safety precautions and combustion considerations before you light it.

The first obvious thing you need to consider is the use of propane. If you want to cook with the Blackstone griddle indoors, you will need to use propane. The natural gas in your home is not propane, so you can’t switch to it.

Instead, you will need to purchase a propane tank to use the grill. There are outdoor style propane tanks on the market that you should not bring into your home.

Propane gas does not disperse easily into the air, and you will need a strong venting system to get rid of it. There are smaller propane cylinders that you can buy and use as well.

But as we mentioned earlier, there are a few important things to consider when using propane.

Burning propane is known to create carbon monoxide. Carbon monoxide is an odorless gas that is usually produced when your stove isn’t burning properly. Without diving too deeply into the science, you should know that carbon monoxide is very harmful for human health and consuming it for a long time can be fatal.

If combustion is incomplete, it goes to produce carbon monoxide. Incomplete combustion usually occurs when the ideal ratio of propane to air is disturbed.

More importantly, if you educate yourself about the harmful effects of carbon monoxide, you will understand that you should not take any chances.

There are also other hazard considerations that you should take into account when using a griddle in your home. First, there is the open flame factor. This is obviously not critical for most people, but if you have stored the barbecue in a room with flammable materials such as curtains or clothes, the open flame is a serious problem. It’s simply a surefire recipe for a disaster!

If the open flame causes a fire, it will be incredibly difficult to extinguish. The propane tank that you need to use with the barbecue poses an additional safety problem, and the risk of explosion is also high.

When cooking with a griddle indoors, always make sure you place it in a well-ventilated space where there are no hazardous materials.

Most importantly, you need to think about the mess that occurs when you cook on a griddle. Firstly, there is always hot oil and grease, which tends to spill out from time to time.

It will fall down on both sides of the table and the worktop will get dirty. If you’re a fan of cooking, this won’t be a big problem for you, but it’s obviously difficult to deal with.

It’s not a big problem for most people, as many professional chefs tend to clean up during cooking.

And then there’s always the issue of smells and fumes. Harmful gases like carbon monoxide are considered silent killers because of their harmfulness. If you haven’t cleaned the griddle properly, the poor combustion will release this gas into your home.

If you notice a strange gas smell in your home, turn off the flame and then take the grill out to investigate exactly what part is causing the problem or leak.

These grills are simply not designed for indoor use, so you should only use them in a well-ventilated outdoor area.

Symptoms of carbon monoxide poisoning

You should also be aware of the symptoms of carbon monoxide poisoning, which is a very dangerous thing. This is important because most people are not aware of their symptoms.

The symptoms are not very noticeable and most people think they have the flu. Common symptoms of carbon monoxide poisoning are stomach pain, weakness, regular vomiting and shortness of breath. Many people are also confused and have chest pains.

Remember that carbon monoxide poisoning can also kill a person. Many people exposed to high doses usually faint before they feel any symptoms.

Defective valves

If you use the Blackstone griddle often, you should always check the plugs and valves. You will have to turn the valves repeatedly, so it is important that you learn how they work.

If you turn the valve too far the first time, the flame will be bigger. However, this is not the problem. One of the biggest problems with cooking on a propane grill indoors is that gas can leak through faulty valves.

Like anything else, valves are susceptible to wear and tear over time. Since they control the flow of gas, a leak at this point can cause a serious problem. The gas will continue to leak and you won’t be able to find the cause of the problem.

What is more, it could lead to a blowout. Equipment failure is always a danger when cooking in a confined environment, and people have gotten serious third-degree burns as a result.

In fact, there have also been fatalities as a result of propane explosions.

If you use your griddle indoors, check it every few months. You can’t do this yourself, so you’ll need to call in a kitchen technician or expert to find out if the valves are leaking or faulty.

Because of the many problems associated with using the griddle indoors, not to mention the fact that the manufacturing company explicitly tells you not to, it’s generally wise to avoid using it indoors.

Instead, you should consider investing in a griddle as it can easily help you cook the same foods without having to worry about propane gas or other issues.

What you need for cooking

It is best to use a frying pan outdoors. But if you want to get the most out of your kitchen (whether you use it indoors or outdoors), there are a few important things to bear in mind.

Firstly, you’ll need to buy accessories to help you cook your favorite dishes in the griddle or frying pan. Here are some of the essential accessories you need to buy.

Spade and spatulas

These accessories are essential, and you simply can’t do without them. If you watch various videos of people cooking food on griddles around the world, you’ll notice that they all use spatulas and shovels.

Unlike traditional pots and pans, hotplates have a flat surface. This means you’ll need spatulas or shovels to lift those pots. There are a myriad of different products you can buy, so it’s best to do your research before making a purchase.

Infrared temperature gun

The amount of dry heat produced by a grill plate is considerable, so it’s important that you know the temperature at which your food will cook. The last thing you want is to pour oil on your frying pan and have it burst almost immediately.

Investing in a good quality infrared thermometer is a good idea, as it allows you to measure the temperature of your food without too much difficulty. There are usually cheaper options on the market for under $30, so you don’t have to worry about spending a lot of money.

The most important thing is that an infrared heat gun allows you to cook your food evenly. Often, the sides of steaks or meats don’t get cooked because the cooker doesn’t press them from both sides.

To avoid this problem, we recommend using an infrared gun and ensuring even temperature distribution. This way you will always get a great, well-cooked meat!

Grease boxes

The Blackstone griddle is also equipped with a grease tray, which allows you to effectively remove any fat that has accumulated on the bottom. It’s easy to remove the grease and you don’t have to spend a lot of time cleaning the grate.

However, by investing in a grease trap, you can easily collect grease in one place. They are made of durable aluminum foil, so you can easily dispose of the grease when you’re done.

Griddle bottles

A traditional oil dispenser may not be a wise choice with a Blackstone griddle because it produces dry heat. Instead, you should consider investing in special griddle bottles.

You’ll basically need two bottles. One uses cooking oil and the other uses water. From time to time you will need to sprinkle a little water on the frying pan to bring the temperature down.

These bottles have small drinking holes and tend to last a long time, making them a worthwhile investment for most people. You are really not required to spend a lot of money on these things, though.

Apron

One of the most important things you will probably need is an apron. Many people choose not to use an apron when they first start cooking on a griddle, but this is a very bad idea.

As mentioned above, a lot of oil escapes when using a frying pan. In a few minutes, you’ll find that cooking without an apron is the perfect recipe for getting your clothes dirty.

Getting a simple dark apron is a clever idea that solves this problem. There are also some great designs on the market, so if you want something unique, you can also choose them.

Wrapping up

Can Blackstone griddle be used indoors

Hopefully, by going through this post, you will have a sound knowledge about why you should not use a Blackstone griddle indoors. I would say, you can do it but the risks are many and you should use your discretion. However, I see no point in getting into trouble that might endanger your life.


You may also read: Best Electric Griddle for Home

How Many Burgers In A Cow?

How many burgers can you get from one cow?

How many burgers in a cow

How many burgers in a cow? This question is often asked in food and kitchen forums in the internet. Many of my friends also asked me this question. So, I decided to do some reserach on the topic This is why, I have written a full post about it to to give you all the answers related to this and I am sure those who are interest in knowing more about it should love it. .

Coming back to the point now, supposing that you have  used all the available meat from an average cow to make a quarter-pound ground beef burger, you would roughly get about 1,600 burgers from one cow..

Usually, however, the best  beef is graded for steaks and only the cuts are ground for meat burgers. If you assume the average of 200 pounds of beef from a cow is actually ground into minced meat, you get about 800 burgers per cow.

How many hamburgers does a cow have?

So the rough answer to the question of how many hamburgers come from one cow is either:

You will get 1600 quarter-pound burgers of a pound if you grind all the meat.

800 quarter-pound burgers if you have kept aside the best beef for steak cuts.

It is not easy to give an exact figure for this calculation because there are so many variables involved. Some of them are:

Different cows provide different amounts of beef.

It depends on how much meat you use for steaks and how much for meat burgers.

It depends on how much fat is in the minced meat.

It depends on the breed of the cow or the buffalo..

It depends on the size of the burger you are making.

It’s also important to remember that the beef you eat in a burger does not come from one cow. It is a mashup of beef from many different cows. So it is entirely possible that you are eating the beef from as many as 100 different cows when you eat a burger purchased from a fast food chain like Mcdonalds.

How do you find out how much hamburger is in a cow?

To know how much hamburger is in a cow, you will have to determine the average amount of usable beef from an average-sized cow and divide that by the amount of beef per hamburger.

1. How much beef can you get from a cow?

As a general rule, a cow or a bull totaling 1,200 pounds will provide about 350-550 pounds of meat in your freezer.

The reason for it is that a lot of weight is lost during slaughter and processing. This includes:

  • Bones
  • Skin
  • Horns
  • Intestinal stuffing
  • Blood

You must also consider the huge amount of fluid loss that occurs after the animal is slaughtered.

To calculate this, it is usually assumed that 40% of the animal’s live weight ends up in the freezer, while the rest is lost in two processes during slaughter:

Hot carcass weight (also called dressing percentage) – This is the weight of the animal immediately after slaughter. It will have been gutted and drained as per requirement. It is normally 62% of the live animal weight.

Processing weight – This is the weight of the beef you get in the freezer. The water has been removed from the meat and the bones have been removed, which gives the final usable weight of the meat.

After all this weight loss, a cow weighing 1200 pounds live will produce about 480 pounds of edible packaged beef.

2. How much of the cow turns into hamburger versus steak?

Clover Meadows Beef gives figures in the same order of magnitude as I gave above. They estimate that you can get about 440 pounds of beef from one of their cows. Of that, about 200 pounds of ground beef and 220 pounds of beef cuts (I know it’s not 440 pounds – but I’m using their rough calculations for that).

Among the 220 pounds of cuts, you’ll find cuts like Porter House, Tenderloin and T-Bone steak as well as ribs and brisket.

So… How many burgers can you get from one cow?

With the above calculations in mind, we can finally arrive at a more exact number.

A 1,200 pound cow typically yields 200 pounds of beef, which becomes hamburgers. That’s the equivalent of 800 quarter-pound hamburgers! Add to that 220 pounds of steak. At 1.5 pounds per steak, you also get 150 steaks.

How many cows are in a hamburger? (Over 100!)

The above points are all hypothetical assuming that you slaughter a cow for your own consumption, but that’s not how mass production works. So, it is just based on theory.

The burgers you find in fast food restaurants are mass produced in slaughterhouses across the country. In these slaughterhouses, the pieces of beef that eventually become ground meat are all mass-processed.

In other words, the ground meat in your burger does not come from a single cow. According to McDonald’s in the UK, the average McDonald’s burger contains meat from over 100 different cows.

Wrapping up

How many burgers in a cow

Determining how many burgers a cow contains is not easy, as there are many variables that affect this number. The size of the cow at slaughter, the final weight of the beef in the package, and how you divide the beef into ground meat and steak all affect what you get at the end.

I think most people who view this page want an approximate naswer. So, roughly speaking, the average cow produces about 800 burgers and 150 steaks, but this can vary greatly depending on the factors mentioned above. Hopefully, you have got all your answers about how many burgerrs in a cow.

How Long Does Quinoa Last? Learn How to Store It Properly


How Long Does Quinoa Last?

HOW LONG DOES COOKED QUINOA LAST IN THE FRIDGE?

If cooked and stored in a tight space, it can last in the freezer for up to 6-7 days at the most.

Quinoa is possibly the most flexible product for cooking a variety of sweet and appetizing things. Whether you add it to a serving of mixed greens or to burger buns, it all tastes wonderful. Many people prefer quinoa for dinner because it’s light and firm. When it comes to storing quinoa at home, the question that many ask is: how long does quinoa last? If you’re looking for an answer to that question too, here is something that you might find interesting.

What are the different types of quinoa available?

There are three main types of quinoa: red, white and dark quinoa.

Red quinoa seeds are flat and have an oval shape.

White quinoa is the most well-known variety used in cooking. It has a delicate flavour and a light surface.

Dark quinoa has a stronger and slightly better flavour than white and red quinoa.

When cooked, it takes on a brown colour. It has a more flamboyant, nutty flavour than the other two varieties and a chewy surface. When cooked, it holds its shape well, making it a great addition to mixed vegetables.

There are a wide variety of dishes you can make with this great ingredient. Quinoa smoothie is perhaps the best choice for breakfast, as it helps you get the integrity of protein and fiber that you can prepare at home with this formula. You can drink it anytime to feel invigorated. If you soak the quinoa grains in water for 30 minutes, you can blend them with different items to make a smoothie. Let me know right away if the quinoa turns sour.

Does quinoa go bad?

Yes, quinoa will go bad after a certain time. Many people wonder if cooked quinoa can stand up to being cooked at the end of the week. In some cases, a large portion of the quinoa grains are also left unstained in the laundry room, and you need to know how long they can keep. The capacity technique is a crucial impulse that can either spoil the grain or keep it spotless. The only thing you need to know, therefore, is how and where to store quinoa properly.

With that in mind, our answer to your question about whether quinoa can go sour is yes. Like most other grains and products, quinoa has a certain shelf life and it turns bad after a certain period of time. For both cooked and uncooked quinoa, the use-by period and signs of decay vary. To prevent cooked quinoa from turning sour, there are a few techniques that we have described below. Before you do, you need to know how to tell if cooked quinoa has gone bad.

What is the shelf-life of cooked quinoa?

Cooked quinoa will keep for a maximum of two hours if left at room temperature. If you store it in the fridge, it can keep for 5-7 days, and if you store it in a cool bag, you’ll be surprised to find that it can keep for eight to a year. If frozen quinoa is reheated, it won’t keep long.

How can you tell if cooked quinoa is bad?

It’s hard to tell when uncooked quinoa goes sour, but you can definitely tell when cooked quinoa has gone sour. In some cases, cooked quinoa has a strange hard surface or it starts to smell bad. This usually happens when the cooked quinoa is left at room temperature for more than two hours. This is an unmistakable sign that it has gone bad.

If the cooked quinoa is left in the fridge for a long time, the surface will also become rotten. This is also a sign that the quinoa has turned sour and you should discard it immediately. These are some basic signs that you can easily spot if you look closely.

Signs that quinoa has gone bad

There are several signs that your quinoa has gone sour. If you have uncooked quinoa, sniff it before you start planning. If the surface and smell change, it’s a sign that your quinoa has gone sour.

With cooked quinoa, the smell and surface are the easiest signs to detect. If cooked quinoa sits at room temperature for more than two hours, it will become very hard and a rotten smell will come out of it. These are the signs. If you reheat frozen quinoa and then freeze it again, the surface and smell will change, which are the signs.

Does uncooked quinoa go bad?

Yes, uncooked quinoa will spoil because it has an expiry date. You can check the expiration date on the package label to see how long it will keep. Since quinoa is a dry grain, it will keep longer than many other ingredients in your pantry. However, it has a specific shelf life and after this time it will start to deteriorate. If it becomes mouldy, it cannot be consumed and should be discarded immediately. If the above storage methods are followed, the shelf life can be extended and the decomposition process delayed compared to normal.

How long can I keep uncooked quinoa?

Uncooked quinoa has a shelf life of 2-3 years from the date of cultivation. For this reason, most packaged quinoa have a ‘best before’ date on the label instead of a ‘best before’ date. There are different types of quinoa on the market, such as red, white and black quinoa. All these varieties have the same shelf life.

Wrapping up

Hope this post will help you to understand how long does quinoa last and how to store it properly so that it doesn’t go bad. Many of my friends and readers asked me to write a detailed post about this, so I thought it would not be a bad idea to resarch the topic and write a few lines about it. Hope this helps. Happy Cooking!


Related Post: How to check if salmon has gone bad


How To Tell If Salmon Is Bad

How To Tell If Salmon Has Gone Bad

How to tell if salmon is bad

How to tell if salmon is bad? This is one important question that crops up in your mind whenever you go to buy or cook salmon for yourself or for your family. I ahve seen people asking this questions so many times in forums. So, I decided to write a post about this for the benefit of my readers.

Well, salmon is one of those foods that are very healthy when fresh and properly prepared. It is lean and packed with nutrients that you need for a rational diet. It is a good alternative to fatty meat if you want to lose a few pounds. However, nobody wants to lose weight by gorging and then vomiting stale salmon, so let’s talk about how to tell if cooked salmon is bad.

How do you know if cooked salmon has gone bad and should not be eaten? That’s the question I want to answer here, and I’ll talk about both cooked and uncooked varieties. You need to know if the salmon is about to spoil or has already spoiled. I want to help you avoid unnecessary toilet visits to remove your food from the system. We would all do well to live without food poisoning and this practical guide will help you do just that. If you see mould, discoloration, slimy residue or strange growths, don’t even think about eating the salmon! If you do that you will do that at your own peril. So, just throw out the bad salmon into the garbage bin.

Benefits of eating salmon

Salmon is great because the nutritional properties of this delicious fish are also impressive. For example, it can give a radiant glow to your skin and make it healthy. Secondly, it is a great stress buster. Thirdly, it give your hair new sparkle and keeps it healthy. Fourthly, it boosts up your energy. Lastly, it helps your bones and heart.

Salmon can also be used in many recipes. But when salmon spoils, you really don’t want to eat it anymore!

Why it’s important to recognize spoiled salmon

A few years ago, before I started cooking professionally, I was on summer vacation with my family. We had decided to use our vacation to eat healthier, and since we were going to eat fish, salmon was an obvious choice. The only problem was that the refrigerator in our cabin didn’t work properly, so we ended up with a piece of slightly darkened salmon that we were going to eat anyway.

Bad choice. In the end, all four of us had severe food poisoning! The moral of this story is this: never eat spoiled meat or fish that has not been properly refrigerated. If you do, you can get illnesses ranging from mild – like abdominal pain – to severe – like parasitic infections like trichinosis.

This is because if meat or fish is not stored properly – by the manufacturer, in the store or by yourself – bacteria and parasites can spread. Although some of the microbes are destroyed when the salmon is cooked, others remain in the fish, along with the toxins released, that make you sick.

How do you know if salmon is bad?

While it is very important to know how to recognize if salmon is bad and harmful for human consumption, it is not always easy! Many of us are not used to cooking salmon regularly since it is an expensive item and sometimes not easily available. This can mean that we don’t actually know what salmon tastes, looks and smells like.

The good thing is you can learn after researching all the tell-tale signs and symptoms of bad salmon. Here’s a quick and easy guide on how to tell the bad fish from the good fish!

Dark spots are always a sign that your salmon is bad. If it shows any of the above symptoms, throw it away immediately!

Visual signs of bad salmon, if they are there, are super easy to spot! Our eyes are one of our most important and powerful senses. However, they are not always present if you are looking for the discoloration, mould or grease which may take some time  to develop, but in spite of the absence of such visible signs, salmon can still be bad! What other ways are there to tell the good from the bad?

Visual signs of spoiled salmon

Under normal circumstances and at its best, salmon should look pink and appetizing – yes, even when raw! The flesh of the fish should be bright pink and dotted with fine white lines – the accumulated fat of the animal that is so beneficial to our nutritional health. This means the salmon is fresh and ready to eat!!! But what does bad salmon look like?

Bad salmon has a cloudy, gray color, as opposed to the bright, pink color of fresh salmon. If it looks grayish, throw it away!

If you bought the salmon as a whole fish, check the eyes. Healthy salmon eyes should be white, have a dark pupil, and bulge slightly. If they look sunken or whitish, the salmon is spoiled.

For those who love whole salmon, make sure the gills are clean. Sticky, white or stringy gills are always a dangerous sign.

The smell of salmon spoilage

We, human beings, generally to be very visual creatures and often don’t pay much attention to our sense of smell. But as a beginner, you need to learn to use this sense constantly. Your nose is particularly good at detecting bad salmon before there are any visible signs of it. It can prevent you from getting into trouble!

It may sound obvious, but fish — even if it’s perfectly fresh — always smells a bit fishy. What does fresh and normal  salmon smell like? How can you detect if salmon has gone bad just by smelling it? It may seem like an impossible task, but it’s actually not that difficult. Here are the usual symptoms:

Normal and safe salmon should always smell fresh, even if it has a slight fishy smell. Your nose knows when you smell really fresh fish because it reminds you of the sea: mild, slightly salty, and just, you know, like the sea.

When salmon goes bad, the proteins in the flesh start to break down with bacteria, parasites and fungi. This noticeably changes the flavor.

Bad salmon has a distinctly sour smell, almost like ammonia.

Rotten salmon has a pungent fishy smell. You won’t eat it, believe me!

Use your nose and trust it! Our olfactory instincts have been with us for thousands of years: they definitely know how to take care of our bodies.

How to tell if salmon has gone bad?  Check again

Touch your arm with your other hand. The arm seems to be firm, isn’t it? When you press it, it doesn’t seem to dent and fall apart immediately. The same is true for fresh salmon, which is safe to eat. After all, it is meat!

It doesn’t really matter whether you bought the salmon whole, in small pieces or just  a can of salmon: the texture is usually a good indication of whether the salmon is spoiled or still good enough to be eaten. But how to ensure that you are not going to eat something that can make you sick?

Take the salmon and if you can’t tell by smell or sight whether it’s rotten, use your fingers!

Press the flesh. Be careful to do this lightly, not as if you were trying to cut the salmon with your bare hands!

If the meat pulls back when you remove your fingers, it’s safe to eat!

However, if the flesh of the salmon continues to dent after you stop squeezing it with your fingers, it’s best not to eat it. It’s probably already bad salmon.

If the fish feels slimy and sticky when you touch it, throw it into the bin.

The same goes for a brittle texture rather than a firm one. Don’t eat it!

But how do we know if frozen salmon has gone bad? What about chilled salmon? First of all, you will have to check whether the salmon is dried out. if there is moisture around the salmon, you should not eat it. If you decide to thaw frozen salmon, it is better to do this the night before cooking and never on the kitchen table. This will prevent bacteria and germs from spreading in the fish and harming you with their toxins.

The key is to use more than one sense to distinguish good salmon from bad salmon. Get in touch with your food using all your resources so you can take better care of your body, your health and your family.

How to store salmon so it doesn’t spoil

That’s fine, but you really wanted to eat that salmon. What should we do? Unfortunately, you can’t fix bad salmon to make it fresh to eat again. But you can preserve it better next time! Here are some quick tips for doing that so that you don’t get into trouble anymore:

First, buy the freshest salmon you can find. It’s always better to buy salmon from a reputable seller: you need to be able to trust the source of the food. Check the store for any dirt or strange smells.

Ask around. Find out where the fish comes from and when it was caught. A reputable seller usually knows.

If you buy salmon, go home and store it. That way you can minimize the risk of spoilage.

To store the salmon, wrap it in cling film, place it in a resealable container and close the lid. Then place the container in the refrigerator or freezer, away from other foods.

Do not leave the raw salmon on the counter for more than a few minutes.

Salmon will keep for up to 2 days in the refrigerator. It will stay safe for 1 or 2 months in the freezer. However, it is always best to eat the salmon as soon as possible.

How to tell if salmon is bad and should not be eaten

Wrapping up

Now that you know how to tell if salmon is bad, you should have no problem in detecting whether it’s good or bad. You’ll never have to deal with the unwanted illnesses associated with bad salmon again! So relax, cook your favorite healthy salmon recipe and enjoy your gourmet meal with your whole family.


How To Fix a warped Cast Iron Skillet

How To Fix a warped Cast Iron Skillet

How To Fix a warped Cast Iron Skillet

How to fix a warped cast iron skillet? Is this problem bugging you? If so, it’s time you read this post carefully, as I’ve tried to give you some ideas here on how to get your skillet back to normal so you can extend the life of your pan and not have to use your credit card to buy a new one.

Cast iron skillets are versatile cooking tools that you can take from the kitchen stove to the backyard fireplace and still cook a healthy meal. Repeated heating and cooling or rough handling and dropping can bend and deform cast iron skillets. This results in an uneven cooking surface and an unstable pan, which can cause burns or unnecessary splatters. Repairing a warped skillet can be very expensive unless you do it yourself at home.

How to fix a warped cast iron skillet at home

First, you should find a stable, hard surface. This could be a concrete floor, a workbench, or any other surface you don’t want to scrape. Fold a towel in half and place it on the surface to create a barrier between the towel and the pan.

Place the frying pan on top of the towel, bottom side down. Place another towel on top of the pan to avoid damaging it. Use a hammer to tap the slanted part of the pan until it becomes increasingly flat. Depending on the size of the curve, crack or dent, this can take from a few minutes to an hour or two.

Turn the pan over and hammer the warped parts to one side, or hammer to correct any unevenness. Continue to remove the lumps. Repeat steps 2 and 3 until the bottom of the pan is completely flat on a hard surface and no longer wobbles when moved.

Tip

Heat the pan to facilitate hammering. Make sure you wear heat-resistant gloves when the pan is hot.

Warning

Do not hammer the pan without towels. The cooker or the base may be damaged.And you should never hit uneven or soft surfaces.

Wrapping up

I hope this short article on fixing a bent cast iron pan has given you an idea, and I’m sure you can solve the problem yourself at home without outside help. Once the pan has regained its original shape, you can use it as you would a regular cast iron pan, as before. You don’t even need to replace it right away. Enjoy cooking!


Related post: Best Cast Iron Skillet

Where To Buy Ostrich Eggs: Its Uses And Benefits

Where To Buy Ostrich Eggs

where to buy ostrich eggs

If you have a health curiosity about ostrich eggs and meats, you are not alone. There are so many people all over the globe eager to know about the uses and benefits of ostrich eggs and hence ask in online forums: where to buy ostrich eggs. Read this post carefully, as I have tried to answer all about the general queries about ostrich eggs and meat and where to procure them.

In the 1990s, a lot of people became curious about ostrich meat and started learning about the benefits of ostrich meat or the use of ostrich oil to heal wounds and cure diseases. You may have tried one or the other yourself or have seen people trying out such remedies. But many people are simply not even aware what to do with ostrich eggs. They are so big and at the same time, so costly!

Read on to learn more about what you can use ostrich eggs for and where to buy them.

ALL ABOUT OSTRICH EGGS

ostrich 
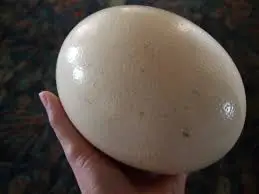
Ostriches are the largest birds in the world. So it’s no surprise that they also have the largest eggs. Ostriches are native to Africa, but are now found on every continent in the world. They belong to a group of birds called ratites – birds that cannot fly. In addition to the ostrich, this group includes birds such as the hippo, emu and kiwi, to name a few.

An ostrich egg ranges in color from light brown to off-white and is very shiny. An ostrich chicken can lay one to two eggs per week during the breeding season (between April and September) and can produce eggs for up to 30 years.

How big are ostrich eggs? They are about 6 inches long and 5 inches wide. They weigh an average of 3 pounds and contain nearly 2 pounds of egg protein. The eggs are equal to 2 dozen chicken eggs.

WHERE CAN YOU BUY OSTRICH EGGS?

Ostrich eggs are expensive compared to chicken eggs. The average price of ostrich eggs is about $30.

Many places do not sell edible ostrich eggs. This is primarily because it is an impractical and uneconomical idea. One ostrich egg is the equivalent of an omelet with 24 chicken eggs, and most people don’t need that big of a breakfast on a regular basis. An edible ostrich egg would cost about the same as a live chicken, and most consumers would not be willing to pay that amount for their breakfast.

However, it is possible to buy empty ostrich egg shells. You can find them on the Internet and at reputable ostrich farms. The shells can be used for craft decorations.

Most ostrich farms sell the shells from eggs that are infertile, i.e., no embryo has developed. A diamond drill is used to make a small hole to remove the yolk and egg white. The shell is then sterilized in a bleach bath before being shipped.

CAN OSTRICH EGGS BE EATEN?

Yes, an ostrich egg is edible and you can eat it. One egg contains about 2,000 calories. Compared to a chicken egg, it contains more magnesium and iron, but less vitamin E and A.

However, in practice, it is not very practical to cook or eat an ostrich egg. According to the American Ostrich Association, it takes almost 90 minutes to hard boil an ostrich egg.

It is also not recommended to fry the egg. Most people probably don’t have a pan or utensils large enough to handle the size of the egg. Besides, the shell is so incredibly hard that you need a handsaw or a hammer to break it!

Given all these characteristics of eggs, it is fair to ask, “Can you eat ostrich eggs?” The answer is yes, and many even recommend it.

Ostrich meat is one of the healthiest red meats available. It is easily digestible, making it a good choice for people with sensitive stomachs. It is very lean and full of flavor. It tastes like high-quality beef and can replace beef in recipes just as well as beef.

Ostrich meat is also humane and sustainable. Most ostriches have a habit of living on farms with open fields. They are not fed on steroids, hormones or antibiotics. In addition, raising ostriches is more environment-friendly than raising cattle. They require less water and land than cattle. They produce fewer greenhouse gases and emit almost no methane.

OSTRICH EGGSHELLS THROUGHOUT HISTORY

For more than 100 000 years, ostrich skins have been used in many different cultures for both practical and artistic purposes. Archaeologists working in the Mediterranean region have found evidence of ostrich eggshells dating back to the 7th century BC. Many African archaeological sites show that shellfish shells were used to store and transport water or paint.

Several ancient cultures used them as tools. They used the shells to make arrowheads and ceramic combs.

Babylonian and Assyrian texts mention the use of ostrich eggs as medicines. Some believed it protected against blindness.

In ancient Greek shrines they were used as symbols of fertility and prosperity. There are still churches where ostrich eggs are hung as decorations.

One of the most popular methods is the use of ostrich eggshells in graves. Elaborately decorated eggshells symbolise resurrection and eternal life. This practice is well documented from cultures between the 4th and 2nd centuries BC. Today, many Muslims still use ostrich eggs to honour their dead by hanging them above their graves.

WHAT TO DO WITH OSTRICH EGGS IN MODERN TIMES?

Decorated ostrich eggs are still used in North African homes today. They can decorate the roofs of thatched cottages or be gilded and placed in a chandelier.

The shells are also used for jewellery and small ornaments. Small slices and shapes are cut from the bark and used in necklaces, pendants, belts and anklets.

Scientists are also studying ostrich eggs to develop new treatments against viruses and bacteria.

Yasuhiro Tsukamoto is Dean of Veterinary Medicine at Kyoto University in Japan. He has been studying ostrich eggs for many years. He is trying to find out whether antibodies can be extracted from unfertilized ostrich eggs to make drugs for humans. His research is still in the pre-clinical phase and has not yet been published or peer-reviewed. However, some of his work shows that he can neutralize the dengue virus.

DIFFERENT USES OF OSTRICH EGGS

Although eating them is somewhat impractical, there are several reasons why people want to know where to buy ostrich eggs. They are particularly well suited to interior decorating and painting projects.

It’s important to find a reputable farm, such as American Ostrich Farms, for eggshells. And while you’re there, check out their other products, like ostrich meat and ostrich soaps and oils!

Wrapping up

Where to buy ostrich eggs

Hopefully, this post about where to buy ostrich eggs and their benefits and uses have given you enough food for thought and if you want to try ostrich meats along with ostrich-based products, you are free to do some experiments. Go ahead!


What Does Almond Milk Taste Like?

What does almond milk taste like?

How does almond milk taste like


What does almond milk taste like? Many people who have not tasted almond milk before ask these questions in different cooking forums and they are particularly interested in knowing how it tastes when you add it to your boba or bubble tea?

For many years now, different types of milk have become increasingly popular. Instead of drinking cow’s milk, we now have oat milk, almond milk, rice milk, coconut milk and a lot more.

But for what reason?

Part of the reason is changing eating habits. More and more people are paying attention to their health, which has led to various dairy-free diets. If you’re lactose intolerant, look for alternatives to milk in coffee shops and tea rooms. And the same goes for vegans.

Plus, dairy-free milk has more health benefits than most traditional dairy products. Who would have thought we’d change the type of milk we consume? It’s crazy, isn’t it?

Now for the main question: what does almond milk taste like?

The delights of almond milk

If you’ve never tried almond milk, you probably think it tastes like almonds. Nothing can be farther from the truth. It tastes more like cereal milk or sweetened cow’s milk.

Let’s break down the taste for you.

If you try an unsweetened almond milk, you’ll find that it actually tastes good. It’s not sweet, yes. But it has that underlying hazelnut and almond flavor and a slight hint of creaminess.

Almond milk doesn’t have as much fat as other dairy products. And that means the milk is a little more watery than traditional cow’s milk. But that’s okay, and it still tastes great. You can take my word for it.

If you ever try the sweetened version of milk in a coffee shop, you’ll be amazed at how good it tastes – it’s fabulous! The most famous flavors of milk are chocolate, vanilla, honey and cinnamon. Of course, it all depends on what you want and what you would like to drink.

Testing the taste

In order to check what it tastes like, we conducted a test between traditional milk (cow’s milk) and almond milk. We did it with milk of three different varieties:

Plain milk: This is a glass of milk poured into a regular glass.

Cereal: The milk was poured into regular cheerios.

Plain

The first test was ordinary milk. They were almost identical, even the taste. But the main difference was that the almond milk was a little sweeter. If you don’t like the taste of regular milk, you can choose almond milk.

Cereal

The cereals used in the experiment were unsweetened. Therefore, those who liked the almond milk preferred the sweet taste to the unsweetened cereal. However, some were concerned that mixing the milk with sweetened granola would make it sweeter.

But that’s entirely up to you and your preferences. If the taste of cereal is important to you, you can use regular cow’s milk or other milk substitutes.

Iced latte

The results of the iced latte were fascinating. Those who didn’t like the coffee taste liked the almond milk ice cream. But even though the milk masked the taste, the bitter aftertaste remained.

Those who preferred coffee opted for the traditional cow’s milk ice cream.

Other uses of almond milk

For sure, you can drink the milk without bothering to add it to anything to have a different taste. But what other popular uses are there for the milk? First of all, you can ask for alternatives to milk when you visit one of the best boba cafes in New York.

Usually your local bubble tea shop has almond milk and it is likely to be so. If not, you probably would not be there. Is there any coffee shop which wouldn’t offer an alternative to milk, especially in this day and age? That’s pretty weird!

You can also use milk as a protein shake. There’s nothing better than adding milk to your protein shake. Try it and see for yourself! Other uses for milk include salad dressings, smoothies and even baked goods.

Benefits of almond milk

There are several benefits to drinking milk. Here are some of them:

It is nutritious

Milk usually contains vitamin D, calcium and protein. This makes the milk more similar to regular milk in terms of nutritional value. But milk is richer in many minerals and vitamins, including vitamin E.

It is low in calories 

Although almonds are high in calories and contain 50% fat, commercial almond milk is low in calories. This means you can consume more of the milk drink without gaining weight. In terms of calorie content, it does contain some nutrients.

The companies that produce the milk dilute it with water. The fat content is therefore almost the same as in skimmed milk, which is usually around 1%. If you take one cup of milk, you get 39 calories. And that’s 50% of the calories in a cup of skimmed milk. How cool is that?

But you should also know that not all almond milk is as good. For example, if you make milk at home, the calories increase. And some brands have a lot of calories in the milk. So before you buy one, you should check the calorie count.

Some companies also add sugar to the milk, which you should avoid to improve your health.

We should keep in mind that factory almond milk may be low-calorie, but not all companies are low-calorie.

Unsweetened almond milk does not cause a blood sugar spike.

As mentioned earlier, many almond milk products on the market contain sugar. However, those that do not contain sugar are low in carbohydrates. Milk is high in protein and fat compared to carbohydrates. Therefore, it does not increase blood sugar levels.

However, we recommend that you read the list of ingredients and choose products that are as pure as possible.

It strengthens your bones

If you’re looking for the richest source of calcium, choose dairy products. On the other hand, almonds are considered to be one of the poorest sources of calcium. However, this product usually contains some amount of calcium. So if you don’t eat dairy products, almond milk may be the best option for you.

Conclusion

What does almond milk taste like? In short, delicious! Although both types of milk scored equally in the  tests, almond milk turned out to be the best choice. This preference is probably due to the low sweetness of the milk, which contributed to all three tests. In terms of taste, however, both types of milk were good. But almond milk tastes better. In terms of health, however, almond milk is much better than ordinary milk.


Hard Anodized Vs Ceramic –Which Cookware Is Better?

Hard Anodized Vs Ceramic Cookware

Hard anodized Vs Ceramic—which one should you buy? This topic often crops up in cooking forums and is hotly debated. For one thing, both sides have a strong fan base and the staunch supporters would not allow themselves to be outdone by the opposition in the debate. Read on if you want to more about this topic.

Now let me begin with a question.How much attention do you pay regarding the choice of cookware? Do you pay attention to the labels and what they say, or do you settle for the design of the cookware?

If you are one of those who have always wondered what the differences are between ceramic and hard anodized cookware, read on to get to the heart of the matter.

Hard anodized or ceramic – which type of cookware to choose?

Anodized pots and pans

It’s best to first understand the technical difference between the two. The anodizing process involves using chemical baths that add a thicker layer to the surface of the pan.

Hard Anodized Vs Ceramic CookwareThis coating treats the aluminum so that it is firmly anchored to the surface of the pan. This is followed by an oxidation process that ensures that the pan has non-stick properties.

Anodized cookware is lightweight and as durable as stainless steel cookware; it does not absorb food odors, is porous and does not scratch easily. Precisely for this reason, many professional chefs prefer them.

Ceramic pots and pans

Hard Anodized Vs Ceramic Cookware


As for ceramic cookware, there is not much to explain, except that these products can be made of ceramic, clay or other similar elements. Professional chefs often claim that the ceramic coating does not leach chemicals and cooks more evenly than other nonstick pans.

Currently, ceramic cookware is considered the safest cookware when there is concern that chemicals may enter the food during cooking.

As one of the most recent inventions, research has not gone very far. Some claim that ceramic cookware has a shorter shelf life. One thing that can affect durability is the use of oil, which must be rinsed vigorously to thoroughly clean the ceramic coating.

Unfortunately, this rubbing also causes the coating to flake off over time, essentially ruining your cookware.

Some manufacturers have chosen to develop cookware with more than one ceramic coating, which makes the pan a little thicker. This has the advantage of making your cookware last much longer, even if it is easily damaged or scratched over time.

The thicker the layers of ceramic, the longer your cookware will last.

Hard anodized VS ceramic : which one to choose?

One thing is certain: hard-anodized cookware can withstand very high temperatures and rough handling, is very light and as strong as stainless steel, and cannot be scratched by metal utensils.

Professional chefs prefer anodized cookware. So, if you are a professional or if you cook every day and your cookware has to combat your busy schedule, then hard anodized pans are for you.

When you think about your health

However, if you are more concerned about your family’s health and don’t need a professional high performance professional pan, ceramic coated cookware is obviously the best choice for you. Another type of non-stick cookware you can find in the ceramic category is micro-stone coated cookware.

They too contain no leaching chemicals and are ten times harder than other similar non-stick pans. Surely, oil is not essential if you are a health-conscious user.

If you are looking for variety

When it comes to the variety of ceramic or hard-anodized kitchen utensils, you will have a hard time looking for the different types of hard anodized products. On the other hand, you will find a wide variety of ceramic kitchen utensils in terms of design, colors, shapes, styles and even the specific materials used (clay, ceramic, micro stone, etc.).

Of late, the number of users buying ceramic-coated cookware is increasing considerably, perhaps due to health problems associated with other non-stick pans such as Teflon and aluminum coating, including hard anodizing. In addition, the variety of ceramic cookware may be another reason for the growing popularity of these products over time. But as mentioned above, hard anodized utensils are mainly used by professional chefs, so there are fans on both sides.

In terms of usability, ceramic coating offers a non-stick option that is user-friendly. In addition, ceramic pots and pans are much easier to clean than their hard anodized counterparts. Plus, you don’t need to use oil when using non-stick ceramic cookware, which makes cleaning up afterwards much easier.

Wrapping up

Hard anodized vs Ceramic Cookware

As you can see, hard anodized and ceramic coated cookware has incredible benefits and advantages. Both clearly have pros and cons, and depending on your own preferences and needs, you can choose one or the other. One thing is for sure, you won’t be disappointed irrespective of your choice.

Check out the manufacturers’ websites and read what they specifically offer. Read why certain features of anodized or ceramic cookware are better than the competition. What we discussed above applies to all hard anodized and ceramic products. However, they may vary from one manufacturer to another. You may need to do your due diligence before taking a final buying decision.

However, hard anodized products are ideal for cooking at high temperatures, as is common in the restaurant industry. These pans are very durable and can withstand aggressive handling and metal utensils without scratching. If they can’t be scratched, it means the surface will stay intact much longer, giving the cookware a longer lifespan.

Ceramic products are absolutely right for you if you are health-conscious and want a non-stick variety. There is no chemical leaching that takes place. You ought to remember that the surface is much more delicate and you should use only wooden utensils for cooking. The variety of products will surprise you, but don’t be intimidated. Any product labeled “ceramic” has the above common characteristics that I have already mentioned. Now it is time you made your decision and go cooking!


Related Post: Ceramic Vs Stainless Steel Cooware


Ceramic Vs Stainless Steel Cookware: Which One Is Better?

Ceramic Vs Stainless Steel Cookware

Ceramic vs stainless steel cookware–which one is better? This question is highly debated in cooking forums and one finds so many threads about it. If you are interested in knowing more about it, you should go through this post thoroughly.

To begin with, healthy cooking always begins with the choice of cookware. You can choose the best, most natural ingredients, and use the safest and smartest cooking methods. However, you will still not be eating healthy food if your cookware produces toxins and other harmful substances.

When it comes to cookware, ceramic and stainless steel are two of the most popular choices. And in most homes, you’ll find both type of cookware in the kitchen. Stainless steel and ceramic are much safer than others, such as Teflon-coated nonstick cookware.

But choosing between the two isn’t always easy, because while your personal preferences may make the choice easier for you, but you should at least know what you’re getting from each.

Here’s a breakdown of the advantages and disadvantages of the two types of cookware and a comparison to help you choose.

Ceramic cookware

Ceramic cookware is one of the newest products on the nonstick cookware market. It is also a more environmentally-friendly and safer option than others such as Teflon. Although it is not as durable as stainless steel, it is still quite sturdy.

There are two types of ceramic cookware: pure ceramic, which is made from fired clay, and ceramic-coated cookware, which is sprayed with a ceramic coating over other cookware such as stainless steel and aluminum.

Recommended Product: Cook N Home NC-00358

Ceramic advantages

Toxin-free – Perhaps the biggest advantage of ceramic cookware is that it is completely toxin-free. The material is all-natural and does not release any foreign or harmful substances into the food. The natural minerals used to create the ceramic coating also do not contain common toxins such as cadmium and lead.

Non-stick – If you are looking for a safe non-stick cookware, ceramic is one of the best options. This material offers natural nonstick properties, which means you won’t have to worry about harmful coatings like Teflon. Stainless steel, on the other hand, is not non-stick.

Easy to clean – Since food doesn’t stick to ceramic, cleaning cookware is quite easy. There is no need to scrub like other cookware, and some modern models are even dishwasher safe for easy cleaning.

Even heat distribution – Ceramic heats more evenly, which means your food cooks more evenly and uniformly because there are virtually no hot or cold spots in the material.

Relatively affordable – These cookware are also relatively affordable, especially if you choose the ceramic-coated types.

Disadvantages of ceramic

Can only be used on low to medium heat – If what you plan to cook requires high heat, ceramic is not suitable as high heat can damage it. This limits its flexibility and you can only use the cookware for certain foods.

Shorter service life – Compared to stainless steel, ceramic has a relatively shorter service life because it is weaker and breaks easily. An accidental drop on the cooking surface will likely mark the end of the life of your ceramic cookware, whereas a stainless steel cookware may be subject to more abuse.

Don’t use metal utensils – It seems that many people prefer metal utensils to plastic utensils because they are more durable. However, if you use ceramic cookware, you may not be able to use them comfortably because they can easily break these delicate pans. Wood or nylon should be used to keep the coating in good condition.

Tips for using ceramic

Ceramic heats up fairly quickly, so it is important to start with a low temperature setting before mastering its use. Also, unlike stainless steel, which can withstand the highest firing temperatures, ceramic should be used on low to medium heat.

Ceramic heats up quite quickly, so it is important to start with a low temperature setting before you master its use. Also, unlike stainless steel, which can withstand the highest cooking temperatures, ceramic must be used at low or medium heat.

You must also be careful not to expose ceramic cookware to heat for extended periods of time, as it is not made for this purpose. When storing kitchen utensils, you will have to make sure to use some sort of padding between them. For one thing, they can break if they bump into each other.

Stainless steel kitchen utensils

Stainless steel kitchen utensils have been around for a long time and they don’t seem to be going out of style. With proper care, this is the type of cookware that will be passed down from one generation to the next, as it can last for many lifetimes.

This amazing cookware is made from a mixture of different metals including carbon, silicon, nickel, manganese, chromium and iron. The resulting alloy is strong, sturdy and safe.

Stainless steel is not only sturdy, but also has a beautiful shine that will always add a touch of glamour to your clean kitchen utensils. Best of all, this material won’t allow toxins or pollutants to seep into your food, making it safe for cooking.

Advantages of stainless steel

Very durable – What gives stainless steel cookware an edge over many others is that it is much more durable than most other utensils, probably only surpassed by cast iron. With stainless steel, you’ll never have to worry about common kitchen utensil problems like chipping or even rust because it’s resistant to all of those things and super durable.

Offers Great Cooking Pleasure – Stainless steel cookware is not only durable, but it is also very popular because of its incredible cooking performance. This material has fantastic heat absorption and will even get hotter than ceramic if constructed properly.

Low maintenance – There is little to do to maintain stainless steel cookware because there is no coating to worry about. You don’t need to dress up to prevent rust. Simple, regular cleaning is all that is needed to maintain this cookware, and no special techniques are required.

Non-reactive to food – Since stainless steel is a non-food reactive material, it is safe to use, even when handling acidic products. You can cook acidic recipes, such as tomato sauces, without worrying about a strange taste or leaching harmful chemicals.

Easy to clean – Like ceramic, stainless steel is very easy to clean. The smooth, non-porous surface is very easy to clean and can be soaked and cleaned quickly without sweating. In addition, most of these kitchen utensils are dishwasher safe, making them easy to clean.

Disadvantages of stainless steel

No non-stick coating – absence  of non-stick coating is the biggest disadvantage of stainless steel cookware, as it means that food will stick to it while cooking. So unless you’re frying, boiling, or stir-frying, you’ll need to use plenty of oil to form a temporary non-stick surface to keep your delicate foods from sticking.

Poor heat conduction – If you are using stainless steel cookware without an aluminum or copper coating, the cooking surface is not very good because it is a poor conductor of heat. However, multi-layer types seem to solve this problem almost completely.

More expensive – If you’re on a budget, stainless steel cookware may not be for you, as it tends to be quite expensive. And while there are cheaper options on the market, they are usually inferior imitations.

Discoloration – When the exterior of cookware is exposed to high temperatures, it can easily discolor. There are many ways to maintain and restore kitchen utensils, but it will require additional work and time on your part.

Tips for using stainless steel

Although stainless steel cookware is not as easy to use as non-stick cookware, such as ceramic, you can still make great meals with it.

One simple tip to keep in mind when using these cookware is to use them like ceramic cookware.

Stainless steel cookware may not be as easy to use as non-stick ceramic models, but you can still make great meals with it.

One simple tip to keep in mind when using this cookware: always heat it up before adding the oil. Once it is hot enough, you should add a generous amount of oil and swirl it around to coat the entire bottom. Do not add food until the oil is shimmering, otherwise it may stick.

Ceramic vs stainless steel cookware

You can be sure that you will have an excellent set of cookware no matter whether you choose stainless steel or ceramic. But if you only want to buy one or the other, try to keep the following points in mind when shopping.

Which one is safer?

Both stainless steel and ceramic are safe cookware because they are made from natural materials and do not release harmful substances into the food. However, in the case of stainless steel, even a small scratch can result in the transfer of small metal particles to food.

In addition, burning stainless steel cookware can cause pitting and release small metal particles into food.

In the case of ceramics, it is usually the coloring and glaze of the cookware that contains harmful substances such as lead or cadmium. However, if the ceramic is not glazed, this is usually the safer option, but in general, both cookware is quite safe.

What one is more popular at the moment?

Stainless steel remains the most popular material in almost every household, as many people prefer it over others for its durability and ease of maintenance. However, as more and more users are looking for safer non-stick cookware, the popularity of ceramic continues to grow.

What is the most durable?

Stainless steel is by far more durable than ceramic, because if you buy genuine, high-quality stainless steel cookware, it will last a lifetime. Also, stainless steel is more durable because, unlike ceramic, accidental drops or bumps in the kitchen will not leave scratches or dents.

What is cheaper?

Quality doesn’t come cheap, so it should be obvious that stainless steel cookware is much more expensive than ceramic cookware. You can easily get a good ceramic cookware set for under $100, but for a good stainless steel cookware set you may have to spend hundreds of dollars, but it will be worth it in the end.

Wrapping up

Ceramic vs stainless steel cookware

Your choice of cookware has a significant impact on everything from safety to the quality and taste of the food you prepare, so you can’t go wrong while making your choice.

And when it comes to choosing cookware, stainless steel and ceramic are as good as it gets. However, both are made of different materials, making them suitable for different situations and types of users.

It is best to have a set of both at home. However, if you have to choose one, ceramic is the better option. If you want something more affordable and non-stick, stainless steel cookware is the best option for you provided, of course, you don’t have any budget constraints and are looking for cookware that will last you a lifetime.


How To Use a Roasting Pan?

Using a roasting pan

1.First, you will have to place the meat rack in the roasting pan.

Some models of roasting pans do not have a rack and instead have ribs on the bottom of the pan to lift the meat.

  1. Next, place the meat to be raosted on the rack.
  2. Now, center the meat in the pan. Leave a space of 5 to 6 centimeters around the meat from the edge of the pan. This will allow the heat to circulate better and cook the meat evenly.
  3. Place the roasting pan on the center rack of the preheated oven.
  4. Follow the recipe for the desired oven temperature and cooking time.
  5. Cover the meat with the lid or with stretched aluminum foil.

How To Use a Roasting Pan?
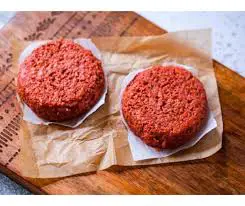
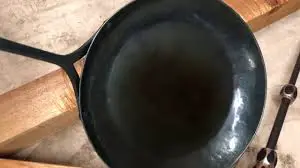
Meat will cook faster in a covered roasting pan than in an uncovered roasting pan. A covered roasting pan creates a mini oven in your regular oven. If the meat browns too quickly before reaching the desired temperature, cover the roasting pan with the lid or aluminum foil.

  1. Let the meat rest in the roasting pan for 5 to 10 minutes after removing it from the oven.
  2. Transfer the meat to a platter and let it rest for an additional five minutes. This will allow the meat’s natural juices to distribute. If you cut the meat too soon, the juices will run down your cutting board and you won’t be able to enjoy it

If you only use your roaster for turkey on Thanksgiving, you’re missing out. Let’s take a closer look at the humble roaster (and why you should use it throughout the year).

You know you need a roaster for your holidays. Cooking a Thanksgiving turkey, glazed ham or standing rib roast is a lot easier when you have a roaster in your kitchen. But what about the rest of the year? You don’t need to stash away your holiday cookware and leave it collecting dust! For one thing, a roasting pan is one of those items you can use every week.

What is a roasting pan?

A roasting pan is actually a large oven-safe dish equipped with a rack. Think of it like a large casserole or a tall, rimmed baking sheet. You can use a roasting pan without a rack, but the rack blocks the roast from touching the bottom of the pan, which promotes even heating and allows juices to drip from the pan.

Because they are often used for large cuts of meat, such as turkey, the most common size is a 16-inch pan, which can be large and heavy. Although heavier than non-stick pans, we recommend investing in a multi-layered stainless steel pan (like the roasting pan I recommend). These pans are ideal for roasting meats for braised dishes in the kitchen, as they provide a better grip and can be used at higher temperatures than pans with non-stick materials. They also tend to retain heat better than non-stick pans, making them ideal for casseroles.

When should I use a roasting pan?

There are many ways to use a roasting pan throughout the year. It can be used in most recipes that call for a skillet, so switch up your skillet the next time you make a sheet pan dinner. You can also roast a whole chicken in it (most 16-inch pans will fit two chickens, so you can easily make dinner for leftovers). Roasters are also great for cooking large quantities of potatoes or other vegetables, which is especially useful if you’re preparing dinner. Don’t be scared to take out your pan to make a large batch of lasagna, enchiladas, or your favorite special holiday dish.

One of my favorite uses for a roasting pan is for braises, such as braised short ribs. You can use these pans to sear the meat on the stove, preserving the delicious flavor. Then deglaze directly in the pan, add the liquid and vegetables and put the whole stuff in the oven. Now you have a big meal in one go!


Related post: How to season a carbon steel pan?

HOW MANY CUPS IN A POUND OF POWDERED SUGAR?

HOW MANY CUPS ARE THERE IN A POUND OF POWDERED SUGAR?

There are many ways to measure ingredients when you cook, and it can be very frustrating if you don’t have the same measuring tools the recipe talks about.

But you need not worry, for we’ve got you covered.

how many cups in a pound of powdered sugarWe’ll help you determine how many cups contain one pound of sugar. If you want to be effective in the kitchen, you’ll want to familiarize yourself with some of the basic conversions.

It’s also important to keep in mind that measurements can vary depending on the type of sugar, as the finer the sugar, the lighter it will be for the same volume in the measuring cup.

Read on to find out the answer.

Here is a quick guide on: How many cups are in a pound of sugar.

If you’re in a hurry, here’s a chart that will give you an idea of what to do.

1 pound of granulated sugar = 2 ¼ cups (540ml).

1 pound of brown sugar = 2 ⅔ cups (640ml).

1 pound of powdered sugar = 4 cups (960 ml).

What is powdered sugar?

Powdered sugar is also called confectioners’ sugar. It is actually composed of two elements:

Corn starch is added to the finely ground sugar to prevent it from clumping when the powder comes in contact with any moisture. This is very easy to do, since moisture is everywhere.

There are many types of sugar and if you want to know more, here is a link to sugar.org  that will give you more information on the different types of sugar.

Superfine powder is often used for dusting on cakes and confectionery products and in fact there are different grinds available. You will also use it to make icing sugar.

If you are interested, you can consult

https://en.wikipedia.org/wiki/Powdered_sugar

Things to keep in mind when measuring powdered sugar

When you want to measure your sugar level, there are a number of things to keep in mind to make sure you get accurate results:

Be sure to sift the sugar so that no lumps remain, as this will affect the volume of the powdered sugar.

These small lumps of sugar will also affect the quality of your frosting and make it a bit grainy.

Does the recipe ask you to sift the sugar before or after measuring?

Are the measuring cups and the area you are working in dry? If the sugar contains moisture, it will form small (or large!) nuggets and may spoil.

In case you missed it – How many cups are in a pound of confectioners or powdered sugar?

You will need 4 cups for every pound of powdered sugar.

how many cups in a pound of powdered sugarDon’t try to compress the sugar, just spoon it into the measuring cup, as compression will have a big impact on the final weight.

You should also not tap the cup too hard to level it, as this will naturally compact the small grains of sugar.

The cup should not be placed in the sugar, as this will also compact it, but rather poured or spooned into the cup.

This is also important to make sure you do not contaminate the sugar with other things you may have measured.

When filling the cup, be sure to smooth the top with a knife or something with a straight edge.

Sift or not to sift: is there any difference?

If you are using a recipe that calls for sifted powdered sugar, you must sift the sugar before measuring because there is a difference in volume and therefore weight.

Sifting sugar makes it more fluid and less compact, which increases its volume. Be sure to read the recipe thoroughly before measuring, as the correct measurement will greatly help you cook or bake to perfection.

How many cups of powdered sugar are in a box?

Don’t confuse ounces of weight and volume when measuring your powdered sugar. Know exactly how much you are buying.

It is common knowledge that one cup equals 8 ounces, isn’t it? Well, when weighing the ingredients in a recipe, a cup is not always 8 ounces. We know that a cup of water weighs 8 ounces, but honey, for example, is thicker than water, so a cup of honey actually weighs 12 ounces.

Powdered sugar out of the box or plastic bag weighs 4 1/2 ounces per cup, so a 1 pound (or 16 ounce) box contains about 3 1/2 cups of powdered sugar. If a recipe calls for sifted powdered sugar, weigh 4 ounces of sifted powdered sugar to make a dry measuring cup. Sifted powdered sugar makes it lighter and frothier, allowing it to take up more space in the cup.

WRAPPING UP

Hopefully, this post has been able to answer all your questions as to how many cups are in a pound of sugar and clear all your doubts related to this. Now get down to preparing your favorite food using all the correct measurement of sugar so that you don’t mess it up.