How Long Does Deli Cheese Last? Does It Go Bad?

deli cheese

How Long Does Deli Cheese Last? 

How Long Does Deli Cheese Last? 

How long does Deli cheese last? Does it go bad? If you have all these questions in your mind and are looking for some authentic information, you should not go anywhere else. Here in this blog post, I am going to discuss this matter and answer all questions related to it.

Anyway, who doesn’t want to eat an enormous fat, fatty burger covered in creamy cheese? There are many kinds of cheeses. However, deli cheese remains an extremely popular choice.

This is due to the quickly it melts as well as due to its texture. Deli cheese is a great choice in almost any sandwich or charcuterie dishes, in pizzas and crackers, and sometimes with noodles in a bowl.

Cheese is not a food that has an excellent reputation among those who are trying to lose weight. In reality, you can enjoy your cheese from the deli so long as you consume it in moderate amounts.

Cheese, by itself, falls into the “PowerFuel” category. They’re packed with good calcium, protein and vitamins. Sliced cheese also has large levels of salt as well as saturated fats.

When you next go looking for cheese, look for low-fat or low-sodium varieties. Cheeses that are low in calories and high levels of nutrient levels are the healthiest choices.

In terms of the thickness of cheese pieces, one is able to pick between medium, thin and thick. If you’re a cheese collector, you will be asking yourself questions such as what time does deli cheese last?

What are the signs to detect that it has gone bad? Let’s answer these questions.

How Long Does Deli Cheese Last? Does Deli Cheese Go Bad?

The answer to these questions will depend on how you keep your American cheese deli. The key thing to remember is to chill the cheese immediately after you bring your purchases home from the shop.

If properly refrigerated, the deli cheese can be eaten for two days to three weeks. Are you aware of the “sell-by” date on your cheese packaging? This is a mistake.

This usually indicates the approximate time when the cheese will be of the best quality. Following that, the cheese might lose some of its texture and flavor. It might remain delicious, though.

However, it is suggested to eat the cheese as quickly as you can to reduce the risk of food poisoning.

To extend the shelf-life of cheese, place any package that is not opened within the freezer. The process of freezing cheese can extend its shelf life for up to 8 months.

To do this you need to wrap it in plastic freezer wrap or aluminum foil. Then, place it in freezer bags made of heavy-duty.

Deli cheese, after being taken out of the freezer can be chilled and defrosted for up to 4 days before using it. Be sure to let the cheese that you have frozen be thawed in the refrigerator by itself.

After being thawed, deli-cheese may be a bit crumbly and therefore ideal to use in casseroles, sauces and soups.

How to tell if Deli Cheese is Bad? Deli Cheese Shelf Life!

Every type of cheese has its own specific timeframe for aging and consequently has a different shelf life.

For example, blue cheese, cream cheese and brie cheese all have their own “usability” dates.

Therefore, it is hard to determine a common measure to decide the exact time when cheese is bad.

There are three certain ways to determine that the cheese you’ve bought for your kitchen has passed its use-by date.

The first indication is its appearance. The majority of cheeses will form a little surface mold on their surfaces. In these cases, you can simply remove the moldy bits.

If the cheese has moldy spots in it, it might not be suitable to consume. If the Deli cheese (or any other cheese in general) has a change in color, the consistency is different, or there’s a sense of thinness, throw out the cheese.

The smell can also be a way to tell a quality cheese from one that has been spoiled. Cheese is dairy-based, which means it’s likely to possess some kind of smell.

For your own security, make sure you smell the cheese before you purchase it. This way, you’ll be able to determine if the cheese from the deli has changed its scent since the time you bought it.

Sometimes, the deli cheese might pass both the tests of appearance and smell. However, it might fail when it comes to flavor.

The outcomes of conducting an experiment on taste may be unpleasant but you must take the necessary steps.

If you’ve got some Deli cheese that’s been stored in the refrigerator for some time, take a bite. If it is sour or has a distinctive smell, you need to get rid of it.

Frequently Asked Questions

  1. Why is the Sliced Cheese in the Fridge All Moldy?

Anything with a lot of moisture content can get moldy if exposed to oxygen. Therefore, if the cheese you cut stored in the refrigerator looks stale it is likely that they were not stored in airtight containers.

If you notice mold on your cheese slices, you should not eat the cheese slices. The consumption of cheese with mold can cause stomach discomfort and heartburn and lead to health problems.

  1. Can You Store Cheese in the Freezer?

Based on the kind of cheese you want to store, it is possible to keep your cheese within the freezer. It is best to make use of the quick freeze function to store cheese, and it keeps the moisture levels.

Cheese that is frozen can last for up to 10 months without a problem. We suggest not eating it past 8 to 10 months.

  1. Can You Freeze Cheese Slices?

Yes, it is possible to freeze slices of cheese only when you properly store them. Wrap your cheese slices in parchment paper, and then wrap the entire block of cheese in a freezer bag.

Make sure that each piece of cheese is covered in a separate manner. Use freezing paper to wrap the entire piece. Utilize a ziplock bag or an airtight container for storing it.

  1. How Do You Store Deli Cheese?

Deli cheeses are cheese that is sliced and that means they spoil quicker than other cheeses. Because they are cut into slices, the moisture is not retained for very long.

So, if you’re trying to keep the freshness of your deli cheese for longer, wrap them in plastic wrap or parchment paper. After that, put the cheese into an airtight container. It will be stored for up to 3-4 weeks in the fridge.

  1. What Happens if You Eat Old Deli Meat or Cheese?

Do not consume old meat or cheese, regardless of the situation. Fresh food spoils quickly according to the climate in which you live and the method you use to store them.

Food items that have been discarded by delis or that have expired can result in severe food poisoning. There is a chance that you will experience stomach pain, fever nausea, diarrhea and vomiting. Therefore, it’s better to be cautious than sorry.

  1. What is the difference between Deli Cheese and packaged Cheese?

It could appear like it’s the same thing, but deli cheese and packaged cheese are completely different in the way they are made and taste.

The cheese we buy at the store is processed versions of the real thing. It is initially a standard cheese, but then chemical preservatives and additives are added. This allows them to last longer shelf-life.

The packaged cheese, on the other hand, is a totally processed cheese. Some believe they have lesser than half cheese. The cheese that is packaged has more extracts and chemicals and food coloring. This is why you get the well-known yellow hue.

Wrapping up

How long does deli cheese last?

The benefit of deli cheese lies in the ease with which they can keep as well as how long they will last in the refrigerator.

It’s good to have some in the kitchen so that you can add in a quick breakfast or snack. It can be added to burritos, sandwiches, crackers, or even instant ramen noodles to provide that creamy saltiness we like. It is recommended to refrigerate cheese from the deli to keep it fresher for longer.

In the case of cheese, the most common guideline is to ensure that the greater its moisture content is, the faster it will begin to spoil.

Some cheeses come with the shelf life of a few days, while others have a better flavor as they get older and start to show a bit of mildew on the cheese.

In the final analysis, refrigerating cheese can be the most effective way to prolong its shelf-life. No matter what kind of cheese you choose to bring to your home, make sure you refrigerate it right away when you return back.


How Long Does Pastrami Last? Does It Go Bad?

pastrami

How Long Does Pastrami Last? 

How Long Does Pastrami Last? 

No matter how you decide to cook or consume Pastrami, it’s essential that you are aware of the various options available regarding how to store it. The method of storage that you choose to use for Pastrami will help you answer the question, “how long does Pastrami last?”

In this article, you will be able to learn about numerous factors that impact the correct preservation of Pastrami. This is especially important in the case of keeping the well-cooked meat stored in a proper way for a long period of time.

Read on to find out more.

What is Pastrami?

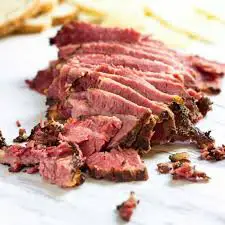
Pastrami can be described as smoked-and-preserved beef that was first introduced during the Ottoman Empire. It is made of fresh or salt-cured meat and then soaked in hot spices like peppercorn, paprika, and coriander.

Pastrami usually has a yellow-colored exterior, with mustard and pepper seeds sprinkled over to enhance the flavor.

The process typically takes around two weeks. The process can take up to two weeks,  but some pastramis are smoked on cherry wood, which gives a rich coloration to the smoke flavoring.

Other options include onion powder, garlic, and celery seeds, as well as other ingredients, depending on the preferences of the cook/chef who prepares the dish following the completion of the curing process.

Pastrami is great sandwich meat, in appetizers and salads. It is usually served cold; however, it is heated to a variety of temperatures based on your preferences.

Is pastrami a good choice for freezing?

Well, yes, the pastrami is a piece of meat that is able to be stored for three months or more. However, you might have problems with dry meat.

It is usually based on the amount of time it has been within the freezing. It can be extremely difficult to prevent this from happening. However, if you wrap it up tightly and make sure it has an airtight sealing, you’ll notice that moisture is stored for longer durations.

If you’re wondering, “how long does pastrami last?” you are sure to be happy knowing that it can be frozen. This can help to extend its shelf life.

How long does pastrami last?

If you buy an item of pastrami from a supermarket, it is recommended to immediately place it in your refrigerator. When you open the package, it must be put immediately back in the refrigerator to be stored.

However, you should be aware that opening the package will reduce the time the Pastrami lasts. It is now possible to have between 3 and as long as five days to utilize the meat that remains.

The meat might appear to not be “bad,” and it might not emit an odor that indicates it’s “bad,” but listeria is a fungus that can grow and develop in a refrigerator. Listeria consumption can cause various health issues.

If you buy fresh sliced Pastrami from a butcher shop, you must ensure that it is eaten within three days. Consuming it after the timeframe could lead to illness.

How about deli pastrami slices?

It is recommended that you immediately put Pastrami or Deli meats in the refrigerator following the purchase. What you can do to answer the query “how long does pastrami last?” — in terms of storage in the fridge — is contingent on a variety of factors, like when you bought it and the way it was stored as well as any other recommendations from the deli at the time of purchase.

To ensure that your deli pastrami has the best overall shelf life, make sure that it is immediately placed within an airtight container or wrapped in a way that reduces the amount of exposure to air. It is possible to make use of a plastic container, aluminum foil, or plastic wrap to safeguard the Pastrami.

The Pastrami you purchased at the local deli will last approximately for 3 to five days, if kept in a proper manner in the fridge.

Can you safely put the pastrami at room temperature?

Yes, the deli pastrami you buy could be left in the refrigerator at room temperatures for short durations without problems.

It is recommended to keep in your mind the fact that hazardous bacteria can begin to show an increase in growth rates on the meat when temperatures are at 40 degrees F and as high as 140degF.

When the meat from the deli pastrami was kept out for two hours, it must be removed immediately as it is at this point that it is a risk to eat it. If you ask, “how long does pastrami last?” the answer is “not long” when it is left at room temperature.

If you’d like to extend the deli’s pastrami’s shelf-life, you should store it in 3 days.

The Pastrami will come in its own packaging but it is suggested that you wrap the packaging material in an aluminum foil of high quality before placing the Pastrami in your freezer.

To prevent the possibility of a freezer burn, you can then wrap the wrapped package with freezer wrap, or even place it in the freezer bag that is made of durable material to safeguard it.

These are some tell-tale signs that help you recognize that your pastrami or deli meats have gone bad.

Check your product’s “sell-by” date on the label. In accordance with industry standards, it’s recommended to consume the product within 7-10 days after the date on the packaging.

If the meat from a deli has been opened, it is the consensus that it must be eaten within 3 to 5 days.

If you observe that the meat is slimy or looks like it has film on it, throw away the item immediately. If you’ve seen the slime or film it is likely that “it is past the point of expiry.”

It doesn’t matter if it’s Pastrami, Ham or turkey, or another kind of meat from deli. Any smells that are unusual suggest that the meat needs to be removed. These smells can be similar to those of vinegar, yeast or ammonia.

If you notice any unusual form of growth in the package or in the meat itself, such as mold, throw the item to the trash.

How to Store Pastrami?

Sometimes, the pastrami you purchase might not be cut to the thickness you require.

Follow these suggestions for storing it so that the meat is fresh and delicious however there is no waste.

In the event that your pastrami has become thick and isn’t able to be put into a sandwich, let the meat to be cooked all the ways first before cutting as thinly as you can.

If you’re planning on eating the pastrami after the next few days, wrap it in plastic and place it in the refrigerator’s lower shelf.

You can also store it within an airtight container, and place it in the cooler of your refrigerator.

Don’t keep the pastrami at room temperature for more than a few days.

If it’s not to be consumed within this week’s timeframe, you can freeze it up to 3 months.

If you’re ready to enjoy the frozen pastrami, let it thaw in the fridge and cook according to the usual method prior to eating.

The reason you should freeze is that if you require something later further down the line, it’ll remain fresh until the time you need it.

If your family enjoys sandwiches made of deli meat that feature thick slices of beef packed high, you should wrap any leftover pieces in aluminum foil. Then place them inside an airtight container, or the freezer bag high enough to make them accessible from within the refrigerator’s door shelf.

Follow these suggestions for storing your pastrami in the kitchen so you don’t end up with wasted portions.

If there is any left-over, after you’ve finished your meal, they’ll be there.

Best way to cook pastrami

In general, there are several different methods that can be employed to cook Pastrami. While making sandwiches, it is recommended to steam the meat. However, this is a lengthy process that can take a while.

Pastrami, even in deli forms – can be described as a form of meat cooked using the five-step method of cooking. There are a variety of different types of meats used, including round, beef brisket lamb, turkey, and so on. After the meat has been selected the meat is dried and then smoked.

Then, it’s primed and then is put through another drying process. After that, it is steam-cooked. If you’re wondering about how long Pastrami lasts, you must be aware of the fact that this method is the one that contributes to its overall longevity.

To cook a good piece of Pastrami to make a sandwich, we suggest making use of the microwave.

Using microwaves

Everyone considers that using a microwave is one of the most effective methods to cook pastrami while making the sandwich. It is due to the fact that it is the most efficient.

To be successful in this endeavor, follow the steps below:

  • Put the desired amount of Pastrami onto the plate.
  • Get it wet, and then wring out a clean towel. Put the damp cloth on top of the meat.
  • Cook the meat in any range between 1 and 2 minutes.

Four ways to heat cold slices

When cooking Pastrami, it is essential to take into consideration the grade of meat you’re working with. If, for instance, you’re using high-quality beef Any heating strategy can be successful.

If you’re using inferior meat, the microwave may not be effective as it could dry the Pastrami until it loses its flavor.

Steam the Pastrami

  • Bake the Pastrami in the Oven
  • Fry the Pastrami in a Pan
  • Microwave the Pastrami

When you are ready to cook the Pastrami regardless of the method you decide to use, let the meat set out until it’s at temperatures that are at room temperature. It is possible to begin the process by removing the Pastrami out of the refrigerator and then letting it sit at the table while you make preparations for the food.

  1. Steaming

This is regarded by many as the most effective method to successfully heat Pastrami to be used.

When you decide for steaming the Pastrami you’re cooking you’ll find that it increases the tenderness as it ensures that the moisture stays inside the meat. A lot of restaurants that are famous for their pastrami dishes use this method of heating.

The process of steaming can be accomplished by making use of a stovetop or making use of an Instant Pot.

Instant Pots are extremely fast when it comes to heating pastrami. However, it makes use of steam to heat the water.

The time it takes to heat up an Instant Pot is considerably lower than boiling water on the stovetop.

It comes with a unique warming feature that will allow you to keep the Pastrami warm for long durations without having to worry about the meat drying. If you are worried about the length of time Pastrami will last, you will notice that your anxiety will decrease with the use of an instant pot.

It also features the ability to warm.

It is a great way to cook, heat, and also to keep warm.

  1. Using a cooking stove

It is possible to heat Pastrami by using a stovetop, but there’s an issue you could face. It is that you might not have a custom-designed steam basket available.

There’s a solution to this, however. Find a way to raise the meat from to the top of the pan, or put the Pastrami inside aluminum foil before placing it inside the pot of water.

Be sure that the Pastrami doesn’t come directly into touch with water. It requires a little exposure to steam from hot water. To achieve this, you should add about two inches of water to the pot.

The meat can then be placed inside a steam basket (if there is one available) and wrapped with aluminum foil.

Be sure that you boil your water regardless of the place where the Pastrami is put or the way it is placed.

When the steaming process has begun, you can put the lid on.

Pastrami heating doesn’t need the use of a hard boil. A simmering boil is fine.

If you’re heating only the smallest portion, it is possible to do the process of steaming for seven to 10 mins.

If you’re preparing for a larger serving, 30 minutes would suffice as a time to cook the meat to ensure it is ready for serving.

  1. Utilizing an instant pot

Pastrami can be cooked in the Instant Pot. It is also possible to do this by using a pressure cooker that has a steaming feature. It’s as easy as adding water and switching to the steaming feature and then placing the Pastrami in the cooker.

In essence, this is the most basic way of the procedure to employ the method of heating by steam using Pastrami. However, there is a need for additional preparation as the meat cannot be placed directly in the water.

Instant Pots usually come with a metal rack with legs to help stabilize the appliance. The term is commonly used to describe  “trivet.” This will enable you to lift the Pastrami from its bottom cooker while steaming.

Place the trivet in the middle of your Instant Pot and add water. The water should reach the top of the rack.

After everything is put in place Once everything is in place, you can put the Pastrami into the trivet by placing it right onto the trivet.

  1. Utilizing aluminum foil

If you don’t have a trivet that fits in the Instant Pot that you use to cook your Pastrami it is possible to make use of aluminum foil.

Make it into a bowl, and then put it inside. Don’t wrap it tightly since this would prevent the meat to experience exposure to steam during boiling.

It is likely that when you use an Instant Pot the steam causes water to drip from the lid. If you’re using aluminum foil, it is important to ensure that the entire top portion is coated.

If you choose to do this, you can simply make tiny holes in the sides of the foil. This allows steam to penetrate the Pastrami without adversely impacting its flavor.

If you’re steaming Pastrami in an Instant Pot It is best to schedule the process to take 40 minutes. However, when you’re steaming smaller portions, you need to cut down on the amount of time.

If you steam large portions then you might need to increase the amount of duration.

The additional advantages of making use of an instant pot.

You can use the delay timer function to ensure that cooking can begin at the time you specify.

This kitchen appliance comes with an option for warming that will permit you to hold the Pastrami warm until it is time to begin your serving procedure.

2 Bake the pastrami in an oven

If you like your Pastrami a little more crispy or prefer the edges that have an incredibly flavorful, solid crust, make the Pastrami bake in an oven while heating it.

You can also cook the Pastrami by baking without making the meat crisp or the crust a bit more difficult. It’s all about the method you employ.

In the event that you’ve got a significant amount of Pastrami that you want to cook and bake, then baking it in the oven can be the most effective choice since it might be too complicated to boil the meat.

In the event that you’ve got a huge quantity of Pastrami to cook and bake, then baking it in the oven can be your best solution since it might be too complicated to boil the meat.

In addition to the advantages of fully heating up in your oven, it can toast bread that you’ll consume alongside your Pastrami. Many people and companies create sandwiches and place the entire meal in the oven to warm.

Although it is a fairly simple task it is important to be cautious not to dry the meat while baking in the oven. This is the most detrimental side consequence of baking in an oven. However, it is easily avoided by putting the meat in an oven for a shorter period.

  • Preheat the oven until it is at 250 degrees or 300degF.
  • Place aluminum foil over a baking sheet.
  • Put the bits from Pastrami onto the aluminum foil.
  • Bake for anything between 5 and 10 minutes,  or until the desired temperature is reached.

When Baking an Entire Sandwich

  • Make the sandwich in the way you would prefer it.
  • Place a baking sheet on top of aluminum foil.
  • Pre-heat the oven until 200°F.
  • Bake the whole sandwich for 8 to 12 minutes.
  • 3 Fry the pastrami in the pan

If you prefer to cook it, place the Pastrami into the frying pan and then utilize the stove to cook the meat. It’s a fairly quick procedure, however, make sure not to rush the heat.

Keep in mind that you aren’t cooking the Pastrami. You are just heating it. It is best if you began at a lower temperature when heating it in the frying pan. If you need to, gradually increase the heat during the cooking process. This will help you are able to avoid cooking the Pastrami.

If you’d like you could try making a pastrami-based sandwich on the stovetop in the way you’re in a position to do it on the oven when baking; however, this is more like making the sandwich of grilled cheese.

The bread will be toasty and the cheese will melt down on the Pastrami, creating an amazing combination of flavorful and robust.

Make sure the stove is set by setting it to medium-high flame. You can use a pan that is marked as “non-stick.”

Put olive oil or even your preferred butter on the stove. It should be heated.

Place the meat in the pan first, to heat it. Add a touch of flavor to the skillet.

Take the meat out, and then put it on the bottom piece of bread to make a sandwich. Add the cheese, meat, and top slice of bread.

The oven is heated lightly, flipping approximately halfway through. Make sure both the bottom and top piece of bread are evenly toasty.

  1. Microwave the pastrami

In terms of convenience and quick cooking time, Microwaving Pastrami is considered to be among the top ways to cook meat.

Be sure to select premium meat and the pieces you’re heating aren’t too thin. If you’re dealing with poor-quality meat or thin pieces, you’ll notice that the meat dries out too quickly and also loses some flavor.

In the majority of cases, the time of heating is 1 minute. is enough time to cook the Pastrami, regardless of the size of the serving or cut. Be sure to monitor the meat as it heats and stop it when it reaches the temperature you want.

Put the pastrami onto a plate in the microwave covered with a damp, paper towel.

Be sure that the microwave is turned off to low power and heated for 30 seconds each.

Once the temperature you want to reach is attained, take it off and relax.

In terms of convenience and quick cooking time, Microwaving Pastrami is thought to be one of the most efficient ways to cook meat.

Making two pastrami sandwiches

Begin by heating just enough of the meat needed for one sandwich of pastrami.

Wrap the meat in an absorbent paper towel.

Be sure to watch it carefully, and ensure that you don’t overcook, as this can dry out the Pastrami.

Can you keep lunch meat frozen?

If you discover that you’ve got a significant amount of deli meats and deli meats, you might be thinking whether it’s appropriate to store them in freezers.

The short answer is “yes.” Not only is this secure, but it also aids in prolonging the shelf-life of the meat for lunch.

Unfortunately, the deli meat, which is often referred to in the form of “lunch meat,” is said to have a limited shelf time. Within a matter of days, the meat could change from a delicious treat into a disgusting nightmare.

Although most people have a general confidence level when freezing meats that are standard, such as stew beef and chicken breasts It is an old-fashioned issue:

When you are deciding how to answer the query “how long will pastrami last?” the main consideration is the method of storage. Naturally, properly stored Pastrami will last for longer than Pastrami that is stored improperly.

How do you define processed meat?

To be able to answer this question it is necessary to elaborate upon what is the general meaning of “processed.” In general, “processed” (in terms of meat) signifies that the meat has been subjected to a unique alteration in order to improve its flavor and/or prolong its general shelf duration.

The most frequent modifications are salting, smoking and curing.

Hotdogs, pastrami, ham as well as sausages can all be processed into meat products. They are much longer-lasting than fresh meats but should be consumed before the date on the package.

If you consume any type of meat that is older than the dates on the packaging label you put yourself at risk of becoming ill.

These guidelines will allow you to determine when it is safe to eat meat and when it is the risk of.

Related questions:

What Does Pastrami Meat Taste Like?

Pastrami has a distinct flavor with an incredibly sweet and spicy flavor. The distinct flavors include a strong black pepper with a hint of smoke as well as a delicious taste of tang that is created through the sweetness that oozes out from the coriander used to make it. After brining and preparing it is soft and juicy, creating an experience unlike any other to the taste buds.

Is Pastrami Processed?

Yes,  it is true that the Pastrami can be described as processed meat since it’s been cooked through a process that aids in its preservation.

Is Pastrami a Cured or Cooked Meat?

In order to comprehend the storage techniques that are associated with Pastrami it is necessary to know a bit more details are needed. Pastrami is brined first and then carefully dried, using an incredibly blended blend of herbs and spices that produce a delightful dry rub.

Following the curing process, the Pastrami is usually then smoked. The whole smoking and curing process assists in tenderizing and enhancing the flavor of the meat. However, it’s also crucial in helping the meat stay longer. It’s cured meat but it needs to be cooked as well.

What food products go well with Pastrami?

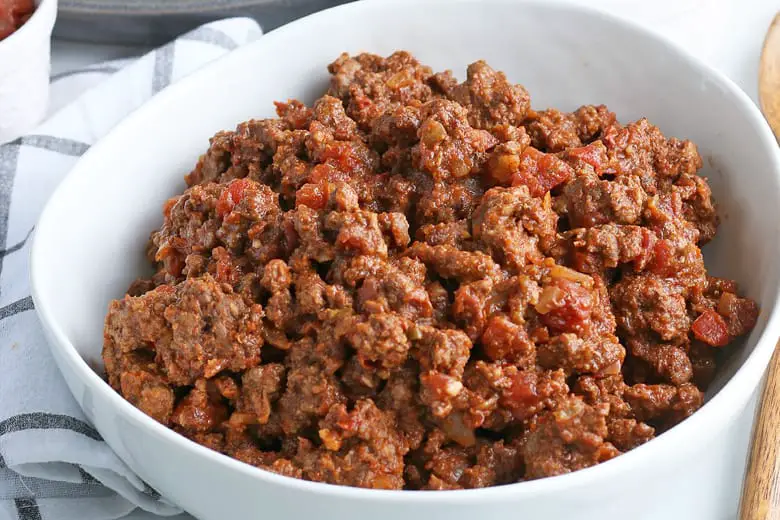
Yes, there are a variety of foods with a distinct flavor that goes well with Pastrami. They include but are not restricted to ground beef, ground turkey Rye bread oregano leaves varieties of high-end, premium condiments, beef gravies, mustards, and garlic, as well as the most basic of seasonings available such as thyme leaf salt, parsley, and peppers.

Although Pastrami is a beautiful dish by itself, it is also used to make mouthwatering sandwiches, for Italian dishes, or in casseroles.

How Long is Pastrami Good For?

The general rule is that Pastrami can last up to three days. To prolong the cured and smoked meat’s lifespan it is recommended that it’s placed in the refrigerator, and then stored inside airtight containers.

You can also wrap the meat in plastic wrap or aluminum foil wrapped. Deli meat pastrami can last for up to 5 weeks in the refrigerator following the opening, however only when it is properly stored. If you can freeze the Pastrami it will last longer, but you should do it before the 5th-day storage date in your refrigerator.

It is essential to know that the storage method you choose to use will depend on the method you prepare the item to be stored as well as the storage technique.

Is Steaming Required for Pastrami?

With the first advent of Pastrami to the world at the time, refrigeration technology did not exist. Therefore, it was dry-cured and then salted for preservation reasons and for the purpose of. Prior to serving it was steamed in a procedure to bring back moisture to facilitate consumption.

Nowadays, most people will are still steaming their food prior to serving. However, it’s not essential. It’s a matter of flavor. If the dried fruit is to keep for long periods Steaming is suggested because it can be difficult to consume.

What cheeses work well with Pastrami?

Like the many food items, ingredients, and seasonings that go well with Pastrami There is an exclusive cheese that mixes well with Pastrami. This is Swiss cheese. Take it out of the packaging or spread it on the meat. The decision is yours!

Wrapping up

So, how long does pastrami last? I think you have already got your answer to that in the earlier part of the article. However, in the end, the pastrami can be defined as smoking, cured beef, which is usually spiced and seasonings added.

The best way to store pastrami is to keep it in the freezer or refrigerator because this kills any bacteria that may be living on the surface.

If you intend to keep your pastrami longer than 6 months make sure you put it in a sealed airtight container and mark the date.

Keep these suggestions in mind while shopping for pastrami. You will never need to be concerned about whether it’s a good choice or if it’s going to cause health problems for you after eating it. Enjoy your pastrami meals at your own home!

How Long Does Taco Meat Last? Does It Go Bad?

taco meat

How Long Does TaHow Long Does Ta co Meat Last?co Meat Last? 


How long does taco meat last? No idea? In that case, you should go through this post carefully since it will give you a detailed account of taco meat and how to store it properly. Read on if you are interested.

Tacos are an essential part of Mexican food, and a lot of people aren’t aware of the amount of meat is involved in making the food.

They’re so simple to prepare and the numerous variations you can make to the taco, it’s not surprising that tacos are so well-known in recent years.

There are many misconceptions regarding the length of time the taco meat can last including whether or not you should put it in the freezer. We’re here to debunk these myths for you.

What is Taco Meat?

Taco meat can be described as a fiery, delicious food that has been consumed in Mexico for centuries. The main components are ground meat as well as spices such as chili powder, to give it its fiery kick.

Beef is commonly used in taco meat. However, other meats are usually cheaper and are mixed into tacos to save money. A few variations of taco meat comprise onions, tomatoes and garlic to make delicious tacos or burritos.

If you’re looking to find innovative ways to take advantage of this dish, consider filling it with lettuce wraps. Taco meat is also delicious in a tasty breakfast, with eggs. You can place it into tortillas, or on the top of toast.

How to Store Taco Meat?

Taco meat isn’t the only taco ingredient It’s also important to determine how long you can keep it in the fridge.

The shelf life of cooked ground beef could vary from one to five days, depending on the cuts and fat content is present.

Chicken or ground turkey is less flavorful than White (lean) meats, but they are delicious served with cheese sauces, lettuce leaves onions, tomatoes and other toppings. It is also important to know that it is possible to put ground beef in the freezer, however, it’s not recommended for prolonged periods of time.

The most efficient method of storing taco meat is store it in the freezer or refrigerator within an airtight container.

Freeze in portions that are appropriate. This can improve the texture and flavor of food after it has been thawed or cooked over again.

Set the “use by” date on your containers so that you determine the length of time you can conserve the meat prior to freezing it.

The best guideline is to wait about 3 months following cooking. However, it can change based on specific variables like the amount of fat and cut type.

Label the left-overs by date of use and by (if appropriate).

“Use-by” or “use-by” date is an indication of freshness, not security.

Make your own judgment regarding whether the product is suitable for use or discarded at this time.

How Long Does Taco Meat Last?

Taco dinner is tradition for numerous families.

It’s difficult to figure out how long the taco meat will keep in the refrigerator before you’re required to make more tacos.

If stored in the fridge taco meat is typically last three to four days.

It’s enough time for an easy meal or is serving tacos for an event in which food is served buffet-style and guests can return for more.

The problem with the idea of storing tacos in the refrigerator is that it could get watery that can make it taste strange even with the seasoning sprinkled to the top.

It is possible to extend the shelf duration of taco meat when you store it in the freezer.

It will remain when stored in the fridge for two to six months provided you adhere to some rules:

You can freeze your taco meat as soon after cooking. This is before any leftovers start to become consumed.

Make sure to use an airtight container or bag with a sealed bag prior to freezing to lessen the loss of moisture due to the thawing process later.

It is best to defrost your food in the freezer for a few hours (do avoid microwaves).

Refrigerate cooked tacos as soon as you finish the defrosting process to ensure that they don’t spoil too fast. Also, this will preserve their texture and taste more effectively than heating leftover tacos from earlier.

So, it’s best to eat taco meat within 3 to 4 days of storing it in the fridge, or within 2 to 6 months if it’s frozen.

What To Do With Leftover Taco Meat?

If you don’t plan to finish eating all your taco meat immediately and you have leftovers, you can store them for up to two days in an airtight box (or place them in the closed container) within the fridge.

If you’re in need of something different than tacos for lunch the next day make them to breakfast burritos, by wrapping scrambled egg scrambles around them and topping them with cheese for an instance.

Recipes using leftover taco meat are available on a variety of food blogs on the internet.

Traditional recipes are enchiladas and quesadillas made of corn tortillas or tortilla wraps made of flour.

Try our recipe for a simple taco casserole. It is essentially a mix of ground beef leftovers and refried beans that are baked in the oven, topped with your preferred toppings.

It is also possible to use taco meat for filling an afternoon or breakfast sandwich along with eggs, cheese and other items.

How to Tell if Taco Meat is Bad?

It’s difficult for someone who hasn’t cooked meat before.

This usually tells you how long the item has been on your counter or inside the package, without refrigerating.

From 2 hours to 3 days following purchase, you shouldn’t be worried about the possibility of spoilage.

There may be unusual smells such as a vinegary, sour or ammonia scent that comes from the meat itself.

Another indication is if the meat is slimy and there is the appearance of mold.

If you notice any evidence of spoilage, such as white or black spots, it’s an excellent indicator that there is something wrong with your food.

Even if you’ve prepared the taco meat that was rotten by accident prior to (say you were in the desert and didn’t put some chicken breasts in the freezer).Don’t cook your tacos all in one go without checking to ensure they’re safe for consumption.

It’s best to stay in the direction of caution and dispose of anything that has been spoiled.

Related Questions

How long is cooked taco meat good to be stored in the freezer?

If properly stored, it can remain at its peak quality for around two to three months but it is safe for longer than the time.

Can you freeze the already made tacos? To freeze taco meat, let it cool completely before putting it into freezer bags that are zip-top. Label the bag with the quantity in Taco Meat you put into the bag. To melt it, remove it from the freezer . Let it cool over night in the refrigerator.

If you’ve cooked up 1 pound of ground meat for taco night, how long will it last in the refrigerator?

Like other leftovers, cooked meats can remain in the fridge for between three and four days, as per the United States Department of Agriculture.

How long can cooked taco meat keep when stored in the freezer? – Related Questions

How long does meat last in the freezer after it is cooked?

If you have leftovers of chicken or cooked meat These will keep in the refrigerator for three to four days and can be stored within the freezer up to a period of 2 to 6 months.

Does taco meat taste good after one week?

In the refrigerator the taco meat is likely to last between three and four days. Refrigerate the taco meat as soon after cooking, and before leftovers begin to get wasted. Make sure you use an airtight container or bags that are sealed prior to freezing to aid in preventing moisture loss due to the thawing process later.

How do you heat the frozen tacos meat?

To heat it up, place it in a pan on medium heat.

If you’re warming frozen, lids can ensure that the moisture levels remain at a minimum, however in the event that it’s straight out of the fridge, you may want to add one teaspoon of water or a splash of olive oil that’s fresh to prevent the meat from drying.

Then, let the meat cool in water. Place the zip-top bag and the meat that has been frozen in an open bowl or sink and cover it with cold water, then weight the meat package down using something sturdy like a pan or large platter. The goal is to ensure that the meat is submerged in the water. The meat must be thawed within less than 15 minutes. Cook immediately.

Do you want to consume taco meat that you have left overnight?

Food that has been cooked and is at room temperature is what the USDA refers to as “the “Danger Zone,” which is anywhere between 40degF and 140degF. Within this temperature range bacteria can multiply quickly and food items can be unsafe to eat and should be allowed to sit out for less than two hours.

Wrapping up

For a majority of people tacos are the ultimate comfort food.

When it concerns food safety, issues like expiration dates, refrigeration and refrigerant are the first thoughts that come to mind.

There’s more you need to be aware of what could cause your tacos to go bad and not.

The taco meat can be stored in the refrigerator. This is an excellent way to preserve it so that you can take them out for days without worrying over food poisoning.

Do not forget to put some space in your freezer or fridge.


How Long Does the Chick-fil-A Sauce Last?

chick-fil-a sauce

How Long Does the Chick-fil-A Sauce Last? Does It Go Bad? 

How long does Chick-fil-a sauce last? If you have no clue, I suggest that you should take a close look at the post here because it will give you enough information about the sauce and other relevant issues related to it.

It’s not commonplace when a Fast food chain is given attention on their sauce than their menu. This is, however, the case with Chick fil-A sauce.

Ever since the Chick fil-A sauce debuted with their name-brand sauce in 2014 it has been a massive hit with customers.

Sure, their chicken sandwich is a must to satisfy your cravings for a stomach. But it’s their sauces made in house that has helped them become the most popular brand.

Customers admit to having a bag full or two of Chick fil a Sauce every when they go out to dine there.

You are able to breathe a sigh relief if you believed that you weren’t the only person doing it.

Now you’ve got a plethora of Chick fil-a sauce in your refrigerator and you’re ready to inquire: how long will Chick-fil-a-sauce last?

I’ll try to answer that question right now.

How can you tell if the Chick-fil-A Sauce is Bad?

You can indeed make use of Chick or a dish after the date on its label. However, just because you are able to however, doesn’t mean you have to!

A Chick fil a dish that has been kept for too long may turn heavy and produce an extremely strange flavor also.

Additionally, if you’ve got an open sauce bottle, you may be having issues with mold too.

Instead of having to deal with everything it’s best to be able to spot the ones that aren’t working and replace them with new ones.

Chick-fil A is always replenishing their condiments pantry, so you may request extras at the next time you visit.

Here are some important signs that tell you that it’s time to get rid of the older Chick fil-a Sauce.

Do you smell odd?

A smell can be the most effective method to know whether your Chick fil sauce is still usable or not.

The sauce deteriorates over time and loses its freshness. It is due in part to the development of spoilage microbes such as yeast, mold and bacteria.

In the end, it can result in it resulting in your Chick fil a Sauce producing a smell that is unpleasant. If you notice an extreme change in the smell of your sauce, I suggest throwing it away.

Does it look thicker?

In general a Chick fil-a sauce is known to be easy and soft texture. However, it completely transforms when it begins losing its freshness.

The sauce is beginning to get thicker. You may even see some obvious mold growth.

The process will take less time when you’re working with an open-sale package.

How Long Does the Chick-fil-A Sauce Last? Does it go bad?

While you might wish for your Chick fil a Sauce to last forever but they don’t!

As with all packaged foods The sauce has a shelf time.

The primary reason is due to being a source of components such as sodium, fats as well as cholesterol.

The compounds may degrade when stored in a proper manner. This, in turn, will affect the flavor of the sauce after a certain time.

Keep in mind that the fact that something is stale doesn’t necessarily mean that the product is old. The only thing that happens is it goes through a change in flavor as time passes.

Back to the issue of what time a Chick fil will last. There isn’t “one” right answer.

However, usually the sauce is sold with a “best-before 90 days” label.

But, it doesn’t necessarily mean you can’t make use of your Chick fil a sauce following 90 days.

The length of time the sauce will (really) will last could depend on many aspects.

It is evident that an open sauce container will spoil faster than one that is sealed.

Also, if you place it in an open space or near the source of heat (or direct sunlight) it will begin to go rancid faster.

All of these aspects of storage play an important part in determining the length of you Chick fil a Sauce will last.

FAQs

How do you keep Chick-fil-a good to last in the refrigerator?

1 – 2 days when stored properly, the cooked chicken nuggets last between 1 and two days in the fridge.

How long will sauces for dipping fast food last?

Here are a few examples of their research: Ketchup, Mayonnaise: One year to ensure optimal flavor. Mustard Taco Sauce, Parmesan Cheese Two to three years to ensure optimal flavor. Tabasco Sauce: Three to four years to ensure optimal flavor.

What can you tell for sure when you have a Chick Fil A sauce is old?

In general the case with a Chick fil a sauce is known to be soft and smooth texture. However, it drastically changes when it begins loss of freshness. It is evident that the sauce is beginning to get thicker and may observe some obvious mold growth.

What is the most-loved product from Chick Fil-A?

For three consecutive years, the Chick-fil-A Nuggets has been the most-loved meal across the country. It shouldn’t come as an issue for our faithful customers who choose our nuggets for an excellent snack, to serve as their main meal or even to feed the smallest chicken-lovers in their families.

Does Chick-fil-a sauce have to be refrigerated after opening?

According to a food expert,  the sauce would last for “a couple of weeks” before you have to throw it out. Additionally, there is you don’t need refrigeration! You can leave it out in a bowl for an ornamental display on your counter. That’s not strange at all.

Do you know if Chick Fil-A sell their sauce?

They have got you covered! Individual 8-ounce bottles from Chick-fil-A, Polynesian, Barbeque, Honey Mustard and Garden Herb Ranch Sauces are available for purchase at participating restaurants across the country. Customers should visit the Chick-fil-A App or call the restaurant nearest to them to confirm availability.

What’s the price of the cost of a bottle Chick Sauce?

A spokesperson for the chain has informed me that those two sauces are among the restaurant’s most requested. The sauces, which cost $3.49 each bottle, are also sold in Publix, Target, Walmart and Winn-Dixie stores.

Are Chick-fil-a condiments bad for you?

Chick-Fil-A’s Chick-Fila sauce is without doubt the most delicious sauce offered in the chain. However, it’s packed with fat, calories, as well as sodium — 140 calories 13g, 140 mg of sodium to be exact. So, it might be delicious, but Chick Fil-A sauce is among the worst ingredients you could apply to your food.

Wrapping up

How Long Does the Chick-fil-A Sauce Last?

If you’re one of those who enjoy taking home an extra packet of Chick fil-a Sauce, you must be aware that they are limited in shelf time.

They’ll have a sour taste and texture over time.

The most effective way to differentiate the quality of Chick fil-a Sauce from one that is not is to look at its appearance and scent.

When you notice these changes, we suggest stopping using them in the future.

It is also essential to store the items in an air-conditioned area (preferably in the freezer) as well as away from direct sunlight.

It could also extend the shelf-life of a few weeks or even months.

The sauces are so popular that people go to extreme measures to purchase these sauces from Chick-fil-A, and some may request additional items for their purchases. Chick-fil-A’s Polynesian Sauce is the customer’s favorite. A few super-fans have admitted to keeping additional bottles in drawers and cabinets at home for other meals.

How To Reheat Tater Tots To Make Them Crispy Again?

How To Reheat Tater Tots? 

How To Reheat Tater Tots? 

How To Reheat Tater Tots? 

How to reheat tater tots? If you have no idea, you should go through this post as it will give you all the necessary information your looking for.

To begin with, made from potatoes, with soft inside and crisp exterior, tater tots are a great addition to any dish, particularly in the case of grilling meat or a different kind of delightful dish that is healthy yet belongs to the fast-food category.

If you’ve got leftovers from lunch, the last thing you’d want to do is throw them away. It can be quite an awkward job.

Are tater tots microwaveable? If the first thought you had was the microwave, then you must immediately stop thinking about it. This would totally ruin the tater tots. Therefore, you must keep it in a different way by making it crisp soft, delicious, and still safe for eating.

Do not worry about it anymore as I will show you ways for heating your tater-tots to perfection.

Reheating Tater Tots in An Oven

With the aid of an oven, your tater-tots will be cooked perfectly. The insides will be soft and flexible, while the exterior will be crisp and beautifully golden brown.

It is also possible to cook huge quantities of food in the oven in one go, so when you’ve prepared an entire meal in advance it is the most efficient way to heat it up.

Step 1: Heat your Oven to 350 degrees Fahrenheit.

As with all ovens, you must switch on the oven first and allow it to heat up to 350o F. This oven must to be heated completely before you can insert the tater tots in it.

Step 2. Set the Tater Tots onto a pan and cover with Foil.

Take a large pan that will let your tater-tots will fit into it, and ideally, in a single row. Cover your pan in aluminum foil.

Step 3. Bake for 15 to 20 minutes.

Place the tater tots into the oven to bake for 15 to 20 minutes. It is possible to check on the progress of the tots so that you don’t risk them accidentally burning. After they’re finished, remove them from the oven and serve them. Be careful before eating them because it’s very hot.

Reheating Tater Tots in A Frying Pan

The frying pan can be yet another option to cook leftover tater-tots and is more efficient than the oven. If you’re in a hurry, rather than ruining your food by heating it in the microwave, try an oven or cooking pan. Here’s how you can get it done the best way.

Step 1: Put the Skillet on the Stovetop and heat it up.

In the beginning, put the pan over the stove and let it cook. Sprinkle a few drops of oil on top so that the tater tots will stay off the pan’s bottom. Reduce the temperature a bit in case you find that the temperature is too high and that the tater-tots might get burned.

Step 2: Place the Tater Tots in the Pan and Heat.

Put the tater-tots in the pan, and start baking them. Don’t move them far from your stove, as they may burn quickly. Make sure you ensure that they are evenly heated on all sides. You can turn them over as you need to.

Step 3. Get them out and soak them in the Oil.

After the tater-tots are cooked to your liking, take them out of the pan , and put them on a paper towel to absorb the fat. That’s it. Your delicious meal is ready.

Reheating Tater Tots In an Air Fryer

Air fryers are ideal to begin the preparation of Tater tots. This will allow for later, reheating. The exterior will get perfectly crispy. Here’s how you can do it.

Step 1: Heat the Air Fryer to 380 degrees F.

First, you must start the air fryer in order to get it to a good temperature. Adjust the temperature to 385 degrees F that is optimal for excellent results.

Step 2: Put Tater Tots Tater Tots inside a basket and heat

Place the tater tots into the basket and then place it in the air fryer for it to warm up. It should take about 5 minutes to attain the desired outcome. You won’t notice the difference between the reheated tater tots and freshly made.

FAQs

How long will tater tots be suitable to keep in the fridge?

If they are stored properly the tater tots can remain in the refrigerator for about 3 to 4 days. But, we must be clear that their texture can change over time and the best outcome will be when you heat leftovers later in the day for dinner. They’re delicious, so it’s not necessary to make them sit around for too long.

Can you freeze cooked tater-tots?

If you have lots of leftovers, you could also freeze tater tots. You can store your tots in the freezer up until one month. Prior to freezing take them out of the fridge and place them in bags for freezing. Make sure to squeeze the most air you can.

Can you reheat tater tots in the microwave?

If you heat them in the microwave, tater-tots will undoubtedly get very hot. However, their crunchiness as well as their fine flavor and texture are going to disappear completely. Hence, I recommend using any of the three options that we have discussed above instead of microwaves.

How do you thaw frozen tater tots?

Another method of thawing tater tots is to set them on the counter for a few hours before heating them. You can also allow them to chill in the fridge.

If you’re in a hurry it’s possible to defrost the tater tots using the microwave. Place them on a microwave-safe plate without touching, and then cook at medium-high for two minutes. Put them in the oven afterward to let them crisp up.

No matter what method you pick the most important thing is to allow your tater tots to rest on a plate covered with a clean towel prior to you heat them. This will absorb any water and gives them an excellent chance of becoming crisp when they are heated.

How do you heat frozen tater tots?

To warm frozen tater tots prepare the oven up to 350degF (180degC). Spread them out on a sheet pan, and then protect the pan with foil. Put them in the oven for 20 minutes and check them frequently to see the progress. For extra crispness add them back to the oven covered for 5 minutes.

To cut down on oven time to speed up cooking, blast the frozen tater tots by heating them in the microwave 30 seconds at high before you bake them.

Also, you can make use of the air fryer.

Within the pan of the fryer, place your tater-tots so they don’t touch and allowing them to cook evenly. Adjust the temperature to 350degF (180degC) to cook for between 10 and 15 minutes, checking frequently to make sure they’re not burning.

The best way to reheat tater tots

Tater tots are a great thing to keep as leftovers, particularly when you cook them correctly to make them taste exactly the same as they tasted when they first were cooked!

The best method of heating them up is by baking them in the oven. This will allow you to cook them perfectly and keep the insides succulent and moist. Additionally, it allows you to cook an entire batch all at once.

The air fryer as well as the stovetop is great ways to heat up tater tots. The result will be deliciously cooked tots, so you should not use the microwave!

Related Question

Can you reheat tater tots that have been reheated recently?

You cannot reheat tater-tots which have already been heated.

This is the case for nearly every food item. The repeated heating of food increases the chances of bacterial growth, which can result in food poisoning.

Reheat only what you’re going to eat. Also, if you have leftover tater-tots that have been reheated, that won’t be consumed take them out and throw them away.

You can also spread the tater tots on a baking tray, and then freeze them in this manner and then place them in bags for freezing.

They are able to stay together after freezing. It also allows you to take out as many as you like to heat without defrosting the entire batch.

Wrapping up

How to reheat tater tots? I think you have already got your answer. If you’ve got left-over tater tots, you can choose one of the three options we’ve provided and the results is fantastic. I do not, by any means, suggest using microwave cooking. You should decide for yourself which method is most effective and most suitable for you. Then, heat the tater-tots for the perfect dinner.


How Long Does Kombucha Last After Opening?

How Long Does Kombucha Last

How long does kombucha last after opening? Does Kombucha go bad?


In this blog post, I will try to answer a couple of questions, among others, especially,  “How long does kombucha last after opening?”, and “does kombucha go bad?” Read on if you are interested in knowing more about kombucha and how to store it.

What exactly is Kombucha?

Kombucha is an intoxicating tea beverage that is advertised as an effective remedy to treat all types of digestive health problems. The process used to make this drink is similar to that of wine and sauerkraut, which raises the question: can the probiotic drink with fizzy fizz get rotten? And how long does Kombucha last after opening?

Quick Answer

Kombucha is a complex drink. It is permissible to drink for a long time; however, it will become increasingly acidic while it is fermenting. If stored at room temperature, it could be unusable within two months. Certain brands even pasteurize their kombucha, making it shelf-stable up to six months. The kombucha that is refrigerated, unopened, will remain fresh for between 6 and 8 months. After the bottle is opened, it’s advised to drink the entire bottle within the first 48 hours.

If the flavor and the health benefits of kombucha suit your lifestyle, then you’ll be interested in knowing the best ways to keep it in your fridge and when to drink it.

How long can kombucha be stored after it is opened?

After the seal of the bottle of kombucha is damaged and the deterioration process begins, it is going to occur quickly. The kombucha will become less fizzy and the flavor is no longer the same. It is suggested for the transfer of the kombucha in an airtight container to keep it fresher for a longer time. When the bottles are opened, it’s suggested to drink the kombucha within one week to get the best taste.

In the refrigerator

  • Store-bought kombucha(unopened): 2 to 3 months after the date printed on the label
  • Buy it at the store kombucha(opened): One week
  • Homemade kombucha: 1-3 months

How to store kombucha?

Kombucha that you buy from a store can be kept at ambient temperature or even in the fridge. The most efficient practice for storage is to put your kombucha in the refrigerator. If it is stored in a room at room temp, the heat from the sun and fluctuations in temperature will affect the quality.

The microbial community that is found in kombucha swells quickly at room temperature, producing an increasing amount of acid and carbon dioxide, and your kombucha may taste like vinegar. Kombucha made at home must be kept stored in a refrigerator.

How can I tell if my Kombucha has gone bad?

Mold

If you notice foamy or fizzy colored spots around either the cap, or even on the surface of the kombucha. It is an obvious sign of spoilage. Get rid of it as soon as you can.

Vinegar-like taste

The kombucha that smells very vinegary could indicate that the kombucha has been overly fermented. It is possible to throw out the kombucha because of quality issues, but it’s safe to drink.

Floaties

Floaties are normal. They usually occur in the form of string-like brown grains or grains. They are yeast strains that ferment kombucha.

How does  kombucha get made?

Create Scoby

SCOBY can be an abbreviation for Symbiotic Colony composed of Bacteria and Yeast. It is the basis of Kombucha and is often called the mother of mushrooms or even by its name. To create your own SCOBY Follow the steps in the following paragraphs.

Ingredients

  • Seven cups of water or 1.6 L of pure water
  • Half cup white sugar (100 grams)
  • 4 bags of black tea (or 1 Tbsp loose tea)
  • 1 cup (235 milliliters) unpasteurized and unflavored store-bought kombucha
  • Ceramic or glass container (two containers that hold at minimum half a gal (1.9 L) each or one jug containing at minimum one gal (3.7 L)).
  • Cloth that is tightly woven (coffee filters napkins, paper towels, napkins cheesecloth)
  • Rubberbands

Instructions

In a saucepan, heat water. Take it off the stove and let it dissolve sugar. Don’t use sugar in place of honey because it increases the likelihood of Botulism.

Make sure to add kombucha tea. Let it sit until the tea is at temperatures of room temperature.

Pour the sweetened Kombucha into a jar, and then cover the jar with a tight-woven cloth. The cloth should be secured with rubber bands.

The jar should be kept in a dark place, between 21-24 degrees Celsius for 1-4 weeks or until a 1/4 inch SCOBY has developed.

The first fermentation

Ingredients

  • 14 cups (3.5 quarts, 3.3 L) clean water
  • 1 cup of white sugar (200 grams)
  • 8 bags green or black tea (or 2 Tbsp loose leaf)
  • 2 cups (470 milliliters) unflavored Kombucha
  • 1 or 2 1 or 2 SCOBYs (Use one per container)
  • Ceramic or glass container (two containers that hold at minimum half a one gallon (1.9 L) each or one jug containing at minimum one gal (3.7 L)).
  • A tightly woven cloth (coffee filters napkins, paper towels, napkins cheesecloth)
  • Rubberbands

How Long Does Kombucha Last After Opening?

Instructions

In a pot, boil water and then mix sugar into it after removing it from the heat. Incorporate kombucha tea, and let it infuse until the water reaches the temperature of room.

Transfer the SCOBY onto an unsterilized plate using fresh hands.

Pour the tea that has been sweetened and brewed into a sterilized container, followed by unflavored starter kombucha, and the final SCOBY.

Cover the jar tightly weaved cloth and secure it using rubber bands. Place the jar in a dark location between 21-24 degrees Celsius for 6-10 days.

Check your kombucha’s taste on the 6th of the month using straws. It should taste acidic and sweet. It should also taste slightly vinegary.

Take 2 cups of this batch to make use of in the next stage to serve as a starting point.

The second fermentation

Ingredients

  • Reserved kombucha from the initial fermentation
  • Sweetener (fruit honey, fruit sugar).
  • A few fermentation bottles with flip-tops.
  • You can also use canning jars even though they’re not airtight.

Instructions

Then strain the kombucha and pour it into bottles with the funnel. You should leave 1-1/2 inches of space at the top.

You can add a sweetener that you prefer and close the bottle.

Place the bottle or bottles in a dark location. Allow it to ferment up to 2-10 days temperatures of room temperature.

How do you keep store-bought Kombucha?

We’ll start with kombucha that you can buy at the store. As I mentioned in the intro, the process of storing commercially bottled kombucha is complicated.

Certain brands, such as Cathy’s Kombucha, say you can keep in a refrigerator at room temperature up to up to half an entire year with no consequences. However there is GT’s kombucha and a host of other brands that require refrigeration.

The most effective way to do that is to make sure the bottle states that you can leave it at room temp and then keep it cool and refrigerated.

Pro Tip:  How Long Does Kombucha Last After Opening?

If you don’t refrigerate your kombucha, ensure that the bottle is kept away from direct sunlight and source of warmth. Both of these can harm the live cultures present in the beverage.

Kombucha is a food that is cultured and high in probiotics, comparable to yogurt and kefir.

The cultures tend to become significantly more active at the temperature of room, which could result in excessive carbonation, as well as a tart flavor. In extreme circumstances the kombucha may change into vinegar, which is absolutely not what you’re looking for.

However, it is important to note that if the manufacturer states that you are allowed to keep their beverage (which can be described as fermentation tea) in the kitchen or in the pantry you are free to do that.

They’ve prepared the kombucha in such an approach that allows it to keep it at room temperature for a longer time.

If you make homemade Kombucha, it’s stored in the refrigerator, just like the other brands sold in stores.

Naturally, you’ll take it out to the fridge after you’ve finished making it. This is because the cold temperature slows the process of fermentation significantly (and this is the reason we usually keep the kombucha in the refrigerator).

How do you freeze Kombucha?

Certain experts believe that the freezing of kombucha can destroy the probiotics that make it a health drink. This could be because of the slow-freezing process at fault. However, it is believed that it is possible to flash-freeze kombucha in order to keep at least half of the probiotics that it has.

You can freeze kombucha using an airtight container that has the room to expand. Some recommend that you make kombucha from a store directly in the container you purchased it in. Others suggest pouring the kombucha in a bigger airtight bottle.

It is possible to flash-freeze Kombucha at home. All you need to do is dip your sealed container of kombucha within an ice bucket and sprinkle salt on it until it is solid. Transfer it into the freezer.

Kombucha is a great ingredient for frozen desserts. You can keep all the beneficial probiotic properties and have a refreshing popsicle or Slushy made from kombucha, generally frozen or fresh fruit.

It isn’t advised for freezing the SCOBY, however, it is possible. The living organism involved in the production of kombucha could end up dying when frozen, but there are some who believe that it is possible to flash freeze the SCOBY without harming.

How can I thaw Kombucha?

The kombucha should be thawed in the fridge and then plan to drink it within the next day. After thawing, the cultures would be dying if stored in the fridge or the room temperature.

Because it needs to be consumed quickly, it is suggested to make small batches of kombucha to freeze. This is the reason that people often make popsicles and Slushies with it and then store the drink in the refrigerator instead.

Frequently Asked Questions

How Long Does Kombucha Last After Opening?

What exactly is an SCOBY? It is the abbreviation for Symbiotic The Culture of Bacteria as well as Yeast. It is an organism living in the body that produces beneficial yeast and bacteria, and has the benefit of probiotics. It’s a gummy layer of substance which typically is found on the surface however you may discover “baby SCOBY” forming at the bottom of every bottle of kombucha.

Can kombucha become alcoholic? In addition to sugar, kombucha may be converted into an alcoholic beverage that is similar to beer. It is because yeast feeds on sugar and produces alcohol. This is not likely to occur with the bottle kombucha you purchased from the supermarket, especially when you keep it in the refrigerator. However, if you’re making Kombucha at home, then you can make it into a alcoholic drink.

Wrapping Up

How Long Does Kombucha Last After Opening?

This article addressed this question “How long does kombucha last after opening?”, and does kombucha go bad?

This drink is beneficial for those who want to be healthy and fit. Humankind has consumed it for over two millennia. It’s carbonated, and has caffeine in it which makes it an excellent alternative to soft drinks that are sugary. Make sure to store it correctly and you’ll be able enjoy a good digestion balance.

Does Granola Go Bad? How Long Does It Last? 

healthy home made granola

Does Granola Go Bad? 

Does Granola go bad

Does Granola go bad? If you are looking for an authentic post about Granola, you should continue reading it. Yes, Granola has experienced a rise of popularity thanks to the rising popularity of fitness. Granola, of late, has become a part of a healthy diet since it’s made up of oatmeal and dry fruits that are rolled with honey, brown sugar and puffed rice.

Granola can also be found with flavorings like chocolate and may also contain flax seeds that help with digestion. It’s a source of carbohydrates and proteins as well as being very low in calories.

Granola is also available in bars, which are easier to carry around. Granola bars are a great snack that is nutritious, filling and delicious all at the simultaneously.

Does Granola Go Bad? How Long Does Granola Last?

Granola isn’t a brittle food item that can be easily spoiled. Granola is still a good snack for a while after it’s been removed from the packaging.

Granola that is purchased from stores typically is able to last for six months. Granola is able to last a long time if stored in the right environment.

Although it has been said that granola remains edible once it is opened, you must look for ingredients that are prone to oxidizing.

If you have ingredients that may react with air, it is prudent to store the granola in a dry, air-tight, dry container.

Granola is a good choice for storing granola in the wrong storage conditions. If there’s an excessive amount of humidity in the storage space or pantry, and the product is not kept in an airtight container then the moisture could get into the granola.

After that the granola will not be as fresh, and could be unsafe to eat by people who have digestive issues.

How to Tell If Granola Is Bad? Granola Shelf Life

As I mentioned previously when granola was not properly stored humidity and oxygen may be the main culprits in creating a deterioration of your granola.

The granola could cause it to appear moldy or even show signs of organic growth that isn’t a good thing to eat.

If the granola is left open for a prolonged period, it is possible for oxygen to come into contact with the components contained in the granola, and cause it to turn it rancid.

A bad granola can also be characterized by the typical smell that can’t be overlooked. Even if the granola doesn’t smell, or does not appear to be particularly moldy it is possible that the granola will have lost its freshness and taste chewy.

It will have a spongy texture that will eventually turn you off from eating it. This means it’s time to dispose of it.

If you have any question regarding storage, shelf-life, getting bad from granola bars, you’re on the right spot. Interested? Let’s start right now.

Does Granola Go Bad?

Granola does not spoil quickly. If no pantry pests or water are introduced into the bag, granola purchased from stores is safe to consume for months beyond the expiration date.

Of course, its taste slowly decreases and, eventually you’ll need to open another bag. You should throw out granola that smells like rancid or off.

Granolas typically contain a small amount of oil, and it could turn rancid after long storage. If yours smells like paint from the past and rancid oil you should leave it alone.

Are they are moldy? If water enters the container, the granola may produce mold. If that happens, you should get rid of it.

There are also pantry bugs inside the container. If the granola is a little old-fashioned, it’s is up to you whether you decide to keep it, or throw it out.

Does granola expire? Actually, the answer is no. On the labels, you will find a date. It exists to tell you about the time frame in which the granola is likely to keep its top quality. If yours is beyond its expiration date, be sure to check for indications of spoilage. If all appears to be fine, you can eat it.

Do granola bars expire? Similar to granola, if the granola bar you bought in the past and smells fine is it suitable to consume. If it’s slightly older, you’ll have to decide to decide whether you want to eat the bar or not.

How Long Does Granola Last?

Granola is usually fresh for between 6 and 12 months after it has been baked and this date is marked as the date of best-by at the bottom of the package. After opening the bag, the granola is going to retain its quality for a period of 1 to 4 months, based on the ingredients used and if only everything is stored properly.

The time for storage of Granola is contingent on the brand and the ingredients that are used.

The majority of brands have their own suggestions and the recommendations vary. For certain brands, it’s either 4 to 6 months and some brands recommend a full year.

Certain types of granolas are made with ingredients that aren’t likely to keep their quality for long, for example, dried fruit or nuts. Other varieties may include preservatives, or other additives that prolong the shelf time. This is the reason why the times are all over the places.

It’s not the case that granola spoils over the course of a week or day following its expiration date. It loses quality with time and eventually it will not be acceptable any longer.

Granola: best before date

What’s the longest time the granola can be used? It’s hard to say. If it’s one of the durable varieties, it’ll likely remain fine for another 2 or 3 months, possibly slightly longer.

If you’re on the other side, you’re buying one with an extremely short shelf-life the flavor will likely diminish quickly and will become stale in one or two months.

The same is true for open Granola. The longer its shelf life is the longer it can maintain its good quality once it is opened.

As with breakfast cereals, even when the cereal is a few months old It’s still sensible to determine if it’s safe to eat it instead of throwing it away immediately.

Granola bars typically maintain their good quality for six to 12 months after they are made depending on the brand and the ingredients employed. Most of them are pretty good for 3-4 months after the date of best-by.

It’s best to unwrap any “expired” bar and check whether it’s safe for you for consumption following the steps I’ve already laid out.

If everything seems okay, take a small amount to make sure that it’s tasty as well. If it is appear to be fine, you’ll have an okay signal to gobble it down.

How Long Does Homemade Granola Last?

Granola made from scratch usually lasts for about a week at room temperature, or a couple of months stored away in the freezer. The best place to search for an accurate estimate is the recipe that you’re making.

If this information isn’t available you can assume that the homemade granola lasts for approximately two weeks in the cabinet and up to three months in the refrigerator.

How To Store Granola

Granola should be stored in an air-conditioned, dry, and dark area. A kitchen cabinet or pantry is ideal. After you have opened the bag, make sure it’s shut tightly, or place the remaining food into a sealed container.

If you’re looking to preserve fresh granola for a few more months, it is possible to put it in a freezer. The details will be discussed later.

Certain granolas and bars can benefit from chilling in the refrigerator. If the label states that you can refrigerate the item to increase the quality, take note that it should be not opened or sealed in the form of a bag or container. In this way, it won’t absorb any moisture from the refrigerator.

If you are certain that you’ll need to finish the bag of granola within one or two weeks, there is no reason to transferring the remaining ingredients into another container. Instead, you can seal the bag using a sealing clip and then call it an evening. That’s how I go about it.

If you’re having trouble with pests in your pantry (or recently) choosing containers is the most effective solution. So, you don’t have to worry about bugs that might be infesting your granola.

Can You Freeze Granola?

Granola can be frozen as well, which is an effective method to prolong the freshness of your product for an additional couple of months. You should place your granola in an airtight container. After that, add the label you would like seal it tightly, and finally place it in the freezer. That’s it.

How long can you freeze Granola? Some brands suggest 2 months to ensure the best quality; however, others recommend a longer period of up to 6 months.

In general, it is possible to assume that the food you buy will keep its flavor for 3 to 4-months in the refrigerator, and maybe even longer than 6-to-9 months.

If your granola has any ingredients that don’t freeze well (e.g. any ingredient that alters the texture when it’s thawed) isn’t an ideal choice to freeze. It’s a good thing that most granolas are perfectly.

4 Tips To Store Granola

Proper storage can make a big difference in the length of time your granola lasts regardless of whether it’s a store-bought or made at home.

If you bought one it, be sure to check if the original package contains storage guidelines. In certain cases there is information on how long the product will be used after opening.

It’s generally simple to store as it has a lengthy shelf life given how it is. However, improper storage could cause it to degrade quite quickly, and that’s why you need to be aware of it.

Take a look at the following tips to find out how you could ensure that your granola in good condition for as long as you can.

Keep The Air Out

Granola is a source of nuts, and perhaps raisins, and all of them may become stale after exposure to air. To avoid this, you should store the food in an airtight bag or container.

This is particularly the case when it comes to homemade granola, which doesn’t have as much sugar, or any preservatives. It’s not necessary to chill it but storing your granola inside an airtight container will increase its likelihood of remaining fresh for a prolonged period.

Repackage/Seal It

Likely, leaving the granola open to the elements of moisture, air and heat can shorten its shelf-life. Always ensure that the original container is sealed prior to placing it in storage.

When you have opened a bag of granolas, you need an a seal clip and close it securely. This will stop air from entering. You can also put everything in a ziplock.

Find A Cool And Dry Place

After you’ve found the ideal method of packing your granolas, it’s time to decide where you’ll store it. The best and most recommended location to keep the granola is inside your kitchen pantry but only if it’s dark and cool.

Examine your pantry to determine whether you have mold or insects that could harm your food items. If not, you’re safe to keep your granola.

Refrigerate

The process of storing granola in the refrigerator isn’t very effective to preserve it. But, it might aid if temperatures are extremely high in the area in the area you reside.

The high temperatures can cause the chocolate to melt, and oils to become stale. In this instance it may be beneficial to store this granola into the refrigerator. However, ensure that the temperature in your refrigerator isn’t too cold as this could make the granola difficult to chew. Make sure to put it in a bag that is sealed or container too.

The Risk Of Consuming Expired Granola

Granola that you buy from a store is suitable to consume up to months after the expiration date, meaning you’re unlikely to experience health issues. All the ingredients are made of plants, so they won’t spoil.

In the end there’s no danger from eating granola that’s expired. Even the soft one that you discovered in the middle of your pantry is safe to eat in the event that it’s not contaminated by mold.

It is possible to feel nausea and nausea if the granola contains butter and is 2 years old. It could have an unpleasant smell that you would notice prior to eating.

There’s one thing for certain that you won’t get food poisoning if you consume old, store-bought Granola. If it’s made from scratch but you may get uncomfortable, and even so you’re not in serious danger.

Wrapping up

So, does Granola go bad? Yes, it does unless you store it properly. Anyway, Granola is a nutritious breakfast or snack that is quick to prepare. The best part is that one can prepare it in bulk to enjoy over several weeks.

It’s not a problem to keep it fresh. However, it may get a bit sloppy and lose its flavor. To avoid this, you should ensure that it is protected from light, air and moisture. You should use it for at least six months.

Does Prosecco Go Bad?

prosecco

Does Prosecco Go Bad? How Long does Prosecco Last?

Does Prosecco Go Bad?

Prosecco is the most well-known sparkling wine made in Italy is the first option when it comes to choosing an aperitif or after-dinner drink. If you’re one of those people, then you’ll definitely have plenty of questions about prosecco.

Does prosecco go bad? Prosecco that has not been opened does not really spoil. However, it is advised to consume the prosecco within 2 years after it’s been stored in bottles. Prosecco that is opened and kept in the refrigerator is in good condition for just 3 to 4 days following when it starts losing its fizziness, smell and taste.

Keep reading to find the answers to all your Prosecco-related questions you’ve ever asked.

How Long Does Unopened Prosecco Last?

Prosecco wines are far more affordable than champagne. It is sold at half the cost as the well-known French bubbly wine a few customers buy several bottles of prosecco when their local grocery store offers them for sale.

What’s the length of time the bottle unopened of Prosecco keep? Prosecco does not technically “go bad,” but its flavor can change with the passage of time. It could be able to lose the fizz, and reduce in size.

Experts suggest drinking prosecco within 2 years of when it is bottled. It is at this point that the fizz and the taste of the drink are at their peak. The quicker you drink and open the prosecco, the more you’ll be able to taste the fruity aromas within the drink.

Does Prosecco Get Better With Age?

While some vintage wines gain by a long time inside the wine cellar Prosecco isn’t. As we’ve already said that it is recommended to drink prosecco as soon as it is bottled.

Prosecco’s reason for not being able to improve with age is due to its greater sugar to acid ratio. Actually the wine will get old if you try to alter it. It will lose its luster and lose its freshness.

How To Store An Unopened Bottle of Prosecco?

There are a few guidelines for storing the unopened bottles of Prosecco.

In the beginning, it is important to keep the cork in a straight position. This will prevent contact between the wine and the cork. If the liquid reaches the cork and becomes very damp, it will allow air to enter. In the end, your prosecco may go to stale earlier than you expected.

The second reason is that prosecco should be kept in a dark place far from lights. Prosecco bottles are typically dark-colored. Although this shields prosecco from light up to a certain degree but it doesn’t offer complete security.

Also, keep prosecco safe from the heat. It is important to ensure that the temperature of the space where you store the bottle isn’t high. It is not necessary to keep the unopened bottle of prosecco in the refrigerator. It can be chilled prior to serving since the majority of people do not like drinking prosecco at room temperature.

If you adhere to the professional guidelines that you follow, the temperature of the sparkling wine should range from 6-8 degC when serving.

Is There A “Best Before” Date On Prosecco?

Prosecco comes with an “best before” date. In the case of numerous products this date may be ignored, but when you are dealing with prosecco, it is advised to follow the guidelines.

The date printed on the prosecco bottle isn’t just a producer’s prediction of how long the wine will keep its best qualities , but it’s a general fact.

So, be on the lookout for the “Best Before date of this wine is sparkling and don’t forget to open the bottle when you get the chance.

Does Prosecco Go Bad in the Fridge?

First of all, prosecco that has not been opened should not be stored in the refrigerator unless have guests coming and you are planning to serve them the drinks. Prosecco can be stored in the refrigerator for a maximum period of four days.

If you keep it in the refrigerator for more than a week it will dry out. This is where the problem begins. As the cork begins to dry the cork loosens, causing an oxidation process and changes to the aroma and flavor that the wine. Furthermore it is also possible to reduce the bubbles.

For an unopened bottles of Prosecco,  you may store it in the refrigerator for two to three days. Then, you can dispose of the prosecco because it is no longer appropriate for consumption.

Do You Have to Refrigerate Prosecco After Opening?

If you are looking to store an entire bottle of prosecco, there will be no other choice other then the refrigerator.

Do not let a bottle that is opened Prosecco at room temperature, even if you think you’ve successfully returned the cork in the bottle.

How Can You Tell If Prosecco Is Bad?

If you store it properly, a bottle of prosecco is likely to spoil. Prosecco’s chances of getting stale are higher if you’ve kept an open bottle in the refrigerator for a couple of days.

The indications of spoilage that occurs in prosecco can be discoloration (darker brown to yellow) or staleness, flatness loss of aroma, bitterness.

What Happens If You Drink Old Prosecco?

Like old champagne, the old prosecco isn’t a cause for health issues If you consume it.

In fact, you likely will not drink it after one sip, as the old prosecco isn’t bubbly and fruity that it was in the past.

5 Ideas For Leftover Prosecco

If you’ve had the prosecco after your meal and you are left with a half-full bottleof prosecco, is it advisable to repeat the drink over the next few days or is there a different method to use the prosecco you have left?

Do not let the Prosecco get flattened and then go bad within the refrigerator, you should rather play around with it. There’s more you could accomplish with prosecco than you imagine. If you’re not sure that you’ll drink the sparkling wine in two to three days, you could at least have a blast by using it in other ways.

Here are some fun methods to drink prosecco that differ from the usual method of drinking it.

  1. Prosecco Syrup for Pancakes

If you’ve had an alcoholic glass of prosecco after your meal, but don’t wish to put the rest in the refrigerator, prepare an syrup of prosecco and pancakes. In the morning, you’ll have a type of breakfast you’ve not experienced before.

Make 200ml of sparkling wine along with 200 grams of sugar , stirring until the mixture becomes thicker. Make pancakes using your preferred recipe.

Serve the pancakes with syrup of prosecco. Are you familiar with pancakes that have this unique twist?

  1. Prosecco Pears

While this strategy will not help you rid yourself of an enormous quantity of prosecco, it can certainly help you find other ways to enjoy the drink that is so popular.

Peel a few pear. Sprinkle them with lemon water to stop them from browning. then add several layers of Prosecco. Place the pears into an oven. Cook for about an hour in a sealed pan.

Prosecco-infused pears are amazing when paired with ice cream and the addition of a little cinnamon.

  1. Prosecco Sauce for Scallops

The prosecco seafood sauce is for those who are bold. If you are a fan of sauces that create your dish unique it is a good idea to try this one.

Chop some shallots and garlic , and sauté them with butter for about two minutes. Add 150ml of the remaining sparkling wine and some lemon juice. Cook at a low temperature until the sauce becomes thicker.

Take advantage of scallops as well as pan-fried seabass.

  1. Prosecco-Berry Sorbet

If you’re seeking a more elegant way to make use of the prosecco left overs, this recipe could be a good fit for you.

Create a berry sorbet using simple sugar syrup and the berries and lemon juice. Then freeze to achieve the perfect consistency for sorbet.

Once the sorbet is prepared to serve, pour a little into a glass of your choice and pour a glass of prosecco over it.

  1. Boozy Prosecco Ice Cubes

If you’re not up to cook, and you just want the half-full bottle and out of your way this is the ideal choice for you.

Pour the drink onto Ice cube trays. When you next host an event, your guests will be impressed by your inventive Ice cubes.

Related Questions

Does Prosecco Last Longer Than Champagne?

As we’ve previously mentioned in the article, Prosecco does not spoil as other items do. Similar is the case for champagne. There are merely specific times when you are advised to drink these beverages.

If you hold off for longer than you should, Prosecco and champagne will start to become less sparkling. In addition, the taste is likely to begin to fade.

A champagne bottle that is not opened is recommended to consume it within four years. Its taste is the best during this time frame.

For prosecco, it is believed to be best in 2 years following it is bottled.

Therefore, champagne technically is more durable than prosecco.

Does Prosecco get stale after being it is opened?

Prosecco will begin losing its carbonation once you remove the cork. The carbon dioxide is flowing out of the bubbles. After Prosecco is opened, it is recommended to consume in the next 24 hours.

The use of an Champagne stopper can help prolong its lifespan, but not more than 12 hours. Drinking straight Prosecco isn’t harmful; however,  it’s not bubbly. When Prosecco is flat, it’s similar to other white wines that have a shelf-life of around 2-3 days.

How do you how do you store Prosecco after it’s opened?

In contrast to still wines, the corks of sparkling wine can’t be put back into the bottle. It’s designed like the shape of a mushroom to handle all the force of bubbles when it’s open.

You can purchase the Champagne stopper to keep the bubbles. It will seal on the cap of the bottle, and stops the bubbles from dispersing. By keeping the bottle on the ice or in the fridge can also reduce releases of carbon dioxide, which is the substance that bubbles are made up of.

Do spoons help Prosecco last for longer?

You might have heard about placing a spoon, with the handle down inside the wine’s neck will prevent the bubbles from flattening. Unfortunately, this myth has been disproved!

In this report from Scientific America a spoon in the neck of the bottle could not stop or slow in the eventual loss sparkle. The only way to ensure that the champagne stays fresher longer is to stop the bubbles from escape using the use of a Champagne stopper.

Do old Prosecco cause you to be sick?

It’s extremely unlikely to be sick after drinking old Prosecco. For, Prosecco has alcohol that creates an inhospitable environment that allowed bacteria to flourish. The older Prosecco might not have the refreshing and fruity aromas, but it’s not likely to cause you to become sick.

Does Prosecco have a shelf life?

Yes. The shelf life of Prosecco is three years in the right conditions. Prosecco is loved by many for its refreshing and fruity. The aromas and flavors of Prosecco and, in particular, the bubbles, will begin to diminish after 3 years.

Should Prosecco be kept by its sides?

Prosecco should be kept in a side-by-side manner. Much like other wines, Prosecco is closed with cork. Cork is an organic material that alters in size depending on the level of humidity. In extremely dry environments, cork starts to shrink, which weakens the seal, and allows oxygen to enter the wine. The oxygen in wine causes it to age prematurely.

What is the age of my bottle Prosecco?

This is a tricky one because typically Prosecco is NV which means that it might contain grapes from a variety of varieties inside. There may be a date on the label that indicates the age of the wine, but generally, there’s no way of knowing. If in doubt, sip Prosecco whenever you can to ensure you’re drinking it fresh and young.

What is it that makes Prosecco so inexpensive?

Prosecco is among the most affordable sparkling wines. It is this because of the method by which bubbles are made. Prosecco is produced using by the Charmat method, also referred to as the tank method.

This means that the entire wine is carbonated in a tank, and the second fermentation doesn’t take place inside the bottle. This is a quicker and less labor-intensive method of making sparkling wine. It is evident in the price.

Do you think Prosecco can be served chilled?

Prosecco is best consumed directly from your refrigerator, or in an an ice bucket. Prosecco should be served chilled so that the cork does not fall off as you shake the bottle.

Keep Prosecco in ice when you’re drinking it to ensure optimal bubbly and flavor.

Are Prosecco dry or sweet wine?

Prosecco is typically dry, that is, that it isn’t as dry as Brut but it’s also not as sweet. Its sweetness Prosecco is dependent on the amount of sugar is added to the second fermentation within the tank.

Wrapping up

Prosecco is a refreshing, light-bodied white wine that many people love. This sparkling wine is an affordable alternative to champagne, and it is still a great choice for many occasions. A glass of prosecco can be a fun addition to any day.

Although you might think that stocking your wine cellar with prosecco makes sense, have you ever wondered: how long does prosecco last?  Or does prosecco go bad?

Well, there’s nothing worse than flat bubbly. You must make sure that your prosecco lasts at least two years by purchasing high-quality bubbly.


How Long Does Yellow Squash Last? 

Yellow Squash  

How Long Does Yellow Squash Last? 


The yellow squash is a vegetable of the Cucurbitaceae family. It is a good source for vitamin A, C, and potassium. They are very common in the United States, particularly during winter months when they are harvested from September to December.

This blog post will first answer the question: how long does yellow squash last. Then it will discuss other issues like how to store it and how to eat it.

What is Yellow Squash?

The yellow squash, also known as summer squash is a type green, elongated vegetable.

It can have skin colors ranging from light to dark yellow and flesh that can range from pale yellow to deep yellow-orange.

Yellow squash should be picked as soon as possible (usually between four and six weeks). This is because their tougher skins make it more difficult to peel later.

Yellow squash tastes like zucchini, but has more flavor than summer squashes like spaghetti or patty-pan squash.

They are also easier to cook because they have fewer seeds than other summer squash varieties.

Yellow squash is often eaten raw, in salads, or chopped up and combined with other vegetables.

They can also be sautéed, grilled or baked.

Because squash is not easily softened by air, it can be stored for long periods of time.

They are perfect for cooking dishes such as soups or stews.

How to store yellow squash?

Yellow squash is considered a vegetable and should be stored in the same way as other vegetables.

Pre-cut them and wash them.

Cut them and place them in a bag or container that is airtight.

Yellow squash should be placed near the bottom of the fridge, so that it is coldest close to the produce drawers. This is where you want your vegetables stored at all times.

This will prevent it from rotting and make it last for longer.

How long does yellow squash last? Is Yellow Squash a Bad Food?

Although squash is a healthy vegetable, its shelf life can be short.

You can enjoy yellow squash for as long as you want without worrying about it going bad.

Most vegetables have a shelf life of three to four days. However, this depends on several factors like temperature, moisture, pH levels, and how long the refrigerator or freezer has been kept.

Yellow squash, for example, has a shelf-life of approximately four days.

The vegetables can be used in many recipes for a long time, but they are susceptible to bacteria growth when not properly stored or handled.

If stored properly and handled correctly, cut squash can last for up to four days.

This vegetable can be susceptible to bacteria growth in the fridge.

Keep yellow squash in the refrigerator for as long as possible.

Uncooked yellow squash has a shelf-life of approximately three weeks.

Yellow squash can be stored in the refrigerator for up to 4 days. However, it should be consumed before that expires for maximum taste and nutrition.

Is it possible to freeze yellow squash?

You can freeze yellow squash.

This is best done by cutting it thinly, then placing them individually on a baking tray before placing them in an airtight container or bag for long-term storage.

Make sure to thoroughly thaw frozen vegetables in cold water before you cook with them. They won’t cook properly if there are any ice crystals within the food.

They can be stored in the freezer and used immediately.

Frozen vegetables can be stored in a freezer for up to 12 month and can still be used as their non-frozen counterparts.

How to freeze summer squashes?

Before freezing the vegetable, ensure that it is completely dry. If you plan on blanching the vegetable, you can pat it with a paper towel.

Cut into small pieces, approximately 1 inch thick. This will depend on how long it takes to cook them thoroughly.

To freeze quickly and without sticking together, place one layer of cut vegetables on baking sheets covered with parchment paper. After the veggies have frozen completely, take them off the parchment paper and transfer them to an airtight container or bag.

Blanch your vegetables first, and then freeze them once they have been cooked.

How to Freeze Winter Squash?

Winter squash’s fruit body is more rigid than summer varieties. This makes it easy to cook the squash before freezing, so you can throw it into soups and other dishes for a quick meal.

Frozen Butternut Squash (recipe)

1 butternut squash

Salt and pepper

Optional food processor

Remove the outer skin completely. Take the squash and cut it in half. Then, use a large spoon to scoop out the seeds. Cut the squash into 1-inch pieces and heat your oven to 400°F.

Put the winter squash in a baking dish. Now you are supposed season with salt and pepper. Cook for about 30-40 minutes, or until tender.

You can either freeze the cooked squash in an airtight container or put it in a freezer bag. You can add purees to soups or pies.

How long does butternut squash keep after being frozen? This squash can be kept frozen for up to one year, but it will taste better if you use it sooner. Before using frozen butternut squash in your favorite recipes, it is best to let it thaw in the refrigerator overnight.

Did you know you can also freeze watermelon? What is the shelf life of a watermelon in the freezer? For a tasty smoothie or cocktail, freeze watermelon cubes for up to six months.

Our favorite meals enhancers are summer and winter squashes. They provide essential nutrients and flavor to our favorite dishes.

These vegetables can be used in many different ways and it is easy to keep them fresh. No matter what squash you prefer, it is important to know how to keep squash fresh for all of us squash-lovers.

How do you tell if yellow squash is bad?

Many home cooks love yellow squash in the summer. But, it is important to be able to distinguish between good and bad yellow squash.

Here are some warning signs that your squash may be contaminated:

A pungent (off) smell or flavor that may be present along with sliminess.

Skin that is swollen and softened is often caused by squash that has been kept at too high temperatures for too long.

Insect infestation can manifest in many ways. Live insects or empty larval shells may be found around food items. Larvae are also present on food surfaces.

You should immediately throw out your yellow squash if you see any of these signs.

A lot of slime can be seen on the skin’s surface, which indicates that there is decay beneath the skin’s outer layer. Watery spots and a soggy appearance inside the fruit are signs of rotting flesh.

You should immediately dispose of any squash that has any of these symptoms.

Cooking around it can also be made more difficult by its off-flavor.

Summertime favorites such as yellow squash can be stored in isolation for as long as possible. Then, store them in the fridge for up to seven days.

Wrapping up

How Long Does Yellow Squash Last? 

Yellow squash is a versatile vegetable that can be eaten raw or cooked. This means that you might want to have some in your home at all times. We hope that this article has answered any question you may have about yellow squash after it has been cut.

Although yellow squash is nutritious, its shelf life is very limited. If it is not properly cared for, it will quickly go bad. Its shelf life is also dependent on how it is stored. At normal temperatures, yellow squash can last almost three to four more days.

How long does yellow squash keep good quality? The refrigerator can help preserve its peak quality for as long as a month. The shelf life of yellow squash can be extended to three months at the most if it is stored in the freezer.


How Long Does Queso Last?

queso

How Long Does Queso Last?

How Long Does Queso Last?

Queso is a form of cheese dip very popular in Mexican food. You can make it using the cheddar cheese, Colby as well as Monterey Jack cheeses.

It is also being served as an appetizer in bars and at parties across in the United States.

Most people haven’t had the chance to experience queso, and they don’t know what to do with it. In addition, they are looking for an answer to the following query: How long does queso last?

This article will help answer these questions and many more.

How do you define Queso?

Queso is a Mexican cheese sauce that can be prepared using either American-style white cheese or American yellow cheese.

The dish was originally developed within Central America and the Caribbean but has since become an iconic element of Tex-Mex cuisine.

Queso is a fantastic dip for tortilla chips , or an additional topping for tacos, burritos or nachos.

It’s also widely used to fill quesadillas (a kind of tortilla that is stuffed with food).

A few dishes that incorporate Queso includes: Fajitas con Queso; Enchiladas Verdes as well as Fiery Queso.

It’s important to know that the term “queso” is not limited to Tex-Mex cuisine.

Queso is an ingredient in a variety of dishes such for: Quesadillas as well as Nachos; Spaghetti with vegetables as well as cheese Sauce; Macaroni & Cheese and Stews or Soups with Cheese additions.

In Mexico there are numerous varieties of cheese sauces which Queso came from, such as Chihuahua cheese sauce, Menonita cheese sauce, Puebla Style cream sauce, as well as Sonora cheese sauce to mention some.

What is the best way to Make Queso?

Do you enjoy Mexican food? If yes, this recipe is for you.

This step-by-step tutorial explains how to make Queso at home from scratch.

Follow these easy steps to discover the ingredients you should make use of and why they are crucial in creating your ultimate dip that is certain to be a hit with your most-loved chips.

Ingredients:

  • Evaporated milk
  • Cheddar Cheese
  • Tomato Paste
  • Jalapeno Peppers
  • Garlic Powder
  • Salt, and Pepper for taste
  • The cayenne pepper and the cumin

Directions:

In a medium-sized saucepan in a medium sized pot, melt butter on moderate temperature.

Incorporate jalapenos, tomatoes and garlic powder into the pot.

Cook for approximately five minutes. This allows the ingredients to release juices, which will assist to maintain the consistency of the dish later when you include milk and cheese to it.

Next, add evaporated milk, stirring it until the liquid has completely evaporated from the pan (about about three mins).

While stirring constantly, gradually add cheddar cheese (one cup at each time) until the cheese is completely melted into sauce.

Re-test the mixture before adding salt or pepper as is required to get the desired flavor degree. For those who love spice and want some extra spice: Add Cumin or Cayenne Pepper in the last few seconds of tasting.

Transfer the mixture into a pot and cook over low heat until desired thickness has been reached (about about five minutes).

Remove from the heat and place in the bowl or dish for serving.

The recipe is simple to prepare and can make enough food for four portions according to the level of your guests’ appreciation for it.

Queso is served with tortilla chips for an appetizer or with other Mexican food items at dinnertime.

Also, if you wish for this queso with an extra spice, add Cumin along with Cayenne Pepper in the next tasting until the desired amount of spice is achieved.

This recipe is fantastic since the melting cheese goes creating a cohesive sauce that connects all these ingredients together.

How do you store Queso?

Queso is generally an unrefrigerated food item.

It will spoil more quickly than bread or yogurt, but it can be slowed by filling coolers with ice packs to keep it cool and fresher for longer.

If you’d like to store to keep your Queso to be used later or even save some (or should you plan on not eating the entire portion), wrap it tightly using plastic wrap suggested.

Make sure not to cross-contaminate other foods, even though.

If there’s no option to store the Queso and you’re not able to refrigerate it, then you’ll need to find a facility which will store it for you.

A lot of grocery stores offer queso in their cheese section. They can also be found in Latino supermarkets.

If you cannot find it locally, you should plan to freeze immediately you can following purchase, though this might not be possible with certain cheeses.

How Long Does Queso Last? Does Queso Go Bad?

Queso is able to last an extended time since it is not cooked.

If you keep the queso in a sealed seal, it will last for up to five hours in the freezer.

If you intend to keep it for a long period of time be sure you’ve put in preservers such as the oil of canola or vegetable.

If the queso is kept with no ingredients, it can begin to give off an unpleasant smell and taste within a few days of storage.

To ensure freshness of your queso longer, make sure to add hot sauce as well as chopped jalapenos to the dish before it completely cools down.

If you buy queso from a store, you can keep it in an air-tight container up to two weeks prior to eating it.

Queso from a store is best consumed within one week of opening the jar or package because the flavor and texture begin to diminish after this time.

If you’d like for yourself some fresher Queso,  you can freeze some.

Freezing Instructions:

Place small portions in freezer bags that have as the air squeezed out as you can (don’t ignore the cubes of ice.) Close the bag tightly and freeze.

After they’ve been frozen put them all together on flat surfaces until they’ve formed a small cheese block.

Then, put them back in the freezer bag to allow you to take one portion at a given time whenever you need it.

How can you tell the difference between good and bad Queso?

Queso can be made using processed cheeses, or cheeses that are fresh, blended with other chilies.

The color of queso may vary according to the type of cheese that is that is used to make it.

For instance, a white and yellow, for example indicates that it was created with American processing cheddar as well as Monterey Jack. If it’s red or orange there are peppers included inside the blend.

What would bad queso look like? The most effective way to determine whether a cheese pot is good or not is by looking at its color.

If you see massive white clumps that are present in your liquid, you could have an issue related to mold.

Sour and unpleasant smells are also signs that it’s time for removal.

Another indicator that your queso isn’t good is if it’s darker, or is perhaps too thick.

It is often identified as white clumps, and generally smells sour.

There are a variety of reasons it is not recommended to eat moldy food, among them that the fungus can cause allergic reactions , such as vomiting headaches, hives, headaches and breathing difficulties.

Frequently asked questions

How Long Can You Store Queso in the Fridge?

Queso is not able to stay very well in the refrigerator. Queso that is fresh can be stored in the fridge for around five days. Queso that is preservative-free like the ones you can buy at a supermarket can last for about two weeks.

If you purchase queso from the restaurant, it can be kept in the refrigerator for 3 to 5 days. Keep an eye out for signs of mold on the surface.

Is Queso Fresco A Good Melting Cheese?

Queso fresco isn’t a melting cheese. If you’re looking for melting cheese, this isn’t the one you’re looking for. This is because it doesn’t melt well under heat like other cheeses.

It is usually utilized as a filling, rather than dip. It will soften but won’t melt when heated.

There are a few options for more melting cheeses include provolone, mozzarella, and cheddar. A different option, Mexican cheese, which is similar in taste to Monterey Jack, is Oaxaca cheese. It’s great with guacamole.

How Do You Eat Queso Fresco?

There are a variety of ways to enjoy queso fresco. It is a great choice for lighter and heavier meals. Queso fresco goes well with enchiladas, quesadillas, huevos, rancheros and carne asada as well as salads and grill vegetables.

What exactly is Queso Fresco and what is the best method to use it?

Queso fresco is rich and fresh. If you make it yourself, the milk is allowed to ferment and curdle. The curdled milk can be strained using cheesecloth and then pressed. Some let it sit for a few days, whereas others make it available for sale or consumption immediately.

The best thing about queso fresco is that it’s very crumbly. It can be easily used in any recipe. Queso Fresco is a delicious snack to eat with tortilla chips, and then include an ounce of sour cream or salsa to go with the cheese.

It is also possible to stuff tacos with queso fresco, or mix it into salads. Queso fresco is delicious on cooked beans too.

Queso fresco may also be cut or chopped rather than crumbling. If you slice it, or cut into cubes it will go well with dried fruits and even meat. This is a healthy and nutritious snack.

You’ll want a special serving dish for cubed, or crumbled queso.

What Do You Do with Your Old Queso Fresco?

Queso fresco cheese makes an excellent addition to almost every Mexican food item. You can easily break up queso fresco, and sprinkle onto your favorite tacos, quesadillas and nachos. It is also empanadas, enchiladas and tamales to mention some. It’s good to sprinkle on salads too.

It is an excellent filler in tacos, too! You can purchase the lazy susan taco station and make use of one or two bowls to store the cheeses you’d like to include in tacos.

Queso fresco’s texture is similar to the texture of ricotta and feta. Queso fresco can be described as a smoky cheese. It is not able to melt and is more used to accompany a meal instead of a cheese which melts faster and can be used as a dip.

Dinner Ideas Using Queso Fresco

Queso fresco goes well with almost any Mexican food. It is great as a topping or filling. Spiced dishes stand out when you add queso frisco.

Tacos

Tacos are an excellent meal option for any time any day of the week. You can pick between soft or hard shells for taco evening or even a combination of both. You can crush some queso fresco pieces to mix in with the other taco toppings.

Supreme Nachos

The best thing about Nachos is they are able to be anything you’d like to make them. You can garnish your nachos with anything you want, from beef lettuce, guacamole, lettuce jalapenos, tomatoes, and onion, or even shredded queso fresco and cheddar cheese.

Quesadillas

Quesadillas are simple to prepare and taste delicious when served by adding queso fresco. Add this to your beef or chicken to make delicious quesadillas.

Tamales

Tamales are made from corn dough, which has beans or meat in the middle. You can easily add queso fresco into your tamales. You can simply crumble some and then sprinkle it in with the rest of the filling for your tamales.

Enchiladas

Enchiladas are like burritos. Add a splash of queso fresco. It’s not just a flavor enhancer but also looks appealing when served over the sauce, too.

Empanadas

Empanadas typically contain an ingredient of protein like chicken, beef or pork. They are served with basic vegetables like corn or carrots. They’re like pockets of dough that has the filling in them. This is a great addition to any meat and vegetable combo you prefer. You should:

  • Cut circles out of the crust of pie.
  • Fill the container with the cooled ground beef and cheese.
  • Fold over and then crimp edges using edges with a fork.
  • Spray the air fryer basket with oil
  • Then, adjust the air fryer to 350 degrees to 375 degrees, and cook for about 8 minutes.
  • Turn each one gently. Spray once more.
  • Using oil or brushing with butter, then with butter or oil for one additional minute.
  • Serve them with sour-cream and salsa.

Wrapping up

So, how long does queso last? Well, many folks believe Queso can last a long period of time, but others do not.

It is made typically from Monterey Jack Cheese, as well as other ingredients, like peppers or tomatoes.

It can last up to 5 days within the refrigerator in terms of the duration of time.

And, last but not least, you should always verify the expiration date in order to make sure it’s still acceptable.


You may also read: What does Guacamole taste like? 

How Long Does Flan Last? 

flan

How Long Does Flan Last? 

How Long Does Flan Last? 

How long does flan last? If you are looking for an answer to this question, you should go nowhere. For one thing, in this post, I am going to discuss in detail about flan and how long it lasts along with other relevant information. Read along if you are interested.

Flan is a sweet, baked treat that is made with sugar and eggs. Flan is available in numerous varieties around the globe.

Spanish food has gained a lot of popularity and has been introduced to different countries through the colonization efforts. Flan is often consumed for a snack or an element of a meal.

In this blog, we will cover the length of time that flan can last and the best way to store it when you decide for making it yourself.

What exactly is Flan?

Flan is an ice cream dessert people from Spain and Portugal typically eat, however, it’s also a global hit. It is composed of eggs that are mixed with milk and sugar.

It is cooked in the oven, with a caramel sauce at the bottom and may be topped with chocolate or whipped cream or even nuts.

Flan can be served with whipped cream, making it even more delicious.

The texture of flan should be silky smooth similar to custard but not as thick.

Flan is a famous dessert from south Spain it has been popular since the middle ages and has the same characteristics with other desserts such as crème caramel, panna cotta or the zabaglione.

It’s a fairly simple recipe that can be made at home, especially for people who are comfortable cooking eggs.

How do I store Flan?

Flan typically has eggs and milk. They are combined with sugar prior to making a ramekin.

After cooling off from cooking, flan needs to be refrigerated overnight so that the custard has time to get set to ensure that when you cut into the delicious cake it’s delicious goodness won’t be wasted.

Flans taste better after they’ve been refrigerated after cooling . However, they don’t require any special attention after being they are stored away. They should be in a sealed container until the time they need to be used again.

How Long Does Flan Last? Does Flan Go Bad?

The flan is baked inside a casserole known as “flan mold” until set.

After the flan has set it will be covered with an outer layer that’s hard to touch, and the inside of the coating is a semi-solid liquid custard.

There are a variety of regional variations of flan. Flan is made using various varieties of sugar, milk vanilla beans, other flavors.

Flan, in general, is best enjoyed when freshly baked.

Flan will last from two to three days in the fridge.

If refrigerated, flan must be stored in a piece of wax or plastic paper that covers the top 1 inch to one and a half inches of the flan’s surface.

This layer prevents the custard from getting wet. of the custard. It also prevents any other food items from being absorbed into it.

Flan can last up to two weeks in the fridge, and is just as tasty without flavor or texture changes.

How do you tell the difference between bad or good flan?

Flan is a light and sweet custard dessert. It is served as a single dish or on large trays.

It is a common food in many Latin American countries including Mexico in addition to Cuba.

Flan can be made using various flavors (chocolate or caramel) or with additional ingredients to add flavor (vanilla extract or cinnamon).

The best way to know whether your flan dessert has gone bad is to look at its scent. When the custard turns sour, it releases a strong unpleasant smell.

The custard-like foam that is on top of the flan can also separate from the remainder of the dish. Additionally, the liquid component of the flan could appear as a dense, gelatinous mass.

Another indicator that your flan is deteriorating can be seen in the way the flan feels, soft or hard.

If the custard appears to be watery, it could be a sign that you’ve got an expired or spoiled flan before you.

How to tell whether your flan is completely ready?

Your flan is finished when it’s light-colored and soft to the touch, but not completely solid. To confirm, put the blade of the knife into the middle of the flan, and about halfway down. The blade should be with a clean edge. Take the baking dish from the oven, and then take the flan out of the bath of water.

Can you freeze flan?

Can you freeze Flan? Yes, and if you do the right thing, you can freeze it for as long as 3 months indefinitely without altering its flavor or the texture.

Flan is among the most popular and well-loved desserts around the world. Flan’s beautiful, soft and flan with a wobbly texture and a delightful sweet flavor are sure to please the masses.

It’s not too hard to create, however you might believe that it isn’t going to have a long shelf-life due to the delicateness of its texture. But , you may be wrong.

The main ingredients in most flans are cream, eggs that are whole and sugar. However, for egg whites, they are the same components used for making Ice cream. Ice cream freezes at the temperature of 0°F, so why don’t you make flan?

Why is it that my Leche Flan has bubbles?

Flans contain ugly bubbles around and the inside isn’t smooth. This is due to the high temperature of baking or steaming or a prolonged baking time which causes the milk boil in the mix. This leads to flans that are overcooked.

How long can custard be kept in the refrigerator?

We typically recommend that you wait 3 hours before you take it away, in the risk zone of between 40 and 140 degrees F. If you have eaten it and feel fine, it is probably fine but don’t give it to anyone who is in the group at risk.

Can you make flan in the mold of a silicone?

This recipe yields a small flan, which can be found in one of my silicone baking molds that is approximately 9” in diameter. You can also use non-silicone baking pans.

Can flan sit out overnight?

Can flan be consumed even if it’s left out for an extended period of time? I wouldn’t suggest that. Although it is loaded with sugar as an ingredient used to preserve food, flan also has milk as well as eggs, which contain an abundance of protein and moisture content. This creates a great place for the growth of unwanted harmful bacteria.

How do you take flan off the mold?

The flan should cool off in the hot water bath till it is sufficient to hold the dish; then chill for 8 hours prior to serving. To remove the flan from the mold take a knife and run it around within the mould. place a plate topside down on the mold. Invert the flan onto the platter.

Can you get food poisoning due to flan?

Some food experts say that leche flan could become a source for bacteria in the event that it becomes spoiled. Ingestion of it could cause stomach pain and headaches.

What is the shelf-life of flan?

Keep any remaining leche flan in the refrigerator inside an airtight container up to 3 days.

Does flan in a sealed container go bad?

Flan can last from two to three days when stored in the fridge. When refrigerated, it should be stored in a sheet of wax or plastic paper that covers the top one inch to one and a half inches on its top. Flan is good for 1 to two weeks in the freezer, and is as delicious with no flavor or texture changes.

Does flan get spoiled when it is not refrigerated?

Flan can never spoil since the primary ingredients are dairy or cooked milk. This kills the bacteria that spoil food, and sugar is also included, which is used as a preservative for ages. The same is true for fluid milk. It doesn’t spoil for weeks based on the date it was made.

Do I have to eat flan on the same day?

Is it possible to store hot flan in the refrigerator? Flans are served warm in room temperature, or chilled. Store the flans within the oven until they are ready to serve on a plate. Custards can be stored in the refrigerator for around two days. They are perfect to prepare ahead of time for parties.

Can you re-cook flan?

Therefore, do not make an overcooked flan, and take them off the stove. The desire to cook an additional few minutes is normal when the flan’s center of the flan is still wobbly. Don’t do it. It’s better to keep it undercooked rather than overcook (as flan continues to cook after you remove it your oven.)

Flans are cold or hot?

The flan will fall on the plate using a squelch and then lift it off the pan then let the caramel flow across the top. (If the flan isn’t able to emerge, then flip it over and set on the bottom of the pan on a hot, wet cloth for just a couple of minutes to soften the caramel.) Serve chilled, cut into slices.

Can you keep flan at room temperature?

Flans are served warm in room temperature or chilled. Store the flans inside the dish of baking until they are ready to serve on a plate. Custards will keep in the refrigerator for around two days. They can be made ahead of time for parties.

Do I need to reheat flan?

Flans are baked in smaller souffles and ramekins until they are set. They are not only adaptable; these flans possess an additional benefit. The flans are baked, then unmolded one day in advance and returned to the oven when required.

Do I need to be covering my flan while baking?

A foil-covered flan will help in cooking. Set the dish on the rack in the middle and bake for 30 to 40 minutes. Check at intervals of 10 minutes, until your flan is displaying the appearance of jello within the center and the sides are cooked. After you take the custard out of the oven they will firm up when they cool.

What can I do to tell when flan is ready?

The flan is done when it is lightly colored and soft to the touch, but not quite solid. To confirm, put the blade of the knife into the middle of the flan, and about halfway down. The blade should be with a clean edge. Take the baking dish from the oven and take the flan out of the bath of water.

Do you want to eat flan hot?

Flans are ready! Super quick dessert. It can be served hot or cold. Make sure to spoon some caramel sauce on top when serving it. If you have any leftover, put it in the refrigerator.

What can you serve with flan?

By adding cream condensed milk, cheese along with evaporated milk. This recipe for flan is guaranteed to be delicious and smooth! Serve it with a gorgeous salad of fruits to soak up the sweet caramel sauce and make for the ultimate dessert.

Can you freeze caramel flan?

Yes, you can. Similar to the majority of baked products, you can freeze flan to extend its shelf life by 1 to two months. Flan is extremely freezer-friendly and does not cause any damage to texture or changes in flavor or taste. Flan is made using foods that are freezer-friendly.

How do you cool flan quickly?

Remove the baking pan and all the ingredients out of the oven and allow it to rest in water at most an hour. After it has cooled, cover the flan with cling film before transferring it to the refrigerator. Then, chill for at minimum 4 hours or up to an overnight.

Can you freeze cheese flan?

It can be kept on the shelf for up to 3 months but keep in that the filling is likely to cause the crust to get soggy. Hence to get the best results, we suggest making it use within one month. You can bake this directly into the oven after it has been frozen.

Why does my flan taste eggy?

Your flan can taste eggy. Freshly cooked flan has more of an eggy taste. But, this is likely due to an imbalance in the egg: liquid ratio.

Wrapping up

So, how long does flan last? Well, I have already discussed this topic in the earlier part of the blog post.

In the end flan, we can say is a kind of dessert that lots of people like, but it is a food that can spoil.

We hope that you have enjoyed this post on flan’s shelf life.

Flan is an incredibly delicious, versatile and delicious dessert. It is served with fruit for breakfast, substituted of ice cream to add an innovative twist on your preferred flavor, or garnished with whipped topping for an experience that is more traditional. Try it if you haven’t.


How Long Does Asparagus Last?

asparagus

How Long Does Asparagus Last?


So, you bought asparagus, ate about half of it and then put the remainder in  storage. But then, after a few days or so, you will definitely start wondering: how long does asparagus last? Not unlike, isn’t it? Read on for more information about asparagus storage.

You don’t want it to go to waste in the time you get a opportunity to utilize it. It’s also a costly vegetable as well as you’re a conscientious spending person.

Perhaps you’ve heard that asparagus is a food item with a extremely short shelf-life and you would like to discover the best method to keep it in storage it to ensure that you can store the asparagus in the place it should be once you get back home.

If one of these sounds familiar, this article is intended for you. Let’s get started.

How long does asparagus last in the fridge?

  • Asparagus 3- 4 days :4 days
  • Asparagus wrapped in a dry paper towel: 5 – 7 days
  • Asparagus in a glass jar with water: 10-14 days
  • Cooked  asparagus: 3- 5 days

Fresh asparagus is good for three to four days inside the refrigerator by itself. To get longer storage time, you need to either wrap it in a damp paper towel or put it on its side in a container that has water in it. The former will give you the opportunity to store it for up to a week but the latter could allow asparagus to last to up to 2 weeks.

As you can see, the durations vary significantly based on how you’re willing to invest when it is time to move to storage.

If you’re prepared to invest a few minutes to go an extra mile (more details on techniques in the section on storage), you can triple the length of time asparagus lasts for.

TIP

If you want to preserve it for a longer period,  freezing is the best option to take.

Another crucial aspect in making the asparagus to last for as long as is possible is picking the best asparagus you can find in the grocery store or supermarket.

Here’s how to choose asparagus from the grocery store:

Pick bunches with glowing green spears, which feel hard to the feel

Avoid slimy, limp, or darkening asparagus

When it is to cooking asparagus it maintains its freshness for around 3 to five days after being stored in the fridge. Similar to its raw counterpart that you can freeze, this is how you keep it over time.

How to store Asparagus

You should store asparagus in the refrigerator in an un-sealed plastic bag. If you would like to preserve it for a longer period, wrap the spears’ bottoms with a damp towel or set them up in a container with a little water. Both  these methods can help asparagus spears to keep their the moisture and improve their quality.

When it is time to the storage of cooked asparagus, simply transfer asparagus spears to an airtight container. Close the cap and then refrigerate, or freeze.

These are the basic points and let’s discuss the specifics.

First, asparagus that is raw is available using a rubber band that is placed around the asparagus. Don’t remove this band when you get at home. It can help secure the spears while in storage.

In addition, unlike other vegetables that are grown in the garden, asparagus thrives in a humid environment. This is why placing it in a half-opened bags of plastic is a suitable alternative. The bag not only helps retain water, but it also lets it to breath.

To make it to last more time, you must to provide it with more moisture There are at a minimum two methods to do this.

The easiest solution is to cover the stalks’ bottom inside a wet (not dry) paper towel, then put them back in the bag and leave it un-sealed.

The most efficient method of storage is to place asparagus in a glass jar filled with water, then cover by a plastic bag

The Best Method To Store Asparagus

If you want the stalks to keep their freshness for a month or longer, you should try a more efficient method of storing them in a container having water in it.

For this, you need a jar or container (or a cup, as you will see in the image) that has about one inches of water.

Put the asparagus upright into the container. Cover the stalks’ tops with a freezer bag or plastic. Do not tie the bag, simply hang it over the asparagus. The vegetables still require air circulation to remain fresh. Replace the water if it becomes cloudy.

Does Asparagus require refrigeration?

There’s no need to chill asparagus when you plan to cook it the day you purchase it. However, if you require it to keep its quality for longer than that, placing it in the refrigerator is absolutely necessary.

How long will asparagus last within the Fridge?

If you throw your fresh asparagus in the fridge in a bags made of plastic, it lasts anywhere from three to four days before beginning to get rotten, similar to in how bell peppers are stored in the refrigerator.

If you decide to wrap the bottom of the stalks in a moist towel, and then place them in the refrigerator, you extend the freshness for another three days.

If you make the effort to place your asparagus in a container that has one inch of water, the asparagus will remain fresh for up to fourteen days.

How Long Does Asparagus Last after Cooking?

Once you cook asparagus, its quality quickly changes. When it is stored within an airtight container it lasts up to up to three to seven days. To keep it more, it is an option to keep it in the freezer.

Place the cooked asparagus in a container for freezing, take out the air, then place in the freezer. If you are freezing asparagus that has been cooked is necessary, do it immediately after cooking, rather than waiting a few days because the nutritional value decreases.

Can you freeze asparagus?

Even  if you use the elaborate storage techniques outlined in the previous paragraph, asparagus does not last as long. It’s also way too expensive to throw away it to be thrown away.

Fortunately, it freezes fairly well. If you purchased too much food on a sale or your plans have changed and you don’t have the time to make it within a couple of days after purchasing and the option of freezing it is the best way to go.

How to Freeze Asparagus

This method of freezing is almost identical to what I use to store broccoli (read more about it in my article about the storage duration of the broccoli).

Here’s how you can freeze asparagus:

Prep. Trim, wash and cut the asparagus.

Blanching

It’s now time for the asparagus to be blanched. Before you place the asparagus in hot water separate the stalks according to the thickness. Small ones should be blanched at 90 seconds for more, large ones for 120 seconds, and the thick asparagus to up to 180 minutes. In general, each spear should change to a vibrant green color after the blanching.

Cooldown

After boiling then transfer the stalks to cold water.

Dry them thoroughly. Remove the water and allow the spears to hang to dry over 10-15 – 20 mins. Dry them with paper towels.

Packaging

The stalks should be divided into a small amount if you do not need all of them at the same time. Then place them in a distinct freezer bag. You can squeeze the air out from the bag and close it with a tight seal. You can also add a label that includes a date if you like.

The bags can be frozen.

How to Find Out If Asparagus is Bad?

Throw away asparagus if:

There’s mold. If there’s a fuzzy look on the spears or black spots appear all over the place, then asparagus is not good.

It’s soft or it’s mushy. The tips typically get darker and limp in the beginning before the stalks turn wrinkled. It’s a broad spectrum, naturally – you could use soft spears, however when slimy residue forms it the stalks need to be removed.

It’s an odor that’s funky. Asparagus doesn’t have much smell of its own. So, if it develops an off smell, it’s an appropriate time to allow it go. Don’t be afraid to use your senses.

Apart from that the asparagus spears may begin to begin to lose the color. Color loss is a indicator that they’re not going to last long, so it is best to take them in as fast as you can.

Similar to other vegetables, you can cut out the ones that aren’t good (and some) or throw away the spears that have been spoiled and use the remainder. If, however, the majority of the stalks have been used to use, you probably should throw all of them away.

When you cook the vegetable before cooking, make sure to give it a fresh sniff. If it does not smell fresh, however it has a unpleasant, rotten smell to it toss it out.

Tips on purchasing fresh asparagus

One aspect to take into consideration when purchasing fresh asparagus spears is the season. The asparagus season is between February and June. April is the best month to buy fresh ones because it’s the peak of its growth season.

Being aware of when to buy the best quality asparagus is the first step. you should also be aware of what to look for in the local supermarket to get the highest quality. When you are choosing the freshest spears, search for ones that have a hint of violet and bright green.

Check the stems for firmness. Beware of buying stems that are limp. Some might advise you to get the best flavor select stems with thinner ones but the thickness does not affect the flavor.

Best Strategies to Utilize Asparagus Leftovers

Despite the most ardent intentions, at times you find yourself with leftover asparagus. Although it’s sometimes okay to re-use the same roast or steamed vegetable for two nights at a row is generally not recommended. Instead of heating your spears, you can use them to serve as a construction block to make something fresh and exciting.

One method to make use of your leftovers is to mix them. Begin by reducing a thick cream into a saucepan, then sprinkle on some pepper and salt, and then add your leftovers chopped up. It should be heated long enough to make your spears toasty and serve it on toast.

Another excellent side dish for leftovers is to mix asparagus along with the peas. Sugar peas are a great choice however so do snow peas and snaps. Cook your peas and then toss into the asparagus to cook to a simmer. Incorporate butter and mix the vegetables until well coated. Sprinkle on some Italian seasoning, and serve warm.

If you want to find ways to make some food leftovers in a main course There are a variety of methods to make it. Cut the asparagus into pieces that are bite-sized and add it to the next dish of stir-frying. It is also possible to add it to any pasta dish.

Once it’s cooked, toss it into the dish at the end to cook it. Rice fried and skillet dishes are fantastic options for leftover asparagus.

If your asparagus leftover is slightly overcooked, or you would like to make use of the fresh asparagus prior to it goes to waste, you can make pickled asparagus.

Wrapping up

How long does asparagus last? No need to ask this question again. For, I have already given the answer in this post. Anyway, Asparagus is a great ingredient for cooking and is certainly a healthier option, particularly when your life has become hectic that there’s not enough time for a balanced food diet.

It is high in minerals, vitamins, and antioxidants, each of which is vital for nutrition and growth.

Asparagus can also contribute to a better mood and less hangovers due to alcohol-related intoxication. To ensure that you get all the benefits from asparagus it is crucial to consume fresh ones.


You may also like: What does cactus taste like?

How Long Does Sangria Last?

sangria

How Long Does Sangria Last? 

How long does sangria last? Let me tell you if summer is around, can sangria be far behind? Absolutely not. With the advent of summer, the refreshing drink that you enjoy on your backyard garden or your lawn, or on the sea beach, is back. The most well-known of all is Sangria. This wine-based fruit drink makes one feel like they’re in the sands of Spain or Portugal.

It is possible to purchase sangria by the bottle, or create your own at your own home. Sangria is usually made using Spanish wines, particularly red, but rose and white wine versions are also becoming increasingly popular.

You can also add some chopped-up fruits. The most sought-after are apples, berries, and lime or lemon juice liquefied with brown sugar , brandy, or rum in the wine and voila! Your sangria is created.

This is the type of beverage that is simple enough to make a large batch at once. You can make multiple pitchers in one go and each one can have distinct tastes.

How long can sangria last in the refrigerator? How long does sangria last in the fridge will differ based on the kind of fruit you’ve selected to include. In general, sangria will last in the refrigerator for up to three days.

Three days after the date, sangria is likely to become stale, begin to lose its freshness and then become undrinkable.

The sangria that you have left in the refrigerator is the ideal place to keep it. Make sure to keep it from being left outside for long.

If you’re planning to take the whole three days in order to consume it, storing it in a sealed container is the best option. However, should you intend to finish it quickly, then a layer of plastic wrap over the pitcher is sufficient.

The method you choose to make your sangria will influence the amount of time it will last. The best method to ensure the longevity of sangria is to let the wine and fruit rest in the fridge for 12-24 hours.

It allows the pieces of fruit to absorb the wine. If you don’t allow the fruit time to soak up the alcohol the sangria may become stale faster.

The wine you pick will also influence how long your sangria can last. White wine sangrias will last longer, up to five days in the refrigerator. However, a typical red wine shouldn’t be kept in the fridge, and must be consumed within three days.

After three days, the wine is likely to undergo oxidation and become rancid.

Avoid Oxidation of the Base Wine

The contact with oxygen is a major enemy for wine. When wine – as well as sangria – comes into contact with air, it triggers an oxidation reaction.

When it’s in contact with air for too long, the alcohol is oxidized to Acetaldehyde. This will make wines smell like bruised fruits. Then it will transform into acetic acids, and this process transforms the wine into vinegar.

The color of the base wine will change due to the process of oxidation. The reactions cause wine to change into an amber-colored shade. White wine is then darker and red wine gets less luminous and dull.

How Can You Tell If Your Sangria is Bad?

As with any alcohol-based wine drink exposure to the oxygen and air can do the most harm. It is easy to determine the signs that your sangria has gone bad from the appearance and smell.

If your sangria appears as if it’s changed color, then it’s probably gone bad. The smell will start to change, too.

There are a variety of methods to determine the condition of your sangria. bad.

Be sure the liquid isn’t cloudy or has any sediments or bubbles floating around. If your sangria doesn’t appear like the typical wine would look, then it’s an indication that something’s not right.

It is important to pay careful attention to the color in your sangria. Red wines appear clearer and white wine may become yellow during the process of the process of oxidation. The sangria you drink is in its peak in the moment that reds appear bright and the whites transparent.

If your sangria has a vinegary smell, it means the base wine has gone rancid, and you need to dispose of it.

If your sangria is sour tasting is a indication that the drink has gone bad.

It’s the process of oxidation that occurs in the wine in your sangria which can make it more acidic. It will also make it smell and taste like vinegar. The cover of your sangria in the refrigerator can aid in preventing some of these reactions. However, it’s something you should watch for if the bottle has been left out for a long period of time.

It’s also crucial to be aware of the fruits in your sangria. It could turn soft or mushy if it’s in proper conditions, which can cause a sour smell.

Beyond a tasting to determine the quality of the drink, don’t drink sangria which has been spoiled. It’s unlikely to cause lasting harm, but it may cause you to feel sick and is better to stay clear of it.

How Can You Make Sangria Last Longer?

If you’ve made a large batch of sangria and prefer to drink the drink in moderation. You can extend its shelf life with the freezing. Take out all the solid fruit and then pour the sangria into an ice-cube tray that is placed in the freezer. When the sangria cubes have frozen solid, place them in a freezer bag to keep them. You can then have it ready to defrost the future.

It is possible to freeze the sangria, which could add a couple of weeks to its shelf life and is an enjoyable treat on a hot day.

Store Sangria Safely – How To Freeze Sangria

Food that is frozen can be preserved. Food stored in freezers will not be affected by external elements. It is a long-lasting solution to all of your storage requirements as the flavor will be retained for up to 3 months.

Sangria is among the few drinks stored in freezers that last very well. Sangria can be stored for five days in the refrigerator, until they start to get snarky or lively. The drink can last for 3 months if kept in the refrigerator.

Sangria could be frozen to make cool ice cream to enjoy on warm summer days.

It is recommended to ice it, and then be instructed to keep it for a longer time frame if you create huge quantities of Sangria. It’s a most simple process, without ingredients needed to make Ice sangria.

Here’s an outline of the steps to freeze:

Step 1: Separate The Fruit Ingredients From The Drink

Be aware that the constituents of the fruit deteriorate more quickly that the wines itself. This means that it increases the chance of fruit becoming rotten if you store wine in a refrigerator for more than four days. It is suggested that when freezing, the ingredients of the fruit be kept separate from the beverage.

Step 2: Put Sangria In A Sealable Bag Or Airtight Container

Make sure you have a watertight, waterproof bottle or a jar that is airtight. When the beverage is clear from any fruit pieces, then you are able to transfer the drink into an airtight and healthy bottle.

Place the recipe for the Sangria inside the bottle. Allow the wine to extend several inches. Cover the wine, label the date of freezing and then move into the freezer.

What Should Be Noted In Preparing Sangria?

Fewer things are more fun than Sangria. The fruit is fresh and sweet, and are vital to a great Sangria recipe. How can the Sangria glass hold all these wonderful ingredients?

There is there is no Sangria law. But, I’ve listed the most important things to keep in mind in order for the taste of your Sangria to be perfect.

The Right Balance Of Wine

The red wine is a renowned wine that is used to make Sangria.

Sangria’s base is one glass or two of red wine. Include a few shots brandy to add a little more flavor. A sophisticated bartender is able to count on diners’ desires to adjust their alcohol level in the Sangria glass. The bartender will add more wine if you so desire.

Freshness Of Fruit

Fresh, seasonal fruits are essential ingredients in making your perfect Sangria.

Cocktails are great when they are made with high-quality seasonal ingredients. This is why bartenders frequently alter the flavor of Sangria in accordance with the season.

It’s your chance to sample the finest of the season. Winter is a time for citrus fruits like lime, lemon, or mandarin combination. In summer, nature gives the amazing aromas of strawberry fruit, peach and mango.

There are a variety of tools like the apple corers compactly to separate the fruit into distinct pieces with the same the quality.

Mix citrus and apples for the flavor of autumn. Add a few teaspoons sugar for more sweetness. It’s not necessary to add sugar, however when you have gorgeous fresh, ripe, and delicious fruit. Sangria recipe ideas can also be influenced by the season’s fruits, to make fresh Sangria any time.

Bartender’s Skills

How long will it take to shake the shaker in order to make the classic Sangria? What fruit should you mix wine to get the perfect taste? What is the right amount of fruit? How do you decorate Sangria to draw the attention of your guests?

A bartender who is skilled can solve all these problems and serve you the finest Sangria. You can also be an excellent bartender if consistently practice and learn the rules of a bartender.

But, these notes should not pose too much of a problem to stop you from making Sangria. Try to improve slowly and then find your favorite recipe. suitable for novices.

Tips For Making The Best Sangria

Sangria is fairly easy to make. But do you want tips on creating your Sangria like the one served by a bartender, who is a pro? Here are some ideas I have that are worth considering. They’re simple, yet they have incredible effects!

Use The Right Wine

It is possible to believe that the price higher-priced the wine is, the better its taste. It’s true, perhaps, but it’s not essential to use regarding Sangria. Alcohol isn’t all that creates Sangria drinkable, as it is lost in the aromas of fruit and other.

Numerous examples have demonstrated that people don’t realize the huge difference between high-end wines or Sangria as opposed to cheaper wine. Therefore, you can save money by choosing the best wine, instead of buying the most expensive ones.

However, it does not mean you should make use of cheap, low-quality wine to make your Sangria. Quality wines of inferior quality can affect the taste and shelf life of Sangria and may even lead to poisoning.

Mash Some Fruit

Are you concerned that the slices of fruit are not yet bringing the full fruit taste you’re looking for? Puree a few fruits and mix them in with Sangria.

The two fruits typically employed are lemons and oranges. You keep the zest intact when you crush since there are essential oils that give off an aroma that is pleasant. It is possible to crush any fruit you want, e.g., apple or pear, strawberry and so on.

For the fruits to more sweet to make it sweeter, sprinkle a few drops of sugar on the fruit as you smash it. After taking the fruit out of the wine for a few hours in the fridge to strain the fruit prior to serving the Sangria since they’re not as attractive.

Crushing some fruit can get your guests to be awed by the unique flavors and bold flavor of Sangria at your events. Make use of this technique and make several interesting Sangria dishes for your guests.

Soak Fruit In Wine Overnight

The slices of fruit will be bursting with rich taste and lovely color when they are soaked overnight.

A lot of Sangria recipes require the wine to be kept in the refrigerator for a night or for at minimum several hours. This lets the fruit soak into the wine, allowing the juices to be absorbed into the mix and make the drink sweeter. I believe that sweetness is derived from the fruit and the wine.

Additionally, to make to make your Sangria more attractive make use of fruit and vegetable choppers to make equal slices.

If you want to include berries, cover the tiny pieces of the fruit into a distinct container with a little wine, and then leave it in the fridge for at least a few hours. After that, return the wine to the Sangria and add a few pieces of fruit to each bottle.

Boost It Up With Some High-Proof Spirits

Sangria is a light drink made of fruit that is perfect for anyone. However, if you’re looking for something different, you can enhance the drink with a few spirits. Spirits can give a distinct and distinct flavor for your Sangria.

How To Know If Sangria Is Bad?

If you consume damaged Sangria, there is the risk of moderate to high of getting poisoned based on the condition of the Sangria. The reason for this is the oxidation process that converts Sangria to acid and vinegar when it isn’t stored in a proper manner and consumed for the required amount of time.

To avoid these dangers and to reduce the risk, look at the following warnings prior to drinking Sangria to ensure that the Sangria is of high-quality.

Color Change

The most well-known indicator that you shouldn’t overlook is color change. It indicates that the alcohol is beginning to alter its properties through oxidation and.

Sangria that loses its consistency is also beginning to alter its color. Red wine could turn orange, while white wine could turn yellow. The most obvious sign is discoloration of the grapes. If the slices of the fruit do not retain their fresh color and are turning brown or wilted, it is time to throw away the Sangria.

If the color variance is only small and the color is not too different, the Sangria is still a good choice in the event that it doesn’t show any indications of spoilage.

Unpleasant Smell

A peculiar smell could come from Sangria that’s been skewed. Be on the lookout for it! Like I said, when it is spoiled, Sangria can be oxidized to vinegar and acid and you’ll smell the strong and sour scents of both.

If you are able to spot these indications, don’t be scared to dispose of the beverage right away. I don’t believe you are looking forward to drinking the acid or vinegar, are you?

Mold

The fruits turn unattractive and toxic when they become moldy.

Dark, white, or even greenish spots typically signifying mildew can be found visible on the outside of food. Most often, mold is visible following the opening of the container due to bacteria.

In the case of drinks, mold may be difficult to detect. As for Sangria, you can see through the slices of fruit.

You can also check the quality of your fruits after packing your Sangria along with your fruit. The development of mold can be a result of Sangria that has pieces of fruit that have gone rancid.

Wrapping up

So, how long does sangria last? I suppose I have already given the answer in details. Anyway, Sangria may spoil as with any other wine-based beverage. The lines blur in determining when sangria that is questionable is at the point where it becomes undrinkable, but making sure the bottle is tightly sealed will prevent any oxidation.

The fridge is the ideal storage space for it to last up to 3 days. However, it’s recommended to consume the drink as quickly as you can. The more fresh the batch, the better it’ll taste.

Be sure to monitor the fruits you’ve added to see if it’s still in good condition. If any fruit has turned bad, it may ruin the entire pitcher.

How To Reheat Mussels? Your Top Guide

How To Reheat Mussels? How to reheat mussels? If you want to know all about mussels, and how to reheat it, you should take time to go through this blog post. Mussels can be thought of as an acquired taste because they are not popular with everyone. However, in recent times they have gained a lot of attention as a highly nutritious dietary product. Seafood in general is a standout in terms of nutritional value and health benefits, however the majority of seafood types require additional care in preparation process and, later when it comes to storage. Mussels aren't the same. Whatever your plans for mussels, whether it's cooking or freezing the mussels, you should be on the lookout for them to avoid the risk of food poisoning. What are Mussels? Mussels are one of the most sought-after types of seafood that is found in coastal areas like those in the Atlantic as well as the Pacific. They are found in saltwater as well as freshwater, and are typically consumed in raw form. They can be prepared in many methods, such as frying poaching, steaming, or poaching. There are a variety of mussels that have regional variations that can affect the texture or taste. The most sought-after kind that is most popular is Blue Mussels from New Zealand. However, they also originate from Ireland, Scotland, Canada, Wales, and Japan. The most common method of prepare mussels is to cook them in a pan with garlic, wine parsley, tomato sauce for about 12-18 mins. This recipe can be cooked enough to feed two people. In the next section, we will discuss how to cook mussels again when they've been cooked. Can You Eat Leftover and Cooked Mussels? The answer is yes. Mussels are edible leftovers since they've been cooked and consumed. Mussels cooked shouldn't be heated in the microwave since they tend to become hard and overcooked when heated and again. This will take away any flavor or moisture that was left after cooking them. To get the best outcomes, it is suggested to cook leftover mussels over a stove to prevent the possibility of drying, overcooked mussels. How to Store Leftover and Cooked Mussels? Mussels are among the most frequently-found seafood found in North America, and they're among the easiest to cook. Steam mussels on their own, or you should serve them with rice, pasta or garlic breadcrumbs or any other dish you prefer. But storing leftover cooked mussels is a challenging task that few people are able to accomplish correctly. When you've finished cooking your dinner, don't toss out the remaining broth. Keep your food in an airtight or sealed container. You can take it out the following day. You can also keep cooked or steamed mussels in a freezer to be used later. If you intend to freeze cooked mussels be sure to keep your mussels inside an airtight container. In the event that you cooked them in the broth be sure to remove them from the broth before storage, to ensure they don't go too soggy or get spoiled. For freezing, remove the shells of the mussel after cooking and then remove the flesh. Place the shell inside an airtight container. Freeze for up to 2 months. How to Tell if Leftover and Cooked Mussels are Bad? Just made some mussels and you're now thinking if they're suitable for eating? Here's a list that will tell you what to do. The first step is to throw away mussels that do not open, since it is likely that they're dead and unfit to eat. Then, throw away any mussels that have broken shells, as this is an indication of spoilage or overcooked. Also, you should ensure that the texture and smell are fresh and the food is not damaged or overcooked. If the mussels smell unpleasant that resembles seafood that has gone bad, you should avoid eating them too. If they meet the above requirements, then you'll be able to know the mussels you purchase are safe to be eaten and fresh. How to Reheat Mussels on Stovetop? Are you in the mood for mussels but aren't sure how to cook them on the stove? Here's the information you require and some suggestions. It is recommended to take the flesh out of the shell, and dispose any mussels that are not opened prior to reheating them. While pre-cooked mussels can be tough and dull however, they are less chewy than freshly cooked ones. To avoid this taste and to avoid blandness, take the shell off prior to heating them up again. To heat cans on the stovetop Cook in a pan using cooking oil on medium-high heat. Add mussels to the pot, and cook for approximately 3 minutes or until hot enough to consume. Don't overcook them as they will turn hard. How to Reheat Mussels in Broth? Many chefs agree to heat up mussels in broth that is made from the mussel cooking water, along with additional onion garlic, butter, and onions. Also, they can be heated in champagne or white wine. Mussels are typically made by cooking them in an oven-safe dish on moderate heat for around five minutes or until they break open in the pan and let the juices out into the sauce. To warm mussels, first, separate their broth from them or the dishes with which they were served. Clean any remaining shells and place them aside until you heat the dish that is served. It is best to bake your meal within the oven for just a couple of minutes before pouring in the broth or any other liquid. Then, add the mussels to the dish, and place them in the oven for a couple of minutes. So, you can ensure the dish is cooked to the perfect temperature and ready for serving and yet preserve all its flavor and aroma from the cooking process. If you're concerned that your brothy stuff after reheating may be too salty, try adding some tomato juice to help balance it prior to serving. If you want add spice, try using cumin or paprika chili powder or curry paste into the liquid. But don't forget the addition of citrus. How to Heat Frozen Cooked Mussels? Did you realize that mussels are an ideal option for your New Year's Eve dinner? And to make the experience even simpler, all the preparation is already done. If you think frozen cooked mussels sound you would like Here's how to make them a hit to cook. If your frozen mussels aren't been cleaned then it is possible to cook them either by steaming them for about 5-7 minutes in 1 inch of water, or wine, or sautéing them with oil and butter over a high temperature. You can discard the shells that haven't been opened. It is essential to take off the beard prior taking a bite of frozen or mussels. This can be accomplished using fingers or a knife. To heat up frozen mussels, put the mussels in bowls, then add hot water enough to fill them up. Wrap the plastic with a lid, lid and microwave at high power for approximately 30 seconds to 1 minute. This is all there is to it. A couple of minutes of prep time will let you take pleasure in your favorite meal anytime in the near future. What to Do with the Leftover Mussels? Are there any leftover mussels in your refrigerator? Before throwing them out, make this recipe. It's easy and delicious. Cleaning up is easy and a lot of recipes are made in one pot and don't require a lot of effort clean up after eating. What else can you ask for an evening meal? Mussels Marinara Mix cooked pasta with leftover tomatoes in a pot at medium-low temperature. Add spices, and then add mussels once the mix gets to a boil. When they're cooked the cheese is served with parmesan sprinkled over the top or fresh parsley as a garnish. Mussels filled with Garlic and Parsley In a skillet on medium heat, cook the garlic with butter. Add chopped parsley to the mix and simmer for about a minute before adding the wine. After simmering for 5 minutes, add the mussel meat to the stew and allow the pot with water to cook through (about 4 minutes). Serve right away with bread that is crusty. Mussel Chowder in a pan at medium-high heat, cook the garlic with butter for about one minute before adding celery and potatoes. Once the veggies are cooked, add cream or milk to create the base for the chowder. Bring it to a boil, reduce the heat to simmer for 5 minutes, stirring frequently. Include mussels now since they cook quickly after being added because they have been cooked. Serve with a garnish of parsley If desired. Mussels and Rice Cook the water to a boil , then season them with salt. When the water is boiling, add the steaming rice, and cook for 5 to five minutes or till the rice is completely cooked. Place the meat of the mussel over the top of the rice mix Then cover the rice with enough water to allow them to steam (about 4 minutes). In this regard how do you heat mussels? It is possible to reheat mussels by taking them out of their shells, and then microwave them rapidly on a small plate that is covered with a moist paper towel. Always reheat mussels in a separate vessel from the soup or dish they're in, and then add them only after the remainder of the dish is cooked. If you try to heat the entire meal, I can assure you that most of the time the mussels will begin to lose their texture and flavor. There are many safe ways to cook them, without risking food poisoning, or loss of flavor and texture. In this regard, you should read below for our complete instruction on how to cook mussels. A Complete Guide to Reheating Mussels Mussels belong to the mollusk family of seafood. The cultivation of them was started thousands of years ago by ancient cultures. They are extremely healthy and nutritious, which makes them a favorite of many people who lead a healthy and balanced lifestyle. There are a variety of mussels; the majority does not recognize them unless they are very knowledgeable about the particular species. Of all, Mediterranean mussels are the most frequently found species in shops, but you will find other types particularly in areas close to the ocean or the coast. The correct method of handling mussels is essential if you wish to prevent food poisoning and other serious illnesses. But dealing with fresh mussels can be an issue to be discussed at a different time and isn't relevant to our current discussion. We will now concentrate on the already cooked mussels must be reheated in a safe and secure manner. How to Reheat Mussels In the beginning, you can cook mussels on their own or in an appetizer, but the various methods require different steps. In both cases there are a few steps that must be followed unless you do not want to have bad tasting mussels. Here are two of the most frequently encountered situations: The sole method of reheating mussels is to cook them. If you are planning to eat the mussels by themselves it is essential to always get them out of their shells before eating them. The mussels that are cooked before cooking can become hard and chewy, which is the reason you should take them out of the shells to stop them drying out. Many people make the error to cook them on a large platter. However, we recommend using as little of an area as you are able to. The most important thing is to ensure that the mussels are kept condensed. This is the best method to keep them moist and avoid drying that can lead to loss of flavor. The next step is to prepare a moist newspaper towel that covers the stack of mussels, in order to preserve as much moisture as you can. If they're well-condensed and covered then you can put them into the microwave. It is important to set your microwave at a low power setting at least 30% if the microwave is able to handle these settings. Reheat for 15 or 20 seconds at a stretch and test after every time. You can reheat them to your liking. However, overheating them isn't recommended as it could dry them out, or you'll have to consume them swiftly because they'll lose value once the temperature falls. Cooking with broth or other recipes The best method to cook mussels is to use broth or a similar dish , though it may need a little additional effort. In order to do this, you'll need to separate the mussels from your dish or broth. Put them aside to cook the dish you are serving. Make sure you remove the shells, if they're still intact. Ideally, cook your dish to the required temperatures on your stove. Once it's sufficiently warm, take it off your stove, and then add mussels. We suggest heating your food until it is very warm, as the moderate temperatures might not be enough to cook the mussels later. If the dish or broth is sufficiently heated, it will be sufficient to cook your mussels without the possibility drying out or losing quality. Make sure you stir the dish thoroughly to ensure that each mussel passes through the middle. It doesn't matter if there is an ice-cold broth on the table you, or any other food item, like pasta for instance. The principle is the same. You must never add the mussels until the other food items have been heated. How long will cooked mussels last? Before we get started it is important to note that cooked mussels must be stored in a refrigerator for not more than 2 days after they have been cooked. If you keep them longer than that, we advise throwing them away. While they might be safe and healthy, you cannot be certain of the growth of bacteria. Apart from that it is possible to put the mussels into the refrigerator for up to five days. However, you should be sure to put them in a sealed container. It is possible to make use of freezer wrap or premium aluminum foil, but we advise against it in order to prolong the shelf time for your mussels. If you're not sure if you'll eat them in these weeks or not, then we recommend freezing the mussels. This they will normally keep their freshness for a period of about 3 months. If you are planning to make use of the mussels and you'll need to let them thaw in the morning, we suggest putting their in refrigerator for a night. It is possible to keep the mussels in the refrigerator for a few days after freezing and thawing. What can you discern if mussels have been contaminated? The easiest way to determine whether your mussels aren't suitable to consume will be to smell the mussels and take a look at them. If you notice a sour smell in the heap of mussels, you need to dispose of the whole batch. Also, if the mussels appear slimy, they're most likely to be toxic. Mussels that do not open can be removed. This usually signifies that the mussel has become dead and therefore unhealthy to consume. Related Questions What happens when you eat bad mussels? The poisoning of seafood by food is one of the most hazardous forms of food poisoning. It could cause severe illness. This is why it's vital for you to prepare your seafood as fast as you can after purchasing. As I am not a medical expert, let me simply mention the most common symptoms and what to do in the event of food poisoning caused by seafood. If you consume mussels that are contaminated, you could expect to experience reactions such as diarrhea and vomiting. This is usually the initial phase of the issue that is followed by numbness and tingling in the jaw and headaches. There are also cases of temporary fever. What is the time it takes to notice the first signs? Most of the time, it takes up to a few hours, but there are occasions where people notice that they have symptoms within 48 hours. This can be a huge problem since it is possible that you do not know that the food poisoning is from mussels or other seafood and you might not be aware of it and get more serious issues. Although shellfish poisoning isn't necessarily serious If you or others around you develop unexpected symptoms that don't diminish quickly, we suggest seeking medical attention immediately. If you are able, contact the emergency line in your town and speak with the department of poison control. How do you properly freeze mussels? In the case of mussels, it is possible to store mussels that are fresh or cooked. The idea is similar. If you are planning to freeze fresh mussels be aware that you have to do it quickly. Like fresh mussels have to cook within a few hours after purchase, we suggest freezing them the same day. Be sure the mussels you purchase are sealed or as close as they can be. If you spot any mussels that are not closed, we advise to throw them out as they could damage the entire pack later on. Make a freezer bag that is heavy-duty or a couple of smaller ones and begin filling them of your mussels. Be sure to leave some headroom and get as much air as you can. If you'd like to create another layer of protection against freezer burn, place the freezer bag into another bag and let out the maximum amount of air. Make sure to keep the mussels as far as you can from the freezer's door to protect them from temperature fluctuations. Consume the mussels within 3 to 4 months if you're focused on the quality. They'll last for a longer time in the freezer and are safe to consume however not in the same freshness. Wrapping up So, how to reheat mussels? I have already given answer to that question in the earlier part. Anyway, it is always good to have leftover mussels to freeze. Why? If you require them they'll be ready to cook and taste fresh. If you don't have time to cook the entire mussel, you may take a look at these two options to heat leftover mussels.

How To Reheat Mussels

How To Reheat Mussels


How to reheat mussels? If you want to know all about mussels, and how to reheat it, you should take time to go through this blog post.

Mussels can be thought of as an acquired taste because they are not popular with everyone. However, in recent times they have gained a lot of attention as a highly nutritious dietary product.

Seafood in general is a standout in terms of nutritional value and health benefits, however the majority of seafood types require additional care in preparation process and, later when it comes to storage.

Mussels aren’t the same. Whatever your plans for mussels, whether it’s cooking or freezing the mussels, you should be on the lookout for them to avoid the risk of food poisoning.

What are Mussels?

Mussels are one of the most sought-after types of seafood that is found in coastal areas like those in the Atlantic as well as the Pacific.

They are found in saltwater as well as freshwater, and are typically consumed in raw form.

They can be prepared in many methods, such as frying poaching, steaming, or poaching.

There are a variety of mussels that have regional variations that can affect the texture or taste.

The most sought-after kind that is most popular is Blue Mussels from New Zealand. However, they also originate from Ireland, Scotland, Canada, Wales, and Japan.

The most common method of prepare mussels is to cook them in a pan with garlic, wine parsley, tomato sauce for about 12-18 mins. This recipe can be cooked enough to feed two people.

In the next section, we will discuss how to cook mussels again when they’ve been cooked.

Can You Eat Leftover and Cooked Mussels?

The answer is yes. Mussels are edible leftovers since they’ve been cooked and consumed.

Mussels cooked shouldn’t be heated in the microwave since they tend to become hard and overcooked when heated and again. This will take away any flavor or moisture that was left after cooking them.

To get the best outcomes, it is suggested to cook leftover mussels over a stove to prevent the possibility of drying, overcooked mussels.

How to Store Leftover and Cooked Mussels?

Mussels are among the most frequently-found seafood found in North America, and they’re among the easiest to cook.

Steam mussels on their own, or you should serve them with rice, pasta or garlic breadcrumbs or any other dish you prefer.

But storing leftover cooked mussels is a challenging task that few people are able to accomplish correctly.

When you’ve finished cooking your dinner, don’t toss out the remaining broth.

Keep your food in an airtight or sealed container. You can take it out the following day.

You can also keep cooked or steamed mussels in a freezer to be used later.

If you intend to freeze cooked mussels be sure to keep your mussels inside an airtight container.

In the event that you cooked them in the broth be sure to remove them from the broth before storage, to ensure they don’t go too soggy or get spoiled.

For freezing, remove the shells of the mussel after cooking and then remove the flesh.

Place the shell inside an airtight container. Freeze for up to 2 months.

How to Tell if Leftover and Cooked Mussels are Bad?

Just made some mussels and you’re now thinking if they’re suitable for eating? Here’s a list that will tell you what to do.

The first step is to throw away mussels that do not open, since it is likely that they’re dead and unfit to eat.

Then, throw away any mussels that have broken shells, as this is an indication of spoilage or overcooked.

Also, you should ensure that the texture and smell are fresh and the food is not damaged or overcooked. If the mussels smell unpleasant that resembles seafood that has gone bad, you should avoid eating them too.

If they meet the above requirements, then you’ll be able to know the mussels you purchase are safe to be eaten and fresh.

How to Reheat Mussels on Stovetop?

Are you in the mood for mussels but aren’t sure how to cook them on the stove? Here’s the information you require and some suggestions.

It is recommended to take the flesh out of the shell, and dispose any mussels that are not opened prior to reheating them.

While pre-cooked mussels can be tough and dull however, they are less chewy than freshly cooked ones.

To avoid this taste and to avoid blandness, take the shell off prior to heating them up again.

To heat cans on the stovetop

Cook in a pan using cooking oil on medium-high heat.

Add mussels to the pot, and cook for approximately 3 minutes or until hot enough to consume.

Don’t overcook them as they will turn hard.

How to Reheat Mussels in Broth?

Many chefs agree to heat up mussels in broth that is made from the mussel cooking water, along with additional onion garlic, butter, and onions.

Also, they can be heated in champagne or white wine.

Mussels are typically made by cooking them in an oven-safe dish on moderate heat for around five minutes or until they break open in the pan and let the juices out into the sauce.

To warm mussels, first, separate their broth from them or the dishes with which they were served.

Clean any remaining shells and place them aside until you heat the dish that is served.

It is best to bake your meal within the oven for just a couple of minutes before pouring in the broth or any other liquid.

Then, add the mussels to the dish, and place them in the oven for a couple of minutes.

So, you can ensure the dish is cooked to the perfect temperature and ready for serving and yet preserve all its flavor and aroma from the cooking process.

If you’re concerned that your brothy stuff after reheating may be too salty, try adding some tomato juice to help balance it prior to serving.

If you want add spice, try using cumin or paprika chili powder or curry paste into the liquid. But don’t forget the addition of citrus.

How to Heat Frozen Cooked Mussels?

Did you realize that mussels are an ideal option for your New Year’s Eve dinner? And to make the experience even simpler, all the preparation is already done.

If you think frozen cooked mussels sound you would like Here’s how to make them a hit to cook.

If your frozen mussels aren’t been cleaned then it is possible to cook them either by steaming them for about 5-7 minutes in 1 inch of water, or wine, or sautéing them with oil and butter over a high temperature. You can discard the shells that haven’t been opened.

It is essential to take off the beard prior taking a bite of frozen or mussels. This can be accomplished using fingers or a knife.

To heat up frozen mussels, put the mussels in bowls, then add hot water enough to fill them up.

Wrap the plastic with a lid, lid and microwave at high power for approximately 30 seconds to 1 minute.

This is all there is to it.

A couple of minutes of prep time will let you take pleasure in your favorite meal anytime in the near future.

What to Do with the Leftover Mussels?

Are there any leftover mussels in your refrigerator? Before throwing them out, make this recipe.

It’s easy and delicious. Cleaning up is easy and a lot of recipes are made in one pot and don’t require a lot of effort clean up after eating.

What else can you ask for an evening meal?

Mussels Marinara Mix cooked pasta with leftover tomatoes in a pot at medium-low temperature.

Add spices, and then add mussels once the mix gets to a boil.

When they’re cooked the cheese is served with parmesan sprinkled over the top or fresh parsley as a garnish.

Mussels filled with Garlic and Parsley In a skillet on medium heat, cook the garlic with butter.

Add chopped parsley to the mix and simmer for about a minute before adding the wine.

After simmering for 5 minutes, add the mussel meat to the stew and allow the pot with water to cook through (about 4 minutes).

Serve right away with bread that is crusty.

Mussel Chowder in a pan at medium-high heat, cook the garlic with butter for about one minute before adding celery and potatoes.

Once the veggies are cooked, add cream or milk to create the base for the chowder.

Bring it to a boil, reduce the heat to simmer for 5 minutes, stirring frequently.

Include mussels now since they cook quickly after being added because they have been cooked.

Serve with a garnish of parsley If desired.

Mussels and Rice Cook the water to a boil , then season them with salt.

When the water is boiling, add the steaming rice, and cook for 5 to five minutes or till the rice is completely cooked.

Place the meat of the mussel over the top of the rice mix Then cover the rice with enough water to allow them to steam (about 4 minutes).

In this regard how do you heat mussels? It is possible to reheat mussels by taking them out of their shells, and then microwave them rapidly on a small plate that is covered with a moist paper towel. Always reheat mussels in a separate vessel from the soup or dish they’re in, and then add them only after the remainder of the dish is cooked.

If you try to heat the entire meal, I can assure you that most of the time the mussels will begin to lose their texture and flavor.

There are many safe ways to cook them, without risking food poisoning, or loss of flavor and texture.

In this regard, you should read below for our complete instruction on how to cook mussels.

How to  Reheat Mussels: A Complete Guide

Mussels belong to the mollusk family of seafood. The cultivation of them was started thousands of years ago by ancient cultures. They are extremely healthy and nutritious, which makes them a favorite of many people who lead a healthy and balanced lifestyle.

There are a variety of mussels; the majority does not recognize them unless they are very knowledgeable about the particular species. Of all, Mediterranean mussels are the most frequently found species in shops, but you will find other types particularly in areas close to the ocean or the coast.

The correct method of handling mussels is essential if you wish to prevent food poisoning and other serious illnesses. But dealing with fresh mussels can be an issue to be discussed at a different time and isn’t relevant to our current discussion.

We will now concentrate on the already cooked mussels must be reheated in a safe and secure manner.

How to Reheat Mussels

In the beginning, you can cook mussels on their own or in an appetizer, but the various methods require different steps. In both cases there are a few steps that must be followed unless you do not want to have bad tasting mussels.

Here are two of the most frequently encountered situations:

The sole method of reheating mussels is to cook them.

If you are planning to eat the mussels by themselves it is essential to always get them out of their shells before eating them.

The mussels that are cooked before cooking can become hard and chewy, which is the reason you should take them out of the shells to stop them drying out.

Many people make the error to cook them on a large platter. However, we recommend using as little of an area as you are able to. The most important thing is to ensure that the mussels are kept condensed. This is the best method to keep them moist and avoid drying that can lead to loss of flavor.

The next step is to prepare a moist newspaper towel that covers the stack of mussels, in order to preserve as much moisture as you can. If they’re well-condensed and covered then you can put them into the microwave.

It is important to set your microwave at a low power setting at least 30% if the microwave is able to handle these settings. Reheat for 15 or 20 seconds at a stretch and test after every time.

You can reheat them to your liking. However, overheating them isn’t recommended as it could dry them out, or you’ll have to consume them swiftly because they’ll lose value once the temperature falls.

Cooking with broth or other recipes

The best method to cook mussels is to use broth or a similar dish , though it may need a little additional effort.

In order to do this, you’ll need to separate the mussels from your dish or broth. Put them aside to cook the dish you are serving. Make sure you remove the shells, if they’re still intact.

Ideally, cook your dish to the required temperatures on your stove. Once it’s sufficiently warm, take it off your stove, and then add mussels.

We suggest heating your food until it is very warm, as the moderate temperatures might not be enough to cook the mussels later.

If the dish or broth is sufficiently heated, it will be sufficient to cook your mussels without the possibility drying out or losing quality. Make sure you stir the dish thoroughly to ensure that each mussel passes through the middle.

It doesn’t matter if there is an ice-cold broth on the table you, or any other food item, like pasta for instance. The principle is the same. You must never add the mussels until the other food items have been heated.

How long will cooked mussels last?

Before we get started it is important to note that cooked mussels must be stored in a refrigerator for not more than 2 days after they have been cooked.

If you keep them longer than that, we advise throwing them away. While they might be safe and healthy, you cannot be certain of the growth of bacteria.

Apart from that it is possible to put the mussels into the refrigerator for up to five days. However, you should be sure to put them in a sealed container.

It is possible to make use of freezer wrap or premium aluminum foil, but we advise against it in order to prolong the shelf time for your mussels.

If you’re not sure if you’ll eat them in these weeks or not, then we recommend freezing the mussels. This they will normally keep their freshness for a period of about 3 months.

If you are planning to make use of the mussels and you’ll need to let them thaw in the morning, we suggest putting their in refrigerator for a night. It is possible to keep the mussels in the refrigerator for a few days after freezing and thawing.

What can you check if mussels have been contaminated?

The easiest way to determine whether your mussels aren’t suitable to consume will be to smell the mussels and take a look at them.

If you notice a sour smell in the heap of mussels, you need to dispose of the whole batch. Also, if the mussels appear slimy, they’re most likely to be toxic.

Mussels that do not open can be removed. This usually signifies that the mussel has become dead and therefore unhealthy to consume.

Related Questions

What happens when you eat bad mussels?

The poisoning of seafood by food is one of the most hazardous forms of food poisoning. It could cause severe illness. This is why it’s vital for you to prepare your seafood as fast as you can after purchasing.

As I am not a medical expert,  let me simply mention the most common symptoms and what to do in the event of food poisoning caused by seafood.

If you consume mussels that are contaminated, you could expect to experience reactions such as diarrhea and vomiting. This is usually the initial phase of the issue that is followed by numbness and tingling in the jaw and headaches. There are also cases of temporary fever.

What is the time it takes to notice the first signs? Most of the time, it takes up to a few hours, but there are occasions where people notice that they have symptoms within 48 hours.

This can be a huge problem since it is possible that you do not know that the food poisoning is from mussels or other seafood and you might not be aware of it and get more serious issues.

Although shellfish poisoning isn’t necessarily serious If you or others around you develop unexpected symptoms that don’t diminish quickly, we suggest seeking medical attention immediately.

If you are able, contact the emergency line in your town and speak with the department of poison control.

How do you properly freeze mussels?

In the case of mussels, it is possible to store mussels that are fresh or cooked. The idea is similar.

If you are planning to freeze fresh mussels be aware that you have to do it quickly. Like fresh mussels have to cook within a few hours after purchase, we suggest freezing them the same day.

Be sure the mussels you purchase are sealed or as close as they can be. If you spot any mussels that are not closed, we advise to throw them out as they could damage the entire pack later on.

Make a freezer bag that is heavy-duty or a couple of smaller ones and begin filling them of your mussels. Be sure to leave some headroom and get as much air as you can.

If you’d like to create another layer of protection against freezer burn, place the freezer bag into another bag and let out the maximum amount of air.

Make sure to keep the mussels as far as you can from the freezer’s door to protect them from temperature fluctuations.

Consume the mussels within 3 to 4 months if you’re focused on the quality. They’ll last for a longer time in the freezer and are safe to consume however not in the same freshness.

Wrapping up

So, how to reheat mussels? I have already given answer to that question in the earlier part.

Anyway, it is always good to have leftover mussels to freeze. Why? If you require them they’ll be ready to cook and taste fresh.

If you don’t have time to cook the entire mussel, you may take a look at these two options to heat leftover mussels. This can help you discover your preferred method to enjoy these delicious shellfish dishes.

If not, there are lots of other recipes waiting for you on YouTube. So, check those videos and prepare the recipe you like most.


How To Thicken Gumbo? All You Should Know! 

How To Thicken Gumbo? 

How To Thicken Gumbo? 

How To Thicken Gumbo? 

How to thicken Gumbo? This is a common question I see frequently in the forums for food and drink and, therefore, I’ve decided to dedicate an entire blog post on this subject. Check it out if you’re looking to learn more about Gumbo and the best way to thicken it in the proper proportions so that the dish turns out to be a delectable one.

Gumbo is a popular southern American food that is very popular in Louisiana and the Gulf Coast. It is made up of Chicken Okra, rice and various spices, based the region you’re living in Louisiana.

It was first made by slaves of West Africa to use every part of the animals they hunted developed. Gumbo is enjoyed using your hands and contains several variations of the recipe.

This popular dish is available in restaurants as well as at your home. Gumbo is simple to prepare however, it is extremely labor-intensive.

It is usually served for around 1 hour after it’s been prepared until you are able to take it out to eat. Gumbo is an excellent dish, and it can become extremely runny after serving.

The amount of gumbo’s thickness is dependent on the amount of time it cooks and whether you add thickening ingredients to it.

There are numerous methods to thicken your gumbo by using household items or things you find in supermarkets.

Learn more about how to thicken Gumbo.

First, you need to purchase every ingredient. Make sure you have a large pan that will hold all your ingredients.

Incorporate cooking oil and onions to the large saucepan.

This recipe calls for the addition of salt garlic powder, black pepper as well as celery seeds (optional) and the leaves of thyme (optional) as well as tomato sauce (in cans or ketchup) as well as chicken stock (from the box).

Take your ingredients, celery seeds, leaves of thyme, and tomato sauce.

If you’re looking for more spice in your Gumbo, you can add the three seasonings mentioned above to add some spice.

Celery seeds are small round-looking objects that taste just like celery. Thyme leaves are tiny, round items that taste similar to thyme.

The tomato sauce doesn’t provide any flavor, but instead enhances the flavor of the Gumbo.

Once all your ingredients have been placed in your pot, and then cooked some time then you can begin adding the rice in for approximately 25 minutes of cooking and beef stock from a container or beef broth that you can store in 20 mins.

After the gumbo has cooked for approximately 45 minutes, you are able to now add the chicken and Okra.

Once the Chicken is added, continue to cook it for another 15 minutes.

After everything is properly cooked and done together with some additions to thicken it added the gumbo, it is ready to serve.

Different variations of Gumbo

There is no set rule regarding the preparation of Gumbo. The cooking time is reduced when using seafood. Meat cooks longer to cook on the stove, and simmered until the meat is the meat is cooked to a thick.

It can take quite a while before it gets to your stomach. However, it’s worth the effort and time! Due to the lengthy cooking time, it’s recommended to cook it in large batches, and then put the remainder in the refrigerator to be used later. It can also last quite a long time within the freezer.

Tips: could take it out in portions and then place it in the freezer to make it easier to store.

It is possible to use chicken to make a Gumbo. Skinless, deboned chicken thighs can make a fantastic dish. It is also possible to use sausage for this. There’s no difference in the method of making the base.

The flavor blends beautifully with the kind of meat you pick. If you are planning to cook seafood gumbo, ensure that it isn’t cooked too long. Seafood cooks faster than beef and should be served within the last few minutes of cooking so that you don’t overcook it.

Apart from that it is possible to combine and mix any recipe you like! Actually, there’s no restriction that stops you from mixing the three! The ultimate gumbo combination is one that you must cook in truly huge quantities and then save for later, perhaps to save for the remaining time season.

Why should you consider thickening the Gumbo?

Sometimes, on the menu of a restaurant, and at home, you will be served a very spongy gumbo.

The broth is normally made of chicken stock including tomatoes and okra in it.

A few seasonings are used to add an extra taste; for example, spices such as garlic powder, celery seeds, leaves of thyme etc.

Irrespective of the flavor, the broth is extremely thin. Gumbo that is thickened can result in runny liquid into a rich and satisfying food.

The more dense the gumbo, the more likely you’ll eat it without becoming messy with your hands.

How to thicken Gumbo?

The consistency of gumbo is dependent on the time it takes to cook it and whether you add thickener to it.

There are numerous ways to thicken your Gumbo, with or without the ingredients you have at home or from the nearby grocery store.

The most well-known and most common method of thickening Gumbo is by adding a roux made of butter, flour and oil to the broth.

1 – Add Roux

To make a roux you need to add oil to the pot where Gumbo is cooked in.

Oil can be any kind of cooking oil, but vegetable or olive oil can complete the job just as effectively as peanut oil or coconut oil.

Add around three inches of cooking oil in the base of your pot. Incorporate flour and butter into the pot.

The flour and butter form a mixture that is known as the Roux. Mix the roux with a whisk until it is thick and clear.

Add salt If you think the roux may not be enough salty. Continue to whisk until it changes into to a light brown hue.

  1. Add Cornstarch

The other method of thickening the gumbo is to add cornstarch.

Incorporate approximately two tablespoons cornstarch to the pot. Then slowly add chicken broth into it.

Corn starch is likely to be absorbed into the broth, and will make it more thick until you can’t see any cornstarch as you stir.

  1. Add Flour

Flour can be added the same manner as cornstarch. Put about 1 tablespoon of flour to the pot then slowly pour chicken broth over it.

The flour will absorb the broth and will make it more dense until you don’t discern any flour while stirring.

This is a fantastic method of thickening that you can use in the absence of cornstarch or prefer a “roux”.

  1. Add a vegetable Soup Base

A soup made of vegetables is very thick and will give a wonderful taste to the soup, and make it thicker as required.

Add 1 packet in vegetable soup base to the pot. Add approximately one cup of water to the pot, stirring until the soup base is completely dissolved.

Add slowly more water until you have reached your desired thickness.

5 – Allow it to simmer

If you don’t want add anything, or don’t have any at the home, simmer it.

Simmering takes about an hour longer than be if you didn’t have the enough time for the gumbo to become thicker.

If you need to rush, mix in some cornstarch or flour and it’ll be ready to be enjoyed in no time.

6 – Add Chicken Soup with Cream

Another way to thicken the gumbo is using chicken cream soup.

Incorporate 1 can soup made from chicken cream and then pour it into the pot, stirring until it disintegrates in the broth.

Let it cook for a couple of minutes longer before serving.

7 Add Cornmeal Grits

This is among the most sought-after methods for thickening Gumbo.

Mix 1 cup of cornmeal, after which add water, and then mix till the mixture is smooth and nice without any lumps.

When you pour the mixture in the pot, make sure to stir it in one direction with ease to avoid lumps. Add the quantity of water needed to create the consistency you desire.

  1. Add Bread

Pick a couple of slices of bread. Then place it in the Gumbo. Don’t cut the bread into pieces, but put it in whole.

The reason for this is to ensure that all the tiny pieces are soaked in the broth from the gumbo, and to ensure that, when it is poured down your throat, it will not have any piece of bread that is not soaked.

You may slice the bread if you prefer. Let it soak for around 10 minutes or until it becomes soft and then take out the excess and throw it away.

How thick should Gumbo be?

The truth is that the answer is not definite as everyone is different in their preference to achieve a “perfect texture.” In general, Gumbo is thicker than the soup itself, and one could call it thicker than a smooth soup. It is possible to adjust the thickness by adding roux or other thickeners.

Gumbo, whether thin or thick, is a favorite dish for many because of its powerful flavor and combination of vegetables. You can maintain the gumbo’s consistency according to your preferences because  gumbo always tastes delicious whether it’s thick or not.

Wrapping up

How To Thicken Gumbo? 

There are numerous ways to thicken your gumbo. However, the main factor is to create it the way you like.

It can be as thick or soupy as you like. Be sure to prepare the soup according to your taste and the recipe you’re making.

Gumbo is a simple recipe with a healthy approach. It’s simple and hugely delicious. You can employ any of the listed Gumbo thickener techniques to get that perfect consistency.

Roux is a popular and widely used method; however, some are also fond of using the file powder or okra. Based on the ingredients that are available in your kitchen, you should select one of the thickeners in gumbo to get your desired texture. Now happy cooking!


How Long Does Alfredo Sauce Last In The Fridge?

How Long Does Alfredo Sauce Last In The Fridge?

How Long Does Alfredo Sauce Last In The Fridge?

How Long Does Alfredo Sauce Last In The Fridge?

How long does alfredo sauce last in the fridge? No idea? If you are here to get an answer to this question, don’t go anywhere  because I am going to write all that you need to know about alfredo sauce and how to make it at home as well as how to store it.

Alfredo pasta sauce an amazing ingredient to mix with your favorite foods to make delicious rich, creamy meals.

You’re planning to purchase and cook with this pasta sauce made of cream to prepare your meals for this weekend, and you’d like to learn the expiration date dates and storage. What is the length of time that alfredo sauce will remain in the fridge after you’ve opened the jar? How do you store it to get the most shelf-life?

Read our article to have all the details to answer your query.

Brief Information About Alfredo Sauce

Before we get into the details of how long alfredo sauce can be stored in the refrigerator, let’s take a close look at the alfredo sauce details.

Alfredo sauce is an incredibly rich pasta sauce, which originated in Italy. It is typically made up consisting of butter Parmesan cheese and (often thick cream) to give it a delicious flavor that has a creamy texture.

In addition to these ingredients, manufacturers frequently add other ingredients like black pepper and garlic powder to improve the taste. It is also possible to add egg or starch to improve its texture.

What to Do With Your Creamy Alfredo Sauce?

The variety of foods that you can add this delicious sauce to and elevate their taste to a new level appears to be inexhaustible. We will list various ways to consider. Let’s first, throw your fresh pasta into this rich cream-based sauce and create a delicious meal in just a few just a few minutes.

It is also possible to mix this delicious sauce with cooked vegetables, like baked potato or stir-fried broccoli to make delicious healthy meals.

A different option would be to mix it with pesto sauce or tomato sauce to make marinade to cook beef, chicken or pork while roasting. We are sure that you’ll be amazed at the way it enhances the flavor and keeps the meat tender.

How Long Does Alfredo Sauce Last In The Fridge?

So, how long does the alfredo sauce last in the fridge? Do you notice any differences in the shelf-life of the store-bought or homemade alfredo sauce? Scroll down below to find out right away.

For The Homemade Alfredo Sauce

The homemade sauce for alfredo has an extremely short shelf life because it is only good for about an hour after the preparation.

If you are looking to extend the shelf life, place the fresh sauce in the refrigerator as soon as you can. In this instance how long is the alfredo sauce safe to keep in the refrigerator? It typically lasts between 3 and 4 days.

To extend the shelf life, it’s essential to freeze any leftover sauce. While freezing allows the pasta sauce made from scratch to remain intact for months on end, the taste of the sauce could change with time.

For The Store-bought Alfredo Sauce

What’s the deal with store-bought sauce? How long can the alfredo sauce that is not opened last? It is best to keep the pasta sauce sealed and keep it in a safe place in the pantry. time to expire the Classico alfredo sauce could be anywhere from 2 to 3 years when stored at the room temperatures.

What is the length of time alfredo sauce suitable for after opening? The answer is different based on the type of sauce. The shelf life of refrigerated alfredo sauce is 7 days if stored in proper conditions. Food experts recommend making use of the sauce within five days.

How long will Prego last after being opened?

The manufacturer suggests that you immediately refrigerate any leftover sauce below 40 F. After that, it will be at its highest quality for three days.

What’s the Bertolli sauce? How long will Bertolli alfredo sauce last after you’ve opened the jar? Similar to Prego this cream-based sauces can last three days if you keep it in the refrigerator.

If you’ve put alfredo sauce over your favorite food items, like tortellini, how long will cooked tortellini keep in the refrigerator? Refrigerate the tortellini that you have cooked within an hour of cooking the dish. It will stay fresh for three to five days.

How to Know If the Alfredo Sauce Is Bad To Use?

When we add fresh alfredo sauce that we have made to our meals, or with a pasta bowl will give us delicious and healthy meals to take pleasure in.

If the cream-based sauce becomes sour ingestion, it will increase the risk of food poisoning. So, how do you know whether alfredo sauce is rotten? Here are the indicators to quickly recognize spoilt alfredo sauce.

Signs that the alfredo sauce has turned bad

To reduce the chance of getting food poisoning or avoid stomach-related issues, it is essential to recognize the indicators that let you recognize that the sauce is deteriorating and that it is time to dispose of the sauce because nothing is more crucial that your wellbeing. These are the indicators which can assist you in deciding whether or not to eliminate the alfredo sauce

Smell

If the aroma of alfredo sauce is sweet or sour, it signifies that the sauce has gone bad and it is best to throw it out.

Color

If the distinctive creamy color of alfredo sauce has gone and it has turned to into a yellowish color, the sauce is bad. Avoid using this sauce.

Taste

If the aroma or color of sauce isn’t enough to make you think that it’s gone bad, then tasting a small amount of the sauce can help. The taste of a small amount of the bad sauce is not harmful to the person who is drinking it.

How To Store The Alfredo Sauce Properly?

Now that you are aware of how long alfredo sauce lasts after opening, it is time to learn some simple ways to preserve its excellent quality while storing it for later use.

Refrigerate the Unused Sauce

If you are making your own sauce, put it in a jar of sauce with a lid, and then bring it to the refrigerator. If you purchase the sauce from a store it is enough to cover the jar tightly and then refrigerate it.

What is the length of time pasta sauce good to keep after it has been opened and frozen? You can keep the sauce in good condition for three months or more when freezing it.

FAQs

How long does the alfredo sauce last in the freezer?

Alfredo sauce is fresh for up to three months in the refrigerator. It is possible to store Alfredo sauce in freezer-safe sealed plastic bags or air-tight containers. However, you must be aware that freezing your pasta with alfredo will keep the growth of bacteria at bay, but that doesn’t mean it won’t impact the flavor in the dish. Alfredo sauce could undergo an alteration in taste if kept excessively long time in the freezer.

How long does alfredo sauce last at room temperature?

The alfredo sauce can be stored when it is at room temp for approximately 4 hours. 40°F to 140°F is the best temperature at which bacteria can thrive. Additionally, alfredo is a dairy-based dish and is a prime candidate for bacterial contamination. Hence, should it be removed if exposed at temperatures of longer than four hoursit’s advised to dispose of it.

How long does the alfredo sauce keep in the fridge?

Alfredo sauce lasts for approximately 4-5 days if stored in the right conditions in the refrigerator. It should be stored in a sealed airtight container or bag. Alfredo pasta unopened can last between 6 and 8 months if it is stored correctly within the kitchen pantry.

If you purchase supermarket-bought sauces, it is recommended to be sure to read the best before or expiry date onto the label sauce container.

Does alfredo sauce go bad?

Like other foods as well, alfredo sauce may go bad. This is an aging cream sauce that is a perishable food item. It is therefore important to take care when storage.

How can you make homemade alfredo sauce?

Alfredo sauce is an Italian delight that compliments the noodles and pasta beautifully while making the taste delicious, is a favorite dip across the world.

The mouth-watering, delicious sauce is made with parmesan cheese, butter in addition to heavy cream for the main ingredients. The recipe is fairly easy to follow as you need to warm the butter and heavy cream over moderate heat.

Add garlic or other condiments that you prefer to add with constant stirring. After that, mix the cheese of your choice to the mix until it is well-mixed, and voila! You now have your silky smooth alfredo sauce waiting for you to enjoy.

You can also add salt, pepper or any other seasoning that you prefer to give the sauce your own personal touch. you could even substitute heavy cream with cream cheese.

Wrapping up

I hope that this article has all the info you require to get an authentic answer to the question “how long does alfredo sauce last in the fridge?”

Alfredo sauce is an excellent condiment for any food you like. If you intend to keep it for a long time it is necessary to preserve it appropriately.

It is crucial to keep in mind it is important to note that Alfredo sauce can be best enjoyed in the freshest state.

The most effective thing you can do is to make just the quantity of sauce you require. If you need it, you can easily whip up a fresh amount of sauce within only some minutes.

Making excessive sauce is not an excellent idea since the sauce that you have made yourself could be ruined very quickly. It’s not recommended throwing away the sauce due to this reason.

If you’ve ever made enough sauce, make sure to cool it down as quickly as you can, and if you feel that it’s gone bad just throw it away.

The bottom-line is, throwing away sauce is always a better option than getting sick.

Can You Freeze Tzatziki? All You Need To Know!

Can You Freeze Tzatziki?

Can You Freeze Tzatziki? Can You Freeze Tzatziki?

Can you freeze Tzatziki? If you have idea, I suggest that you go through this post for an authentic answer that would stand you in good stead. Read on for more information.

Tzatziki, a well-known Greek condiment, is simple to prepare and adds great flavor to many dishes.

Ever wonder if leftover tzatziki can be frozen or made ahead? Tzatziki sauce is more suitable for freezing than other dairy-based dips. It has a lower water content than most other dips. There will be some texture changes, but this won’t alter the taste of the sauce as long as it is properly defrosted.

Continue reading for more information about yogurt sauce, how to freeze it and how to defrost it properly.

What is Tzatziki?

There are many variations of tzatziki sauces, but it is most commonly known as a Greek condiment. This classic sauce is made of yogurt, cucumbers, lemon juice and garlic.

These are the basic components of traditional tzatziki. However, your taste buds will vary depending on the herbs and spices you use.

This spice packet from Amazon is my personal recommendation for making tzatziki.

The consistency of the tzatziki sauce will vary depending on whether it is made with diluted yogurt or strained yogurt. Tzatziki made from diluted yogurt will be quite watery. Greek yogurt is used to make the classic Greek tzatziki. It has a thicker consistency.

The sauce is mild in flavor. This sauce is extremely fresh and smooth. To balance it out, tzatziki can be paired with spicy foods.

Tzatziki can be used as a side dish or appetizer. This simple but effective condiment can be used in many ways. You can use it as a salad dressing to make a quick lunch.

Mixing tzatziki and a few fresh ingredients like tomatoes or feta cheese can create a light, flavorful Italian-inspired bruschetta.

You may have noticed a fresh sauce on your gyros wrap if you’re a fan of street food. It’s likely that it was tzatziki.

You can also enjoy the tzatziki sauce with Greek chicken souvlaki and kebabs.

How to Make Tzatziki

Tzatziki can be made in a matter of minutes. Simply chop up some ingredients and combine them with yogurt to make a delicious sauce.

Tzatziki can be made from plain Greek yogurt, which you can buy in any supermarket. It is a good idea if there is a Greek market close to your home to buy real Greek yogurt. It tastes much better than local Greek yogurt.

Plain Greek yogurt is fine, but be aware of the Greek keyword. Greek yogurt is strained, which is different from regular yogurt. This means that the yogurt is strained to remove excess water. Greek yogurt is thicker than regular plain yogurt.

You will need these ingredients to make Greek tzatziki sauce:

  • 1 cup plain Greek yogurt
  • 1 finely chopped or grated cucumber.
  • 3 tablespoons fresh chopped finely chopped dill (mint parsley, thyme).
  • Three finely chopped garlic cloves
  • 2 tablespoons lemon juice
  • Black pepper and salt

Make a tzatziki sauce by preparing these ingredients and stirring them together. Add a sprinkling of olive oil to the top.

Can You Freeze Tzatziki?

Tzatziki sauce lasts for approximately 4 days in the fridge. It is best to freeze the sauce if you are unable to finish it in a few days.

There are no health risks associated with freezing tzatziki sauce. It is not likely to be as smooth as fresh-made tzatziki.

The tzatziki sauce can be kept in the freezer for up to 3 months. It is important to remember that the texture of the tzatziki sauce will change the longer it is stored in the freezer.

What happens when you freeze tzatziki

Tzatziki can become separated due to the high water content of the sauce from yogurt, cucumbers and lemon.

Curdling occurs when the lemon juice in the tzatziki sauce causes them to be juicy. Cucumbers also change in texture. The yogurt’s acidity helps preserve their initial crunch.

The Greek yogurt is water-exuding when it’s in the freezer or fridge. The texture and taste of Greek yogurt will change slightly. Yogurt becomes more loose and less smooth. The flavor becomes acidic.

Yogurt contains a lot good bacteria. Some of the good bacteria in yogurt is destroyed when it’s frozen. It is safe to eat frozen Greek yogurt or tzatziki made from it.

How to Freeze and Defrost Tzatziki

You will need to be careful about how you store the tzatziki sauce in the freezer. Also, how you defrost it later.

How to freeze  Tzatziki Sauce

You will need a tightly-fitting container to store your tzatziki sauce in the fridge. You can wrap the container in plastic wrap by adding a few layers.

You can remove as much air from the container by placing it in a freezer bag. The bag should be sealed tightly to prevent air from entering.

Double wrapping the container ensures that the tzatziki stays fresh after being defrosted. You should always mark the date on your bag to ensure that you don’t eat expired sauces more than a few months later.

How to Defrost Tzatziki

It is not a wise decision to take tzatziki from the fridge and leave it on the counter to thaw. Frozen yogurt will eventually change in texture. There are steps you can take to get the best results.

For the initial stage of defrosting, place the tzatziki sauce into the refrigerator. Only after it has thawed slightly, you can take it out to fully defrost.

After the condiment has thawed you’ll see some water. Do not try to add it back into the sauce. Instead, pour it out. To achieve a better consistency, reduce water consumption.

The defrosted tzatziki sauce can be used as a dip with vegetables, chips, or crackers. You can also use it as a dressing to potato or pasta salads.

Tzatziki is also great with fried vegetables like eggplant and zucchini.

Tips for Freezing Tzatziki Sauce

Here are some tips for making tzatziki that is suitable for freezing if you plan to store it in cold storage.

These tips are designed to make condiments less watery. As we all know, thawing makes food watery. It is important to remove as much water from the sauce as possible.

Tip No:1

Greek yogurt is more watery than regular yogurt. Full-fat Greek yogurt is thicker.

Full-fat yogurt will not only make the defrosted Tzatziki sauce less liquidy, but it will also make the sauce richer and creamier.

You can strain plain Greek yogurt to thicken it if you don’t have full fat Greek yogurt.

Tip No: 2

For your tzatziki sauce, try Persian cucumbers. They are crispier and have less water.

There is a way to extract as much water from cucumbers as possible if you don’t know where they are. Although you can remove the seeds, it will cause the cucumbers to lose their texture and waste your product.

Instead of cutting out all the good parts, you can slice the cucumber and sprinkle salt on it. Salt will help extract water from cucumbers, so you’ll have less liquid in your Tzatziki sauce.

Tip No: 3

A good tip to make the cucumbers less watery is to grate them for half an hour before you prepare the sauce. Season the grated cucumber with salt by placing it in a strainer. This is another way to make the vegetables lose excess water.

After the cucumber has been in the strainer for 20-30 minutes, give it a good squeeze so that as much water is as possible.

If you plan to make a lot of cucumbers for the tzatziki, this is a great method.

Tip No: 4

Tzatziki sauce can become grainy once it has been frozen and thawed. You can thicken the sauce with heavy cream and mix well before placing it in the freezer.

The sauce’s flavor may change. If you don’t use high-fat Greek yogurt, heavy cream can be used to increase fat content and preserve the sauce’s texture.

Tip No: 5

Tzatziki, like most other foods that can be frozen, also changes in texture. It can be enjoyed as well as fresh tzatziki by some people, but not all.

You can freeze a small amount tzatziki sauce and then defrost it to taste the difference.

Wrapping up

Can You Freeze Tzatziki?

To conclude, tzatziki is a Greek dip that can also be used in Greek salads, souvlaki, or pastries. If the tzatziki is to be used within 4 days, it may not need to be frozen.

Tzatziki’s shelf life can be extended to 12 months by freezing.

It is crucial to make sure that your tzatziki stays safe from freezing burn.

How Long Does Ranch Last?

how long does ranch last

How Long Does Ranch Last?

How Long Does Ranch Last?

Think about eating potato chips and nachos with no dip. You can also make your salad without dressing. Many dressings and dips are available nowadays. Ranch is one of America’s most loved dressings. Ranch was voted the favorite dressing by 40% of Americans. Ranch is a delicious dish. Ranch is delicious, but how long does ranch last? This is an important question to answer.

Ranch is often made from buttermilk, garlic and herbs, along with some spices, mayo, or yogurt.

Ranch is loved for its creaminess and rich flavor. You might have questions if you are thinking of buying it or if you already own it.

Can Ranch Dressing Go Bad?

Ranch dressing and sauce can go bad but they can still be used for a very long time after being opened. Ranch sauce bought at the grocery store contains many shelf stabilizers and preservatives. It is made to last no matter how long it has been opened. Ranch dressing is a condiment that can be used in many different ways in the United States.

Most Americans have ranch sauce at home. It is safe to eat as long as the dressing doesn’t contain any chunks.

How long does ranch dressing last?

Store-bought ranch dressing: Due to the preservatives or stabilizers, store bought ranch dressing will last approximately 12-18 months in the fridge and cupboard. It will last about 6-12 months.

Freshly made dressing: There is nothing better than homemade ranch dressing. It doesn’t last very long. You only have four days to consume ranch dressing once you have made it.

How long does it last?

Time for Ranch Dressing

Unopened, store bought: 12-18 months

Store-bought opened: for 6 months after purchase

Fresh made: 4 days

How can you tell if ranch dressing is bad?

Mold: You may see mold growing around the bottle and in the opening of ranch sauce as it approaches its expiration date. You must throw away any mold that is visible on the bottle, but not in the dressing.

Avoid eating food with mold. Many people think that mold can be removed or moved easily and food is safe to eat. This is false. Scientists now know that mold spores can infect any item with even the smallest amount of mold.

Bad smell: You won’t have to wonder what ranch sauce smells like when you open it. You will notice a ranch-cool or vinegary smell. There will be no middle ground. It is dangerous to eat the vinegar smell.

Bloated bottles: No matter what kind of food you eat, a bloated container is a sign that the food has been spoilt. Bloated containers are a sign that foodborne pathogens have multiplied in the container and can cause food poisoning.

Inadequate storage: Most people store an open ranch dressing bottle in their cupboard until they are ready to use it. However, some people forget to put it in the fridge and instead stick it in the cupboard.

It is fine to place it in the fridge if it has been there overnight. If it’s been several weeks or months since the last time it was opened, throw it out and buy a new one. Most likely, the milk and dairy in your dressing will go bad.

Can you eat expired ranch dressing?

It is not a good idea to eat expired food. However, just because the date has passed does not mean the food is no longer valid. The shelf-life of ranch sauce will be extended if it is kept in the fridge right after being opened.

Ranch sauce can be eaten up to two months after expiration as long as it is still in the refrigerator and the smell and taste are good.

You can throw away your ranch dressing after making it. It’s not as stable than store-bought ranch dress.

Ranch dressing has gone bad: substitutes you can use

Ranch dressing is well-known for its creamy texture and cool flavor. It is best to look for other sauces that have the same characteristics. Cilantro dressing is a rare dressing that can be almost identical to ranch dressing. Cilantro dressing uses the same ingredients as ranch dressing but contains cilantro. You won’t find cilantro dressing at many restaurants or in limited stores.

Many people don’t like cilantro so a blue cheese dressing is a good choice. Blue cheese dressing is nearly as popular as ranch dressing. Many places that offer popular food like wings, pizzas, and finger foods will also feature blue cheese.

How to store ranch dressing

Keep it in the cupboard Place it in the fridge once you have opened it.

You can find your sauces and dressings in the fridge by placing them on the sides of the refrigerator. However, you should put the ranch dressing at its back so that it doesn’t get exposed to the warm air when you open the fridge doors.

Fresh: Keep your homemade ranch dressing fresh in a sealed container. It should be eaten within 4 days.

Shelf Life of Ranch

You’ve made ranch dressing, or bought it from a store and forgotten to use it. It’s possible that your ranch dressing has gone bad. What can you do to tell if ranch dressing is bad? Well, I have already discussed that in the earlier part of this article.

You only need to see and smell to tell if ranch dressing is bad. It’s not difficult.

Smelling a ranch that is deteriorating is the best way to tell if it’s rotten. It is likely that the ranch dressing has a foul odor.

If you don’t store it properly, this can happen. Ranch dressing should always be kept in tightly sealed jars and refrigerated.

If it is left out too long, heat can cause damage to ingredients such as yogurt and buttermilk. This causes the bad smell.

The development molds are another way to determine if your ranch is in trouble. Molds can develop in ranch dressings that have been spoiled over time.

.Ranch dressing should be used before its best before date.

Throw it out if your ranch isn’t oil-based or the contents of the jar separate. The ranch has gone bad and should not be eaten.

Similar Questions

Is ranch dressing made with mayonnaise?

Ranch dressing is a dressing for salads that’s made with garlic, salt, onions, mustard, herbs and buttermilk. They are mixed with mayonnaise or another oil-emulsifying agent.

Can you freeze ranch dressing?

It is possible, but not recommended to freeze ranch dressing. Buttermilk is one of the ingredients in this recipe. When it’s thawed, it will leave behind a bland, clumpy and bitter-tasting sauce.

Wrapping up

How long does ranch last?

These are the important points to remember:

Ranch dressing is a popular condiment all across the US. Ranch dressing bought in stores usually lasts 12-18 months in the cupboard. The dressing can be kept in the refrigerator for up to 6 months. Ranch dressing must be consumed within 4 days if it is made fresh.

But you must throw it out if your ranch sauce is dry or bloating.

There are two ranch dressing options: blue cheese dressing and cilantro dressing.

Ranch dressing is a healthier and more delicious option than any other. This is one of the healthiest dressings. You can either buy it or make your own and add flavor to your meals. This dressing is delicious and should not be wasted. These tips will help you make your ranch last for many weeks.

Remember that different ingredients have different health benefits and freshness. Please share this recipe with family and friends.


Does Moonshine Go Bad?

Does Moonshine Go Bad?

Does Moonshine Go Bad?

Does Moonshine Go Bad?

Does moonshine go bad? If you are not sure about this, I urge you to go through this blog post carefully as it contains all the details.

Many a time we have found ourselves in a situation when, finding an alcohol bottle hidden in the kitchen cabinet, we start contemplating whether it’s safe to consume. For this particular bottle, which is moonshine, there isn’t even a standard time frame for this illegal beverage.

While different sources may differ on the subject however the truth about the question of whether moonshine will go bad or not is obvious. an unflavored bottle of moonshine as with other plain spirits, comes with an unending shelf life. A moonshine bottle that is flavored will likely have a shorter shelf-life however.

If you’re looking to ensure that you are able to be sure to drink the bottle of moonshine which has been sitting in the back of your cupboard for what seems like a long time this is all you should be aware of about moonshine!

What is the shelf-life of moonshine?

Most moonshine bottles have a shelf-life that is indefinite and, therefore, in the majority of cases you won’t need to be concerned regarding the quality or any health risk when you come across an unopened bottle of moonshine which has stored in your pantry for years.

If the moonshine bottle was opened, the shelf life would be shorter by six months.

The reason that the moonshine bottle that is not opened will last for long is due to the process of distillation. In contrast to many alcohols, moonshine distills without sugars, meaning that the liquor will not spoil. Sugar-based products have the potential to last for a shorter time and that’s why moonshine that has added flavors, or any other spirits with added flavors in general, will spoil in the event that it is stored for longer duration.

Be aware that not all moonshine is produced and distilled the same manner. The process of making moonshine can be an arduous and complex process due to the legality of the drink. So, unless you’ve created the moonshine on your own, chances are that you’re drinking a moonshine that’s not 100% pure.

Commercial moonshine usually comes flavored with sugars added to it which can lead to a shortening of the lifespan. When unopened, the moonshine is supposed to last for a long time but considering safety and quality of the drink, you are advised to consume it as quickly as possible.

How To Tell If Moonshine is Bad?

If you’re worried that an open (or not yet opened) container of moonshine has turned bad, here are some warning signs to look for.

The most obvious sign that your moonshine has gone off is the flavor. It’s not going to cause you any harm to crack open the bottle of moonshine and take one sip. You’ll know when it’s off as the flavor will be unpleasant. A sip of moonshine to determine whether it’s gone bad will only be a safe thing if the moonshine was stored, sealed and distilled in a proper manner.

Remember this: if moonshine was been stored without a lid and consequently was exposed to air, this could alter the flavor of the moonshine. However, this doesn’t necessarily indicate that it’s deteriorated.

If you do notice that the color of the moonshine appears different from normal don’t consume it. If you are unsure, be sure to pass the test of the spoon. The test for the spoon works like this Pour some moonshine into the spoon and then set it on fire.

A blue flame indicates that the moonshine is safe to drink. A yellow or red flame signifies that the moonshine has lead, meaning it’s not safe to drink.

Is it unsafe to consume bad moonshine?

There’s a reason moonshine is illegal: the process of distilling moonshine could be contaminated with deadly metal particles. Even if moonshine is a product with an unending shelf life it’s impossible to tell whether a specific bottle will be fatal or not.

If you’re just beginning to learn about moonshine, you need to know two chemical substances you should know about: ethanol and methanol.

Methanol

Methanol is a colorless alcohol substance, which is the simplest alcohol available. Even in the smallest dosages, methanol is extremely dangerous and could be fatal when mixed with ethanol.

Ethanol

Ethanol is, on contrary is a basic alcohol which is safe for you to consume in small quantities. If you consume excessive amounts of ethanol it could be hazardous which can cause stomach cramps for instance. This is the reason why ethanol should be consumed in smaller amounts for example, with an mixer or in shot.

If you are making a quality moonshine batch it should not contain trace of Methanol. In a bad batch moonshine, there are trace amounts of methanol, making the harmless alcohol toxic.

What is the purpose of methanol?

After consumption in a methanol-based beverage, it breaks into formaldehyde, formate, as well as formic acids. In the most straightforward of terms it is possible that methanol causes permanent blindness because it targets the optic nerve. This is usually the case after consumption, however, it could also happen in the distillation process.

In the most extreme situations, methanol may cause death. This is because it’s difficult to determine if the liquid is methanol-containing or not, as Methanol is not flavoring.

The potential danger of methanol contained in moonshine is for its being illegal. If you plan to purchase an ounce of moonshine it should be purchased from an experienced and reliable dealer who has completed the correct process of distillation.

Can moonshine expire?

The good thing is that moonshine generally isn’t a thing that expires. However, there are some factors that can affect the quality of the moonshine you purchase.

Moonshine is also referred to as whiskey that is clear and unaged. There are two primary varieties of moonshine. They can be normal or flavored. Moonshine of these two main types can’t be kept for the same amount of time.

Does moonshine improve with age?

Certain alcohol-based drinks like wine are able to improve when matured for a couple of years. Moonshiners are often concerned that their spirits could also get better when kept for a long period of time.

Wine and other alcohol-based beverages can be stored inside wooden barrels and they will absorb a bit of the flavor and essence that the wood provides. The characteristics of flavor in the wood will alter the taste of liquor over time.

Since moonshine is stored inside glass jars, not wooden barrels, it’s unlikely to alter significantly in taste. Actually, the oxidation process of open moonshine could alter the flavor, and if your moonshine gets exposed to sunlight at storage, the product could turn out to be of extremely bad taste.

The moonshine you’ve purchased isn’t likely to improve when it’s stored on the shelf. This means it’s best to enjoy it while drinking.

How to store moonshine?

As with all spirits it’s not advised to drink a full bottle of moonshine all by yourself that’s why you should know how to properly store it so that you can drink it later on safely.

If you’re wondering if moonshine needs to be refrigerated there’s no wrong answer. Certain people like refrigerating their moonshine in order to keep the alcohol cool and out of sunlight, however there is no proof that suggests that moonshine that is not refrigerated is good for your health.

But this is only applicable to moonshine that is pure, since the bottle that has been opened and moonshine that has a flavor is required to be chilled to prolong its shelf time. This is due to the fact that the coldness in the fridge slows the process of oxidation and delays the degradation of the sugars contained in the moonshine that is flavored.

Be aware that this is only applicable to bottles that are opened and moonshine that are flavored, as unopened bottles of moonshine flavored with flavor will last for years, regardless of whether it’s stored in a refrigerator or not.

When it comes to what you should keep it in it doesn’t matter if you put it in glass or plastic. Moonshine will not be able to burn through plastic unless an open flame is in the vicinity. If you want to store it long-term it is best to use glass containers.

It’s best to keep it away from direct sunlight. The UV rays can penetrate the bottle (whether it’s glass or plastic) and will ultimately “cook” the moonshine and decrease its shelf-life significantly. This is the reason why most people keep their moonshine at an in the rear of a cool, dark cabinet.

What about moonshine in the heat?

This is why moonshine shouldn’t get exposed to sun’s direct rays. But what happens to temperatures?

If it is sealed in a proper manner, it shouldn’t be a problem what temperature the space it’s stored in.

The wine won’t spoil according to the conventional sense. However the taste of the moonshine is affected. The reason is that the heat causes the moonshine’s chemicals to form a new arrangement that results in a change in the flavor.

This shouldn’t be a problem for those who do not care about the flavor of moonshine. If you are it is necessary to keep moonshine in a cool and dark place. A cellar for wine or a an area that is cool and cool is the best choice for this.

Can I freeze moonshine?

So, we’re aware moonshine’s taste changes with the hot weather, but what happens in the cold?

Moonshine has an ABV content of about 40%. This implies that it requires a cold, extremely cold location to be able to freeze. A normal freezer is unlikely to suffice, since moonshine needs a temperature of -235°F to completely freeze.

However, even if it does freeze it’s likely to happen that water of the moonshine will be frozen before the alcohol and will make the moonshine stronger with an increased ABV content.

Does flavored moonshine go bad?

Pure moonshine is a spirit with an unending shelf life but flavored moonshines have significantly shorter shelf-life. Pure moonshine, as with other spirits that are pure, is distillated for such a long time that it has the least amount of sugar which means it will not be easily spoiled.

Flavored moonshine, on other hand, is dependent on sugar to flavor it and this means that it will get spoiled eventually. The sugar content may be derived from artificial sweeteners, or from fruits.

What about moonshine mixed with fruits?

Moonshine infused with fruit has an extremely shorter shelf life as pure moonshine. If stored properly and not opened it could last for many years. If the container is opened, shelf life will be reduced to about 3-6 months when stored in the refrigerator. Many people do not think that sugar is a major component present in fruit, which is increased during distillation.

The reason that moonshine mixed with fruit turns rapidly bad is due to evaporate. After the bottle or container is opened (or when it’s been cleaned) and exposed to air causes the alcohol to slowly evaporate. It may take a few hours however the effects will become apparent over the course of several years, at which point the contents will simply disappear.

The process of evaporation will only speed up when the moonshine with a flavor is exposed to light and heat that will reduce the alcohol content, and also weaken the flavor.

Air exposure can also lead to the process of oxidation. Oxidation is an enzymatic reaction which alters the atomic composition of moonshine. This can cause the flavor of moonshine to be slightly sour. It also reduces its shelf time.

Wrapping up

Does Moonshine Go Bad?

So, does moonshine go bad? I have already given that answer for you. That’s it. If you’ve kept the bottle of moonshine pure properly and bought it from a trusted retailer, the shelf-life of the liquor is unaffected.

When you keep your moonshine with a flavor, its shelf life is about 2 to 3 years. After opening the moonshine with a flavor, its shelf life decreases to about 3 months because of the amount of sugar in the product and air exposure.

Moonshine’s world is a tangled and confusing one. For one thing,  it is difficult to discern whether the moonshine bottle is harmful or if it is not. However, certain folks may be tempted to put their health at risk to determine if the alcohol is safe to consume.

The importance of purchasing moonshine and drinking it from a reliable dealer can’t be overemphasized. It needs to be sealed, distilled and proofed and stored in a safe manner to reduce the chance of it becoming stale. In addition, it is difficult to determine if the moonshine has methanol as well, and this can cause blindness, or even death.

There are a lot of dangers to be aware of when drinking moonshine. Make sure you follow the rules for preserving empty and unopened bottles of moonshine.

Does Nutella Go Bad?

Does Nutella go bad?

Does Nutella Go Bad? How Long Does Nutella Last? 

Does Nutella go bad?


Does Nutella go bad? If you want to know the answer to this question, you should go through this post which contains all the information related to Nutella and its shelf life.

With a rich and varied background, chocolates have been consumed as a beverage and  food. Nowadays, chocolate-based foods are among the most sought-after dessert options all over the world.

Chocolate is rich, sweet and rich and has been proved to be a great stimulant of dopamine, which is the happy hormone.

Chocolate comes in different forms. There’s baking chocolate that’s very bitter and is used to bake.

The dark chocolate can be a little bitter, but is much more satisfying. Milk chocolates are the most well-known and delicious version.

Despite how much people love eating chocolate, it’s widely known to be high in calories, and it isn’t very healthy. Nutella is a chocolate spread that is made up of hazelnuts and cocoa that tastes similar to chocolate.

Nutella is considered to be healthier than chocolate. Its accessibility as a paste-like spread makes it ideal for sandwich and breakfast preparation as peanut butter.

However, the main question is: does Nutella go bad? In this article we’re going to find out the answer to that question.

We’ll also show you how to keep the jar that contain Nutella in a proper manner, as well as the best way to determine when it’s gone bad.

What is Nutella Anyway?

Nutella is a common spread eaten with bread at breakfast, similar to margarine and peanut butter.

It is often described as a hazelnut and chocolate spread; however, sugar and palm oil are about 50% of the ingredients.

A few of the ingredients that make up Nutella differ from one country to another. However, the main ingredients comprise modified palm oil, hazelnuts, sugar, hazelnuts powder, and skimmed milk.

The production of this spread begins with extracting cocoa powder using cocoa beans. Then, the hazelnuts get processed, and only the healthy and whole fruits are accepted.

A powerful mix of hazelnuts, cocoa powder sugar, skimmed milk and is then made in an enormous tank until it turns into a paste-like.

When the proper consistency of the paste has been attained, the next step is an adding of modified palm oil.

This is to help the Nutella spread maintain its consistency of a paste at room temperature, without melting.

Based on the country of origin or manufacturing facility, additional ingredients may be added later.

The most well-known member of the breakfast family is utilized to bring that chocolaty sweetness to a wide range of meals.

It can be used for in baking cakes, drinks, or consume it by itself.

Does Nutella Go Bad? How Long Does Nutella Last?

As with any processed food item, Nutella has a best-by date. This is the manufacturer’s estimate of the optimal time to consume it and is based on shelf-life study and knowledge of the ingredients.

Similar to food products that are processed, I am sure  you are aware that using Nutella after the date of its sell-by is possible. But for how long? What is the duration Nutella last?

To begin, we need to discuss the ingredient and their effects on the impact the overall. It is made of sugar palm oil, milk hazelnuts, cocoa, and sugar.

Sugar is a great preservative as it absorbs water and hinders the development of microorganisms. It is considered to be a dairy product and has a short shelf duration.

Hazelnuts are also renowned for their short storage times and make up the rather limited shelf time of Nutella.

Unopened Nutella jars is more durable than an open one. It can be enjoyed even up to six months after the date of its best before.

A jar that has been opened can last for a year after having been opened. It will definitely lose quality and freshness; however, it is still a good product to consume.

Therefore, while Nutella is a bit stale and its shelf life gets shorter, but you are able to take pleasure in your hazelnut spread for a long period of time.

All you need to do is to practice good storage practices, and follow the steps in the previous paragraphs, and you’ll be able to take advantage of the best Nutella for an extended period of time.

How to Tell if Nutella Is Bad?

We have now established that the container of Nutella could be rotten. The next step is to know whether it’s gone bad.

In determining whether food items are fresh items, there are three signs. The aroma, taste and also the appearance of the food. The same indicators are applicable to Nutella.

Here are some ways to identify if your container of Nutella is rotten.

Nutella is a great source of oil. One obvious indicator for bad oil is the smell. So, if your Nutella jar begins to smell foul and unpleasant, it’s unfit to be consumed and must be thrown away.

As a chocolate-hazelnut spread, it must be sweet and chocolaty in taste. If it has an unpleasant or bitter taste the product is no appropriate to eat.

Nutella has a soft paste-like texture; this is the typical appearance and feel. However, a sign that indicates Nutella becoming spoiled is a change in texture that makes it hard and dry.

Be aware, Nutella is a rich source of oil. After a few months of storage the oil will eventually rise upwards. It’s not an indication that the Nutella jar isn’t good.

It’s common along with other sandwich spreads such as mustard or tahini.

Be aware that refrigeration can cause your Nutella difficult to eat. That’s why it’s bad if you bought it from the refrigerator and it’s not creamy.

How to Store Nutella Properly?

How you keep your food can make an impact on getting most out of it and frequently waste of resources. Storage of Nutella isn’t any different.

It has a significant amount of sugar, which can help to stop the rapid growth of microorganisms and thereby slowing down any process of degradation.

However, whether you have opened or not it is important to adhere to the best storage practices to allow the jar(s) that contain Nutella to last as long as it is possible to. Here are some tips on storage and usage:

  1. Keep it in a cool, dry area. Just as the label states, “Store in a cool dry, dark place” The kitchen pantry is one such location.
  2. . After opening the container, make sure you seal the lid securely.
  3. Make sure your Nutella jar isn’t near any source of heat or direct sunlight. Otherwise, the oils inside the Nutella jar will begin to separate.
  4. Use a clean tool to avoid cross-contamination. Avoid using your fingers.
  5. Avoid refrigeration as it can harden the spread, making it hard to actually “spread”.
  6. Don’t keep your Nutella in freeze because it is usually packaged in glass containers. Glass shatters at certain temperatures.

What happens if you eat an expired Nutella?

Consuming expired Nutella will not cause you to become sick unless it is damaged. Nutella is sold with a best-by date rather than an expiration date. The date doesn’t indicate the safety of the product. Instead, it tells you the length of time that the product will last in the best condition.

A jar of Nutella that is unopened is good for approximately 1 month beyond the date printed if stored properly. If Nutella is not at its peak, check it for various quality factors prior to eating. If it smells rancid or starts to smell moldy off-flavor, off-color, or off-flavor, the product is in danger of going bad.

How long will Nutella last?

It is not recommended to use a spoon that is wet or old for scooping out Nutella. The introduction of contaminants can increase the rate of degradation. In the same way, dipping fingers into the Nutella container isn’t the ideal way to proceed.

In the pantry

Nutella(unopened) Six months after the best-by-date

Nutella(opened) 6 months

How do I keep Nutella?

Nutella is best kept in a dark, dry and cool area. Temperatures of 18 to 20 degrees are suitable to store the Nutella spread safe. It is therefore recommended to store this spread inside the refrigerator. Be sure that the spread isn’t exposed to the sun’s rays or heat from the stove or humidity.

Refrigerating Nutella can extend the shelf-life of it but it also reduces the possibility of spreading due to the process of hardening. After refrigerating Nutella, don’t store in your cupboards. It will be exposed to fluctuations in temperature that could accelerate the degrading process.

Can you freeze Nutella?

The freezing of Nutella is not advised. It can affect the flavor and the texture of spread in a significant way.

It leads to it to separate milk protein as well as different solids in the oil. It won’t return to its smooth and creamy texture, even after it has thawed.

If it is necessary to freeze Nutella, the best way to do it is to move it from the the glass bottle into an freezer bag. Label the bag and then throw Nutella into the freezer.

Other FAQs on Nutella: does Nutella go bad?

How do you prepare Nutella by yourself?

Ingredients

  • 8 oz. hazelnuts
  • 1 cup confectioners’ sugar
  • 1/3 cup cocoa powder unsweetened
  • 2 tablespoons of oil canola, or coconut
  • 1 tsp vanilla extract
  • 1 teaspoon salt
  • 3/4 cup chocolate chopped chips or semi-sweet chocolate chips are also an option.

Instructions

The oven should be heated to 375 for 20 minutes. Prepare a baking tray with a baking mat made of silicone or parchment. Place the hazelnuts on the tray in an even layer and bake for 12 to 15 minutes. After 10 minutes, you should check to ensure that the nuts are evenly browning. Stir to keep the nuts from becoming burned.

Remove the hazelnuts that were roasted from the oven and place them on a kitchen cloth. Let them cool.

If they are cold enough to be touched, then gently rub them with the towels until skin falls off of the seeds.

In the food processor, add the hazelnuts that have been dehusked and roast and then grind until finely crushed. The nuts must undergo processing until they begin in releasing oil.

Then add the sugar and cocoa powder, and blend them by mixing the hazelnuts in a liquid until they are homogeneous.

Add the salt, and continue to process for five minutes. Be sure to scrape the top of the machine frequently to ensure that the nuts are thoroughly ground and incorporated with the other ingredients.

The last but not last least, add chocolate chips, and then grind until they are combined. If the mix feels lumpy you can add vegetable oil, such as coconut oil until the desired consistency is reached.

Use a spatula to transfer the mixture from the blender into an unsterilized container. Place it in the fridge for a week.

Wrapping up

Does Nutella Go Bad?

This article has answered the question ” does Nutella go bad?”, and how do you keep Nutella? I am sure all these information will stand you in good stead in future when you go to the kitchen to prepare a Nutella-based dish for your family members.