What Does Dr Pepper Taste Like?

What Does Dr Pepper Taste Like?

What Does Dr Pepper Taste Like?

What does Dr Pepper taste like? I am sure you are here because you want to have some basic  idea about this soft drink Read on if you are interested about this topic.

In this article, we’re talk about Dr Pepper. You’ll learn what this soda tastes like, how and why it’s different from Coke, and how to make your own imitation of Dr Pepper at the convenience of your home.

Let’s get started now.

WHAT DOES DR PEPPER TASTE LIKE?

Dr Pepper is soft drink that’s been around in since the late 19th century. It does come in a variety of flavors, but we’ll focus on the original to make things simple.

This beverage has a deep, bold flavor. It’s spiced with what tastes like a combination of allspice, mint and faint licorice. But most obvious are its darker fruit elements. You’ll get cherries, prunes and plum jam, but taste testers have reported anything from apricots to citrus.

DOES DR PEPPER TASTE LIKE COKE?

A lot of folks are of the opinion that Dr Pepper is almost like Coke, but spicier. When we say spicier, we don’t mean hot—we mean sharper with a richer diversity of spices.

What may be a better comparison is Coca-Cola Cherry. But Dr Pepper is also frequently compared with root beer for its sassafras quality. Suffice it to say, there’s a lot going on in this soda.

DOES DR PEPPER TASTE LIKE MEDICINE?

You could say that, but only in the same way that you could say cherry-flavored Coke and cherry candies taste like medicine. To some, cherry flavor is reminiscent of cough syrup.

But Dr Pepper fans are probably not going to find that it tastes medicinal. It’s sweet with a whirlwind of tastes. If you like cherry candy and root beer, you may like Dr Pepper.

DOES DR PEPPER HAVE PEPPER?

Dr Pepper does keep its proprietary formula secret, so we suppose that we can’t say for sure whether it has pepper in it or not.

There are those who swear that they taste black or even cayenne pepper, but this is still not a hot-spicy drink. It’s a little bit of a Rorschach test for flavor.

THE TRUTH ABOUT DR PEPPER’S USE 23 FLAVORS TO CREATE A UNIQUE FORMULA

There’s something different about cracking open a cold can of Dr Pepper. From the fizz buzzing to the unique scent, fans of the soft drink know all 23 flavors are about to hit their taste buds with a sweet and peppery kick. But there’s more to the signature taste and smell of the classic soda than simply striving for complexity and balance.

Dr Pepper was invented in 1885 by Charles Alderton, a pharmacist in Waco, Texas. Noticing that customers loved how the soda fountain inside the drug store where he worked smelled sweet, Alderton decided to create a drink that imitated that soda fountain scent and flavor.

While the aroma of the old-fashioned soda fountain might have been the inspiration behind the drink’s taste, a blend of other kinds of soda isn’t exactly the 23 flavors that give Dr Pepper its unique taste.

To find out exactly what those ingredients are, you’d have to break into the vault that holds the recipe, currently located inside the Dr Pepper Snapple Group headquarters in Plano, Texas.

The 23 flavors that make up Dr Pepper, however, are the company’s top-secret.

When you think of what Dr Pepper tastes like, and what we know other soda flavors are flavored to taste like, you might be surprised by the flavors people believe make up the drink’s profile.

According to The Daily Meal, mega fans of Dr Pepper believe the 23 flavors are (in alphabetical order) amaretto, almond, blackberry, black licorice, caramel, carrot, clove, cherry, cola, ginger, juniper, lemon, molasses, nutmeg, orange, prune, plum, pepper, root beer, rum, raspberry, tomato, and vanilla.

So, the peppery kick that the soda has might come from pepper itself, but it could also be helped along by black licorice, clove, ginger, and root beer to give Dr Pepper the more subtle spice it has.

Whether you agree with the public consensus on Dr Pepper’s flavors or not, you should definitely pick up a bottle and try to decipher it yourself for the fun of it. You might be surprised at what flavors your palate finds hidden within the soda’s proprietary secret blend.

WHY IS THERE A SCARCITY OF DR PEPPER NOWADAYS?

If you’re a fan of Dr Pepper and have recently been having trouble procuring cans of your favorite flavor, you’re not alone. CNN reports that this specific soda shortage is being seen in multiple regions throughout the United States.

The outlet believes that corona virus is partly to blame for the scarcity, saying that the shortage is being caused by customers purchasing extra canned beverages at the beginning of the pandemic to offset their consumption that would normally happen in bars and restaurants.

Fearing potential lock-downs or illness, many consumers overbought products, leading to shortages in things like toilet paper, meat, and yeast.

In a statement posted to the brand’s Twitter account, Dr Pepper confirmed that shortages are being seen nationwide across all of their products, including newcomer Dr Pepper & Cream Soda. The company’s website lists 11 permanent flavors of the soda in total.

In their statement, Dr Pepper thanks fans for their patience and understanding as the brand works through the accessibility problem with their distribution partners while continuing to prioritize workers’ safety

DR PEPPER RECIPE TIPS

The thing is, Dr Pepper is not the most nutritious drink in the world. It is a soda. If you want to try something more health-conscious, you can check out a few videos in YouTube:

WRAPPING UP

What Does Dr Pepper Taste Like?

Dr Pepper has been around for quite some time. It’s sort of like cherry cola, but more nuanced. It’s not for everyone, but it’s still a popular beverage.

To avoid the artificial flavors and high-fructose corn syrup, try making a mock Dr Pepper with fruits, spices and sparkling water. We guarantee that it’ll be the winner.

So, I would like to wind up saying that you can always buy a can of Dr Pepper and check for yourself how it tastes and whether you like it or not. In today’s world, when Coke and Pepsi are enjoying a monopoly in this field, I think we should have more entrepreneurs coming up with such kind of formulas. Who knows they can be as successful as these multinational giants!

What Does Crab Taste Like?

What Does Crab Taste Like?

What Does Crab Taste Like? Does Crab Taste Good?

What Does Crab Taste Like?

Crabs are a form of shellfish that is located in various parts of the globe. They are usually taken in as seafood and consumed in most parts of the world as a staple diet. However, they also possess distinctive flavor that you might not have experienced before. There are numerous ways to enjoy the crab meat. For instance, you could prepare an amazing crab ceviche, or delicious crab rice that has been fried. In this blog I’ll provide you with an answer to an important question: what does the crab taste like?

What is Crab & Crab Meat?

Crab is a kind of crustacean. They are creatures living in cold waters that can live in fresh and salty water. They have been part of the human diet for a long time. Crabmeat is the food part of the crab’s body.

It is taken from whole crabs or from pieces taken out and removed including legs and claws.

The majority of them are caught in coastal areas around the world Crabs are typically used for food and are sold as live species.

But, they are also able to be frozen or canned.

Crabmeat is a common ingredient in many dishes, including salads and crab cakes.

It’s rich in protein, and is low in fat in comparison to other meats, which makes it a perfect choice to eat healthy and healthy meals like the Mediterranean diet, which requires fish at least twice a week.

Varieties of Crab

It is crucial to know the different kinds of crabs and the purposes they’re used for.

Of course, certain crabs such as Blue Crabs or Dungeness will cost more due to their popularity but with a amount of investigation it is possible to find cheaper alternatives like rock crabs can be just as delicious.

All it takes is to know your target market.

In this post, I hope you will have learned something new about these tasty crustaceans.

Rock Crab: These crabs can be used for many purposes, such as Bait and Saltwater Fishing baits which makes them a cheap alternative, especially when compared to other varieties like Dungeness Crabs.

They’re also great to cook at home, and are available for less than $40 for a dozen across the Northeast US.

Dungeness Crab: Dungeness Crabs great for any occasion or use because they taste great when cooked.

They are very low in leftover meat (less than 50 percent) because of their size and soft texture. This makes them suitable for a variety of dishes such as sushi-style rolls to crab cakes.

Raw, they’re delicious eaten with lemon juice olive oil, mayonnaise as well as mayonnaise and celery.

King Crab: King Crabs the most expensive crabs and possess a sweet taste when cooked because of their large proportion of meat.

They’re also ideal for sushi since they can be prepared raw with olive oil, lemon juice mayonnaise, celery, and olive oil or simmered in hot water, then immersed in an ice water bath, which helps firm their texture and makes it easier to chop.

Blue Claw Crab: This kind crab comes with a mild flavor that’s quite like shrimp, which is why it’s often found in dishes like Chowders, scampi sauce and bisques.

It also makes a fantastic bait.

Snow White Crabs: These crabs thrive in cold temperatures as do mussels. That’s why they are typically located within Alaska and Maine.

They have a delicate and sweet taste making them ideal for salads, sauces bisques, and chowders.

Health and Nutritional Benefits of Crab Meat

In the world of food, Crab meat is a delicious delicacy typically consumed during mealtimes.

Did you know that it is a great source of health benefits? It is a good source of 18% protein and two grams of fat in a 100g portion.

Additionally the crabs have high Omega 3 fatty acids levels vital for heart health.

A single serving of food will provide you with about 12g protein as well as significant vitamin B12, calcium, and magnesium levels to give a few advantages.

Crabmeat is a great supply of Vitamin D that helps increase calcium absorption in our bones, assisting us to maintain healthy, strong teeth and bone density as we get older.

Don’t forget to mention the vitamin A12 that is crucial to nerve function and the production of red blood cells.

This summer, if you’re looking to cut calories while enjoying some tasty seafood- consider substituting your steak or chicken with a healthy portion of Dungeness crab.

It’s a great snack, but it can also be enjoyed in sandwiches, salads, or mixed in eggs for breakfast. It is a great match with nuts, vegetables, and even fruits.

It’s delicious it’s cooked over the grill, or in a pan with your favorite pasta dish.

There’s a lot to enjoy about this dish.

Its rich flavor, healthy benefits and its versatility, it’s a win-win for your tastes as well as your body.

What Does Crab Meat Taste Like?

The taste of it is different according to the type and size of crabs that are harvested.

However, it is described by many as having a flavor as a blend of lobster and shrimp, and with the right amount of salt, it should taste awesome.

Crabmeat is white meat not as soft and salty as steaks or chicken but it does not have a strong fishy taste.

Instead it absorbs flavors similar to butter, giving it a better taste, but without the fishy scent.

The texture of the crab meat is soft and not as tough as meat from other fish.

However, it is prone to fall apart quickly, so it’s not necessary to be afraid to eat it using your fingers.

The sweetness is natural to crab meat, which is due by the low sodium content of seafood.

While it is a good source of oceanic taste, any spice will overwhelm its delicate taste when added to it too strongly.

If you’re looking to discover new flavors to try this season, you can try adding balsamic vinegar, or brown sugar to your crab cakes.

What Does Crab Butter Taste Like?

Crab butter is a delicious delicacy that is popular in the Chesapeake Bay area.

It could have initially been served as an appetizer or a side dish, but it’s been gaining popularity and is widely available in Maryland, Virginia, Delaware and even southeast Pennsylvania.

Crab butter is a creamy texture that is bursting with flavor thanks to the creamy texture and the fresh herbs.

But, the richness is balanced by the herbal taste, based on the spices you pick to enhance the flavor of the sauce.

If you’re seeking something light after a long meal or an appetizer to go with your meal it isn’t the kind of thing you’re looking for but if enjoy the rich flavors that fill your mouth, and you’re happy, then you should try it.

Fresh herbs are typically added towards the end of cooking time (most often tarragon) which gives the dish a herbal taste that is in contrast to its creamy richness.

You can serve crab butter with toast as an appetizer prior to dining or with your main meal as a side dish or even as a dessert when served with fruits like honeydew melon and figs.

It’s generally made from blue crabs since they’re widespread across the East Coast, but other species like Dungeness crabs, stones crabs and king crab could be substituted.

What Does Imitation Crab Taste Like?

Imitation crabs are made of surimi, a minced piece of pollock labeled “imitation,” and then mixed with other ingredients, before it is heated, cut into tiny round pieces and then coated with starch.

Soft and chewy, it is much like regular crabmeat.

The flavor however may be a bit sour for some because it doesn’t possess the natural sweetness that comes from freshly caught white fish that’s cooked or steamed in broth to eliminate any excess saltiness from the surimi before cutting it into smaller pieces.

The imitation crab is more salty than other seafood due to the fact that it contains MSG (monosodium glutamate) as well as sugar.

This can help mimic various flavors like salty and sweet.

A lot of people believe imitation crab is a great alternative to fresh crab meat since it’s much easier to locate and also less expensive.

Also, it contains preservatives which mean they remain longer on shelves and aren’t easily spoiled.

What Does King Crab Taste Like?

King Crab is a crustacean living within the Pacific Ocean.

They are renowned for their delicious flavor and they are as delicious as they could be.

Their meat is clear and smooth, and comes with various textures . It also has a distinct flavor typically called “sweet”.

King Crab can be found in a few Asian countries, however they are typically found in Western countries.

It is the King crab season runs from October until January because of the patterns of its migration.

The texture and sweetness of the meat of crab are like lobster. However, there is also a salty taste of iodine.

If you’re not used to salty foods, then this may be too salty for you.

The most well-known method for cooking King Crabs would be to boil them or steam them until they are cooked Then cut them into pieces large enough to satisfy all to eat.

What is the Difference Between Snow Crab and King Crab?

Although both species of crab are renowned for their delicious leg meat (we generally don’t eat the flesh from the body) There are some key distinctions among these crustaceans sought-after by many.

Size and Legs

The size is the biggest differentiator between the two kinds, with king crabs being the bigger specimen. The largest of them can weigh 20 pounds and be five feet in length, while the legs that are sold in stores weigh an average six pounds. King crab legs are shorter than snow crabs and are more robust with a thick hard-to-break shell. Snow crabs have incredibly long legs and thinner shells. They weigh between 2 and 4 pounds.

Habitat and Season

The snow crabs are found throughout both the North Atlantic and North Pacific oceans. They prefer the cold, deep waters of these seas that are located in the northern part of the world. The harvesting season begins in the latter part of fall and can last until the beginning of summer. The Alaskan King crab, however has a restricted area of habitat and harvesting season. The huge crustaceans live within the Bering Sea that lies between Alaska in the Arctic and Russia. King crab fishermen collect them for only two weeks during the winter.

Taste and Texture

The name Snow crab comes from the meat that changes from red to a snowy white upon cooking and has the sweet, subtle briny taste. The texture is firm, and it is more flexible (easily breaking into small pieces) than the king crab. The leg shells of the snow crab are easily broken and can be used for breaking open by hand.

Alaskan king crab’s flavor reputation precedes it. The meat of the leg is renowned for its sweet, rich taste and tender, delicate texture that resembles lobster meat. However, it isn’t easy to get that sought-after meat — the heavy shells with massive spikes typically require cracking tools.

Does Crab Taste Like Lobster?

Both the crab and the lobster are cold-water creatures that reside in the oceans of the world.  However, there is no connection between them aside from this simple fact.

The flavor of crab is different according to the kind.

In certain instances it can have a mild sweet and sweet taste.

The meat of lobster isn’t always sweet however it does have an acidic, clean flavor.

The texture of the crab meat is distinct from lobster meat.

Lobster meat is generally thought of as more tender, whereas crabmeat is a lot more dense consistency.

In certain regions of the world, such as Asia and Europe the people consume both varieties of food together since they share similar textures and taste.

In North America, most people like eating only in restaurants, or shop for seafood in supermarkets because crabs are much more popular in this region than lobsters.

How to Cook Crab?

The best method of cooking crab is to boil the crab in a pot of water.

Then, put the vegetables and crabs on top of one another inside the pot. You can add the addition of salt to enhance flavor , if you wish.

Then you should add enough water that they’re covered one inch or so above their shells. Then, bring it to a boil , which can last between 10 and 12 minutes based on the size.

After boiling the crab for around 12 minutes, pull them out and allow them to cool down for a while.

Then, remove any meat that remains from your shell. It should be easy to remove after it has been cooked.

Finally, enjoy your delicious crab.

You can dip them into butter or sauce, or eat them just as they are.

Why Is Crab So Expensive?

Crabs are delicacy and their cost reflects the value. Costs for crabs have grown as the demand for them increases.

There are many reasons crab is so expensive.

First of all crabs have a seasonality which means they are only harvested in certain times of the year.

A crab can spoil rapidly after being caught, and anglers are required be aware of their surroundings prior to going to the supermarket.

They can stay fresh over extended durations in cold temperatures and without much exposure to the standard room temperature.

Because fishermen have already put a lot of effort into catching crabs and rotting the crabs can be expensive and is a major source of irritation across all levels.

Crabs are typically caught on the hand in a fishing facility which is able to only remove only one to two pots at a time which means the process is extremely time-consuming and labor intensive.

The type of crab you’re trying to catch will determine the price.

Regulations can help keep prices reasonable and ensure that crab populations are not overharvested.

What does the blue crab taste like?

A blue crab is white meat, which has a subtle, sea salt flavor, with a slight sweetness. The meat of the back fin is the best piece of meat, which is soft, flaky, and soft. It offers an “feel” of a scallop however, the blue crab is an exclusive seafood. Its delicious, creamy, and rich mouthfeel is difficult to find in any other fish that is pulled from the sea. The blue crab will have an aroma that is reminiscent of the sea, if it’s fresh.

Delicious Crab recipes

Wasabi Crab Cake

To find out what crab tastes like, test out some of the recipes. A very well-known recipe is the Wasabi crab cake. It is possible to make this dish at at-home kitchen by yourself.

Make a bowl with the finely chopped pepper around 1/3 cup of bread crumb, two egg whites and three tablespoons of mayonnaise as well as a fourth teaspoon wasabi that you’ve already prepared, and then the finely chopped green onion. Mix all of this together, and then add the meat of the crab, too.

Separately in a bowl add the bread crumbs. Use a tablespoon of the prepared mixture and cover it thoroughly with the crumbles. Make patties and put them on baking sheets.

Pre-heat the oven to 425°F and then place the tray in. Bake for 15 to twenty minutes, or until the patties are brown. This is your sign that crab cakes that are ready to serve.

Crab Soup

You can also make crab soup. Make a pan, and then melt 3 tablespoons of butter that is un salted in it. Add 3 tablespoons of flour for all purpose into the mix and stir until it is well blended. Then, add 1 teaspoon of mustard and 1 teaspoon of Old Bay seasoning, and any other spices to taste. Add the four cups of half and half and bring the entire mixture to a simmer. Once the soup is been thickened it is time to add the crabmeat, and stir. Add water to reduce the thickness should you desire. Pour it into bowls and serve hot.

Wrapping up

What Does Crab Taste Like?

If you think of crab, what images come to your mind? Yes, it must be a delicious feast with your family and friends, all enjoying together an exquisite meal.

The taste of this meat is delicate and delicate, which many people believe tastes similar to shrimp or lobster. However, others say the flavor may be like fish.

This article, hopefully, has given you some clarity on whether crab is the right choice for you.

It’s time to try your hand by making a crab cake or even making an Alaskan snow crab. I am sure with a bit of an experience, you would be an expert in such delightful crab dishes!

Does Evaporated Milk Go Bad?

does evaporated milk go bad?

does evaporated milk go bad?


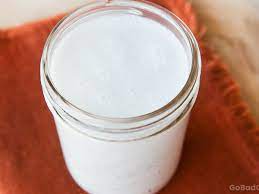
Evaporated milk can be described as a dairy product that is produced through the process of evaporation and the removal of approximately 60% of the water. In contrast to condensed milk,  it doesn’t have sugar or any other sweetener. However, it is more stable on the shelf than ordinary milk, so it can be used for a long time.

The main questions, however, you would like to ask are: how long does evaporated milk last and does the evaporated milk go bad? Let’s discover.

The dehydrated milk is later sterilized at high temperatures. The result is a dark, healthy product that has an aroma of caramel and a longer shelf time than milk.

You can add water before you get regular milk, however, it’s typically an ingredient you can utilize to cook delicious meals, without changing its form.

The shelf life of evaporated milk is largely dependent on its best before date as well as the method of storage. If you store an opened product improperly, it could turn bad and then become unfit to consume. However, when it is stored in an unopened container, it is unlikely to spoil even if the container is damaged.

How Long Does Evaporated Milk Last?

The milk that evaporates is sterilized, unsweetened condensed milk that does not contain sugar as an additive to preserve it. Therefore, it is important to be aware and be sure to check how long it lasts.

Unopened Evaporated Milk

The canned item will remain in top condition for at most 1.5 or 2 years following the date that is the best before when properly stored. If the storage conditions aren’t ideal If you store your container in your kitchen area, then you are able to make use of this product for the duration of a year.

Be aware that prolonged storage can alter the flavor, color, and color of evaporated milk and texture, however, it’s safe to drink in the majority of cases. However, refrigerating the product in sealed packaging won’t extend the shelf-life of the product.

Opened Evaporated Milk

The milk that evaporates will last 2 to 3 days after you open the can however, you must keep it refrigerated. Certain producers say they are safe to use for 5 days following the opening of the package.

Avoid storing evaporated milk in an open container. Make sure to pour it into a container that is sealed and keep it in the fridge.

Low-Fat, Skim Evaporated Milk

The evaporated milk can be consumed up to nine months after the expiry date if it is stored in a dark and cool pantry. A bottle that is opened will last no more than 2-4 days if it is kept in the refrigerator.

7 Tips To Tell If Evaporated Milk Has Gone Bad

Remember that you shouldn’t drink it for longer than 3 or five days, even if it seems fine as it’s probably not. However, it’s very rare. Most of the time you’ll see obvious evidence of spoilage. Let’s take a look.

Milk Skin

There are times when you will see milk skins appearing on the surface of the product that has been opened. This is not an indication of spoilage, but rather a normal process of fat segregation that happens when evaporated milk is stored in a container that has not been properly sealed or not airtight.

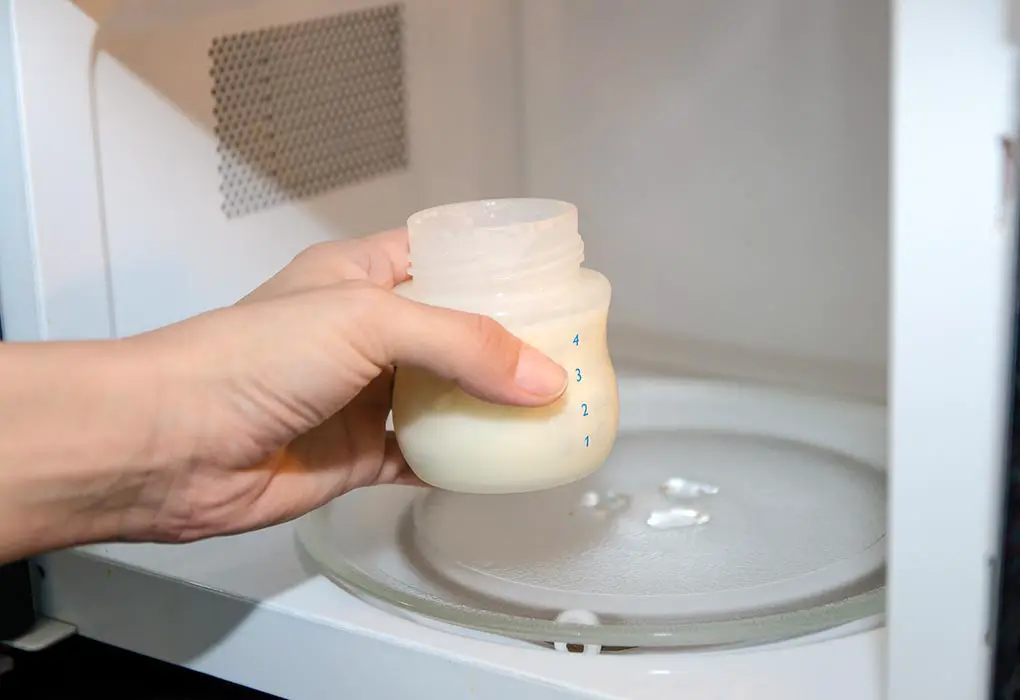
This will occur when you expose milk to air. It is possible to resolve this problem by warming the milk, stirring it up until it reaches that desired level of consistency.

Smell

It won’t smell awful. It’s likely to smell different from a fresh one. If you notice a foul smell, there is no need to think about it. It’s time to dispose of the smell away.

Color

The milk that is fresh evaporated will be white, therefore any color changes are a sign that something is not right. If your product begins to turn brown or green or black, you need to eliminate it.

Texture

It has a smooth texture. The appearance of curd-like lumps signifies that you have spoilt evaporated milk.

Taste

There’s no reason for you to try a taste of evaporated milk in order to conclusively say that it has gone bad. But, a sour flavor indicates that it’s not good food in the future.

Mold

If you see mold growing on the milk that has evaporated You can be certain that all the content has gone bad. This isn’t a solution that can be solved by simply removing the change. Get rid of it immediately to avoid health issues.

Can

If you discover that an unopened container containing evaporated milk has been damaged or dented, rusted, or is leaking, the most effective solution is to dispose of it. This type of container is at risk of extremely dangerous botulism poisoning.

How To Store Evaporated Milk

The best practice is not to keep opened evaporated milk in the refrigerator for longer than two hours. In the event that you do, you’ll allow the growth of bacteria in the fridge at ambient temperature which could result in potential harm.

Kitchen

It’s not difficult to keep an unopened container filled with evaporated milk on the countertop or in the cabinet of your kitchen. This way, you will be able to protect your item for between 6 and 12 months.

Pantry

Storing milk cans that have evaporated in a cool and dark area is an ideal way to extend the shelf life. It can be kept in a closed container for two years if it is not opened.

On the contrary, you can store an unopened bottle of skim evaporated skim milk, low-fat, and low-fat within your refrigerator for approximately nine months.

Fridge

After opening the can, it is time to put the milk that evaporated in the refrigerator. Don’t keep it in an open container, instead pour the leftovers into containers or jars that are airtight containers to keep them from inhaling the scents of other food items.

Beware of containers that aren’t airtight, as oxygen can alter the contents and lead to the formation of a film on the surface.

Freezer

It is not the best option because it weakens the structure of the product. It also results in loss of color and flavor and can lead the ingredient to separate. But, you can still make it happen if you need to and extend the shelf life of your product for up to 3 months.

Conversion

It is possible to convert the evaporated milk to regular by adding the same quantity of water. If you require one cup of milk, it’s sufficient that you mix 0.5 cups of the evaporated milk and 0.5 cups of water. Stir them thoroughly and take the milk exactly as you would normally.

A different option would be to create an alternative to buttermilk. You’ll require a one-half cup of evaporated milk as well as one tablespoon of white vinegar or lemon juice to make a cup of buttermilk.

The Risk Of Consuming An Expired Evaporated Milk

When you check the label of the product it will be apparent that your evaporated milk comes with an expiry date on it. This is the date that the product will be of high quality, however, you can consume it up to the date.

It is generally accepted that you will most likely utilize this milk for about two months, but keep in mind that the shelf life is generally shorter.

If you own a bottle of evaporated milk that’s been sitting for too long the best choice is to examine the ingredients before taking it. If you don’t, you could be suffering from digestive tract disorders or food poisoning. These are common symptoms which include:

  • Fever
  • Stomach cramps
  • Nausea
  • Diarrhea

Rusted cans pose a risk because they can directly trigger botulism, a serious illness caused by a toxin that is accompanied by symptoms such as:

  • Trouble breathing
  • Muscle paralysis
  • Death

Can You Freeze Evaporated Milk?

As you’d expect evaporated milk producers do not suggest freezing their milk because low temperatures alter their consistency. In the end, your creamy milk may be separated and the quality of your milk will decline.

But, freezing is still possible as well, and you can use the frozen food item to cook and bake as needed. In addition, you can increase your texture and texture simply by stirring it.

One of the most effective ways to store evaporated milk in the freezer is to pour it into an ice cube tray. So, you’ll have the ability to make use of a smaller amount when you need to. If you’d like to add this item to your broth or soup it is not necessary to let it thaw at all. It’s enough to select a couple of cubes and add the soup or broth.

Another option is to pour the remainders onto baking sheets, then put them in the freezer, and smash the ‘plate’ into powder.

It is enough to add some water to it once it’s thawed and then get the milk you can use as you require.

Do not freeze a can that hasn’t been opened. It’s not logical since canned food products don’t get rotten when the packaging is intact. There’s also the possibility of destroying the can when temperatures are low. It isn’t a viable option as you don’t need the entire amount at one time.

How To Store Evaporated Milk?

When it comes to the storage of evaporated milk, it’s simple and easy. Canned evaporated milk can be stored in a shelf-stable condition and is able to be kept at the temperature of the room. It should be stored in a cool, dry area far from light sources and heat.

The kitchen pantry or cabinet is the perfect place to store things. It’s not required to store an unopened container in the refrigerator. The manufacturing process and the packaging can ensure that it will last longer than the refrigerator.

After opening, store the product in a refrigerator for future use. Cover the surface that has been opened with plastic wrap or place the remainder of the product into a tightly sealed container or Jar.

FAQs

Are evaporated milk and condensed milk the same thing?

No. If you’re often confused about these two products, you’re not alone. Many of us have the same problem.

Many people believe that they are the same products. They aren’t, however. Condensed and evaporated milk are dehydrated concentrated milk.

The main difference is the sugar amount. Evaporated milk is often called unsweetened condensed milk. It’s simply dehydrated milk that has the addition of no added sugar.

Condensed Milk is short for sweetened condensed milk which is dehydrated milk that has been added with a significant quantity of sugar.

While both appear like they are similar, they possess different features and functions, and this is especially true when you add sugar. Be sure to follow the recipe carefully before you purchase the correct product from the store.

Do you have to use evaporated milk?

An unopened bottle of evaporated milk can be considered to have a long shelf time. If the container isn’t damaged and you don’t notice any signs of spoilage It is usually suitable for consumption.

There could be a change in flavor or taste due to the fact that the quality has been degraded over the course of time.

What else can you make use of the milk that you have evaporated for?

Add it to your tea or coffee, or use it in baking and cooking. There are many recipes that require evaporated milk. It is also possible to make use of it to replace whole milk. To do this, dilute the milk by adding water at the ratio of 1:1.

How long can you keep milk evaporated unrefrigerated after the opening?

In accordance with the guidelines for food storage according to the USDA Once opened evaporated milk must not be kept in the refrigerator for more than 2 hours.

Bacteria can multiply faster than what you’d imagine at room temperature and could make the food inedible to eat. While many people have consumed food or milk stored outside and didn’t become sick, you will never know what you’re going to get. It is always better to be safer rather than sorry.

Wrapping up

Does evaporated milk go bad?

Evaporated milk is a tasty and nutritious dairy product that will last longer than regular dairy. After opening the can, it’s important to consume the contents within five days in order to stop it from deteriorating and causing pain or illness. Be cautious, keep the nutritious food correctly and enjoy it for longer.

Beware of the risk of food poisoning by ensuring cleanliness and storage that is safe. If you notice any indications of spoilage, be sure to stay in the safe zone and dispose of the remainder.


How To Use a Wok On an Electric Stove?

How To Use a Wok On an Electric Stove?

How To Use a Wok On an Electric Stove?

The oven or cooking range is an item that will never remain unchanged for long. With the changing of the times, the appliance is also equipped with innovative and new ideas to make cooking an enjoyable time. With every change in your oven or cooking range it’s obvious that you need to alter the cooking equipment to work with the latest versions of your oven.

Woks are among the most commonly used appliances you will find practically everywhere in the kitchen. In the past, if you had a gas-powered stove, you would put the wok on the cooktop to cook as it was perfectly set on. However, the electric stove is taking the place of gas stoves and you need to redesign your kitchen. So, the question one would like to ask, ” how to use a wok on an electric stove?” To get the correct answer, you must look into the whole issue. Let’s explore.

What are woks?

Woks are a form of frying pan that is made from different components like carbon casting iron, cast iron and non-stick steel. It is mostly utilized for different cooking techniques such as boiling, frying, steaming smoking, and other. Two types of handle, loop and stick, this pan does more than help you cook quickly, but also protects your hands from burning.

Types of Wok

There are two kinds of woks that are used widely. One is a round-bottomed and the other is a flat-bottomed. Both offer a different look however they offer almost the same service, with a few exceptions. Let’s take an in-depth review of both and discover the differences between the two.

Round-Bottomed Wok

The round-bottomed wok is ideal for mixing, and can also allow heat to penetrate all the parts within the wok. There are only a few adjustments to improve its functioning. This means that you require an aluminized wok ring that allows your round-bottomed wok to be used with electric stoves.

Flat-Bottomed Wok

The wok with a flat bottom works better with electric stoves. Since it has a proper contact with the heat , and it remains solid on the stove’s surface. There is there is no need for a wok-ring for it to be stable.

How to Use a Wok On an Electric Stove

It is now time to learn the workings of a wok with an electric cooktop. It is essential to understand you can choose between two kinds of electric stoves. One can be described as an electric coil stove, and one is glass ceramic stove.

On an Electric Coil Stove

When using an electric coil stove for cooking, you must utilize a flat-bottomed frying pan that is placed above your heating coils. So the heat will be able to be distributed throughout the wok’s bottom in a uniform manner and enable you to cook your food in a proper manner. Particularly, a carbon-steel wok can do a fantastic job in this regard. With regard to the round-bottomed wok kind of stove isn’t as easy to cook on. Since you can’t make it stand on the cooktop for a long time, you should always hold the handle when you work.

On a Glass-Ceramic Stove

For the glass ceramic stove, you must utilize a round-bottomed frying pan for greater efficiency. Before that, however you should set up a wok ring onto the cooktop so that you can put the wok in it. This lets the wok remain in place in the oven. In addition it also has a gap of half “- 1” between the wok’s bottom and the cooktop, to avoid scratches from happening. This is why you can’t use a flat-bottomed wok when cooking on the glass ceramic stove.

Glass Ceramic Stove

Furthermore, the glass-ceramic cooktop is the best choice for round-bottomed woks for another reason. This is because it is constructed of solid material that is able to withstand extreme temperature fluctuations without breaking. However, if you drop a sharp object, cracks could develop on it. This is why you shouldn’t make use of the carbon-steel wok with the type of top.

Preferred heat required for Wok

It doesn’t matter what kind of cooker you’re using, in all cases you must heat your wok for at minimum 10 minutes before adding oil to the wok. After that, you need to whirl the oil form an oily coating inside the wok. Once the oil is hot and then you can add all the ingredients for food according to the recipe, and stir fry.

However, in the beginning you must start heating your wok slowly before gradually increasing the temperature until you reach 3000-watts or more. If you apply the maximum heat right at the beginning can cause your wok to shrink. Temperatures ranging from 145 degF up to 300 degF are required for cooking a variety of food items in the wok.

Seasoning of wok

The process of seasoning is a crucial one that should be carried out by your wok even in the event that it is new. In order to avoid becoming rusty for the manufacturer, you must use the oil. This must be cleaned out prior to the beginning cooking for the first time. In order to do this you must follow a specific procedure.

To get rid of this chemical layer, clean the wok both the inside and out using a stainless steel scrubber as well as some of the liquid soap.

Place the wok over the flame and allow it to dry using high temperatures.

If the black spots appear on the bottom, and the wok begins to turn gunmetal gray, it indicates that the wok has been heated to the right temperature.

Then, let the wok cool.

Incorporate some oil that has been heated over the wok, forming an extremely thin, non-stick coating.

After that, heat the wok and add 2 TBSP oil. Spread it over the wok.

Mix in some chopped ginger, and stir fry for 15 to 20 minutes. In this manner your metallic scent should disappear and your wok will never be rusty again in the future.

Remove the mix from the wok, and then remove your wok off the heat source. Allow it to cool.

Clean the wok using an absorbent sponge. In this manner your wok is now ready to cook

Advantages

Both flat and round bottomed woks have benefits which can be a good fit depending on your preferences.

It’s pretty simple to wash You’ll need dish soap and water to wash your wok after cooking session has ended.

Disadvantages

Temperatures that are below the recommended temperature are the most significant issue when using the electric cooking wok. Under heating makes the dish more cooked than it is fried.

The majority of electric woks will require 1000-1700 watts to create the necessary heat required for cooking. It’s a sure way to eat into your pockets while you pay the electric cost.

How to use a wok on an electric Stove: step-by-step

Here are a few easy preparation steps for your wok to prepare your wok that is electric in less than a minute!

Step 1: Put your wok over the burner before turning it off.

If you’re cooking in a wok with a flat bottom, put direct on your stove that you prefer, and make sure that the burner is of exactly the same size as the wok, if it is possible.

If you have a round-bottomed wok, you should start by placing the wok’s ring on your electric stove and then place the wok on top, and examine it to ensure it’s in a secure position. Ideally, you would like the ring to raise the wok off the burner by less than 1/2-1/2 inch.

Step 2: Let the wok heat slowly on the stove.

Let the wok heat on the stove for 10 minutes before adding oil or food. The wok should appear to be smoking by this time.

The preheating process is essential whether you’re using carbon-steel as well as cast-iron woks. Both react badly to sudden temperature changes. Carbon steel woks can crack, and the virtually impervious cast-iron may crack.

Step 3: Add the cooking oil and heat and you’re ready to mix fry!

Pour cold oil into the wok. Gently move the pan and swirl it until the pan is completely coated. When the oil is hot you’ll be able to be able to hear it sizzle and it’s the time to begin cooking.

A Few Extra Wok Cooking Tips

Cast Iron Wok

Slice your food into pieces that are uniformly sized to cook them more evenly

Sprinkle the surface with seasoning every time you cook once you have finished. In other words, high temperatures can cause a seasoning to become weaker over time.

Do not double the recipe, because an over-filled wok will prevent ingredients to get to the hot surface directly.

Choose cooking oils with high smoke point such as grapeseed oil, instead of olive oil with a low smoke point that can ignite when heated to high levels and then releases carcinogens harmful to the body.

Find a long-handled ladle brush, spatula and slotted spoon , so that you are able to easily reach the wok’s bottom without having to squish your hands overheated with burning hot vegetables and oil.

Incorporate your most difficult vegetables first, and then wait until adding the soft ones to ensure that all ingredients are cooked, but not too much.

Wrapping up

How To Use a Wok On an Electric Stove?

his article on the best way to cook with a wok with the electric cooktop has met your needs and provided sufficient information about this issue. It is important to keep in mind that no matter what kind of stove top you have at home, there’s one wok that can be used in all situations: the cast-iron flat-bottomed wok, which is great for electric, gas and glass top stoves.

We are awestruck by the cast-iron pieces we carry however, while the added weight can make transferring your food items a bit more difficult It also helps to avoid scratches on glass tops. It’s also an alternative method to increase your muscle mass If, obviously, you’re willing to try it!

Can You Microwave Tupperware?

Can You Microwave Tupperware?

Can You Microwave Tupperware?

Can You Microwave Tupperware?

You may be an at-home Mom or somebody who is looking for an  answer to the question, ” Can you microwave Tupperware?” If the answer is yes, here is a post exclusively created for you to drive home the  point. And I am sure you would get your answer as well. Now, without further ado, let us get into the topic straightway.

The microwave is one of many modern appliances that can make life easier for everyone. You can quickly turn cold food into a delicious hot meal in just a few seconds.

Many types of products are being invented as technology improves. Tupperware is a good example. These plastic containers are supposed to be microwave-safe, but is that  true?

Is Tupperware microwave-safe? The point of fact is that Tupperware plastic containers may not be microwave-safe. You can find a label at the bottom that will indicate the microwave compatibility of each product.

Microwaving plastics can pose health risks. You might wonder if buying Tupperware containers to heat or cook food in the microwave is safe for you.

There has been much debate about the safety of microwaving plastic products manufactured by manufacturers Tupperware, GladWare Rubbermaid, Ziploc, and Rubbermaid.

What was the conclusion regarding safety standards? Find out the answers to common questions about whether your Tupperware can be used in the microwave.

Is my Tupperware microwave safe?

However, not all Tupperware containers can be labeled as microwave safe. The manufacturer claims that microwave safe food can be prepared in Tupperware containers that have been specifically designed for microwave use.

This is in contradiction to the widespread information that microwaved plastics can release dioxins into heated foods. Dioxins can cause cancer and hormonal disruptions.

I have concerns about heating plastic in the microwave because it can melt and leach harmful chemicals to your food. The risk of plastic containers breaking, disfiguring, and warping is obvious to me.

All Tupperware containers can be used in the microwave. Tupperware can be safely microwaved if you don’t overheat or reheat your meals for too long.

Is Microwaving Tupperware bad?

Tupperware for microwaving is safe, especially when it’s used to heat meals. The risk of cooking with high heat can be higher.

This is because plastics are made in different ways. Plastics are also molded using heat, which raises questions about the melting point and chemical exposure to foods.

Plastic can be confusing. It may refer to different materials with compounds or substances that are added to shape and stabilize them. BPA (Bisphenol A) and phthalates are two common stabilizers.

BPA is used to harden plastic. Phthalates are used to make plastic materials stronger and more flexible. BPA and phthalates compound are often associated with endocrine disruptors. This means that they can block hormones or mimic them.

When microwaving Tupperware, your food will be wrapped in plastic and placed in a microwave-safe container. This can lead to chemical compounds possibly leaking or mixing with your food.

After prolonged exposure to these synthetic compounds, your body may become more sensitive to them. There have not been any long-term studies that show the effects of plastic absorption on the human body.

How can I tell if my Tupperware microwave-safe?

Before microwaving, Tupperware products must be checked for safety. Commercial manufacturers have many options, so make sure they are using the right plastics to withstand high heat.

The concerns that I personally have about Tupperware microwaving containers are:

  • Plastic can leach harmful chemicals into food
  • Microwave can melt plastic

Tupperware has created a comprehensive plastics chart to help consumers understand the resin ID codes used in plastic containers. This helps reduce concerns about microwaving.

This can be verified by checking that the containers have the following markings:

Inside, Microwave logo has 3 wavy lines:

Microwave safe label

3 to 5 wavy lines

Make sure the Tupperware container is marked with three lines of wavy line on the bottom. It is best to throw out plastic Tupperware that has no lines on it or does not have a label or microwave safe symbol.

Tupperware Company offers a wide range of containers that can be used for cooking.

If the container is marked #5, it is made from polypropylene (Polypropylene). This makes it microwave-safe.

CPET #1 can also be used in the microwave. This is used to heat simple meals in short bursts. It should not be in any way confused with APET. For one thing,  CPET has been crystalized to withstand high temperatures.

APET (E), containers are not microwave-safe. This plastic is used for making deli containers, water bottles, and supermarket bottles among other cold food packaging.

What is the maximum time you can microwave Tupperware for?

Tupperware Company recommends that plastic containers be microwaved for best results. It is important to avoid heating or reheating food for prolonged periods of time, especially foods that are high in sugar and/or fat.

One concern is that these meals could be too hot to keep your container from burning. Sugar and fat have heat limits that are higher than the boiling point water (100degC/212degF).

Tupperware is best used for defrosting and reheating food. Plastic containers should not be used for cooking purposes.

Tupperware microwave products, however,  are not meant for cooking.

The instructions clearly label the containers that must be reheated in a sequence of no more than three minutes each. Consider if your meal requires longer heating times. If this is the case, you can stop the microwave at a specific time and stir the contents. Then, restart the process for 3 minutes.

Tupperware safety tips

Safety will be affected by the condition of the Tupperware and the contents of the food.

These tips will ensure that your Tupperware microwaves safely.

Boiling water can cause fats like cheese and meat to rise in temperature. It is important to follow a sequential and systematic method of heating such foods.

To reduce heat stress when you’re heating or reheating large quantities of food at once be sure to cook smaller batches.

All Tupperware plastic containers can’t be used for continuous reheating. Before you microwave them, verify the label or symbol on the bottom. Only microwave-safe Tupperware containers are allowed.

Use the Tupperware microwave plastic container with a vent to avoid overheating meals. The food can dry out if it isn’t covered. To avoid this, microwave the container with the vent open and the lid on. This will ensure that the pressure escapes effortlessly and smoothly. If there is no vent, it may be worth lifting one corner from the Tupperware container.

Microwaves can be a breeding ground to microbial contamination. Because they produce inconsistent heating, which can cause food to become hot and cold spots that aid in their survival. When reheating food, ensure that you stir, heat, and keep stirring until the heat is evenly distributed throughout.

Reheating leftovers should be done to raise the temperature to 165 F. This will kill any bacteria that might cause food borne disease.

For your safety, ensure that microwave Tupperware products are BPA-free or phthalate-free. Tupperware older than 10 years may not be safe if it is made from safer plastics.

Tupperware with cuts, scraps, or warped edges should not be microwaved. The material could be damaged and may not be safe for use in the microwave. Tupperware that is beyond its prime may need to be thrown away.

It is important to follow the safe reheating instructions provided by the manufacturer.

Is Tupperware safe?

Tupperware microwave containers can be a valuable addition to your modern kitchen.

Tupperware containers may not be microwave-safe. You can use the container as directed if it is correctly labeled microwave-safe.

It is important not to heat oily, fatty, or sugary foods when using plastic in the microwave. These items have a higher heat point than water boiling point, so they can melt plastic and cause damage to food.

Tupperware containers can be used for defrosting and reheating, but not for cooking. To reduce the chance of the container being damaged, use medium heat.

The manufacturer also recommends that Tupperware containers be reheated for no more than three minutes. To prevent hotspots from developing, keep the heat to a minimum and stir frequently.

You can continue to microwave food in your Tupperware if you are confident. If you are unsure about the safety of using plastic Tupperware for microwaving food, then consider using glass or ceramic meal prep containers. They are more resistant to heat and are easier to clean.

Wrapping up

This is all you need to know about Tupperware containers that are microwave-safe. You can rest assured that your microwave-safe Tupperware will work as it was intended if you follow the manufacturer’s instructions. But if anyone asks you this question: “Can you microwave Tupperware?” The answer you should give is yes, provided they have the necessary microwave-safe label.

Can You Microwave Milk? Is It Safe?

Can You Microwave Milk? 

can you microwave milk

Can you microwave milk? This is one question that perhaps haunts many women everywhere around the world. Those who are not sure about it, choose not to use microwave to heat milk. But Let me assure you that microwaving milk is an efficient and quick way to achieve results. Besides, it is absolutely safe to do that. Read on if you want to learn more about this.

If you do it slowly, microwaving milk can be very easy. You can heat milk to make hot cocoa, or for other purposes.

Is it safe to microwave milk?

You have two main risks when heating milk in a microwave or double boiler.

Scorched milk can be very unpleasant and should not be used again. Although heated milk skins can sometimes be mixed back in, this can alter the texture.

Pasteurization involves heating milk to 145°F and cooling it to 40°F for long-term storage.

Pasteurization specifications include many additional requirements. Be aware, however, that DIY pasteurization can be dangerous and could make your family and friends very sick.

It is best to buy chilled pasteurized milk. This will ensure that your family can enjoy it safely. Milk can be stored for up to two weeks after the date of packaging, even if it is handled with care.

Pasteurized milk can also be a breeding ground for bacteria. The leftover milk from a heated batch of milk should not be used.

How to Heat Milk in Microwave?

It doesn’t matter what tool you use, slowing down the heat of milk is important. You’ll have boiling milk everywhere if you rush the process.

The process may take longer if you stop stirring your milk every fifteen second. If you have ever seen scorched milk boiling in your microwave or on the stovetop, then you know that slow, steady heating is crucial.

Place the milk in a microwave-safe container. If you are making hot chocolate, pour the milk into a microwave-safe container. You should leave at least one inch of space at the top of the container.

Turn the microwave on medium-high, and program it for fifteen seconds.

Now you will have to remove the container carefully and gently stir the milk.

For another 15 seconds,  you should  microwave on medium-high for the remaining ingredients. Stir and remove from the microwave.

Keep going, stopping every 15 seconds to stir.

When steam is visible from your milk, it’s done.

How long does it take to microwave milk?

One cup (250ml) should be ready in 45-60 seconds using the above procedure. To avoid uneven heating (which can lead to scorching of formation of a “skin”, or even scorching), follow our instructions and stir it every 15 seconds.

It is important to stir the milk when you heat a bottle of milk, or formula-milk mix, for your baby.

Microwave bottles can cause “hot spots” in the liquid, which could lead to burns. To ensure that food is safe for babies, it should be left to cool in the microwave for at least 30 seconds.

Microwaveable baby bottles and baby food should be used only when it is impossible to do otherwise. If possible, heat baby bottles from the outside in by heating them in a water bath or running them under hot water.

How long does it take to microwave milk for hot chocolate?

Either microwave the milk and add chocolate or cocoa, as well as extras such sugar or ground cinnamon, at the end of the process. The process may take between 60 and 90 seconds.

Is it possible for milk to lose nutrients if heated in the microwave?

Although milk can be microwaved quite easily, will it lose its vital nutrients? It remains a controversial issue whether microwaves are safe for heating, cooking, or defrosting foods and beverages. Multiple researches have led to different results.

The Journal of Dairy Research published a study titled Microwave Heating and Vitamins A, E and B15 in Milk. It found that heating milk in the microwave oven doesn’t remove vitamins A, B2 and E.

Similar results were also found in another study published in the US National Library of Medicine. The microwave heating of milk affected the minerals balance. The research found that the microwave heating didn’t cause significant changes in the milk, as opposed to conventional heating.

What Materials are Safe to Use in a Microwave Oven?

Some utensils are not suitable for use in microwave oven cooking. Unsafe utensils can cause damage to your microwave. Here are some materials you can use in your microwave oven

You can microwave safe dinnerware but don’t use it if they are cracked or chipped.

Aluminum foil can be used as a shielding layer, but only in small quantities. You can use a small piece of foil to cover thin parts of the cooked meat.

Heat resistant glassware. It should not contain any metallic parts when it is placed in the oven. Avoid using cracked or chipped glass jars.

Use microwave-safe plastic. Follow the manufacturer’s instructions when using it.

Also, microwave-safe plastic wraps are available. These wraps are used to preserve the food’s moisture while it is being cooked. However, it is important to ensure that the plastic wrap does not touch the food.

Follow the instructions when using oven cooking bags. Make sure to leave steam through the slits and don’t use metal ties.

What you should not  put in the Microwave Oven

You will often put just about anything in your microwave oven to make it quick and easy. If you’re not careful about what you put in your microwave oven, it could cause damage and even injury. These are the things you shouldn’t put in your microwave oven.

  1. Paper Bags

Every paper bag is made in the same way. Susceptors are a material that can absorb microwave waves. However, paper bags such as those you find in grocery stores don’t use suspectors and can release toxins and fumes if heated. This can lead to the bag setting itself ablaze.

  1. Aluminum Foil

Sparks can fly if the microwave oven is used in large amounts. The microwave oven’s interior is made from metal which allows it to function as a mirror. The microwave ovens reflect the reflections of the metal, which is placed in place. These waves produce electromagnetic energy that heats the items. The waves that reflect off metal can cause it to glow, which causes the foil to catch fire

  1. Travel mugs

These mugs, whether made of steel or plastic, should not be used in the microwave. Because microwaves are made of metal, steep cups will prevent the beverages from heating up and can even cause friction from the energy being released. Make sure that your plastic mug is microwave-safe

  1. Takeout boxes

Take out the box if you plan to heat your takeout Chinese food in a microwave. These takeout boxes usually have metal handles that are not suitable for microwave use.

  1. Butter and Yogurt Containers

Plastic containers are only meant to be used once and contain buttercups and yogurt. They are not designed to withstand high temperatures, so heating them in the microwave is not an option. The food will melt in the container and then release harmful chemicals.

Important Safety Tips for Microwaves

You can avoid injury and damage by taking safety precautions when using microwave ovens. Here are some safety tips.

To avoid food contaminating the microwave, make sure you only use microwave-safe containers

When cooking, ensure that the microwave oven’s door is shut. Sometimes, the sensors can fail when operating without closed doors.

Use water, mild detergent, and soft sponge to clean your microwave oven. You risk contaminating new food by not cleaning out old food particles.

Wrapping up

Is it safe for milk to be microwaved? There is no danger if you do it correctly. However, milk can be delicate and should be handled with care. To avoid it scorching or boiling, stir it frequently as it heats. Once it has been warmed up, you can use it. Re-chill milk that has been heated, for there is too much risk of bacterial contamination. Hope this post has been able to clear all your doubts involving microwaving of milk.

How To Blanch Sweet Potatoes–Tips And Tricks

How long do you blanch sweet potatoes? 

How to blanch sweet potatoes


How to blanch sweet potatoes? This is one question that hovers in the minds of most newbie chefs when they think of making some sweet potato doshes. Well, you should better know it now, or else you will mess with the whole thing sooner or later. Read on if you are interested.

To begin with, sweet potatoes are a well-known superfood. If you like to eat healthy, you’ll understand why this root vegetable is so attractive. For one thing, it is is a very important  source of complex carbohydrates.

The abundant vitamin C helps reduce flu and cold symptoms, and vitamin D promotes healthy bone development and maintains bone density. If you eat a lot of sweet potatoes, you’re probably constantly looking for new and creative ways to add sweet potatoes to your meals. One method we all can use is blanching.

But you’ll have one question in your mind: How long do I have to blanch sweet potatoes?

There’s a lot to know about blanching and how to do it correctly, but the answer is between 3 and 5 minutes. Now let’s see what blanching is and how to do it. I will also tell you why I prefer to blanch sweet potatoes. And it’s delicious.

What is blanching?

Blanching means turning something white, but in cooking it is not. In the kitchen, food is usually blanched with vegetables. Basically, you cook the vegetable (sometimes called boiling) in boiling water for a few minutes.

When it’s partially cooked, take it out of the boiling water and “shock” it by running it under cold water or putting it in ice water.

Why should you blanch?

This allows you to extend the shelf life of the sweet potato, making it great for salads and even freezing. Although 3-5 minutes is a good rule of thumb, the blanching time depends on how many potatoes you have.

As I mentioned above, the time it takes to blanch potatoes varies depending on how much you have in the pot, the type of slices you’ve made, and the size of the slices. For example, thick slices of sweet potatoes need more time in boiling water than julienne slices. And if you have a lot of potatoes in the pot, it will take longer than if you only have a few potatoes.

How to blanch sweet potatoes

Blanching is a cooking method that every cook (professional or amateur) should learn. It’s a great way to pre-cook your potatoes so they can be finished later, and it’s a good first step to freezing them. To blanch your sweet potatoes, you’ll need a few things:

  • Ice water
  • A jar
  • Salt
  • A large bowl
  • Knife and cutting board
  • Plate and paper napkins
  • Chopping and cooking

The first step is to bring the water in the pot to a boil. While waiting for the water to boil, start chopping the potatoes. Make sure they are equal in size so they fry evenly.

This RSVP blanching basket from Amazon makes it easy for you!

RSVP Endurance 9 inch wide edge Mesh BasketView on Amazon

Salt to preserve flavor and color

Just before adding the potatoes to the boiling water, add plenty of salt to the pot (this prevents the potatoes from discoloring and adds to the flavor). Leave the potatoes in the boiling water for 3-5 minutes.

This Farberware pot from Amazon is one of our favourites for blanching vegetables. Farberware Classic Series 11 quart pot with glass lid

View on Amazon

Testing and dipping

After 3 minutes, taste how tender they’ve become. When partially cooked, i.e. soft but not spongy or tender, quickly remove from boiling water and place in a bowl of ice water.

These top-quality Pyrex bowls from Amazon should serve your purpose.

Pyrex glass mixing bowl set (3-piece set, interlocking, microwave and dishwasher safe)

View on Amazon

This step stops the cooking process. If you fail to shock the potatoes, they will continue to cook for several minutes after you remove them from the boiling water.

Cooling and drying

When they are completely cool, you can remove them from the ice water and place them on a plate with dry kitchen paper. Dry them and you’re done blanching your sweet potatoes.

I love these Pyrex containers to store blanched veggies in the freezer.

 Why blanching is great

If you’re like 90% of the population, you’re busy all week, whether it’s at work, school or with the kids, you always have something to do. This lack of time probably keeps you from preparing balanced meals for you and your family (an overwhelming number of Americans say the reason they eat out so often is convenience).

Blanching vegetables is a great way to drastically reduce cooking time. In general, vegetables are the most time-consuming part of a meal. Try blanching your sweet potatoes on one of your days off. It doesn’t take long and can save you a lot of prep time when you get home to make dinner.

Anyone want some sweet potato fries?

My favorite use of the blanching technique is sweet potato fries. It’s done a little differently.

 Don’t have a fryer? Amazon has a fabulous one  from T-Fal. This T-fal fryer with basket, which is made of stainless steel, is quite  easy to clean, having oil filtration( 2.6 pounds, silver, model FR8000).

View on Amazon

You should set your fryer to 260º and place your sweet potato pieces in for 5 minutes. However, you must make sure to let the oil warm up to 260º first. Once you’ve removed them from the oil, turn your fryer to 360º and finish the fries. It’s easy to tell if your fries are done, because if they float, they are done.

Wrapping up

How to blanch sweet potatoes

Blanching vegetables can be a great way to incorporate vegetables into your daily meals. For example, you can prepare them to freeze for later use. And if you blanch potatoes earlier in the week, they will be ready to cook in no time on busy weekday evenings.

 Sweet potatoes are an obvious candidates for blanching, so it’s easy to combine the convenience of preparing blanched vegetables with the many benefits of sweet potatoes, not to mention their awesome flavor. So, now that you know how to blanch sweet potatoes, I am sure you will be able to do your job more confidently and make your family happy with your  sweet potato dishes.


How To Cook Frozen White Castle Burgers In The Oven

How To Cook frozen White Castle Burgers 

How To Cook frozen White Castle Burgers  in the oven

How to cook frozen White Castle Burgers in the oven? This is the question that often get asked in the kitchen forums and other websites that deal with culinary stuff. This is why I have collected a whole heap of questions from the internet so that you may have a solid understanding of the matter we are concerned with. Let me know, if you have any other queries in mind.

How do I cook frozen White Castle burgers in the oven?

The sliders thaw more slowly so they can “slack out”. Then you can heat the burgers in the microwave for just 30 seconds instead of 60 seconds. Second, let me tell you how to cook the frozen sliders. Step:1 Preheat the oven to 375oF. 2. Place the frozen sliders on a nonstick pan or foil and bake for 12-14 minutes.

How long should you cook White Castle frozen burgers?

Steam frozen burgers for 10-12 minutes, thawed burgers for 8-10 minutes, or until the center of the burger reaches 165°F. Remove the burger from the pan with a spatula. Note: The buns should be curly, but very soft, like the fresh ones from our restaurants.

How are White Castle burgers prepared?

White Castle burgers are not grilled, but steamed. You put a pile of onions on the grill and put 30 patties, which is exactly the same number in a Crave case, on top. The steam passes through the onions and cooks the burgers, while holes in the burgers allow the steam to pass in and through the patties.

Are the frozen burgers from White Castle any good?

They’re much better when you buy them fresh at White Castle. The frozen ones are fairly good ones. They’re a reasonable substitute. They’re much, much better when you buy them fresh at White Castle.

Why is White Castle so good?

They’re excellent, and the burgers are carefully prepared from high-quality beef. A few years ago, the St. Louis Post Dispatch conducted a meat survey of all fast food restaurants in the region. White Castle got the highest rating for the quality of the beef they use in their burgers.

Can White Castle’s fresh burgers be frozen?

These little burgers are great to prepare and store in the freezer for a quick snack or meal on the go, but they’re also great for parties because they provide a lot of food with very little work.

How long can I reheat White Castle burgers in the microwave?

Heat them in the microwave for 60 seconds if frozen, or 35 seconds if defrosted. The power of the microwave may vary, so adjust the heating time accordingly.

Why some people get sick eating the burgers of White Castle?

Consuming food from White Castle restaurants can lead to food poisoning. It is worth mentioning here that the restaurant chain has withdrawn frozen sandwiches from sale in 2019. The most commonly reported diagnosis at White Castle is listeria, and the most commonly reported symptoms are diarrhoea and nausea.

Can you get White Castle burgers delivered to far-off places?

Prices range from $127.95 to $170.95 and include a frozen gel pack and overnight shipping to the continental US. On White Castle’s website, there are fairly detailed instructions for steam heating the frozen sliders.

Are White Castle burgers harmful?

Although they contain slightly more protein and fiber than Burger King and McDonald’s, the White Castle burgers contain nearly twice as much sodium, which is a bit discomforting, especially for people with high pressure. It’s similar in size and number to the Burger King products, but comes in second thanks to the higher sodium content.

Why do white burgers give you a bloated tummy?

The large amount of onions in both White Castle and Krystal burgers is to blame for this. Onions contain a natural sugar called fructose, which is known to cause gas, bloating and even diarrhea. You can try eating them without onions, but that’s like reading Hamlet without the prince of Denmark!

How many White Castle Sliders are equal to one hamburger?

Depending on your mood, taste, hunger and bank balance, you can eat 4 to 10 sliders if you’re not into side dishes. If you want a more luxurious stuff, you can also add cheese to the sliders. Four sliders are enough for two normal burgers at McDonald’s.

What’s the best frozen burger?

What are the best frozen burgers? The best overall is, of course, the – Mount Pleasant Grass-Fed Beef Frozen Burger. The best on a budget are the- Omaha Steaks Turkey Frozen Burger. The best for vegans is the – Dr. Praeger’s Jumbo Kale Veggie Frozen Burger. Last but not least, the Best for grilling is – the Ball Park Flame Grilled Beef Patty Frozen Burger.

How long do White Castle burgers keep in the fridge?

When you bring frozen burgers home, put them in the fridge for up to 10 days. The plates will thaw more slowly, allowing them to relax. Microwave the burgers for just 30 seconds instead of 60 seconds and that will suffice

Which White Castle burgers were recalled in the past?

White Castle has initiated a voluntary recall of a limited number of 6-pack frozen cheeseburgers, 6-pack frozen burgers, 6-pack frozen jalapeño cheeseburgers, 16-pack frozen burgers and 16-pack frozen cheeseburgers due to the possible presence of Listeria monocytogenes. Though this has happened once, the company has become very cautious that such things do not happen again.

How long should White Castle burgers be in the oven?

Oven:1 Preheat oven to 375oF. 2 Place frozen patties on a non-stick pan or aluminum foil and bake for 12-14 minutes, until they are soft. Heating instructions: Heat the slices on an Armour Flame grill until the internal temperature reaches 165 degree F on a food thermometer.

Why are White Castle burgers so delightfully tasty?

The larger surface area gives the meat more room to absorb heat, and the holes in the burgers help steam move through the burgers, cooking them faster. It’s indeed a part of White Castle’s commitment to delivering fresh burgers to customers as quickly as possible.

How do you heat a White Castle burger?

Remove the burgers from their cardboard packaging, unwrap them and place them in the pan with a slotted spoon. Cover the burgers and the slanted part of the pan with foil and seal tightly. Reheat for 15-20 minutes if frozen, or 10-15 minutes if thawed. After heating, let the pan stand for 2 minutes before removing the foil.

How do I keep White Castle warm?

In the case of a White Castle, for example, 5-10 seconds in the microwave is probably enough, depending on how many sandwiches you make at a time. You can always reheat them in the oven if you’re worried about them turning to mush. You can also put the sandwiches in a toaster oven.

Wrapping up

How to cook frozen White Castle burgers in the oven

Hopefully, this question and answer post has given you a detailed idea about how to cook frozen White Castle burgers in the oven and I am sure you would note down all the points so that you don’t create a mess. Enjoy your white castle burgers  till you feel you have had enough!


Related Post: How to cook chicken breast in a pan


Best Professional Electric Griddle

professional eletcric griddle

COMMERCIAL OR PROFESSIONAL ELECTRIC GRIDDLES

Electric griddles are used to cook various foods at a specific controlled temperature. It is extremely important to choose a suitable and reliable product. These grills use hot oil for cooking. Hence, it is very important that you choose one which serves your purpose in every way.

Electric griddles are also very convenient and portable. However, it can be tiring if they are difficult to clean and maintain. Therefore, you should also consider the fact that the product you buy is easy to clean. After considering every aspect, you are ready to make your final buying decision.

Who should look for a professional electric griddle?

Professional electric griddles are amazing products. They are best suited for those who often serve a large group of people — two or three times a week. They are best suited for large-scale cooking. A professional griddle is considered to be one of the best products you can buy. However, it is not an ideal product for people with small families. It will not suit you if you only arrange backyard parties occasionally.

If you want to read more about electric griddles, click here!

Professional electric griddle in 2021

  1. Waring Commercial WGR140 Electric Griddle
  2. Koval Inc. 15″ Electric Food Griddle
  3. Broil King PCG-10 Professional Griddle
  4.  Grindmaster-Cecilware EL1624 Electric Griddle

 Professional electric griddle #1 :

Waring WGR 140 Electric Griddle

The WGR 140 professional electric griddle is made of stainless steel. It ensures an even temperature distribution over the griddle surface. This is why, there are no hot spots during cooking. It has additional steel walls on three sides. These walls prevent oil and grease from spilling. The front is also narrow to avoid any kind of splashes. It also has a removable 11-inch grease tray for easy cleaning.

All these features make this product one of the best professional electric griddles. It is an ideal option for cooking all types of food. This includes burgers, chicken, meat, vegetables, etc. It is silver in color and comes with heat resistant handles.

This product is quite heavy, so it needs a fixed location and is not really portable. This electric griddle eliminates the need for a non-stick griddle and works great at all temperatures and with all kinds of food. This professional electric griddle has excellent features and performance.

Notable Features:

– Temperature controlled surface

– Extra high walls to prevent spills

– Heat resistant handles for better user comfort

Check price on Amazon

Professional Electric Griddle #2:

Koval 15″ Food Electric Griddle

The Koval Professional Electric Griddle is made of stainless steel and has a cast iron cooking surface. This surface helps the grill to heat evenly. This professional electric grill is compact and sturdy and has a removable grease tray. This allows you to easily clean your griddle. It has very high walls on the sides. These walls protect the user from oil splashes. The thermostat temperature control allows the user to set the desired temperature according to their needs.

This product is 8mm thick and measures 15″ x 14-1/5″. This professional electric griddle is versatile and perfect for preparing meat, vegetables, a complete breakfast meal, etc. with a temperature range of 122°F to 572°F.

This professional electric griddle from Koval Inc. includes an electric countertop griddle, four legs for stability and strength, a spatula and an instruction manual for easy installation and use.

Notable Features:

– Easy to clean

– Excellent temperature control

– Lightweight; easy to transport (portable).

Check price on Amazon

Professional Electric Griddle #3:

Broil King PCG – 10 Electric Griddle

The Broil King PCG professional electric griddle is one of the best non-stick griddles on the market. It’s made with an eco-friendly interior and has a stainless steel back that prevents oil and grease spills. The temperature can be adjusted up to 400 degrees F. The stainless steel handles stay cool, making it easy and safe to use. The grease trays are removable and easy to clean.

– The unit measures 29″ x 12.5″ x 5.5″, and the cooktop measures 21″ x 12″. Materials used in the poduct are metal, plastic and stainless steel.

– The rear legs are easily accessible and can be used to drain or lift fat for cooking various dishes. Broil King’s after-sales service is good, and the one-year warranty is very reliable.

Notable features:

– Easy to use

– Easy to clean

– Perfect durability

Check price on Amazon

Professional Electric Griddle #4:

Grindmaster EL 1624 Electric Griddle

Grindmaster EL 1624 is a very reliable product which is made of stainless steel. It is lined on three sides with high quality walls to prevent splashes that could harm the user or contaminate the surrounding walls. This professional electric griddle is also relatively portable and convenient and can be carried away to any place in the house, and it also takes up little space once installed. It is made from a durable material that proves to be very durable and reliable in use.

– It is quite easy to use. Plus, the exterior is made of stainless steel and is therefore quite easy to clean. So, it can be used every day for perfectly prepared meals.

Notable features:

– Stainless steel

– Stainless steel

– Durable

– Easy to use

– Easy to maintain

Check price on Amazon

Professional Electric Griddle #5:

Cadco CG-10 Electric Griddle

The Cadco CG-10 griddle is a tabletop model with non-stick coating and has a stainless steel construction. This electric griddle has a large, heavy-duty cast iron grilling surface. Stainless steel is ideal for cleaning your griddle as the smooth surface is easy to wipe clean. Its compact size makes it easy to move around and it can be placed anywhere.

This professional electric griddle is equipped with three splash guards at the end of the griddle. A heating element, built into the griddle, distributes the heat evenly over the entire surface and heats the food to an even temperature over the entire surface. The thermostat allows the temperature to be increased to over 425 degrees.

– The on/off button has a light to indicate that it is in operation, which is a good indicator in a dark room. It even has a removable stainless steel grease tray that’s easy to clean.

Notable features:

– Stainless steel.

– Splash-proof walls

– Easy to transport

– Large cooking surface

Check price on Amazon

How to choose the best commercial or professional electric griddle for your kitchen?

Choosing the best commercial or professional electric griddle for your kitchen can be difficult because there are so many options on the market. There are three things you need to consider:

The power supply used in a professional electric griddle

Material used: steel, chrome steel, ceramic glass.

Surface: flat or “ribbed” or even a combination of both.

Construction of a commercial frying pan

Full height

Let’s look at each one separately to see how the different features meet the needs of your kitchen.

Power

When choosing the best commercial or professional griddle, you should also consider the power supply you need.

Professional electric griddles are available with two main power sources: electric and gas. The main difference is heating and recovery time – gas grills tend to heat up and recover faster than their electric counterparts. Recovery time is the time it takes for the griddle to reach the correct cooking temperature after being turned off or after the temperature has dropped. Electric griddles, on the other hand, are easier to move and set up and come in a variety of sizes, making them more versatile and better suited to large kitchens and small mobile catering businesses.

Plates

Commercial or professional electric griddle manufacturers use three main materials for the plates.

Steel: steel plates are the most versatile and economical. They are suitable for continuous cooking, but require proper maintenance to avoid wear and tear.

Chrome-plated steel: the chrome-plated surface transfers heat to the food very efficiently, so less heat is generated in the kitchen; it also prevents food from sticking to the plate. Easy to clean, as long as you follow the care instructions.

Ceramic glass: Ceramic glass is a perfect heat conductor. This finish saves energy and the surface heats up quickly. It is also much easier to clean if you use a scraper designed for this purpose.

Commercial griddle plates come in three different versions:

Flat: plain, flat baking papers. Regular baking sheets: without grooves, grease does not drip off and food cooks in its own grease: tastier, less healthy, no burns. Perfect with pancakes and eggs

Ribbed: these electric griddles have small grooves that allow fat to drain away. Excellent for meat and fish, but not for eggs, pancakes and the like.

Mixed: these are a combination of ribbed and flat, and are only available in large electric griddles

Size

Full-height grills are stand-alone appliances, while tabletop griddles can be placed on other appliances. In both cases, they must be placed under a canopy or hood, but the choice depends on the kitchen size and the kind of work you are required to do.

Wrapping up

The topper in this product review is undoubtedly the Waring Commercial WGR 140. This stainless steel griddle distributes the temperature evenly over the entire surface. The three extra steel walls on the sides prevent oil and grease spills. All these features make it the best professional electric griddle available on the market today.

But all the brands mentioned in this article are excellent for indoor cooking. They all have their potential benefits. We’ve written this article to help you choose the best professional griddle for your home.

We hope that this best professional eletric griddle review will help you make the right decision. Go shopping!

.


Farberware Cookware Reviews

Farberware Cookware Review

Are you looking for an honest and unbiased Farberware cookware reviews? If you are, you are in the right spot as in this post I am going give a detailed reviw of the farberware stainless steel cookware products so that you may decide whether to buy them or look for a better set of cookware.

to begin with, a cookware set is the heart and soul of your kitchen. It helps you simplify daily operations in your kitchen and make it more organized. It is important to have quality branded cookware in your kitchen that offers durability and ease of use.

When it comes to choosing cookware, no other brand can compete with Farberware. The brand has earned the respect and trust of its customers. Today, we present you with a guide to choosing the best Farberware cookware to help you make an educated decision about the products.

Here are my top five recommendations and here in this post, I am going to give you more details about each, including why I liked them. When you’re ready, you just have to click the Amazon button to purchase the product you have selected.

#1 – Farberware Classic 15-piece stainless steel cookware set

The choice of cookware plays an important role in the design of your kitchen. Quality cookware will keep your kitchen nice and tidy, while providing you with the convenience and ease of use you need. You shouldn’t have to search separately for different cookware and utensils. In our quest to select the best cookware from Farberware, the first product on our list is this exquisite 15-piece set from the brand.

If you are new to the world of cooking and have little idea about what kind of utensils to buy, this cookware set is the perfect solution to all the problems that arise during your daily routine. The reviews about Farberware products are very positive, as the range contains all the essential utensils one needs on a daily basis.

Two pots come with lids, and four pots are also available with matching lids. In addition, the products include pots and pans of different sizes. The sizes available are 8 inches and 10 inches and one can choose the size according to their convenience. Cookware is an essential part of the cookware range and this set includes three basic cookware which are spoons, spatula and slotted spoon.

What I like:

What really attracted us to this product is the fact that the range caters to the needs of both beginners and veterans. All the utensils that are part of the cookware series are ones that are needed on a daily basis, which is very convenient for consumers. Moreover, the aluminum core used in the base is something that makes these tools and utensils reliable and durable.

Check price on Amazon

#2 – Farberware Millennium 10 Piece Stainless Steel Cookware Set

One of the main reasons why people invest in cookware is because they want to save themselves the trouble of buying different items from different places. Therefore, they want to invest in sets that are not only healthy but also of superior quality and use.

The second product on our list is one that will meet the needs of professionals and veterans alike. From the design itself to the polish of the product, everything is designed with the quality and functionality of the set in mind. The set includes two-quart pans with lids and an 8-quart stockpot also with a lid. The material used in the construction of this cookware is stainless steel, which contributes to the durability and reliability of the set.

Farberware cookware reviews attest to the fact that the product is well-suited to the needs of people who like to cook professional-style dishes that require long hours of preparation.

In addition to the stainless steel construction, all utensils are covered with an aluminum base to add an extra coating to protect the shape of the utensils. Prolonged exposure to heat can damage the appearance of the cookware, but the aluminum coating prevents wear and tear.

What we like:

What we liked most about this product is the fact that the cookware series is designed to be suitable for all types of cooking. You can completely rely on these utensils in any situation. The rivets on the frying pans and pots have been tested under various conditions, so you have no doubt about the quality and grip of the utensils.

Check price on Amazon

 #3 – Farberware 17 piece high performance non-stick aluminum cookware set

We’ve had our fill of stainless steel sets, so we wanted to try another Farberware series. This series focuses on design and an aluminum-based coating to provide extra protection and add elegance to the cookware. Our review of the Farberware cookware is very positive, as the set meets expectations and standards. The set includes pans and cookware of different types, as well as pots and pans designed to facilitate cooking. In addition, there is a wide range of kitchen utensils that will meet the daily needs of anyone interested in cooking.

Although the cookware is an absolute success in all respects, what caught our attention the most is that the design of the range has been made to perfection. The manufacturers have taken care to pay due attention to every aspect of the manufacture of these utensils and kitchen tools, and that is why the reviews of Farberware cookware are very positive. The handles are double riveted, which makes for a more efficient and firm grip. Also, the glass lids are unbreakable, which means that even if the lid accidentally falls on the floor, the glass of the lid will not be damaged.

What we like:

What we liked most about this product was the design of the kitchen utensil. The manufacturers made sure that the design is such that the whole range is presentable. The aluminum coating and base give these utensils a unique shine that makes them the perfect choice for open kitchens. In addition, the utensils are heat resistant, which means they can handle heat up to a certain power without any problem.

Check price on Amazon

#4 – Farberware 15 Piece Non-Stick Aluminum Cookware Set


A cookware is designed to increase the convenience and comfort of the person using it. It saves people from choosing and buying different utensils in different stores. When we learned about this cookware, we were immediately hooked. We wanted to try it because it seemed so compelling. The range of utensils and tools was very varied and all the tools had a different purpose. This room contains pots and pans of two different capacities, a 5-quart Dutch oven and 8-inch and 10-inch frying pans. In addition, there are pots and pans and cookware that are made of nylon. The entire range is made of stainless steel, which speaks to its quality and durability.

In addition to the sturdy design and quality of the cookware, another important feature is the highlight of the product: all items are non-stick. Thus, you don’t have to worry about the cleaning process of the cookware. All utensils and tools are designed to be used in the dishwasher, which makes it more convenient for the user. In addition, the exterior of the cookware is stain resistant.

What we like:

What attracted us to this product was the idea behind the cookware design. Our Farberware cookware reviews are completely in favor of using this product. Customer reviews of the Farberware cookware are also in favor of the sturdy construction and easy maintenance of the set. All utensils and tools can be easily cleaned, as the entire range is dishwasher safe.

Check price on Amazon

#5 – Farberware Anodized Aluminum Non Stick Cookware Set


When we were about to reach the end of our search for the best cookware set from Farberware, the last product that made it to our list was this amazing product from Farberware. This cookware series is absolutely beautiful, and with its sturdy construction and impressive base, it is the perfect choice for people who want a product that perfectly combines comfort and convenience. The entire series is a heavy-duty aluminum series with an aluminum base, so you don’t have to worry about the durability and reliability of the series.

Another reason why you should invest in this product is that the design of the cookware series is designed with people’s comfort in mind. The handles of the cookware are double riveted, which ensures that the grip and hold of the handle are much better than its competitors. In addition, the glass lids are shatterproof and breakproof, so you can easily subject them to regular use. The product warranty is also quite long and extensive, so you don’t have to worry about trust and service issues. Moreover, all utensils are heat-resistant, which is a major reason for its popularity.

What we like

What we liked most about this product is that the brand has made sure that all the tools and the range of kitchen utensils are designed as a perfect blend of finesse and design. The products that are part of the range are quite sturdy and comfortable to build.  Moreover, the construction of the cookware range is extremely heat resistant, so you can easily expose them to hours of cooking.

Check the price on Amazon

How we chose the best Farberware cookware in our list

Choosing a cookware set is always an important decision for most people. Cookware is necessary in almost every household these days. No matter how busy you are, you always need a reliable cookware set that you feel comfortable with. Our Farberware cookware reviews all show that we make a careful decision and selection only after thoroughly studying all other aspects of a cookware system.

Moreover, we make sure that our Farberware cookware reviews are based on a wide range of parameters. We make sure that we conduct a detailed research about our customers’ needs and expectations regarding appliances and only then draw our conclusions. The first requirements for a kitchen utensil are its construction and design. The kitchen utensils we select have a solid structure and an easy-to-use design. We make sure that the products are extremely easy to use and clean.

Another important point on our list is that we pay special attention to the handle and grip of the cookware. All products that are part of our list are double riveted, which provides a better grip and a better hold on the utensil. In addition, we make sure that all of our cookware is coated with aluminum.

The different types of Farberware cookware in your kitchen

When it comes to choosing Farberware products, there are many products in each line. Farberware cookware offers a wide variety of options, which benefits the brand. You can easily choose the product that suits your expectations and needs. According to the Farberware nonstick cookware review, the products in each series are designed to meet the needs of the buyers. There are different types of products available in each price range.

Stainless steel cookware series: the first product on our list is the one made of stainless steel. Stainless steel is one of the strongest materials for building utensils and tools. With the help of stainless steel, you can make the most of the money you have invested because this cookware series offers you the sturdiness in construction and design. In this regard, the Farberware Classic 15-piece stainless steel cookware is an amazing product that offers maximum convenience to the people who use it.

Aluminum cookware series – Another product in this range is the cookware series that uses aluminum coating. Aluminum coating prevents the cookware from discoloration and that is why it is very popular. Especially in the open kitchen culture, it is very important to find products that are both stylish and very functional.

Why you need the best type of cookware in your kitchen

Cooking is a form of meditation rather than an activity. It is important that you have a well-organized kitchen. The kitchen is the heart of the home and no matter how small your needs are, you should always have a well-stocked kitchen. With the help of a cookware set, you can structure your kitchen.

According to Farberware reviews, Farberware cookware and similar products can meet all your needs. In addition, Farberware hard anodized cookware reviews also highlight the fact that the cooking range is very suitable for people’s needs. These Farberware cookware sets are extremely resistant to heat and breakage, which in turn saves you from problems. Moreover, the cookware sets are quite durable, as they have an aluminum coating that adds to the strength of their design.

According to Farberware nonstick cookware reviews, the cookware and kitchen tools are designed in such a way that all your needs for cooking tools and processes are met in one place. With this range of cookware by your side, you will no longer have to go from place to place looking for different utensils and equipment. By purchasing a range that includes all the utensils and tools, you will save yourself the hassle of cooking, which is a great time saver.

Wrapping up

I am sure this Farberware cookware reviews will help you to make up your mind whether you should add them to your kitchen cabinet or choose another brand. Hopefully, with the help of this guide, you will be able to make an educated decision while choosing your cookware range.

Best Saute Pans To Buy In 2022: Top Reviews

saute pan

Best Saute Pans Reviews

Are you looking for the best saute pans? If you are looking to buy one, this review post will serve your purpose. To be gin with, owning the best saute pan will help you to improve your cooking skills and complete dishes. A sauté pan can easily be confused with a pan or a frying pan simply because people do not know the difference or because they do not know in retrospect when to use each pan.

A sauté pan has a larger cooking surface and usually has one side that is vertical and even all around so that a lid can be placed on the pan. A frying pan or a skillet on the other hand has open sides and is much flatter. Yes, both perform some of the same cooking functions,  a sauté pan can perform all of them, depending on its size and design. However, some electric skillets claim to be able to do most of the things a pan can do because their shape and design are very similar. So there are a number of differences and similarities between sauté pans and frying pans.

Sauté pans are perfect for preparing whole dishes with this pan. The pan can probably be placed in the oven, which doubles its function as a baking pan. There are many different methods and techniques used in a sauté pan that most others do not master. There are also some differences between certain models of sauté pans. So, don’t expect that  any sauté pan will do the job of another.

In this longish post, I am going to discuss what you should look out for when buying a new sauté pan, as well as the best type of construction and design that best suits your needs. We will also discuss some of the sauté pan models that are available on the market today.

HOW TO CHOOSE THE BEST SAUTE PAN

You would like to make the sauté pan one of the last ones you have to buy. So, you will want to make sure that it is well built, is made of high quality materials and that it comes with some kind of warranty.

There are many types of sauté pans, but they can be grouped into three categories. Stainless steel, cast iron and non-stick or Teflon- coated. Each of these pans serves a different purpose. You can have all three types to ensure that you are ready for any cooking situation, or you can determine what you need in a sauté pan and make the best decision for yourself.

Pans with non-stick coating are easiest to use as long as you take care of them. They are usually lighter and Teflon-coated to prevent them from sticking all the time. Normally these pans cannot be put in the oven and should be cleaned by hand and not in the dishwasher. You should also only use wooden or rubber utensils for cooking in this pan. Metal utensils scratch the Teflon coating.

A stainless steel pan is a very versatile pan and is also used in most professional kitchens. The pan is heavy and can be placed in the oven and in most cases in the dishwasher. However, the pan is quite heavy and has no non-stick coating.

The cast iron frying pan is also an excellent choice as it is the cheapest of all options and is an amazingly versatile product. This pan is ovenproof and also has a non-stick coating. However, it is very heavy and not dishwasher safe. Cast iron pans need to be cleaned by hand and seasoned again and again to make them last forever.

Construction and design

The design of the frying pan is very important because it has to perform several functions at the same time compared to other pans, such as the wok, the frying pan, the pot, the skillet, the griddle and others. The size of the sauté pan will also make a big difference in the different cooking methods.

The most common sizes are 12- to 14-inch pans. Other sizes are also available, but for a pan used as a whole, this is the correct size. The pan should also have the same design as a saucepan with higher walls. Other “pans”, which are actually frying pans or skillets, have walls that protrude outward and upward like a wok.

Most of them are made of high quality materials, heavily coated with iron and steel, or, by the way, totally made of cast iron.

Some have a copper bottom to create a uniform cooking surface throughout the pan so that everything cooks evenly. However, this copper bottom does not work in an induction burner as it is not compatible. If you have an induction burner, you should ensure that you have a sauté pan that matches it.

Some of the models are also equipped with lids, which are very useful to avoid blockage by confinement. However, make sure that the lid can also be placed safely on the oven. Not all lids are metal and most are glass. So you should also ensure that the lid can withstand this type of heat before using it in the oven.

Warranty

A warranty protects your sauté pan in case of breakage. Most quality manufacturers offer a lifetime warranty on their products because they are convinced that it will last forever. If the product does not come with some sort of warranty, it is clearly a warning sign and should not be considered a reliable product that will stand the test of time.

THE 10  BEST SAUTE PANS AVAILABLE ON THE MARKET

(1) All-Clad 4403 Stainless Steel Saute Pan

The best stainless steel frying pan

Our first sauté pan is a top quality product, so the price is over $200. It is fairly expensive, and there is also no guarantee that it will protect against defects or damage that may occur during use.


(1) All-Clad 4403 Stainless Steel Saute PanThe pan is made of high quality 18/10 stainless steel, which is said to be stick-resistant. The internal structure is combined with iron-coated steel to create a uniform temperature across the entire surface of the pan. This pan works equally well on any induction burner.

The pan is also equipped with a stainless steel lid. Because the pan and lid are made entirely of metal, they are safe to use in an oven or dishwasher. This expands the number of techniques and methods that can be used with the pan.

For

Frying pan made of 18/10 stainless steel, robust and heavy, with an internal iron-coated core for a uniform cooking temperature on the surface of the pan.

Supplied with a metal lid for safe placement in the oven.

The pan is dishwasher safe, but hand washing is recommended.

Against

The frying pan can be very heavy and sometimes difficult to manoeuvre.

This pan is quite expensive, with no guarantee of protection against defects or damage that may occur during use.

CHECK PRICES ON AMAZON

(2) Calphalon Classic Non-Stick Saute Pan

The best non-stick sauté pan

This will be the best choice for a non-stick pan. In addition, this stove only costs a fraction of the price of the previous one, which has many similar features.


Calphalon Classic Non-Stick Saute PanThe pan is made of cast stainless steel with a Teflon-coating on the bottom. This means that nothing sticks to the pan without grease or oil. The pan is also different from most other pans with non-stick coating because it can be placed in the oven at temperatures that reach up to 450 degrees.

The pan is also supplied with a tempered glass lid to prevent splashing or spitting during cooking. The handles are also oven-resistant and remain cool when working with the pan during cooking..

For

The pan is equipped with a tempered glass lid to prevent damage and the handles not only enter the oven but also remain cold on the plate during cooking.

The pan is made of high quality cast stainless steel and is Teflon coated to ensure that nothing sticks to the pan during cooking.

The pan can also be baked up to 450 degrees.

Against

There is no warranty to protect the product from defects or damage that may occur during use.

The lid does not fit in the oven.

The pan is not dishwasher safe.

CHECK PRICES ON AMAZON

(3)  Tramontina 80116/058DS Gourmet Stainless Steel Saute Pan

The second best stainless steel sauté pan

This pan is, with few exceptions, almost identical to the first one we talked about, so it is number 2 among the stainless steel sauté pans.


Tramontina 80116/058DS Gourmet Stainless Steel Saute PanAlmost all saute pans have the same characteristics, except that this model costs half as much as the other one we mentioned earlier and also has a lifetime warranty to protect it from damage or defects that may occur during use.

However, this pan is much heavier and is not made of top quality materials than the other one. The other is also two quarts larger than this one and allows for the use of many more cooking techniques.

For

The lid is made of metal, which allows it to be placed safely in the oven.

This saute pan is dishwasher safe, but it is recommended that you should wash it by hand.

The pan has a lifetime warranty to protect it from defects or damage that may occur during use.

Against

The saute pan can be very heavy and sometimes can be fairly difficult to manoeuvre.

CHECK PRICES ON AMAZON

(4)    Cooks Standard Multi-Ply Clad Deep Saute Pan

Saute pan made of durable Stainless Steel with Even-Heating Aluminum Core

This pan is also almost exactly the same as the runner-up model we mentioned before. All the same statistics and functions are there, but with only one or two small differences.


Cooks Standard Multi-Ply Clad Deep Saute PanThe sauté pan is made of the same high quality materials as the others, but this pan is only coated with two layers of iron, while the other saute pans are coated with three layers of iron on the bottom and sides. In addition, there is no warranty to protect it from defects or damage that may occur during use.

The saute pan is cheaper than the other two we have studied and is also the largest size with the capacity to cook up to 5 quarts. Everything is dishwasher and oven safe, with little or no problems. A great buy for any homemaker.

For

It has the largest surface area and the largest collection volume of any jumper available on the market.

It is equipped with a metal lid that allows it to be placed safely in the oven.

The pan is dishwasher safe, but hand washing is recommended.

Against

The frying pan can be very heavy and sometimes difficult to manoeuvre.

The pan is built with only two layers of iron instead of three like most other pans.

There is no guarantee that the sauté pan will be protected against damage or defects that may occur during use.

CHECK PRICES ON AMAZON

(5) Anolon Advanced Covered Sauté Pan

Not quite a top deal in terms of quality and pricing

The next sauté pan may look like a big deal with all its self-proclaimed features and tall claims, but it turns out to be a disappointment since it is an expensive product. This saute pan is quite costly and says it can do more than the average non-stick frying pan, but we disagree.


Anolon Advanced Covered Sauté PanThe pan is very large, holds 5 quarts and is covered with a non-stick Teflon layer to prevent food from sticking when cooking. The pan also has a tempered glass lid, but it doesn’t fit in the oven. The pan is designed to be ovenproof up to 400 degrees, but the Teflon can wear out and the synthetic rubber handles may not withstand the heat. Although the frying pan is rather expensive, there is no guarantee that it will be protected from damage or defects that may occur during use.

For

The saute pan is very large and has a capacity of up to 5 quarts.

The pan is covered with Teflon to prevent it from sticking during cooking.

The pan is equipped with a glass lid to store the contents and has synthetic rubber handles for convenience.

Against

The pan is not dishwasher safe and cannot be placed in the oven at high temperatures.

The pan is not protected against damage or defects that may occur during use.

CHECK PRICES ON AMAZON

(6) Cuisinart 733-30H Chef’s Classic Saute Pan

The best stainless steel saute pan for money

This saute pan is really very affordable and can be the right thing for you and your kitchen.


Cuisinart 733-30H Chef’s Classic Saute PanThe pan is much larger than the others that are available in 5 ½ quarts size. The saute pan is made of two-layer cast stainless steel and also has a steel lid. The pan and lid are also dishwasher safe and can also be placed together in the oven.

The pan, elegant and shiny, may seem the best choice because of its low price, but also because it arrives with a lifetime warranty to protect it from damage or defects that may occur during use.

For

A very affordable saute pan that is guaranteed for life to protect it from damage or defects that may occur during use.

The pan is very large with 5 ½ quarts and is also fitted with a stainless steel lid to prevent damage.

The pan and lid are dishwasher safe and can be placed together in the oven.

Against

The pan is made of only two instead of three layers of cast stainless steel, which makes it a bit lighter but also less durable and with a less even heat distribution.

CHECK PRICES ON AMAZON

(7) Calphalon Classic stainless steel saute pan

The best deal in the sauté pan category

It offers great value for money so far as the all stainless steel sauté pans are concerned and slightly cheaper than the last one as well. It also has a warranty to protect it, but it comes with only 10 years instead of a lifetime warranty like the previous one.


Calphalon Classic stainless steel saute panThe sauté pan has the same construction and the same features as the previous one, except for one thing. The lid is made of tempered glass instead of stainless steel, which means that it is dishwasher safe but cannot be placed in the oven at high temperatures.

For

A very affordable sauté pan that comes with a 10-year warranty to protect it from damage or defects that may occur during use.

The pan is very large with 5 ½ quarts and is also fitted with a stainless steel lid to prevent damage.

The pan and the lid are dishwasher safe and the pan can be placed in the oven.

Against

The pan is made of only two instead of three layers of cast stainless steel, which makes it lighter but also less durable and with a less even heat distribution.

The lid is not suitable for placing in the oven at high temperatures.

CHECK PRICES ON AMAZON

(8) Emeril Lagasse Dishwasher-safe Nonstick Hard Anodized Covered Deep Saute Pan

Perfect non-stick pan for braising, stewing, or cooking one-pot meals for a crowd

This pan that holds the eighth position on our list is from a famous chef who makes all his pans with a copper-coated base to distribute the heat evenly over the surface.

Emeril Lagasse Dishwasher-safe Nonstick Hard Anodized Covered Deep Saute PanThe pan is well-constructed with double layer cast steel and coated with non-stick Teflon to prevent sticking during cooking. The sauté pan has a heated lid and is dishwasher and oven safe up to 350 degrees. The pan comes with a limited warranty, but only against possible shipping defects, but the good news is that the pan is very affordable.

For

A very affordable saute pan with a limited warranty to protect against defects that may occur during transport.

The pan is very large in 5 quarters ½ and is also equipped with a stainless steel lid to prevent damage.

The pan and lid are dishwasher safe and the pan can be placed in the oven.

Against

The lid does not look very safe for the oven.

There is no guarantee to protect it from damage that may occur during use.

CHECK PRICES ON AMAZON

(9) Ozeri All-in-One Stone Earth Saute Pan

Stands apart in the crowd for its sophisticated features and design

Ozeri ZP9-5L is an awesome sauté pan because it is virtually a workhorse with multitasking ability. It is a stone earth sauce pan because it uses a stone-derived coating from Germany, 5 L (5.3 quarts) in size, and it has a coconut brown look.


zeri All-in-One Stone Earth Saute PanCustomers who love natural products say the Ozeri All-in-One sauté pan is perfect for them. The pan is covered with a non-stick coating and has a fake earthenware look which matches any modern kitchens.

The pan has a capacity of 5.3 quart. According to verified reviewers, it can hold complete sauté dinner and breakfast or lunch recipes for families of four to six people.

Ozeri attracts environmentally-conscious buyers. It is made of German stone, which is free of a number of known chemicals. According to users, it offers a natural non-stick performance.

For added safety, the handle is made of heat-resistant silicone. The high-end pan is available in three colors: coconut brown, granite gray or lava black. Each choice comes with its own lid. All in all, this is one sauté pan you should genuinely take a close look at as it has 87% 5 star reviews in Amazon and stands out in the crowd because of its elegant looks.

For

Genuine ceramic

Environmentally friendly construction

Three sophisticated color selections

Natural non-stick coating

Delivered complete with cover

Comfortable silicone-handle

Against

The lid has metal edges and can wear out the non-stick coating

CHECK THE PRICE ON THE AMAZON

(10) Cooker King Non-stick Saute Pan

Top quality  saute pan with 3 layers of PFOA free and TOXIN free healthy nonstick coating 

COOKER KING non-stick sauté pan can work in any type of heat which includes induction oven, gas ranges, electric ranges and ovens. This product is dishwasher safe, ovenproof, multi-purpose frying pan with stainless steel handle.


Cooker King Non-stick Saute PanThe non-stick coating consists of three PFOA-free layers. Food release is effortless, and cleaning is easy and scratch-free according to verified tests.

The sturdy handle is riveted for a good grip and heat resistant for added safety. There’s also a convenient tempered glass lid so you can cook your favorite dishes comfortably.

According to Cooker King, the pan can be used in the kitchen and the stove tops that can be used up to 480℉. The lid is also suitable for this temperature range and will not warp or break. Verified buyers say they like the pan as a welcome gift.

For

Ideal for all types of stoves and ovens

The perfect gift for a housewarming party

Triple PFOA-free non-stick coating

Heat resistant safety handle

Tempered glass cover

Against

The bottom is not perfectly flat

CHECK PRICE ON AMAZON

Wrapping up

Best saute pans

Whichever sauté pan you intend to buy, you must make sure it is a safe product and quite reliable. Also make sure that you are familiar with the product. It makes no sense to buy something you don’t know much about and have no idea how to use it. If you have an induction stove, make sure that it is compatible with the burners. If not, make sure that the pan is made of high quality materials and is properly constructed to ensure durability and strength. Get out now and get the best saute pans for the money and start cooking!


Related Post: Best Electric Griddle


Presto 07211 Liddle Griddle Review

Review of the Presto 07211 Liddle Griddle

The Presto Liddle Griddle is not large enough to meet the needs of many individuals. It has an 8.5 x 10.5 inch cooking surface and it weighs about 2 pounds. Its size makes it look like a conservative version of other Presto griddles. This makes the Presto 07211 griddle perfect for small homes and families and for people who use it occasionally.

You can certainly mPresto 07211 Liddle Griddle Reviewanage cooking two or three steaks or a few eggs and bacon on this griddle. The cooking surface has a non-stick coating that reduces the amount of oil, which should allow food to be cooked safely without sticking. Copper should not be used as it scratches and removes the non-stick coating.

The body of the Presto griddle is made of cast aluminum, which is light and very rigid, but is also suitable for heating. The owners are very satisfied with the quality, but some think that the plastic handles are not sufficiently strong and can break quickly.

This electric griddle is part of the basic equipment and is essentially a flat electric frying pan. It has an estimated power of 1000 watts and works with any 120 V socket. The temperature can be regulated by a knob, which makes it possible to retain the heat up to 400ºF even when the “heat” is uncertain.

Click here to learn more about the Presto Liddle Griddle

At one end there is a channel that absorbs the oil drops during cooking. Although it is not large enough to cook for a large family, many have had no trouble preparing pork chops, hamburgers and steaks. The heat is surprisingly easy to control and the owners feel wonderfully happy.

This Presto Electric griddle heats and cools faster than most other griddles, probably due to its size. The Presto 07211 not only heats up quickly, but also maintains the temperature longer than the other models. In addition, this is an important factor in the possibility that you may have to use a different food group to prepare.

The Liddle Griddle is anything but difficult to store due to its size. It does not take up much space, either on the kitchen counter when in use or in the cupboard when stored. You can store it in one of your kitchen cabinets with little effort. Its legs and handles can be unscrewed, and this feature makes capacity much easier.

Like its capacity, the cleaning process is equally simple. If you isolate the temperature measurement, you can immerse everything in hot, foaming water to clean it. Some owners have put their Liddle griddle in the dishwasher and do not complain. Unlike other electric griddles, this griddle leaves plenty of room in the dishwasher for various dishes.

Since the oil channel is part of the machine and cannot be insulated, you have to turn everything upside down to unload it. You prefer not to do this while the griddle is still hot, but if you grab it to cool down, some of the fat will harden. This is the most basic observation when cleaning the griddle.

The robust cast aluminum body prevents deformation and transfers heat evenly across the cooking surface, keeping away from problem areas. Most electric griddles on the market offer uneven heating. With the exception of areas where the heating component sizzles a little more, the 07211 offers an equivalent heating surface that can surpass many of the superior models on the market without overstretching, especially the larger models that take longer to heat up.

It is not just easy to use, but also very moderately priced compared to other electric griddles. It is modest like the other Presto griddles, which boast of the most attractive price on the market. It is perfect for singles, couples,  and people who need an additional practical device for occasional use.

It does exactly what is expected of it. It is anything but difficult to clean and easy to store. There are not many objections to it, and most owners say it is a “big little griddle”. It can easily replace electric pots and pans or gas barbecues, with the only disadvantage being its small size.

If you live alone or with your partner and don’t have to cook for a larger group, this Presto Liddle Griddle may be right for you. However, if you are looking for a griddle with an open cooking surface, you should look for different models.

Check out the latest price on Amazon

The highlights:

Durable cast aluminum

8.5 “x10.5” cooking surface.

Maintains a wide temperature rise, up to 400ºF

Power – 1000 Watt

Completely low

1 year warranty

Pros

Cast aluminum resists torsion for a long time

Programmable temperature control

Drainage work releases oil and grease

Easy to clean

Easy to store

Cons

Best for small quantities

Heats up a lot

The handles can be released

The transmission channel is part of the equipment.

Wrapping up

Customers love this griddle because it can be used regularly to cook bacon, burgers, grilled cheese, pancakes, eggs and more. Whether you live alone, with a partner or with a small family, this is the ideal size you want! It doesn’t take up all the space in your closet and fits perfectly 4 hamburgers or 3 large pancakes. It heats up evenly and the side drip tray collects the fat from the bacon. This is my second model and I’m still addicted to it. I bought it as a backup, but I love this brand and size!

Buy Presto 07211 Liddle Griddle from Amazon


How Does An Air Fryer Work? Read This Before You Buy One!

How does an air fryer work? People have them at home and yet few know how it works. Well, the whole concept of frying in the air looks like a magical thing. Frying without fat? Is that possible? Like many things that seem mysterious, it actually has a very logical explanation. But before revealing,  it should be made clear that air-frying is not really frying. To really fry, you have to dip the food in oil. There is no other way. But what a deep fryer can do is to give you the crunch that makes southern fried chicken or a potato chip so delicious. You get the point now?

All right, let’s get on with it.

How does an air fryer work?

An air fryer is actually very similar to a countertop convection oven. It’s a small electrical appliance with a heating element and a fan that blows air into a cooking chamber. In an air fryer, however, the air is very quickly swirled in a circular pattern. This is why, it reaches all food surfaces better and produces a crispy crust. In addition, the food is placed in a perforated basket that keeps the food in contact with the hot, moving air. Is there anything else that makes a big difference? You should take into account that there is not much space between the walls of the chamber and the basket increases the heating effect.

Buy Philips Avance Collection XXL Digital Twin TurboStar Air Fryer from Amazon.com

Are all fryers the same? No, not really. Among many brands, I can say that some machines cook better and more evenly. Almost all of them brown and chop the food above and below, although some do it more evenly. In the best kind of fryers, the food is also “fried” in the middle of the basket. The difference lies in the construction of the oven, and as you would expect, and, needless to say, the best are the most expensive. (The best I have using for years is shown above!) However, you can help by preheating these fries and shaking and turning them while cooking.

Can I do without the oil altogether?

Most manufacturers of air fryers and recipes recommend spraying it with some oil. However, I have discovered that this is unnecessary. The food remains just as crispy without a thin layer of oil. If you want to add a little butter or olive oil for flavor, I suggest that you do this after cooking to maximize the effect.

Can I use my air fryer for purposes other than frying?

You can use your air fryer for grilling and baking, but do not expect to get the same results as in a conventional oven. If you have no other kitchen appliances, yes, satisfy your hunger for freshly baked blueberry muffins, but be aware that they will not become as even or brown as they would in a normal sized oven or a countertop oven.

What foods can be prepared in an air fryer?

It depends on your creativity! Meat, vegetables and even baked goods can work in your air fryer.

Here are some popular choices:

You can cook vegetables like potatoes, carrots, squash– basically anything that can be fried or roasted on a baking tray.

Meat dishes like chicken nuggets, bacon, hamburgers and hot dogs in an air fryer at home.

Frozen foods like chicken nuggets, mozzarella sticks, onion rings and French fries can also be cooked in an air fryer.

Baked goods such as doughnuts, doughnuts and funnel cakes can be done as well.

Tips for using your air fryer

It takes a little practice to achieve good results with an air fryer.

Since air fryers are a relatively newer piece of kitchen equipment, many models simply fail to keep up so far as performance is concerned. Therefore, you need to make sure that you are using a quality air fryer to get the most desired results. If you do not yet own an air fryer, our guide to the best air fryers will help you find one that suits your needs and works well, no matter how you prepare your food. However, I have already mentioned the best air fryer available on the market today according to performance and quality, and I have used this model personally. So, I presume I am qualified to recommend it. Click the image above or the link below:


 Buy Philips Avance Collection XXL Digital Twin TurboStar Air Fryer from Amazon.com

You will also find some tips that you should follow when you start using your air fryer.

  1. Preheat before cooking

Your air fryer needs time to reach its desired temperature before you use it, just like your oven or stove. Even if your appliance indicates that it does not need to be preheated, you will probably get better results if you let it heat up first. Fortunately, preheating an air fryer doesn’t take long, usually one to three minutes, instead of the eight minutes or more when you go to deep-fry something.

  1. Do not overdo it!

As with conventional frying, overloading the air fryer does not produce the best results. If you put too much food in the fryer, the food may soak or cook unevenly. It can also prolong the time it takes to cook the food completely.

  1. Turn over when frying

You may fry in the open air, but you should not throw away everything you know about frying. You should bread the items well before you drop them, and you should remember to flip the food in the middle of cooking.

And don’t be ashamed to monitor your progress while frying – it will help you get the desired results, especially the first few times you use the appliance.

  1. Clean thoroughly after use

Do not miss this important step! Food particles can get stuck in the corners of your fryer, accumulate over time and cause problems in the future. We recommend that you clean your appliance at least partially after each use. Allow the fryer to cool after use and follow the manufacturer’s instructions as given in the brochure/manual for proper cleaning.

Wrapping up–how does an air fryer work

Hopefully, this post has answered the question: how does an air fryer work? You should really have some basic knowledge about the way it functions and about the advantages and disadvantages of buy one for home. Otherwise, chances are that you end up buying the wrong one for yourself and waste your money.


10 Best Panini Press: Top Reviews In 2022

 Best Panini Press Reviews

Are you looking for the best Panini Press available on the market today? If you are, this post should be the one you should go through because here I have listed, after a thorough research online, the best products for you.

To begin with, everyone loves a good meal, especially if it is easy to prepare. A panini, which means bread roll in Italian, is a simple solution that is both delicious and easy to prepare. Little wonder the panini press is gaining popularity all over the world.

You can often find it in sandwich shops and even in bakeries. But the good news is that you can also make Panini at home with a Panini press.

So take a look at the best panini press grills and start making mouth-watering paninis for your whole family today!

Best panini presses on the market today


  1. Cuisinart GR-4N 5-in-1, Silver, Black Dials

The Cuisinart GR-4N offers five cooking options. It is perfect as a panini and also for many other dishes. With these multiple options, you can also prepare pancakes, sausages, grilled cheese, steaks and hamburgers.

You can open and reform the GR-4N 5-in-1 according to your cooking needs. These shapes leave more space to cook. Adjust the temperature and you are ready to cook.

This press does not contain BPA, so it can be used safely with food. And with non-stick coated cooking plates that are also easy to clean, the food you cook can’t be healthier than this.

This product helps you to remove the excess fat from your food. Safely collected in your grease trap below, you can eat healthier food all the time.

With its brushed stainless steel structure, it is a great addition to your kitchen. It is also dishwasher safe, and with this product, you will have all the fun cooking your stuff!

Cuisinart GR-4N 5-in-1 Griddle, Silver, Black Dials

Our rating : 4.8 out of 5 stars (4,8 / 5)


CHECK  PRICE ON AMAZON

Pros

  • Can be used for different types of food – grill/griddle, panini press
  • Heat regulation
  • Flat opening to create more cooking space
  • Automatic drainage and fat collection
  • No BPA
  • Non stick model
  • Good finish
  • Dishwasher safe

Cons

  • The grease separator is not easy to remove.


    1. Breville BGR820XL Smart Grill

Everything’s getting smarter these days, isn’t it? You have smart phones, smart watches, even smart mobikes. Here’s a grill you can add to your “smart” collection.

Then why is it so “smart”?

The Breville BGR820XL smart grill uses a technology known as Element IQ. This technology works with heat sensors built into the grill plates for regulating the cooking temperature. By performing “intelligent” calculations, it distributes the heat in such a way that consistent results are obtained every time.

The Element IQ also reduces the preheating time. When you place your Panini, the grill takes over!

Look at the screen and see the digital display that guides you.

Underneath, there is a drip tray that collects excess oil and a display that shows the cooking mode and the current temperature.

This versatile panini press can also be used to burn meat, make pancakes and even for cooking eggs. If you need more space searing or sizzling on your barbecue, open the cover to A 180-degree flat mode.

It’s as simple as that.

The BGR820X’s cooking plates  are made of titanium-coated cast aluminium with quantanium infusion. This gives it an excellent non-stick surface. The casing is made of stainless steel, while the handle is made of die-cast material that is always fresh.

Dishwasher safe and height adjustable, this product is very popular both in use and function!

Breville Intelligent Grill BGR820XL

Our rating : 4,6 out of 5 stars (4,6/ 5)


CHECK PRICE ON AMAZON

Pros

  • Automatic function for even heating
  • Shortened warm-up time
  • Collecting tray for recovering excess oil.
  • Non-stick model
  • Ergonomic handle that looks so elegant
  • Dishwasher safe
  • Six height settings

Cons

  • The non-stick layer will peel off after a while.
  • It is not suitable for intensive use.


  1. Hamilton Beach 25460A Electric Panini Press Sandwich Maker Grill


This model is available in two sizes: medium and large, there is an electric Panini press, model no: 25460A that will suit you perfectly. This model has a chrome-plated exterior that is both attractive and durable.

The Hamilton Beach 25460A can handle paninis of all strengths. The floating lid fits and rests perfectly and evenly on your sandwiches.

But that’s not all. This press is equipped with a power supply and preheating lamps. So you just have to watch your stove while you do other things. And when you’re done, the cleaning is easy. With a non-stick surface, a few wipes with a piece of cloth and you’re done.

It also requires very little storage space because it can be placed vertically.

An average-sized 25460A can hold two or three sandwiches at a time. So even with this small size, you have enough for all occasions. And in much less time!

Hamilton Beach 25460A Electric Panini Press Sandwich Maker Grill

Our rating: 4.1 out of 5 stars (4.1/5)


CHECK PRICE OF AMAZON

 Pros

  • Two sizes to choose from
  • A durable and attractive look.
  • The adjustable lid allows you to press the panini in any thickness.
  • Power supply and lamp preheating.
  • Non-stick model
  • Requires less storage space

Cons

  • Uneven heating
  • Has a rather fragile appearance


  1. DeLonghi CGH912C Indoor grill – Silver


With its five cooking functions, the DeLonghi is a multi-tusker which can be used as a contact grill, panini press, full grill, full griddle and a half grill/half griddle. Thanks to this versatility, it is capable of cooking hamburgers, paninis, meat, fish and also vegetables.

This product is made of scratch-resistant stainless steel, which gives it a more durable appearance. The interior is covered with Durastone ceramic, which is also scratch-resistant. This interior coating is non-stick and distributes heat evenly over the food.

Try it once in a while and you can easily see the difference with other normal models.

\The CGH912C automatically drains and collects excess oil. Equipped with two drain trays, just check it from time to time.

Sit back and enjoy your meal.

With this press, you don’t need kitchen gloves because the handles are always cool to touch. Go to the dishwasher too, and enjoy your food while your cooking plate is being washed in the kitchen!

The package includes a free spatula to use with your best panini press.


DeLonghi CGH912C Indoor Grill – Silver

Our rating: 3.4 out of 5 stars (3.4 / 5)


CHECK PRICE ON AMAZON

 Pros

  • Versatile, comes five-cooking functions.
  • Scratch-resistant inside and out.
  • Non-stick model
  • Two drip trays to collect excess oil
  • Even heat distribution
  • Comes with cool handles
  • Dishwasher safe
  • Free spatula included in the package.

Cons

  • The drip cups are separate items. They don’t fit in the press, except after a few manual manipulations.


  1. Cuisinart GR-11 Griddler, 3-in-1 Grill and Panini Press


The Cuisinart GR-11 is excellent in three respects. It works as a panini press, a grill, or a griddle. These three functions allows it to function as a more versatile product. Compact and with a well-polished surface, this product is easy to carry thanks to its large handle. This handle never gets hot and the lid can be closed when not in use.

Thanks to the non-stick inner surface on the top and bottom, cleaning this panini machine is a breeze. Even removing the food  never poses a problem.

Just what you need for your meals.

In this cooker, there are indicator lamps. They tell you when your press is on and when it’s at the right temperature to place your food. Since no adjustment is necessary, the preset temperature of this press is perfectly suitable for your meals.

Best of all, the floating top allows you to place food of any thickness. It adapts to this size and ensures even pressure on it.

With its drip tray and dishwasher-safe design, this item offers you healthy meals and a simple solution for your stomach!

Need more space? Open this panini press and you’ll have twice the space!


Cuisinart GR-11 Griddler 3 in 1 Grill and Panini Press

Our rating: 3.1 out of 5 stars (3.1/5)


CHECK PRICE OF AMAZON

 Pros

  • Multifunctional design
  • Elegant appearance
  • Open floor function to create more cooking space.
  • Ergonomically designed handle that is always cool
  • Non-stick model
  • Pre-heat lights
  • Drip tray to collect excess oil

Dishwasher safe

Cons

  • Looks rather fragile
  • The top plate has been known to fall off during use
  • Temperature setting cannot be adjusted by the user


  1. Oster CKSTPM6001-TECO Extra Panini Maker And Indoor Grill – Black


The Easter Panini press has been built larger than average in order to respond more quickly to demand. In addition to its size, it is also designed to cook up to 30% faster than other panini machines.

In addition to the panini press function, you can open the cover of this machine (up to 110 degrees) to grill meat, fish and vegetables. The lid is covered with a PFOA- and PTFE-free ceramic coating, which makes it easy to remove the food and guarantees the safety of the food. This coating is scratch-resistant and is very easy to clean.

But that’s not all. There is a drip tray at the bottom. This allows you to collect excess oil from your food. The adjustable feet allow the oil to enter quickly or slowly, depending on your preference.

You can take different thicknesses of sandwiches and cook them evenly. It’s the ideal companion for your next panini!

Oster CKSTPM6001-TECO Extra Panini Maker And Indoor Grill – Black

Our rating: 3.7 out of 5 stars (3.7/5)


CHECK PRICE OF AMAZON

Pros

  • Larger size
  • Faster cooking time
  • Compatible with the grill function
  • Chemical-free composition
  • Non-stick surface, resistant to scratches
  • Retention tray to collect excess oil
  • Adjustable feet for more convenience
  • Even heating

Cons

  • Non-removable grill plates make cleaning a little more difficult.
  • There is no on/off button


7.George Foreman GRP4842P Multi-Plate Evolve Grill


Do you want a black one, or a red, or a platinum one? What color preference do you have? George Foreman’s GRP4842P gives you a lot of flexibility in terms of  choice. With two sets of removable plates, you get a grill, a panini and a waffle maker, all at once.

With a special cooking feature, you also get 90 seconds of heat (500 degrees Fahrenheit) to give your food a professional finish. It also has a timer and adjustable temperature. Both are displayed on the screen to help you make an exact calculation. This allows to easily make other adjustments for better results.

Foods dissolve easily and are easy to clean. Offers multi-layer non-stick coating. This makes it easy to remove and clean the food easily. The exterior is also easy to clean because the buttons are kept flat against the surface of the panini press. Also, since this product does not contain PTFE or PFOA, it is safe to use. This press can be adapted to any sandwich thickness and also has an adjustable inclination to facilitate the flow of oil.

The dishes are removable for hand washing or dishwashing. The handle also stays cool at all times, so you can have a cool experience with this panini press.


George Foreman GRP4842P Multi-Plate Evolve Grill

Our rating: 4.1 out of 5 stars (4.1/5)


  Pros

  • Searing Burst function for better results.
  • LCD screen
  • Adjustable timer and temperature
  • Durable multi-layer non-stick feature
  • Easy to clean inside and out
  • Both PTFE and PFOA free
  • Drip tray to collect excess oil
  • Adjustable inclination.
  • Hot plates are dishwasher safe.Always handle cold

Cons

  • The second pair of removable plates is sold separately
  • The non-stick function does not last long enough


  1. Breville BSG520XL Duo 1500-Watt Nonstick Panini Press


The BSG520XL Breville is robust and durable and is both functional and aesthetically pleasing. With its brushed stainless steel frame, it is a beautiful addition to your kitchenware.

This panini press heats up quite quickly (up and down). Its interior surfaces are non-stick and scratch-resistant. The top plate impresses your dishes with perfect looking sear marks to give them a top class look.

This model works with any thickness of sandwich. The top plate is held in position by a floating hinge. This type of hinge allows you to work with any thickness of sandwich placed on it. There are lights to show you when the machine is on and when it is properly heated for use.

This grill is equipped with effective non-slip feet and will not slip unexpectedly or cause a cooking accident. The handle is thermally insulated and stays cool during use. Best of all, it has an adjustable height control that you can adapt to your needs. It also has a slot for winding up the power cord.

As the first company to manufacture a panini press for home use, the Breville team has always adhered to high product standards and they hardly compromise with the features.


Breville BSG520XL Panini Duo 1500-Watt Panini Press

Our rating: 4.6 of 5 stars (4.6 / 5)


CHECK  PRICE ON AMAZON

Pros

  • Top class finish
  • Fast warm-up time
  • Even cooking from top to bottom
  • Non-stick, scratch-resistant interior surface
  • Power indicator lights and preheating
  • Non-slip feet
  • Adjustable height control
  • Power cable winding slot for safe and easy storage

Cons

  • There’s no on/off button


9.  Lodge LPP3 Cast Iron Square Panini Press- 8.25 inches

Solid and sturdy, this panini press is made of cast iron kitchen cookware. Safe for cooking food, it’s a material that lasts for years. The handle is shaped like “one with the press”, so it never comes loose.

It provides amazing results all the time. Put this panini press on your stove, and you’ll find that it distributes the heat evenly. Just season it with a little oil and press the panini. You will get excellent results, every time.

Easy to clean, just a simple hand wash will do. The press is ribbed to give your food the best visual finish.


Lodge LPP3  cast iron square ribbed Panini press – 8.25 inches

Our rating: 4.5 of 5 stars (4.5 / 5)


CHECK  PRICE ON AMAZON

Pros

  • Highly durable
  • Made of food grade material
  • Uniform heat distribution
  • Easy to clean
  • ribbed press for a fabulous food finish

Cons

  • It’s all manual
  • The excess oil spills onto the stovetop
  • Rusts quickly if not properly maintained


    1. Imusa GAU-80102 Electric Panini Press 1400-Watts – Silver


The Imusa GAU-80102 is a versatile panini press. Its above average cooking surface allows you to evenly heat the top and bottom of your paninis, sandwiches, meat, and vegetables.  The non-stick surface is smooth and much easier to clean.

It is equipped with a heat and power indicator light. The upper part of the floating hinge allows this press to work well with any sandwich thickness.

And, with its polished stainless steel exterior, it will simply look fabulous in your kitchen!

Imusa GAU-80102 large Electric Press Panini 1400 Watt – Silver

Our rating: 4.2 of 5 stars (4.2/5)


CHECK PRICE ON AMAZON

 Pros

Large cooking area

It’s a non-stick model

Energy and heat indicator lights

Beautifully polished exterior

Cons

No drip feature

Uneven heat distribution

Leaves no grill marks on your food

No buttons or temperature control switches


Best Panini Press Buying Guide

For your reference, here are the most important considerations you should take note of before buying the best panini press for your home.

Capacity and power

The bigger the device, the faster the paninis are made. You should buy the panini press that best suits your needs. If you have family or friends who drop in often, a bigger press is better for you. However, larger machines consume more energy. So if you need the press for personal use, a small or medium-sized press will be a better choice for you.

 Versatility

Although it is rare to find a panini press that has only one function, some are more versatile than others. A versatile panini press allows you to do much more than what is expected. It also means that you don’t have to buy another device to perform a function that the panini press can already do.

Cooking Plate

A long-lasting non-stick product is essential. This facilitates the release of food. It also allows easy cleaning afterwards. You should also prefer a panini press with removable plates. They are even easier to clean and many are dishwasher safe.

Besides, the cooking plate must be able to distribute the heat evenly. This gets rid of hot spots and gives you edible food that is properly golden and safe to eat.

Finally, you must choose a design that matches your needs.There are three types of plates: smooth, ribbed and mixed (they are simple on one side and ribbed on the other). While simple ones are easier to clean, ribbed dishes leave a mark and make food more attractive.

Additional features

A timer and an adjustable temperature are pleasant features that you should consider in your best panini press. A timer makes the operation of your press easier. The temperature setting allows you to experiment with the texture and taste of the food.

A drip tray and hinges are material features to consider. A drip tray automatically catches the oils dripping from your food. If a panini press does not offer this as an automatic function, it will cause even more confusion in your kitchen.

The hinges are used to adjust the top plate. This allows the press to adjust to the thickness of the sandwich you are offering.

Manual or Electric?

Although the electric panini press is generally easier to use, it is up to you to decide which one suits you best, depending on your needs.

The best tips for using the panini press

As with all kitchen appliances, a few tips will help you get the most out of your panini press. So here are a few to turn you into a panini master chef!

Read the user manual

To understand how your device works, first read the instructions in the supplied manual carefully. This is because each model is different and will work differently. So to avoid damage, pay attention to things that should not be done while operating the panini press.

Also follow the instructions in the manual meticulously, so that you don’t have to waste time soving puzzles to make it work properly.

Preheat

Like any pot or oven, your press must be preheated before cooking. Once heated, your panini press can pick up the food directly and cooking can start immediately. Since paninis only need a short time to cook, you will get much better results by heating your press before placing your sandwich on top.

Vary machine use

As already mentioned, one of the best panini presses is dynamic and versatile. Why not add poultry, hamburgers, sausages, seafood or fish and cook that too? Flattening and eating paninis is all well and good, but variety is, as they say, the spice of life.

Clean your machine

Clean your press after each use. Depending on the model you have, there are different methods available. If your model consists of removable plates, remove them and put them in the dishwasher for thorough cleaning. However, if your model does not have this option, you should take a damp sponge and wipe the entire inner surface of the grill.

f the plates are not removable, make sure that the electrical part is not splashed.

Above all, do not forget to empty the drip tray, which collects excess oil from the food. Empty the oil for later use and wash this tray.

What is the best panini press?

Whether you are a professional chef or just a hobby cook, you need a panini press. This machine, which can process many meals, is an indispensable gadget in your kitchen.

So, for our winner, our choice for the best panini press is—

Food processor GR-4N 5 in 1 Griddler

This awesome panini press has myriad features. And because it is compatible with many foods and has an expandable cooking surface, it is simply fantastic. Moreover, this press is safe and easy to use as it comes without chemicals and has a non-stick surface. The ability to drain and collect excess oil automatically means healthy meals for you!

Put it in the dishwasher, sit on your couch with your sumptuous panini in your hand, and your dishwasher will clean it up for you! Get this model right now if you need something versatile that does many things for you at the same time!

Wrapping up

Hopefully, this long post about the  best Panini Press available on the market today will help you decide about which one to buy and why one to avoid. After all, you are the best judge to decide which one suits your need most. So, choose one from our selections that matches your requirements completely.


Related Post: Best Small gas Grills