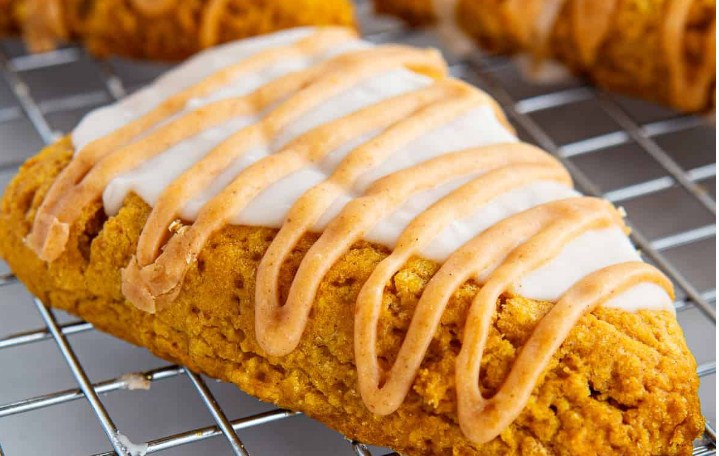

I make this easy pumpkin scones recipe so often in the fall that my husband once asked if I was running a bakery out of our kitchen. Fair enough, I guess, since the counter is usually dusted in flour by 8 a.m. There’s just something about that first cool morning in September that makes me want pumpkin everything, but scones specifically, because they come together in about 35 minutes and don’t require me to babysit a mixer.
I didn’t grow up baking scones. My mom was a “buy them at the store” kind of woman, and I respect that. But a few years back, my neighbor Carol handed me a plate of these over the fence, and I basically begged her for the method. She laughed and said it wasn’t a big secret, just butter, pumpkin, and not overworking the dough. Turns out she was right, and also turns out I ignored her advice the first three times I tried it. Live and learn.
This version is soft in the middle, a little craggy and golden on top, and tastes like pumpkin pie decided to become a breakfast pastry. It’s not fussy. You don’t need a stand mixer, you don’t need cake flour, and you don’t need to be a “baking person” to pull it off.
Why You’ll Love This Recipe
Here’s the thing about scones — a lot of recipes make them taste like sad, dry bricks. This one doesn’t. The pumpkin puree keeps everything moist, and cold butter cut into the flour gives you those little flaky layers that make people ask what your secret is.
It’s also fast. Start to finish, you’re eating warm scones in under 40 minutes, which is basically a miracle for anyone who’s ever waited around for yeast dough to rise.
And honestly? The kitchen smells like cinnamon and nutmeg the second these hit the oven. My kids come running from two rooms away every single time, no joke.
Ingredients
- 2 cups all-purpose flour
- 1/3 cup granulated sugar
- 1 tablespoon baking powder
- 1/2 teaspoon salt
- 1 teaspoon ground cinnamon
- 1/2 teaspoon ground ginger
- 1/4 teaspoon ground nutmeg
- 1/4 teaspoon ground cloves
- 6 tablespoons unsalted butter, cold and cubed
- 1/2 cup canned pumpkin puree (not pumpkin pie filling)
- 1/4 cup heavy cream, plus more for brushing
- 1 large egg
- 1 teaspoon vanilla extract
- Optional glaze: 1 cup powdered sugar, 2 tablespoons milk, 1/4 teaspoon maple extract
Equipment Needed
You’ll want a large mixing bowl, a pastry cutter or two forks, a baking sheet, parchment paper, and a bench scraper if you have one — though a butter knife works in a pinch. A wire rack helps for cooling, but I’ve absolutely skipped that step and just eaten them off the pan. No judgment here.
Step-by-Step Cooking Instructions
- Preheat your oven to 400°F and line a baking sheet with parchment paper.
- In a large bowl, whisk together the flour, sugar, baking powder, salt, cinnamon, ginger, nutmeg, and cloves.
- Add the cold, cubed butter to the flour mixture. Using a pastry cutter or your fingers, work the butter in until the mixture looks like coarse crumbs with some pea-sized bits remaining.
- In a separate bowl, whisk together the pumpkin puree, heavy cream, egg, and vanilla extract until smooth.
- Pour the wet ingredients into the dry ingredients. Stir gently with a spatula just until a shaggy dough forms. Don’t overmix — a few dry streaks are fine.
- Turn the dough out onto a lightly floured surface and pat it into a circle about 3/4-inch thick, roughly 8 inches across.
- Cut the circle into 8 wedges, like a pizza, using a bench scraper or sharp knife.
- Place the wedges on your prepared baking sheet, spacing them about 2 inches apart.
- Brush the tops lightly with heavy cream for a golden, slightly shiny finish.
- Bake for 16 to 19 minutes, until the tops are golden and a toothpick inserted in the center comes out clean.
- Let the scones cool on the pan for 5 minutes, then transfer to a wire rack.
- If using the glaze, whisk powdered sugar, milk, and maple extract together and drizzle over the cooled scones.
Cooking Tips
Keep your butter cold. I mean it — pop it in the freezer for 10 minutes before you start if your kitchen runs warm. Warm butter melts into the flour instead of staying in little chunks, and those chunks are what give you flaky layers. I learned this the hard way on a 90-degree September afternoon when my scones came out flat as pancakes.
Don’t skip chilling the shaped dough if your kitchen is hot; even 10 minutes in the fridge before baking helps the scones hold their shape.
Also, resist the urge to knead this dough like bread. Scones want a light touch. The more you handle it, the tougher they get, and nobody wants a tough scone.
Substitutions & Variations
If you’re out of heavy cream, whole milk works, though the scones will be slightly less rich. You can swap half the all-purpose flour for whole wheat pastry flour for a heartier texture, and some folks add a handful of chopped pecans or white chocolate chips right into the dough, which honestly sounds excessive until you try it and then you’re hooked. I’ve also made these dairy-free using coconut cream instead of heavy cream, and vegan butter in place of regular butter, and they turned out just fine, maybe even a touch more tender.
What to Serve With It
These pumpkin scones pair really well with a strong cup of coffee or a chai latte, especially if it’s a chilly morning. My friend Dana likes hers with a smear of cream cheese, which I thought sounded weird until I tried it myself — now I can’t go back. They’re also great alongside a bowl of yogurt and fruit if you want to round out breakfast into something a little more substantial.
Storage & Reheating
Store leftover scones in an airtight container at room temperature for up to 2 days, or in the fridge for up to 5 days. To reheat, pop one in a 300°F oven for about 8 minutes, or microwave for 15 to 20 seconds if you’re in a hurry. You can also freeze the baked scones for up to 3 months; just wrap them individually in plastic wrap first.
Cook and Prep Time
Prep time: 15 minutes Cook time: 18 minutes Total time: about 33 minutes Yield: 8 scones
Nutrition Facts
Calories: 265 per scone | Total Fat: 11g | Saturated Fat: 6g | Cholesterol: 55mg | Sodium: 240mg | Total Carbohydrates: 37g | Sugar: 13g | Protein: 4g
Nutritional information is provided as a courtesy and is calculated using standard ingredient databases. It should be considered an estimate only, as actual values will vary depending on specific brands, product measurements, and any substitutions made.
Why This Recipe Actually Works
The magic here really comes down to two things: cold butter and canned pumpkin instead of fresh. Canned pumpkin has a more consistent moisture content, so you’re not guessing whether your homemade puree is too watery or too thick. Combine that with butter that stays solid until it hits the oven, and you get scones that puff up with those little flaky layers instead of baking flat and dense.
The Small Change That Made a Big Difference
For the longest time, I skipped brushing the tops with cream before baking. I figured, eh, who needs an extra step. Turns out that was a mistake — that light brush of cream is what gives the scones that golden, slightly crisp top instead of a pale, matte one. It’s a 15-second step that changes the whole look of the finished pastry, and now I genuinely think it’s non-negotiable.
What I’d Do Differently Making It Again Tomorrow
Honestly, I’d probably double the batch. Eight scones sound like plenty until my son eats three before they’ve even cooled, and then I’m left with two for the rest of the week. I’d also chill the dough for a solid 15 minutes before baking next time, just to make sure the shape holds even better in a warmer kitchen.
What I Skip When Short on Time
On busy mornings, I skip the glaze entirely and just dust the tops with a little extra cinnamon sugar before baking. It’s faster, one less bowl to wash, and honestly still tastes great. I’ve also, more than once, skipped the wire rack cooling step and just let them sit on the baking sheet — don’t judge me, sometimes you just want breakfast on the table.
FAQ
Can I make the dough ahead of time? Yes. You can shape the scones and refrigerate them, unbaked, for up to 24 hours. Just add a couple extra minutes to the bake time since they’ll be starting from cold.
Why did my scones turn out dense? This usually happens from overmixing the dough or using butter that got too warm. Handle the dough as little as possible and keep everything cold.
Can I freeze the dough instead of the baked scones? Absolutely. Freeze the shaped, unbaked wedges on a tray until firm, then transfer to a freezer bag. Bake straight from frozen, adding about 4 to 5 extra minutes.
Is pumpkin puree the same as pumpkin pie filling? No, and this trips people up all the time. Pumpkin pie filling has added sugar and spices already mixed in, while puree is just plain cooked pumpkin. You want the plain stuff for this recipe.
Final Thoughts
This easy pumpkin scones recipe has become one of those things I make without even thinking twice once the weather turns cool, and I genuinely think it’s one of the simplest ways to bring that pumpkin spice feeling into your kitchen without a long ingredient list or complicated technique. Give Carol’s method a try — cold butter, gentle hands, and a good brush of cream — and I think you’ll end up making these on repeat too.