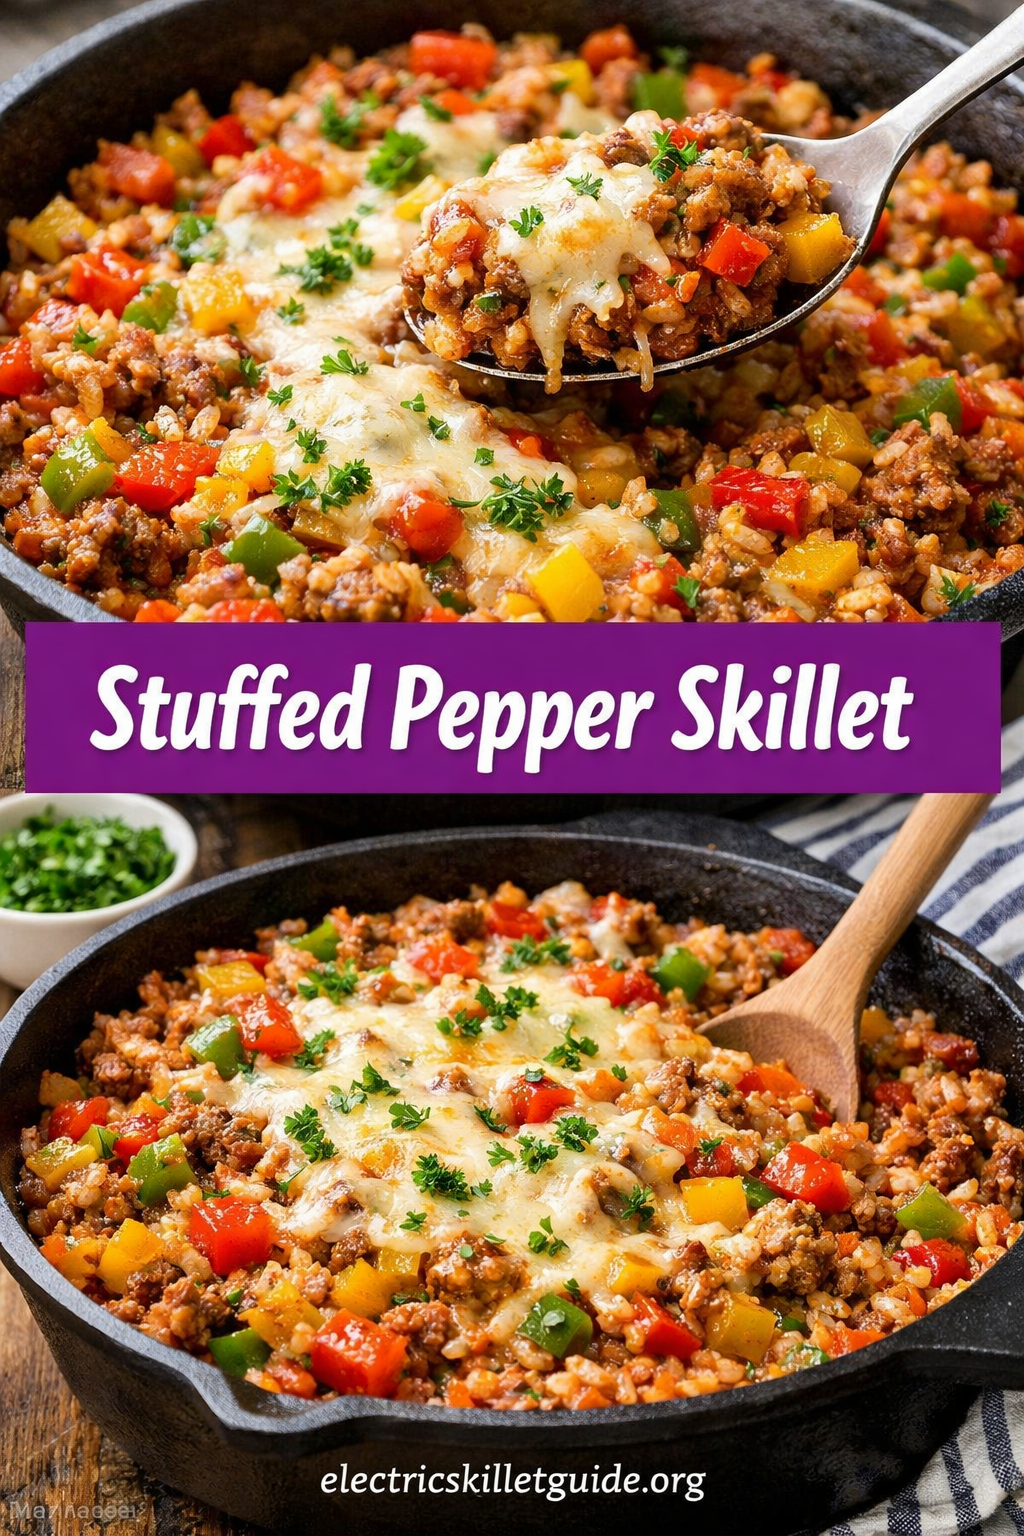
Stuffed Pepper Skillet Recipe
I didn’t actually plan to make the stuffed pepper skillet recipe to work magic for me.
Like… not at all.
The original plan was proper stuffed peppers—you know, the kind where you carefully hollow them out and pretend you’re the kind of person who has patience for that sort of thing. I got halfway through the first pepper, made a mess of it, almost sliced my finger (not dramatically, just enough to annoy me), and gave up.
So this happened instead.
And weirdly? It’s better. Like… consistently better. I’ve made both versions more than once, and this wins every time without much debate. Or at least in my kitchen it does.
This stuffed pepper skillet recipe has all the usual stuff—seasoned ground beef, bell peppers, rice, tomatoes, cheese—but everything just goes into one pan and figures itself out in about 35-ish minutes. No oven, no stuffing, no balancing peppers upright like they’re about to fall over (because they usually do… at least mine do).
It’s one of those meals that looks like effort… but really isn’t. I’ve made it while half-watching TV and still got compliments, so that tells you something.
Why You’ll Love Stuffed Pepper Skillet Recipe
Let me just say this upfront—this is not fancy food.
And that’s kind of the whole point.
It’s filling, it’s simple, and it uses things you probably already have sitting around. Nothing here is trying too hard, which honestly makes it more reliable than a lot of “impressive” recipes.
Here’s why it keeps coming back into my weekly routine (even when I say I’ll try something new… which I do say a lot):
It’s a one-pan situation. Everything goes in the same skillet—protein, rice, vegetables, cheese—and that alone saves you from doing a pile of dishes later. Which, on a random Tuesday night, matters more than it probably should.
It’s also fast. Not super rushed fast, but fast enough that you don’t feel like cooking is taking over your evening. Around 30–35 minutes and you’re done. More or less.
Leftovers? Weirdly better the next day. I don’t know why—maybe everything settles into itself—but I’ve gone back for lunch and liked it more than dinner. Happens more often than I expected.
Also, you can mess with it. Swap the meat, change the spice level, throw in extra vegetables if you feel like being responsible. It doesn’t break easily. Which I appreciate.
And yeah—kids usually eat it. Not always enthusiastically, but they eat it. That counts.
Ingredients
Here’s what you’ll need. Nothing complicated.
For the skillet:
- 1 lb (450g) ground beef (80/20 is ideal, but honestly anything close works)
• 1 tablespoon olive oil
• 1 medium yellow onion, diced
• 3 bell peppers (I usually mix colors, mostly because it looks nicer… and feels healthier somehow)
• 3 cloves garlic, minced
• 1 cup long-grain white rice, uncooked
• 1 can (14.5 oz) diced tomatoes, with liquid
• 1 can (8 oz) tomato sauce
• 1½ cups beef broth
• 1 teaspoon Worcestershire sauce
• 1 teaspoon Italian seasoning
• 1 teaspoon smoked paprika
• Salt and black pepper to taste
• 1½ cups shredded cheese (mozzarella, cheddar, or whatever’s already open in your fridge)
Optional stuff (but worth it if you have it):
- Fresh parsley
• Red pepper flakes
• Sour cream
Step-by-Step Instructions
Step 1: Brown the Beef
Heat a large skillet over medium-high heat.
Add the olive oil, then the ground beef. Break it up as it cooks—doesn’t have to be perfect. Mine never is. Let it brown properly, not just turn grey. That takes about 5–7 minutes, depending on your stove (mine is inconsistent, so I just eyeball it and hope for the best).
Drain off most of the fat, but not all. Leaving a little behind actually helps everything taste better. I used to remove all of it—mistake.
Step 2: Cook the Aromatics
Push the beef to one side. Add the onion to the empty space and let it cook for a couple minutes.
It doesn’t need to be perfectly soft—just not raw.
Add the garlic, mix everything together, and cook for maybe 30 seconds. You’ll smell it immediately. That’s how you know it’s ready. Or close enough.
Step 3: Add the Peppers
Throw in the diced bell peppers.
Stir everything together and let them cook for about 3 minutes. You’re not trying to fully cook them here—just soften them slightly.
If they still have a bit of bite, that’s actually better. I prefer it that way anyway.
Step 4: Add Rice, Tomatoes, and Liquid
Now add the rice, diced tomatoes (with all the liquid), tomato sauce, and beef broth.
Then Worcestershire sauce, seasoning, paprika, salt, pepper—basically everything else.
Stir it all together. It might look like too much liquid at first. It’s not. It works out. It always looks wrong before it looks right.
Bring it to a boil.
Step 5: Simmer Until the Rice Cooks
Once it starts boiling, reduce the heat to low and cover the skillet.
Let it cook for about 18–20 minutes.
And yeah—don’t keep opening the lid. I still do it sometimes out of habit, then regret it. The steam matters here. More than you think.
Check around the 18-minute mark. If the rice is soft and most of the liquid is gone, you’re good.
If not, give it a few more minutes. No big deal. Cooking isn’t that strict here.
Step 6: Add the Cheese and Finish
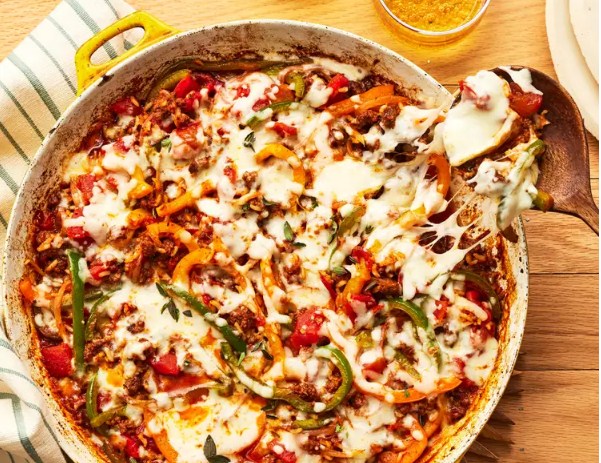
Take the lid off, sprinkle the cheese over everything, and put the lid back on.
Give it about 2 minutes.
The cheese melts, everything settles, and it suddenly looks like actual comfort food. Like, properly put together.
Add parsley if you want to feel slightly fancy. Or don’t. I skip it half the time.
Serve it straight from the pan. Fewer dishes. Always a win.
Cooking Tips
A few things I’ve picked up after making this more times than I probably should admit:
Use a wide skillet. Seriously—it makes a difference. The first time I tried this in a smaller pan, the rice cooked unevenly and I ended up with a weird mix of mushy and slightly undercooked grains. Not ideal.
Don’t rush the browning step. It feels small, but it isn’t. Those browned bits at the bottom? That’s where a lot of flavor comes from.
Toasting the rice… okay, optional. Nice if you do it. Fine if you don’t. I skip it more often than I’d like to admit.
Season as you go—or at least taste before finishing. Sometimes it needs more salt. Sometimes it doesn’t. Depends on the tomatoes, honestly.
And yeah—keep the lid on. I’ve tested the “peek every 2 minutes” method. Doesn’t work.
Substitutions & Variations
This recipe is pretty flexible.
Ground turkey or chicken works. Beans work too, if you’re skipping meat. Not the same—but still good.
Brown rice needs more time and liquid. I forget that almost every time.
Cauliflower rice is quicker. Add it near the end or it goes too soft. Learned that the hard way.
Cheese—use whatever you like. I’ve mixed random leftovers before. Still worked.
Want more spice? Add jalapeño, cumin, or fire-roasted tomatoes. Small changes, noticeable difference.
Cream cheese at the end makes it richer. Not always necessary… but yeah, it’s good.
What to Serve With It
You can eat this on its own. I usually do.
But if you want something extra:
A simple salad helps balance things out.
Bread is always a good idea. Mostly for scooping up whatever’s left at the bottom—which there usually is.
Extra vegetables if you want to feel productive.
Cornbread if you’re leaning into that slightly Tex-Mex vibe. It just works.
Storage & Reheating
Leftovers are honestly one of the best parts.
Store in the fridge for about 4 days. Probably fine a bit longer, but I wouldn’t push it too much.
Freezes well too. Texture changes slightly, but nothing dramatic.
Reheat with a bit of liquid so it doesn’t dry out. Stove is better. Microwave is faster. Depends on your mood.
Why This Stuffed Pepper Skillet Recipe Actually Works
It’s mostly about layering.
You brown the meat. Then everything builds on top of that. The rice cooks in flavored liquid instead of plain water, which makes a difference—even if it’s subtle.
Nothing complicated. Just small steps that add up.
Small Changes That Made a Big Difference
Switching from tomato paste to sauce + diced tomatoes helped a lot.
Smoked paprika made it better too. Not dramatically—but enough to notice.
Hard to explain. It just works.
If I Were Making This Again Tomorrow
Cast iron skillet. Probably.
Red and yellow peppers. Maybe green if that’s what’s there.
And I’d double it. Not for guests. Just for later.
What I Skip When I’m Short on Time
Toasting the rice.
Fresh onions (sometimes).
Grating cheese.
Some days, convenience wins. That’s just how it goes.
FAQ
You can use instant rice—but adjust liquid and timing.
Undercooked rice? Add liquid, cook longer.
Make ahead? Yes. Reheats well.
Pan? Anything wide enough.
Dairy-free? Skip the cheese.
More vegetables? Always works.
Final Thoughts
This stuffed pepper skillet recipe isn’t trying to be impressive—it just works.
It’s the kind of meal you end up making again without really planning to. One pan. Minimal effort. Reliable result.
It’s reliable. Which honestly matters more than anything on a busy weeknight.
And yeah—you’ll probably make it again.
Go grab your skillet.