Top 5 Best Chefman Air Fryers
Are you interested in buying a Chefman air fryer? If you are, you should take a close look at the 5 best Chefman air fryer reviews, which will give you a detailed idea about the kind of products you are going to have, their efficiency and craftsmanship, price and looks, so that you can make a buying decision based on that recommendation.
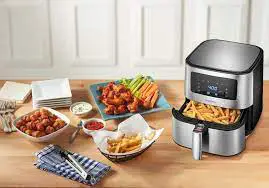
To begin with, many of us love fried foods but are concerned about the fat in unhealthy fried foods. A hot air fryer is an appliance that cooks crispy fried foods with little or no oil. It circulates hot air around the food and makes it crispy and crunchy.
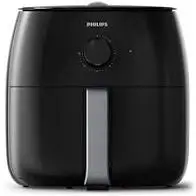
There are many different brands of this great appliance, which has become very popular in recent years. One of the brands of air fryers that I like is Chefman. The Chefman air fryers are affordable compared to other brands like Philips Air Fryer. They can cook the food tasty and crispy so well that you won’t even notice that the food was cooked with an air fryer.
Best Chefman Air Fryer
Chefman offers many models of air fryers that vary in technology and features. Today, I’m going to provide you with a list of the best Chefman air fryers and give you a review of each one so you can make a decision on which model is best for you.
Is Chefman a good brand?
Chefman is an American company known for manufacturing small kitchen appliances. Some of the products it makes include pressure cookers, deep fryers, sandwich makers, convection fryers, and many other kitchen appliances. Chefman is dedicated to helping you master the art of cooking with confidence. They make innovative, high-quality products that allow you to prepare a meal to share.
Is Chefman a good fryer?
The Chefman fryer is a versatile kitchen appliance that uses futuristic rapid air technology to create a crispy texture for fried foods without using oil. In addition to frying, some models have advanced features for baking, grilling and dehydrating food. Hot air fryers can cook your favorite dishes faster, healthier and tastier without any pollution. In addition, the fryer is very easy to operate, either with an analog dial or a digital touch screen. It is also easy to clean after cooking.
What size fryer should I choose?
Chefman fryers come in many different sizes. What size should you choose?
The 1.7 quart and 2 quart models are ideal for a single person.
The 2.7 quart and 3.6 quart models are perfect for couples or small families and can cook meals for 2-4 people.
The 6.3 and 6.8 quart models are ideal for a large family, as you can save time by preparing food in one cooking cycle. They’re also great for cooking multiple dishes at once, so your meal is ready in less time.
Features to look for when buying a Chefman hot air fryer
In addition to size, here are some of the factors you should pay attention to before buying a hot air fryer.
Digital display – Do you need a digital display? You will usually pay a higher price for a digitally controlled model.
Additional Features – Each Chefman fryer has its own unique features. Chefman multi-cooker and rotisserie air fryers allow for unique cooking methods, including dehydration and roasting spit. You’ll need to decide if you need these features, as these models are a bit more expensive because they have
Cooking presets – The one-touch preset model makes cooking much easier because it is already preset.
Price – Chefman fryers are generally very affordable compared to other brands.
What can you cook with the Chefman air fryer?
You can use the Chefman air fryer to cook chicken, steak, vegetables, fish, fries, and a variety of desserts. It is possible to prepare entire meals, from appetizers to main courses and desserts, with one fryer.
Some of the delicious dishes you can prepare are:
Asparagus from the fryer with parmesan and garlic.
Salmon from the fryer
Pork tenderloin from the hot air fryer
Chicken fillet from the hot air fryer
Air-fried chicken thighs
How does the Chefman hot air fryer work?
The Chefman hot air fryer is very easy to use. Here are the steps to follow:
Place the fryer on a heat-resistant surface and make sure no other objects are blocking the fryer so that you can easily remove the fryer basket.
When you are ready to cook, place the ingredients in the basket, trying not to stack them so they cook evenly.
Best Chefman Air Fryer Reviews 2021
Chefman makes a wide range of air fryers, from mini models with 1.7-liter capacity to large 26-liter family fryers. If you are not sure which Chefman air fryer meets your needs, as I have already mentioned, read this detailed reviews. This will help you make an educated decision on which which air fryer you should buy for your home.
The best Chefman air fryers
-


Judging by the name, Chefman XL air fryer, we already have an idea of what this gadget has to offer. It has a lot more features than an ordinary air fryer.
This Chefman model is much more than an air fryer. For one thing, it is also a dehydrator and a convection oven, all rolled in one.
In other words, it’s a multi-appliance in one.
With it, you can declutter your kitchen without having too many appliances. You can fry, bake, roast, dehydrate and much more with it.
The best thing about this digital air fryer is its exterior, which is made of shiny, polished black plastic. A large window built into the door allows you to monitor the cooking of your food without opening the door, as it is illuminated by an interior light.
The front of this fryer is adorned with a large LCD control panel with light blue food icons and temperature settings. These icons represent 8 pre-programmed settings for frying, meat, shrimp, chicken, roasting, baking, and dehydrating. There is a large start/stop button on the top. Everything looks cool.
This fryer also has a large 6.3 liter capacity, which you won’t find in most fryers. This is ideal for a large family. It can cook enough food without using other appliances. And if you like to invite friends over for dinner, this is a very convenient way to cook for a large number of guests.
The Fryer has many interesting features and accessories.
It is equipped with 2 grills on different levels. This significantly improves the cooking performance. So you can cook a couple of different recipes at the same time. Maybe a pizza on one level and chicken on the other, saving you time. This gives it a very distinct advantage over other, more traditional models.
It comes with a roasting spit that is ideal for roasting a whole chicken. The roasting spit and forks come with a rotisserie pickup and a rotating basket for perfectly crispy and juicy chicken. This rotating basket can also be used to cook other foods rotisserie style.
This Chefman model is also equipped with a removable drip tray. It is very useful for cleaning. It facilitates the removal of grease and dirt that forms during cooking.
Your Chefman food processor is equipped with a dehydrator function. It is ideal for making dried fruits, chips and many other fun snacks at the touch of a button.
This is one of Chefman’s most expensive air fryers. But if you have a large family and have the budget for it, this unit is worth considering. You get what you pay for with this top-class air fryer.
One of the downsides to this Chefman fryer is the problem with the door. Some customers had issues with the door opening randomly and stopping the entire cooking cycle. However, most customers were very happy with this fryer with no issues with the door.
-


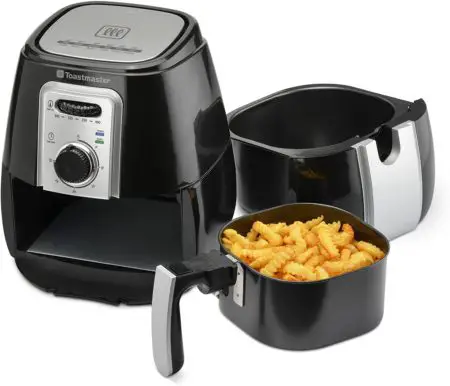
This is another excellent deep fryer from Chefman. It can provide you with the best frying taste without leaving the smell of frying oil in your home.
And you also don’t get extra calories because you eat less fat. It uses 98% less oil than traditional fryers.
You can bake, fry and roast almost anything with this air fryer, which makes it a very useful kitchen appliance. You can even reheat leftovers that have been softened and they will regain their original consistency.
This deep fryer is designed for a large family. It has a capacity of 6.5 liters and comes with a shallow basket that increases the space by 40%. What a great way to prepare healthy meals for the whole family. You can even invite a whole group of friends over, and this air dryer will make cooking a breeze.
If you’re not a good judge of size, imagine putting in a whole glass of milk. It fits.
The Chefman 6.5 liter air fryer has a compact design and is easily
The Chefman 6.5 liter fryer has a compact and slim design. It has a digital control that allows you to set the interior temperature.
It also has a 60-minute timer. When you set the timer, you don’t have to worry about your food overcooking, burning, or drying out because the fryer automatically shuts off when the timer runs out.
It uses the latest advances in fast air technology. It delivers amazing results because it circulates hot air at high speed. Every inch of your food will be evenly crisped. You don’t even have to turn them over.
Cleaning is easy. The non-stick basket can be removed and placed in the dishwasher. Be sure to use soft sponges and cloths when washing your fryer by hand to make it last longer.
You won’t hear a loud noise while cooking, just a hum. This is a quiet fryer.
It uses less energy with 1700 watts. That’s much better than a regular oven.
The downside? Some customers have commented that there is no on/off button. But don’t worry because it turns on and off automatically with the timer setting.
For a large family, this Chefman 6.5L digital fryer is a great addition to your kitchen. Not only does it save space, but its large capacity saves cooking time.
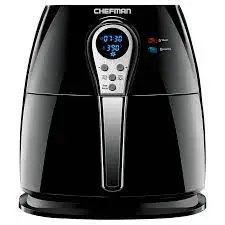
-


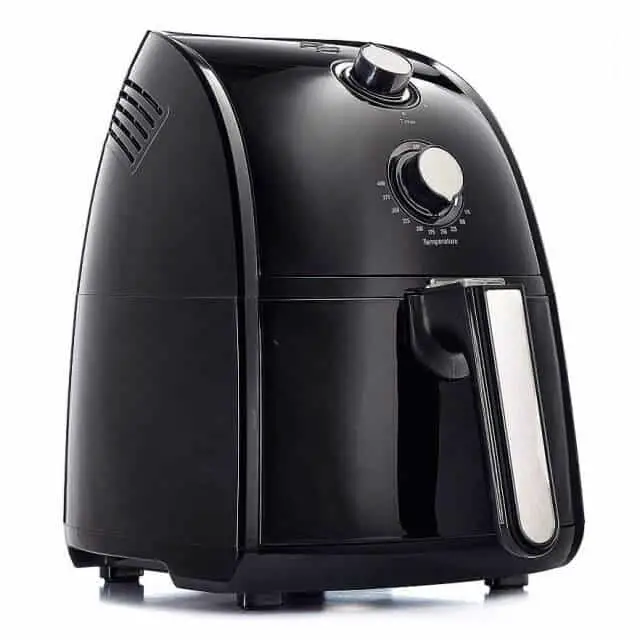
If you want to prepare healthy fried food, the Chefman 3.6 Liter TurboFry Air Fryer is for you.
Did you know that the industry standard for reduced oil consumption is between 75% and 80%? Well, the Chefman TurboFry uses 98% less oil to prepare healthy, low-fat meals!
If you are someone who wants to lose fat and improve your health, this is definitely in your favor.
This is an entry-level fryer that works well. You can bake, grill and fry in this appliance with ease. This is an impressive fryer that gives you quality cooked food. You will get juicy, tender, crispy and crunchy cooked meat. And it’s not difficult at all.
The cooking quality is somewhere between frying and baking. It gives you the best of both worlds.
The TurboFry has a capacity of 3.6 liters, which is ideal for cooking for two or three people. With this capacity, you have more space than in a standard air fryer.
This small fryer is ideal for your countertop or cabinet. If you have a small kitchen, it will easily fit in there because it saves a lot of space. You can use it in your office, for RV trips, in a dorm room and more.
This is an air fryer that is very attractive. It has a slim, round shape with a matte black finish with silver accents. The matte finish means it won’t leave fingerprints when you touch it.
The housing features “Cool Touch” technology, which prevents it from getting hot enough to cause burns.
This analog hot air fryer has two buttons that allow you to adjust both temperature and time. This looks cool and more functional than the traditional separate dials.
It has a built-in 60-minute timer that automatically shuts off the fryer when it reaches zero. So you don’t have to worry about your food being overcooked.
If you’re someone who occasionally lets food burn, then the TurboFry is ideal for you. The automatic shut-off ends your cooking cycle when the timer is over.
The temperature range is between 200 and 400 degrees, so you can cook to the temperature you want. Every inch of your food will be evenly crisped.
The basket and bowl are dishwasher safe, making it easy to clean. Even if you wash by hand, just use soapy water and wipe it down with a damp cloth and it’s ready to be used again.
The fryer has an added safety feature: it only works when the basket is fully retracted.
The Chefman TurboFry has an affordable price. For a cheap airfryer, it’s surprising that it comes with a free recipe book.
The downside of the Chefman TurboFry is that it lacks many features and is more suited to cooking fries, nuggets, and frozen meals than to cooking fresh, thick meat.
If you haven’t tried a hot air fryer yet and you want to, this is a great device.
-
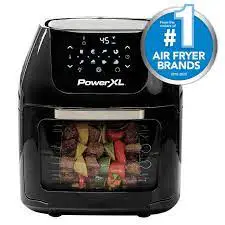
Here’s another Chefman model that delivers delicious, low-fat and quick meals.


This is a superb, innovative design deep fryer with 3 cooking functions, bake, deep fry and even dehydrate. It also has 14 pre-programmed options for your convenience.
What makes this fryer so special is the automatic stir-fry function, which agitates the food in the fryer to cook it evenly. You don’t even need to add cooking oil, and it fries with 98% less oil than other conventional frying methods.
To use the self-stirring function, simply select the STIR function and the ingredients will move around in the fryer until they are perfectly cooked.
It also has two heating elements that allow you to fry in less time. So this is a time-saving appliance. It has an infrared frying function and a convection frying function.
The self-baking pan also works as a dehydrator. You can put your favorite fresh fruits or expensive vegetables in the oven and dehydrate and preserve them in no time.
With this fryer you can get an irresistible crunch from your fresh or frozen food without adding oil. Thanks to automatic stir-frying, you’ll get a golden, crispy finish no matter what you put in the hot-air fryer. No need to shake or flip food during frying.
You can even use it as an oven to make irresistible desserts in this dynamic air fryer.
This fryer is very practical and functional in every way.
If you have a big family or like to have guests over for dinner, you can prepare a big meal in no time with the 11.6 litre capacity. Designed for family dinners.
This oven has a capacitive touch screen and 14 presets to make your work easier. It also has an automatic shut-off function for preventing food from overcooking.
The drip tray, oven basket and rotating spit accessory are easy to clean and dishwasher safe. So you don’t have to stress when the party’s over.
This is an oven that will satisfy your many cooking needs. With its excellent quality, this fryer is a great value.
The downside of this Chefman fryer is that it is not ideal for small kitchens as it takes up a lot of counter space. And some customers complain that it’s not so easy to remove the drawer for cleaning.
But overall, this model is a great appliance that simplifies home cooking and allows you to prepare delicious and healthy meals quickly. With the touch of a button, you can prepare meals for a large family or guests with simple touch-screen controls.
-


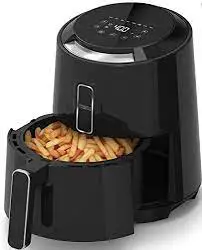
Chefman 6.8 litre digital air fryer with space-saving flat basket
If you’re looking for an air fryer for the whole family, the Chefman 6.8 Liter Digital Air Fryer is the perfect model for you. You’ll get the deep-frozen flavor you love without the extra oil and calories. Bake, bake and bake like a pro with this air fryer. Temperature control with 60-minute timer automatically turns off when food is done. A manual control version is also available.
This fryer uses the latest advances in high-speed air technology, circulating hot air at high speeds to fry your favorite food and create a crispy fried texture with or without little or no oil.
This multi-functional appliance can fry, grill or broil virtually anything, making it the ultimate cooking appliance.
Its large capacity can feed the whole family!
Key features
Healthy baking: This air fryer makes “healthy baking” a reality. Its 175°F to 400°F temperature range allows you to bake at your desired temperature and cook healthy, crispy foods with at least 98% less oil than conventional ovens. Whether it’s veggies, pizza, frozen food or leftovers, this hot-air fryer will get every bit of your food evenly crispy.
Larger portions: extra guests or just extra hungry? Either way, this fryer has been thoughtfully designed for the whole family. With a 6.5 liter capacity and a shallow basket that increases space by 40%, you can prepare delicious, crispy and healthy meals for the whole family!
Perfect crispy food. With manual temperature control and a built-in 60-minute timer, you can bake up anything from frozen veggies to mozzarella sticks, chicken or roasted potatoes, and even reheat yesterday’s dessert! No need to worry about overcooking – the fryer automatically shuts off when the timer goes off.
Easy to clean: The 6.5 liter non-stick basket is dishwasher safe, so cleaning is a breeze. If you wash by hand, keep your fryer in good condition by using soft sponges and cloths.
Guaranteed for longer life: Equipped with advanced safety technology for long life and backed by Chefman’s 1-year worry-free warranty, so you can shop with peace of mind.
The air fryer is backed by 1-year warranty, it is safe to use and comes with a 1-year warranty
It has a quite safe, economical design and it is also easy to clean.
The shallow basket offers greater capacity and the air fryer is equipped with digital control to regulate temperature. And I am sure you would love its compact and elegant design and smart features.
Amazon Customer Reviews
Rob
After reading the reviews I decided to buy it. I know others have had complaints, but I couldn’t be happier. As with
any new device, the learning curve is quite a bit, but so far it has exceeded my expectations. I hardly ever use the oven again between the frying pan and the pressure cooker. I’ve cooked everything from grilled cheese to legumes and roast chicken to Chinese food.
Lisa Hennessy
This exceeded my expectations. I love it!!! Doesn’t take up too much space, easy to clean…. Put the racks and drip tray in the dishwasher (top rack) and wipe down the inside. Now I dry green beans, kale etc and make my own healthy snacks…… And not so healthy snacks. I fry chicken wings until they are perfect. I’ve even cooked hamburgers in them.
Chai
I’ve had this product for the last 30 days now. It has worked very well and exceeded my expectations till last night. I was frying chicken wings when it suddenly shut off completely (screen went completely blank). I thought it was just too hot. I unplugged it and waited until this morning to plug it back in, and voila – nothing happened. I thought it may have tripped a circuit breaker, but no. Now I have a beautiful air fryer that works perfectly.
Wrapping up
Hopefully, this best chefman air fryer reviews will help you make a purchase decision. You should keep in mind that air fryer ovens are the appliances of our time. The modern housewife does well to have an air fryer oven in her kitchen. It saves time, is convenient and can replace 3 or more appliances.
One of the best brands of air ovens is the Chefman air fryer. This is an affordable air fryer that can handle most functions, including the more expensive ones, and more. Take a look at the different models and see for yourself how highly functional and convenient they are when preparing your meals.
Check out our Chefman air fryer reviews above and see why so many people love this brand. They may have a low price, but they offer you similar features and more compared to more expensive air fryers.
Chefman air fryers are very popular on the market today, even though some models are still quite new. And it is becoming more and more a brand for air fryers.
Their products are very durable and do not have many defects. They have very cool features that you can choose from. So, if you haven’t tried one yet, it’s time to consider a Chefman air fryer. I can assure you will not be disappointed.


 Ostriches are the largest birds in the world. So it’s no surprise that they also have the largest eggs. Ostriches are native to Africa, but are now found on every continent in the world. They belong to a group of birds called ratites – birds that cannot fly. In addition to the ostrich, this group includes birds such as the hippo, emu and kiwi, to name a few.


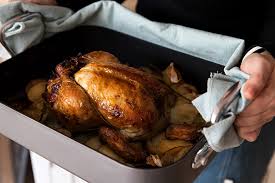
 Meat will cook faster in a covered roasting pan than in an uncovered roasting pan. A covered roasting pan creates a mini oven in your regular oven. If the meat browns too quickly before reaching the desired temperature, cover the roasting pan with the lid or aluminum foil.