HOW MANY CUPS ARE THERE IN A POUND OF POWDERED SUGAR?
There are many ways to measure ingredients when you cook, and it can be very frustrating if you don’t have the same measuring tools the recipe talks about.
But you need not worry, for we’ve got you covered.
We’ll help you determine how many cups contain one pound of sugar. If you want to be effective in the kitchen, you’ll want to familiarize yourself with some of the basic conversions.
It’s also important to keep in mind that measurements can vary depending on the type of sugar, as the finer the sugar, the lighter it will be for the same volume in the measuring cup.
Read on to find out the answer.
Here is a quick guide on: How many cups are in a pound of sugar.
If you’re in a hurry, here’s a chart that will give you an idea of what to do.
1 pound of granulated sugar = 2 ¼ cups (540ml).
1 pound of brown sugar = 2 ⅔ cups (640ml).
1 pound of powdered sugar = 4 cups (960 ml).
What is powdered sugar?
Powdered sugar is also called confectioners’ sugar. It is actually composed of two elements:
Corn starch is added to the finely ground sugar to prevent it from clumping when the powder comes in contact with any moisture. This is very easy to do, since moisture is everywhere.
There are many types of sugar and if you want to know more, here is a link to sugar.org that will give you more information on the different types of sugar.
Superfine powder is often used for dusting on cakes and confectionery products and in fact there are different grinds available. You will also use it to make icing sugar.
Things to keep in mind when measuring powdered sugar
When you want to measure your sugar level, there are a number of things to keep in mind to make sure you get accurate results:
Be sure to sift the sugar so that no lumps remain, as this will affect the volume of the powdered sugar.
These small lumps of sugar will also affect the quality of your frosting and make it a bit grainy.
Does the recipe ask you to sift the sugar before or after measuring?
Are the measuring cups and the area you are working in dry? If the sugar contains moisture, it will form small (or large!) nuggets and may spoil.
In case you missed it – How many cups are in a pound of confectioners or powdered sugar?
You will need 4 cups for every pound of powdered sugar.
Don’t try to compress the sugar, just spoon it into the measuring cup, as compression will have a big impact on the final weight.
You should also not tap the cup too hard to level it, as this will naturally compact the small grains of sugar.
The cup should not be placed in the sugar, as this will also compact it, but rather poured or spooned into the cup.
This is also important to make sure you do not contaminate the sugar with other things you may have measured.
When filling the cup, be sure to smooth the top with a knife or something with a straight edge.
Sift or not to sift: is there any difference?
If you are using a recipe that calls for sifted powdered sugar, you must sift the sugar before measuring because there is a difference in volume and therefore weight.
Sifting sugar makes it more fluid and less compact, which increases its volume. Be sure to read the recipe thoroughly before measuring, as the correct measurement will greatly help you cook or bake to perfection.
How many cups of powdered sugar are in a box?
Don’t confuse ounces of weight and volume when measuring your powdered sugar. Know exactly how much you are buying.
It is common knowledge that one cup equals 8 ounces, isn’t it? Well, when weighing the ingredients in a recipe, a cup is not always 8 ounces. We know that a cup of water weighs 8 ounces, but honey, for example, is thicker than water, so a cup of honey actually weighs 12 ounces.
Powdered sugar out of the box or plastic bag weighs 4 1/2 ounces per cup, so a 1 pound (or 16 ounce) box contains about 3 1/2 cups of powdered sugar. If a recipe calls for sifted powdered sugar, weigh 4 ounces of sifted powdered sugar to make a dry measuring cup. Sifted powdered sugar makes it lighter and frothier, allowing it to take up more space in the cup.
WRAPPING UP
Hopefully, this post has been able to answer all your questions as to how many cups are in a pound of sugar and clear all your doubts related to this. Now get down to preparing your favorite food using all the correct measurement of sugar so that you don’t mess it up.
What does turkey taste like? Many people have asked me this question. But since I have never cooked it or tasted it, I have avoided answering that question. Yes, it is a bit embarrassing to admit how long it took me to roast a turkey for the first time. I always wanted to roast a fully grown and naked turkey in all its glory. But somehow I’ve always avoided it, for one reason or another.
But let me answer the question first before I get into the details.
Turkey meat tastes like chicken. This is the common reaction of people all over the world. In fact, chicken flavor is a phrase we often use to refer to exotic meats, and one might think that because it is a bird, it could also refer to turkey meat. But according to scientific research, this is completely wrong. In fact, the meat that most closely resembles turkey in taste is pork. Yes, believe it or not, it is a fact!
Are you a turkey newbie too? Or are you just watching from the sidelines? Let me bring you into the game. A turkey may be big, but it’s no big deal.
That’s what I learned after many years of avoiding turkey service on Thanksgiving. Why avoid turkeys? This bird makes me nervous. Every year before Thanksgiving there is a big fuss about it. Can you make it? Can you make a turkey? The tips and problem solving in cooking magazines and TV shows always made me nervous instead of boosting my confidence!
For years, I got away with telling my friends and guests that I had an aversion to turkey. I didn’t have a big enough pot. My mother, my father (yes, both of them), my grandmother, and even my younger sister make better turkeys than I do. Consequently, I never thought of competing with them. Why would I get into an ego battle within the family?
Well, I have parts of the turkey prepared – breast and thighs and legs cut separately for a fabulous uncooked Thanksgiving dinner. But never a whole turkey. Really, I had never dragged a whole turkey home and put it to the test.
That finally changed a year or two ago when I had to test roast turkey for my own cookbook. I frowned throughout the process of buying and thawing the turkey, scraping the giblets out of the middle, and putting it in the oven.
And then, three hours later, I took the turkey out of the oven and muttered to myself, “What was the big deal?
So, let me confess, I was stupid to avoid it for so long. It’s just an overgrown chicken, folks. There’s no need to be afraid of cooking turkey!
This may seem like the height of obviousness to most of you. A turkey is shaped like a chicken, after all, and those are the ones most of us have dealt with. But the size, weight, and unfamiliarity (not to mention the annual rituals of thawing, curing, and cooking) can give us the impression that a turkey is more than it really is.
Turkeys Are Just Like Chicken, But Only Bigger
Now, before you start nitpicking with me, yes, of course turkey and chicken are two different birds. They are not the same. Turkey has a richer, darker taste than chicken, and it makes even more wonderful stock and broth. After that, though, the differences are few. Let’s weigh them up:
A turkey is bigger than a chicken: You’ll need a bigger pan.
A turkey needs more seasoning: Because it’s bigger than a chicken.
A turkey needs to brine for longer: Because it’s bigger.
A turkey needs to roast a little longer than a chicken: Because, again, it’s bigger. This also leads to a little more delicacy about making sure the breast doesn’t overcook; the mismatch in size between the breast and legs is greater in a turkey, but it’s not that big a deal.
All you really need to do with a turkey is bang it in the oven, the way you would a whole chicken, and let it roast until it’s golden and succulent, then pour lots of gravy on top. Can you tweak and improve and apply bits of family lore all over the process of roasting a turkey, like so many ephemeral notes passed down through the generations? Of course, to your heart’s delight.
But just don’t forget: this is just a really, really big chicken. You’ve got to understand this.
Is turkey better than chicken?
This means that fattier cuts of meat contain more calories than leaner cuts. Dark pieces of chicken have slightly more fat and calories than dark pieces of turkey. The same is true for the white meat of both types of poultry, since turkey is slightly leaner and contains fewer calories than chicken.
So, which tastes better– turkey or chicken?
Turkey has a richer and darker flavor than chicken and makes an even more wonderful broth. After that, however, there is little difference. Turkey is bigger than chicken: you need a bigger pot. The turkey needs more seasoning: Because it’s bigger than chicken.
Second, some people wrongly ask: Does turkey have fewer hormones than chicken? In fact, all turkeys and poultry are raised without hormones, as required by federal law. The use of hormones in poultry production has been banned since the middle of the 1950s. It is absolutely illegal in the United States to feed hormones to poultry. So, the question does not arise.
So is turkey better for dogs than chicken?
Like chicken, turkey provides a lean, white meat that helps dogs to build muscle. Turkey meal is made through a rendering process and has a greater protein content and less water than fresh turkey. If you choose to feed your dog a freshly cooked turkey, make sure the skin has been removed and no spices or salt have been added.
Which is fattier, chicken or turkey?
Chicken breast without skin contains similar calories to turkey, but less protein (48 g per 150 g serving) and more fat per serving (3-4 g). The macronutrient content of chicken compared to turkey is not very different.
Wrapping up
Hopefully, this post gives an answer to your question: what does turkey taste like? You can cook turkey at home at your leisure without any difficulty. You can enjoy roasting or cooking a turkey just like you prepare a chicken dish. So, get going and see how easy it can be!
Almost everyone, I presume, has tasted duck meat. But still there are few who haven’t tasted this succulent meat. So, the question remains: what does duck taste like? Although duck is a poultry product,, it can hardly be compared to chicken or turkey. For one thing, duck has less meat. So think about this if you want to invite a large number of guests for dinner.
Taste
To answer the question that was asked at the beginning. Duck has a strong flavor that is closer to red meat than, say, chicken. It is also fattier and, when prepared correctly, has a delicious, tender, moist, fatty flavor – the perfect protein combination for meat lovers.
The skin of duck is much thicker and fattier than that of turkey or chicken. The secret to a delicious flavor is to bite into the skin during cooking. However, if the duck is not prepared properly, the fat will create a rather unpleasant and rubbery texture.
Is duck a popular choice?
Over time, duck has become a popular dish among Americans. In fact, between 1995 and 2010, consumption increased by more than 40%, which says a lot about the popularity of duck meat. Apart from statistics, duck is a great source of selenium and zinc, which help with cell metabolism.
No wonder duck has gained prominence in the market and more and more people are taking advantage of it.
Wild or farmed duck?
Wild duck is tastier. Wild ducks can move around and eat a wider variety of foods. They are also able to fly, and sometimes take long flights. This means they are endowed with lean and strong muscles.
A breeding duck, on the other hand, does not have to face the same harsh and hostile environment. As a result, it becomes fattier and the meat has a very different texture.
Wild ducks are definitely more flavorful. However, if you can’t find it locally, farmed duck is also a delicious alternative.
Types of duck
While flavor and aroma are essential factors to consider about the type of meat we eat, it is also important to know the different types of duck to get the most out of your meal preparation.
Long Island Duck or Perkin Duck
The Long Island Duck or Perkin Duck is one of the most popular types of duck because it has a mild flavor, making it perfect for those who are new to this area. Long Island duck is ideal for roasting, and can also be served skinless if you want to reduce calories.
Moulard Duck
The Moulard duck is a much larger duck, with a broader breast. It also contains more fat, which some say, makes it tastier. It is the perfect duck if you are feeding a large family or entertaining guests. They will appreciate the delicious, juicy texture.
Muscovy duck
This duck is the most popular in Europe. The Muscovy duck is less fatty, has a thinner skin and deeper red meat than the others. Its carcass is also larger, so it costs more than the other types of duck.
How to prepare and store duck to preserve its flavor
You need not worry if you are not a professional chef or cook. With a little advice and a few tips, anyone can successfully prepare and store duck. There are numerous good recipes on the Internet, but before you venture out to prepare your duck, you need to know how to store it.
The best way to store duck is in the freezer at 0 degree Fahrenheit. Duck retains its texture better than chicken or turkey when frozen.
If you defrost duck, you should place it in the refrigerator. You will have to leave it overnight if you want to defrost duck breasts and for a couple of days if you want to defrost a whole duck. If you want to expedite the process, you can soak the duck in cold water, but you must change the water every 30 minutes.
Different ways to cook duck
How is it that some people describe the taste of duck in different ways? Some compare it to chicken, others say it tastes like liver. Well, the differences may be due to the fact that taste is subjective. It is also because duck meat has a different profile depending on how it is cooked.
One of the best ways to prepare this meat is to make duck confit, one of the most respected dishes in French cuisine. It is a century-old way of preparing duck that preserves the meat and gives it a long shelf life.
On the other hand, if you want to keep the flavor simple, you can try pan-frying roasted duck breasts. Pan searing is a good way to prepare them, as it brings out the flavor the best. You can also get a delicious recipe with just olive oil, salt, pepper and duck meat.
For those who want a smoky flavor, grilling the duck is a good option. If you are at home, you can use an oven, but at the campsite it is best to cook on a campfire grill. It tastes so much better and smokier. For starters, make sure it is properly brined. This will shorten the cooking time and add more flavor to the duck meat. Brush it with the barbecue sauce of your choice to get the flavor you want.
Do you want to cook duck breast like a pro? Check this video below:
Health benefits of duck
The fat in the top layer of duck meat is thick. This gives it a distinct and juicy flavor and also makes the meat more succulent. However, this is also the reason why some people people do not like to eat duck. Due to its high fat content, it is a source of high cholesterol and hence the health-conscious folk stay away from it.
Among other things, duck is a top source of protein. This has a good effect on your skin and is also fairly effective in improving the immune system.
With a high zinc content, it is also worth mentioning that duck meat can be hugely beneficial when it comes to cellular metabolism. This will enhance cellular development and your immune system.
It is also a rich source of selenium. One serving would already provide 25% of the recommended amount of selenium in your daily diet. This can also be helpful in improving thyroid health.
The B vitamins in duck, especially B5 and B12, are good for the nervous system. This will improve the health of your nerves for better body function.
As a source of iron, eating duck is also good for people who suffer from anemia.
But although it is healthy, it is necessary to consume duck meat in moderation. As mentioned earlier, it contains a lot of fat and cholesterol.
How to buy duck meat
In general, as mentioned, duck meat is delicious. It has a distinct flavor that you will love if you want meat with an elegant taste. However, the taste depends not only on the method of preparation, but also on the freshness of the product. Therefore, it is crucial to buy duck meat wisely.
You should buy a whole duck if you want it roasted. On the other hand, buy only certain parts of the duck meat if you do not need the whole meat. For grilling, for example, you can buy only the breast or leg piece.
Pay attention to the color of the meat, for fresh duck meat should be dark. If it is rotten, it will be gray and yellow.
Also, you need to pay attention to the texture of the meat. If it is slimy, that is a sign that it has gone bad. Bacterial growth can also be seen.
Finally, you will also notice an unpleasant odor. It is spoiled if it has an unpleasant odor.
Goose vs. Duck Meat
Ducks and geese are two kinds of waterfowl, which are component of the Anatidae family.So, it’s easy to conclude that they taste alike and taste slightly distinct.However, they don’t.
Although duck is sweet and savory but the goose meat is mainly sweet.It’s also very tender.
The meat of a goose appears to be full of juice, especially when it is cooked well.The meat of a goose is more fat that duck’s meat.The goose is more full and more fatty.
Goose meat is slightly darker than duck meat , which means it has a slight increase in iron content.Like ducks, goose has a tough and crisp outer skin.It’s also much softer than duck’s due to its additional juicy.
Because ducks are omnivores they typically possess lighter meat than geese.They also have a game wildlife kind of taste.Goose however tastes more dark and more fatter meat than the duck.
Chicken vs Duck Meat?
Chicken is among the most uninteresting flavors of meat.Like duck, it’s ordinary tasting.Its more gamier taste is what makes it enjoyable to eat, even though it’s not cooked according to any specific recipe.
Chicken’s flavor is unadorned and more basic.It’s pretty like turkey.Chicken needs spice and flavor in order to make it enjoyable.Duck is, contrary is the most delicious on its own.
But, the way in which the chicken is reared can significantly affect the taste.For instance the free-range chicken typically will have a stronger flavor and a more intense flavor.
However, in general, duck is meaty and rich in comparison to chicken, which is more light as well as more neutral.
Does Duck have a better health rating than chicken?
Duck is deemed to be healthier than chicken by a few experts, but the majority are unable to determine for themselves.The skin of the duck is very fat when cooked and although this makes it more juicy however, it’s a major food source for cholesterol.
The duck meat is rich in of zinc and helps in metabolism.Duck meat boosts the immune system.
It’s a fantastic sources of protein.The consumption of duck meat can affect your skin glowing and appear healthy.
Duck meat is an excellent source of vitamins B12 and.These vitamins can be beneficial in your nervous system.They also aid in the overall functioning of your body.
It’s a great iron-rich food and iron, so it is recommended to those who suffer from anemia.The meat of duck is also rich in minerals, including magnesium and potassium.
Additionally, duck meat is a source of selenium, which is similar to chicken.One portion of meat from duck is believed to contain 25 percent of the selenium required for daily consumption.Selenium is a key ingredient in improving the health of your thyroid.
While it is nutritious, duck meat should be consumed in moderation.This is due to it being rich in fats and, consequently it is high in cholesterol.
Dishes such as Peking duck can be a great alternative to other kinds of meat.The fat content in ducks is mostly found within the skin.Thus, cooks can cook dishes that are less fat but with the same flavor.
Furthermore ducks have fewer calories.They also have less saturated fats than chicken.
What are the Duck Eggs taste like?
Duck eggs are very similar to chicken eggs but with more flavor.
Their taste is more intense than chicken eggs due to the diet of ducks.Because ducks are omnivores they are well-balanced in their diet, which results in delicious flavors.
Ducks love snails, bugs, snails, and other creepers that have high protein content.Their diet plays an important influence on the flavor and taste of their eggs as well as the duck in general.
Due to the bigger yolk, duck eggs have higher levels of the fat and cholesterol as compared with chicken eggs.They also have a higher protein levels.They also have a higher level of omega-3 fatty acids.
That’s why they’re the top choice for paleo dieters, many of whom are fond of high-fat meals.In addition being nutritious, the profile of duck eggs is similar in structure to chicken eggs.
What does Duck Sauce Taste Like?
The Duck Sauce is an apricot flavor that is commonly served in Chinese eateries.It’s sweet and fruity, with some spice due to the vinegar.
Duck sauce could also contain other ingredients such as mustard, garlic apple, and brown sugar.These ingredients impart the sauce with spice, caramelized and savory characteristics, and vice versa.
Many have claimed it is comparable the orange marmalade.This is due to the same color and similar jelly-like and thick texture.
Although the traditional Duck Sauce is smooth certain duck sauces have chunky bits of fruits.It’s called duck sauce since it was first created for a duck-fried dish.
The duck fat is comprised of 51% monounsaturated fat 36% saturated fat, and 14 percent polyunsaturated fat.Duck fat is stable throughout cooking due to its large amounts of monounsaturated and saturated fats.
It has a smooth and loose consistency.Duck fat has 50 percent lesser cholesterol than butter, and 30 percent lower saturated fat.
Rendered duck fat provides the slight sweetness and creamy, rich taste.
Duck fat gives the duck meat its distinctive taste , and makes the duck meat tender and full of flavor.
Wrapping up
What does duck taste like
The following is a brief summary of some of the important points raised above:
Duck has a distinct and strong flavor that is more like a roast than chicken.
The thick layer of fat on the top of the duck makes the flavor richer. As a result, however, it also contains a lot of cholesterol and fat.
Duck contains a number of beneficial vitamins and minerals, such as zinc, iron and selenium.
The way duck is cooked affects the flavor and freshness of the meat.
All in all, duck is a great, rich, juicy and much tastier alternative to chicken or turkey. Although it is a fattier meat, it is still a delicious dish to enjoy from time to time.
Compared to other poultry meat, it also has more health benefits and is richer in vitamins and minerals. In short, duck meat offers a much tastier version that will please your taste buds and your palate.
How many chicken wings in a pound? Well, the actual amount of chicken wings in a pound depends on several factors. It includes the size of the wing, the parts of the wing that are included, and the extra coatings, such as pasta, breads, or sauces. The packages which are produced for commercial use may contain 4 to 5 wings per pound. A 10-pound bag of chicken wings from the supermarket contains about 40 to 50 wings and fills about 9 people.
Chicken Wings: The facts in general is that a chicken wing contains less than an ounce of meat. In restaurants, an order of one pound of wings can contain between 7 and 12 pieces. The parts of a chicken wing include the drumette, which is the section between the shoulder and elbow, the middle section and the tip. Chicken wings can be sold as a whole (with the three parts), with only the first and second parts, or separately as a drumettes or central section. Chicken wings can also be sold with or without bones.
Before the 1960s, chicken wings were considered an unwanted piece of meat and were sold at low prices in supermarkets and butcheries. Wing meat was usually used to make soup stock during that time.
Modern chicken wings were invented in Buffalo, New York. After Teressa Bellissimo, co-owner of Anchor Bar, prepared chicken wings in hot sauce as a late night snack, she decided to put this dish on the menu in 1964. Her popularity earned the dish the nickname “Buffalo Wings”.
In the 1970s and 1980s, the popularity of sports bars grew, as did the consumption of chicken wings, often breaded and/or covered with hot sauce. The appeal of this dish, together with the fact that it is easy and cheap to serve in bars, has made chicken wings a staple food in bars.
Super Bowl chicken wings also became popular as one of the most common Super Bowl snacks. Every year, Americans eat 1.35 billion wings on Super Bowl Sunday, enough to take three turns around the globe if placed end-to-end, according to the National Chicken Council’s 2018 Chicken Wings Report. The report also found that ranch sauce is the most popular sauce for wings, preferred by almost 60% of Americans. Other popular dip sauces include buffalo sauce, hot sauce, BBQ sauce and honey mustard sauce.
How much does a chicken wing weigh?
A raw chicken wing weighs about 3 ounces or 89 grams. The amount of lean meat on a chicken wing is about 30 grams. The skin of the wing weighs a little less than one ounce or 26 grams.
A raw wing represents 12% of a chicken’s total meat production. The wings are made of white meat and have, as already mentioned, three distinct sections: the tip, the central section, and the drumette. The drum is the part between the shoulder and the elbow.
A large boneless chicken wing contains about 124 calories when consumed, 75%of which come from fat. The total fat content of the wing is on average 8.3 grams or 0.3 ounces.
How many chicken wings in a 10-pound bag?
If we assume there are about 4 to 5 chicken wings in a pound, that means there are about 40 to 50 chicken wings in a 10-pound bag. 10 pounds of chicken wings feed about 9 people provided they have an average appetite.
Hopefully, this short post has been able to answer your question: how many chicken wings in a pound? I am sure if you keep this in mind, it would be easier for you to avoid any sort of confusion when you are thinking of inviting your guest for a dinner party at home.
So, if you are still in a confusion: how many wings in a pound?
Generally, one pound of whole chicken wings purchased in a store is equivalent to four to five chicken wings. However, this should not be considered a rule of thumb as the amount can vary depending on how the chicken wings are cut.
Chicken wings are divided into three parts: drumette, wingette and tip.
When you buy chicken wings in a grocery store or restaurant, you usually eat the thighs and/or wings. The butcher may sell you a whole chicken wing, which is obviously heavier and therefore means a kilo fewer wings, but this is not always common. Besides, all that tasty meat is in the wings and drum! It’s better to use the tips to make chicken stock.
Wings and drumsticks are also known as “buffalo wings” – sound familiar? Depending on the size, one kilo of wings and drumettes (buffalo wings) can make between seven and twelve wings.
Admittedly, it can be a little confusing. When we say chicken wings, we often think of a wing or a drumette. Although most restaurants and shops don’t usually serve whole chicken wings, there are of course exceptions – equally delicious exceptions!
How many chicken wings is a normal portion for one person?
A normal portion of chicken wings per person as a starter is about 1.125 kg – the equivalent of about 12 buffalo wings or 6 whole wings. For the main course, you’ll need twice as many!
At a restaurant, again as an appetizer, a one-pound serving of Buffalo Chicken Wings might contain seven to twelve chicken wings.
But we all know about restaurants that reduce portion sizes and make offhand comments about how many “pounds” there should be. A rough suggestion for an “average” serving for one person should be no less than seven buffalo wings, if that’s a typical size.
You decide at home! Hey, maybe you’ll eat a thousand wings and no one can stop you! While no one will probably complain, it’s certainly not recommended.
Weighing chicken wings
When looking at the different types of chicken wings, an even combination of drumsticks and flat parts is important. Imagine that you get a kilo of wings that consists only of drumsticks. In that case, you might only get 5 or 6 wings per kilo! I think that’s a fraud!
In a good restaurant they butcher an even mix of drumsticks and flat wings, and on average you get about 10 wings out of a pound of uncooked chicken wings.
An uncooked flat wing weighs about 1½ to 2 ounces. A raw drumstick can weigh between 2 and 4 ounces.
Note that if you choose breaded wings, it will mean weight and possibly less meat. It’s your choice, and if you like extra crispy chicken wings, you probably won’t mind!
Another option that has gained popularity in recent years is boneless chicken wings. These wings aren’t actually chicken wings at all. Instead, a boneless wing is the meat from a chicken breast that has been cut up and wrapped in bread. The result looks like a chicken wing. This type of wing is basically a large lump of chicken, which is convenient for some people and can be cooked quickly. It is certainly a popular type of chicken wing among children.
A brief history of chicken wings
Believe it or not, chicken wings have not always been in fashion. It’s hard to imagine a world without delicious chicken wings, but before 1960, chicken wings weren’t on the menu.
Around 1960, the Anchor Bar in Buffalo – hence Buffalo Wings – in New York City had the revolutionary idea of coating chicken wings in a spicy sauce and serving them to hungry customers. Previously, chicken wings were usually considered a lesser cut of meat and therefore not very popular. When Anchor Bar cooked them in the sauce, the planets seemed to align and the earth was never the same again!
Chicken wings became incredibly popular shortly after their introduction, and today there is hardly a bar in the world that doesn’t serve some form of buffalo wing.
How do you cook chicken wings?
Like other chicken meats, wings can be grilled, baked, etc. If you can do it with a thigh or breast, you can almost certainly do it with a wing.
A common way to prepare wings is to roast them, but that doesn’t mean you can’t cook them in the oven. If you bake wings in the oven, they are also healthier.
What should they be coated in?
You don’t need to think twice about it. BBQ sauce and more BBQ sauce, and what else! BBQ chicken wings are definitely a manna from Heaven!
But it doesn’t stop there. If you want traditional Buffalo wings, you have to top them with hot sauce. But again, I would like to remind you that there are all kinds of hot sauces, from mildly hot ones to those that burn your mouth. Taste it as you like!
Wrapping up: How many wings in a pound
Hopefully, I have been able to clear all the doubts and confusions about the query: how mnay chicken wings in a pound? So, just have fun in the kitchen and cook your favorite chicken dishes!
Carbon steel cookware may be the best alternative to Teflon cookware because it is safe and non-sticky. It is protected because it does not contain dangerous toxins or plastic coating like Teflon. Like cast iron cookware, carbon steel cookware also has a characteristic non-stick coating. In addition, these kitchen utensils reduce the necessity for using unwanted butter or oil to prepare your meals. However, in spite of some positive features and certain distinct advantages, carbon steel cookware nevertheless faces a few negative sides as well. Here are the pros and cons of carbon steel cookware, which will help you clear up the ambiguity about these cooking utensils.
A brief review of carbon steel cookware
Carbon steel cookware has components comparable to iron cookware. It is composed of about 1% carbon and 98% or 99% iron. This cookware is ideal for stir-frying, burning and grilling. In addition, this type of cookware is resistible when heat is maintained. This cookware can heat evenly and withstand all temperatures. Therefore, this cookware can be used in burners, microwaves, electric and gas ovens.
In addition, this type of cookware releases iron into the food. You should know that iron is a solid mineral that the human body needs. These cookware are lighter and a little thinner, making them comfortable to use, especially if you use large bowls or pans. In general, carbon steel cookware has a long handle that helps to steer or lift the pan. In addition, carbon steel cookware is suitable not only for home cooking, but also for experienced cooks.
Pros and Cons of Carbon Steel Cookware
Carbon steel is probably the best known cookware for a long time. That doesn’t mean, however, that these cookware have no drawbacks. There are pros and cons of these cookware or like any other cookware for that matter. Take a look at them to get a general idea of this type of cookware.
Pros of carbon steel cookware
There are several reasons why you should consider adding a carbon steel wok or frying pan or a skillet to your cookware assortment.
Regular non-stick properties
One of the extraordinary advantages of using carbon steel kitchen utensils is their usual non-stick property. These kitchen utensils are generally non-sticky when prepared properly. However, carbon steel utensils may require a few steps of preparation before they become completely non-sticky. Unlike some other standard nonstick cookware, the nonstick properties of these utensils improve after a period of time and under normal use.
Incredibly durable
Carbon steel is really strong and durable. Carbon steel is 99% iron, which makes it less brittle than cast iron. If you use and maintain it properly, the carbon steel pan will last you a long time. If you don’t use your carbon steel cookware properly, it may bend, but it won’t break.
Amazing thermal conductivity
Another incredible advantage of using carbon steel cookware is its high thermal conductivity. This cookware has an amazing temperature response and excellent thermal conductivity. Unlike cast iron cookware, carbon steel cookware heats and cools much faster. When you change the heat setting on your stove or burner, the cookware takes the heat in a flash.
High Heat Tolerance
Unlike non-stick Teflon coated cookware, carbon steel cookware can tolerate extremely high cooking temperatures, making it ideal for baking. In addition, you can heat the carbon steel pan without breaking it, and it doesn’t release toxic fumes when exposed to high heat (such as a Teflon-coated pan).
Reasonable and relatively inexpensive
Compared to other high-quality kitchen utensils, cookware made of carbon steel are inexpensive and, as a rule, modest. Since these cookware can usually be made without much preparation, no extra effort is needed for non-stick coating.
Light and easy to handle
One of the extraordinary strengths of carbon steel kitchen utensils is their lightness and the fact that they are pleasant to follow. These cookware are lighter and easier to shake, lift and turn. This feature makes these cookware very comfortable for more experienced people and those with weak hands.
Cons of carbon steel cookware
In addition to these advantages, carbon steel cookware also has some disadvantages. A brief overview of the disadvantages of these cookware can be found directly below.
Cannot be cleaned in the dishwasher
Perhaps the most well-known disadvantage of carbon steel cookware is that it is not dishwasher safe. This is because the harsh plastics in the dishwasher could damage its usual non-stick coating. For this reason, you should keep a strategic distance from any type of dishwasher or coarse cleaner when cleaning this cookware. It is wiser to clean your carbon steel bowl or wok or skillet with a cleaner and water.
Reacts with acidic foods
Exceptionally acidic foods like vinegar could separate normal non-stick preparations from carbon steel cookware. These utensils cannot be used to prepare exceptionally acidic foods such as tomato paste. This does not mean that acidic foods cannot be cooked with this container. Just keep a strategic distance from highly acidic foods to ensure non-stick coverage. If you have the misfortune of cooking particularly acidic foods, you will need to clean and re-season your pan.
Requires proper seasoning
The carbon steel pan or skillet is certainly not a non-stick right out of the container. It requires proper flavoring and support to achieve an ideal level of cooking and non-stick finish.
Susceptible to bending or warping
Cheaper and thinner carbon steel kitchen utensils are bent into shape until they are wrapped. A wrapped bottom does not rest on the level of the oven. If you have an oven in your kitchen, try to get an excellent carbon steel roasting pan.
Are carbon steel cookware safe?
Many of you may be wondering if carbon steel is safe or toxic.
You should keep in mind that carbon steel cookware has a characteristic non-stick surface that is not from Teflon. As a result, the cookware is free from toxic fumes or hazardous plastics. Also, the cookware prevents toxins from getting into your food. In addition, these utensils are useful for preparing solid meals with less unwanted margarine or oil.
Preparation of carbon steel or cast iron
As with cast iron, preparation is fundamental with carbon steel cookware. Fortunately, since carbon steel is less permeable than solid metal, it quickly takes on a particular flavor. The terrible news is that it can also quickly lose its preparation ability. In commercial kitchens, it’s not out of the question for food experts to prepare a carbon steel container several times overnight.
Another thing to keep in mind when buying a new carbon steel is that manufacturers usually use a beeswax or mineral coating to prevent the cookware from rusting on its way from the produce to your kitchen. Be sure to remove this coating before cooking, as your flavor won’t stick anyway. Beeswax and different coatings can be removed by scrubbing with a steel fleece and heated water. You must season at this point as you would a cast iron pan. Prepared foods are eatable, but these flavors are often unpredictable and should still be served at home.
Carbon steel is a very inexpensive material, unlike the various types of cookware. The new carbon steel cookware is so easy to use that it can be used in many ways.
Wrapping up
In general, if you already have cast iron pots and pans and are satisfied with them, it’s probably not a good idea to buy carbon steel cookware. However, if you are replacing other types of cookware or moving cast iron to the next generation and want slightly lighter pots and pans, carbon steel cookware is a great eco-friendly option.
However, these cookware do require a small amount of oil or butter to prevent food from sticking, but this is not detrimental to health. Also, these cookware can heat and cool much faster, which prevents food from overcooking. Anyway, weighing all pros and cons of carbon steel cookware, it can be said confidently that carbon steel cookware is completely safe for healthy cooking. So, get ready to do some shopping!
Want to know how to season carbon steel pans or skillets?
So, you are here to know more about how to season a carbon steel pan. Truly, people often get confused even though they know or have some idea about how to season a cast iron pan or skillet.
To begin with, “seasoning” your non-stick frying pan means applying a thin layer of oil (usually vegetable oil or other fat) to fill the small pores in the surface coating and further prevent food from sticking. A properly seasoned non-stick pan surface can help reduce the need for excess fat.
Although, generally speaking, none of the non-stick frying pans require seasoning (except the carbon steel frying pans, which need a carbon steel seasoning process), it can increase the durability of the frying pan.
Yes, Seasoningis not a greasy layer left by a poorly washed pan, nor it is a flavor that has developed over the years. Rather, it is a protective layer created by burning oil onto the pan. Here’s how to do it right with a carbon steel pan.
Carbon steel stoves don’t have half the love of cast iron pans, which is a shame because carbon steel pans can be just as useful in a home kitchen. Like cast iron, carbon steel has relatively low heat conduction and good heat retention, making it a solid choice for roasting meat. Besides, as carbon steel pans are often stamped or extruded from a sheet of metal rather than cast into a mold, they have sloped sides and are thinner and lighter than cast iron. These two features make them much better suited for removing food, making them one of the best pans for roasting meats and vegetables.
Carbon steel has one more thing in common with cast iron: It’s seasoned. Contrary to popular belief, “seasoning” in the context of cookware is not a flavor that accumulates in a pan over time. Rather, seasoning is an accumulation of filmy layers of oil that have been transformed into a solid, plastic-like polymer by the heat of the liquid fat.
There are several reasons for seasoning a carbon steel pan (the same reasons and techniques apply to cast iron). First, bare carbon steel will rust if exposed to moisture; the treatment acts as a water barrier and prevents the pan from rusting in wet weather. Seasoning also increases the pan’s performance, giving it a non-stick surface that only modern Teflon-like coatings can overcome. When properly seasoned, carbon steel is ideal for eggs, pancakes and more. In fact, traditional omelet and pancake pans are made of carbon steel.
A carbon steel pan at the beginning of seasoning
Seasoning a carbon steel skillet is easy. It’s also more instructive than seasoning an iron pot. That’s because most dishes are pre-seasoned at the factory, making it difficult for the amateur cook to understand seasoning. That’s right, jet black cast iron isn’t black from the metal, it’s black from the seasoning – underneath the dark exterior is gray cast iron.
Look at a new carbon steel pan and you’ll see something that is rare in cast iron: the color of the bare metal. Most carbon steel pans are not seasoned at all, so you can see the seasoning develop before your eyes. With enough layers of seasoning, your carbon steel pans will turn as black as cast iron. Once you see this, you will have no more confusion about what is seasoning and what is not.
Step 1: Remove the protective coating and wash the pan
Most carbon steel pots and pans are untempered and unseasoned and have a protective coating that prevents bare metal from rusting. How to know if your pan is not seasoned? It will have a metallic gray color, not black like most commercial cast iron pots and pans.
The first thing to do is remove this coating. Since different manufacturers use different coatings, I won’t give you instructions on how to do this here. Just follow the instructions that come with the frying pan. After that, wash the pan thoroughly.
Step 2: Drying the pan
Once the protective coating has been removed and the pan has been washed, it needs to be dried immediately: The substance that prevented your pan from rusting is gone, and you’d be surprised how quickly a light layer of rust can form on wet, bare steel.
I usually dry the wet pan quickly with a towel and then place it on a burner on the stove to remove any remaining moisture. This also leads to the next step: heating the pan.
Step 3: Heat the pan
It is time to apply the first coat of seasoning. Just heat the pan first so that the oil can be applied as thinly as possible. I often do this on a burner, but you can also do it in the oven at 450°F as long as your carbon steel pan handle is suitable for the oven. For, you will have to remember that unlike cast iron pans, which are solid pieces of iron with a handle, carbon steel has a riveted handle; some carbon steel skillets or pans handles cannot withstand the high heat of the oven, so check the owner’s manual.
Step 4: Apply oil sparingly
Apply oil on a cloth to season a carbon steel or cast iron pan or wok.
Lightly grease a kitchen cloth that you don’t bother to dirty with neutral oil. Canola oil, vegetable oil and grape seed oil work. What you should not use: lard and vegetable shortening; butter, in which water and dairy ingredients are mixed; olive oil, which is more expensive and often contains sediment; or flaxseed oil, which provides a better quality seasoning but is more liable to flaking.
Step 5. Rub oil into a steel pan to season it
Now rub the inside and outside of the pan with the oil, being careful to remove the excess oil until the pan appears dry. I can’t stress this enough: If you apply the oil too firmly, you won’t be able to season your pan properly and you will end up with a smeared, sticky layer that is difficult to repair. If you are wondering if you have applied too much oil, I can assure you that you have.
Clean it, dry it, and remove all traces of oil from the pan. Don’t worry, there is still oil, and it’s enough for seasoning.
Step 5: Burn it on carefully
A sequence of time intervals can show exactly the formation of seasoning in a new carbon steel skillet (the skillet will change from a metallic to brown color).
Now let the oiled pan heat up, either on the burner or in the hot oven. The burner works well, but since carbon steel does not conduct heat well, you may have to move the pan a bit to make sure that the oil has formed a polymer everywhere. How do you know this? Well, with the new carbon steel, you can see it. The areas where the oil has solidified into a solid layer will be slightly brown. That’s what you call seasoning!
The sequence shows a very smoky frying pan, and gradually the smoke fades away.
The smoke passage time decreases and disappears once the oil has completely polymerized into a layer of seasoning.
Be careful, the frying pan will smoke a lot during this process, so open the windows, turn on the fans and send your children outside to play.
Eventually, the smoking will stop, a sign that the oil layer has completed its transformation. The time a burner will run depends on the burner power and the size of the skillet or pan, but it can take quite a few minutes. In the oven, about 30 minutes should be sufficient for it.
Step 6: Repeat the process
Continue to apply and heat these micro-fine layers of oil until they darken, again and again, until the pan acquires a dark brown tint. This should be enough to start cooking.
Step 7: Use the skillet and season again if it is necessary
From this point onwards, your goal is to make use of the pan. By burning, roasting or sautéing sufficiently in the pan, you get even more seasoning. Of course, you can also continue to add layers of seasoning using the heat-oil-heat method described above. In time, your pan will turn black. If my experience serves me correctly, seasoning in a carbon steel pan may flake off a little more easily than seasoning in cast iron. If this happens, don’t worry, just season the pan a few more times to touch up the problem spot.
Wrapping up
How to season a carbon steel pan
So, all that’s now left to do is take care of the pan properly. The method is the same as for cast iron pans. Hope this post on how to season a carbon steel pan will be enough for you to do the seasoning of your skillet or pan at the comfort of your home. And when you have done it all by yourself, you would definitely find great pleasure in completing your task successfully.
How long it takes to cook a pancake on each side is certainly not an exact science , generally speaking, given the constant variations from pan to pan – but you can definitely look for a clear visual clue to show you when everything is going well and when it is ready. By looking carefully at your pancakes and using your preferred method of flipping them, you can prevent your breakfast from being undercooked or burned.
First side
In a lightly oiled skillet or griddle over medium heat, a regular pancake will take about two to three minutes on each side to bake. Although you can use this time as a guideline, it’s best to watch the pancake as it cooks to make sure it’s cooked evenly and is puffy. When the first side of the pancake is cooked, bubbles will form on the outside of the uncovered side – first at the edges, then in the center. When air pockets begin to form in the center, flip the pancake over to the other side.
Second side
Since the above strategy will not work for the next side, use the time it took you to do the first side as your guide. As you approach the second side, gently lift the pancake with the spatula and look for the bright golden color of a finished pancake.
How do I know if the pancake is fully cooked?
You will have to watch for bubbles on the main side; if they form and the cake looks slightly dry at the edges, turn it over. After a while or so, lift one edge of the hot cake – this is done when the other side is shiny and golden. Do this over medium heat, but start with a hot skillet or a griddle. Try not to overcook them, otherwise they will dry out. Remove them from the heat much sooner than you think because the pancake will continue to cook for a while.
Apart from waiting for the bubbles as an indication to turn the pancake, and then leave the next side to turn golden in color, if you think it’s done, you can take a wooden toothpick and stick it in the center. If it comes out clean without anything messy or sticky about it, the pancake is ready. If it has a portion of raw batter on it, it is not finished. I like thick pancakes, that’s why I do it. With thin pancakes, it’s probably redundant.
How long to cook pancakes on each side
Wrapping up
You should wait until you see, as I have already mentioned, bubbles forming on the pancake. After a while or so, you will notice a few more, and then test the bottom. If it’s brown and comes out of the skillet or pan with ease, it’s ready to be turned over. If not, wait a little longer. After two or three tries, you’ll get used to the exact number of air bubbles you should expect. This takes about two minutes, but depends on the size of the pancake, the recipe, the type of pan and the temperature, so bubbles are a better method of checking whether it is time to flip the pancake. You may make a few mistakes initially, but after a few tries, I swear, you would become an expert pancake maker and will earn praise from your family members and guests you have invited to your small party.
Can you put a crock pot or a slow cooker in the oven?
The crock pot or a slow cooker is an invention that has been well-received in many homes in America and around the world.
It offers a comfort that didn’t exist before, but can you put a slow cooker in the oven? We will address this and many other questions in this article.
To briefly answer the question, the slow cooker can certainly be used in the oven, but there are a few precautions you should take if you want to do so safely and not damage your crock pot or slow cooker quickly.
First of all, it consists of many different parts and not all of them are suitable for the oven. Invented in the 1940’s, the slow cooker or crock pot was then known as a bean meal cooker and was a smaller version than the one we have today.
It was just used for preparing one meal at a time. It wasn’t until the 1970s that the larger version of the crock pot was invented with the ceramic insert.
At that time, the popularity of the slow cooker exploded. This was primarily because many women started working outside the home.
They found it very convenient because they could start a meal in the morning and complete the cooking in the afternoon or in the evening when they came home from work.
The crock pot kept this basic design but added a few extras such as timers, automatic switches and temperature indicators that made cooking more convenient. Nowadays, crock pots can cook food and turn off automatically when the cooking time is over.
Can you put a crock pot in the oven?
Yes, as we have already mentioned, you can put a crock pot or a slow cooker in the oven.
This is the big question this article tries to answer. There are many crock pot recipes that require putting a crock pot in the oven.
Or maybe you have an idea you want to try that requires you to put your slow cooker in the oven. To answer this question, I will tell you a little bit about how the crock pot is built.
In general, a slow cooker is made of ceramic and is surrounded by a metal box that houses the controls and a heating element inside the base.
With most crock pots, the inside of the ceramic inner can be placed in an oven and can withstand temperatures up to 400 degrees Fahrenheit. This means that you can put your crock pot in the oven in most cases.
Can the crock pot go in the microwave?
You may also wonder if a slow cooker can go in the microwave. As described above, the ceramic piece can go in the oven. However, most lids have plastic and metal parts and cannot be placed in a conventional or microwave oven.
Wrapping up
So, can you put a crock pot or a slow cooker in the oven?
The answer is yes. You will need to consult the manufacturer’s instructions to find out how much heat your slow cooker can handle. Since most slow cooker lids are made of metal and plastic, they generally cannot be placed in an oven or a microwave. Otherwise, you won’t have any problem with it. Hopefully, this short post will dispel all your doubts from your mind about whether you can put a crock pot in an oven.
Do you want to know how to make orange juice with a juicer or a blender? If you are, you should go through this post carefully as this article deals with it in details.
Preparing a freshly squeezed orange may require a little more effort than a store-bought juice, but the difference in flavor type and novelty is unprecedented. Fresh-squeezed oranges are fruity and sweet – so much better than any orange juice “made from concentrate” at the store and with no added sugar or anything which is bad for health
Plus, when you make freshly-squeezed oranges at home, you can choose whether you need squeezed oranges with or without pulp. What’s more, it’s packed with nutrients and medicinal benefits. Without sugar, the squeezed orange never tasted as good as when it comes directly from the fruit!
Is Orange juice good for your health?
Oranges have some basic medicinal benefits. Many people know that this juicy organic product provides huge amounts of vitamin C. In fact, an average cup of squeezed oranges provides almost 100% of the daily recommended vitamin C. In any case, it also contains a few other nutrients and minerals, including vitamin A, calcium, folic acid and iron.
Vitamin C helps maintain our immune system, protects our gum, and aids wound recovery and bone health. Then, potassium reduces the danger of heart disease, stroke and bone deformities. It also diminishes hypertension and reduces the danger of kidney stones.
Folic acid is essential for pregnant women and reduces the risk of birth defects, and orange juice is extraordinary compared to other common sources. By far superior, squeezed orange is rich in antioxidants that are powerful fighters against dangerous free radicals, and protects us from chronic conditions and inflammations.
In fact, one of the only drawbacks of consuming squeezed oranges (or many juices from organic products) is the measurement of the amount of sugar it contains. So, it is always better to drink homemade squeezed oranges two or three times a week, freezing leftovers to turn them into smoothies.
How to make orange juice with a juicer
You should prepare the orange juice by peeling them first. Then, chop them into smaller parts to fit your juicer chute.
Insert a few at a time into the juicer chute and you can look forward to having some great orange juice.
How to make orange juice with a blender
Peel the oranges and get rid of the seeds. Alternatively remove the seeds (if you are straining the juice, it doesn’t matter at this point).
Put the orange pieces into a blender. You can add a little water to help the mixture if needed (1/4 cup should be a large enough amount to keep it from being too extremely diluted). Blend it into a delicious, thick liquid. At this point, and then allow the following thick paste to pass through a sieve. If you like your orange with orange pulp (also for additional nutrients), leave it like that.
Using handheld juicer for orange juice
There is no need for clarification on this point. If you have a citrus juicer at home, cut the fruit in half, put it on the juicer, squeeze it and crush it by turning it to get the desired amount of juice.
For pure orange juice with pulp, simply scoop out the leftover orange (after squeezing the juice) and add it to your glass.
Step-by-step instructions for storing orange juice
It is best to consume a freshly squeezed orange quickly to get maximum benefit. In any case, supplements can be kept in an air-tight glass containers in the refrigerator for up to three days.
What should you do with the leftover pulp?
Orange pulp can also be frozen in an ice tray for later use – in smoothies, broths or prepared products. On the other hand, you can leave it for composting, if you so desire.
FAQS
What are the best oranges to squeeze?
If you want to squeeze oranges at home, you have the option of trying different types of oranges. Some great options are regular oranges, navel oranges, valencia, tangerines, clementines, satsuma and so on. You can also use blood oranges when they are in season.
There is not one that is explicitly “best.” It all depends on accessibility, cost, and the type you want to use.
Note: Pressed navel oranges can become hard and bitter if not drunk in time, but are often considered exceptional compared to other tasty oranges.
How much juice is there in an orange?
There is about 1/4-1/3 cup of juice in an ordinary orange (navel). However, this can vary and varies greatly among different types of oranges.
Is orange juice good for cold?
Yes, due to the vitamin C content of oranges, this juice is excellent for reducing the symptoms and duration of a cold.
Is orange juice good for a sore throat?
Surprisingly, the answer is no. Although the juice is good for a cold, the acid in the juice can actually make the sore throat worse because it can irritate it even more.
Can you freeze orange juice?
Yes, fresh orange juice can be stored frozen for 3 to 4 months. If you want, you can freeze it in portions in ice-cubes to facilitate thawing and portion control.
Orange juice recipe notes
– If the first or second method is used, you may want to extract as much white pith as possible from the orange to avoid bitterness. However, this is not necessary and we usually don’t do this.
– If you use the third method, it can be useful to roll the orange several times against a counter to loosen the juice, to get more out of it. You can also heat the fruit briefly in the microwave (for 10-15 seconds) before rolling it. However, if you are concerned about the loss of nutrients, you can skip the heating.
– For “instant” chilled juice, leave the orange in the refrigerator overnight (or in the freezer for 30 minutes) before squeezing. You can also add ice, but this will quickly dilute the juice.
– If you find that a batch is bitterer than you want, you can add a small natural sweetener to the juice. For sugar-free orange juice, you can use sugar-free sweeteners such as erythritol or other kinds of artificial sweeteners available on the market.
Wrapping up
How to make orange juice with a juicer or a blender
Hopefully, this longish post has been able to guide you on how to make orange juice with a juicer or a blender and now it is time for you enjoy the best kind of fresh orange juice and enjoy its heavenly taste with your family and friends!
However, before I conclude, I would like to mentions that these are two best juicer for orange juice and blenderI use for myself and I am very happy with its performance. If you don’t have one, or need a new one, you can give them a try. They are extremely well-built and make you a happy purchaser!
Can you put a cast iron skillet in the oven? This is one question that people frequently ask in question answer forums, especially in quora or reddit.com. The answer is yes. You can put cast iron skillet in the pan and there is no problem. Moreover, cast iron skillets are absolutely oven-safe. Anyway, if you are one of those readers who want a definite answer, just go through this post carefully.
It happens that the cast iron skillet is so versatile as a kitchen tool, and it is thought that there is no other frying pan that will come close to it. Cast iron skillets are perfect for cooking and baking different dishes. So, it is not a bad idea to have this handy utensil in your kitchen.
However, as I have already mentioned, this post is not to talk about what this type of pan can do. I’m here to discuss whether cast iron skillets can be put into the oven.
Many people have asked the same question, and it’s only fair that we clarify it for your benefit. People think that cast iron skillets should be treated like delicate flowers, so the question is whether they can withstand the high temperatures of the oven.
Those who doubt cast iron should know that it is as hard as nails. That’s why you can always find cast-iron pots in antique stores.
Cast iron is built to last and that’s why it’s hard to ruin. It is designed to be heavy and thick, and that is the only reason it is able to retain heat for long periods of time.
The only problem with cast iron is that it doesn’t heat up evenly. You will have some hot spots because it takes time for the heat to reach the walls of the pan.
Fortunately, cast iron has a non-stick coating that prevents food from burning. Cast iron pans are designed for a wide variety of cooking methods, so they can be used safely in the oven.
I often use my cast iron skillet in the oven and have not had any problems yet. Most of the time I use it to cook meat, and what I do is to put the meat on the stove first and put it in the oven later.
This method works well when I prepare boneless chicken breasts and any other similar dishes. Cast iron is considered an excellent material for preparing baked goods. People use it to cook pork chops and it is delicious.
The use of cast iron in the oven is very effective because this cooking utensil is known for its ability to cook slowly. When you use cast iron in the oven, you always have to be very careful.
I say this because cast iron is heavy and must be handled with both hands. Once you take the skillet out of the oven, it is important to let it cool down before putting it in the water.
Letting it cool down prevents the pan from becoming deformed. You can also use your cast iron skillet in the oven if you want to season it. Seasoning is done to restore the non-stick properties of the pan. Here is one method of seasoning it which you can do easily at home.
Clean the pan thoroughly with hot water and soap.
Dry it well.
Spread vegetable oil on the skillet.
Place the skillet upside down on a medium oven rack and adjust the temperature to 375 degrees Fahrenheit.
if you want to check which are the best electric skillet of 2021, visit our Home Page.
Wrapping up
I am sure you have got your answer to the question: Can you put a cast iron skillet in the oven? With the above information, it is quite clear that cast iron skillets can be used for baking, cooking meat and seasoning and you can also put it in the oven. Just be careful when using this skillet in the oven.
Cottage Cheese has been widely popular in the States for so several decades now, and it really first became popular as a substitute for meat because it was advertised as being both more affordable and containing a greater amount of protein. People also believed of cottage cheese because a fantastic diet food because of its low-fat material however deliciously creamy taste and texture.
But, since the late 70s, the popularity of cottage cheese has been on a steady decrease. Due to the growing prominence of new high quality pasta manufacturers and weak marketing related to the different aspects of cottage cheese, it plummeted down to become one of the very unpopular products in the dairy section of stores–but is the world ready to appreciate cottage cheese once more?
Cottage Cheese was originally called Dutch cheese, but it was coined as cottage cheese since this cheese was originally made from the leftover milk cottages from the making of butter. It had been discovered that these cottages had a brand new taste and soft feel that many people came to love.
Even though rather unpopular now, this cheese has existed for quite some time now–really, for centuries –using the very first ever documented use of this cheese occurring around 1831.
Because of the different sizes of curds and moisture levels, two different variants of cottage cheese came to life: dry cottage cheese and moist cottage cheese. Dry cottage cheese is a candy flavored version of cottage cheese, which sweet taste comes from its own rinsed curds.
This kind of cheese is lactose-free because most its lactose is broken down through the fermentation procedure. Thus, this variant of cottage cheese is very good for men and women who are lactose-intolerant.
The second variation of cottage cheese is your moist cottage cheese. This cheese has a mixture of the curds in addition to the addition of a cream dressing to attain a richer taste.
In relation to the curd sizes, cottage cheese gets the features of a California-style, country-style, along with popcorn-style. If you want to understand whether your cottage cheese is high quality, it is possible to check the curd size, flavor, and also the consistency of your cottage cheese.
Great quality Cottage cheese has a clean, creamy look and taste together with a relatively uniform size of curds. Last, it ought not be pasty or firm, but have a soft, pliable texture.
Cottage Cheese Substitutes
Since Cottage cheese has been poorly promoted and advertised, you may encounter problems regarding its availability. Furthermore, you may also wish to try out fitter or cheaper ingredients to use in place of cottage cheese. If this sounds like your choice, you’re lucky! We have chosen the top of the best cottage cheese substitutes just for you.
Ricotta Cheese
Ricotta Cheese is an Italian cheese that’s traditionally made from the leftover whey of Provolone cheese and Mozzarella cheese made from the milk of sheep, cows, goats, or Italian water buffalos. Considering that it came in the leftover whey, its name can also be translated as “re-cooked.” Nowadays, there are already lots of techniques used to create this milk like pasteurized non-fat milk with the inclusion of the natural salt.
This cheese also has lots of health benefits to offer you. Its high carb content makes it a terrific supply of energy; also it is a fantastic source of protein too. Ricotta cheese is also a great source of vitamins and minerals such as Riboflavin, vitamin A, Zinc, Phosphorus, Selenium and vitamin B12. Obviously, since ricotta can be a dairy item, calcium will not be missing from its nutritious contents. Using a cup serving of the cheese fulfilling a substantial 52 percent of the daily salt recommendation, this is 1 cheese that your bones will really thank you for! Lastly, ricotta is a source of good fats such as omega-3 along with omega-6 fatty acids. Excellent fats do not lead to heart ailments, unlike bad fats.
Ricotta is a Great substitute for cottage cheese if you want a similar texture to your own dish. It’s not actually the exact same feel per se, but it’s certainly similar enough to earn a worthy replacement if you want to keep that timeless cottage cheese texture. But, do not forget that ricotta can have a stronger flavor than cottage cheese, and can be slightly creamier.
Egg White
Egg whites are included as one of the greatest substitutes for cottage cheese because of their affordability and flavorful taste. Egg whites can also be packed with protein that can be very useful when you’re using cottage cheese to get a low-carb diet. Additionally, egg whites additionally contain a higher quantity of protein while using a very less quantity of calorie compared to cottage cheese, making it an even better alternative if you’re looking for something as healthy as possible.
Apart from that, egg whites are also user friendly, exactly like cottage cheese. In keeping egg whites, then you will just have to simply hard-boil each one the eggs and store them in a fridge until it is time to consume it. It can require more work in contrast to cottage cheese sometimes, but its standing as a terrific cottage cheese substitute is also undeniable.
We touched briefly on the health advantages of egg whites before, so let us have a deeper look at what makes this alternative so healthy. Egg white contains a number of important vitamins such as Vitamin D, vitamin A, B12, and Riboflavin that’s also called as vitamin B2. Egg whites may also help in preventing cardiovascular disorders by controlling your body’s blood pressure. It contains a good amount of potassium that doesn’t just help in bone development, but also in blood pressure regulation. Moreover, it is high in protein content while also having a tiny quantity of calorie that was already mentioned earlier. Last, it’s cholesterol-free which is vital in preventing the risks of afflicted by hepatitis ailments.
Fromage Blanc
Fromage Blanc is quite a rare and costly cheese to find. It is a fresh cheese which has a yogurt-like, tasty, and buttery character. This cheese can be commonly used for sausage sandwiches. Fromage Blanc can be low in fat that is a fantastic substitute also for cottage cheese. It has a taste of light sweet or sour. Another use for this particular cheese is really a spread for bread. The name of this cheese can also be translated from French “White Cheese.”
Apart from being used as a substitute for cottage cheese, Fromage Blanc can also be utilized as a substitute for cream cheese and ricotta cheese. This cheese also functions as a terrific set for veggies, because of whip, and as a part of your dish along with various types of herbs and spices. Not lots of individuals use this type of cheese because it is a tiny bit pricey and quite difficult to find in certain stores. But as soon as you’ve tried it out, you may just end up craving for more.
The Consistency of the French cheese is what will make this ingredient worth-finding for. Although it has also been renowned for its creamy and soft texture, this cheese doesn’t let you suffer from a high amount of fat intake. If you’re trying to find a cottage cheese substitute to your own dessert or baked products like lasagna, this is the go-to choice for you. But as it’s hard to find, the chances of finding this particular cheese are lower compared with all the other cheeses which are cited.
Plain Greek Yogurt
Greek yogurt Is another fantastic substitute for cottage cheese if you’re searching for a new cottage cheese replacement for snacks like desserts and fruit bowls. Lately, Greek yogurt was not actually named as such because it comes from Greece. Unlike its name, Greek yoghurt is actually believed to have originated in the Middle East.
As western Nations are more used to their form of berry, this novel, healthier form has become particularly well known in countries including America and the United Kingdom. This is one of the best ingredients to use if you want to achieve a creamier dish and especially if it is made up of several fruits or dessert choices.
Greek Yogurt Is also beneficial for people who are lactose intolerant because the sugars in the milk are easily broken up by the bacteria it contains. Greek yogurt can also be loaded with health benefits, which is excellent news for you if you are especially health conscious.
This yogurt includes a high amount of protein, much larger than the protein content of milk. It is also loaded with probiotics, high in vitamin B-12, and a high amount of potassium that neutralizes the sodium amount of your physique. These characteristics have added into the case of Greek Yogurt is one of the greatest substitutes of cottage cheese which you are able to locate.
Tofu
Tofu is soy Food which may also be a good substitute for cottage cheese. Just like any other soy foods, carrot originally came from China, and it’s a rather interesting back-story. According to legend, it was approximately 2000 years back that a Chinese cook inadvertently added nigari blossom to soy milk and then curdled it, which afterward formed tofu. When the 8th Century came, tofu was released to Japan. Being a non-dairy source of protein, tofu is also remarkably popular with vegetarians and vegans.
In choosing Tofu as a substitute for your cottage cheese, there are a couple of tips that you want to understand in order to have the ideal edition of tofu as your choice. Together with the non-firm number of tofu, you should completely mash it until you have achieved the identical consistency as cottage cheese. Though tofu is rather distinct from cottage cheese concerning taste, it boasts an extremely similar feel when mashed this way.
Tofu can be A fantastic use for producing ravioli, lasagna-filling, cannoli, and manicotti. On the other hand, the egg-like taste of tofu disappears once used in baked goods. Apart from cottage cheese, tofu is also an alternative for ricotta cheese also has a very high amount of protein while having a low quantity of cholesterol and cholesterol intake. Another reason why you need to pick this is the fact that it is totally free of saturated fats and sodium.
Wrapping up
I am sure you you have got enough information about the best cottage cheese substitutes here in this post. In fact, you will find several alternatives which you could use in place of cottage cheese. However, it’s Important to remember that all of these substitutes aren’t likely to match your needs all the time–there are still some instances wherein the only best ingredient to utilize is cottage cheese with no other options.
Egg roll vs spring roll–how do you distinguish between the two? Many are really curious to know the actual difference between egg roll and sping roll and this is why it is often seen that food fiends often ask these questions in kitchen forums in order to find out how to distinguish between the two.
You may find some key differences between egg rolls and spring rolls that can help you distinguish between the two. This should be a valuable tip if you’re looking through an appetizer list and is unable decide which one to buy.
Spring rolls are wrapped in bread or corn foil, while spring rolls are wrapped in a softer, much crispier package that has been dipped in egg for freshness.
Egg rolls are fried, which contributes to their tasty and crispy appearance. Meanwhile, the spring rolls are fried or baked and sometimes baked with the filling in general. The spring rolls are often filled with fresh vegetables, while the egg rolls are filled with a tasty mix of vegetables and meat.
There are obviously no guidelines when it comes to making good Chinese beers. Just take the different types of spring rolls and egg rolls which we can make at home. In good restaurants you can always find pork and vegetable spring rolls are tastefully packaged and filled with meat and all our spring rolls have a crispy exterior.
What spring rolls and egg spring rolls have in common, however, is that they are super delicious! -both are served with dipping sauces. Hot sauces, hot peppers or even a mixture of both are always a fantastic thing.
What exactly is in a spring roll?
A garden spring roll, for example, is probably filled with a variety of fresh vegetables such as carrots, bamboo shoots, peppers and cabbage. And spring rolls, which are much juicier, tend to be filled with meat and vegetables, usually pork, poultry or shrimp.
What’s in an egg roll?
As with spring rolls, the filling of an egg roll depends mainly on the chef’s ideas and interpretation. But there are a few guidelines to follow. Since spring rolls have a softer shell, it is very important to wash them with something that suits both texture and taste. That’s why egg rolls, unlike most spring rolls, almost all the time have tomatoes that are cooked and are almost always beef. However, vegetable egg rolls can be both tasty and healthy because they contain a cooked mixture of hearty vegetables such as celery, cabbage and onions and lots of seasoning.
The exact roots of egg rolls and spring eggs are somewhat opaque, although both have their origins in oriental cuisine. Although the jury is still confused about the details, many food experts believe that spring rolls arrived that were adapted to become what was later called a spring roll. And while others also claim that the spring rolls are far from being a Chinese-American innovation compared to traditional Chinese food, but there is no doubt that they have a quite a strong Chinese influence.
undoubtedly, there is a lot to appreciate about them, and whatever you choose, you can discover tasty variations of both! Take a look at all types of egg rolls and spring rolls available on the market, such as Vegetable, and Pork and Vegetable and Chicken Roll, and look for them in grocery stores and restaurants near you , waiting only to be tasted and savoured.
Wrappng up
Hopefully, you will now be able to set them apart now that you know about their differences. So, next time if anyone ask a question like this: Egg Roll Vs spring Rolls –what’s the difference, I am sure you would be able to handle that query like an expert. Now go and enjoy your food at home or in the nearest restaurant!
How To Make Banana Pancakes—Healthy Banana Pancake Recipe
How to make banana pancakes? Frankly, when one of my close cronies asked me this question, I was a bit nervous because I had never tried it before. So, I told her to come to my place after a couple of weeks. For one thing, I wanted to try that recipe myself and also wanted to see if I could master that cooking technique before inviting my friends to breakfast or dinner. Yeah, that I think is a sensible practice since it saves you from a lot of social embarrassment! Elementary, Watson, as Sherlock Holmes would have said.
Now I would like to tell you how I entertained a few of my guests with some healthy and sumptuous banana pancake recipes adding my own twist to it. That’s another story, though. Just read on carefully if you want to know all the details.
Truly, this is a very pleasant time of year and it’s time to make some delicious banana pancakes! This banana pancake recipe makes wonderfully moist pancakes, even if they are made with whole wheat flour.
These whole wheat flour pancakes have more substance than the average pancake, which means they can keep you full until lunchtime. I would like to put peanut butter on them to give them more fiber and protein.
I adapted these pancakes from a famous chef’s banana and coconut pancakes. If you haven’t tried them yet, you’ve truly missed something! These are classic banana pancakes, and I was able to add a little more banana puree for maximum banana flavor.
These banana pancakes are great for lazy weekends and are perfect for warming up if you have a big breakfast during the week. You can also double the amount and freeze the extras for later. No doubt they brighten up cold grey mornings like the ones we had recently.
HOW TO MAKE BANANA PANCAKES – STEP BY STEP
You will have to start by mixing the flour, baking powder, sugar and salt in a bowl.
Now beat well and set aside.
Make a banana puree in a medium bowl until almost smooth.
Add the eggs.
Use a fork to mash.
Add the milk and vanilla extract.
Pour the banana mixture and melted butter into the dry ingredients.
Fold the batter with a rubber spatula. It will be thick and bulky.
Heat the vegetable oil with a cushion of butter on a baking tray or in a non-stick frying pan (the butter gives flavor and the vegetable oil prevents the butter from burning). Place the pancakes on the baking sheet and cook them until bubbles appear at the top and the bottom is golden and crisp.
Turn the pancakes over and let them cook for a few more minutes.
Cover with maple syrup.
Tips for making banana pancakes
Always make the pancakes by hand and not using an electric mixer. Mixing too much dough will result in rubber-like pancakes. Just combine wet and dry ingredients according to the instructions. Stir with a large spoon until no large pieces of powder are left.
Grills are great because you can cook several pancakes at the same time. Electric grills are great because the temperature is kept constant.
If you are cooking on the stovetop, you have to lower the heating a bit over time. The temperature is too high if the pancakes are golden outside but still raw inside.
You should brush your griddle or skillet slightly with butter or coconut oil in the middle. Clean the excess butter/oil with a paper towel so it does not burn. If there is too much butter in the frying pan, it would do more harm than good.
The pancakes are ready to be turned when the external look of the pancakes has gone from bright to matte. It’s better to wait a little longer to be sure than to end up with a mess.
What I like about these banana pancakes
Quick and easy to do
Light and smooth texture
High fiber content
Important tips to remember
After making so many pancakes, I have learned a lot from my mistakes and now I am happy to share my best tips for making awesome banana pancakes.
You should not mix them up too much. If you mix all the ingredients, be careful not to mix them overmuch. And don’t pay attention to some lumps in the batter. Over-mixing promotes gluten development, which makes the pancakes hard and rubbery.
Let the batter rest! This is not a strict rule, and if your time runs out you can skip this part. But the ideal method is to let the batter rest for 5 or 10 minutes before baking it. This ensures a smoother and more uniform texture and also ensures that the gluten development gets checked, making the pancakes lighter and softer.
It is best to grease the pancakes as little as possible. Pancakes should not be fried. If you use a frying pan, rub some vegetable oil on the pan with a paper towel. Butter is also good, but be careful not to burn it.
Grill on top of the skillet. The pancakes need heat, even heat to look delicious golden chestnuts and with a uniform shape. In this respect, an electric skillet or a griddle looks better than an ordinary frying pan because the temperature is kept constant and is easier to control when several pancakes are cooked at the same time.
Professional cooking tip: To check the cooking surface temperature, pour a few drops of cold water over it. The drops should fly and dance before they disappear. If they evaporate immediately, the pan is too hot and the pancakes will burn. If they don’t do it, the pan is too cold and the pancakes will turn pale.
Variations of banana pancakes and serving ideas
A simple splash of maple syrup on your pancakes is always a sure thing! That’s why I use very little sugar in the pancake batter. Some cooks would even leave some in the batter, and that would be perfect. For a little extra you can decorate your pancakes with some berries, banana slices, nuts, nut butter (peanut, almond, cashew etc) and/or a few spoonfuls of whipped cream or yogurt.
Another possibility is to make caramelized banana slices! Make sure you have some extra bananas on hand. Then melt one or two tablespoons of salted or unsalted butter in a pan. Add the thickly sliced bananas and a few tablespoons of light or dark brown sugar and cook, stirring frequently, until the bananas caramelize and turn into syrup. This should take about 5 minutes. Serve immediately on your pancakes and enjoy!
What about using chocolate? If you like chocolate with your pancakes like I do, you can always use chocolate chips in the batter before baking. For this recipe, I recommend using 1/3 to 1/2 cup (60-90g) of chocolate chips, depending on your taste.
Wrapping up
Hope you enjoyed reading about how to make banana pancakes. And I am sure you would have no problem now to make a few delicious banana pancakes at home and you can also give them a personal touch to it using ingredients to suit your own taste. Go cooking!
How to make cookies on an electric griddle or electric skillet
One of my readers recently shared with me memories of her mother baking cookies on a griddle on the stove. What an awesome idea to save energy on a hot summer day, when your family members are looking for freshly-baked cookies, but you don’t want to pollute the house with the heat of the oven.
This cookie baking method is also the answer when you only need a few cookies. You don’t have to bake a whole batch of cookies. You just need to make the dough, cut the cookies and put a layer between the pieces of wax paper. Now store them in the freezer and then take out the amount you need for making cookies. Let them defrost for about 20 minutes, then place them on the hot griddle. You will have a small amount of cookies in no time!
You can also use an electric griddle and get the exact same results. This method makes these griddle cookies so easy and delicious! It would be very easy to take a frying pan or an electric griddle or skillet with you when you go camping or for an outdoor activity as long as electricity is available. Make your dough at home or freeze it in advance and take it to your destination.
I have made some changes to the recipe from the one I found in a cookbook. When I made the cookies, I replaced the sugar with Splenda. They tasted good, but I left the sugar in the recipe below for you to decide what kind of sweetener you want to use. As indicated below, I used cinnamon instead of the nutmeg that was recommended in the original recipe. I like the blend of raisins and cinnamon together, which create a different flavor. Make them the way your family likes them best. That’s what good cooks do. After all, you are cooking for your family or guests, so you will have to keep in mind the kind of cookies they would enjoy.
Cooking time
Preparation time: 25 minutes Cooking time: 45 min. The cookies will be ready in : 1 hour and 10 minutes : Depends on the size of the cookies, though.
Ingredients
3 1/2 cups all-purpose flour, sifted
1 cup of sugar
1 1/2 teaspoons baking powder
1 teaspoon of salt
1/2 teaspoon baking soda
1 teaspoon cinnamon
1 cup of butter
1 egg
1/2 cup of milk
1 1/4 cups raisins
Instructions
In a large bowl, sift the dry ingredients.
Cut the butter. (any brand will do).
In another bowl, beat the eggs well. Add milk and mix.
Add the egg mixture to the flour. Mix well.
Add raisins and stir until dough is firm.
Roll out the dough on a lightly floured surface to a thickness of one-quarter inch. Cut with a round cookie cutter if you have one or use a small glass upside down.
Lightly grease the griddle (either kitchen or electric). Heat it until a few drops of water sizzle on it. You may have to experiment with the right temperature, but remember that it is better for the iron not to be hot enough than to overheat and burn your cookies.
Place the cookies on the griddle. As the bottom of the cookies browns, the top swells. Then, turn the cookies over and brown the top.
Cool them down on a wire rack.
Ideas for Additions and Experiments
Add nuts to make it different
I tried this recipe again and this time I added nuts. The nuts made them even more delicious. Be careful when adding nuts to a recipe as many people are allergic to them. If you are serving your own family, you should be aware of the problems. However, if you’re making cookies to share at a party, it’s probably best to leave them out of the recipe.
Substitute golden raisins for regular raisins.
I also substituted golden raisins and the taste was the same for me. However, I liked the look of the regular raisin cookies better than the golden raisin cookies and they were cheaper in my grocery store.
Try this method with other cookie recipes
I don’t know why this cooking method wouldn’t work on a variety of cookies. I like the idea of using all the dough prepared in your refrigerator so that you can use it whenever you need. I plan to try a package of chocolate chip cookie dough soon!
Wrapping up
I am sure you would love this post that tells you how to make cookies on an electric griddle or an electric skillet and your family members, especially the small children would love to have these mouthwatering cookies. The electric griddle is a versatile kitchen gadget and you can make so many useful things with its help and yet we seldom use them for other purposes. Go cooking cookies!
Electric griddle Vs Stove Top–which one is better?
Whether you are an amateur cook or a professional chef, it really doesn’t matter. I am sure you would always like to take part actively in the debate that often goes on in forums. The topic? Electric Griddle V Stove Top. Truly, comparison between the electric griddle and the stove top seems to be a never-ending one. And most probably none wins in the end and the debate remains unresolved.
It is a relatively common question, one that actually needs to be thought through. Like most things, the griddle and stove top have their own uses. They are two unique pieces of equipment that can be used for many different purposes. Obviously, in some cases one has an advantage over the other. In this post, we would like to provide you with the information you may need while purchasing your own cook top.
Why should you use a griddle?
An griddle can be described as a kitchen appliance that has a flat surface. The griddle uses a heat source under the surface, which adds a lot of heat to the surface for cooking. A griddle has many variations. Some griddles are integrateddirectly into the cooking range. Others are made of wrought iron or cast iron. The main advantage of having a griddle is that the food is cookeddirectly on the griddle. The flat top of the griddle offers enough space to place the food and cook on it. This allows you to give the food an extra crispy texture during cooking.
Why should you use a stove top?
The stove top is a modern and conventional way of cooking food. It comprises a heat source that is directly connected to the burners of the oven. Kitchen stoves use the direct application of heat to cook. Even in the stove top, there are many variations, ranging from a single burner to several burners on a single stove top. The main advantage of using a stove top is that it takes very little time to heat up and is therefore considered the faster alternative to both. This is because the heat source is directly connected to the burners, so that the pots or pans placed on it heat up immediately. Hence, they do not need much time to warm up.
What should you do if portability is your main concern?
The answer in this case is quite clear. The electric griddle is much more portable when it comes to kitchen gadgets. The stove top is heavy and generally very difficult to carry. The electric griddle is compact and presents a reliable option of cooking your food anywhere. The disadvantage is that you need electricity wherever you go. In general, however, we believe that the griddle is the best option in this case. Modern stove tops are quite bulky and usually have more than three burners. The number of burners determines the size and weight of the entire stove top. This product is usually considered to be a high-value item that is not suitable for carrying around here and there. Modern stove tops often require a gas supply for operation and to provide heat. This can be a major disadvantage, as setting up a gas supply is a somewhat cumbersome task no matter wherever you are.
Finding the more energy efficient option
In general, many people have a different perspective when it comes to the question: which of these two systems is more energy efficient? However, these are not based on solid facts or evidence. In most cases, these are just personal opinions put forward by users. On an average, the stove is much more energy efficient than the griddle for several reasons. The griddle takes a longer time to heat up and therefore consumes a lot of energy. The electric griddle reduces this slightly, but it still takes some time to heat up. The latest and most modern stove tops use electrical energy with great efficiency and they seem to reduce energy consumption by up to 30%.
Which one is easier to clean up: electric griddle or stove top?
That’s kind of a subjective answer. But I will try to give you my personal opinion as much as possible. The electric griddle is a flat top surface with a heating element underneath for cooking food. The stove top consists of separate burners and usually contains a gas supply for the flame on which the food is cooked. It is therefore easy to say that the electric griddle is easier to clean because of the nature of its surface. The surface is flat and smooth, making it easier to clean. However, the stove top has small gaps between the burners and the interior parts of the burners also need to be cleaned.
Although the griddle is easier to clean up, it needs be cleanedfrequently. Experts suggest that it be cleaned before and after each cooking session. They may not be effective in this regard. On the other hand, a stove top can remain intact for weeks and can still be used for cooking quite safely. But of course, we recommend that you clean it to ensure the tidiness of your kitchen or wherever you intend to cook.
Which of these solutions offers the best overall solution?
We believe that after all that has been discussed so far, the electric griddle is finally the best solution for cooking. You would always find it easier to clean and cook on the griddle than on the stove top. The stove may have its own benefits and take precedence over some other aspects. But the electric griddle is certainly much more energy-efficient and environment-friendly. Last but not least, it is a lot cheaper. The electric griddle is also portable and easy to transport. This makes it much more suitable for picnics and family celebrations.
Electric griddle Vs Stove Top
Wrapping up
The electric griddle is certainly the better of the two in many ways. It is reliable, convenient and efficient. The stove top has its own special characteristics, but we believe that it belongs to the past. For, it does not cover many requirements as the griddle does as a whole. So, if you are still undecided whether you should buy an electric griddle for your kitchen, go for it right now.
Boiling eggs on a griddle is not at all difficult if you know the correct techniques. Functionally, the only difference between a griddle and a pan lies in the cooking surface. You will have to use the right griddle temperature to get the optimum results.
According to the USDA, eggs are a versatile ingredient and a good source of protein and other essential vitamins and minerals.
In order to compensate for the unmovable cooking surface when you are making eggs in an electric frying pan or a griddle, you should be a little careful with your wrist, especially if you want to cook eggs too easily. A large compensating spatula is one of the essential tools for frying eggs on a griddle or a frying pan.
You may use a thin metal spatula if you have a cast iron griddle and a silicone spatula for electric an griddle with a non-stick coating.
How to cook eggs on a griddle
Try the Sunny-Side Up
Step 1: Break the eggs
Choose eggs that are not cracked when making eggs in the electric pan or griddle. According to the USDA Food Safety and Inspection Service, cracked eggs can give you direct access to harmful bacteria and hence should be kept at bay.
Break each egg into a cup. Break the eggs wide open on the work surface so that the pieces of shell don’t get into the egg whites.
Step 2: Prepare the plate
Place the cast iron griddle on the stove and keep the burner medium low. If you have an electric griddle, you should slightly grease the cooking surface with oil and set the temp to 325 degrees Fahrenheit, the temperature suitable for eggs.
Step 3: Pour the eggs onto the griddle
Pour each egg from the cup onto the surface of the plate. You may season the eggs according to your taste with kosher salt and freshly ground black pepper.
Step 4: Add water and cover
You will have to pour a small spoonful of water on the plate and let it bubble for a few seconds. You will now have to cover the eggs with a lid.
Step 5: Cook until the whites are set
Boil the covered eggs for a minute, and then uncover them. You should continue cooking until the whites are absolutely set, more or less about 30 seconds.
Step 6: Remove and serve
Slide the spatula under the eggs and scrape them out of the pan. You may pry up a corner of the eggs, if necessary, so that you can pass the spatula cleanly under the eggs.
Scrambled eggs in the electric frying pan
Step 1: Heat the griddle
Provide medium heat to an electric griddle with oil or butter push the temp to 325 F.
Phase 2: Stroke and season
Beat the eggs with a tablespoon of dairy for each and season them according to your taste. Although milk or cream is usually used, a little sour cream, buttermilk or yogurt works fine, and even adds a pleasant acidity that contrasts with the fatty egg yolk.
Step 3: Add a little butter
Break small pieces of cold butter and beat them into eggs. The pieces of butter smear the curd and make the eggs fluffier. You can also add a pinch of bicarbonate of baking soda to make it a little lighter if you like.
Step 4: Carefully turn the eggs over
Pour the eggs on the griddle. You should now carefully slide the base of the sliding spatula over the top of the eggs, in a circular motion, for about a minute.
Step 5: Turn the eggs over
Turn the spatula and bring the eggs closer to you and turn them. Turn off the heat from the electric griddle and allow the eggs to boil with the residual heat until they have reached the hardness that you want.
The eggs will reach their full hardness if you leave them on the plate for 30 seconds; they will soften as soon as you remove them from the griddle.
Easy, medium or difficult cooking
Step 1: heat the griddle
Break each egg into a cup. Place a well-oiled cast iron plate or griddle on the stove at medium heat or set a well-oiled electric griddle to a temp of 325 F.
Step 2: Pour the egg onto the griddle
Pour the egg from the cup on the griddle. Boil the egg until the egg whites become hard and opaque, keeping it there about one minute.
Step 3: Place the spatula under the egg.
If you are right-handed, slide the left side of the spatula under the right side of the egg; if you are left-handed, you will have to slide the right side of the spatula under the left side of the egg.
Don’t slide the front of the spatula under the egg as you would normally do; instead, you have to slide the whole left or right side of the spatula under the egg.
Step 4: give it a gentle rollover
You should roll your wrist when you get the spatula under the egg. Do try to lift the egg and let it fall upside down on the frying pan to turn it. You will break the yolk each time. Just roll the spatula smoothly with the egg on top.
Step 5: Cooking to completion
Boil the egg for about 15 seconds after turning it on medium heat; you may boil the egg for a minute after turning it to make it harder.
You should eat the eggs immediately after cooking for maintaining best quality. You must throw away any remaining eggs left over that have been at room temperature for more than two hours. Yes, this is what has been recommended by the USDA Food Safety and Inspection Service to reduce the risk of diseases that can occur from food.
Things you will need
Small cups or mugs
Butter or vegetable oil
Baking powder (optional)
kosher salt
Freshly ground black pepper
Offset metal or silicone spatula
Important tip for you
You may use frying rings if you want to give the eggs a clean, round shape. Place a frying ring on the griddle, pour the egg in and then you should remove the ring after 30 seconds.
Wrapping up
How to cook eggs on a griddle
Now that you know how to cook eggs on a griddle, you should be able to do it with great ease. You might have some early problems, but after you do it a few times, you will be quite an expert.
Difference between an electric griddle and an electric skillet
Are you looking to buy an electric griddle and still unsure whether you should buy an electric griddle or an electric skillet, this post is for you. Let me first ask this question to you. Do you know the difference between an electric griddle and an electric skillet?
To begin with, no matter whether you are preparing dinner or breakfast, an electric skillet or an electric griddle can make your work easier. Instead of using the oven, dirtying up dozens of pots and pans and making a complete mess in your kitchen, these practical cooking appliances can prepare your food quickly, comfortably and very efficiently.
While both an electric skillet and an electric griddle can offer a number of advantages to any homeowner, there are actually some significant differences between the two appliances. Both are hot surfaces and can cook some similar dishes. But there are subtle differences between these cooking surfaces. And that make both more suitable for preparing certain dishes. Now let us explore the differences between these two appliances and the foods that each of them can cook better than the other.
Electric Griddle
First, turning on the electric griddle is quite easy. Switching off this appliance is also very is not a problem.
An electric griddle can also be heated by an electric heating element. One of the biggest advantages and the main reason why people use electric griddles compared to stove-top pans is that the iron heats up evenly all throughout and maintains the necessary heat. It does not fluctuate. Furthermore, griddles tend to have a much larger surface area than the average frying pan.
Electric griddles are perfect for preparing pancakes, scrambled eggs, ll-free surface makes it easy to turn and cook breakfast food, and the large surface enables you to easily prepare enough food for the whole family.
The Presto Tilt ‘n’ Drain Big Electric Griddle has a durable, scratch-resistant non-stick surface. It prevents breakfast food from sticking and allows you to place your food on a convenient warming tray underneath for large meals.
Electric skillet
Similarly, the electric skillet can also be the starting point for your kitchen. The electric skillet can indeed become the most necessary tool of your kitchen.
Like an electric griddle, the skillet can be placed on the counter and heated within minutes of connection. However, unlike an electric griddle, the electric skillet has a flat, warm surface with small wallsents. It also allows you to use liquid ingredients that you cannot use with an electric griddle.
The lid gives you more control over the cooking process. An electric skillet is ideal if you are preparing a large meal and need an extra burner or if you just don’t want to worry about using your stove. With this unique appliance, you can prepare dishes such as rice, pan-fried dishes and dozens of other foods. The Oster DuraCeramic electric skillet has a natural non-stick surface that is easy to clean.ll also help you decide which one you should choose for your kitchen if these two very important kitchen appliances are still missing in your kitchen.
Wrapping up
Now that you know the difference between an electric griddle and an electric skillet, you should have no hesitation in deciding which one should you buy for your kitchen. Obviously, that depends on your personal choice and your requirements and you should be the best judge here.
Do you want to know how to boil water on an electric griddle? It might sound strange and a bit confusing but sometimes you need to think out of the box to do such small things which apparently seem very easy but not so when you try to do it.
Yes, you will have to think differently when you consider using your electric griddle for boiling water. An electric griddle has a flat, non-sticky surface that heats to the temperature set by the person who is cooking. Food that is normally prepared in a pan cooks directly on the surface of the cooker without any additional utensils. But in order to boil water you would require a glass pan to hold it without damaging the non-stick surface of the cooker. This method takes longer than heating in a metal pan on a stovetop. Besides, it depends on the model of your griddle and the type of glass used in the construction of your cooking pot.
Method:
Preheat the electric griddle to the maximum.
Do not fill the glass pot more than half its capacity with water.
Carefully place the pot at the center of the griddle without pulling it across the surface of the plate.
Allow the water to boil, which is indicated by bubbles rising quickly to the surface of the water and breaking.
Lift the pot directly from the surface of the electric griddle lest you should scratch the surface.
Wrapping up
I am sure this small trick is nothing new. Anyone can do it if he knows how to do it. And now that you know how to boil water on an electric griddle, you should be able to do it easily without any hassle.
If you want to know about the common mistakes you should avoid when making pancakes, you should go through this post carefully. For, here, in this post I have discussed what are things you should not do when making pancakes at home.
Truly, there is nothing better than spending the weekend with a delicious and soothing breakfast. More precisely, a breakfast with pancakes! There is a whole lot to choose from a wide variety of delicious pancakes! You can make the thick and soft buttermilk pancakes. Or else, you can choose the light and tender ricotta pancakes. You may also like to make a luxurious Dutch baby pancake for your children. so, the choice is endless! Just do not forget to add the syrup.
But the key to making good pancakes on the griddle is technique. Here are some tips on how to do things right and avoid some common mistakes people are likely to make.
1. Over-mixing the batter
Do you have the urge to keep stirring the batter until the lumps disappear and it is completely smooth? Avoid it completely.
If you mix dry and moist ingredients together, gluten will start to develop. And the more you mix the dough, the more gluten develops. What happens then? The result of a overworked batter is a bunch of hard and soft pancakes instead of the light and soft pancakes you’ve probably been dreaming about.
You can follow this tip: Only mix the batter until the wet and dry ingredients mix together and no more flour flakes are visible. The batter can be lumpy, and this is normal.
2. Allow some time for the better to rest
You are so close to making a delicious pancake breakfast that it seems like an excruciating pain to wait a little longer. It is a small but crucial step that should not be skipped. It does not matter if you are hungry. Take your time and don’t hurry through things.
The resting period, which can vary between five and thirty minutes depending on the recipe you are going to prepare, plays a dual role. The gluten, which was activated during the kneading, rests and relaxes. In addition, the starch molecules in the flour absorb the liquid from the batter. This eventually gives it a thicker consistency.
You can follow this advice: Good things come to those who stand and wait! And, yes, this saying also applies to pancakes. It may look like a trifling thing, but letting the batter rest is an important step. It gives the gluten a chance to relax and settle down. In other words, it makes the pancakes softer and softer. And this is especially important for Dutch pancakes and baby pancakes. Use this time to clean, set the table or simply get the things ready you might need while serving.
3. Do not start with a insufficiently hot pan
In my opinion, a good pancake is characterized by tender, buttery-crispy edges and a soft, tender interior. You may start with a pan that is not hot enough. But instead of forming a slightly crispy outside, the dough will start to absorb the butter or oil from the pan and become greasy.
Follow this tip: Give your pan time to heat up properly. Before the batter is added to the pan, the butter or oil should be very hot but not steamy. If you are not sure whether the pan is hot enough, don’t be afraid to make a small test with the pancake first to see if everything is alright.
4. Set the heat on a higher level but keep an eye on it
If the heat is too high, the pancakes will not cook faster, but will cook unevenly with the outside of the pancake burnt. The pan should be hot, but don’t make the mistake of setting the temperature too high. For, the bottom may burn while the inside remains raw and soft.
Follow this tip: Setting the oven to the right temperature is one of the keys to making a good pancake. The pan should be hot, but that doesn’t mean you have to turn up the heat. For making a well-cooked pancake with a golden brown outside and a soft inside properly cooked, the heat should be kept at medium level.
5. Turning pancakes too early and too often
You may be tempted to flip them over as soon as the bubbles start appearing, but this is not the right time. Wait one more minute.
Pancakes should be turned once, and only once during cooking. And as long as you don’t turn them too soon, you won’t need to turn them again. If pancakes are turned too often, they will let the air out of them and lose some of their wonderful soft texture.
Follow this advice: wait until the pancakes are turned when the bubbles burst on the surface, and don’t do this a second earlier.
Wrapping up
So, these are the 5 common mistakes you should avoid when making pancakes.Hopefully, the advice given here will benefit you a lot while go about doing pancakes for your family. Making pancakes is not a difficult job, but if you are careful, you will end up with a mess. Hence, you should take all precautions before you make pancakes at home. the Write button and compose something new.
Are electric skillets better than frying pans and stoves? Yes, it is often asked by people if electric skillets better than frying pans and stoves. Before we enter that discussion, let us see what electric skillets are. To begin with, an electric skillet is a pan that can be used for frying or cooking. Instead of being placed in a conventional cooker, it is plugged into an electrical outlet. Some skillets have heating surfaces, making frying quicker and easier, which is not possible with any other frying pan or cooking stoves.
The electric skillet is available in several shapes, such as round and square. The pan can only measure 12 x 12 inches to 18 x 18 inches, giving a larger heating surface. Its size makes it more advantageous than stoves, as it offers large areas for heating and frying. However, more space is needed to accommodate large frying pans or skillets.
The electric skillet has a non-stick surface that allows you to avoid burning food during heating. They also have temperature controls that allow you to set the correct and preferred temperature for the food you are cooking. However, some of these properties may be limited to certain types of electric cookers.
Care should be taken when placing the tray in the dishwasher, as the plug must be disconnected from the outlet. Pot heaters can use electricity for frying and heating, unlike gas stoves. Some electric cookers have a “keep warm” function that keeps food warm and can also be used for short-term storage.
You can cook and keep your food hot while you wait for lunch. With a stove and other cooking facilities once the food is cooked, you need to find a way to keep it warm afterwards. This feature is perfect for kitchen businesses such as hotels and buffets.
Most electric skillets on the market have an aluminum non-stick coating. But there are also some in stainless steel. When using a non-stick skillet, it is recommended not to use serving utensils or metal objects. This could scratch the coating. When the coating begins to peel, it is old and it is best to use a new mold.
The electric skillet should be placed in a safe place and out of bounds, especially for children. It should be placed away from the edges to prevent it from falling off or being easily accessible. The skillet should be placed on its own and not in a stove or oven. Careful handling is required for high performance and safety.
The advantage of an electric skillet is that it has a constant temperature compared to a cooker or frying pan. This makes it suitable for many applications, such as frying doughnuts, baking pancakes and much more. It is quick to fry and cook and is always used for foods that need to be prepared in a short time. Many people use it as a breakfast-making tool, as it helps you to prepare breakfast when you are hurrying to start your day.
There are a variety of dishes that can be prepared deliciously with a frying pan, such as pasta, beef, steak and various seafood recipes. A skillet is used to evenly heat the surface and cook everywhere. It has the right temperature because the temperature is set and you can cook a lot of food with it for a short period of time in a small space.
Electric skillets serve the same purposes as pots and ovens. The electric skillet consumes electricity because it is plugged in, but the pan is placed over a heating source, such as a stove, while the cooker can consume gas. Heating in the skillet is also faster thanks to the use of electricity.
The electric skillet should be placed in a safe place and away from the reach of children. It should be placed away from the edges to prevent it from falling off or being easily accessible. The skillet should be placed on its own and not in a stove or oven. Careful handling is required for high performance and safety.
There are a variety of dishes that can be prepared deliciously with a frying pan, such as pasta, beef, steak and various seafood recipes. A skillet is used to evenly heat the surface and cook everywhere. It has the right temperature because the temperature is set and you can cook a lot of food with it for a short period of time in a small space.
Wrapping up: are electric skillets better than frying pans and stoves?
In general, electric skilletsare faster, less bulky, and cook better than frying pans and stoves thanks to proper heating and temperature control. You save time and energy, allow you to heat accurately and cook many dishes at once. They are quite useful in the kitchen and hence the use of electric skillets is an ideal choice for the modern kitchen. You can cook your food fast and easy.

 We’ll help you determine how many cups contain one pound of sugar. If you want to be effective in the kitchen, you’ll want to familiarize yourself with some of the basic conversions.
 Don’t try to compress the sugar, just spoon it into the measuring cup, as compression will have a big impact on the final weight.
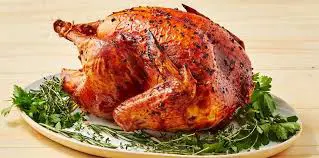

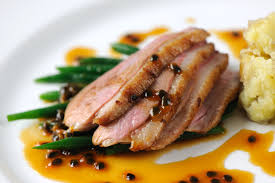


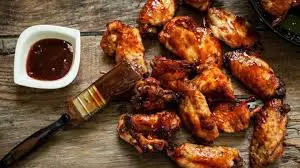
 Chicken Wings: The facts in general is that a chicken wing contains less than an ounce of meat. In restaurants, an order of one pound of wings can contain between 7 and 12 pieces. The parts of a chicken wing include the drumette, which is the section between the shoulder and elbow, the middle section and the tip. Chicken wings can be sold as a whole (with the three parts), with only the first and second parts, or separately as a drumettes or central section. Chicken wings can also be sold with or without bones.
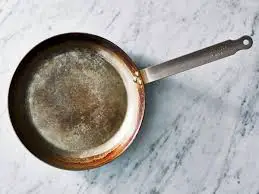

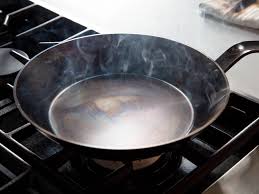

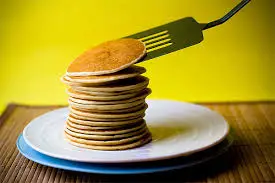
 How long it takes to cook a pancake on each side is certainly not an exact science , generally speaking, given the constant variations from pan to pan – but you can definitely look for a clear visual clue to show you when everything is going well and when it is ready. By looking carefully at your pancakes and using your preferred method of flipping them, you can prevent your breakfast from being undercooked or burned.
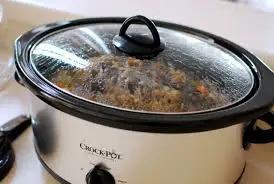
 It offers a comfort that didn’t exist before, but can you put a slow cooker in the oven? We will address this and many other questions in this article.
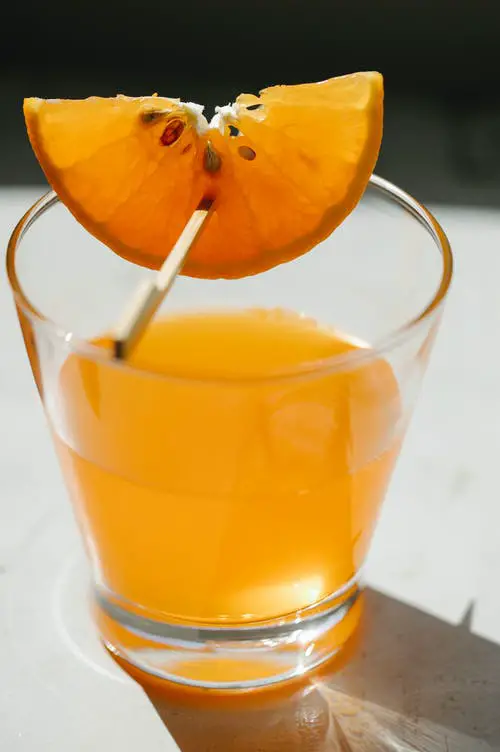

 You should prepare the orange juice by peeling them first. Then, chop them into smaller parts to fit your juicer chute.
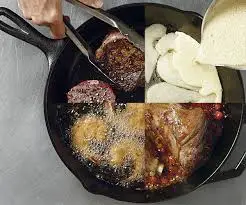
 Can you put a cast iron skillet in the oven? This is one question that people frequently ask in question answer forums, especially in quora or reddit.com. The answer is yes. You can put cast iron skillet in the pan and there is no problem. Moreover, cast iron skillets are absolutely oven-safe. Anyway, if you are one of those readers who want a definite answer, just go through this post carefully.
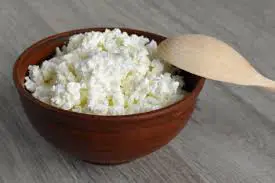
 But, since the late 70s, the popularity of cottage cheese has been on a steady decrease. Due to the growing prominence of new high quality pasta manufacturers and weak marketing related to the different aspects of cottage cheese, it plummeted down to become one of the very unpopular products in the dairy section of stores–but is the world ready to appreciate cottage cheese once more?
 A garden spring roll, for example, is probably filled with a variety of fresh vegetables such as carrots, bamboo shoots, peppers and cabbage. And spring rolls, which are much juicier, tend to be filled with meat and vegetables, usually pork, poultry or shrimp.
 Now I would like to tell you how I entertained a few of my guests with some healthy and sumptuous banana pancake recipes adding my own twist to it. That’s another story, though. Just read on carefully if you want to know all the details.
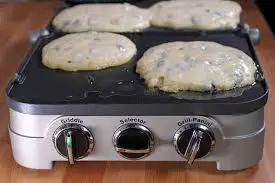
 This cookie baking method is also the answer when you only need a few cookies. You don’t have to bake a whole batch of cookies. You just need to make the dough, cut the cookies and put a layer between the pieces of wax paper. Now store them in the freezer and then take out the amount you need for making cookies. Let them defrost for about 20 minutes, then place them on the hot griddle. You will have a small amount of cookies in no time!
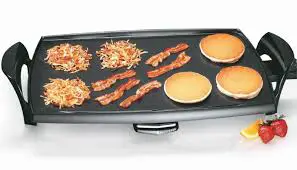
 surface, which adds a lot of heat to the surface for cooking. A griddle has many variations. Some griddles
  The stove top is a modern and conventional way of cooking food. It comprises a heat source that is
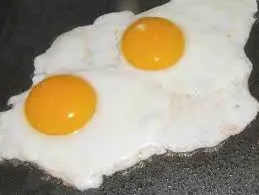
 In order to compensate for the unmovable cooking surface when you are making eggs in an electric frying pan or a griddle, you should be a little careful with your wrist, especially if you want to cook eggs too easily. A large compensating spatula is one of the essential tools for frying eggs on a griddle or a frying pan.

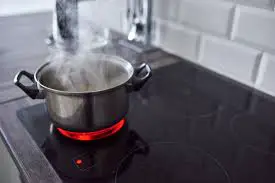
 Yes, you will have to think differently when you consider using your electric griddle for boiling water. An electric griddle has a flat, non-sticky surface that heats to the temperature set by the person who is cooking. Food that is normally prepared in a pan cooks directly on the surface of the cooker without any additional utensils. But in order to boil water you would require a glass pan to hold it without damaging the non-stick surface of the cooker. This method takes longer than heating in a metal pan on a stovetop. Besides, it depends on the model of your griddle and the type of glass used in the construction of your cooking pot.
 Truly, there is nothing better than spending the weekend with a delicious and soothing breakfast
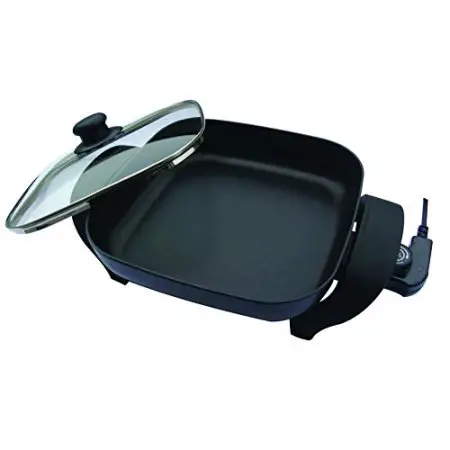
 The electric skillet is available in several shapes, such as round and square. The pan can only measure 12 x 12 inches to 18 x 18 inches, giving a larger heating surface. Its size makes it more advantageous than stoves, as it offers large areas for heating and frying. However, more space is needed to accommodate large frying pans or skillets.