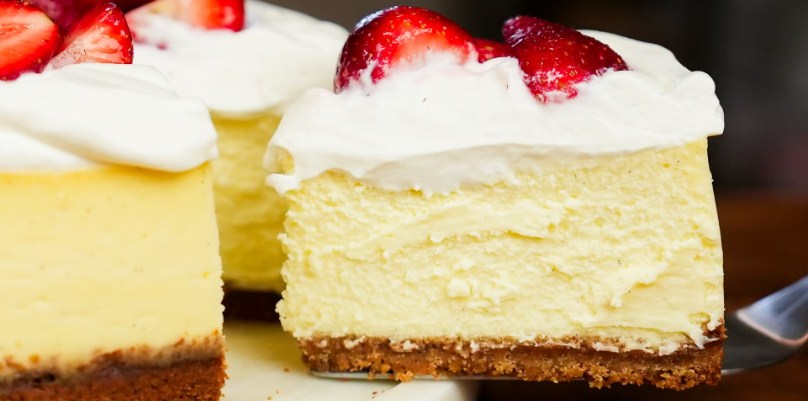
Classic New York Cheesecake Recipe with Graham Cracker Crust
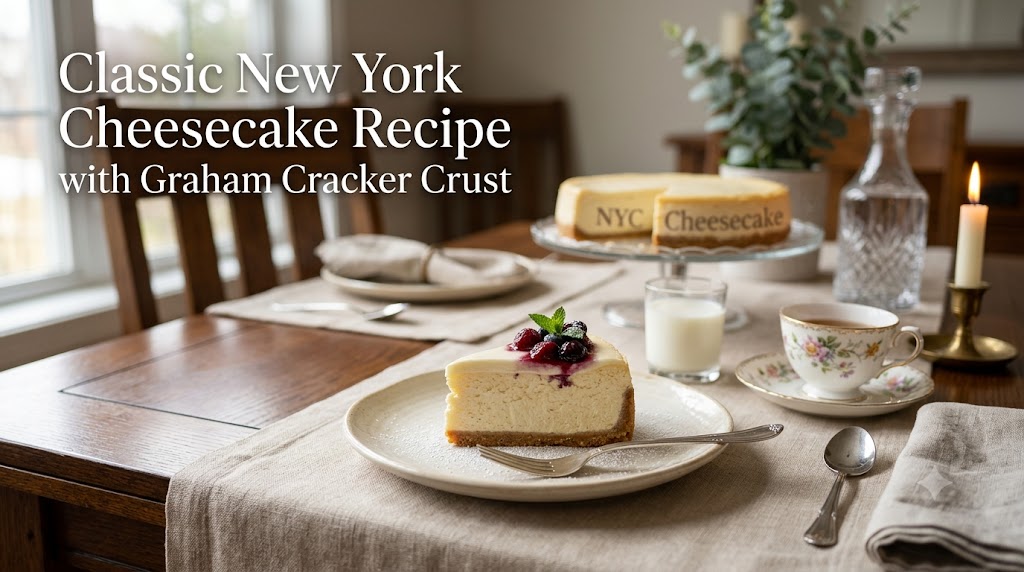
I have made a lot of bad cheesecakes. There, I said it. Before I landed on this classic New York cheesecake recipe with graham cracker crust, I had a sunken one, a soupy one, and one so cracked down the middle it looked like a canyon photo from a geology textbook. My husband still brings up “canyon cake” at random moments, usually when I’m trying to look competent in the kitchen. This recipe is the one that fixed all of that, and I’m walking you through every step, every mistake, and every small trick that actually made a difference.
If you’ve ever wanted that dense, rich, tangy-sweet cheesecake you get at old-school New York delis, this is it. No gimmicks, no weird ingredient swaps, just the real deal made with cream cheese, sour cream, a touch of lemon, and a buttery graham cracker crust that holds its shape when you slice it. I tested this one more times than I’ll admit, and I’m giving you the version that worked, plus the ones that flopped, so you skip my mistakes entirely.
Why You’ll Love This Recipe
This classic New York cheesecake recipe is dense without being heavy, and it’s tangy in a way that keeps you going back for another bite even when you’re stuffed. The graham cracker crust adds a little crunch and a little sweetness that plays off the tang of the cream cheese filling. It’s also, weirdly, kind of forgiving once you know the two or three things that actually matter (hint: it’s not the fancy stuff you think).
Here’s the short version of why this works:
- It uses a water bath, which sounds fussy but genuinely prevents cracking and dryness.
- Room temperature ingredients blend smoother, so you get that silky texture instead of lumpy filling.
- The sour cream and lemon juice cut through the richness so it doesn’t taste like a block of cream cheese with sugar dumped on it.
- It’s make-ahead friendly. Actually, it needs to be made ahead, since it has to chill overnight. Plan accordingly, unlike me the first three times.
Ingredients
For the graham cracker crust:
- 2 cups graham cracker crumbs (about 16 full sheets, crushed)
- 6 tablespoons unsalted butter, melted
- 1/4 cup granulated sugar
- Pinch of salt
For the cheesecake filling:
- 4 packages (8 oz each) cream cheese, softened to true room temperature
- 1 1/4 cups granulated sugar
- 1/4 cup sour cream
- 1 tablespoon fresh lemon juice (zest works too, or both)
- 1 teaspoon pure vanilla extract
- 2 tablespoons all-purpose flour (optional, but it helps with stability)
- 4 large eggs, room temperature
For the optional sour cream topping:
- 1 cup sour cream
- 2 tablespoons granulated sugar
- 1/2 teaspoon vanilla extract
That’s it. No cornstarch mystery ingredients, no cream cheese substitutes that taste like sadness. Just the basics, done right.
Step-by-Step Instructions
1. Prep your pan and oven. Preheat your oven to 325°F. Wrap the outside of a 9-inch springform pan tightly in two layers of heavy-duty foil. This part feels tedious, and honestly I used to skip it, which is exactly why I ended up with a soggy-bottomed cheesecake floating in water bath juice one memorable Thanksgiving. Don’t skip it.
2. Make the crust. Mix the graham cracker crumbs, melted butter, sugar, and salt in a bowl until it looks like wet sand. Press it firmly into the bottom of your springform pan, and a little up the sides if you like extra crust. Bake for 8 to 10 minutes, then set it aside to cool while you make the filling. It should smell like a graham cracker box exploded in your kitchen, in a good way.
3. Beat the cream cheese and sugar. In a large bowl, beat the softened cream cheese and sugar together on medium speed until smooth. This takes about 2 to 3 minutes. Scrape the bowl down at least once. If your cream cheese isn’t fully softened, you will get lumps, and no amount of beating fixes that later. Trust me, I tried for a solid ten minutes once out of stubbornness.
4. Add the flavor. Mix in the sour cream, lemon juice, vanilla, and flour (if using) on low speed, just until combined. Don’t walk away and let the mixer run on high here. Overmixing at this stage pumps air into the batter, and air bubbles are basically little crack invitations waiting to happen once the cheesecake bakes.
5. Add the eggs, one at a time. Add the eggs one at a time on low speed, mixing just until each one disappears into the batter. Stop as soon as you don’t see streaks. I know it’s tempting to dump all four in at once to save time. Resist. This is the single biggest reason my early cheesecakes cracked and sank in the middle.
6. Pour and bake in a water bath. Pour the filling into the cooled crust and smooth the top. Place the springform pan into a larger roasting pan, then pour hot water into the roasting pan so it comes about halfway up the sides of the springform. Bake for 55 to 70 minutes, until the edges are set but the center still jiggles slightly, like Jell-O that hasn’t fully set.
7. Cool it low and slow. Turn off the oven, crack the door open a few inches, and let the cheesecake sit inside for about an hour. This gradual cooling is what keeps the top from cracking as it shrinks. Rushing this step is basically asking for a canyon.
8. Chill overnight. Remove the cheesecake from the water bath, let it cool to room temperature on the counter, then refrigerate it, uncovered at first, for at least 8 hours or overnight. I know waiting is the worst part. Make it the night before you need it and go to bed.
9. Add the topping and serve. If you’re using the sour cream topping, whisk the sour cream, sugar, and vanilla together and spread it over the chilled cheesecake before serving. Run a thin knife around the edge of the pan, release the springform latch, and slice with a hot, clean knife (run it under hot water and wipe between cuts) for those clean bakery-style slices.
Cooking Tips
Room temperature ingredients are non-negotiable here, not a suggestion. Cold cream cheese doesn’t blend evenly, no matter how long you beat it, and that’s how you get little white lumps in your finished cheesecake. Set everything out at least an hour before you start, longer if your kitchen runs cold.
The water bath feels like a hassle, and honestly some days it is. But it’s the difference between a smooth, creamy cheesecake and one that’s dry around the edges with a cracked, sunken middle. If your foil leaks even a little, water gets into the crust, and that’s a genuinely sad thing to discover the next morning.
Don’t open the oven door to peek. I get it, the temptation is real. But sudden temperature changes are another crack trigger, right alongside overmixing and rushed cooling.
Substitutions & Variations
If you want a lighter version, swap the cream cheese for Neufchâtel, which has less fat. The texture is slightly softer but still very good. For a gluten-free crust, use gluten-free graham crackers or crushed gluten-free digestive biscuits; the ratio stays the same.
No sour cream in the fridge? Full-fat plain Greek yogurt works as a substitute, though it adds a slightly tangier edge. Some people skip the flour entirely for a purely traditional New York style, and that’s fine too, just know the texture will be a touch softer and more delicate to slice.
Want variations? Swirl in a few tablespoons of melted chocolate or fruit puree before baking for a marbled look. A little orange zest instead of lemon gives it a completely different personality.
What to Serve With It
Fresh berries are the classic pairing, and a quick macerated strawberry or blueberry compote takes about five minutes on the stove. A drizzle of warm caramel or a spoonful of chocolate ganache also works beautifully if you want something richer. I usually serve mine with strong black coffee, since the bitterness cuts through the sweetness nicely.
Storage & Reheating
Store the cheesecake covered in the fridge for up to 5 days. It actually tastes better on day two, once the flavors settle. For longer storage, wrap individual slices tightly in plastic wrap and freeze for up to 2 months; thaw overnight in the fridge before serving.
There’s no reheating involved here, since cheesecake is meant to be served cold or at room temperature. If you forget to take it out ahead of time, let a slice sit on the counter for about 20 minutes before eating.
Cook and Prep Time
- Prep time: 30 minutes
- Cook time: 60 minutes
- Chill time: 8 hours (overnight recommended)
- Total time: approximately 9.5 hours, most of which is just waiting
Nutrition Facts (per slice, 12 slices)
- Calories: approximately 420
- Fat: 30g
- Carbohydrates: 32g
- Sugar: 20g
- Protein: 7g
These numbers are estimates and will vary depending on your exact ingredients and slice size.
Why This Recipe Actually Works
The combination of room temperature ingredients, a water bath, and low-speed mixing solves the three biggest cheesecake problems in one shot: cracking, sinking, and lumpy texture. It’s not one magic trick, it’s three small habits working together, and once you understand why each one matters, you’ll never go back to skipping them.
Small Changes That Made a Big Difference
Switching from a wire whisk attachment to the paddle attachment on my mixer cut down on air bubbles significantly. Also, wrapping the pan in two layers of foil instead of one stopped water leaks completely, after one very wet, very frustrating attempt.
If I Were Making This Again Tomorrow
I’d add the lemon zest along with the juice, since I think it brightens the whole thing up even more. I’d also start the crust a few minutes earlier so it has more time to cool before I pour in the filling, since a warm crust can make the bottom layer slightly soggy.
What I Skip When I’m Short on Time
I skip the sour cream topping entirely and just serve it with a quick berry compote instead, since that takes five minutes versus prepping and chilling an extra layer. I also sometimes crush graham crackers in a zip-top bag with a rolling pin instead of pulling out the food processor, which saves on dishes.
FAQ
Why did my cheesecake crack? Cracking usually comes from overmixing, skipping the water bath, or cooling it too quickly. Slow down at each of those three steps and you should be fine.
Can I make this without a water bath? You can, but you’re rolling the dice on cracks and uneven texture. If you skip it, place a pan of hot water on the oven rack below the cheesecake instead, which helps a little.
Can I use a regular cake pan instead of a springform? I wouldn’t recommend it. Getting a cheesecake out of a solid cake pan without destroying it is nearly impossible, and a springform pan is inexpensive enough to be worth buying.
How do I know when it’s done baking? The edges should look set and slightly puffed, while the center still jiggles like gelatin when you nudge the pan. It will firm up completely as it cools and chills.
Can I freeze cheesecake? Yes, wrap slices tightly in plastic wrap and freeze for up to 2 months. Thaw in the fridge overnight before serving.
Final Thoughts
This classic New York cheesecake recipe took me way more failed attempts than I care to admit, but it’s the one I make now without any nerves, and that’s saying something for a dessert with this much of a reputation. If you follow the steps here, especially the parts about room temperature ingredients and the water bath, you’ll end up with a cheesecake that’s creamy, tangy, and crack-free. And if it does crack a little anyway, just cover it with the sour cream topping and call it a bonus texture. Nobody at the table will know the difference, and honestly, most of them are just there for the cheesecake, not the aesthetics.