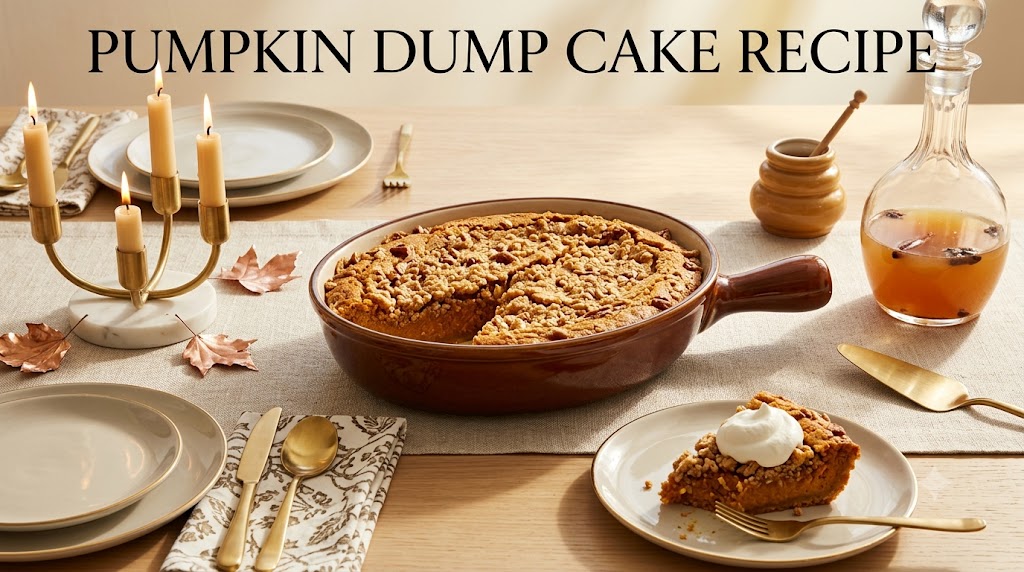
Here is my story about the pumpkin dump cake recipe. Are you interested? Well, my oven timer beeped three times before I even remembered I’d set it, because I was busy arguing with my sister on the phone about whether canned pumpkin actually tastes different from fresh. (It does, a little, but that’s a story for another day.) That distraction is basically how I fell in love with this pumpkin dump cake recipe in the first place — it’s the kind of dessert that forgives you for wandering off. You dump, you bake, you eat. No creaming butter and sugar for ten minutes, no worrying about over-mixing batter, none of that fuss. If you’ve ever burned a “fancy” dessert because you got a phone call at the wrong moment, this one’s got your back.
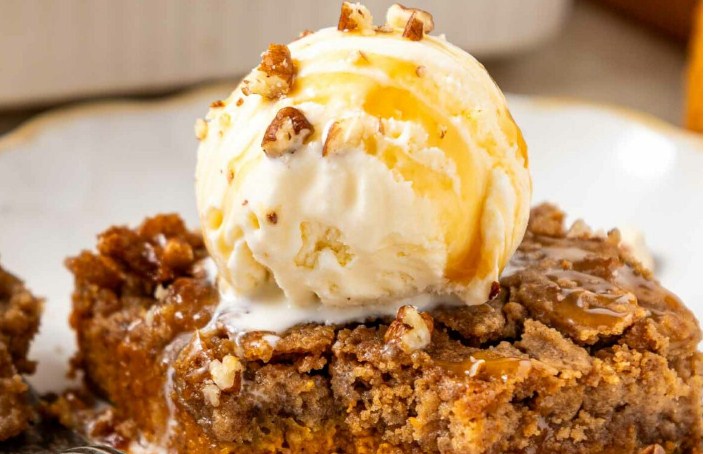
I’ve made this so many times now that I could probably assemble it blindfolded, though I wouldn’t recommend testing that theory with a hot oven nearby. It’s basically pumpkin pie and cake had a baby, and that baby is objectively delicious. The bottom layer tastes like pumpkin pie filling, all custardy and spiced, and the top gets crunchy and buttery like a cobbler crust. Weird combination on paper. Works incredibly well in practice.
Why You’ll Love This Recipe
Honestly? It’s the ratio of effort to payoff. You’re looking at maybe fifteen minutes of prep, most of which is just opening cans and stirring, and then the oven does the heavy lifting. I’ve brought this to two different Thanksgivings and one very confused Fourth of July cookout (long story, someone’s freezer broke and we needed to use up pumpkin puree before it went bad), and it disappeared every single time.
It’s also nearly impossible to mess up, which I say as someone who has absolutely messed up simpler recipes than this. There’s no delicate technique required. You’re not folding egg whites or tempering chocolate. You’re dumping things into a pan in layers, more or less, and letting heat do its thing.
And it feeds a crowd without draining your wallet. A can of pumpkin, a box of cake mix, some butter and spices — that’s not expensive, especially compared to, say, a fancy layer cake that needs three kinds of specialty ingredients you’ll use once and then forget about in the back of your pantry.
Ingredients
- 1 can (15 oz) pumpkin puree — not pumpkin pie filling, that’s a different thing entirely and trust me, it matters
- 1 can (12 oz) evaporated milk
- 3 large eggs
- 1 cup granulated sugar
- 1 teaspoon ground cinnamon
- 1/2 teaspoon ground ginger
- 1/4 teaspoon ground cloves
- 1/2 teaspoon salt
- 1 box (15.25 oz) yellow cake mix
- 1 cup chopped pecans (walnuts work too, or skip if you’ve got a nut allergy in the house)
- 3/4 cup unsalted butter, melted
Equipment Needed
You need a 9×13-inch baking dish, a couple of mixing bowls, a whisk, and measuring cups. That’s genuinely it. No stand mixer required, no special pans. If you’ve got a can opener and an oven, you’re basically set.
Step-by-Step Cooking Instructions
- Preheat your oven to 350°F and lightly grease your 9×13 baking dish. Don’t skip the greasing — I did once, around 9pm on a Wednesday when I was rushing, and spent way too long scraping cake off the corners afterward.
- In a large bowl, whisk together the pumpkin puree, evaporated milk, eggs, sugar, cinnamon, ginger, cloves, and salt until smooth. It should look like thick, spiced orange soup, which sounds unappetizing but tastes wonderful.
- Pour this pumpkin mixture into your prepared baking dish, spreading it into an even layer.
- Sprinkle the dry cake mix evenly over the top of the pumpkin layer. Don’t stir it in — this is the “dump” part of dump cake, and resisting the urge to mix is genuinely half the battle here.
- Scatter the chopped pecans evenly across the top of the cake mix layer.
- Drizzle the melted butter over everything, trying to cover as much of the dry cake mix as you can. Some spots will stay a little dry and powdery before baking, and that’s completely normal.
- Bake for 50 to 55 minutes, until the top is golden brown and slightly crisp, and the center is set (it’ll jiggle just a tiny bit, like set custard, not like liquid).
- Let it cool for at least 20 minutes before serving. It’s tempting to dig in immediately, I know, but the pumpkin layer needs time to firm up or you’ll end up with more of a soupy mess than a sliceable dessert.
Cooking Tips
Use room-temperature eggs if you remember to pull them out ahead of time — they blend into the pumpkin mixture more smoothly. If you forget, and you probably will because who’s thinking about egg temperature on a random Tuesday, just give them a few minutes in a bowl of warm water. Also, check your cake mix box for its exact weight before buying. Some are 15.25 ounces, some are a little different, and it honestly doesn’t make a huge difference either way, but I like to keep things consistent.
One thing I learned the hard way: don’t rush the butter drizzling step. I used to just pour it all in the center and figure it’d spread out on its own in the oven. Turns out that was a mistake — you end up with a greasy middle and dry, powdery edges. Take the extra thirty seconds to drizzle it around evenly.
Substitutions & Variations
You’ve got room to play here. Swap the pecans for walnuts, or leave nuts out entirely for anyone with allergies. Spice cake mix instead of yellow cake mix gives you an even more autumn-forward flavor, if that’s your thing. Some people use a butter pecan cake mix too, which honestly might be my favorite variation, though I go back and forth on it. For the butter, you can use salted instead of unsalted if that’s what’s in your fridge — just maybe cut the added salt in the pumpkin layer down to a pinch. And if you want a little extra warmth, a dash of nutmeg or even a tiny pinch of allspice won’t hurt anything.
What to Serve With It
This is basically begging for a scoop of vanilla ice cream on top, melting slightly into the warm cake. Whipped cream works too, obviously, especially if you’re going for that pumpkin-pie-adjacent vibe. I’ve also served it with a drizzle of caramel sauce when I wanted to feel a little extra, and nobody complained. Coffee on the side is pretty much mandatory in my house, particularly if this is a fall or winter dessert situation, which, let’s be honest, it usually is.
Storage & Reheating
Cover the dish tightly or transfer leftovers to an airtight container, and keep it in the fridge — it’ll last about 4 to 5 days. To reheat, a few seconds in the microwave brings it right back to warm and gooey. You can also freeze individual slices wrapped well in plastic wrap for up to two months, then thaw overnight in the fridge before reheating. I wouldn’t recommend leaving it out on the counter overnight, though, since the pumpkin layer is essentially a custard and custards don’t love room temperature for long stretches.
Cook and Prep Time
Prep time runs about 15 minutes. Bake time is 50 to 55 minutes. Add in that 20-minute cooling period, and you’re looking at roughly an hour and a half from start to first bite, most of which you’re not actively doing anything.
Nutrition Facts (per serving, based on 12 servings)
Calories: 310 | Fat: 16g | Saturated Fat: 6g | Carbohydrates: 38g | Sugar: 24g | Protein: 4g | Sodium: 290mg
Nutrition information is provided as a courtesy and is calculated using standard ingredient data. Actual values may vary depending on the specific brands and quantities used, so please treat these figures as an estimate rather than an exact measurement.
What makes this pumpkin dump cake recipe actually work is the way the two layers cook differently while sitting right on top of each other. The bottom stays moist and custardy because it’s essentially protected under that blanket of cake mix and butter, while the top gets crispy and almost cookie-like from direct oven heat. It’s a happy accident of a technique, honestly, and I don’t think whoever invented dump cakes fully appreciated how clever that layering trick was.
The small change that made the biggest difference for me was switching from margarine to real butter, melted rather than just softened. I used to grab whatever was cheaper without thinking twice. But melted butter spreads more evenly over the cake mix layer, and you get way better coverage — fewer of those dry, chalky spots that never quite bake into anything.
If I were making this again tomorrow, I’d probably toast the pecans first for about five minutes in a dry pan before adding them. I keep meaning to do this every time and then forget in the rush of getting everything into the oven. Toasted nuts add this deeper, nuttier flavor that raw pecans just don’t have, and it’s such a small extra step.
When I’m short on time, I skip the whisking-by-hand step and just dump everything for the pumpkin layer into a blender for about ten seconds. It gets just as smooth, honestly smoother, and it saves me a few minutes of arm work. I also occasionally skip greasing individual ramekins for portioned versions and just do the one big 9×13 dish, because cleanup on a dozen tiny dishes sounds like a nightmare on a weeknight.
FAQ
Can I use fresh pumpkin instead of canned?
You can, but you’ll need to cook it down and drain excess moisture first, or your dessert ends up watery. Canned pumpkin puree is more consistent and honestly just easier for this particular recipe.
Why is my dump cake still gooey in the middle?
It probably needs more time. Every oven runs a little different, so if the middle’s still jiggly after 55 minutes, give it another 5 to 10 minutes and check again.
Can I make this ahead of time?
Yes, and it actually holds up well overnight in the fridge. Just reheat individual portions rather than the whole dish for the best texture.
Is pumpkin dump cake the same as a pumpkin cobbler?
They’re cousins, not twins. Cobblers usually have a fruit filling with a biscuit-like or batter topping stirred together more, while a dump cake keeps its layers more distinct since you don’t mix the dry cake mix in.
Final Thoughts
If you take one thing away from this pumpkin dump cake recipe, let it be this: don’t overthink it. I spent years making complicated pumpkin desserts around the holidays, fussing over pie crusts that never quite cooperated, and this dump cake does half the work while tasting just as good, arguably better in that weird custard-meets-crumble way. It’s forgiving, it’s fast, and it makes your kitchen smell like cinnamon for hours afterward, which is really all I want out of a fall dessert anyway. Give it a try this weekend — worst case, you end up with a slightly imperfect cake that still tastes amazing.