Raspberry White Chocolate Scones Recipe
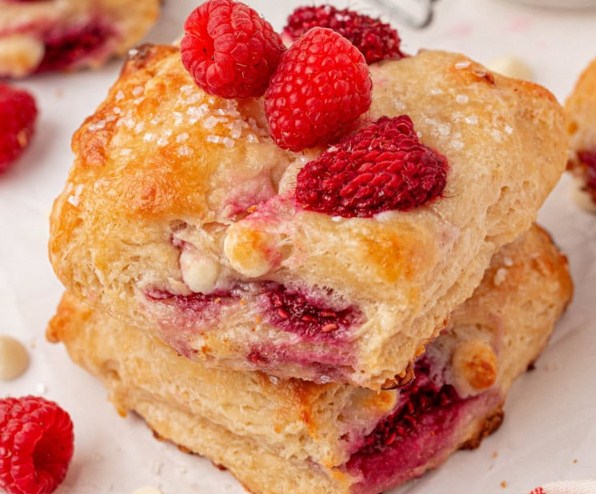
I made these raspberry white chocolate scones for the first time on a rainy Tuesday morning back in March, mostly because I had half a pint of raspberries going soft in my fridge and didn’t want to waste them. My neighbor Diane smelled them from her porch — I’m not exaggerating, she texted me “what are you baking?” before I’d even pulled the tray out — and now she asks for them almost every time she sees my kitchen light on early. That’s kind of become our thing. Anyway, if you’ve never made raspberry white chocolate scones before, you’re in for something that’s tender in the middle, a little crisp on the edges, and just sweet enough without tipping into dessert territory. These aren’t the dry, sad scones you get at a coffee shop that need three sips of latte just to swallow. Trust me, once you get the ratio of butter to flour right, you won’t go back to store-bought.
Why You’ll Love This Recipe
This one’s forgiving, which matters a lot on a Tuesday morning when you’re not exactly at your best. The dough comes together in about fifteen minutes, no stand mixer required, and the raspberries and white chocolate do all the flavor work for you. I also love that these scones freeze well, so you can make a double batch and stash half for whenever you need something warm without starting from scratch. And honestly? They look fancier than the effort they actually take. Serve these at a brunch and people will assume you spent your whole Saturday morning on them. You didn’t. Don’t correct them.
Ingredients
- 2 cups all-purpose flour
- 1/3 cup granulated sugar
- 1 tablespoon baking powder
- 1/4 teaspoon salt
- 1/2 cup cold unsalted butter, cubed
- 3/4 cup fresh raspberries (frozen works too, don’t thaw them)
- 1/2 cup white chocolate chips or chopped white chocolate bar
- 1/2 cup heavy cream, plus a little extra for brushing
- 1 large egg
- 1 teaspoon vanilla extract
- Coarse sugar for topping, optional but I always do it
Equipment Needed
You don’t need anything special here. A large mixing bowl, a pastry cutter or just your fingers (I usually just use my hands, less to wash), a baking sheet, parchment paper, a bench scraper if you have one, and a sharp knife for cutting the dough into wedges. A box grater actually works great for the butter if your kitchen runs warm — I’ll explain that trick more in the tips section.
Step-by-Step Cooking Instructions
- Preheat your oven to 400°F and line a baking sheet with parchment paper.
- In a large bowl, whisk together the flour, sugar, baking powder, and salt.
- Add the cold cubed butter and work it into the flour mixture using your fingers or a pastry cutter until it looks like coarse crumbs with some pea-sized pieces still visible. Don’t overdo this part — some texture is good.
- In a separate small bowl, whisk the egg, heavy cream, and vanilla extract together.
- Pour the wet mixture into the dry ingredients and stir just until it starts to come together. It’ll look shaggy and a little messy. That’s fine.
- Gently fold in the raspberries and white chocolate chips. Go easy here, the raspberries will want to smash and turn everything pink, and honestly a few streaks of pink are kind of pretty, so don’t panic if it happens a little.
- Turn the dough out onto a floured surface and pat it into a circle about 8 inches wide and an inch thick.
- Cut the circle into 8 wedges, like a pizza, and transfer them to your prepared baking sheet, leaving some space between each one.
- Brush the tops with a little extra heavy cream and sprinkle with coarse sugar if you’re using it.
- Bake for 16 to 18 minutes, until the tops are golden and a toothpick comes out clean.
- Let the scones cool on the pan for 5 minutes before moving them to a wire rack. They’re best eaten warm, but they hold up fine once cooled too.
Cooking Tips
Cold butter is non-negotiable here, and I mean genuinely cold, like straight-from-the-freezer cold if your kitchen tends to run warm in summer. I used to just take the butter out of the fridge and cube it right before mixing, figuring that was cold enough. Turns out that was a mistake — the scones spread more than they should have and lost some of that nice flaky layering. Now I freeze the cubed butter for about ten minutes before I even start. Also, resist the urge to overmix once you add the wet ingredients. The dough should look a little rough and uneven. If it looks smooth like bread dough, you’ve gone too far and your scones will end up tough instead of tender.
Substitutions & Variations
You can swap the raspberries for blueberries, blackberries, or even chopped strawberries if that’s what you’ve got sitting around, though strawberries release more moisture so you might need an extra tablespoon or two of flour. Dark chocolate chips work in place of white chocolate if you want something less sweet, and I’ve done a version with lemon zest added to the dough that honestly might be even better than the original, though don’t tell Diane I said that. For a dairy-free version, swap the butter for a solid coconut oil and use full-fat coconut cream instead of heavy cream. Gluten-free folks can use a 1:1 gluten-free flour blend, though the texture ends up slightly more crumbly, which isn’t a bad thing, just different.
What to Serve With It
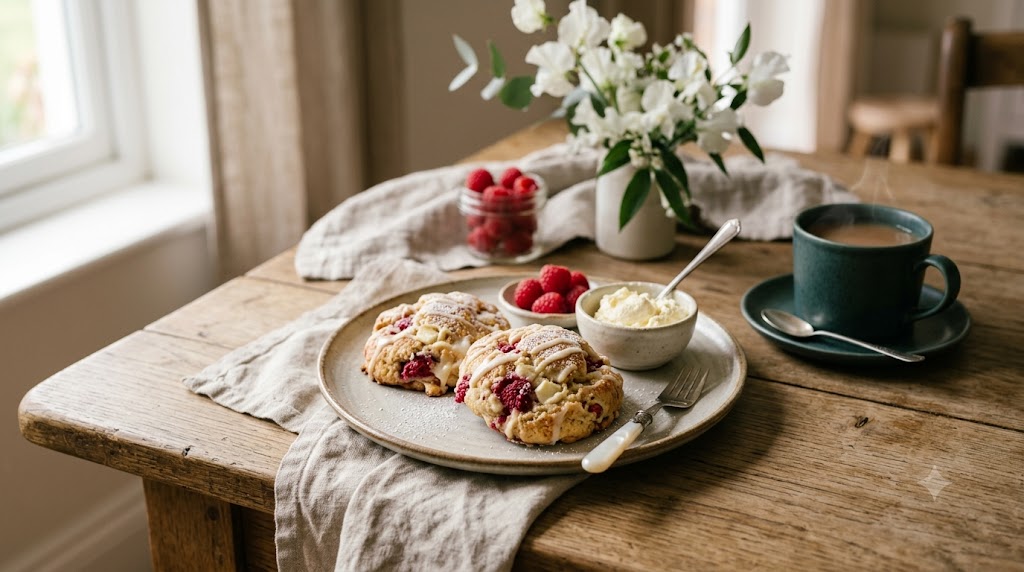
These scones go really well with a simple lemon glaze drizzled on top if you want extra sweetness, or just a pat of salted butter if you’re keeping it classic. Coffee is the obvious pairing, but I actually think a cup of Earl Grey tea does something interesting with the white chocolate flavor that coffee doesn’t quite match. For a full brunch spread, add some scrambled eggs and fresh fruit on the side and you’ve basically got a whole spring morning figured out.
Storage & Reheating
Store leftover scones in an airtight container at room temperature for up to 2 days, or in the fridge for up to 5 days if you want them to last longer. To reheat, pop them in a 300°F oven for about 8 minutes, or microwave for 15 to 20 seconds if you’re in a hurry and don’t care about the texture being perfect. For freezing, wrap unbaked scone wedges individually and freeze them on a tray first, then transfer to a freezer bag. You can bake them straight from frozen, just add 3 to 4 extra minutes to the bake time.
Cook and Prep Time
Prep time: 15 minutes Bake time: 16 to 18 minutes Total time: about 35 minutes Yield: 8 scones
Nutrition Facts (per scone)
Calories: 290 | Fat: 14g | Saturated Fat: 8g | Carbohydrates: 37g | Sugar: 15g | Protein: 5g | Fiber: 1g | Sodium: 210mg
Nutritional information is provided as a courtesy and is calculated using standard ingredient data. Actual values may vary depending on specific brands, substitutions, and portion sizes used. For precise dietary needs, we recommend calculating nutrition with your own ingredients or consulting a registered dietitian.
There’s a reason this dough works better than most scone recipes I’ve tried over the years, and it comes down to keeping everything cold and handling it as little as possible. Scones are basically flaky biscuits with a sweeter attitude, and the same rules apply — the less you touch the dough, the more those little pockets of butter stay intact, and that’s what gives you layers instead of a dense hockey puck. Once I actually understood that, my raspberry white chocolate scones stopped being hit-or-miss and started coming out right every single time.
The small change that made the biggest difference for me was freezing the butter ahead of time instead of just using it cold from the fridge. It sounds like a tiny detail, almost not worth mentioning, but it changed the whole texture of the finished scone. I went from scones that were fine to scones that people actually commented on, which is a pretty big jump for one extra step that takes ten minutes and zero effort.
If I were making this batch again tomorrow, I’d probably use frozen raspberries instead of fresh ones, honestly. Fresh raspberries are lovely, but they’re delicate, and by the time I fold them into the dough half of them have already burst and turned things a bit soupy in spots. Frozen ones, straight from the bag without thawing, hold their shape a lot better through the mixing and cutting process. I didn’t expect that, but there it is.
When I’m short on time, which is most weekday mornings if I’m being honest, I skip brushing the tops with cream and sprinkling coarse sugar. It’s a nice touch for a weekend brunch, but it doesn’t change the flavor of the scone itself, just the crunch on top. I also skip patting the dough into a perfect circle and just kind of shape it into a rough rectangle and cut squares instead. Nobody’s ever complained about a square scone. It’s still the same recipe on the inside.
FAQ
Can I use frozen raspberries straight from the freezer? Yes, and I actually recommend it. Don’t thaw them first, or they’ll bleed color and moisture into the dough before you even get it in the oven.
Why did my scones turn out flat instead of tall? This usually means the butter got too warm before baking, or the dough sat out too long before going in the oven. Try chilling the shaped wedges for 10 minutes in the fridge before baking if your kitchen runs warm.
Can I make the dough ahead of time? Absolutely. You can shape the wedges and refrigerate them overnight, then bake in the morning, adding a couple extra minutes to the bake time since they’ll be starting from cold.
What’s the best white chocolate to use? I like using a chopped white chocolate baking bar over chips, since chips are formulated to hold their shape and don’t melt quite as richly. That said, chips work fine if that’s what you have in the pantry.
Do I need a food processor to make this? Nope. I’ve never used one for this recipe. Your hands or a basic pastry cutter do the job just fine, and honestly, using your hands lets you feel when the butter pieces are the right size.
Final Thoughts
At the end of the day, raspberry white chocolate scones are one of those recipes that reward a little patience with cold ingredients more than they reward fancy technique. I still make a batch most weeks, partly because Diane keeps asking, and partly because there’s something satisfying about pulling a tray of golden, slightly pink-streaked scones out of the oven on a morning when nothing else is going right. Give this recipe a shot, mess around with the fruit if you want, and don’t stress if your first batch isn’t picture-perfect. Mine sure wasn’t. It still tasted great, and that’s really the whole point.