What Does Dragon Fruit Taste Like?

If you’ve ever come across the dragon fruit, then you’ve probably wondered about what it tasted like. So, what does dragon fruit taste like?
In all likelihood, it looks like it’s going to have a delicious taste, does it not? It’s all pink and spiky and the inside is stunning. It’s seen in many pictures and videos from cooks to influencers to your fashionable friends.
So let’s check if a dragon fruit is like any other or not. If it does, then what’s that flavor? This will help determine whether it’s worth purchasing this costly food item or not.
So, what exactly do you think of the taste of dragon fruit?
Dragon fruit has a mild and slightly sweet taste that reminds us of an amalgamation of watermelon and pear and has the texture of a Kiwi.
However, its flavor does not match its stunning appearance. The flavor of the fruit is different in ripeness and when it is not and picking a mature one can be very difficult.
Dragon fruit doesn’t have a distinct flavor in the early stages; this is the reason that most people think it is tasteless.
Ripe dragon fruit is sweet and has a syrupy flavor, while unripe ones taste unappetizing with a little bitterness.
Additionally, it’s difficult to determine the true flavor of the fruit since its taste may differ from person to. The fruit that tastes sweet to one individual may seem very boring to another and the flavor of dragon fruit isn’t always clear.
How do you define dragon fruit?
Dragon fruit gained popularity together with travel writers who began to explore further into Asia as well as expose the West to exotic fruits as well as food items and places.
It’s most likely that you also saw the image of dragon fruit for the first time.
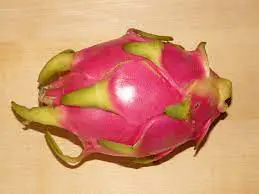
Dragon fruit, more commonly referred to as pitaya or strawberry is an exotic tropical Cactus plant that thrives in desert areas. The fruit is indigenous and is native to Central America, but is commercially grown in Vietnam and the majority in Southeast Asia.
The Dragon Fruit was named as such because of its appearance–which is a bit like an artichoke. The sharp “scales” around the oval-shaped fruit remind us of dragons. The fruit is available in four varieties and colors.
Different Varieties of Dragon Fruit
The majority of people don’t know there are many kinds of dragonfruit. They include:
White-fleshed Pitaya: This variety has red skin and white flesh. It’s the most popular variety that is sold in markets and supermarkets and is most likely what you’ll want to take in. The skin is regarded as red, but it’s actually pink with green bits everywhere. The leaves haven’t yet sprouted and won’t be. If you cut open the flesh, the inside is stunningly white and seeds are visible. There are many varieties of it out there This one is a bit plain.
Red-fleshed Pitaya: If you buy the red-fleshed pitaya, it is easy to will notice that it is similar to the white-fleshed variant. After you cut the pitaya open, you will see an orange or crimson red hue inside. I believe that this variant offers a more complex taste profile when compared to the white variant. There’s a little acidity also. Make sure to be cautious when making it, since the red juice may make your clothes and skin smudge.
Yellow Pitaya: The yellow dragon fruit is extremely difficult to come across in a store or in the market. If you find these, get whatever you can! They are yellow with white flesh and spiky hairs. It is not evident that they exist since they are removed before when you buy it kind of plant, which is the reason that stores don’t have these. This kind of wine has a lot of flavors and has a sweeter, more appealing scent.
What part of the dragon fruit do you eat?
A lot of fruits and vegetables have skin, membranes stalks, leaves, and stalks that aren’t edible. Dragon fruit is one of them. It has skin that is thinner and can be eaten as seeds. It is a good alternative for people who want the most bang for their money.
There aren’t any special tools to cut the dragon fruit. Simply cut the fruit by cutting it in two from bottom to top, and take the pulp out. Each part is edible. If you’d prefer to peel off the skin just like you would peel off the skin of a banana.
Dragon fruit is lovely to behold with its vivid and vibrant shades. Set them on the table for a centerpiece that can be eaten. The skins can be used when they’re taken off as mini-displays to hold desserts and ice cream!
Dragon fruit is richer in fiber than other fruits and is rich in vitamin A, magnesium and calcium. It’s a great choice for vegans as it’s hard to obtain these nutrients without meat or dairy in certain instances.
How do you select and store a dragon fruit?
When picking a dragon fruit ensure that it is firm with some flex when you squeeze it lightly. If you notice that it’s difficult to squeeze, buy it and allow it to mature for a couple of days before letting it ripen. The skin should be clear and vibrant with no stems becoming shriveled or brown spots.
When you have purchased the fruit and taken it home, you may place it on the kitchen counter or table for around three days. Dragon fruit that is cut can stay inside an airtight container stored in the fridge for about 3-4 days.
If you’d prefer to hold off for them to be eaten, place them in a plastic bag and place it in the refrigerator’s vegetable drawer for up to 3 weeks. They must remain in their original state with their skins on up to the point that you’re set to consume them.
How does dragon fruit taste like?
Ways to eat dragon fruit
The majority of people like eating it fresh on its own. Cut your fruit into half, then scoop out the inner parts using the help of a spoon. Add chili powder and black pepper in order to enhance the flavor.
Cut the fruit into small cubes and mix it into your fruit salad. Add it with melon, pineapple and any other fruit you’d like to add.
Make the juice of dragon fruit or include it in a non-dairy smoothie to make nutritious food.
You can make sorbet or fruity Ice cream (made using non-dairy milk products) to make dessert.
You can make jam or jelly, chutney, or preserves using it.
Incorporate fruit into cakes or muffins for an ethereal touch of tropical taste.
How do you tell if a dragon fruit is ready?
It is easy to tell whether a fruit is ripe, or not based on its skin. It means that you won’t be able to judge how the fruit feels in your palm or even a half-sized fruit.
Inside the fruits will not change color when it matures and will remain the same.
Once the skin color is uniform, the wings become yellow and the edges begin browning. The fruit is considered to be overripe when its skin shows dark spots or splotches.
The fruit can be stored in a fridge or store at room temperature.
However, be aware that dragon fruit is a difficult fruit to choose. Farmers take the fruit down a bit early to ensure it doesn’t spoil in transport.
This results in some fruits not being ripe, and therefore not being very delicious.
How to eat Dragon fruit?
Despite its sometimes unappetizing taste, the majority of people use it because of its many health benefits (aside from the fact that it looks cool).
It’s a great source of vitamin C, fiber, and omega-three fats that are contained in the seeds. Due to its nutty flavor, it is usually blended with other fruits to make frozen smoothies or bowls.
Here’s an easy way to devour this dragon fruit. Slice the fruit lengthwise or crosswise and eat its flesh with spoons. It is also possible to cut the fruit into quarters, and then peel off its skin starting at the sharp edge, in case you wish to remove the flesh easily.
Choose a fruit that is ripe It should have evenly colored skin. This is deep pink, red or yellow.
Utilizing a knife, cut the fruit into half, and cut straight across it.
Remove the outer skin, then slice the flesh or make use of a spoon to eat it.
The fruit can slide down a bit on the plate or into your hands, similar to the kiwi that has been peeled. Be careful, especially when your knife has sharp edges.
When you eat dragon fruit in its natural state, you’ll get to taste the full flavor without any other ingredients. However, if you feel that it requires an extra boost, here are a few suggestions.
What can be added to dragon fruit?
The fruit is easy for any recipe and can be served with other dishes in a balanced meal or eaten on its own.
It’s possible to chop the fruit into small pieces and eat them as is. Many people say that this isn’t the ideal way to eat fruit because the bland ones aren’t the best.
Cut the dragon fruit into smaller pieces and enjoy the fruit with chopped nuts, along with Greek yogurt. A drizzle of honey could be beneficial too.
Include chopped dragon fruit in salads, whether it’s the form of a salad or fruit salad is entirely up to you
Add chunks of frozen dragon fruit into smoothies to make an ice cream-like bowl similar to soft-serve cream.
Health benefits of dragon fruit
It’s evident that when you ask people what they enjoy more about the dragon fruit they will not necessarily respond that it tastes delicious.
Dragon fruit is delicious If you choose an excellent one. However, what people focus on is the health benefits of the fruit, which is one of the main reasons to eat dragon fruits.
Here are a few of the top reasons to eat dragon fruit, in addition to the flavor.
-
Dragon fruit is excellent for skincare
Because of its levels of antioxidants, the fruit can be an all-natural treatment for beauty. For instance, people from Southeast Asia believe making a paste out of pitahaya, and then apply it on their face can help them look older for a longer time. The paste can also be great for treating acne and sunburns.
-
Aids in the fight against chronic illness
Dragon fruit is abundant in antioxidants, which neutralize free radicals which cause chronic illness, thereby protecting cells from injury and inflammation. According to research, antioxidants could stop chronic diseases like arthritis, cancer and heart disease, as well as diabetes.
Here are a few of the antioxidants in the dragon fruit:
Betalains can combat the effects of oxidative stress, as well as suppressing cancer cells.
Vitamin C: Consuming a high amount of vitamin C can reduce the risk of cancers of the head and neck.
Carotenoids: Dragon fruit’s color is derived from Beta-Carotene and Lycopene plant pigments. The high carotenoid-content of diets helps protect against cancer and heart disease.
-
Magnesium-rich source
Contrary to other fruits, dragon fruits contain an increased amount of magnesium. Research has shown that magnesium is crucial in the daily life of people as well as in other foods like cocoa powder, nuts and avocado, to mention a few.
-
Dragon fruit promotes a healthy gut
In the gut, there are billions of different microorganisms that include bad and good bacteria. These microorganisms could cause asthma and heart diseases when there is a serious imbalance. Dragon fruit is thought to be an effective treatment for this because it is able to regulate the balance.
The fruit is rich in probiotics that have the potential of helping balance microorganisms. If you consume probiotics regularly they will help reduce digestive tract infections as well as diarrhea.
-
Strengthens the immunity system
Dragon fruit is rich in carotenoids and Vitamin C that boosts your immune system. They protect white blood cells from damage.
-
Dragon fruit increases the iron level
As with other fruits such as apples, fresh dragon fruits are an excellent iron supplement. Iron is a vital component for the distribution and transportation of oxygen throughout the body.
It also assists to break down food in order to give energy. If you’re suffering from a low amount of iron, the dragon fruit is a great option for you.
The fruit has around 4 percent of the recommended daily intake of iron in a single serving. Furthermore, the fruit contains an abundance of vitamin C for the absorption of iron to an excellent level.
Side effects of dragon fruits
In general, dragon fruit appears to be safe. However, this isn’t true for all. Some individuals develop allergic reactions to the fruit after eating it however, these are very rare instances.
According to research, there are only two cases reported of an allergic reaction to the fruit.
Wrapping up
What does dragon fruit taste like?
Dragon fruit is often very tasteless, particularly when you discover an unripe fruit.
If you can discover a mature dragon fruit, it’s quite sweet and refreshing. Similar to watermelon, kiwi and pear, the amount of water is high and it’s a delicious fruit.
Dragon fruit is vibrantly colored and is a great source of vital body nutrients. Even if you happen to find a dull one, it is going to taste well in smoothies.
The idea of eating dragon fruit might be to be a bit scary for some. It’s so difficult to prepare and cook which can turn off a lot of people who are new to the concept. A lot of people love it once they’ve gotten past the look.
Dragon fruit brings lots of enjoyment to food and is a beautiful addition to the table. Its refreshingly mild tropical taste is similar to Kiwi, but it’s less invigorating. It’s a fantastic beginner fruit because it’s easy to open and you can eat without any difficulty.