How long does soup last in the fridge?

How long does soup last in the fridge?

How long does soup last in the fridge?

How long does soup last in the fridge?

First to answer your question.  It is best to make use of soups that are stored in refrigerators within 3-4 days to get the best quality, and then within 6 months when stored in the freezer.

Now coming back to the whole topic for discussion.  In the beginning food safety is a major concern when it comes down to the storage of soup. Why is that? If you are making a huge soup, cooks prepare the soup, then turn off the heat so that it cools down or set them on their counters to let it cool. Then they do not think about it until the next day, when they find it sitting on the counter. Have been there, done that.

So, is the soup still tasty and edible? The answer is a big NO. It’s been out for way too long, and it’s now entered the danger zone of bacteria.

First thing to keep in mind when you take food from the fridge is to record the time. The general rule is to not exceed two hours, or one hour in the event of temperatures of 90 degrees or higher.

If you let it sit longer, you could be exposing yourself for the growth of bacteria and their multiplicative effects especially in the case of the poultry and meats. If you leave it for more than two hours,  you’ve entered the bacterial-growth danger zone.

However, it’s not a good idea make a huge pot of boiling hot steaming soup into the refrigerator, as there is the possibility of increasing the temperature inside the refrigerator.

After you’ve cooked a large pot of soup and you’re prepared to keep it in storage pour it into smaller containers to ensure it can cool quickly. It’s fine to store soup that’s still warm in the refrigerator. If you do not have smaller containers, add water and ice in the bowl of a large size and place the soup bowl inside it. The cold ice bath can rapidly cool down.

In terms of storage for the long term, many soups can be put in freezing, with the exception of cream-based soups that can be a bit difficult to separate. Beware when storing soups that have noodles, it is possible that noodles may absorb broth. When it is frozen the noodles may become soft.

To extend the shelf life of soup cooked with vegetables to ensure safety and quality.  Refrigerate the soup immediately in airtight, covered containers. When properly stored,  cooked vegetable soup can last 3 up to 4-days in the fridge.

Also what to do when your soup is getting old? Try smelling the soup: When you take a whiff of the soup, it will emit a pleasant scent. If the soup smells unpleasant or unpleasant, it’s likely to be damaged and should be thrown away. If the soup smells foul or is sour, you shouldn’t ever taste it in order to confirm. Food that has been spoiled can make you sick.

So, can I consume soup that’s been stored in the fridge for one week?

You should keep fridge at 2 C or 35.6 F if you want to keep the soup for up to a week. There may be some more days, in a clean airtight container, but make sure to check it for smell before heating it. A strong acid smell is a definite sign of bacterial activity.

How do you keep soup in the fridge?

If stored in the fridge, your stew can remain for three to four days. To make it quick and simple to reheat portions, place single serving portions in separate containers. For larger meals, keep portions of soup inside larger containers that can be resealed, and be sure to warm and chill the soup appropriately before serving and storing.

Can you eat week-old soup?

Cook once, and then eat safe during the week. The majority of leftovers, like cooked pork, beef seafood, chicken or seafood chili pizza, soups and stews, as well as casseroles can be stored for up to 4 days.

How can you tell whether chicken soup is bad?

Although it’s not a perfect test, your senses are generally the best way to detect whether your chicken broth has become stale. If your chicken broth is deteriorating, the delicious aroma is replaced by an unpleasant smell. It is possible to see residue at the lower part of the container. Also, the chicken soup may appear cloudy.

Do the boiling of soup kill bacteria?

Active bacteria can be killed by holding the liquid for one minute at 150 degrees or more in temperature. Botulism toxin gets activated after 10 minutes of boiling. However, heating the contaminated stock to serving temperature will not destroy the active bacteria and toxic substances, and it can cause illness to people.

How long can thawed soup be stored in the fridge?

How long does thawed soup last? If you thawed   your soup that you have frozen in the refrigerator for the right period of time (about 24-hours), the soup will be good to store within the fridge for up and a half to four weeks. If you’ve defrosted the soup with a speedier method, discard the food items you don’t consume.

How to fix a Sour Soup?

1 – Check your ingredients. Seriously, you need to do that.

2- Think about your onions and garlic.

4 – Add fruit.

5 – Add dairy.

6- Baking soda.

7 – Sweeten.

8 -Mix it up.

How long can soup stay out before it turns bad?

The U.S. Department of Agriculture Food Safety and Inspection Service advises to throw out food kept at temperatures of longer than two hours and then after an hour if the temperature in the room is at or above 90 degrees.

Is it okay to consume soup that has been left over the night?

Soup that was left out over night is it still safe to eat? According to the expert McGee interviewed the soup or stock that is left to cool over night, simmered for 10 minutes, and refrigerated properly in the morning , is safe to consume since it doesn’t stay cool long enough to allow the bacteria to multiply and germinate at dangerous rates.

How do I store soup in a safe manner?

The most crucial factor to safe cooling and heating food is speed. It is simpler to accomplish this when working with smaller amounts. The larger the volume of soup is, the more time it takes to cool down and that’s where the danger of spoilage. Professional kitchens make use of an ice bath. Place an ice bath in a larger vessel and fill it up with the ice bath to get it to the same degree that the soup. Mix it up from time to time while it cools to increase the speed of things. When it’s at room temperature, the soup may be separated, covered and then refrigerated or frozen. Do not cover it until that point because it could delay the cooling process.

How do I reheat soup?

It is simple to heat soup whether on the stove as well as within the microwave. Defrosting must always be done in the refrigerator, or in the microwave, following the recommended time intervals. Do not cook a dish more than one time. Simply take what you’ll consume and keep the rest of it chilled.

One of the most important rules to keep in mind is that when you’re heating a chicken or meat broth, or clear soup you should bring it to the point of boiling for three minutes to ensure that you are eliminating any harmful bacteria growth.

They are in some ways one way, the most flexible foods in terms of preservation and reuse, as they can be cooked to a boil, without the possibility of scorching.

This is more difficult with soups that have been made with cream or flour or mostly seafood-based; they could be over-cooked, and end up being too thick, salty, or cloudy.

If you’re sure that the soup won’t have a distinct smell, or taste “off” after you remove it from the refrigerator, you can bring it to a boil and then reduce the temperature and stir it as it simmers slowly for three additional minutes.

What are the advantages of homemade soup?

The advantages of making soup at home are numerous. You can control the list of ingredients, using only what you love and removing what you don’t like. Similarly, you can choose the items you know to be good for you. It’s also more affordable than purchasing ready-made soup.

Imagine how content that you’ll be after eating the entire bowl and put it aside in the fridge to use some time later on in the day or even in the freezer for the next day in the event that you require some more again.

Wrapping up

How long does soup last in the fridge?

Hopefully, I have been able to give a satisfactory answer to your question, how long does soup last in the fridge? Equipped with such knowledge, I am sure you would be able to deal with your homemade soup much better in future so that you don’t get into health problems because of eating spoiled soup.

What Does Sake Taste Like?

What Does Sake Taste Like?

Sake is a alcoholic drink that is made from fermented rice. It has been consumed with passion by Japanese for over 2500 years. It is referred to by the name of “rice wine” and has similarities to alcohol, beer and wine. If you’re thinking of drinking this booze to the first time, you’re probably thinking about what it might taste like? We’ll be able to answer the question, and also provide other important questions like how to drink it, how to store it, and the ways that different brands differ in their flavor. When you’re done with this article, you’ll surely become a connoisseur of sake.

What does sake taste like?

Sake is a lightly sweet and clean tasting drink that has a balanced blend of savory and astringent flavors. It has a sweet flavor, with a fruity aroma that is not as strong as that of wine. It’s a light drink that is smooth and unassuming, sake is gentler in its taste than spirits, and doesn’t possess the strong, malty flavor that beer packs.

The aftertaste of sake can last for a while, even though there’s no persistent after-taste.

The most important component, Koji, offers an additional, savory flavor that could be described as a mix of mushrooms and potato. Sake’s mild aroma will fade within a few minutes after it is poured into your glass.

Sake is a full, complete body because of the its high concentration of glutamic acid. A typical bottle of sake contains more than twice the acidity of wine. This makes it richer and adds umami to the taste of the beverage.

Most sake producers will provide their products with a “score” indicating its level of dryness or sweetness. This is also known as nihonshudo, which is a measurement of density. It will usually appear at the bottom of the bottle.

A higher Nihonshudo value could produce a more dry tasting sake with a low density.

A lower nihonshudo level can result in a more sweet tasting, higher-density sake

What are the differences between different brands in flavor?

Sake type: How does it taste?

Honjozo: light, smooth-flavored and easy to drink.

Junmai:  a strong flavor with a moderately acidic.

Daiginjo: premium sake, rich and light.

Ginjo: Complex, fragrant, refreshing and light.

Shiboritate: fruity, wild, like white wine.

Futsushu: Rice flavor with earthy notes.

Nigori : Sweet, creamy taste.

How do polishing and junmai impact the flavor of the saki?

Polishing

In the beginning of making sake it is common for rice to be polished in order to assist in exposing the starchy inner. How does this affect you? The more rice gets polished,  the better becomes the quality level. It is usually (but it is not necessarily) connected with a higher-quality product. When you purchase sake at the supermarket or at eating out, look at the label to see the polished percentage. The best sakes will be polished between 50 and 70 percent.

Junmai

Quality of ingredients plays a crucial aspect in the sake’s quality and especially rice. Junmai is a term that means pure rice and is sought-after by those who drink sake. A bottle that declares that it is junmai indicates that there are no additional additives or alcohol has been made to make the sake. all that is required are rice yeast, Koji and water.

If we want to determine a similarity to sake, most would say that wine is similar to sake. But, remember that they have some significant distinctions:

Sake’s rich amino acid enhances its umami flavor, making it a perfect option to pair with a variety of food items. Sweet, tart, and salty tastes of Eastern dishes, along with numerous Western foods,  are very well paired with sake.

People who love the smell of a quality bottle will initially be disappointed by the lack of aroma from sake. Instead of a strong and aromatic aroma, it provides the subtle aroma of a fruity, nutty scent. The first sakes were made without any aroma, and it was only in late in 1900s that scents began to be a major feature.

Sake has a milder flavor than wine. It also isn’t a source of tannins which result in a more acidic product.

The alcohol content of sake that is undiluted is between 14-20%. just a bit more than wine which typically falls within the 12-15% range.

The comparison between sake and soju

Sake is often described as tasting like soju, a Korean made clear, distilled beverage. While there are certain similarities, it has distinct differences.

As well as rice, soju can also be constructed from barley and sweet potatoes which gives it a stronger scent than sake.

Soju contains more alcohol between 16 and 53 percent.

Soju is an South Korean beverage, sake is Japanese.

A distillation process is utilized to create soju, whereas sake is made.

How does sake get made?

It took many centuries to make sake. It took centuries to perfect the process.

Rice that is short grain is polished to the point that it becomes white. This is where the quality of the ingredients (rice and the water) is a major factor in the final result.

Mix water, polished rice yeast, and koji mold. let the mixture ferment. In this process, the starch in is reacted with Koji to create sugar. The yeast and sugar are combined to create alcohol.

The rice’s shells are removed to enhance the sweetness, and the liquid is then filtered, pasteurized and finally, it is bottled.

The distinctive process and the ingredients produce the drink that is a punchy drink with undiluted sake that ranges from 14 to 20 percent based on the type.

What sake brands are the most popular?

There are more than 1700 different sake brands currently on the market with approximately 10,000 different items. If you’re looking to find a great introduction to sake, then you should look into Dassai, Kokuryu, Juyondai or Otokoyama and all the other premium brands.

How do you taste sake like the pros?

Though this subject is heatedly debated whether  Sake can be consumed chilled or hot. But, a high-end sake bottle should be consumed cold in order not to alter the flavor or smell.

Testing the flavor and aroma of Sake

The process of tasting sake is quite like wine.

It is recommended to examine whether the color of your drink for the quality. It must be clear. Any brownish hue is an indication of oxidation and is not a good sign.

Inhale the sake by rubbing your nose on the cup. There will be subtle scents that can be from rice that has been fermented, to sweet, floral or fruity. Inhaling the aroma, sip a tiny amount while allowing the liquid to flow over the entire surface of your mouth. By sipping gently, you can aid your taste receptors to detect all flavors. Breathe through your nose as you sip.

Choosing a cup

Sake connoisseurs suggest using glass for top-quality brands because glass is a neutral material and doesn’t affect the flavor of the drink. To get a more traditional look, choose an Ochoko. One variant that is available for this type of cup the Janome Choko which is a simple white cup with two blue lines etched at the bottom. This design allows the drinker to determine the color and the transparency of the drink.

You’ll notice that a Sake cup is small. This is due to Japanese customs. In Japan it’s considered unacceptable to pour the drink you’ve made yourself. On the other hand, it’s an honor to pour a drink to them. With smaller cups, there’s more chance to serve drinks to others and you feel more honored.

Pouring etiquette

In a casual atmosphere it’s all about the atmosphere, but in Japan it is still recommended to observe the tradition of pouring drinks for others and then letting them pour your drink. This is how it’s done so just go with it.

In formal settings, a serving flask (tokkuri) is used to pour sake in smaller glasses (ochoko). If you’re the one to pour, ensure that you hold the tokkuri using both hands. This is considered courteous. If you’re getting the drink by someone else, raise your cup off of the table using one hand, and then support the bottom of the cup with the second hand.

How long can sake be good for?

Sake lasts twelve to 24 months when stored in the refrigerator but it is ideal to drink the bottle within one year after the date of opening. A bottle that is not opened can be stored until 10 years. Find out more about how you can keep sake in storage here.

Wrapping up

To ask “how does sake taste like?” is similar to asking about the taste of wine. It’s a broad topic that is hard to answer in a single sentence. Different brands, the use of ingredients, and manufacturing methods produce a variety of aromas and flavors. Sake is moderately sweet, refreshing tasting drink with a balanced blend of astringent and sweet flavor. And when you actually taste it, you would know what I mean!

Sake isn’t as strong an alcohol in the same way that clear spirits such as whiskey or vodka do. But it’s more powerful than most wines and beer, and can cause a lot of pain if you get carried away.

What Does White Tea Taste Like?

What Does White Tea Taste Like?

What Does White TeWhat Does White Tea Taste Like?a Taste Like?

What does white tea taste like? If you are looking for an honest answer, you should go through this post carefully since it has all the details about white tea and its health benefits. Read on.

There is a large variety of wonderful blends of tea, and surprisingly, each one of them has a distinct aroma, flavor and color. You might be familiar with the strong flavor and dark amber color in black tea, or the light mildly grassy flavor in green teas, or may be the spicy and nutty Chai tea which is one of the most common beverages.

What does white tea taste like? What makes it different from other varieties of tea?

Maybe you’re acquainted with the white tea. In that the case, a portion of this post could be familiar territory for you. If you’re new to white tea, I’m glad you’re here! It’s a treat. We’ll discuss how it’s made, its tasting profile, brewing techniques.

What is White Tea?

White tea is made from the same plant that makes green and black tea. The distinction in the tea is due to the method in which this tea gets processed. White tea is the least delicate and slow processing of three blends. Tea leaves are picked while they are still young, and they have white, downy hair. The downy hair on the leaf makes the tea have its distinctive white hue and is maintained throughout the process. Through various stages of drying with air the tea is processed and packaged to enjoy.

What Does White Tea Taste Like?

White tea has a delicate flavor that is slightly sweet to the palate. While some may consider green tea to be a bit grassy in its flavor, white tea is an effervescent tea and doesn’t suffer from this. The mild flavor is why it often is offered in fruity and floral blends. In most cases, you’ll find fruits as well as floral ingredients like honeydew, apricot grape, lavender and grape.

This makes it an excellent match for almost all foods because your dessert and your tea won’t be in competition with each other! There are some ideas for tea pairings in this article, so be sure to keep reading.

How to Brew White Tea

Since white tea is delicate, it’s easy to over-brew it and burn the leaves. This could cause a bitter tea that you’ll eventually dump into the garbage, which is an unwelcome sight for everyone! To avoid over-brewing, be sure you don’t pour boiling hot water onto the leaf. After the water has been boiled, let the kettle to rest for about a minute or so for the water to cool down to a more appropriate temperatures (around 85F), or you can employ a kettle that has a variable temperature to lower the temperature. This will ensure that you will get the best taste from your tea.

In general, white tea is best enjoyed with no sugar or milk However, if you like your tea a bit more sweet, consider adding the smallest amount of honey to your tea. Plum Deluxe has Honey Sticks that provide the right sweetness for an enormous cup of tea. There’s no sticky mess .Just sweet tea!

Like most teas, the taste of white tea may be affected by the way you keep it. Keep your tea in bags or containers that are airtight. The zip lock bags utilized in the company Plum Deluxe to store their tea can ensure that your tea stays fresher longer. If you would like to store your loose tea in a container, make sure that it is airtight. Place your tea inside a dry, cool place. This will allow you to enjoy the great flavor for a long time.

Our Favorite White Tea Blends

Lavender Daydream – A ideal tea party mix or other occasions. Try pairing it with apricot and lavender scones to experience the full experience of lavender! The floral and fruity notes can be enjoyed with any dish. Even though the tea isn’t heavily caffeinated, the scent of lavender in it helps to relax and relaxation, making this to be your new favorite tea when you drink your tea at night.

Candlelight Blend: This is not a must. You need to sip this under the light of a candle. However, you can certainly wish to. The blend takes its beautiful name from the essence of grapes contained in the blend. These are the same grapes that are used in the making of champagne. The subtle grape and orange notes in the blend permit that the tea’s white flavor to shine as the star. Enjoy and relax!

Tea Break White Tea: it is a wonderful aroma with honeydew and tangerine aromas. It is ideal for any time during the day.

Afternoon High Tea: this tea has been made with the help of traditional premium teas that hail from Europe and is a true delight for your taste buds. Peach and Pear are delicate on the palate and make the perfect choice for the occasions where you’re hosting. Like Lavender Daydream, this blend is great with the standard afternoon tea menu.

White Tea and Food Pairings

Scones are the staple of many tea parties due to the reason that they have a delicate, soft texture with ample servings of cream and jam are popular with the crowd. The mild taste of the scone ensures that whatever tea you drink with it, it won’t be look odd or out-of-place. For something unique you can try one of the Apricot Lavender scones. Scones with lavender might appear odd but believe me, it’s fantastic!

Sandwiches are delicious, versatile and simple to prepare. Combine them with white tea for a classy and tasty afternoon tea. If you’re looking to do something different from your sandwich fillings, then try these three different twists on classic sandwiches.

Jammy Dodgers are English biscuits, which are the ideal accompaniment to a cup of tea made from white leaves. The sweet and buttery cookies and jam compliment the delicate sweet flavor of tea without taking away the taste. Make it ahead of time and serve out when friends are rushing around for a cup of tea or whenever you want an indulgence yourself.

This is it. All you need to be aware of while drinking white tea. Enjoy your experience and don’t be scared by the lack of taste of the blend. After you’ve master these simple steps, you could have found your new favorite tea the tea.

When you’re looking at a White Tea, you must look for a tea that is delicate, and loose leaf tea when possible. Take note that most white teas do not appear white. Both the tea leaves and the tea that is brewed will appear white.

You should instead look at the remaining fine white hairs that are on the tiny leaves of buds. In some teas such as Baihao, Yinzhen, Baihao, and Yinzhen only the buds of the tea plant are used and you may notice fine hairs floating in the tea when you sip it. The hairs are fine for us humans, and nothing harmful could occur.

Another thing to keep an eye on for is the hue of the beverage itself. Most often, it’s light, pale yellow hue. It may be floral, it may appear like honey, and might be slightly vegetal but not so much as to make it unpleasant.

For instance, this one is called a silver needle tea. The tea has larger size than other white teas as well as silver needles, which are amongst the most desirable varieties of white tea that are you can purchase.

Make sure to use an infuser when you prepare your loose leaf tea, or strain it if you are making it in the form of a pot. Always make sure that the leaves have ample the space they need to stretch and then unfurl in order to release their full flavor.

Brewing the white tea in the right way

While making white tea, it is important to be aware of a couple of points. First, tea that is white in its brewing process is delicate tea, and it requires cooler water and green or black tea.

It requires water at 75 c/167 F and an extended steeping time. It is possible to start with one full minute and then test the tea using one teaspoon. Let the tea sit for a while, if you’re not satisfied with it. You can taste the tea every thirty seconds, or as often, until you have found the perfect time to brew.

In some instances, you might have to let the tea in for as long as 10 minutes, especially if it’s an extremely delicate tea. In any case, it is recommended to make tea with white tea at a low temperature for a longer duration than an elevated temperature with a shorter amount of time.

White tea is extremely delicate, and it is possible to risk getting it scorched when you put it in a hot water source to make black tea, as an instance. Because white tea is able to withstand the longer time to brew it is also possible to use it to make Iced tea using the cold method of brewing.

It is possible to reuse tea leaves, absolutely, but be aware that you’ll require a more lengthy infusion time and slightly hotter water. The resultant infusion will be less potent than the first and, in certain instances, it may not be worth the effort. However, you can still test it out and see if prefer the second one.

However, if the tea is hot-brewed it is advisable to warm up your tea before pouring it into the cup. This is because white tea can taste different when it is placed in a cold tea cup due to the fact that it reduces the temperature of the tea.

Be aware it is true that the white variety is more floppy and has a lighter the texture than teas of other kinds. This means that you may have to use much more than you think initially for a cup of tea.

Start by using 2 tablespoons of tea per 8 ounces/226ml of water as your starting point and then alter it depending on how you enjoy your tea.

White tea is intended to be enjoyed as a drink on the natural way, with no flavorings or sweeteners. If you want, you can add some honey to make an easy, delicious and healthful cup of white tea.

Health Benefits of White Tea

It is a popular choice for its health benefits way before modern science white tea has been extensively used as a component of Traditional Chinese Medicine.
Recent research in the field of science on white tea and its components have revealed an array in health advantages. Let’s examine the top ten most researched benefits of white tea that are related to:

1. Antioxidant Effect

Antioxidants help shield against the negative consequences of free radicals, damaging molecules produced by an oxidative stress within the body that are linked to the negative consequences of aging as well as many diseases, including Alzheimer’s disease, cancer and diabetes.

Polyphenols, particularly catechins found in tea, have been proven to possess antioxidant properties in our bodies. Recent research has revealed that white tea has the strongest “radical-scavenging” effect of a variety different varieties of tea. This antioxidant action is the basis for several other beneficial effects of drinking tea with white.

2. Weight Loss
The most well-known benefits of white tea is the fact that it can aid in weight loss. A study revealed humans with fat cells treated using extracts of white tea reduced the development of new fat cells, and also enhanced the process of breaking down fat that was already present.

White tea is also a great aid to healthy weight loss by providing an alternative that is calorie-free to drinks with high sugar and fat content.

3. Immune function
Science has previously praised green tea’s capacity to help the immune system to fight illnesses. Recent research has shown the white variety of tea to be more effective, with antibacterial, antiviral, and antifungal benefits..

White tea also helps help protect immune cells. Langerhans cells, which are a crucial component in the body’s immune system the detection of cancerous by-products extremely sensitive to sun-induced damage. Researchers studied how skin by white tea extracts responded to light, and discovered in the end that white tea could restore Langerhans cells’ immune function.

4. Heart
Research indicates that one of the most beneficial white tea benefits is the fact that it can help improve heart health. Catechins found in tea have been shown to lower the chance of dying due to heart disease. Additional research in this area discovered that tea catechins decrease absorption of cholesterol ‘bad’ from the intestine while increasing the desirable (high-density lipoprotein) cholesterol levels, which improves the health of the cardiovascular system.

5. Cancer
The mutations in DNA are often the primary step in the process of becoming cancer. Scientists are able to determine if the compound is able to prevent the mutations and have tried white tea, and found positive results when using green tea. White tea was discovered to be more efficient in preventing DNA mutations and researchers suggested that it may be a good option to protect in the fight against cancer.

6. Skin
White tea consumption could provide anti-aging effects on the skin. It has been demonstrated to block enzymes that breakdown collagen as well as elastin (the chemical components of our skin that help to keep it elastic). The antioxidant properties of the tea also help keep skin protected from damage caused by daily wear and tear.

7. Diabetes
Research indicates that drinking white tea may help relieve the some of the symptoms associated with diabetes like polydipsia, elevated plasma glucose levels and decreased insulin production.

8. Energy/Alertness
We’re all aware it is an stimulant which can boost your mood (or keep you going in the event of excessive use!). Research supports this, showing the positive cognitive benefits of a small amount of caffeine, like increased mood and faster reaction times.

In recent years, research has been conducted on the effects of caffeine as well as another substance that is found in tea leaves called L-theanine. Together, the two have been proven to increase focus and attention.

9. Inflammation
Animal studies have proven the effectiveness of tea, particularly white tea, in reducing inflammation 18. Researchers have observed that consistently taking tea catechins may boost muscle recovery and they believe that this is due to their antioxidant properties.

10. Teeth
White tea consumption can help improve oral health. Along with catechins, white tea also has fluoride and tannins. Catechins fight off the bacteria that create plaque (Streptococcus mutans) and tannins guard against the damaging effects of enzymes on down teeth after 20. Fluoride is believed as a powerful tool in fighting tooth decay. This is the reason it is widely used for dental toothpaste.

The evidence for the benefits of drinking white tea increases with each study that is published in scientific journals however, the effect of drinking tea made from white tea are currently under-studied. It is essential to conduct more high-quality research to provide definitive evidence.

Side Effects of White Tea

With all the amazing advantages of white tea it’s possible to wonder whether there’s a downside. The most frequent questions about the effects of white tea revolve around the calories and caffeine amount of tea. Let’s look at the following:

Caffeine Content of White Tea

Tea leaves, which includes the ones used in white tea all have a natural source of caffeine. But the amount of caffeine in the white tea is much lower than in other teas generally, it is just a fraction the amount found in coffee. What amount of caffeine is you get in your tea will be contingent on how you prepare it. To ensure that the leaves do not get scorched and to preserve the delicate taste that white tea has, you should use water that is a couple of degrees below boiling, and then let it brew for about a minute. These methods have the additional advantage of not releasing as much caffeine into the leaves.

As we’ve mentioned, even small amounts of caffeine may provide beneficial effects to your body and mind. White tea has a small amount of caffeine that the majority of people can consume just a couple of cups per day without worrying about its negative effects.

How do you drink white tea?

For drinking the white variety of tea, require an appliance or kettle to warm the water. You’ll also need a teabag that can hold the leaves in place or a strainer for pouring hot water over leaf tea. Whatever method you choose to prepare the tea leaves, you’ll need to soak them in water that is just below boiling temperature for 3 to 5 minutes. Then, you’ll be able to remove them.

The tea can be consumed in its entirety, which is a great way to experience the delicate flavor of the tea. You can include stevia or sugar and some non-dairy milk as you would with the black tea.

You can also drink it with ice. In this scenario it is possible to refrigerate the cooled-down white tea, and then add cubes of ice. You can also cold-brew by adding dried tea leaves into cold water, and letting them sit for between 12 and 36 hours. This process produces the most clean tasting Iced tea.

Can you drink white tea at night?

A lot of people drink white tea throughout the through the day and into the night because white tea is lower in caffeine than black and green teas.

But, there’s some caffeine in tea that is white (unless you’re told by your supplier that it’s not decaffeinated). If you’re allergic to the presence of caffeine, drinking tea in the evening isn’t recommended.

Wrapping up

What does white tea taste like? Hope you have already got an answer to your question and other related queries. White tea has some resemblances with black tea, and with green tea, but it’s mild, slightly sweet and floral when compared. Drink iced or hot white tea. You can even add fresh fruits to a white tea that has been brewed cold for a delicious summer snack. Now enjoy your white tea everyday for the taste as well as health benefits!


Is Lemon a Fruit Or a Vegetable?

Is Lemon a Fruit Or a Vegetable?

Is Lemon A Fruit?

Is Lemon a Fruit Or a Vegetable?

Is lemon a fruit or a vegetable? This is often debated by people and many are confused about it. But don’t fret, you’re certainly not the only one. There are many people who get perplexed when they look at lemons in the vegetable section of a supermarket and then find it in the section of fruits at a different store.

Then there’s the entire botanical vs. culinary distinction of vegetables and fruits that has sparked many heated debates in families. So let’s put all this to rest and determine the difference between lemons and vegetables.

Is Lemon a Fruit Or a Vegetable?

A lemon is one of the varieties of citrus to be precise. The term “fruit” is used to describe a”fruit” since it’s still a source of seeds, and the way it is used is more like fruits than vegetables.

Lemons are used for sweets more than you’ll see it in meals that are savory. It doesn’t matter if it’s a lemon juice or the rind of a lemon, the flavor is quite common  in sweets.

Why are lemons in the vegetable section?

The reason you might be confused is due to the fact that you may find lemons in the fruit section close to the vegetables. However, this isn’t always the scenario and is more about the way that supermarkets arrange the fruit section than anything else.

In other stores, you’ll find lemons alongside limes as well as oranges, kiwis, apples, bananas and all other fruits you could imagine.

They can also be used in some delicious dishes and this is why they can be found in the vegetable section. However,  that doesn’t mean they’re fruits or veggies.

Culinary and botanical fruit

The most significant scientific reason why lemons are considered to be fruits is the fact that it’s actually a kind of berry ! In fact, all citrus fruits are a kind of berry.

A berry is classified as a fruit since:

  • It has a mature ovary that forms part of the flower.
  • There is an outer skin that helps cover the seeds (even the ones that aren’t edible).
  • It contains seeds in the seeds in the innermost layer.

The lemons are botanical fruits and we know that. What is the culinary use? It is the way people typically use it, as well as the method by which people are able to determine what foods comprise fruits, and which are vegetables, and which are nuts, berries, and so on.

The way that lemons are used can also be classified as a fruit since they’re often utilized in sweet dishes more frequently than in meals that are quite savory. They’re very popular for the taste they add to food and not for the texture and nutritional value (like zucchini, potatoes, or onions, for instance).).

Is lemon a natural fruit?

The lemon is a hybrid made by humans which is actually an amalgamation of bitter orange and citron fruits. There’s plenty regarding the family of citrus that we aren’t aware of but we’ll look into it a little more today.

The first step is to clear the confusion with lemons. Lemons are a cross between citrus and bitter. For those who aren’t aware that the citron is a  citrus fruit which is one of the primary three used to produce the citrus fruits we enjoy in the present.

A citron contains a massive volume of pith (the white portion that is under the rind) and the pulp inside barely apparent and occasionally completely unnoticeable. The skin’s outer layer is extremely sweet, and the texture varies in texture from silky smooth to the wrinkly, or ribbed to the rouched.

There’s a variation of citron dubbed Buddha’s Hand due to the fact that it looks similar to the hand of a person which has numerous fingers. It is extremely aromatic.

Bitter oranges are an intermixture of pomelo (not like the one we have in the present) and mandarin. Certain of the citrus fruits we are familiar with today are made by man-made hybrids, while others have natural hybrids. For instance, the bitter orange is a natural hybrid.

What do you think of sweet oranges? If bitter oranges exist then surely there are sweet oranges. Yes, they exist and it’s believed that they’re the same mix of mandarins and pomelo, but they’re sweet.

What do you think of lemons?

There are many ways to make use of the lemon,  it’s your choice and you will have to decide which is the best option for your situation. In addition to the classic lemonade, it is possible to make use of the rind to create the distinctive lemon flavor, without the sourness of lemon juice. This is the way the lemon-flavored ice cream is created.

If you added the juice of a lemon, it would reduce the milk content within the ice cream and it would then curdle. In fact, this is how the majority of fresh cheeses are made. like paneer and Feta !

Another method to make use of the lemons can be to create lemon jam. You will need the outside skin as well as the rind and you can also use the pulp, if you enjoy. This type of jam needs the use of a lot of lemons and is one of the most unique flavors there. All essential oils of lemons are stored in a container.

Another way to get similar results is to grate some lemon rind in the container  ( plenty of lemons), and then add just enough sugar as you want. The sugar will adhere to the rind of the lemon and the oil from the lemon. Mix them up and keep at room temperature. It won’t last for a full year, but should last at least three months.

It’s a great ingredient in cakes, creams, and everything else you can imagine!

Types of Lemon

There is a belief that citrus were initially planted in the surrounding zones in China as well as Burma. This was the first step for its expansion across Europe (around around the Italian portion).

It was in use prior to the time of the early Romans. However, it wasn’t as popular in the same way as other types of olives or grapes that were transformed into wine.

The lemon tree grew and grew and again, this time through in the Middle Eastern regions of Persia and Egypt. Later, Arabic farming allowed the lemon tree to flourish even more in warmer climates.

Explorers like Christopher Columbus brought the lemon tree to the Americas. The explorers’ movement during the time of conquest has spread the seeds of lemons like wildfire in new areas. The nineteenth century saw areas such as the sunny Florida and the area that would later be called California, which produced lots of citrus trees. This is how the humble lemon was made an essential part of United States.

In the past, limes and lemons were crucial, especially during wars and famines because of  their high content of vitamin C.

Vitamin C helped fight scurvy which was a serious disease and which caused teeth to fall off. In World War II, limes were utilized as a remedy for scurvy in prisoners of war and soldiers too. Who would have believed that a fruit with no calories would play such a significant historical role?

Is lime a fruit or vegetable?

Similar to the lemon, the lime is a berry that emits a sour taste because it naturally creates juice and vesicles. There are many varieties of limes, however the most well-known variety is Key lime (which is utilized for Key lime pie) and the kaffir lime.

There are different varieties of Persian lime that are well-known in various parts of the world.

Health benefits of lemon

Lemons are everywhere. However, it doesn’t mean they’re unhealthy. They are among the healthiest fruits on the market. They are mostly plump due to the fact that they’re an excellent source of ascorbic acids, or vitamin C. Vitamin C is a vital nutrient for the development of strong joints, bones, and teeth.

Vitamin C is an essential component for healthy skin. It also helps protect your respiratory tract from pathogens. Furthermore, many important nutrients are present in citrus fruits, such as limes and similar fruits. A single lemon is home to sixty different kinds of antioxidants. This is a huge amount of antioxidants all in one shot making it perfect for consumption on a regular basis.

All varieties of citrus fruits are excellent source of fiber. A healthy adult requires at minimum 14 grams of fiber daily. Lemons are a great source of both fiber and moisture, in addition to important nutrients.

In addition, lemons are very low in calories and contain natural sugars. The juice of a medium-sized lemon has only 12 calories. If you mix it with water to make refreshing summer drinks, you’ll have the greatest of both worlds. You’ll be refreshed and you’ll cut down on sugar calories.

It is also known that lemons are able to shield your kidneys from pain-inducing kidney stones. The reason is that a lot of people who suffer from kidney stones are those with low levels of citrate within their bodies.

Consuming citrus fruits and other vegetables more often, you’ll be able to increase the levels of citrate naturally. Take your time with your body. It isn’t easy to fix something that’s been in the same place for months or even years.

Then, lemons can be possibly cancer-fighting. Research suggests that fruits help people avoid the most deadly kinds of cancer such as lung cancer or breast cancer.

Wrapping up

Is Lemon a Fruit Or a Vegetable?

I hope this article answers the question, is lemon a plant or fruit? And I am sure this post will also cater to   your needs and clarify all the doubts you have regarding the subject. Lemons have a wide range of uses, so it is recommended that you use them frequently as an integral part of your daily diet.

What Do Figs Taste Like?

What Do Figs Ta ste Like?

What Do Figs Taste Like?

What do figs taste like? If this is what you want to know and have been searching the internet for an authentic answer, you should go through this post right now as it has all the details about it. Read on if you are interested.

To begin with, figs were cultivated from the beginning of time in warmer climates.

Sometimes referred to as the ‘poor man’s food In Mediterranean regions, these fruits are increasingly sought-after across the globe.

This article will explain the flavor of figs as well as the most frequently asked questions about the taste.

What Do Figs Taste Like?

Like most foods, the most effective way to comprehend the taste of figs is to try one.

They have a fantastic texture and shape similar to apples with a good amount of seeds. The flesh is typically dark or purplish. Their skin is soft and easy to chew into.

The flavor of this unique fruit is dependent upon the variety you’re eating. In addition, it is dependent on what you’re serving it with.

This is because figs can be added to any variety of dishes by chefs to serve different purposes particularly desserts. Naturally, not everyone will enjoy figs due to personal preferences that are often at play.

However, those who enjoy it have said it has an underlying sweetness that is as honey. Additionally, figs possess a slight hint of the taste of berries.

As per all evidence that figs are an amazing fruit. In fact, some prefer eating it on its own rather than incorporate it in any dish.

Dried vs Fresh Figs Taste

It is commonplace to compare dried figs with fresh ones to see if there are different reasons. However, the two types of figs are quite different.

But the variations between them aren’t as obvious as you believe.

The first, and the most evident is in their texture. Fresh figs are juicy and soft flesh that gives sweetness and honey-like syrup of a kind.

Dry figs however aren’t as lavish with their liquids or as soft. The honey-like syrup was fully absorbed by the flesh of the fig.

The dried figs taste similar to their fresh counterpart. However, they don’t provide the same sweet sweetness as fresh figs.

For those who are attracted by juicy fruits, it could be a huge turn-off. Many have described dried figs as sour and sweet.

However, regardless of the opinions of other people, dried figs, just like fresh ones offer numerous health advantages. They’re excellent sources of soluble fibers as well as natural sugar.

How to Store Fresh Figs

Fresh figs can be quite delicate and can spoil quickly.

If you want to preserve the items for a longer period, they are stored in a variety of ways. A commonly used way is freezing.

You can freeze figs in the same way as you freeze other food items. Simply put the figs into the refrigerator. This extends the life for the fruit for a few weeks.

If refrigeration isn’t an option there are other options. One of them is drying.

A majority of people purchase dried figs rather than drying them on their own. With a relatively low cost, the figs last for a longer time.

Another storage option is to can. It’s not typical for people to make this by themselves.

Therefore, we’ll suggest you also purchase this at any local supermarket near you. The process of canning can increase the fig’s shelf life by about 10 months.

Although these storage options are useful, it’s an excellent option to think of another route.

It is easy to buy fruit when you are ready to cook or eat them and then make use of it within the same day. The best fruits are fresh.

How to Tell When Figs Are Ripe

Finding out if the fruit is ready to eat is easy and can be accomplished by three methods.

The first one is in appearance. There are a variety of figs, and in most cases the unripe ones, are green.

When the fruit is ripe The hue of the fig becomes darker to a dark brown/purplish shade.

But, don’t limit your color choices to just one. It is because some varieties of figs like Kadota are green even when they are ripe.

Therefore, instead of taking a look at the color, examine how the fruit hangs on the tree. Ripe fruits can be quite large.

As a result of that, they hang low from the tree. So much so that they appear to be drooping.

You can also tell if a fruit is ripe by touching it. The mature and ripe figs tend to be softer to the touching. Unripe ones are more difficult to hold because the juices aren’t yet present.

The third way to judge the ripeness is to taste it. It is not recommended to consume figs that aren’t ripe.

But, you must be aware that ripe figs are known to have a smooth and sweet taste as we have mentioned previously.

How to Freeze Figs

In just a couple of steps, you’ll be able to make your figs freeze-ready for storage for longer periods.

Clean all the figs you own with running water. This removes dust and other dirt.

After washing your figs, it’s time to cut them in half. Take out those that are too soft or are just too ripe. If you don’t cut them, you may face issues later, as they’re not very freeze-able.

After separation, wipe clean your wash the figs clean with a dry cloth. Be sure to take care to do this with a gentle touch so you don’t break their delicate skin.

Place the figs in a row on a tray, a millimeter or two from one another. This arrangement, naturally will not include the ripe and tender figs.

In order to freeze the figs, put your tray filled with figs into your freezer for approximately four hours. After the figs have been frozen you can place them into plastic baggies to keep them in the refrigerator. They should last three months in the refrigerator.

How to Dry Figs

There are two primary techniques you can employ when drying your fruit. The first uses sunlight from the sun while the other is made possible by technology, namely a dehydrator.

To dry your figs using sunlight, it is necessary to begin by washing and drying your figs first. This is due to the same reason as we mentioned earlier: to eliminate the impurities.

After washing the figs clean, cut the figs in two and put them on an edging. The rack could be made of wood or comprised out of wires.

Whatever their material regardless of their material, they’re still superior to solid trays which do not allow airflow.

When the fruits are placed set on a rack, you need to transfer them from one side to the next. This will ensure that every side is dried equally.

Be sure to not place your figs in the shade as this could cause them to spoil.

If you get enough sunlight and plenty of movement, you can expect fully dried figs in just 24 hours.

The alternative to natural sunlight is using technology. This technique is better and more efficient.

All you need to do is switch on the dehydrator for 8-24 hours and then turn the figs in the manner you want. After that, you’ll have fantastically dried figs that can remain for months.

How to Eat Dry Figs

There is no set rule regarding eating dried figs. They’re delicious by nature and your choice of how much you consume is entirely yours.

There is a way to enjoy dried figs in their natural state. Just pop one into your mouth and enjoy a delicious sweet and delicious snack.

To the contrary, you can soak dried figs in water. This makes them plumpier, and they will look like the ones that are fresh. But, they aren’t as fresh and juicy.

So long as you don’t soak it too long, you’ll still enjoy the great flavor.

Another method of eating dried figs is to include them in a meal or as in a snack. You can, for instance, make toppings for your Ice cream.

How to Tell When Figs are Bad

The most effective way to determine whether a fig is rotten is to smell it. Place it in front of your nose, and then sniff it for odd scents.

If the fig releases an unpleasant smell If it smells bad, it’s in bad shape.

Also, you can look at its appearance and texture. If it’s extremely soft, it’s going to be deteriorating rapidly and will soon be totally negative.

If you notice mold growing on the surface It’s probably a sign of a problem.

Wrapping up

What Do Figs Taste Like?

You should now know the answer to what you wanted to ask– “what do figs taste like?”. They’re sweet and make an excellent snack, even if eaten on their own. Just make sure that they don’t become rotten, as they’re extremely delicate. You should use figs for pies and desserts to try different flavors. And I am sure you would be able to come up with your favorite dish which every one of your family will enjoy!

How To Cut Onions For Fajitas

How To Cut Onions for Fajitas

How To Cut Onions for Fajitas

How To Cut Onions for Fajitas

How to cut onions for fajitas? Well, if this is what you are looking for, you should take a close look at this post which has all the details about it.

To begin with, it’s easy to cut an onion into thin slices for delicious fajitas. But it is important to do so in a consistent manner. It is simple to cut an onion in half and then make horizontal slices.

However, this can result in very different sizes. To prevent slices from burning faster when you cook onion slices like fajitas or other dishes, you need them to be the same size. Radial cuts require a little more skill, but you will get slices that are nearly perfectly uniform.

Step 1

Peel the onion, and then cut it in half from the stem to root on a cutting board.

Step 2

Place one-half of the onion flat on the cutting board. The stem and root ends of the onion should be cut. The onion should be turned so that one side faces you. This position will allow you to make radial cuts from the root to stem end.

Step 3

Place the knife on the one side of the onion closest to the cutting board. At an angle, make sure you follow the lines on the onion. The first radial cut should be made into the onion. This will release slices with equal length. Place the knife again on an onion line. You should space your slices so that the cut width is equal.

Step 4

Continue to make radial cuts in the onion until you reach its center. At this point, the remaining onion will start to wobble. You can keep the remaining onion sturdy by placing it on its side. Then, make the same radial cuts in the onion until you have it completely sliced.

Things you’ll need

  1. Cutting board
  2. Sharp chef’s knife

Tip

Basic chicken fajitas can be made by cooking sliced chicken breasts in an oiled skillet. Meanwhile, sauté bell peppers and onions in another oil skillet. Layer the chicken and vegetables in a flour tortilla. Top it with shredded cheese and guacamole, pico de gallo, sour cream, and lettuce.

3 ways to cut an onion

Although onions add great flavor to many dishes and textures, they can be difficult to cut if the right technique is not used. We’re going to show 3 ways to slice an onion in three different ways so you don’t have to be mad at chopped onions.

STYLE 1 – SLICES/RINGS

Slices of onion are great on burgers, sandwiches, and tossed on the grill. You can also make your onion rings.

Use a chef’s or kitchen knife to cut off the top of the onion. Leave the root end.

Take off the onion skin’s papery layers and throw them away.

Cut a small piece of one side of an onion. Place the onion on its cut side. This will give the onion a place to rest on and prevent it from rolling around as you cut.

Start at the root end and slice the onion evenly. Then, work your way back to the root. For onion rings, cut thicker slices and burgers thinner slices.

STYLE 2 – STRIPS

You can use onion strips in kabobs and fajitas as well as crockpot recipes and stir-fries.

Use a chef’s or kitchen knife to cut off the top of the onion. Leave the root end.

Take off the onion skin’s papery layers and throw them away.

Cut the onion in half along its length. Place one-half of the onion flat side down.  Place one-half of the onion flat side down. Depending on the purpose of the strips, you can choose how wide you want to cut them. For thin strips, such as fajitas or kebabs, you can make several cuts. However, for thicker pieces like kebabs, there are only two to three cuts.

Take off the root end and discard it. Now you have your pile of onion strips. If desired, repeat the process with the other half.

STYLE 3 – CHOPPED/DICED

You can use chopped onions in many recipes, including casseroles, sauces and salads. Or, you can mix them in with ground beef to make tacos. Taco Tuesday is my favorite!

Use a chef’s or kitchen knife to cut off the top of the onion. Leave the root end.

Take off the onion skin’s papery layers and throw them away.

Cut the onion in half along its length. Place one-half of the onion flat side down. Place one-half of the onion flat side down. For larger chunks, space your cuts approximately 1/2 inch apart.

To cut small pieces of your onion into smaller pieces, hold the root end of the onions. The root end should be thrown out.

The onion can be placed flat or upside down. Remember, safety is the first priority!

That’s the way to go!

Wrapping up

How To Cut Onions for Fajitas

I am sure now you will have a better understanding of how to go about slicing onions for fajitas and you should be able to tackle any problem that comes your way while you get down to cooking. Now do it like a professional chef!

Substitute For Capers – Top 10 Alternatives!

Substitute For Capers

Substitute For Capers 

Substitute For Capers

You’re making a dish that calls for capers, all the guests you have invited are waiting, but you don’t have capers at home! Do you have to rush out of home to get into the closest grocery stores for capers, which you need for your favorite dish? Well, no, not at all. For, there are a lot of alternatives or substitutes for capers which can replace them. Read on if you are interested.

So, what are capers anyway?

Capers are fruits of the caper plants that are found in the Mediterranean. They are often used in Mediterranean-style recipes, and most famously in the chicken piccata. Served in pickles, you can find them in jars close to olives. They’re round, dark green-gray, roughly the size of the peppercorn.

More details about capers

What is the flavor of capers? They’re lemony and briny and they add a tart flavor to dishes. They’re essential in Pasta Puttanesca. Since the taste of capers is unique we suggest you visit the grocery store and purchase some as soon as you can!

What are berries of capers vs. non-pareil capers? “Non-pareil” refers to the smaller dimensions of capers. Translated from French”non-pareil”, it means “has no equal” So, they are of the finest quality and size when picked for recipes.

Caper berries are around the size of olives and are accompanied by the stem that is attached. They are the ripened fruits that come from caper plants unlike non-pareil capers, which comprise buds. Caper berries tend to be tougher and starchier, and do not offer the same flavor as non-pareil capers. Therefore, they’re generally not recommended for use as a replacement for capers in cooking.

Substitute for capers

Capers add a splash of salty, tangy taste to food items. Pasta puttanesca, sauces chicken piccata, salmon and bagels can all be paired with capers. There are two reasons why you might be looking to substitute capers for your next meal:

  • The flavor doesn’t grab your attention.
  • There are no capers available.

We’ll offer options for capers that will help you finish the recipe. You’ll have to be open when considering these alternatives as they’re a distinctive taste and flavoring ingredient that you can never substitute for 100%.

Find an alternative solution.

10 substitutes for capers

It is a great choice if you like capers, but don’t have

  1. Green olives

them in the kitchen.

Green olives are a great alternative to capers since they have similar salty and bitter flavors. They can be used for chicken piccata, stews salads, sauces, and other dishes.

They also have a similar color. Cut the olives into smaller pieces. They could be used in place of capers for garnishing salmon or as a component in tartare made of beef.

  1. Black Olives

It is a good choice if you love capers but don’t have green capers.

The black olives are hung in the tree prior to being picked, which results in a softer, less strong tasteful fruit. They can provide your meal with a lesser taste. They are salty and bitter. flavor. For the most delicious taste, purchase olives from a local delicatessen to ensure a high-quality product.

  1. Nasturtium Buds

This is an ideal choice for the creative home cook.

The nasturtium is an edible flower that is a good choice to provide a backup plan if capers aren’t your style. Instead of opting for a bitter flavor opt for nasturtium because of its strong peppery taste.

It is available at gardening stores and some specialty food stores also carry it. An alternative is to plant nasturtium seeds in your home. You’ll be able to access buds at any time they’re in bloom.

The trick to making use of nasturtium is picking the buds when they’re fresh and green. Put them in the container of vinegar and onions, as well as dill and garlic until you are ready to make use of the flowers. When it’s time to cook, keep in mind that the nasturtium flower is an attractive garnish.

If you’re looking for lots of ways to make edible flower arrangements, make sure to read this guide to the top edible flowers.

  1. Fresh Thyme

It is an excellent choice for those who love herbs.

Fresh thyme is an astringent herb with a distinct bitter and lemony taste like capers. If cooked slowly in a sauce or casserole it will give the same taste. Fresh thyme isn’t suitable for recipes in which capers play an integral part in the recipe. Beef tartare is an illustration.

  1. Green peppercorns

The best option is to reduce visual impact.

The green peppercorns can be described as the unripe form of the black peppercorn. Since they’ve been picked earlier and aren’t ripe, you’ll be able to avoid the extreme spice that black peppercorns have.

Caper alternatives to salmon

Green olives cut into pieces are great as a garnish with salmon.

Green peppercorns, as a substitute for capers, is an excellent option for those trying to recreate the look of capers. They’re both similar in appearance and taste similar. And the mild peppercorns won’t cause your food out of equilibrium.

  1. Pickles with dill

The best option is to use tartar sauce for salads and other antipasto platters.

Dill pickles, also called cornichons, provide a mix of sweet and tart flavors in one bite of crunch. They’re a delicious addition when cut into pieces and included in pasta salads, tartar sauce, and an antipasto platter. Dill pickles have a distinct flavor and they are different from capers because their texture is crisper, and they don’t have the strong bitter taste of capers.

  1. Anchovies

It is the best option for adding salty flavor to slow-cooked meals.

The flavor of the caper and anchovy is distinct. But that doesn’t mean that you should not use anchovies to give an extra boost of saltiness and umami in your next meal. If you don’t like an edgy taste be careful not to add more than one. You can experiment with the ratios, but generally, one anchovy is sufficient. They also make a great supplement to Italian spaghetti sauces.

  1. Caperberries

It is a good option for those who prefer a less sour flavor.

The berries of pickled caper berries are larger than capers and have seeds. They offer a more subtle flavor that is why they are a good alternative for those who don’t want strong ingredients.

  1. Artichoke hearts

You can make use of marinated or pickled artichoke hearts. They’re ideal for dishes that are based on chicken or fish as well as pasta dishes. You can begin by using half the amount of capers that you’re looking in your recipe. You can include more to alter the flavor.

  1. Mustard Greens

Even if pickled food isn’t your style, you’re still able to relish classic dishes with an added twist. If cooked mustard greens are introduced, they can impart the flavor of spicy pepper.

Saute mustard greens for an accompaniment or cut them into salads with an extra pinch of salt to substitute capers used in this recipe.

Recipes that are popular using capers and their alternative

Salmon garnish: chopped olives or green peppercorns

Piccata Fresh Thyme, or olives with green sides

Tartar sauce Dill pickle

Beef tartare: chopped olives or Dill pickle

Wrapping up

Substitute For Capers

Hope these substitutes for capers will serve your purpose. It’s indeed quite a challenge to make an ingredient replicate the taste of another. This is a most significant risk you can take, particularly with regard to capers. Sometimes, it’s completely unavoidable. When you’re cooking some delicious food for your family members, try using any of these items instead of capers. It’s possible that you won’t be having the same taste as capers. However, you’ll get pretty close to that and that should bring a smile in your face!


How To Peel Tomatoes In The Microwave?

How To Peel Tomatoes In The Microwave?

How To Peel Tomatoes In The Microwave?

How To Peel Tomatoes In The Microwave?

How to peel tomatoes in the microwave? If this is the question hovering in your mind right now, you should go through this short post which will give you all the information about doing it the right way.

Truly, off all the tasks a microwave is capable of doing, the peeling of tomatoes quickly stands out as you don’t have to leave with burnt fingers. Yes, who would like to get involved in tedious kitchen chores? Truly, everyone would like to peel the tomatoes in a short period of time in case you need to instead of burning it crisp and then heating it up more than what you planned. Nobody wants a mess, isn’t it?

Step 1: Clean the Tomato

Wash the tomato in cold water, and then wash away dust particles, along with the stem.

Step 2: Make an Incision

Prick at the base of the tomatoes by making an X on the bottom using the edge of a paring knife that is sharp and then make a few tiny cut-outs in the stalk as well. Because microwaving the tomato quickly increases the pressure inside as the water changes to steam, it’s important to create a channel for the steam to be able to escape.

Step 3: Zap Quickly

Place the tomato in the microwave-able dish. Cook it at full power for about 30 seconds, and then let it cool before touching the skin which will be very hot.

Based upon the dimensions of your tomato as well as the power of your appliance, you might be required to repeat the process for another 30 seconds.

Red tomatoes that are ripe are more likely to split as compared to green tomatoes for instance. Be aware, however, when you cook the tomatoes for too long, you could end in cooking the tomato, instead of just loosening the skin.

Step 4: Allow It to Rest

Take the tomatoes out of the microwave, and carefully remove the skin that should appear stretched and split, using the help of a fork. Keep your mind that tomato’s flesh will be hot to contact.

Tips to remember

Place the hot tomato in the bowl of cold water first, to help disperse its heat, and that would make  the tomato easier to work with.

Step 5: Peeling a Batch

For tomatoes that are larger, or if you’re making a large batch, cut the tomatoes into half, then place them in a microwave-safe heatproof dish and then microwave them for one moment or two until the skin has wrinkled. It is possible to move the tomatoes during each session so that each enjoys an extended time both at the edges and towards the middle.

In addition to peeling off the exterior, microwaves do not let the best out of tomatoes. For instance, tomato sauce will likely explode when you microwave it, splashing the walls with scorching chunks.

However, blanching tomatoes in boiling water in order to make sauces can be a lengthy process and typically result in scalding fingers. Cutting up tomatoes without skins to create the sauce is not recommended since the indigestible skin affects its smoothness.

Then, you can zap the tomatoes to remove the skin, leave any cooking to be done on the stovetop and a low, slow simmer will release the sweetness of the tomatoes and create the silky texture.

You should always store uncooked, unpeeled tomatoes inside the fridge in order to extend their shelf-life. Although tomatoes, considered a fruit, are fragile, they will remain fresh for 2 weeks when stored in the fridge. But once the skin that protects them is removed, the storage time is reduced significantly.

Wrapping up

How To Peel Tomatoes In The Microwave?

Peeling tomatoes takes a bit of effort, but once you get a  taste of the fruit in tomato soups and sauces, you’ll see that the benefits are worth it. The peeling process will give sauces a sweeter and smother taste. I am sure after going through this post, you have understood how simple it is to peel the tomatoes with the help of the microwave.


How Many ML In a Shot Glass? Know Your Facts!

How Many ML In a Shot Glass?

How Many ML In a Shot Glass?

How Many ML In a Shot Glass?

How many ml in a shot glass? If you are confronted with this question in a booze party, and you don’t know the actual answer, it may be a source of embarrassment for you. So, get your facts right!

So, do you plan to have an occasional drink? How about organizing a cocktail connoisseur? In that case, you must use shot glasses. In the kitchen, shot glasses might be considered if you are required to make sure you have a specific amount of liquid. Sometimes, it can be difficult to determine which one is most suitable and what many milliliters of liquid in the shot.

It is recommended to utilize both fluid ml as well as ounces. It is also crucial that you know the proper use of a shot glass when cooking. Read on to find out more.

What Is A Shot Glass?

A shot glass can be described as a glass that is intended for measuring or holding alcohol and other liquids. Shot glasses may be decorated with toasts of different types humorous images, advertisements. They are excellent as souvenirs and collectibles. A typical shot glass is constructed of the finest glass that allows it to not break once one hits the glass.

Small shot glasses are made for use in kitchens. It can be divided into units like half-teaspoon, an ounce or tablespoons and milliliters. They can be useful for recipes that require a number of pieces of the same amount which allows you to make use of all of the ingredients in one measurement.

So How Many ml in a Shot?

It is important to know that the typical shot glass will differ based on the country, and in the US the sizes are as follows:

Larger Shot is 89ml or 3 pounds

Medium Shot is 44 milliliters or 1.5 1 ounces

Small Shot is 30ml or 1 Ounce

However, there is an important need to be aware that there is an actual standard size for when it comes to shot glasses. The typical size is thought to be anywhere between 1.25 an ounce and 1.5 ounces.

Other examples of shot glasses include the following:

In Canada a pony shot in Canada is 28.41 milliliters, or 1 inch, a shot is 1.5 pounds (or 42.61ml) and a larger shot is 71ml or 2.5 ounces

In Australia Shot glasses are 30 milliliters or 60 milliliters.

In the UK there is a single shots of 25 or 30 milliliters and double shots for 50 or 70 ml shot glasses.

Becoming familiar with shot glasses will aid you greatly in terms of how to use these glasses. How many milliliters in the shot? In reality, the average shot glass contains 44 milliliters or 1.5 ounces, while the pony shot is just 30 ml , or one in ounce.

Why Use A Shot Glass?

Additionally, there are several reasons why it is necessary for you to utilize shot glasses. For novices shot glasses are considered to be essential if you’re looking to make cocktails that are delicious. Shot glasses can be utilized for a variety of things when cooking and making drinks. They’re certainly useful when making an effort to amaze your visitors with your culinary abilities or when you want to throw a celebration.

Shot glasses are now used for various functions. There are a few people who might use a shot glass for wedding favors as well as barware at events, as a gift or an element of a board game.

If you own a few shot glasses in your home that you own, they’ll never left unattended since there are plenty of different things you can utilize these glasses. You could try glasses to measure items such as vinegar, water or oil. You could also use them to measure wine when you cook.

Uses Of Shot Glasses

There are a variety of options to use shot glasses. One of them is the following:

  1. You could make use of shot glasses to keep cool desserts in and chilled soups.

2 .Dips made from homemade can be placed into a shot glasses to allow you to eat your food.

  1. Shot glasses are also an ideal option as a condiment bottle for your own.

4. Shot glasses are excellent options for your salt shakers and pepper shakers.

5 . You may be tempted to drink your coffee in shot glasses. Enjoy your coffee with twist.

6.  For tea drinkers, why don’t you think about enjoying tea in small portions to make it a relaxing way to end an evening dinner.

There are other methods of using shot glasses depending on your preferences or choices.

Make The Best Use Of Shot Glasses

The first thing to occur to us when we imagine shot glasses is that they will be a grotesque and raucous gathering. However, there may be specific ways to make shot glasses more attractive and classy.

In certain situations shots are often employed when drinking whiskey or vodka that has been aged. It is also possible to utilize shot glasses when making drinks like Gin and tonic or an Moscow Mule. An alcoholic drink during the Christmas season could also be served as shot glasses. In fact, shot glasses can be used to their maximum according to the method you plan to use them.

Cooking Using Shot Glasses

As we mentioned previously Shot glasses can be as useful in the kitchen, particularly when you’re cooking. So, why not utilize them to make the next meal? You’ll surely appreciate the new twist they will bring to your desserts. Shot glasses are sure to provide the an adequate amount and let you serve your food with a variety of different ways.

In addition, the recipes that shot glasses are used include:

Brownie Sundaes

Who wouldn’t like sundaes would you? So next time you’ll serve this type of dessert, make sure you have shot glasses as well.

Who wouldn’t like a sundae, isn’t it? So next time you serve this type of dessert, make sure you have shot glasses, too.

The ingredients for a shot glass include:

  • Coconut flakes for garnish
  • One brownie
  • Handful cherries
  • A teaspoon of whip cream

Now you will have to follow these steps:

Place half of the brownie in the bottom of the big shot glass. Add the whip cream to the plastic bag, then cut off a little bit on the corner, and then squeeze it onto your shot glass.

Include the cherry. You can chop them up in case they’re too large or you could mix them to create a compote-like mixture.

Place the second half of the brownie on top and garnish it with the whip cream. Garnish with the coconut flake.

This is an excellent dessert to enjoy during the holidays!

Mini-Strawberry Shortcake Shots

This is indeed a great dessert that everybody will be able to enjoy at home. Make sure to make the following ingredients:

  • The strawberry cup
  • Half cup of vanilla frozen
  • 1/2 cup of cake from a pound in pieces
  • 2 teaspoons of the agave syrup, or honey
  • 1/4 cup of crushed Graham crackers
  • Whip cream until it is topped off.

The procedure to make this delicious pudding in the shot glass goes as follows:

Place the agave syrup or honey on the plate , and then cover your shot glass with the syrup. After that, you add the crushed Graham crackers on the rim.

Then, combine the cake with the strawberries and ice cream and blend them until they are smooth.

Last but not least, fill your glasses up with mix, and place the whip cream to top it off.

It’s really simple, isn’t it?  Now you can enjoy your delicious dessert in a shot glass!

White Chocolate Peppermint Mousse

This is another choice when you’re craving an excellent dessert, and the usage of shot glasses. The ingredients you need are:

  • A teaspoon of peppermint candy that has been crushed
  • The whip cream in a cup
  • 1/4 peppermint extract
  • 3/4 cup white chocolate

Follow these steps:

On a medium-low heat in an oven, cook half a cup of whip cream until it is hot, then mix in the chopped white chocolate and add the peppermint extract.

Cool it down by and then place it inside the fridge for approximately 10 minutes. Then whisk it every now and then, allowing it become much thicker.

Beat the other half cup of whip cream until it is thick. Then put the chocolate mixture into it. Use shot glasses to serve the dessert.

You should keep them in the fridge and serve them cold. Sprinkle the pieces of peppermint candy after they are ready for eating.

You’ll surely enjoy such an exquisite dessert particularly when served in shot glasses.

Wrapping up

How Many ML In a Shot Glass?

Remember that there isn’t a common measure that applies to the shot glass. If you’re still uncertain about the ml count in a shot, it is 44 milliliters or 1.5 oz. In addition, you should also keep in mind that shot glasses can be used for a variety of purposes and helping you create a distinctive dessert is only one. In fact, a shot glass is an item you should never overlook.

Penne Vs Ziti: What’s the Difference?

Penne Vs Ziti

Penne Vs Ziti: What’s the Difference?

Penne Vs Ziti

Penne Vs Ziti–it’s time to discover the penne vs ziti similarities and differences. Because pasta is among the tastiest and comforting food items that you can eat, it’s worth knowing the basics about. This will help you make your favorite Italian dishes the authentic way, unless, of course, you use your own imagination to add a personal touch to each of the recipes.

Over time I’ve honed my pasta-making skills. So, I’m eager to share my expertise to assist you in becoming a master yourself.

There are many kinds of pasta. They are over 100 when you consider the variations in length. Ziti, as well as penne, can be readily available, and appear similar on the surface.

But, a deeper review will reveal the differentiators that experienced chefs use to maximize the value of their dinners.

Ziti and Penne are two basic pasta shapes. You can purchase them in any grocery store, and cook these at home, too. They aren’t just different in length and shape but there are many other distinctions worth to be noted.

Before we get to the differences and top recipes for ziti or penne Let’s find out more about their background. So, you’ll be able to give some historical facts when you cook dinner to feed your children!

Origin Of Pasta

Today, everyone associates pasta with traditional Italian food, however, there is another country we must be thankful to for this amazing food.

Many historians are of the opinion with the fact that pasta, as we eat today, is a result of traditional Chinese noodles. Today, pasta and noodles are two different foods, regardless of their commonality.

The term pasta is a reference to food products made from durum wheat flour, eggs and water. It is cut into different shapes. Traditional Chinese noodles do not use durum wheat, but dried gluten.

The process involves making dough from the primary ingredients pressing it, cutting into the desired shape and then cooking it with various sauces.

But, we must be grateful to Marco Polo, who is believed to have introduced pasta to Italy sometime in the past. Some historians have disproved Marco Polo’s role in pasta’s popularity in Italy. The person who brought pasta to Italy is a person who many people appreciate to this day.

Italians created and perfected their food and developed delicious recipes for cooking it. In the past, Americans have developed a fascination and love for the three-ingredient meal.

Types Of Pasta

Pasta is available in a variety of shapes and lengths, which include basic shapes like ziti and Penne. However, the shapes were invented to make them look more appealing.

Chefs have noticed that certain shapes are better at holding certain sauces than others, and they developed recipes to suit these shapes. For instance, long flat pasta works the best choice for sauces that are creamy and pasta made with ridges or the holes works well with recipes that use meat and vegetables.

Certain varieties are best cooked in boiling water and others are ideal to bake or filling.

Ziti and penne are great for a wide range of sauces. However, it is important to discover their functions and characteristics in traditional Italian dishes.

Italian Penne Pasta

Fresh Or Dried Pasta

Moving onto some tips for the newbie chefs and  also some important facts about pasta. The pasta you purchase at the grocery store, packaged and ready to cook is dried pasta that has been prepared in factories and has a very low level of moisture. This allows it to stay in its shape for a longer time and keep it fresh when properly packed.

Additionally, dried pasta typically isn’t made from eggs, but instead with different flour varieties.

Contrary to what you might think, fresh pasta is extremely soft, and contains eggs, and is more fluidity than pasta that has been dried, which means it takes lesser time for cooking.

While you can keep dried pasta indefinitely at room temperature fresh pasta must be kept in a refrigerator.

Fresh pasta tastes better and if you’ve ever been on a culinary show you’ve probably observed that professional chefs create fresh pasta. But, if you don’t have the expertise or time, or even the right tools dried pasta is ideal.

Ziti as well as penne is usually dried due to its unique shape. Pappardelle, oreccihette , and ravioli taste best when cooked fresh.

Penne Vs. Ziti Noodles – The Primary Differences

Ziti and Penne are both hollow and cylindrical pasta varieties. They are both moderately big and are great to make sauces for meats and vegetables. Both are delicious. But, how do ziti and Penne differ? Let’s see!

Origin

While pasta originated in China, Italians developed the art of pasta to unimaginable dimensions. Ziti pasta developed  in Italy and, in particular, in the Sicilian region.

The most well-known dish in the world, ziti is extremely loved within United States, especially US baked ziti made with cheese and tomato sauce.

On the other hand, there are more details about the person who invented the penne. An Italian pasta-maker who was from Genoa, Giovanni Battista Capurro developed penne in 1865 after having built his diagonal-cutting machine.

The machine he invented could cut penne into sizes of 1 to 2 inches. Penne that was 1 inch in size was referred to as mezze penne, or half pens and the larger, more popular 2-inch pens were referred to as simply pen.

The most well-known dish made by Penne is Penne with vodka. It is at this point that it becomes interesting. Some experts believe it was an American student from Columbia University who has developed this delicious dish made of penne and cream, and penne. So it’s the Americans are responsible for the popularity of the Italian-derived pasta Penne.

Detail of Ziti Pasta

Ziti – Long and smooth and tubular pasta cut at a straight line

The shape is most likely the most obvious way to differentiate the two types of pasta.

Ziti and Penne are pulled through tubular shapes during the process of making in the pasta machine. They have therefore hollow, circular forms. Thus, ziti and penne have a similar diameter, and also have the same lengths.

The length of Penne is 2.12 inches and ziti is a bit shorter at 2 inches in length. The width is 0.4 inches, and the thickness of the walls also differs. Ziti tends to be a bit thicker, with 1.25 millimeters, when compared with the 1-millimeter thick wall of Penne.

These differences aren’t apparent to the majority of people. The most noticeable distinction is the cut shape and texture.

Ziti pasta is made of straight angles, making them appear longer and more rounded.

Penne pasta is cut at an angle, which makes them appear different.

In addition, penne can have an outer surface that is ridged typically, but it is possible to get smooth penne at specialized shops.

Ziti consistently has a silky texture, making it soft and creamy once cooked. Due to the ridges, the pasta maintains its hard shape even after being cooked.

Variations

The word” penne” is derived from the Italian word that means quill. The name of the pasta was derived because of its appearance. The shape of the tubular structure allows it to pull the sauce into it.

The two variations available of penne differ in their structure.

The smooth penne is referred to as lisce, while those with ridges, which are more accessible and common, are called rigate.

Penne rigate is durable, while the lisce version is soft.

Ziti, however, on contrary is made with the same size and shape There are no real variations in this type of pasta.

Cooking

Ziti and penne both have distinct applications in cooking. Ziti is most often utilized in bake dishes that require them to be cooked undercooked so as to avoid mushy pasta. When you boil ziti through and later bake it in a cheese sauce and along with other ingredients, ziti pasta will lose a lot of its texture and will end up too soft, and almost muddy.

For baked ziti dishes boil them in water for 5 minutes is sufficient. They’ll be cooked completely by baking them in the oven. Be sure to rinse ziti properly and then toss them in hot sauce as well as in the oven preheated to get the most optimal outcomes.

Since ziti cooks to a half-cooked state in hot water, when you add them to hot sauce, the pasta will remain cooking in a continuous cycle until you achieve an ideal creamy texture. If you mix them with cold sauce and cook them, the process will cease and you’ll be left with spongy pasta.

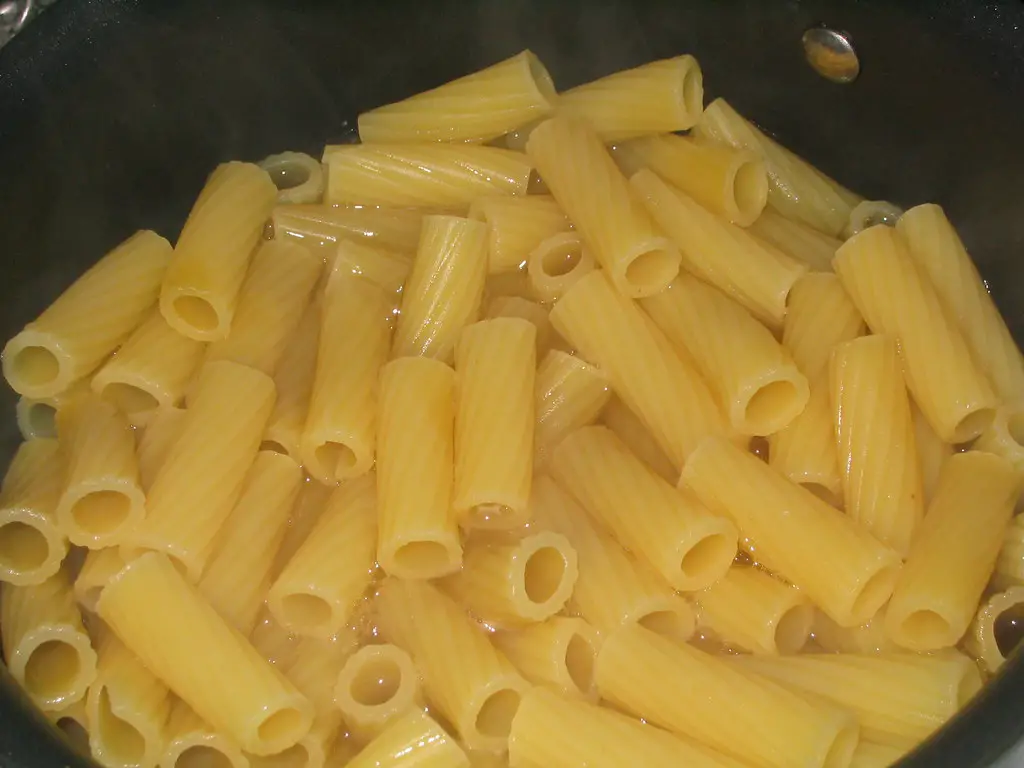
Penne needs a little bit longer to cook until you achieve the right texture, which is about 13-14 mins in water that is boiling. Be sure to add the proper salt and then take the lid off once the water is beginning to simmer.

Use In Recipes

Ziti is smooth pasta, and therefore, you’d think it becomes more enriched when paired with rich sauces. This is where the true magic of pasta comes out. Ziti is best cooked in the oven, accompanied by thick sauces as baking adds the desired punch in flavor and texture.

If you combine mitzvah with creams you’ll be left with an ice cream dish. The flavor would be tasty, but the appearance and presentation won’t be as appealing. So, it’s a good idea to have different pasta varieties to try out until you find the most delicious recipes for yourself.

Ziti pasta is also excellent for stir-fries or in addition to salads that are fresh with large and chunks of crunchy vegetables.

However, Penne is great for cream sauces due to its smooth texture. They go well with cream sauces, vegetables, and meat dishes.

It is not recommended to pair ziti with cheese shaved due to its delicate texture. However, penne pasta that is sturdy is ideal for this. Also, the cheese stays better than pasta.

Carbonara, a thinner sauce pesto, carbonara, and Ragu are excellent for pasta. If you’re planning to serve your ziti with sauce rather than baking, I would suggest using sauces with a thinner consistency and other vegetables, like carrots, celery, and onions.

The reason is that the silky texture of ziti makes the thickest sauces slide off  the pasta. The angled ends of penne capture the sauce better. However, you can also bake penne in place of ziti.

In general case, penne is a more adaptable pasta than ziti. Additionally, the majority of chefs will serve it al dente, which means firm enough to bite.

My favorite way to use ziti for ziti is baking dishes that have melty cheese

Can You Make Ziti And Penne Fresh?

Ziti and Penne are two kinds of pasta that are extruded using an extruder to create their tubular form. Both can be made by making the pastas at home however you’ll need the right machine and dyes to get the form and texture you desire.

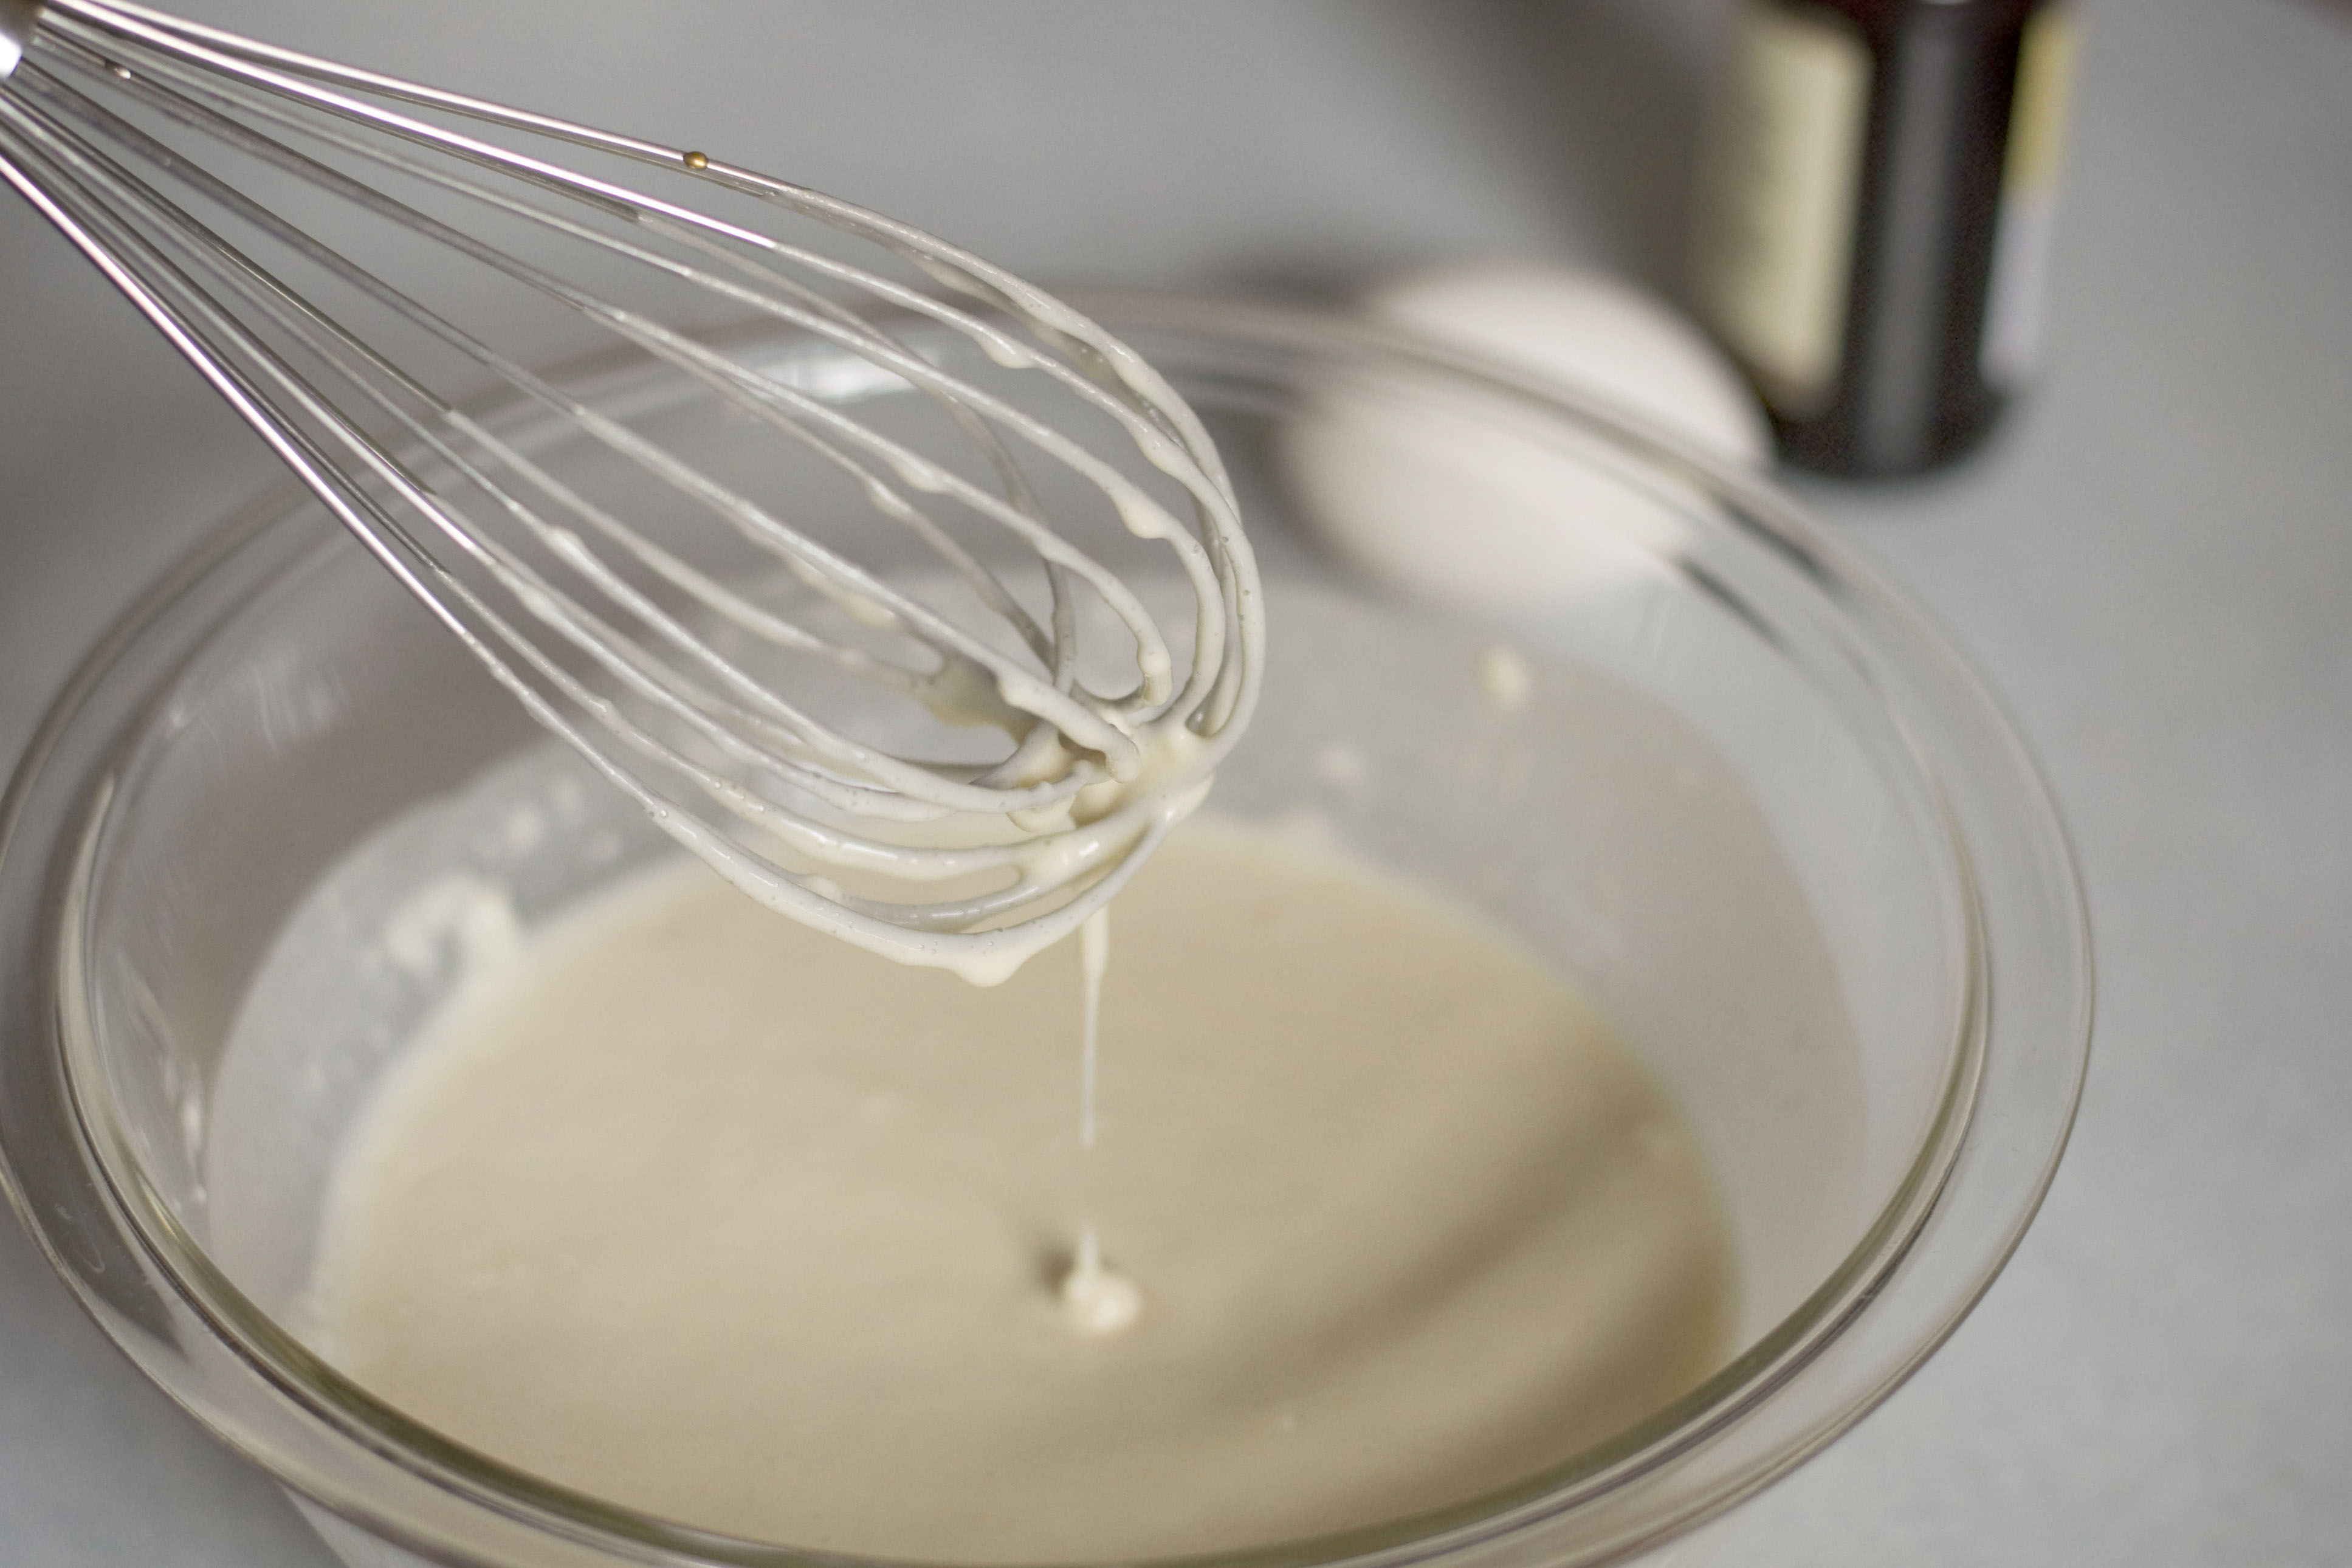
The base recipe for both recipes is eggs, flour as well as oil. It is not recommended to add water as the dough must be firm enough to ensure that the pasta can hold its shape but be soft enough to be used with an extruder. It takes some expertise and time to master your dough. Also, it’s more complex than making fresh flat pasta.

The recipe that I have found to work for me is made up of 3 1/2 cups of all-purpose flour with no soy-based additives with five eggs, and two tablespoons of olive oil. But, it’s important to add only one egg at a time and gradually make the dough. If you feel it is too dry, make it a little more oily.

Once you’ve made the dough, put it in the extruder, and then make your pasta with ziti or a penne attachment.

Remember that practice is the best way to improve, so once you’ve cooked fresh ziti, or penne a few times, you’ll know which type of texture works best. If you don’t own an extruder for pasta or a pasta maker, you can make use of dried pasta that is available in stores in any recipe.

Don’t Confuse Ziti And Penne With Rigatoni

Pasta Grape Tomatoes

Delicious, short and rigged Rigatoni pasta is like ziti and penne

Rigatoni is another tubular extruded pasta variety that is similar to ziti as well as Penne. Rigatoni pasta is considerably longer but also more wide than ziti or the penne. It is cut straight or curly with the ends being cut in squares. Rigatoni is best served shredded cheese and is also served in baked dishes in place of ziti.

Best Penne Recipe

Creamy Italian Penne Pasta

Garlic sauce and Penne is simple to prepare and a delicious dish

I’ll be sharing with you my top recipe using Penne. I’m speaking about the creamy flavor of garlic Penne pasta. The recipe is easy to make, cheap, and does not require skilled cook abilities. I’ve made it several thousand times and it always tastes great.

Here’s what you need:

  • Penne – 1 box
  • Butter 2 tablespoons
  • Garlic cloves 3
  • Flour – 2 teaspoons
  • Chicken broth – 1/2 cup
  • Milk – 1/2 cup
  • Spices include salt, pepper Parsley, salt
  • Cheese – parmesan, 1/2 half cup

Cut your garlic cloves into pieces before adding them to melt butter in the pan. The butter and garlic will cook for two minutes, then add the flour. Stir the mixture continuously all through, and then include chicken broth along with milk. Reduce the temperature and let the sauce thicken by itself. Make sure you stir it regularly.

In the meantime, it is recommended to cook the penne in accordance with the instructions on the packet. Add your cheese and spice to the pan and take the pasta out.

In the sauce, toss the pasta and then turn off the heat and stir it until cheese melts.

Serve hot and top with grated Parmesan cheese, and freshly chopped parsley!

Best Ziti Recipe

Here’s my most warm-baked ziti recipe. It takes around an hour to cook all the way through and the prep requires about 10 minutes.

You are able to substitute any of the ingredients with whatever you like. However, this is the recipe I prepare it.

You’ll require:

  • One box of Ziti Pasta
  • Ground beef 1 pound
  • Onion – 1 chopped
  • Garlic: 2 cloves minced
  • Rosemary – 1 cup, fresh minced
  • Red pepper flake 1 teaspoon
  • Tomato sauce – 1 jar – 32 ounces
  • Salt, pepper, olive oil
  • Oregano 1 teaspoon
  • Basil 1 teaspoon
  • Thyme 1/2 teaspoon
  • Cheese mozzarella, ricotta, and pecorino – 2 1/2 cups total

Begin by cooking your meat and onions along with garlic, on a huge pot. Cook the ziti pasta for 5 minutes, then drain it in a colander and then drizzle it with olive oil it to prevent that it gets stuck. When the meat is cooked,  add salt and pepper along with any other spices.

Reduce the heat, and cook for 5 minutes. Stir frequently. The oven should be set to 350 degrees F. You can prepare your casserole, spreading olive oil on the bottom.

The tomato sauce should be added into the pan along with meat and spices, and let it simmer for about a couple of minutes.

Here’s how you arrange the dish:

Then, place the sauce on top then sprinkle ricotta cheese on top. a few pieces of pasta on top. Repeat the process with the remaining ingredients. Finally, add the fresh mozzarella cheese as well as pecorino cheese.

Bake for 20-25 minutes. It should be enough time for melting the cheese, and the pasta to be cooked completely.

It is possible melting cheddar cheese to make your baked ziti recipe if you overcook the pasta prior to putting it into the oven. It’ll take less time to bake, but the cheese will melt faster than other cheeses.

Allow it to cool for a few minutes, then serve hot!

Casserole Ziti Pasta

It is possible to garnish baked ziti noodles with minced beef and tomato sauce. You can also garnish it with fresh herbs and cheese.

Wrapping up

Penne Vs Ziti

If you’ve been wondering about the differences of penne vs ziti and whether you could use them interchangeably, this post, I presume, has served your purpose. However, if you wish to cook pasta in the style of authentic Italian way, you should remember that ziti should be used for baking and penne for  cream sauces.

There are a lot of recipes available online for both pasta varieties. I suggest you try some of them and try them until you’re completely satisfied with the flavor and texture. Go cooking now!


How Long Does Pancake Batter Last In The Fridge?

How long does pancake batter last in the freeze?

How Long Does Pancake Batter Last In The Fridge?

How long does pancake batter last in the freeze?

In this post, we’ll address the question of how long does pancake batter last in the fridge? And the second question is also equally important, and that is, how do you make perfect pancakes? Both of these questions are crucial because if you have no clue about this, it’s very likely that you will not be able to preserve your food for a long time and the chances are high that it will spoil.

Can you freeze pancake batter?

Absolutely! To ensure the best results, pour the batter for pancakes into an airtight bag. Make sure you remove the most air possible before sealing and make the bag flat. The thinner and flatter the liquid is the faster it will melt when you’re ready to make use of it again.

To let it thaw, put the bag in the bowl of warm water or if you’re comfortable waiting around, put the bag in an empty bowl and put it in the refrigerator for a night to defrost. What’s the greatest thing about being able to store it in an airtight bag? You can slice off the portion of the bag, and put your pancakes right into the pan. That’s an awesome freezer trick!

How do I preserve pancake batter?

The key lies in the container

It’s essential to keep your pancake mix in proper storage to ensure it’s as fresh as you can. It is recommended to transfer the batter of your pancakes to an airtight container in order to preserve its freshness. If you don’t own one, you could cover the bowl with Clingfilm, but ensure that you have a tight seal to the bowl.

If you do not seal your mix correctly and seal it properly, you will not only struggle to keep it fresh, but bacteria that are in your fridge (from items like meat and vegetables) could be able to transfer into the batter for your pancakes. Be sure to mark your pancake batter with the date that it was prepared as well as the expiry date. A well-organized fridge is vital!

If you’re keeping pancake batter at room temperature for an extended amount of time it’s best to also store it in a sealed airtight container. It is also recommended to place the container inside an ice bowl in order to keep it as cool as you can.

 Top Tip: You should save your squeezy, bottle of ketchup to use to store the pancake mix. It will keep it nice and fresh and make it easier to pour into your pan. This is a fantastic baking trick!

Q&A

Why is it that pancake batter needs to rest?

If you are cooking pancakes may be aware that your recipe suggests leaving the pancake batter to rest. What’s the reason? If you allow your mix to rest it will allow the gluten to relax and you’ll have well-textured fluffy pancakes.

You may be wondering what is the consequence if you don’t let the batter for your pancakes to rest? If you do not allow your batter for a while, do not be worried. The pancakes you make will still be tasty. There is no need to let your batter rest if you’ve mixed it up quite a bit as you try to take the lumps out of the mix. This will cause the gluten to be activated in the flour and make pancakes that are more difficult to cook.

Will my pancake batter remain as good the next morning?

While it’s suitable to preserve and utilize pancake batter (if it’s done properly) However, you may discover that the result is less fluffy than on the day that the batter is created. Baking soda that is present in the batter for your pancakes is likely to lose half its strength. The remaining portion is activated by the heat of the pan.

How long will the batter for pancakes last at room temperature?

In accordance with the FDA, it is not recommended to leave refrigerated food items outside of refrigerators at room temperature for longer than two hours.

The batter for pancakes contains eggs and milk, which is why I don’t recommend leaving it at the temperature of a room for longer than a couple of hours, at most. Anything longer than that will get you into trouble.

It is possible to ask if it matters if the batter for pancakes is made with dairy-free or UHT milk. It is important to verify the labeling of the ingredients insofar storage stability, as well as shelf-life, is concerned.

As with regular milk, other kinds of milk must be chilled as soon as the milk has been opened. This same rule applies to pancake batter mixes as well.

How do you think the batter for pancakes will keep in the refrigerator?

A normal pancake batter made from flour and milk as well as eggs is safe to store for 2-5 days in the refrigerator. It will, however, have to be based on the expiry date printed on the package of the product.

If the egg and milk expiry date goes over the expiry date, I’d suggest you use the batter within the expiry dates of the products.

Can you freeze pancake batter?

Indeed you can! For the most effective results from making pancakes, advise pouring it into the Ziploc bag. It is essential that you remove as much air as you can from the bag prior to sealing it.

It’s recommended to flatten your bagged mix because the smaller it gets and the more quickly it will defrost once you utilize it again.

If you’re not sure how much time The best method of defrosting your batter for pancakes is to soak it in warm water. If time isn’t a problem I would suggest placing the frozen mix in the fridge and allowing it to defrost overnight.

It is not just that Ziploc bags are useful to get the air before you seal them, but once your pancake batter is defrosted, cut the corner from the Ziploc bag and then pour the batter directly into the frying pan. No-fuss, simple, and easy.

What Happens When You Refrigerate Pancake Batter Overnight?

There’s an astonishing number of ways to make the perfect pancake. And every one of them contains ingredients that can be stored in a unique way and can alter the texture of your final product.

The most important issue is the growth in the batter.

If you like the fluffy American-type pancakes before you decide if your batter can be kept in a safe place for a long time, look over recipes for ingredients we’ll cover in the next section.

Also, the photo is in the picture because they are my very favorite pancakes. You can purchase them on Amazon!

And, no matter what kind of pancakes you’re planning to freeze, you’ll need an airtight container that is food-safe (I am a fan of the ones from Amazon) Or you could even keep it in a batter-dispenser with a lid similar to this model from Amazon.

Refrigerating Pancake Batter: Thin Pancakes or Crepes

If you’re looking to make thin pancakes that are flat or crepes for breakfast the preparation of your batter before time is ideal.

If you mix with the dry and liquid ingredients in the batter, it airs and produces bubbles. Air bubbles allow pancakes to puff up and rise. That’s not what you want from crepes. To make truly flat pancakes all bubbles need to break down.

These cakes are ideal to roll up in the car with jam and peanut butter, or other fillings or topping them with a dollop of whipped cream to create an extravagant meal in only two minutes.

Refrigerating Pancake Batter that Contains Baking Soda

Baking soda acts as a leavening ingredient, which means it will help raise the level of your batter to make your pancakes come out fluffy and light.

However, baking soda begins to function when it’s mixed into the batter, and it can become a flat mess if not cooked in a short time. If your recipe requires baking soda as your sole method of obtaining some rise from the batter, it’s not an ideal recipe to cook ahead of time.

Refrigerating Pancake Batter That Contains Baking Powder

Baking powder, however, will typically store well. A majority of baking powder is “double acting” which means it will begin to activate at the moment it is in contact with the wet ingredients. However, it will activate again when it comes in contact with the heat.

The pancakes may not be the same height as they would when you cooked them right away and if the first pancake you cooked appears somewhat flat to your tastes, add a little baking soda to the batter the next morning to help it re-fluff.

Be sure to keep it within 25% to 50percent of your initial amount required.

Refrigerating Pancake Batter That Contains Yeast

Making pancakes with yeast is a popular option to prepare ahead. The yeast is active, meaning that your pancakes will be cooked to the amount you enjoy even if they are cooked the following morning. Many people believe that waiting for the yeast to rest and prove overnight can add to the taste.

It is even possible to prepare waffles and pancakes with the sourdough starter, which is usually made several weeks prior to baking.

In both cases, you should remove the batter from your refrigerator about an hour before you cook it so that it can come back to the temperature of the room.

Refrigerating Buttermilk Pancake Batter Overnight

If pancakes made with buttermilk are your preferred breakfast option making your pancakes in advance can be a bit challenging but it’s not impossible.

Buttermilk can deflate if it is left to sit for too long, therefore the solution, in this instance is to combine all the dry ingredients before the time and then fold in the wet ingredients right before you’re ready to fry the batter.

Dry ingredients don’t require refrigeration, and wet ingredients can be mixed together in a single bowl, and then placed within an airtight container for the night however, it is recommended to combine them only before you add them to all of your dry items in the early morning.

This isn’t the best of methods to reduce time however it’s not the worst-case scenario either. Most of the time it won’t take much longer mixing the ingredients than it would take to heat up your griddle or pan.

If you’re planning to mix all the batter in advance and then refrigerate it overnight just look for a recipe that makes use of yeast, and you’ll be fine mixing everything before time.

Refrigerating Pancake Batter That Contains Egg Whites

Certain recipes call for egg whites whipped for use to bring more taste to the recipe, in place of baking soda.

If this is your favorite recipe, the best option is to make your pancake batter in the evening before however, save the egg whites for whipping and incorporate them into the batter before making the pancakes.

This gives you the convenience of pancakes that you can make overnight and the fluffy, light effect of making them on the very next day.

How to Store Pancake Batter Overnight

If you’re planning on storing pancake batter overnight the most important thing to be aware of is the absence of air exposure.

To get the best results here is how to chill pancake batter overnight:

Pour the batter into the Tupperware container that is sealed with an airtight seal.

When you close the lid, you should cover the entire surface of your batter using plastic wrap. This will provide the best protection against the air.

Another method of making pancake batter that can be refrigerated overnight:

Place the batter inside a safe liquid Ziploc bag.

Make sure to squeeze out as the air as you can before closing it

Once you’re ready to use it, just take a small corner of your bag to squeeze it like you would with a piping bag.

It is also possible to keep it in a dispenser for pancakes such as this from Amazon.

Certain people love eating pancakes every day And to those, I can only say, “why not?”

If you’re in this situation then you might find it easy to cook an enormous amount of pancake batter during your days off and then save it for later use during the week.

The most efficient method I’ve found is to store large quantities of pancake batter to store them in an old, big, empty ketchup bottle, or another kind of squeeze bottle with a good seal.

It’s nice and simple to pour pancake batter straight onto the pan or griddle for almost instant pancakes.

If you plan to keep pancake batter in storage for prolonged periods of time, the best choice is to choose pancake batter with yeast instead of baking soda or eggs.

The taste and the rise will only improve with time, and you don’t need to fuss about mixing more ingredients whenever you’re in necessity of your breakfast.

The only exception, of course, is when you like flat, Scandinavian crepes or pancakes. In that case, it’s not a matter of concern that the baking soda or the powder you use to make them loses its lifting ability with time.

The last ingredient to look out for is milk. If the recipe you’re making requires milk, it’s not advisable to keep the batter for your pancakes for more than one week at a time, to make sure that it doesn’t go spoil on you.

Why is it that my pancake recipe calls for the resting time?

It’s unusual, but not uncommon for pancake recipes to have the necessary resting time. When you’re mixing flour, lots of mixing can cause the gluten to harden and resting your dough or batter can loosen the gluten and prevent a pancake from becoming rubbery.

The key to making a good pancake is not to overmix the batter. The lumps are acceptable. However, an overmixed batter is thin and, as this inquiry suggests, could be hard to handle.

Can I freeze cooked pancakes?

Yes, you can! Many people prefer to cook a large number of pancakes, then freeze them for quick consumption later instead of making pancake batter in advance. When your pancakes are done cooking and cooling, allow them to be cool before wrapping them with plastic wrap.

To ensure they are protected You can put each cake individually wrapped inside one safe freezer Ziploc bag or Tupperware container. The container should be labeled with the day the cake was of freezing and then try eating your pancakes within three months.

For eating, you can put the pancakes frozen in your toaster oven or your toaster or oven, or allow them to thaw on your counter, and then reheat in a frying pan or in the oven in larger quantities.

How do you create your perfect pancakes?

Ingredients

2 cups all-purpose | plain flour, (290 g | 10 oz)

1/4 cup of granulated sugar, or sweetener (60g | 2 1 oz)

4 Tsp baking soda

1/4 tsp baking soda

1/2 teaspoon salt

1 3/4 cups milk, (440ml)

1/4 cup butter (60g | 2 1 oz)

2 tsp pure vanilla extract

1 large egg

Instructions

Mix the wet and dry ingredients in separate bowls.

Mix the dry ingredients with those of the moist components.

Put 1/4 cup batter for pancakes on a hot, greased non-stick pan.

The top of the pancake begins to bubble, the bottom becomes golden. Turn it over and cook the other side.

Make sure to serve it with maple syrup.

Wrapping up

How Long Does Pancake Batter Last In The Fridge?

In this article, we’ve provided the answer to these questions “How long does pancake batter last in the fridge?” as well as “how to make perfect pancakes?”I hope I’ve been able to provide information about other queries you may have. After you have a good understanding of this, you’ll have no trouble making the perfect pancake. Now, go cooking!

Does Cheesecake Go Bad? How Long Does Cheesecake Last?

Does Cheesecake Go Bad? 

Does Cheesecake Go Bad? 

Does Cheesecake Go Bad? 

How long does cheesecake last in the fridge? This is an important question indeed. More so, if you have got more cheesecake than you can manage to consume in a single sitting. You might be wondering as well, “does cheesecake go bad?’ Somewhat confused, you might try to figure out how you can maximize your delicious dessert or avoid the possibility of throwing it away. What should you do now?

So, before you make that decision to purchase cheesecake, you should take a close look at this article to find out how to store cheesecakes and the best storage techniques available to you.

What exactly is Cheesecake in the first place?

Cheesecakes are recipes that have been available to us for the last 100 years. The earliest recipes, in fact, date back to the 18 century.

It was in the late 19 century that this dessert was popularized in the USA. The recipe did not contain cream cheese but rather thick milk instead.

The recipe for a delicious cheesecake has a base layer that consists of crushed cookies, pastry, or sponge cake. There are two kinds of cake: baking or non-baked (refrigerated).

So, after you make layers of cheesecake using cream cheese, and then add fruit or whipping chocolate syrup, cream, and so on,  the cheesecake is ready to be eaten.

The flavors offered are delicious, ranging from pumpkin to strawberry,  lime, chocolate and toffee. There are also chestnuts and other nutty flavors.

Cheesecakes can be enjoyed with a smile any time of the day, for breakfast or dinner, snacks at the end of dinner, or for any special occasion.

Cheesecakes are among the exotic meals that are easy to prepare and they are well-presented and taste fantastically delicious.

How to Preserve Cheesecake Properly?

The best method to store cheesecake is by cutting the slices in half and then storing them separately.

The more occasions you take the entire cheesecake platter and cut them into smaller pieces, the greater is the chance of your cheesecakes becoming spoiled.

So, once the dessert is finished and it is time to store break it into pieces that can be consumed in one sitting.

If you are planning to eat it the next day, it’s a good idea to store it in the refrigerator.

If you’re not a lover of sweets and believe it’s only on weekends when you indulge in the sweets such as Storing Eli’s Cheesecake suggests that you put food items in freezers. However, it should be stored in separate sealed plastic containers.

Don’t try freezing cheesecakes that are baked without baking. They are not good for freezing.

Unless otherwise stated by the recipes, cheesecakes baked may be stored in the freezer.

It is not recommended to add any garnish or topping prior to freezing.

Make sure you know the temperature at which you’ve been storing your cheesecake at. A rise of 10.8 degrees could be detrimental to the shelf-life of this dessert. So, it is best to store the cheesecake at an even temperature.

When storing them in containers, ensure that they are kept in glass or plastic airtight containers to avoid reactions to the containers made of metal. Hermetic seals are the best choice, therefore.

When shopping for cheesecakes it is the last item on your shopping list to purchase at the end. It will be kept at a cold temperature for a longer time. This means that when you arrive home and put it in the refrigerator, it remains fresh and smelt delicious for a longer period of time.

How Long Does Cheesecake Last? Does Cheesecake Go Bad?

Cheesecakes can fail when not properly stored or stored at an appropriate temperature. The main reason for cheesecakes to fail is the eggs that are contained in them.

Because of the eggs, the lifespan decreases from 7 to 4 days. The cheesecake will last for a long time if it is kept in the original container.

It is best to keep it between 35 and 45 degrees Fahrenheit. Its shelf-life of the tasty is dependent on the preservatives that are employed, the time of travel as well as the humidity to which that it has been exposed to and more.

Unfortunately, the shelf life of cheesecake is very short. It is essential to be attentive to its freshness as well as its storage.

The Department of Agriculture’s Food Marketing Institute is of the opinion that cheesecakes that are sold in stores may have a maximum refrigerating time of seven days.

This will be a part of the packaging design as well as the specifications for the timeframe.

We suggest that it is securely wrapped in a container of plastic. Actually, it can be kept in the freezer, but not if you intend to consume it on that same evening.

If you’re planning to eat it later in the evening take it out at least two hours before to begin digging into the desert.

If you are worried that you will not be enough to finish the whole task in one go it’s a good idea to slice the cheesecakes in portions and store them in the freezer for the future.

How Long Does Cheesecake Last In The Fridge?

The typical Cheesecake that is opened can last as long as seven days if it is stored properly.

But, cheesecakes that are not opened and are fresh made, frozen, or homemade can be stored in the fridge for 6 to 8 days following the date of last printing. It is also possible to freeze them too and remain fresh for 6 to 8 months.

A variety of factors must be considered when storing items in refrigerators. For example, how long was the cheesecake in the fridge, and how long did it take to get between the store and your house.

Was it hot to make it to your home from the grocery store, or did you leave it in the sun for too long?

It’s a little-known fact that even a speed that is unsettling could ruin the cheesecake. Cheesecakes left at a temperature of a room for more than two hours will give off a bad smell, brown color, and a sour taste.

To prevent the growth of bacterial, you should take the cheesecake out of the refrigerator before it is ready to be served. It stays firm, and the flavor is robust and it tastes delicious.

In the event that the cheesecake is frozen, it’s ideal to store it at least 4 hours prior to serving it so that the cheesecake can be at room temperature. It will not be frozen, but it will be fresh.

How To Tell If The Cheesecake Is Bad?

Cheesecake is loaded with cream, eggs, flavors, cheese and other ingredients and all have limited shelf time. It is inevitable that cheesecake goes bad, and it will soon turn into a flood hazard when left at room temperatures.

The high content of moisture, combined with the non-perishable ingredients makes cheesecake a perfect food for visible mold and invisibly spores bacteria, such as salmonella and listeria, which can’t be seen with the naked eye but are nevertheless risky.

Unfortunately, it doesn’t take time for the cheesecake to spoil. The simple act of leaving it at the counter over a couple of hours can turn your delicious dessert into a place for dangerous bacteria.

Let’s go deep into how long cheesecakes can last.

4 Tips To Tell If Cheesecake Has Gone Bad

Because of its limited shelf-life, it’s easy to determine if cheesecake is degraded. The signs of a decaying cheesecake can be seen within several hours.

Here’s what you need to be watching when examining the cake for freshness:

  1. Aging

Fresh cheesecakes usually have even and smooth edges. The cheese itself is soft and smooth. Cakes that are stale on the contrary side will have cracked and separated edges. The cheese may appear and taste rubbery and the toppings may be sour too.

  1. Discoloration

A cheesecake that is no longer fresh can turn a dull yellow color and may also show gray spots. Be careful not to take the discolored pieces and eat the rest of the cake. The color change is usually a sign of bacterial activity. You could get sick after eating this cake.

  1. Foul Smell

A glance is often enough to tell that the cheesecake has gone off. However, to ensure that you are 100% certain, take a thorough sniff to ensure freshness.

The cake’s smell is of aged dairy products, then you must eliminate it. It could also be leaking the liquid that is a further indication of bacteria activity.

  1. Mold

The presence of mildew is an obvious indication of the possibility of spoilage. The spores of mold usually develop after the cake has been laid in a room at room temp for longer than the two-hour minimum. The cake left unattended in the fridge may result in the growth of mold because of the exposure to moisture.

If you can’t detect mold spores doesn’t mean the cake is safe to take a bite of. Cheesecake that is not refrigerated will be a magnet for bacteria and it is best to keep it in check and throw it away.

Keep an eye on the cake’s creation date as well as the amount of time it is left outside the refrigerator. Remove cheesecakes that have been sitting at the counter longer than two hours.

4 Tips to Store Cheesecake safely

A proper storage method will ensure that cheesecake remains delicious and safe to eat. Here are some suggestions to store store-bought as well as homemade cheesecakes:

  1. Tightly Wrap With Plastic Film

When it comes to the storage of cheesecakes, the goal is to limit contact with moisture as well as to ensure that the cake hasn’t picked the flavors of other food items in the refrigerator.

Cut and serve as many slices that you need then, wrap the cake in cling film to wrap tightly around the rest of the cake. Make sure to not allow any air pockets to enter.

  1. Store In An Airtight Container

Airtight containers are fantastic alternatives to freezing bags to store the cake. If keeping the cheesecake in baggies that seal can be an option, you can keep your cake by placing it inside an airtight bottle. It’s recommended to wrap the slices in plastic wrap before placing them in the container.

  1. Refrigerate As Soon As Possible

If you baked the cake or purchased it, make sure you put the cake in the refrigerator immediately and then store it until you are ready to make use of it.

The maximum time that cheesecake can remain when it is at room temperature is 2 hours. If it is left longer, the cake could be dangerous for consumption due to having potentially dangerous bacteria.

If you are unable to cover the cake and not damage its cake’s surface, simply put the cake on the pan on a sheet, cover with plastic wrap and then store it in the refrigerator for no more than 7 days.

  1. Freeze For Longer Freshness

It is possible to freeze slices of cheesecake, or whole the entire thing. The cheesecake you have made is best refrigerated when you arrive home.

To store the cake in the freezer, wrap it in aluminum foil, then stick it into the freezer to keep it for two months. When you’re ready to enjoy it, defrost and cool it in the refrigerator for up to 7 hours before serving. We’ll discuss the best way to store cheesecake later.

The Risks Of Consuming Expired Cheesecake

Cheesecake expires within a couple of days after the date of manufacture. At the end of a week, even cheesecakes that have been carefully stored can become a signal for bacteria activity.

Let’s face it, there’s a significant danger in eating cheesecake that is expired. The risk is that bacteria like Salmonella Enteritidis, Escherichia coli and Campylobacter are likely to find a place within the cake.

Consuming bad bacteria could cause serious bacterial infections, and symptoms such as stomach pain and vomiting, fever, nausea, and dehydration.

If you spot even the tiniest hint of spoilage such as a sour flavor or smell, discoloration, oozing, and, of course, mold, you must remove the cake.

Can You Freeze Cheesecake?

Cheesecake can be frozen for a long time. It’s possible to prolong the shelf-life and keep the cheesecake safe for eating through freezing.

Use these instructions to make cheesecake freeze-ready.

Securely wrap each slice of cheesecake using aluminum paper. Be careful when placing them in the freezer, and let them cool until ready to consume.

Sometimes, cheesecakes can be too soft to wrap. It is possible to solve this issue with a baking sheet and then freezing it.

Slice each piece of cake that has been frozen, wrap it in plastic film and place the individual pieces into a freezer bag that is resealable.

Make a mini cheesecake which you can consume as needed. You can bake only enough to avoid having to throw away the entire cake once it is past its shelf-life.

If you’re in the mood to eat it, take the cheesecake out of the freezer and let it cool in the refrigerator for a night. If you want to use it right away you can let the cake cool at room temperature for between 20 and 40 minutes.

Make sure to note the date on which you froze the cake. This will allow you to monitor how long the cake has been stored in the freezer and examine the freshness of the cake when it is time to serve.

Remember that freezing can affect the texture and flavor of foods, for example, your cheesecake. While freezing can keep the cake in good condition for 3 months or more, we suggest that you finish the cake within less than a month.

Wrapping up

Does Cheesecake go bad?

Cheesecake is susceptible to bacterial activity, and your favorite dessert can spoil quite quickly. Refrigeration can help maintain the quality of the dessert for a longer period of time, but you must eat it or dispose of it before the end of one week. Do not eat cake with obvious signs of spoilage, and those that have been left out for more than two hours.


Related Post: Does Evaporated Milk Go Bad?


Do Radishes Go Bad? How Long Do They Last?

Do Radishes Go Bad?

Do Radishes Go Bad?

Do Radishes Go Bad?

When you’re planning to cook salads or make a quick roast dinner, radishes will be an essential ingredient. But the main issue with these delicious all-year-round foods is, do radishes go bad? It’s not a good idea to go through the effort of buying them only to have them get rotten before you start making that salad.

Do Radishes Go Bad?

You might be thinking about whether radishes can go bad? Yes, radishes like all vegetables can become spoiled. Why do radishes go bad? Because of their moisture content, they’re not able to last long. The trick lies to store them properly. You may be able to store them longer if you use appropriate storage strategies.

The temperature plays a major role in the length of time your bunch of radishes lasts. The high temperatures destroy these vegetables extremely quickly. If you’re looking to prolong their shelf life be aware of where you keep the radishes. For radishes, at least,  the colder the more nutritious.

How Long Do Radishes Last?

It is recommended that you ate your radishes fresh and crisp. Due to this, many people struggle to maintain their freshness. Otherwise, radishes will go bad. If stored correctly, however, you’ll be able to keep them fresher longer, and you can enjoy them for up to a week after purchasing.

Depending on where you reside depending on where you live, radishes can last for up to 3 days in water that is at temperatures of room temperature. What is the reason to put them in water? The answer lies in the cooling aspect. The cooler the atmosphere where you’re storing your radishes, the higher chances you have of keeping them longer.

You can keep your radishes in the refrigerator for up to 8 days, but you will still have that delicious red, white, or purple veggie on the day you’ll need it. If you opt for a canning container, radishes will last for up to 8 days, but they will not be becoming rotten. If you store them in a freezer, they can keep them for up to 2 weeks before they’re spoilt.

If you enjoy gardening and just picked your radishes with the correct method, even after a few months,  your radishes will still be in good shape. A container of sand or soil is all you require to extend the shelf-life of your bumper crop.

5 Tips To Tell If Radishes Have Gone Bad

If you’re a fan of radish, you’d certainly not like to learn that your favorite vegetables are spoiling. However, it does happen and you must be aware of the indicators of damaged radishes.

Soggy or soft The radishes you’ve stored most efficiently But then something seems off. Certain radishes are like they’re soft or soggy. This is a sign that they’re not fresh and you need to throw them away. the radishes. Fresh radishes must be crisp and tough on the outside.

A strong, unpleasant smell If your radishes emit an unpleasant smell, then it’s time to put them into the trash. An unpleasant smell is not an indication of healthy radishes.

Growing mold – Are radishes bad once they begin to develop mold? Yes. Just like any other vegetable, the radishes may begin to grow mold which signals the time is right to remove the fungus

Color change – A color change is another indication of a damaged radish. If your radishes have begun to turn dark, they might have been spoiled by shelf time.

Pay attention to leaves: If it’s leaves, look for moisture content. Avoid eating wilting leaves of radish. Also, the presence of dark spots may be an indication that radish is has gone rotten. Like in the case of roots, rotten leaves should not be in your refrigerator.

8 Tips To Store Radishes

  1. Chop Off The Greens

The first step is to take the leaves off. Why do radishes deteriorate more quickly if left with their leaves? Leaves contribute to a loss in moisture which is why you shouldn’t have to have wilted the radishes. However, don’t toss out the greens.

They’re also edible and you could save the leaves for another day. Try some dishes using the leaves, for instance, sauteing them in a pan or giving some color to your salad. The leaves can be stored within an airtight container.

  1. Dry Completely

After that, clean the roots thoroughly as they are often filthy. Water is a major enemy of any effort to preserve vegetables. So, to ensure your radishes remain firm, you should leave them out for a long time to dry before storing them. If you own a dehydrator, drying will be much more simple and speedier.

  1. Airtight Plastic Bag Does The Trick

The majority of radishes can be stored in a plastic container before throwing them in the fridge. But, you can add some paper towels to the plastic bag, and they will keep absorbing the moisture.

It is important to get rid of all air from the bag before storage. It’s not necessary to worry regarding black radishes. They will last longer in shelf life if they are kept dry. Find a perforated plastic bag to store them in.

  1. Blanch Before Freezing

The option to freeze can give you more days of radishes. This method is also great for leaves of radish. To get the most from the radishes following the thawing process, ensure that you ensure that they are properly preserved.

How do you go about this? Cut the radishes in half before blanching them. Make sure to keep the blanching time less than 3 minutes. It is important not to lose their texture or color. After that, soak the radishes in cold water and dry them. The radishes are now dry to be put in freezer bags for storage.

  1. Use A Canning Jar

Another great method is to place your Radishes in a jar that you can keep. After you’ve put water into it, gently put the radishes inside. Then, place the container into the fridge and you’re good to go.

  1. Wrap Each Bunch

If the damp container sounds like too much effort You can put the Radishes in a cool dry area without washing. Make sure that each bunch is wrapped in a way to keep moisture out. But, the radishes you buy will be ruined faster than if they were in a box.

  1. Sandbox Can Go For Months

Do radishes get rotten if you don’t wash them? There’s a way to keep them fresh. If you’re looking to keep them longer, do not fret. It is best to keep them in their natural state, but without cleaning them. This method is great for radishes that are straight from the garden. Take a box and place some soil or sand that is damp on top of it, and then place the radishes.

Avoid sand and dirt that is wet. Make sure you keep your radishes in an area that is dry and cool to ensure their preservation, such as in a basement or cellar. Be sure to check on them to ensure they’re in the right place in case they begin to rot.

  1. Always Mark The Storage Date

A great method of keeping track of the radishes is to write down the day that you placed them into the sandbox. If you discover that some of the radishes are decaying, throw it out. If you leave it in, it will cause the decay to spread to other radishes, so everything you have done will go wasted.

The Risk Of Consuming An Expired Radish

Do radishes deteriorate when left unattended? Absolutely. There is a chance of eating this veggie once it is past its shelf lifespan. Any food consumed after the expiry date could cause illness. Radishes consumed raw may cause illness because they could contain bacteria like E. coli and Salmonella that can cause fever or diarrhea. In the most severe cases, dehydration could be a result.

However, the pathogens which cause food poisoning aren’t identical to those that are found in rotten veggies. What is this referring to? If your radishes appear to be dying the reason is that they’ve been dehydrated. But they are not harmful to your health.

However, one aspect to be aware of is that once they’re rotten they lose their nutritional value. Thus, eating rotten radishes doesn’t bring any value to your diet. Why would you eat something irrelevant to you?

There are a variety of options concerning rotten radishes. They should be kept away from.

Beware of canned food items. One method to preserve radishes is making them into a can, and if they get rotten, you should remove them. Why? Botulism can be caused by canned vegetables that manifest as difficulties in swallowing and speaking, as well as paralysis. When it gets severe botulism could be fatal.

Can You Freeze Radishes?

You can keep radishes in the freezer because you may purchase more than you complete. Why do radishes go bad? Incorrect storage is among the main reasons. It is ideal to not gamble with your veggies and freezing is an excellent option for storing the vegetables.

This is done by blanching them before freezing. Why? Freezing whole radishes will cause them to harden so that they’ll explode.

But, there’s only one drawback. When you store radishes in a freezer the texture and flavor might change slightly. This is due to their high content of moisture. Additionally, the nutrient-rich radish loses some of its nutritional value following being frozen.

It isn’t an issue. Why? They’ve kept their youthful look and always cook great meals.

Another thing to consider is that there isn’t any magic to freezing. It is only a way to keep them in shape for a time and not permanently. In this case that timing is essential. Do not let them sit for more than an entire two weeks frozen.

Have a full week ahead? Here’s a fantastic radish trick for you. If you’re looking to save yourself the trouble of making an entire dish using radishes and freeze them, you can either cook them or roast them.

Wrapping up

Do Radishes Go Bad?

Why are radishes rotting as they’re an excellent food source for vitamin C and potassium, calcium as well as anti-oxidant qualities? They shouldn’t be. These simple tips will help you enjoy your favorite vegetables for a longer period by keeping them in the right way. The proper storage removes the anxiety when purchasing and will save you from frequent trips to the grocery store.

How long does tomato soup last in the fridge?

How long does tomato soup last in the fridge?

How long does tomato soup last in the fridge?

In this article, I’ll tackle the question “How long can tomato soup last in the fridge?” and “How to freeze and reheat tomato soup?” Read on if you are interested.

How long does tomato soup last in the refrigerator?

The soups that are refrigerated continuously stay fresh for 3 to 4 days when stored in the refrigerator. After opening then take the tomato soup that you have canned or packaged soup into a sturdy glass or plastic airtight container.

How long does tomato soup last when stored in the freezer?

The homemade tomato soup can last for 4 to 6 months on the frozen shelves if properly stored. However, homemade tomato soups can be consumed within a month after storage.

The soup that has been thawed and heated can be kept in the refrigerator for a further 3-4 days. It is not advised to chill tomato soup, especially when it is made with dairy ingredients such as milk or cream.

Can You Freeze Tomato Soup?

The tomato soup recipe is a cherished classic that is enjoyed at any time! Contrary to other soups tomato soup is not made with thickeners, which is why it freezes so well. This is true for canned as well as made tomato soup.

The addition of milk, cream, or any other thickener to the soup could cause the separation of dairy proteins as well as the soup’s liquids. There are, however, ways to alter the soup to prevent this from happening. A tip to keep in mind when freezing tomato soup,  you must make sure that the soup has completely cooled. This will extend the shelf time for the soup.

How to Freeze Tomato Soup?

Freezing Homemade Soup

Prepare the soup the way you would normally and then allow it to completely cool. After the soup has cooled completely, you can prepare a plastic container that has an airtight cover. Pour the soup straight into the container and leave about 2 inches of room. So the soup can expand more as it cools. Cover the lid with an airtight seal and mark the date of storage then put it into the freezer. Check out the video above for the step-by-step guide on making tomato soup freeze-ready.

Freezing Store-Bought Tomato Soup

If, for example, you purchased tomato soup at your favorite restaurant and leftovers or used tomatoes in a canned soup, then you could save the rest of the soup to enjoy later. Ideally, you’ll want to keep the soup you’d like to freeze from the remainder of the soup you’ll consume. However, if this isn’t feasible, be sure to utilize a serving spoon to minimize the chance of spoilage.

Make sure the soup has fully cooled and then put it in a sturdy plastic container with a lid that is airtight. Place the soup in the bowl leaving at least two inches of space so that the soup expands as it cools. Cover the container with an airtight lid, and write the storage date, and stick it into the freezer.

Cooking and Freezing Tips

If you’re cooking tomato soup in the kitchen and would like to add milk or cream do not add this ingredient until prepared to serve. After the soup has been removed from the freezer it is possible to add the milk or cream while you warm the soup.

For a soup that has more richness and flavor, you can consider roasting the vegetables first. This includes roasting the tomatoes prior to cooking the soup. We also suggest using beef or chicken broth in place of vegetable broth to give it more flavor.

Does your tomato soup’s consistency seem too fluid? Here are some suggestions to give somebody to soups that are thin such as roasted eggplants or Croutons. Roasted eggplants help to thicken the soup and adds a unique flavor to the soup. Croutons can also give bulk to soups that are thin, and without adding flavor.

A careful reheating process is required in the case of warming tomato soup that is creamy. Incorrect reheating can result in the milk ingredient curdling and give the soup an unappetizing appearance or lumpy consistency. To ensure that the soup’s consistency remains even, heat the soup over a low to medium temperature. Mix the soup thoroughly to ensure the consistency is and smooth. If the soup seems to be runny it is possible to add a bit of cream when you heat it.

If you’ve got leftover tomato paste leftover from cooking tomato soup you can also freeze tomato paste.

Tomato soup:  shelf life, thawing, and reheating tips

If stored in the freezer homemade tomato soup or tomato soup that is purchased from a store will last for between 4 and six months. Make sure to eat your soup in 1 month or less for maximum taste. Tomato soup that is thawed and then reheated can be stored for up to 4 days in the refrigerator. It is not recommended to refreeze the soup leftovers, particularly, when it’s a thick tomato soup.

To defrost the tomato soup, simply move the soup from the freezer to the refrigerator and allow it overnight to defrost. When the tomato soup is completely thawed, it is possible to warm it. To warm the soup it is possible to simmer it in a skillet on medium heat or microwave it in a bowl at high speed for about 15 or 20 seconds.

If you have removed the thickener or cream before placing the soup in the freezer, it is possible to include this ingredient together with other ingredients, while the soup is simmering.

How to make the finest tomato-basil soup?

Ingredients

  • 2 tbsp olive oil
  • 1 Vidalia onion
  • three tomatoes on the tree chopped
  • 3 cloves of garlic that have been crushed
  • 28 oz canned whole plum tomatoes that have been peeled
  • 2 tbsp all-purpose flour
  • 1 cup vegetable broth or chicken broth
  • 2 teaspoons sugar
  • 1/2 tsp crushed red pepper flakes
  • 1 Tbsp dried thyme
  • 1/2 teaspoon dried oregano
  • Salt
  • 2 tbsp fresh minced fresh basil

Instructions

In a saucepan, heat oil at medium-low heat, and cook onions until translucent.

Add the tomatoes to the mix and cook until tender. Add the garlic to the mix and sauté until fragrant.

Add canned tomatoes. Utilize a wooden spoon to break the tomatoes.

Incorporate the all-purpose flour, adding the vegetable broth little by little.

Mix all the spices and herbs.

Bring everything to a boiling point, then let it simmer for approximately 40 minutes under the lid covered.

Incorporate fresh basil. Blend until it is homogeneous. Return the soup that you have blended to the saucepan, and cook for another few minutes.

Variations

Blend 1 cup of shaving Parmesan into this soup for a more cheese-y and rich.

Incorporate 1/3 cup of whipping cream heavy into your blended

How To Tell If Pot Roast Is Done?

How To Tell If Pot Roast Is Done?

How To Tell If Pot Roast Is Done?

How To Tell If Pot Roast Is Done?

Pot roast is an iconic American dish, which is often regarded as an integral part of classic American cuisine. It is a combination of a huge chunk of meat, such as Brisket, or chuck, and other vegetables like onions as well as carrots and potatoes that are cooked to perfection. However, when cooking meat, the greatest challenge you face is how to achieve the perfect roast pot.

So, how do you know when the roast is cooked? Put a fork in the meat and test the hardness. If it falls off easily, then it’s cooked. Check the roast temperature at the end of cooking time with a thermometer.

The temperature inside the pot must be 145 ° or higher. To help make it easier I have outlined the steps in this post. Check it out!

How Do You Know if Pot Roast Is Done?

In the first place, you have to determine the precise quantity of heat and the time required for your roast. This will ensure that the roast does not become too soft or undercooked.

The procedure may seem a bit complicated, but with a little caution and a bit of care, your roast is going to come out perfect! Here are detailed descriptions of the steps you need to take to determine whether your roast is cooked.

Step 1: Buy a thermometer for your kitchen and use it

This prevents the serving of meat that has not been cooked or is overcooked.

The most commonly used kind of thermometer is it is the “instant-read” thermometer. They can be either digital or conventional with probes attached to one end and a display of numbers to the side.

Step 2. Correctly insert the thermometer.

Place the probe in the middle of the pot after it’s cooked to the correct length of time (time listed in the recipe for roast after cooking). Roasts cooked in the pot typically cook in 2 or 2 1/2 hours after cooking time however the duration will vary.

Step 3. Examine the temperature

Pay attention to the numbers shown by the thermometer. It is suggested that round toasts be cooked at 140°F while cooking the brisket or chuck should be cooked up to 160°F.

Roast red meats like lamb and beef to various temperatures based on your needs. Below is a short chart to help you determine the best temperature.

Temperature (in F) Temperature (in C) Roast Type

125 F 49 C Rare

130 F 55 C Medium-rare

140 F 60 C Medium

155 F 68 C Medium-well

165 F 74 C impressively done

How to Tell if a Roast is Done Without a Thermometer?

If you don’t own a thermometer, don’t have to be worried. I’ve got alternatives for you.

Pot Roast Cooking

Method 1. The test of the touch

A lot of chefs across the globe employ the test of touch. What exactly is the purpose of the test? It’s a method of testing the quality of your meat by rubbing it using your hands.

Make contact with the meat with your fingers. Next, touch the meat beneath your thumb.

If the meat is similar to the tip of your thumb It is raw. The meat is considered rare if it feels exactly the way when you press your thumb and index finger close.

Now, apply pressure to your middle finger.

If the meat is akin to that, then the meat is medium-rare. Then, join the ring finger to the thumb. If the meat is akin to this, then it’s medium.

Finally, join the pinky and the thumb. If the meat is an identical feel and texture, it does not require further cooking.

Method 2. Utilize a cake tester

Another technique that is employed by many people is to gauge the degree of doneness by using a cake tester.

Place the tester into the middle of the meat. When it’s cold the food is still raw. If it’s warm, the meat is cooked to medium-rare (it’ll be the same temperature as your own body). If it’s warm, you’re all set.

How to Tell if Pot Roast is Overcooked?

It is possible to tell if the roast requires more time to cook or not, by applying the next suggestions.

Cut a small slice or two of the roast to see whether the pot roast is undercooked or overcooked. If you’ve cooked your pot too long, the roast, it’ll appear dry and flaky fibers, and it will split when you cut it.

If you bake your roast excessively long time, the roast could be mushy or hard.

How Do You Know When a Crock-Pot Roast is Done?

If you cook in a crock-pot be sure the cooking duration is between 4-6 hours on high and 8-10 hours when cooking on low heat.

Continue to keep track of the time and then turn off the heat after examining how the meat is cooked. If your roast appears soft and you can fork it without difficulty, it’s completely cooked.

Take the roast out of the crockpot, and chop it into chunks. Serve with gravy and vegetables to enhance presentation and taste.

How To Tell If Pot Roast Is Done?

These factors will allow you to determine whether a roast requires more cooking time or not.

Temperature

In accordance with USDA guidelines According to USDA recommendations, roasts must be cooked at 145° F and allowed at a temperature of around three minutes. A temperature of 100.6 to 106 degrees F (minimum) must be guaranteed to allow the food to cook safely.

Color

Meat cooked to temperatures of 172-180 degrees Fahrenheit or 78 to 85 temperatures Celsius is considered to be well-cooked.

Additionally, cooked meat has an appearance of a dark brown crust on the outside as well as an interior that is completely brown or gray with the absence of any red or pink.

How do you cook a tender roast in a pot?

If you’re interested in learning how to cook your pot roast so that it’s tender and juicy each time, it’s helpful to learn some helpful tips and a bit of advice to guide you down the right track. Let’s see how you can cook pot roast in the correct way.

Selecting the Meat

Common cuts used in pot roast include chuck Brisket, top round bottom round, and the rump. It is always possible to ask your butcher at the grocery store for advice on the best cut suitable for pot roast.

Less fatty roasts like rump, chuck, or brisket are less marbling of fat, which means they are less chewy if they are not cooked properly. It’s the connective tissue and fat in the roast that gets softened through long slow cooking, which results in great flavor and tenderness. You can still get tender meat from less lean roasts through braising, that is, slow cooking the roasts in a tiny volume of liquid inside a covered pan for a prolonged period at low temperatures.

Always purchase more meat than you’ll need. leftover pot roast can make delicious sandwiches the following day. In general, you can expect to receive two to three servings from one pound of boneless roast and two servings from one pound of bone-in roast.

Moist Heat Is Required

The cuts of meat that are used to make pot roasts have lesser fat as compared to steaks, and the long cooking time with liquid (braising) reduces the meat’s fibers. There are a variety of methods of achieving humid heat, such as cooking on the stovetop, as well as in an oven using an enclosed pot or even in the slow cooker. Additionally, pressure cooking with the pressure cooker of your choice or an instant pot is also a great way to braise the meat, however in shorter amounts of time.

Prepare the Roast by Seasoning and Browning

Browning the roast on all sides before making it braised or put under pressure cook will help seal in the flavor. Begin by sprinkling it with salt and pepper and any other spices, such as Cajun seasoning, marjoram, or Thyme. It is also possible to dust the roast with flour or cornstarch before cooking. In a pan for frying cook the oil over a high temperature. Add the meat, and cook each side until it’s cooked. It will take between 8 and the 10th minute, but make certain to budget the time.

Browning enhances the appearance and flavor that the animal has. The high temperature used in browning will caramelize the proteins and sugars present that are present in meat resulting in a smoky flavor. If the recipe doesn’t require browning, you don’t have to be concerned about it.

Using an Oven or Slow Cooker

The most common way to achieve the most optimal results when making the roast bake in the oven in the slow cooker. If the roast simmers in a pan on the stove you must be more attentive to the process of cooking. One of the most appealing aspects of roasting a pot cooked in an oven crockpot is that you can put it in the oven and then walk away.

Try out the Cooking Liquid

When you cook your food, it may utilize anything from cola to tomato juice to beef broth. Explore different recipes for pot roast for ideas on what you can make your braising liquid. Aromatics like sauteed onions or garlic are usually used in the liquid used for braising.

Vegetables and All-in-One Meals

Add some vegetables to the meat, and you’ll have a delicious one-pot meal. Onions, potatoes, carrots, and mushrooms are common ingredients, but you can make your own ideas. It is important to add vegetables at the beginning while you cook in the Crockpot. When roasting in the oven include vegetables approximately one hour before when the meat is cooked.

Timing

If you want to make it as quick as possible opt for a pressure cooker pot roast. You can cook an entire roast in around an hour. If you bake it there is a need for 2.5 up to five hours depending on how big the pot roast. If you are cooking a slow cooker roast, it’s best to start the cooking in the morning, so you can get the roast prepared for dinner.

An undercooked roast will be chewy and hard. Check the roast using a fork before removing it from the pan. If it’s done it will slide the fork through easily and you’ll be in a position to pull off the meat with a forkful. If it’s still firm, transfer the roast to the pan and cook it for another one hour.

Another issue is cooking too long for the pot roast, which leads to dry and dry-looking meat. Avoid this by making sure that you have enough liquid to braise the pot, and make sure you don’t let the roast go dry. For smaller roasts that weigh less than three pounds in weight, test for doneness after two hours. For larger roasts check for doneness at three hours after the time of cooking.

Related Questions

Why is my roast so dry in the crockpot?

If the roast you have isn’t as tender it could be that you used an unboned chuck roast. It could also be that you didn’t cook it enough. It might require another 2 to 3 hours of cooking time, i.e. cook until it can easily be sliced with the fork.

What is the recommended inner temperature of a roast be?

With a meat thermometer, the temperature should not be less than 145°F and 65 degrees Celsius in the largest portion that is the meat.

The USDA suggests an inside temperature of 140 degrees Fahrenheit. Examine the meat’s temperature in different parts, starting with the largest portion. Take note of the smallest.

Can you overcook pot-roasted food?

Yes. If the first taste of roast is chewy, it’s most likely that you’ve cooked the roast for too long.

The roast is overcooked if it is placed on the stove for more time than it is advised. The optimal time to cook a pot roast is between 8 and 10 hours at the most.

Mistakes to Avoid When Cooking Pot Roast

  1. Roasting the wrong way

The tough, affordable cuts of beef are the best for pot roast. This means that you can use nearly every cut of beef, isn’t it? The problem is that cuts of beef that lack connective tissue may be too hard or will turn into the consistency of mush after a long slow braise in the oven.

Choose these roasts instead Find the chuck, brisket, or round roast to make pot roast. Each one is packed with connective tissues to gradually break down into collagen that is rich and supple which will tenderize the meat and enhancing the gravy’s flavor while they cook.

2. Not browning properly

Browning a large roast can be an overwhelming task because many believe that searing is not enough to create a juicer for roasts, it’s tempting to skip this step completely.

Make sure to brown the pieces: Browning, not searing is a true flavor enhancer that requires only an extra few minutes on the stove. The cooked parts are the equivalent of gold. Just a tiny amount can go in a big way to make the dish even more delicious. Cook your roast inside the exact skillet that you’ll cook the meat in after the deglazing.

You can also try this trick for a smarter, better method to brown Meat to make Stew

3. Deglazing with only broth

Deglazing lets out all the wonderful caramelized bits that are created when cooking the roast. But when a roast cooked exclusively with beef broth will be robust, it can taste flat and uninteresting after braising.

Make use of broth in addition to this using Red wine (or even vinegar from red wine) as the initial phase of deglazing. Incorporate beef broth with a small amount of tomato paste and fresh herbs before cooking the roast. Cover it with a lid and begin cooking the beef.

Don’t drink wine when you use this trick: The Most Effective Alternative to Alcoholic Substitutes for White and Red Wine. & White Wine

4. Cooking vegetables for too long

I’ve often imagined the pot roast as a one-pot wonder in which I could put all ingredients in one pot and with just the appropriate amount of time would miraculously make my roast and the vegetable fork-tender simultaneously. After a few mushy vegetables, I discovered that the beef needs to swim alone for a few minutes inside the braising fluid before the vegetables are added to cook.

Timing is everything: cook the roast of beef in 1 1/2- 2 hours before when the potatoes and carrots (or turnips, parsnips, or any other hearty veggies) are put into the pot.

5. Do not thicken the gravy

Gravy, to me, is among the main differences between stews made of beef as well as pot roast. The liquid that comes from the roast must be velvety and thick not just a little thickened, like a stew. The problem is finding ways to thicken the gravy after the braise that doesn’t result in lumps or a dirty pan.

You can also make an emulsion of flour and softened butter, then stir it in the braising fluid following the braising. This paste is similar in concept to roux — where the butter coating on the flour stops lumps but is known as beurre manie.


Horseradish Substitute – The 8 Best Options

Horseradish Substitute

Best Horseradish Substitutes

Horseradish Substitute


Finding a horseradish substitute may be much easier than you believe. If you suffer from an allergic reaction to horseradish, or don’t have any in your kitchen, here are five options to consider. We looked for ingredients that can deliver fiery heat since that’s the flavor you’ll get from horseradish.

We suggest the following as the alternatives to horseradish:

Five options for you If you don’t have any horseradish

1. Wasabi paste

Wasabi is part of the same family as horseradish.

Wasabi paste can be the most suitable alternative to horseradish since they have a comparable taste profile and come from a similar Brassica family. Outside of Japan Wasabi pastes are a mixture of green coloring and horseradish so the distinction between them is minimal.

Wasabi’s main issue is its vibrant green color which may not work for certain foods. For example, if you’re cooking roast beef in cream sauce, the green hue will appear odd. For other recipes, wasabi will match perfectly.

How much horseradish to use?

I’ve read on cooking websites and forums about increasing the quantity of horseradish by up to 50%. I would suggest being cautious when you cook with it. Wasabi can be a powerful punch, so try just a little amount and gradually increase it if you feel the need to.

Health warning: If searching for a replacement option due to allergies, stay clear of wasabi in the form of paste or root as it’s in close proximity to horseradish.

2. Brown mustard

Brown mustard served in a white bowl

Like wasabi, mustard also belongs to the same family as horseradish and therefore it also has a similar spice. Brown mustard has a great number of seeds. This provides it with a strong taste that is peppery and closely resembles horseradish.

In terms of appearance, brown mustard is more appealing than wasabi. It’s a lighter brown shade that’s more similar to the off-white color of horseradish.

Important: If searching for a dijon mustard replacement, then go to this site.

How much should you make use of?

Equal quantities are recommended when replacing brown mustard for horseradish.

3. Fresh ginger

Be careful not to add too much ginger to your food as it will make your food taste bad.

Fresh ginger has a distinct flavor with a blend of lemony and earthy flavors. It begins to warm gradually on the tongue but isn’t to the intensity of horseradish.

How much to make use of?

It is recommended to use more horseradish than ginger to increase the heat. However,  the flavor of the dish can begin to be unappealing if too much is consumed. The best choice is to make use of moderate quantities of ginger and acknowledge that the heat may be less than that of the original recipe.

4. Black Radish

A board with black radish

The skin is the spiciest component of the black-radish.

The black radish is characterized by skin that is dark black-reddish and resembles beetroot with respect to color, shape and size. Inside, the flesh is white and crisp and has a spicy, hot taste. Imitating the flavor of horseradish is attainable with this vegetable.

The problem with black radish is that the major part of its heat can be found located in the skin. Therefore, the best option is to grate the entire vegetable to get the hot spice. The skin, however, is extremely dark and doesn’t mimic horseradish in a convincing way. It is possible to peel the radish but the flavor will be less sour.

How much to make use of?

\Equal quantities are recommended when replacing black radish with horseradish.

Horseradish Sauce

If you prefer cooking from scratch, the recipe below will work for you. For all others, the horseradish sauce, which is available in bottles purchased from the supermarket, is an alternative. Do not expect the same flavor with packaged products as it’s likely to be smaller.

How much should you use?

It is likely that you will need to use 1.5 times the amount of fresh horseradish. However, as with all other alternatives in this list, you should make sure you use less than the amount required, and then taste it to determine if it is necessary to increase the quantity.

Tips: Vinegar neutralizes the reaction and improves the flavor. It should be added as soon as possible to freshly grated horseradish in order to create a more mild taste.

6. Daikon

Daikon is a winter radish that can be used to replace horseradish in numerous recipes.

This radish has a light, tart flavor, with a tangy texture that is distinct from horseradish. It’s milder and has a less spicy flavor than the other radishes.

Daikon is a great ingredient to substitute horseradish in stews or soups or stews, and you can also make it into an alternative to a low-calorie dish for a food item.

Daikon is a raw vegetable and serves as an energizing appetizer in a variety of ways.

7. Sauerkraut

This particular product is derived from lactic acid that is a natural component of the shredded and salted cabbage.

It can be used to substitute horseradish in savory dishes. It is created by cutting the heads of cabbage in order to get rid of the broken green leaves.

Sauerkraut has a bitter flavor and when the sugars have been converted to acid, it indicates that it’s prepared for use. You can incorporate it into recipes such as stock, sausages, and salted meats.

8. Parsnip

Make use of parsnips to replace horseradish for your next dinner. It’s a staple ingredient in soups, broths, and chicken. It can also be cooked, steam, or even mashed.

The root vegetable is known for its distinctive flavor. It’s sweet and tastes similar to carrots. The distinction between the two root varieties is that they are part of different families and come in distinct shades. Parsnip is a substitute for carrots in a variety of recipes.

Frequently Asked Questions

Does Wasabi an alternative to horseradish?

Yes, it is. Wasabi can be described as the most popular alternative to horseradish. It can be used in nearly every recipe that calls for horseradish.

Does horseradish resemble ginger?

Ginger and Horseradish are very similar. In fact, ginger is an excellent alternative to horseradish in numerous recipes. They share a similar flavor and produce excellent outcomes if you use them during the cooking process.

What is horseradish sauce made of?

The horseradish sauce is made of horseradish roots, which are not contaminated by salt and vinegar. It is possible to mix it with cream, sour cream, or another creamier ingredient to give it more flavor.

What is the flavor of horseradish?

When you eat freshly grated horseradish roots or the condiment it is a flavor that is strong and spicy with a distinctive spicy taste. While some ingredients like chili peppers are spicy to the palate, horseradish can be a great way to cause sinus irritation.

Horseradish is commonly used as a sauce for barbecued beef and other meats served within the U.K. and is well-known in Poland as well as other regions of the world.

Do I have to use radish instead of horseradish?

Any radish can be used as a substitute for horseradish. If you want a less spicy alternative you can choose daikon or the more common red variety. To increase the level of spice go for a black radish and make use of the skin and the flesh.

Is horseradish a great substitute to Bloody Mary?

Wasabi is a wonderful source of spice and heat in the Bloody Mary. Make use of 1 Tablespoon of wasabi to create four cocktails. You can also grate into the ginger to give it a bit of spice.

What’s a great horseradish alternative to prime rib?

Wasabi is a great option for those who are comfortable with the green flavor of your food. Brown mustard is a good alternative if you’re looking for similar flavors in addition to less vibrant colors in the dish.

Common uses of horseradish

  • Salads
  • cocktail sauce
  • potato salad
  • sandwiches
  • dressings
  • margaritas

Homemade Horseradish Sauce

Horseradish root is used for many purposes among them the well-known Horseradish sauce. It is easy to make at your home. Get the following ingredients together and start cooking

Ingredients

  • One teaspoon salt
  • One teaspoon sugar
  • 1/2 teaspoon of cider vinegar
  • 1 horseradish root peeled

Instructions

  • Begin by cutting the horseradish into pieces. After that, place them in the bowl.
  • Add salt, vinegar, and sugar.
  • Place the mixture in the food processor and run it for about a minute.
  • Then, you can place the mix in an airtight container.
  • It can be stored in the fridge. This sauce will last for up to two weeks.

Summing up

If you are looking for an alternative to horseradish, there are a variety of options in the local grocery store. The brown mustard freshly-cut ginger, black radish, and horseradish sauce are all good choices to replace horseradish. Although they taste similar, some appear very different. You should take this into consideration when deciding on which horseradish substitute should you use in your dish. Now go cooking!


Does Oyster Sauce Go Bad?

Does Oyster Sauce Go Bad?

Does oyster sauce go bad?

Does Oyster Sauce Go Bad?

Does oyster sauce go bad? I am sure this question is hovering in your mind at the moment and you’re looking for an authentic answer. Why not? If you’re thinking of making use of oyster sauce for one of your meals, you should be cautious about the oyster sauce becoming spoiled because it could make you sick if you consume the rotten stuff.

You’re probably aware that eating oysters is slightly dangerous. You’ve probably also have heard of the saying that you should only consume oysters during months with “R” in the title “R, which means September through April. You do need to be aware of all this. If they’re not fresh, they could cause illness. But what about oyster sauce? Does it go bad as well?

How you keep your oyster sauce can affect the length of time you can keep it after the bottle is opened.

In this post, I’ll detail everything you should know about this sauce. I mean, how to preserve it and how long you can keep it in the fridge as well as the indications of it being spoiled, and so on. Continue reading, and everything will be explained slowly.

How do I store oyster sauce?

There are certain condiments such as vinegar and soy sauce, which aren’t required to be stored in a refrigerator after being opened. It’s not the same for oyster sauce, though. But let’s not hurry. I want to take each matter step by step and discuss the reasons.

First thing first. After you have opened the oyster sauce bottle, it should be kept in a dark and cool space. The shelf of an antique kitchen is ideal, but any cabinet that is cool and doesn’t have a lot of light can be used.

It is important to store it in a sealed container. The container you purchased is okay provided you screw the top back securely. If you purchased it in a container and you have opened the can, you must put any remaining food items in a glass or plastic container with a secure lid and then freeze it.

A top-quality manufacturer, Golden Dragon,  advises that it is recommended to refrigerate the product following the opening, though, it’s not essential. However, keeping items in this manner at cold temperatures can prolong their life span.

Other brands, such as Maekrua don’t contradict. The labels on their products clearly state “refrigerate after opening.”

If you decide to keep an open bottle of oyster sauce at ambient temperature for a couple of days (maybe even for a couple of weeks) the sauce will not go off. However, the quality is likely to degrade more rapidly than if stored in a cool place which is why refrigeration is ideal.

How long will the oyster sauce last?

The shelf-life of oyster sauce depends on its “best before” date printed on the label of the bottle, as well as the method you preserve it. The ingredients used to make the sauce include oysters, sugar and spices. They are simmered until the sauce has caramelized and then its consistency turns thick, sweet and savory.

As with most food items that are cooked, if it’s left for long enough it will eventually be gone. However, regardless of what it is that the “best before date” is on the bottle, you’ll still be able to eat it safely for a while afterward.

Irrespective of the brand of oyster sauce we are discussing, the shelf-life of the bottle that remains unopened will be between 18 and 25 months. You must examine your bottle’s label that you are using and keep in mind that it’ll be edible for a brief time after the date has expired.

The best before dates are described in terms such as “best by” and “best if used by.” They all mean the same thing. Although it is best to know these guidelines and adhere to them whenever feasible, it’s not a requirement.

If you notice that your oyster sauce has developed an odd odor or if you test it by tasting it and its flavor is not what you would like, you should throw it out.

How long will oyster sauce be in its prime after its opening?

The method you use to preserve the oyster sauce will affect how long you can keep it after the bottle is opened. For the best extension of time, make sure you keep the bottle well-protected and refrigerated all the time.

Based on the recommendations of the foodsafety.gov website, you should use up what’s left of the bottle in about three or six months. This is the general rule but if you’re buying one of the most premium brands, you can count on it to last longer, possibly one year or more, in the words of Golden Dragon.

The bottom line is the fact that if you’re not sure whether the product is of good quality or not, try to use up the bottle within six months so that you can enjoy the best flavor and quality.

How long can oyster sauce last in the fridge?

When the oyster sauce has been stored in the refrigerator throughout the day after it is opened, it will last for up to 2 years.

Is oyster sauce opened safe for use after the expiration date?

As previously mentioned,  it is safe to consume oyster sauce even after the expiration date, provided it was stored properly and the quality of the product hasn’t been compromised. But, it is important to make sure there aren’t any indications that the product is damaged or spoiled.

Also, keep in mind that “best by” dates that manufacturers put on labels are not for reasons of safety. They’re there only to show when the merchandise is expected to keep its best, highest quality.

How can you tell if the oyster sauce has gone bad, or spoilt?

If you notice any bad smell of the oyster sauce, you ought to throw it out. Another reason to dispose of it is if you detect any evidence of mold.

By adhering to the most hygienic methods and following the most fundamental food safety guidelines, you will be able to avoid food poisoning.

In the long run, the oyster sauce will eventually go bad. Oxidation will cause it to darken in color and more intense in flavor. Now enjoy your sauce!

How to store the oyster sauce

Oyster sauce is similar to other condiments. The method of processing ensures it is shelf-stable. This means they will have an extended shelf life, even after being opened. Here are four ways for storing oyster sauce:

Keep it sealed: Depending on the kind of oyster sauce you purchase, it will usually come in a jar fitted with a screw top or flip lid. No matter which one you purchase be sure to secure the lid securely before placing it in storage. One of the primary reasons to seal it before storage is because it increases the spreading of bacteria. You should be aware that overgrowth of bacteria is among the main cause of food poisoning, even in cases where the food isn’t past the sell-by date.

Keep away from direct sunlight: Avoid direct sunlight. If you’re not planning to store an oyster sauce container in your refrigerator, you must ensure that it’s kept away from direct sunlight. One of the primary reasons is the fact that bacteria thrive on food items when exposed to temperatures ranging from 41 and 135°F. This is known as the “temperature danger zone”. Hence, it should be kept far from sunlight direct is specifically relevant if you reside in a hot region.

Keep it in a cool and dark place: In order to avoid exposing oyster sauce to the sun’s rays, it is recommended to store your oyster sauce in a cool and dark location. It can be kept in the pantry or in a cabinet in your kitchen.

Place your oyster sauce in the fridge: Although it’s not required to store the oyster sauce in your fridge, it will help in keeping the flavor longer, especially if you plan to keep it for a while.

If you are looking to store this sauce, the most effective suggestion is to follow the manufacturer’s guidelines. The brand you choose will vary the manufacturer will advise you to keep it refrigerated once opened, while some don’t.

Wrapping up

Does oyster sauce go bad?

Oyster sauce is an excellent addition to any dish, and based on the type of brand, it could cost a lot. So, it is important to preserve it for the longest time possible.

Also, it is important not to fall into the trap of eating oysters that have gone bad, you should ensure that you follow the proper precautions of inspecting the bottle to look for any evidence of mold and smell it prior to using it for your meals.

It is expected that when the bottle is first opened, it might go bad, and one of the first indicators you’ll notice is the liquid starting to split.

Oyster sauce that’s been kept for a time after opening may change its consistency, color, and flavor. However, if it has a pleasant aroma and no evidence or evidence of mold,  it is likely to remain safe for use.

When the oyster sauce is manufactured, producers make use of cornstarch to increase the thickness of the sauce. If you notice that water is separating on the surface of the sauce it’s a sign that the sauce has become old. You can stir it around, and, if this doesn’t fix the issue, discard it.

If your food is deteriorating, your health is at risk when you eat it. So, make sure you pay attention to the expiry dates and don’t neglect to ensure the safety of food items.


What Does Boba Taste Like?

What Does Boba Taste Like?

What Does Boba Tea Taste Like?

What Does Boba Taste Like?What Does Boba Taste Like? If you want to know more about this topic, you should go through this post right now as it contains all the details about Boba Tea.

Boba tea is an extremely sweet drink. The balls themselves don’t contain any flavor, though they take in some liquid they’re in. The only flavor you get from drinking tea boba comes from the liquid you choose to drink.

You can choose either a milk-based or fruit-based tea. Certain places offer more exotic flavors that give the boba ball an enticing taste.

That’s why I came up with you with the information you wanted to know. In this post, I’ll discuss all of your questions about the taste and texture of boba or bubble tea.

Let’s start, shall we?

Boba Texture

Boba tea is extremely creamy and frothy and has a texture similar to a melty milkshake. The tapioca ball in the middle of tea can be chewy because they are made of tapioca starch.

In general, boba teas are not cold, however, they’re not frozen and blended in the same way that frappes and milkshakes are, and therefore, they will not freeze the balls of tapioca that are at the bottom.

Do you chew the bubbles in bubble tea?

The bubbles on the top of your drink or bubble tea can be eaten and are extremely chewy which is something many people love.

You can also take a sip of the bubbles if do not desire to chew them as the majority of people chew on the bubbles and find it fun.

Why is Boba black?

The majority of tapioca pearls used in boba tea are black instead of clear or white. They are a better choice for bubble tea than the white tapioca pearls because they perform better in showing up.

Since boba tea typically has bright colors the only black tapioca beads are visible they are in the liquid. White tapioca balls become clear after being cooked and then disappear.

Is Boba supposed to be chewy?

Tapioca Balls are constructed of starch made from cassava. It is a common starch or flour substitute used in cooking. It will always be chewy once the food is prepared. Because of this, the boba tea balls will be chewy, but not too hard.

If tapioca balls aren’t cooking for enough time, they might have a hard center inside between the balls. This could be fixed by cooking it for longer and is an indication that the tapioca pearls were not cooked properly.

What is the difference between white and black tapioca pearls?

Although most cooks at home use white tapioca pearls in their kitchens The majority of boba teas have black pearls of tapioca. This is due to the sweetness they provide as well as their appealing color.

The black pearls are made of brown sugar. This is responsible for their sweetness and also for their distinctive hue. In addition, there is no discernible difference between white and black pearls.

They are both derived from cassava root and share identical cooking instructions before when they are used in the boba tea.

What Is Bubble Tea?

The bubble tea (aka pearl milk tea(also known as tapioca tea the boba nai-cha, boba milk tea, or simply boba) is a drink made of tea that was invented in tea stores of Taichung, Taiwan, in the 1980s.

The recipe typically has tea as the base, blended with fruit or milk. There are also slushy versions that are blended with ice and syrup, or fruit. The most popular bubble tea is served cold.

The most sought-after varieties of bubble tea include bubble milk tea made with tapioca and green tea bubble milk that contains tapioca.

There are many bubble tea stores in America that offer “milk smoothies” or ice shakes that are inspired by the boba concept however they don’t contain tea-based ingredients. There are some boba cafes that offer an alternative to sugar to sweeten the beverage, for instance, agave or stevia. It is common to find the drink offered in transparent plastic cups that have dome-shaped lids, however, many establishments now offer devices that let them close the top using cellophane to make a spill-proof cup (also permitting the shake to be done) and then to pierce it by a straw large enough that the pearls can go through.

Types, flavors and textures of bubble tea

The base of tea is made of black tea (usually Oolong and Earl Grey), green tea (commonly jasmine), or coffee!

The fruit flavors that are commonly accessible fruit flavors are the following: strawberry, green apple mango, passionfruit, lemon watermelon, lychee cantaloupe, pineapple, peach honeydew, bananas, coconut, avocado, jackfruit, and kiwi.

Other flavors that are not fruit-based: The most popular flavors that are not fruit include taro, pudding mocha, coffee, chocolate and sesame. Other popular flavors include barley, sesame ginger, almond rose, lavender caramel, and violet.

Snow bubble: It is a kind of drink made from boba by mixing flavorings with frozen ice instead of the standard coffee or tea base. The same mix-ins may be mixed into these slushy drinks made from boba.

Tapioca balls are the most frequently added chewy treats however there’s a vast selection of other options to add texture to the beverage, like green pearls that have some the flavor of green tea, jelly cubes that come in flavors like konjac, coconut jelly, grass, lychee and mango.

Azuki beans or Mung Bean paste also gives the drinks a slight taste and texture.

Foam red tea: (The English name “foam tea” is not used in all of Asia.) It is a bubble tea with tapioca, but without. It is blended using a cocktail shaker with either warm or hot tea with sugar or syrup, and the addition of ice cubes. Foam or froth can be made by mixing the drink manually or by using the aid of a machine.

Foam milk tea: similar except with the addition of milk.

Milk tea with black pearls: It is made from black tapioca balls (also known as “pearls.”

Instant tea bubbles: It is produced by DeDe or other brands. It is available in certain countries and is made up of tea bags that can be served one-time including powdered milk as well as sugar.

Boba Tea is sweeping the World

Since its inception during the 1980s throughout East Asia, bubble tea has grown in popularity throughout Australia, the UK, Australia and the United States, with boba shops and bars popping up mostly in the larger cities.

Consumers remain awestruck by all kinds of bubble tea, despite the numerous critics of the health benefits, the dangers of choking as well as chemical ingredients.

This is among the main reasons that the process of making your own bubble tea at home has become so popular. When you make your own bubble tea and know precisely what’s in the drink and you are aware of how safe and healthy it is. Additionally, you can alter the sweetness and flavor according to your preference by making the pearl milk tea yourself.

Even McDonald’s is stepping up its game!

As per huffingtonpost.com, “In June 2012, McDonald’s McCafe locations in Germany and Austria began offering bubble tea. They offer black, green, or white tea, available with or without milk. Fruit syrups are also available, bringing the total number of possible flavor combinations to 250.”

How to Make Bubble Tea at Home

If you don’t have a tea bar near your home, then you are able to make your own bubble tea at home. You’ll need access to an Asian supermarket or market to get the ingredients to make the boba.

There’s a wide range of bubble tea components and equipment accessible online, and you can find the best ingredients for making your own bubble tea quickly and conveniently.

Here is a video to check the reaction of people tasting this drink for the first time. Watch the fun!

Making Bubble Tea With Syrup

The video below demonstrates how to make bubble tea using the syrup, soaked into the pearls of tapioca to create a more sweet taste. This is an excellent tutorial on making normal bubble tea with a slight twist.

Wrapping up

What Does Boba Tea Taste Like?

Boba tea is lots of fun because of the delicious flavors you can pick from. It also comes with tasty tapioca balls that are at the bottom. You should try it when you have the chance, and allow you to enjoy this delicious beverage!


You may also read: What does almond milk taste like

Are Wild Bananas Edible? All You Need To Know!

Are Wild Bananas Edible? 

Are Wild Bananas Edible? 

Are Wild Bananas Edible? 

Have you ever observed wild bananas? It’s not like the typical grocery store banana. They are available in various shapes, sizes and shades, and they grow in different parts of the world.

There’s a good chance of finding natural bananas within tropical regions So if you’re going to an area that is tropical, you could easily spot them.

However, can you eat wild bananas? Are they so unique that they shouldn’t be eaten? Today, we’re going to find out exactly what, so continue reading.

Are wild bananas edible?

Yes there are wild bananas that can be eaten. A mature wild banana can be sweet and tasty in flavor. It could also possess a distinct fruity and fresh flavor that isn’t present in the regular banana.

It all depends on the type of wild bananas you come across. The bananas we are familiar with today are actually a blend of two different species of bananas that are Musa acuminata, and Musa balbisiana.

The balbisiana contains an amazing quantity of stone-like seeds that aren’t edible, and eating might be difficult.

The acuminata can be handled however it will certainly cause issues due to the texture.

Wild bananas are often robust, or extremely seedy, and only the flesh that surrounds the seeds can be eaten.

In short, wild bananas can be eaten, but eating them might not be an ideal choice in the absence of knowing exactly what sort of fruit it comes from.

Wild bananas are full of seeds

A lot of us do not eat raw foods from the wild and eating wild bananas may be somewhat challenging. One of the biggest issues people may face when eating bananas from the wild is the large amount of pea-sized, stone-like hard seeds inside them.

Wild bananas might taste delicious but eating them isn’t the same smooth experience like with regular bananas. There are many seeds in them, and they’re soft and chewy.

It is also impossible to eat them alongside the bananas. Although bananas’ pulp is sweet and soft the seeds are opposite, they are dull and hard.

So, can wild bananas really edible? The answer will depend on your own perceptions and largely on how you interpret the seeds present in wild bananas.

If the seeds are a complete turnoff and put the off button, bananas from the wild aren’t for you. If you are able to manage the seeds and accept the presence of seeds wild bananas are just equally delicious as other fruit with seeds, such as apples and pears and so on.

Like the name implies they are wild bananas that have not been planted or nurtured. They’ve grown in wild in their own way. If they’re carrying too many seeds, there is no reason to blame anyone for this.

So, how do you eat wild bananas?

Wild bananas are available in markets that are local to forests and hills across the globe. These bananas don’t look like regular bananas. Instead, they could have unusual shapes and not have the beautiful yellow skin that we’re used to seeing on bananas.

Because they are completely naturally occurring, they possess distinct flavor and taste. You can discover ways to get rid of the seeds and incorporate the pulp for shakes and smoothies. It’s a hugely tasty drink.

It’s recommended to ask the locals how they consume the local wild bananas, as they’ll know the best way to eat them.

They have different looks and shape

In addition to the flavor, there aren’t any outstanding features found in this wild fruit. They might not appear exactly like the bananas that we encounter in our daily lives.

They can have a unique form and shape based on the weather and conditions that they are growing in. For instance, it could appear stout, pointed at each end, with a protruding into the middle.

The skin might not peel off as cleanly and easily. The skin could be tightly linked to the fruit via interlinking fibrous. If you remove your wild bananas, you will find that a substantial portion of the fruit could remain in the skin.

Therefore, the sensation of eating a wild banana could be quite different from eating a normal banana. You can, however, enjoy eating wild bananas. They’re not poisonous neither do their seeds.

They’re perfectly edible so you aren’t averse to the numerous seeds that you will likely be exposed to while eating the wild bananas.

The modern banana came about as an attempt to create that perfect fruit. With seeds that are soft (or none at all) with a moderately firm yet soft texture and a great taste.

Wild bananas are available in many varieties and you won’t be able to tell which one you’ll receive.

Wild bananas can also be seedless

Wild bananas may also be seedless. Wild bananas of this kind can be found in the forest that is found in Costa Rica. These bananas are extremely slim and thin.

They are more similar to trees and are found everywhere. The fruits they produce are referred to as “baby bananas” and are delicious and sweet. You can slice and then bring your hand home filled with the ripening bananas. Let it ripen free of birds and insects.

The forest is filled with these banana trees, and you’ll be able to find plenty of options. A hand will typically have 60 yellow fingers that are 3-4 inches long. They can be eaten as they mature. There aren’t seeds inside these fruits.

However, they are extremely soft and they tend to become extremely mushy.

Are wild bananas edible?

Domestication of bananas

They were domesticated to ensure regular cultivation by two of the most well-known wild species Musa balbisiana and Musa acuminata. The latter being the more popular choice for farmers.

It took a while for the ideal banana-banana combination to be discovered however, once it did numerous offshoots were created. The most well-known fruit for dessert is known as the Cavendish kind.

It’s the longest, largest banana you can find and is probably the one you’re using at your home.

Bananas are in season all the time all year round, which means they’re always fresh as they don’t come in a particular season. They’re picked early and get ripe during transport, which means they’re the ideal fruit.

FAQs

Why do wild bananas have seeds and not commercial ones?

You may be thinking why wild bananas contain bigger and more seeds than commercially grown ones.

The reason behind the differences is due to the breeding method. In nature, seeds are required for the reproduction of plants. Therefore, seeds tend to be bigger and more powerful.

The commercially-grown ones are genetically bred and are not grown from seeds. They’re cultivated from pups. The mature banana plant produces what’s known as Rhizomes. These then grow into small plants that are sometimes referred to as pups. The pups are taken away and planted in different areas, from which the banana plant grows.

The changes made cultivators realize that seeds aren’t needed for the growth of bananas. Additionally, bananas grown without seeds are more supple sweeter, juicier, and are more likely to be sold. The seedless varieties also possess a greater shelf life than those with seeds. Therefore, farmers chose ones that do not contain seeds.

If you happen to find wild bananas with seeds, you might wonder whether it is safe to eat without risk. The answer is yes. It is possible to eat wild bananas that have seeds because they’re not poisonous. It is possible to eat both unripe and ripe varieties.

But they’re not consumed as an unripe banana. The people of Indonesia as well as Southeast Asia slice the banana thinly and take out seeds instead. Then they put the pieces in salads and eat them.

Thus, the seed is eliminated in any way. However, you are able to eat the seeds.

Expect a sour and bitter flavor with very little or any sweetness. However, some varieties, based on the season and the location may taste delicious.

A specific variety, referred to by the name of “Baby banana,” is essential if you wish to eat seeds of bananas. These are indigenous in Costa Rica and grow in the wilderness. If you see the plants, you can eat the seeds and enjoy the delicious flesh.

In general, it is not recommended to eat wild bananas. They may be exposed to viruses pesticides or bacteria. A condition known as “Panama Disease” is common in wild bananas. They can trigger negative reactions within your body and lead to complications.

Where Can You Buy Seeded Bananas?

There are bananas with seeds at certain retail stores. Be prepared to conduct some investigation. There are a few stores that have seeds of bananas. In accordance with the season and any special offers the store may be able to keep seeds of bananas. It is possible to search on the internet for seeds of bananas.

Stores that stock a supply of these fruits advertise the bananas on the internet. The last option is to look online to determine availability. If not, it could be that the seeded bananas you want aren’t available in your area.

There is a possibility of growing wild b

Can You Grow Seeded Bananas?

ananas in your backyard that would yield seeds-filled bananas. To do this, you’ll need to collect seeds, which would then sprout to produce banana plants. Begin by locating the seeds. Some nurseries have seeds. Therefore, you should visit a few nurseries and verify if they’re carrying seeds.

Once the seeds begin to germinate, they’ll take about a couple of months before bearing fruit. The resulting banana will have seeds. Depending on the species of banana the size could vary from small to medium or even large. For the biggest size seeds, you have to speak with the nursery person in the right way. Keep in mind that the banana you seed will differ from the bananas that you buy at home. Therefore, be prepared for the switch.

Wrapping up

Are wild bananas edible? Yes, they can be. Actually, it’s quite an intriguing idea that according to different studies, wild bananas are better than ordinary bananas.

The only drawback is the seeds, which may require some effort to completely eliminate from the wild bananas. However, the effort is indeed worthwhile.


What Does Cornstarch Taste Like?

What does cornstarch taste like?

What does cornstarch taste like?


What does cornstarch taste like? Is this what you want to know?  Are you confused about what you should do with cornstarch? This article we’ll examine the flavor of cornstarch as well as its texture, and the best way to use it for cooking.

So, without further ado, let us start.

What does cornstarch taste like?

Although it is made of dried corn kernels , it doesn’t have a corn flavor. It tastes more similar to flour, which is to say it doesn’t taste as anything at all.

When you get down to the bottom, cornstarch tastes a bit starchy. This could be due to the sensation of the tongue, rather than the taste.

Cornstarch texture

Cornstarch is very fine powder with an appearance and texture similar to powdered sugar. It’s smooth and silky. It’s usually used in liquids because it’s intended to act as a thickening agent that alters the texture.

Cornstarch dissolves in liquids and begins to gel when the liquid is heated. The more cornstarch you add the more jelly-like your liquid will be.

Why do I crave cornstarch?

If you’re craving cornstarch, it could be a sign of nutritional deficiency. It is possible that you are deficient in iron, zinc and other minerals. Your cravings could be your body’s way of signaling that.

The desire for cornstarch may be an indication of a disease that is often linked to nutritional deficiencies. In the end, cornstarch should never be consumed raw, and whenever you notice cravings, it is advisable to set up an appointment with a doctor.

Cornstarch vs. Corn Flour vs. Cornmeal

It is true that corn starch, flour and cornmeal come from the same source: corn. However, there are some distinctions that render them unchangeable for recipes.

The corn flour can be described as a powder that has been finely ground and made from corn kernels that are whole.  While cornstarch is a finely ground  powder composed of only the starchy portion in the kernel, Cornmeal is a granular substance that is made of dried corn kernels.

Cornstarch is generally tasteless and is utilized for a purpose (thicken the contents of a mix) and not to impart flavor. Both cornmeal and corn flour have an earthy sweet taste that can be easily detected in food items.

Corn flour is a good choice in lieu of wheat flour for baking. It gives a distinct flavor and golden color. Cornmeal can be used the same way. However, it will create some texture differences in the final product. Because cornstarch does not contain either fat or protein and isn’t a fat source, it shouldn’t be used the same way as cornmeal or corn flour in recipes.

Cornstarch Substitutes

In the event that you do not have cornstarch at your shelf, you can add a thicker layer of ingredients like flour, powdered arrowroot tapioca, potato starch or (in the case of a pinch) even instant potato Granules.

The flour thickens roughly in the same manner as cornstarch, but it does not produce a shiny shine. Arrowroot powder can produce shiny shine, however it requires cooking for longer time than cornstarch.

Find out more about cornstarch substitutes here What Can I Substitute for Cornstarch?

How to Store Cornstarch

Cornstarch must be kept in a dark, cool location. The majority of cornstarch available at the market is sold in resealable bottles, so ensure that the lid is securely fixed when you’ve finished with the product. If stored properly the cornstarch can be used for a long time.

What is a healthy alternative to cornstarch?

Some people don’t like cornstarch. So if you prefer to use another thickening agent for your sauces, there’s a wide range of options that are both healthy and vegetarian.

Flour, which includes whole wheat flour, is a good choice to replace cornstarch since it thickens liquids when cooked, though it could give off the characteristic “floury” flavor if used in greater quantities.

The starch made by the arrowroot plant is also a cornstarch substitute and is a great option to thicken fruit sauces and pie fillings. Tapioca starch is ideal for pie and other dishes where needs to remain transparent and gelatinous instead of somewhat transparent and starchy.

How to use cornstarch in your kitchen?

Because it’s such an amazing thickener, it’s great to have on hand to make everything including vegan cream sauces and cheeses that are vegan.

Here’s a fantastic recipe for a vegetarian cheese with a herb crust. Though this sounds like a lot of work, it’s actually not that difficult. All you have to do is blend cashews with water, cornstarch nutritional yeast olive oil, lemon juice and spices, then heat in your stove and let cornstarch do its magic, and then allow it to set in the refrigerator. Make your own toppings, and try everything from dried fruits to nuts.

Watch the following video in order to understand how to make cornstarch at home:

FAQs

Does cornstarch taste good?

There is no taste when it is made in your dish, recipe or correctly.

What is the flavor of cooked cornstarch like?

Cooked Cornstarch will not taste like anything whatsoever. However, you need to mix the cornstarch in a slurry of water that is free of lumps, and then cook it until it is completely removed of any flavor.

Does cornstarch leave an aftertaste?

It doesn’t leave any lingering taste if it is used in a proper manner. However, if you didn’t mix it correctly, you’ll end up with an unctuous texture, and some people will consider it to be a taste.

What texture do Cornstarch contain?

Cornstarch has a smooth and silky texture that’s almost exactly the same as powdered sugar. It’s added to liquids in order to thicken them, which alters the texture.

How to use cornstarch for cooking?

If you’re searching for a quick and easy method to thicken the flavor of any gravy or sauce without adding extra fat cornstarch is among the best options available.

It’s not quite as effective or have the similar effect as other options however it adds enough thickness to make the appear nice, while remaining lightweight and airy.

It is available in a lot of supermarkets these days or in the bakery aisle, or in the section of canned goods.

How to Store Corn starch?

If you intend to keep cornstarch in your home, make sure it is kept away from sources of heat, such as microwaves, ovens and so on. Since these components can cause the product to reduce its effectiveness.

There are ways to store cornstarch and not lose the properties it has. The most effective method to store cornstarch is to store it in an airtight container. It will last at twelve months if kept in a dry, cool place. Also, keep it away from direct light while it is kept.

Does Cornstarch change the flavor of food?

Not when it is properly handled. When mixed with liquids like juice, milk as well as soup, cornstarch produces an even consistency. However, it has to be cooked so that there isn’t any alteration in the taste of the food, or any texture that is grainy.

If you are adding too much cornstarch but not enough, the sauce may turn thick instead of smooth.

You’ll know if you’ve overused cornstarch after tasting the finished product. If it’s dry, reduce the amount next time.

Can you use any other type of starch than Cornstarch?

Yes! There are a variety of starches that are available today, such as tapioca starch, potato starch, arrowroot flour rice flour and gluten-free flour. All of them are suitable for replacing cornstarch. Make sure you be sure to follow the directions precisely because they behave in different ways.

Why shouldn’t you overuse Cornstarch?

The use of cornstarch too often can cause an unnatural texture. The substance turns into a gel, rather than being completely absorbed.

Why do people eat cornstarch?

Cornstarch is consumed by people since it is employed as a thickening agent. It’s not eaten because of its flavor, as when used properly, it doesn’t have any flavor.

Are Cornstarch and Potato Starch Interchangeable?

Do you have the option of substituting cornstarch with potato starch? Yes, since both starches behave in a similar manner. This means that a substitute could be utilized.

What is the best way to do it? If you’re replacing cornstarch with potato flour as a thickener, one tablespoon of potato flour to 1/2 teaspoon cornstarch should be used.

Wrapping Up

What does cornstarch taste like?

Cornstarch is a powder derived of corn and can be used to create a flexible thickening agent. It’s suitable for cooking with different substances. However, it’s not recommended to be consumed by itself. Cornstarch is a great ingredient to create sauces, to make tofu more crisp and apple pie made from vegan ingredients silkier.


You may also read: Why does people eat corn starch?