How Long to Cook a Duck in the Oven
I’ll be honest with you— the first time I cooked a whole duck, I didn’t trust it. Not the recipe, not the oven… not even myself, if I’m being real. I kept opening the oven door like that would somehow help, which, yeah, it didn’t.
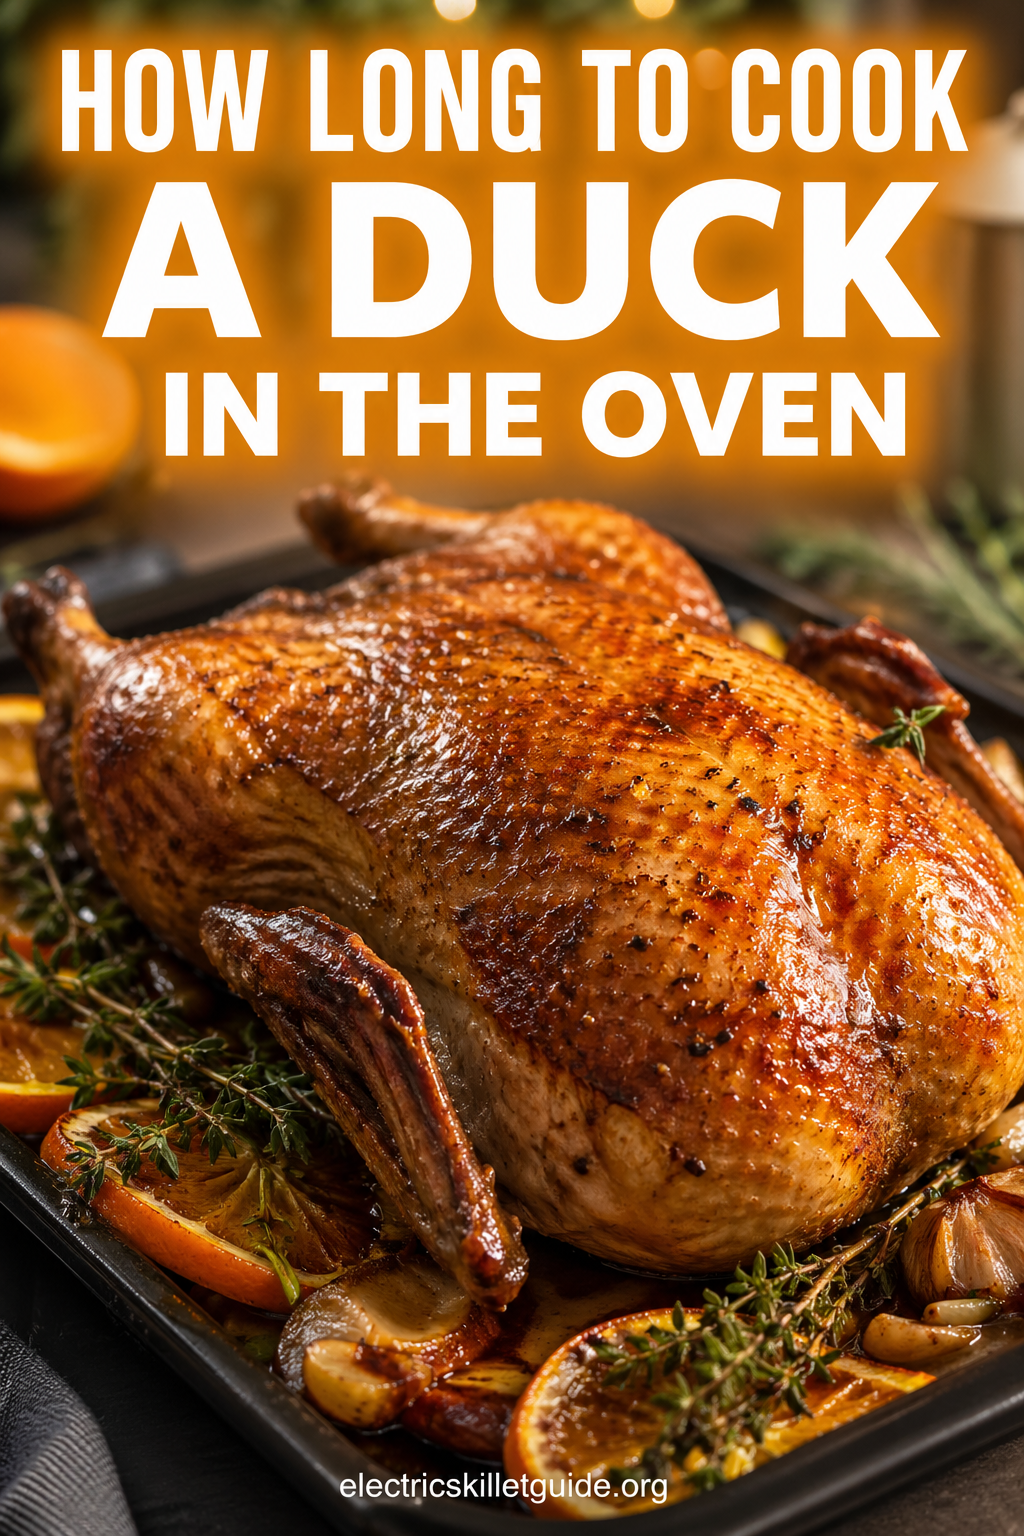
It looked amazing even before cooking, though. That part threw me off a bit. Like, how can something look this good and still be so easy to mess up?
Anyway, figuring out how long to cook a duck in the oven isn’t exactly complicated… but it’s also not as straightforward as chicken. That’s where most people trip up. Duck has this thick layer of fat under the skin, and if you don’t give it enough time (or the right temperature), it just kind of… sits there. Doesn’t render properly. And then the skin never really crisps, which is honestly the whole point.
When it does work, though — crisp, golden skin, juicy meat — it feels like you did something impressive without actually doing anything that complicated. Which is always a nice place to land.
So yeah, this duck cooking guide goes through timing, temperature, and a few small things that made a bigger difference than I expected. Some of them I ignored at first. Regretted that later.
Why You’ll Love This Recipe
Duck sounds fancy. It just does. But once you understand how it cooks — or more specifically, how the fat behaves — it’s actually pretty forgiving. Not foolproof, but close.
The flavor is richer than chicken. Slightly gamey, but in a way that feels intentional, not weird. It’s the kind of dish where people stop talking mid-meal. Not dramatically, just… quietly focused on eating.
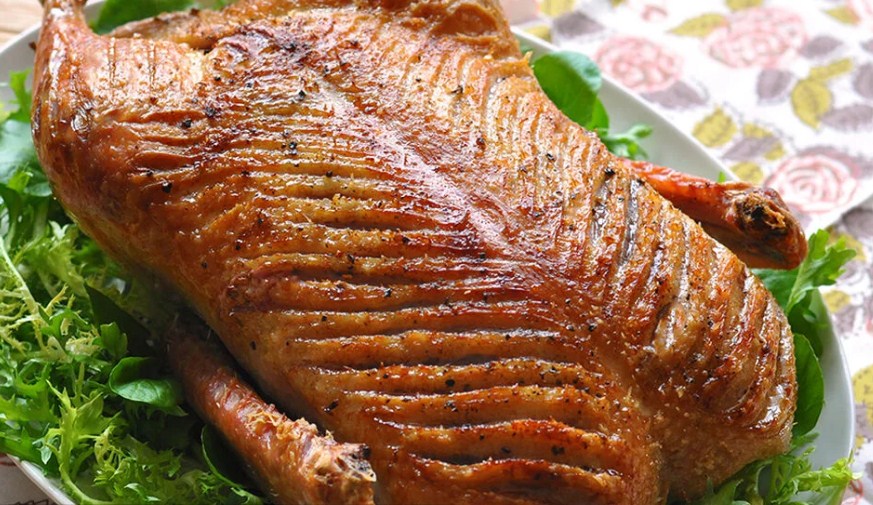
And the skin — I mean, yeah, everyone talks about it, but for good reason. When it turns out right, it’s crisp in that almost delicate way. You hear it when you cut into it. I didn’t expect that the first time.
My kids go straight for the crispy parts near the legs. I usually pretend I’m not interested, then end up taking a piece anyway when no one’s looking. Not proud of it, just honest.
Also, most of the cooking is hands-off. You do the prep, put it in, and then it’s mostly waiting. Which, depending on the day, is either relaxing or slightly stressful.
Ingredients
This is a pretty straightforward setup. No complicated ingredients, nothing you have to hunt down.
For the Duck:
• 1 whole duck (4–6 lbs), thawed if frozen
• 1½ teaspoons kosher salt (maybe a bit more for larger ducks — I don’t always measure exactly)
• ½ teaspoon black pepper
• 1 teaspoon garlic powder
• ½ teaspoon smoked paprika
• 1 orange, quartered
• 4 sprigs fresh thyme
• 3 garlic cloves, smashed
Optional Glaze:
• 3 tablespoons honey
• 1 tablespoon soy sauce
• 1 tablespoon orange juice
• ½ teaspoon five spice powder (this one quietly does a lot)
You can skip the glaze. I have, more than once. But every time I do, I kind of miss it a little.
Step-by-Step Instructions
Step 1: Thaw and dry the duck completely.
If it’s frozen, give it 24–48 hours in the fridge. Then dry it really well. And I mean really. I used to rush this part — didn’t seem like a big deal — but it actually is. Moisture just ruins the crisping later.
Step 2: Score the skin.
Use a sharp knife and cut a crosshatch pattern into the skin. Not too deep — you don’t want to hit the meat — but deep enough to get through the fat layer. This took me a couple tries to get right, honestly.
Step 3: Season generously.
Mix your spices and rub them all over, including inside. Add the orange, thyme, and garlic into the cavity. It feels basic, but somehow it works.
Step 4; Place it on a rack. And leave it uncovered in the fridge for at least 4 hours. Overnight is better. I don’t always have the patience for this, but when I do… yeah, it shows.
Step 5: Roast low and slow, then finish hot.
Start at 300°F (150°C). About 1 hour per pound. It sounds like a long time — and it is — but this is where the fat slowly renders.
Then increase to 425°F (220°C) for 20–25 minutes. This is where things suddenly start looking really good. Also where you need to pay attention, because it can go a bit too far if you forget about it.
Step 6: Check the internal temperature.
Thigh should hit 165°F (74°C). Some people go higher for tenderness. I usually check twice because I don’t trust my first reading. Not sure why.
Step 7: Rest before carving.
Let it sit for 15–20 minutes. This part feels long when you’re hungry, but skipping it is worse. Learned that once. Didn’t repeat it.
Optional Step: Apply the glaze.
Brush it on during the last 10 minutes. It caramelizes and gives that glossy look. Also makes it smell ridiculous — in a good way.
Quick Reference: Duck Oven Temperature and Cook Time
Duck Weight | Low-Temp Roast (300°F) | Final High-Heat Blast (425°F) | Total Approximate Time
4 lbs | ~2 hours | 20 minutes | ~2 hrs 20 min
4.5 lbs | ~2.5 hours | 20 minutes | ~2 hrs 45 min
5 lbs | ~3 hours | 20–25 minutes | ~3 hrs 20 min
5.5 lbs | ~3.5 hours | 25 minutes | ~3 hrs 50 min
6 lbs | ~4 hours | 25 minutes | ~4 hrs 25 min
These are estimates. A thermometer is still the safest way to know. Always.
Cooking Tips
Score deeper than you think. Not aggressively, just enough to expose the fat. Too shallow doesn’t do much.
Keep the duck fat. Seriously. Store it. Use it later. It feels like a bonus ingredient you didn’t plan for.
Flipping halfway is optional. I don’t usually do it. Feels like extra work, and I like the top crispier anyway.
Use a rack. Without it, the bottom kind of… steams. Not great.
Why This Recipe Actually Works
The two-temperature method is really the whole thing. At 300°F, the fat slowly melts out — usually more than you expect. First time I saw how much came out, I paused for a second.
If you try to crisp everything too early, it just doesn’t work. The fat blocks it. So you end up either burning the outside or getting soft skin. Neither is ideal.
Low and slow first. Then hot and fast. It sounds simple — maybe too simple — but it’s the difference between “okay” and “actually really good.”
Scoring helps because it gives the fat somewhere to go. Otherwise it just sits there. Which… yeah, not helpful.
Small Changes That Made a Big Difference
Air-drying overnight made the biggest difference. Before that, my results were inconsistent. Not terrible, just not great either.
The orange in the cavity surprised me. Didn’t expect much, but it adds moisture and a subtle brightness. Hard to explain, but noticeable.
The glaze — technically optional — but it makes the whole thing feel more complete. Especially with the five spice. That flavor sticks with you a bit.
Substitutions & Variations
Duck breasts cook faster — around 20–25 minutes at 400°F. Usually start them in a pan first.
Duck legs take longer, around 1.5–2 hours at 325°F. More forgiving, though.
No five spice? Mix cinnamon, cloves, and anise. Not exact, but close enough.
Herb crust version works too — rosemary, thyme, Dijon, olive oil. Different vibe, still good.
What to Serve With It
Duck is rich. So lighter sides help.
Roasted vegetables work well. They also soak up some of the fat, which is… honestly a bonus.
A simple salad balances things out.
Potatoes — especially with duck fat — are hard to beat.
A quick pan sauce with the drippings adds a lot without much effort.
What I Skip When I’m Short on Time
I usually skip the overnight drying first. It helps, but it’s not mandatory.
Sometimes I skip the glaze too. Depends on the day.
What I don’t skip: scoring and resting. Those matter more.
Storage & Reheating
Store leftovers in the fridge for 3–4 days. It holds up well.
Reheat in the oven to keep the skin crisp.
Microwaving the skin doesn’t go well. Tried it once. Not again.
Freeze for up to 2 months if needed.
Cook and Prep Time
- Prep Time: 15 minutes (plus optional drying time)
• Low-Temp Cook Time: 2–4 hours
• High-Heat Finish: 20–25 minutes
• Resting Time: 15–20 minutes
• Total Active Time: About 40 minutes
Nutrition Facts
(Based on approximately 4 oz serving of roasted duck with skin, no glaze)
Calories: ~340 kcal
Protein: 27g
Total Fat: 25g
Saturated Fat: 8g
Carbohydrates: 0g
Sodium: ~380mg
Iron: 15% DV
Zinc: 18% DV
Duck is higher in iron and zinc than chicken, which is a nice plus.
FAQ
Can I cook a frozen duck without thawing it first?
You can, but it’s not ideal. Cooking gets uneven. Better to thaw it.
Why is my duck skin not crispy?
Usually moisture, shallow scoring, or too much fat sitting underneath.
How long to cook a duck in the oven at 350°F?
About 20 minutes per pound. It works, just not as crispy.
Do I need to baste the duck?
No. There’s already enough fat.
Can I stuff a duck like a turkey?
Aromatics yes. Stuffing… not really. Gets greasy.
If I Were Making This Again Tomorrow
I’d start the night before. It helps more than I thought it would.
I’d also make extra glaze. I always run out.
And yeah — definitely potatoes underneath. That’s non-negotiable now.
Final Thoughts
Cooking duck isn’t as tricky as it feels at first. If you know how long to cook a duck in the oven, of course. Surely, it just has its own rhythm — slower at the start, hotter at the end.
Once you understand that, it gets easier. More predictable too.
Low and slow, then hot and fast. Let it rest. Use a thermometer. That’s really it.
And honestly? The smell alone while it’s cooking… kind of makes the whole thing worth it.