 Skillet Brownie Recipe
I was wondering if I could do something worthwhile with a skillet brownie recipe. But unfortunately, I burned my first skillet brownie. Not just a little overdone either — I’m talking full-on hockey puck territory. And yes, I still scooped some out, threw ice cream on top, and tried to convince myself it was fine. It wasn’t. So if you’re even slightly nervous about messing this up… don’t be. I’ve already taken that hit for you.
After way too many test batches (honestly, I didn’t hate that phase), I landed on a skillet brownie recipe that actually behaves: crackly top, gooey center, and those slightly crisp edges that somehow become the most fought-over part. I don’t entirely get it, but I respect it.
Best part? It all happens in one cast iron skillet. No juggling bowls, no weird parchment folding tricks, no complicated steps that make you question your life choices. Just one pan, decent chocolate, and maybe half an hour — give or take depending on how distracted you get.
Why You’ll Love This Recipe
Here’s the thing — skillet desserts just feel fancier than they are. You carry a hot cast iron pan to the table and suddenly it’s a whole moment. People act impressed, even though you probably did less work than making regular brownies. Funny how that works.
The batter comes together fast. Like, ten minutes fast. Which means this is totally doable on a random weeknight when you weren’t planning to bake anything at all. No mixer needed either, which I personally appreciate because fewer dishes = better mood.
And because cast iron holds heat like it’s its job, the center stays warm and gooey for longer than you’d expect. You don’t rush through eating it — well, you might, but you don’t have to.
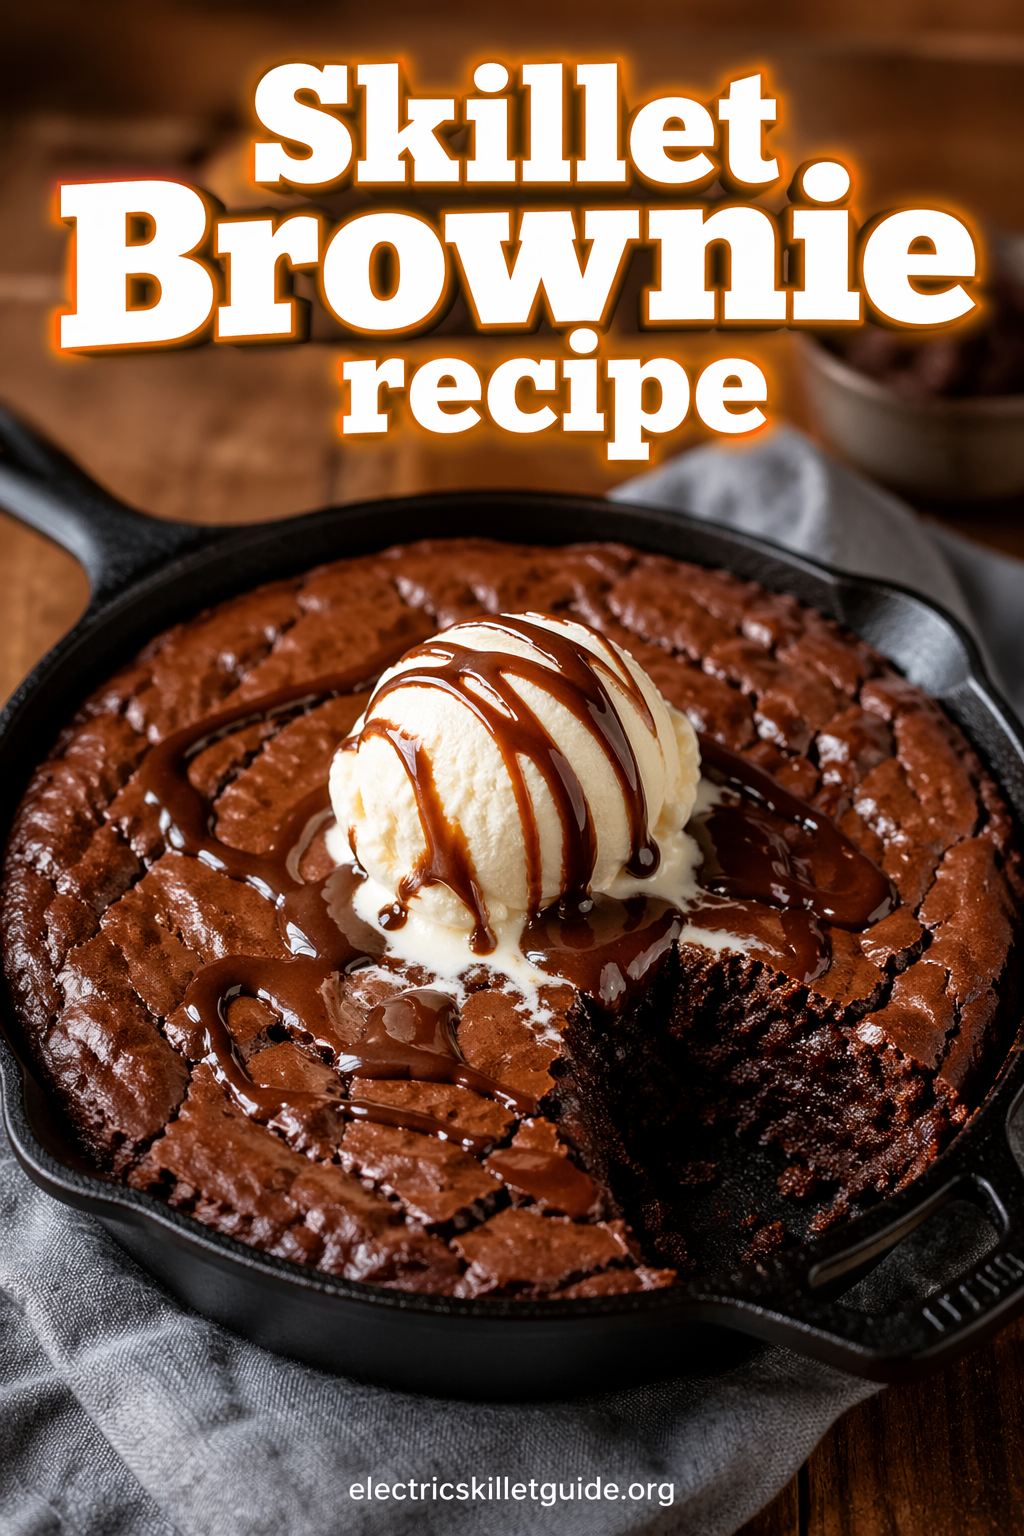
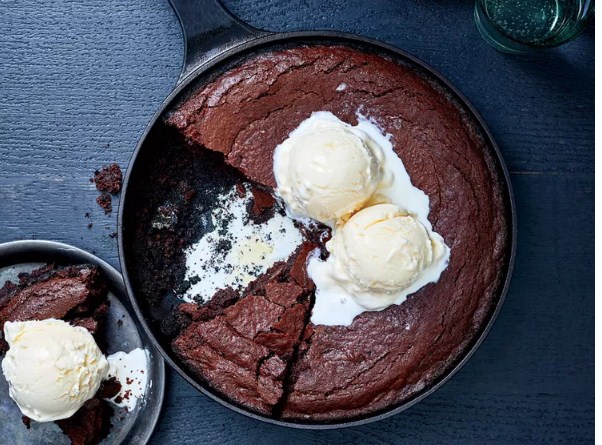
Also — and I feel oddly passionate about this — skillet brownies are basically designed for vanilla ice cream. A scoop hits the surface, starts melting instantly, and sinks into all those little cracks. It’s messy in the best way.
Ingredients
Here’s everything you’ll need. Nothing weird, nothing you’ll have to hunt down online or question at the store.
- ½ cup (1 stick) unsalted butter
• 4 oz dark chocolate (around 70% cocoa — use a bar, not chips if you can)
• ¾ cup granulated sugar
• ¼ cup brown sugar, packed
• 2 large eggs + 1 egg yolk
• 1 teaspoon pure vanilla extract
• ½ cup all-purpose flour
• ¼ cup unsweetened cocoa powder
• ½ teaspoon salt
• Optional: ½ cup chocolate chips or chopped walnuts
One small thing — that extra egg yolk? I know it feels like a minor detail, but it’s not. It’s what tips the texture into that rich, fudgy zone. Without it, the brownie is still good. With it… it’s the kind of thing you might quietly eat straight from the pan.
Step-by-Step Instructions
Step 1: Preheat and Prep
Preheat your oven to 350°F (175°C). Grab your 10-inch cast iron skillet. No need to grease it — the butter coming up will handle that. One less step, thankfully.
Step 2: Melt Butter and Chocolate
Set the skillet over low heat on the stovetop. Add the butter and chopped chocolate. Stir slowly until everything melts into a smooth mixture.
Take it off the heat as soon as it’s ready. Don’t let it sit there too long — overheated chocolate is not your friend here, especially when eggs are coming next.
Let it cool for about five minutes. I know, waiting is annoying. But this part matters more than it seems.
Step 3: Mix in Sugars
Once it’s cooled slightly, stir in both sugars. At first, it’ll look a bit grainy and weird. Totally normal. Keep going — it smooths out eventually.
Step 4: Add Eggs and Vanilla
Add the eggs, that extra yolk, and vanilla. Then stir like you mean it — about a minute or so. This step is doing more than it looks like; it’s what gives you that shiny, crackly top.
Sometimes I stop halfway and think, “Is this enough?” It usually isn’t. Keep going.
Step 5: Fold in Dry Ingredients
Add the flour, cocoa powder, and salt. Fold everything together gently. Don’t overmix — just enough so you don’t see dry streaks anymore.
If you’re adding chocolate chips or nuts, this is where they go in. Or don’t. Honestly, both ways are good.
Step 6: Bake
Smooth out the top (it’s already in the skillet, which still feels convenient every time). Bake for 22–26 minutes.
Edges should look set, center should look slightly underdone. That’s intentional. It keeps cooking after you pull it out, even if it doesn’t seem like it.
Step 7: Rest Before Serving
Let it sit for 10 minutes before digging in. I know, this is the hardest step. But it really does make a difference.
Cooking Tips
Don’t overbake it. I know everyone says that, but here it actually matters. If it looks fully done in the oven, it’s probably already gone too far.
If you want to be precise (or just nervous like I was at first), use a thermometer. Around 165–170°F in the center gives you that fudgy texture. Anything above 180°F and you’re heading toward cakey brownies — which some people like, but that’s not the goal here.
The chocolate you use matters more than you’d think. Chips have stabilizers, which is great for cookies but not ideal here. A decent chocolate bar works better. Doesn’t have to be fancy — just something you’d actually enjoy eating on its own.
Also, cold eggs can mess things up. Try to take them out about 20 minutes early. I forget this all the time and end up warming them in my hands like it’s some kind of ritual.
Why This Skillet Brownie Recipe Actually Works
This recipe leans on a double chocolate setup — melted dark chocolate plus cocoa powder. The melted chocolate builds that dense, fudgy structure. The cocoa powder deepens the flavor without making things heavier.
Brown sugar is quietly doing a lot too. It adds moisture and a slight caramel note that makes everything taste more layered. I once tried skipping it — it worked, technically. But it felt flatter somehow. Hard to explain, but noticeable.
And then there’s the cast iron skillet. It holds heat evenly and keeps the edges just crisp enough while the center stays soft. A regular pan just doesn’t behave the same way.
Small Changes That Made a Big Difference
That extra egg yolk? Total game-changer. Early versions of this recipe didn’t have it, and while they were fine… they weren’t this. The texture now is noticeably richer.
I also started pulling the brownies out a couple minutes earlier than felt right. It made a bigger difference than expected — the center stayed properly gooey instead of setting too much.
And weirdly, switching to a wooden spoon for mixing the eggs helped with the shiny top. I can’t fully explain why. Something about the texture or friction, maybe. It just works.
Substitutions & Variations
No dark chocolate? Semi-sweet chocolate chips will do in a pinch. Slightly sweeter, slightly less fudgy, but still good. I’ve done it when I didn’t feel like going out — no regrets.
For a dairy-free version, swap butter with coconut oil and use dairy-free chocolate. The texture shifts a bit, not quite as rich, but still very enjoyable.
You can also play around with add-ins. A swirl of peanut butter before baking, crushed pretzels for crunch, or even a pinch of espresso powder to deepen the chocolate flavor. You won’t taste coffee, just more chocolate.
And yes, someone I know adds cayenne. It sounds odd. It works.
For a cakier version, add one extra egg and a teaspoon of baking powder, then bake a few minutes longer. Not my preference, but if that’s your thing, it’ll get you there.
What to Serve With It
Vanilla ice cream is the obvious choice — and honestly, it’s obvious for a reason. The contrast between cold and warm just works.
But if you want to switch it up:
• Whipped cream if you want something lighter
• A drizzle of salted caramel for something a bit indulgent
• Fresh raspberries to cut through the richness
• A sprinkle of flaky sea salt right after baking — seriously, don’t skip that
If you’re serving guests, bring the whole skillet to the table. It looks impressive with almost no extra effort.
If I Were Making This Again Tomorrow
I’d probably double the recipe and use a bigger skillet. One batch disappears faster than you’d expect.
I’d also remember to take the eggs out early — maybe. And set a timer so I don’t wander off and overbake it while scrolling my phone. That happens more than I’d like to admit.
It’s the kind of dessert that works on a random weeknight but also somehow fits when you have people over. Low effort, high reward.
What I Skip When I’m Short on Time
Sometimes I don’t bother chopping chocolate and just use larger chips. Yes, I know I said not to earlier. It’s one of those “do as I say, not always as I do” situations.
I also skip the resting time when I’m impatient. If you do that, just eat it quickly — the center will be very molten. Not exactly a downside.
And toppings? Usually just salt and ice cream. That’s enough.
Storage & Reheating
This is best eaten the same day. Warm, gooey, straight from the skillet — that’s peak.
If you somehow have leftovers, cover the skillet and leave it at room temperature for up to two days. It firms up a bit but still tastes good.
To reheat, microwave a portion for 20–30 seconds. Or warm the whole skillet in the oven at 300°F for about 8–10 minutes, loosely covered.
Avoid refrigerating unless it’s really hot where you live. Cold brownies get dense and… a little sad, honestly.
FAQ
Can I make this without a cast iron skillet?
Yes, an oven-safe stainless steel skillet works. Just watch it closely — the heat won’t distribute quite the same.
My brownie top isn’t shiny. What happened?
Most likely not enough mixing when adding the eggs, or the batter was too warm. Still tastes great though — just less photogenic.
Can I use a smaller skillet?
An 8-inch skillet works, but the brownie will be thicker. Add about 5–7 minutes to baking time and keep an eye on it.
How do I know when it’s done?
Edges look set, center looks slightly underdone. A toothpick should come out with moist crumbs — not wet batter, not completely clean.
Can I make this ahead?
You can prep the batter and refrigerate it for a few hours. Let it come to room temp before baking, or just add a few extra minutes in the oven.
Final Thoughts
There’s something really satisfying about pulling a bubbling skillet brownie out of the oven and setting it right on the table. No extra fuss, no complicated plating — just warm chocolate and a spoon passed around.
This skillet brownie recipe is always the one I keep coming back to. Not just because it’s easy, but because it actually delivers every time. Gooey center, crackly top, those buttery edges — it all just works.
Make it once and you’ll get it. There’s a reason cast iron and chocolate feel like they belong together.