How to Cook a Roasted Duck
I want to be candid with you. I actually had no idea about how to cook a roasted duck. The first time I tried to roast a duck, I pulled something out of the oven that looked like a deflated football. Pale, sad, swimming in its own grease. My family was very polite about it, which somehow made it worse.
At the time, I genuinely thought I had followed everything correctly. Clearly… I hadn’t.
That was years ago. I’ve since made roasted duck probably thirty or forty times—maybe more, I stopped counting at some point—and somewhere around attempt number five, I stopped being afraid of it. Or at least less afraid.
Duck isn’t difficult. It’s just… different from chicken. That’s really it. Once you understand why it behaves the way it does, things start to click. Not instantly, but they do.
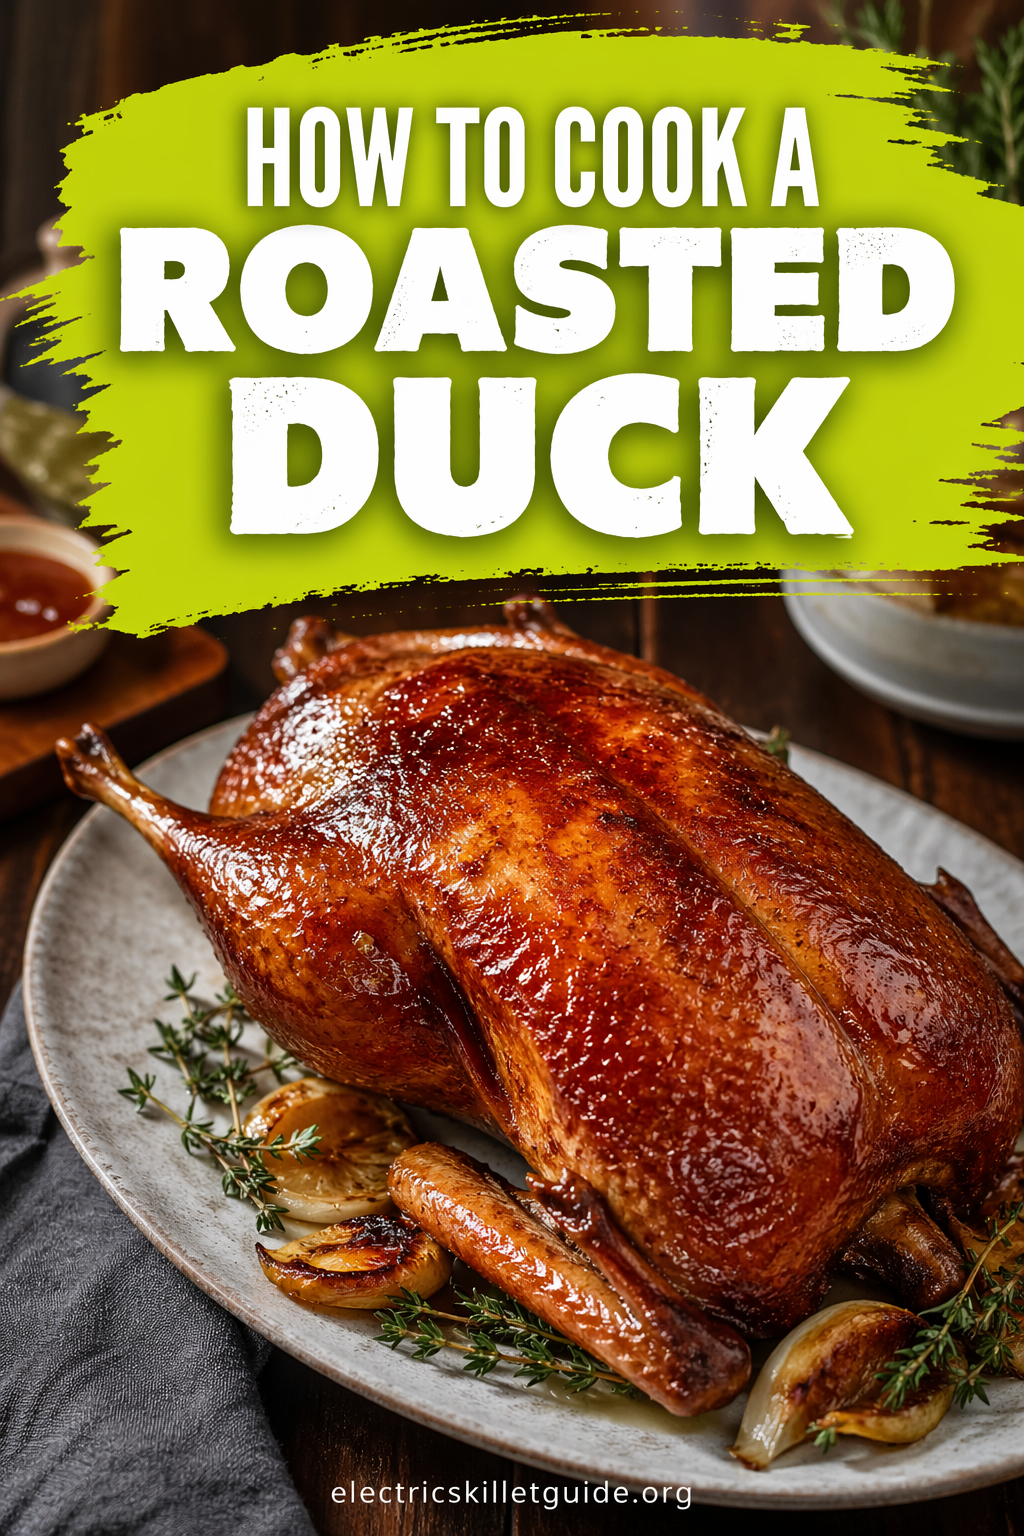
This is hands down the best roasted duck recipe I’ve tested—crispy skin, juicy meat, and (ideally) no greasy disaster.
If you’ve been putting off making roasted duck at home because it sounds intimidating, this is probably the point where that hesitation starts to fade. Or at least, that’s what happened for me.
Why You’ll Love This Roasted Duck Recipe
The skin. I have to start with the skin.
When this goes right, roasted duck skin comes out crackling like the surface of a crème brûlée—amber, crisp, and just slightly ridiculous in how good it is. Chicken can’t really do this. It tries, but it doesn’t have the fat for it.
Duck does. Almost too much, honestly.
But that’s kind of the whole point.
Beyond the skin, there are a few reasons this recipe sticks:
Duck looks impressive without requiring anything overly technical. It’s one of those dishes where people assume you worked harder than you actually did. I’m not complaining.
You also end up with rendered duck fat, which—if you’ve never used it before—feels like discovering a cheat code for cooking. Roasted potatoes in duck fat are… yeah, they’re worth it.
And unlike turkey, duck is manageable. It fits in a normal oven without you having to reorganize your entire kitchen setup, which I appreciate more than I probably should.
Also—this might just be personal bias—but duck tastes better than chicken. I said what I said.
Ingredients
Here’s what you’ll need for one whole roasted duck, serving about 3–4 people comfortably (or 2 if you’re really into duck… which is fair):
For the duck:
1 whole duck, about 5–6 lbs
2 tsp kosher salt
1 tsp freshly ground black pepper
1 tsp five-spice powder (trust me on this… or don’t, but it helps)
1 tsp garlic powder
Zest of one orange
4–5 fresh thyme sprigs
Half an orange, cut into wedges
1 small onion, halved
4 garlic cloves, smashed
For the glaze (optional but recommended):
3 tbsp honey
2 tbsp soy sauce
1 tbsp orange juice
1 tsp rice vinegar
That’s it. Nothing complicated. No last-minute ingredient hunt.
Step-by-Step Instructions
Step 1: Prep the duck (the night before, if possible)
Take the duck out, remove the neck and giblets, and pat it completely dry. And I mean completely—this is one of those steps that feels repetitive but actually matters more than you think.
Moisture is the enemy here.
Using a sharp knife or skewer, prick the skin all over—especially around the thighs and breast. Don’t go too deep. You’re not trying to damage the meat, just the skin.
Score the breast in a crosshatch pattern.
Mix your salt, pepper, five-spice, garlic powder, and orange zest, then rub it all over the duck. Stuff the cavity with the orange, onion, thyme, and garlic.
Place it on a rack and refrigerate uncovered overnight.
Or at least a couple of hours if you’re short on time… though honestly, overnight is noticeably better. I’ve tested both.
Step 2: Bring it to room temperature
Take the duck out about an hour before cooking.
Cold duck straight into a hot oven doesn’t behave well. It cooks unevenly and just… feels off.
Let it sit.
You can also use this time to double-check everything, which I tend to do more than necessary.
Step 3: Start low and slow
Preheat to 300°F (150°C).
Place the duck breast-side down on a rack.
This part feels a bit counter-intuitive at first. I remember thinking, “shouldn’t the nice side face up?” But starting breast-side down actually makes a difference.
The fat renders from the back and naturally bastes the breast. It’s one of those things that sounds simple but works surprisingly well.
Roast for 1 hour.
Every 30 minutes, drain the fat.
Yes, it’s slightly annoying. And yes, you’ll probably wonder if skipping one round would be fine.
It’s usually not.
Step 4: Crank the heat
Increase to 375°F (190°C).
Flip the duck breast-side up and continue roasting for another hour.
Keep draining the fat every 30 minutes.
At this point, it starts to look like something you’d actually want to eat, which is always reassuring.
Step 5: Glaze and finish
Mix the glaze ingredients.
Brush it over the duck during the last 20 minutes, then increase heat to 425°F (220°C).
This is the part where things can go from perfect to slightly burnt if you’re not paying attention.
I’ve made that mistake. More than once, actually.
Roast until the skin is deeply golden and crisp.
Internal temp should hit around 165–170°F in the thigh.
Step 6: Rest before carving
Let it rest 15–20 minutes.
I know this is the hardest part.
Every time I tell myself I’ll wait properly… and every time I end up checking it too early.
Still—rest it. It makes a difference.
Cooking Tips
The biggest mistake people make is skipping the overnight dry-brine.
Even two hours helps, but overnight really changes the texture of the skin. It’s not subtle.
Use a rack. Always.
Otherwise, the duck sits in its own fat, and that’s not really roasting anymore—it’s something else entirely.
Watch the glaze closely. Honey burns faster than you expect.
Also, use a thermometer.
I used to guess. It didn’t go well.
And for some reason, I still find myself double-checking the oven temperature during the final stage. Not entirely sure why—probably because I’ve overcooked it once and that memory stuck.
Why This Recipe Actually Works
It comes down to the two-temperature method.
Starting low allows the fat to render slowly before the meat tightens up. Then the high heat finishes the skin.
That’s the main idea.
Although, to be fair, I didn’t really think about any of this the first few times I made it—I was just following steps and hoping for the best. It only started making sense after a few attempts.
The breast-down start also helps more than it seems.
Gravity does the work. Which is nice.
The five-spice adds something subtle. Not overwhelming, just… interesting.
Hard to explain exactly, but you notice it.
Substitutions & Variations
No five-spice powder? You can mix a small pinch of cinnamon, ground star anise, fennel seed, cloves, and white pepper to get somewhere in the same direction. It’s not exact—I don’t think I’ve ever gotten it exactly right—but it works well enough that most people won’t notice the difference.
Or, honestly, you can just skip it and go with smoked paprika and thyme for something more classic and European. Different flavor profile, still very good. Just… less mysterious, if that makes sense.
If you want to skip the glaze entirely, the duck still turns out great. The glaze is more about that glossy finish and a slight sweet-savory contrast. I like it, but I’ve skipped it on lazy days and nobody complained.
For a citrus-herb variation, swap the orange for lemon and use rosemary and sage in the cavity. It leans a bit more rustic. I tried this once on a whim when I ran out of oranges, and it turned out better than expected—so now it’s in rotation.
You can also use duck legs instead of a whole bird. Actually, if I’m being honest, duck legs are probably easier the first time around. I didn’t start there, but in hindsight, maybe I should have.
Small Changes That Made a Big Difference
I used to skip the orange zest in the rub and just rely on the orange inside the cavity. It felt like enough.
Then one day I added zest directly into the rub—mostly because I didn’t want to waste it—and the difference was immediate. The aroma alone was stronger, in a good way.
Pricking the skin more aggressively (without hitting the meat) also changed things quite a bit. I was very cautious at first. Probably too cautious.
Now I’m… not careful, exactly. Just more confident about it. The fat renders better when you actually give it a way out.
And resting the duck uncovered in the fridge instead of loosely covering it—this one surprised me. It dries the skin more evenly. It’s a small adjustment, but it adds up.
I didn’t expect that to matter as much as it did.
What to Serve With It
Duck is rich. There’s no way around that.
So you want something that balances it, or at least doesn’t make the whole plate feel heavy.
Braised red cabbage with apple is a classic. Sweet, slightly tangy—it cuts through the fat nicely.
A bitter green salad works too. Something simple, sharp vinaigrette, nothing complicated.
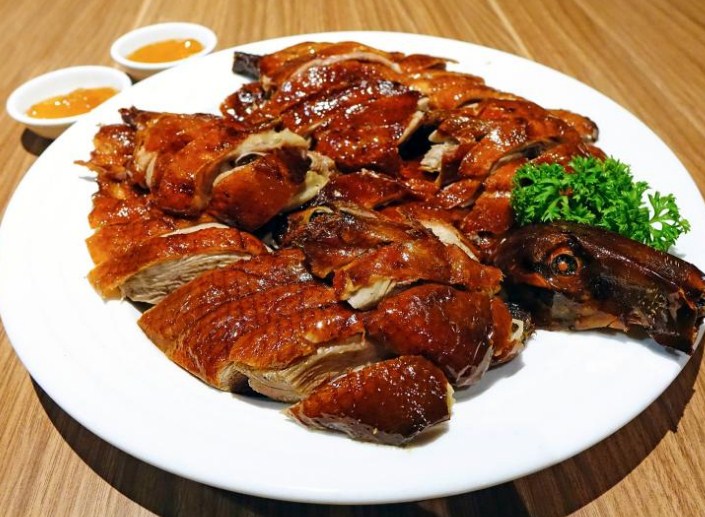
If you’re leaning toward the five-spice version, serving it with rice and something fresh like cucumber slices works really well. It starts to feel like a deconstructed Peking duck situation, which is kind of fun, even if it wasn’t the original plan.
And yes—duck-fat roasted potatoes.
I mean… you saved the fat, right?
Because if not, you might regret that later.
If I Were Making This Again Tomorrow
I’d probably start the dry brine two days ahead instead of one. It’s one of those things where the difference isn’t subtle once you’ve seen it.
The skin just gets better.
I’d also make a quick pan sauce. I don’t always do it, mostly out of laziness, but every time I do, I wonder why I don’t do it more often.
Just deglaze with wine, add a bit of stock, reduce it down. Nothing complicated.
And I’d definitely set a timer for the glaze stage.
Because for some reason, that’s the exact moment I tend to get distracted. Not sure why. But it happens.
What I Skip When I’m Short on Time
The overnight brine is technically skippable… but I try not to.
If I really have to, I’ll do a shorter version—maybe two hours—but it’s not quite the same. Still good, just not great.
I also sometimes skip making the glaze from scratch and use a quick mix of store-bought hoisin and honey.
Not identical, but close enough when you’re tired.
What I don’t skip: pricking the skin and using a rack.
Those two steps carry a lot of the result. Everything else is, more or less, flexible.
Storage & Reheating
Leftover duck keeps in the fridge for about 3 days.
The skin softens overnight. That’s just how it goes.
But you can bring it back.
Reheat in the oven at 375°F for about 10–15 minutes. Use a rack if you can.
Avoid the microwave.
I mean—you can use it. But the skin won’t survive the experience. I’ll leave it at that.
Duck meat is great in leftovers, though. Fried rice, tacos, even pasta. I once threw some into a late-night fried rice situation and it turned out better than the original dinner.
Didn’t expect that, but I wasn’t mad about it.
Duck fat keeps for weeks in the fridge, longer in the freezer. Use it on anything you’d normally cook in oil or butter.
It makes things… better. That’s the simplest way to put it.
FAQ
Do I need to score the duck breast skin?
Yes. It helps the fat render properly. Just don’t cut into the meat—this part takes a bit of control.
Can I use a cast-iron skillet instead of a roasting pan?
For duck legs, yes. For a whole duck, not really. You need space and airflow.
Why is my duck skin not crispy?
Usually moisture. Either it wasn’t dried enough, or the heat wasn’t high enough at the end. Or the duck didn’t have proper airflow.
Sometimes it’s a combination of all three, which is frustrating, but fixable.
Is duck supposed to be pink?
Duck breast can be. Whole duck—especially thighs—should be fully cooked through.
What type of duck should I buy?
Pekin (Long Island) duck is the most common and easiest to work with. Muscovy is leaner and cooks a bit differently.
If it’s your first time, stick with Pekin. It’s more forgiving.
Final Thoughts
Well, I presume you have now got enough idea about how to cook a roasted duck. Truly, roasted duck is one of those dishes that sounds harder than it actually is.
It just takes a bit of patience—and maybe one or two attempts before it really clicks.
Once it does, though, it becomes one of those meals you come back to. Not all the time, but often enough.
The low heat, the fat rendering, the final blast of high heat—it all has a purpose. And once you understand that, you stop overthinking it.
Or at least, you overthink it a little less.
Give it a try this weekend.
Worst case, you still end up with something pretty good and a jar of duck fat.
Best case—you nail it, and suddenly you’re the person who “makes duck,” which, not going to lie, feels kind of impressive.