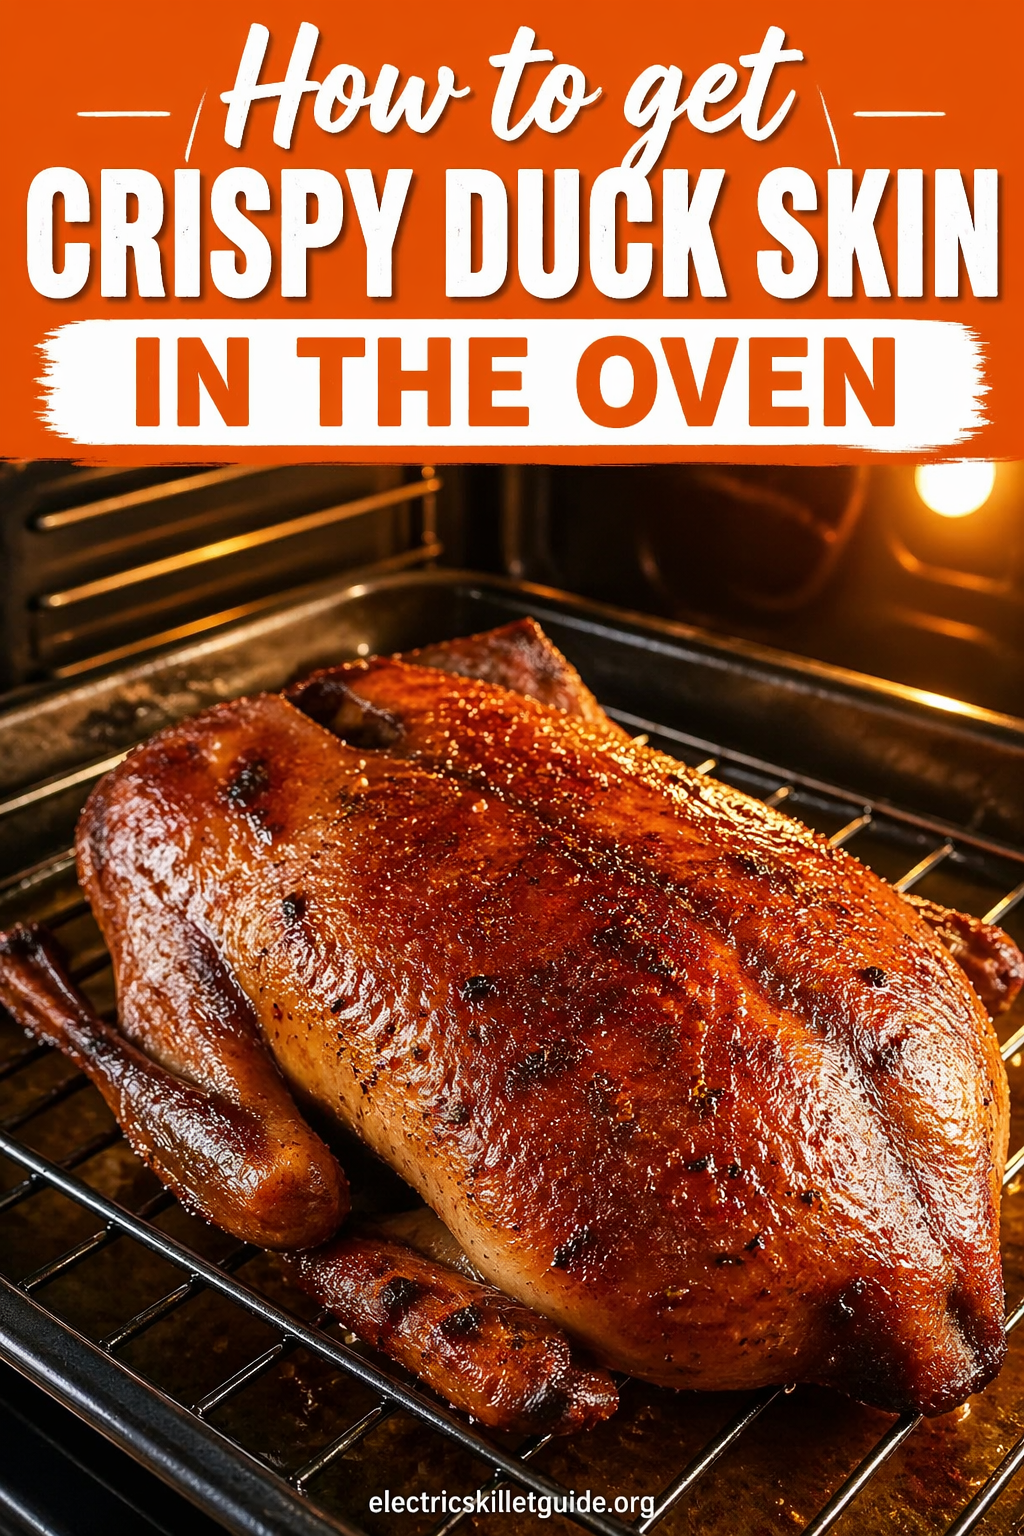
How to Get Crispy Duck Skin in the Oven
I am sure you are here because you have been wondering about how to get crispy duck skin in the oven. Let me be honest with you — the first time I tried to roast a duck, I pulled it out of the oven and the skin looked like a sad, soggy raincoat. Not crispy. Not golden. Just… depressing. I stood there in my kitchen holding a rubber spatula and questioning every decision I’d ever made. But here’s the thing: crispy duck skin isn’t some mythical achievement reserved for Michelin-starred chefs. It’s completely doable at home, in a regular oven, once you understand what’s actually going on with that thick layer of fat underneath the skin. This guide is going to walk you through exactly how to get crispy duck skin in the oven — the real way, with no shortcuts that don’t actually work.
Why You’ll Love This Recipe
Duck is one of those proteins that sounds intimidating but rewards you like crazy once you crack the code. The skin, when done right, shatters like a potato chip. The meat stays juicy. And honestly? The smell of duck fat rendering in the oven is something I’d bottle and sell if I could.
A few things that make this method worth bookmarking:
- You don’t need a fancy setup — a regular roasting rack and sheet pan work perfectly.
- The prep is mostly hands-off. You do a little work upfront and the oven does the heavy lifting.
- Duck fat is a byproduct you keep. Yes, you collect it and use it to roast potatoes later. You’re welcome.
- It’s impressive. If you’re having people over, a perfectly roasted duck with lacquered, crackly skin is a guaranteed conversation stopper.
Also, let’s not pretend — duck just tastes better than chicken. I said what I said.
Ingredients
For one whole duck (about 5–6 lbs):
- 1 whole duck, thawed completely if frozen
- 1 tablespoon kosher salt (don’t use table salt — it’s too harsh)
- 1 teaspoon white pepper or black pepper
- 1 teaspoon five-spice powder (optional but highly recommended)
- 1 tablespoon apple cider vinegar or rice vinegar
- 1 teaspoon baking powder (this is the secret weapon — more on this later)
- 4–5 garlic cloves, smashed
- A few sprigs of fresh thyme or rosemary
- 1 orange, halved (for the cavity — it brightens everything)
- 1 tablespoon honey or maple syrup (for the glaze at the end)
That’s it. Nothing weird. Nothing you need to order online at midnight.
Step-by-Step Instructions
Step 1: Dry the Duck — Like, Really Dry It
This is where most people give up too early. Pat the duck dry with paper towels — inside the cavity, outside, under the wings, everywhere. Then put it in the fridge uncovered for at least 24 hours. Ideally 48. I know, I know. But the dry-brining process is what pulls moisture out of the skin and lets it crisp up properly in the oven. Wet skin = steamed skin = rubber. No thank you.
Step 2: Score the Skin
Use a sharp knife to score the skin in a crosshatch pattern, especially over the breast and thighs. Don’t cut into the meat — just through the skin and fat. This helps the fat render out during cooking instead of just sitting there being useless and soggy. Think of it like giving the fat an escape route.
Step 3: Apply the Dry Rub
Mix your salt, pepper, five-spice, and — here’s the part people skip — baking powder. That baking powder raises the skin’s pH and helps it brown and crisp faster. Rub this mixture all over the duck. Get it into the scores. Stuff the cavity with the garlic, herbs, and orange halves. Let the duck sit at room temperature for about 30 minutes before it goes in the oven.
Step 4: Start Low, Finish High
Preheat your oven to 300°F (150°C). Place the duck breast-side up on a rack set over a roasting pan or rimmed baking sheet. That rack is non-negotiable — it lets hot air circulate under the bird so the bottom doesn’t steam in its own juices.
Roast at 300°F for about 2 hours. Every 30 minutes, pull the duck out and carefully pour off the rendered fat into a heatproof container. Don’t skip this step. Letting fat pool in the pan creates steam, which is the enemy of crispy skin.
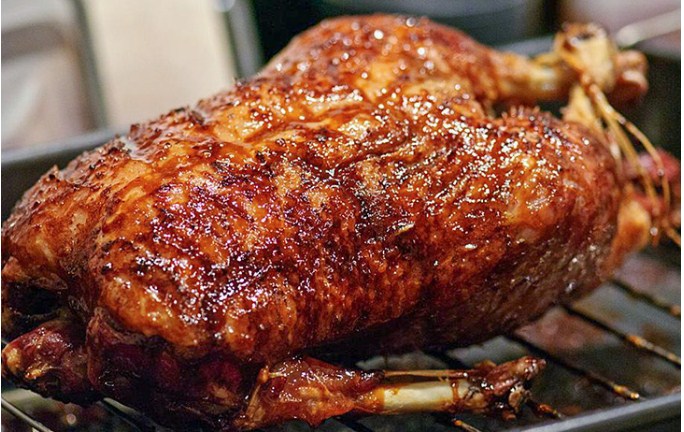
After 2 hours, crank the oven up to 425°F (220°C). Brush the duck with your honey or maple syrup glaze and roast for another 20–25 minutes until the skin is deep mahogany and crackling when you tap it.
Step 5: Rest Before You Cut
Pull the duck out, tent it loosely with foil, and let it rest for 15 minutes. This isn’t optional. Cutting into it right away will send all those beautiful juices running out onto your cutting board and you’ll be left with dry meat under that gorgeous skin. The rest lets everything redistribute.
Cooking Tips
A few things I’ve learned the hard way so you don’t have to:
The fridge is your best friend. Seriously. I’ve tried to rush this recipe and the skin always suffers. Plan ahead.
Don’t skip the rack. A flat pan traps steam underneath the duck. The rack lifts it up and lets heat get everywhere. Some people use a bed of sliced onions instead of a rack — that works too, and adds flavor to the drippings.
Watch the glaze. Honey burns fast at high heat. Don’t wander off to check your phone when you’ve cranked the oven up to 425°F. Set a timer for 15 minutes and actually check it.
Save that duck fat. Strain it through a fine-mesh sieve into a jar. It keeps in the fridge for weeks and makes the most incredible roasted potatoes, sautéed vegetables, or even scrambled eggs. It’s liquid gold, basically.
Oh — and if your smoke alarm goes off during the high-heat phase, that’s totally normal. Open a window. The skin is worth it.
Substitutions & Variations
No five-spice powder? Use a mix of cinnamon, star anise (ground), and a pinch of cloves. It won’t be identical but it’ll get you close.
Skip the glaze entirely if you want a more savory, European-style roast duck. Just season with salt, pepper, and herbs and let the skin speak for itself.
Add a citrus-soy glaze instead of honey if you want something more umami-forward — mix equal parts soy sauce, honey, and orange juice and brush it on in the last 20 minutes.
Whole duck vs. duck legs: Everything here applies to duck legs too. The cooking time drops significantly — about 1.5 hours low, then 20 minutes high. Duck legs are actually a great way to practice before you commit to a whole bird.
What to Serve With It
Duck is rich. Like, really rich. You want sides that can stand up to that without making the whole plate feel heavy.
Roasted root vegetables — parsnips, carrots, beets — work wonderfully. They can go right in the oven with the duck during the low-heat phase. A simple bitter green salad with a sharp vinaigrette cuts through the fat nicely. And if you’re feeling indulgent, duck-fat roasted potatoes alongside the actual duck is borderline overkill in the best possible way.
For sauces, a classic cherry reduction or an orange-ginger pan sauce are both excellent. I once served this with a quick plum sauce from a jar and nobody complained.
Storage & Reheating
Leftovers: Store duck meat and skin separately if possible. Leftover duck keeps in the fridge for up to 4 days or in the freezer for 2 months.
Reheating: This is where a lot of people ruin their leftover duck — they microwave it. Please don’t. The skin turns to leather. Instead, place the pieces skin-side up on a rack and reheat in a 375°F oven for 10–12 minutes. The skin comes back to life. It’s genuinely impressive.
Using leftovers: Shredded duck is incredible in tacos, fried rice, noodle soups, and even duck quesadillas. I may have eaten duck fried rice for breakfast the morning after making this recipe. No regrets.
Why This Recipe Actually Works
The crispy skin comes down to three things working together: moisture removal (the dry brine), fat drainage (scoring + basting off the rendered fat), and the Maillard reaction (the high-heat finish that browns and crisps everything). Skip any one of those steps and the results suffer noticeably. The baking powder trick accelerates the browning by making the skin more alkaline — same science behind why bagels are boiled in alkaline water before baking. Duck skin is basically your canvas, and these steps are how you get it to paint gold.
Small Changes That Made a Big Difference
Adding baking powder to the dry rub was a turning point for me — I’d read about it being used on chicken wings and decided to try it here. Total game changer. The other big one was being ruthless about draining off the fat every 30 minutes. I used to skip a round and the difference in the final skin texture was noticeable. One more thing: resting the duck on a rack even while it’s in the fridge during the dry-brine phase. Air circulation on all sides means the skin dries evenly, not just on top.
If I Were Making This Again Tomorrow
I’d start the dry brine two days out instead of one. I’d use a wire rack inside the fridge, not just a plate. And honestly? I’d make double the glaze — I always wish I had more for brushing at the end. I might also zest the orange into the dry rub for a little extra citrus perfume in the crust. Small thing but it does something nice.
What I Skip When I’m Short on Time
The dry brine is the one step I refuse to cut. But if I’m truly pressed, I skip the glaze and just let the skin brown naturally — it still comes out great, just less lacquered. I also skip scoring the back of the duck (the breast and thighs get scored, the backbone doesn’t really matter as much). And honestly, sometimes I skip the fresh herbs in the cavity. The orange alone is enough to keep things fragrant.
FAQ
Can I get crispy duck skin without drying it in the fridge overnight? You can try, but your results will be noticeably worse. If you’re truly short on time, pat it dry as thoroughly as possible and let it air-dry uncovered on the counter for at least 2 hours before roasting.
Why is my duck skin still soft after roasting? Almost always comes down to moisture. Either the skin wasn’t dried enough beforehand, fat wasn’t drained during cooking, or the oven temp wasn’t high enough at the end. Also — did you use a rack? A flat pan is a soggy skin guarantee.
Do I need to prick the duck skin before roasting? Some people do this instead of scoring. Pricking can work but it’s less controlled. Scoring lets you target the fattest areas specifically. I prefer scoring.
What’s the internal temperature for fully cooked duck? The USDA recommends 165°F, but many chefs prefer duck breast at around 155–160°F for juicier meat, especially for Pekin duck. Use a meat thermometer and check the thickest part of the thigh.
Can I use this method on a duck breast instead of a whole duck? Absolutely. Score the skin, season with salt and baking powder, and sear it skin-side down in a cold oven-safe skillet — start cold so the fat renders slowly. Then finish in a 400°F oven. Different method, same principles.
Conclusion
Getting crispy duck skin in the oven isn’t complicated — it’s just patient. Dry the skin out, score it, render the fat slowly, and hit it with high heat at the end. That’s the whole formula. Once you make this once and pull that glossy, crackling bird out of your oven, you’ll wonder why you ever thought it was intimidating. Duck is absolutely worth the 48-hour commitment. And if anyone tries to tell you the skin is the best part — they’re right, and don’t let anyone shame you for eating it straight off the cutting board before dinner is even plated. I won’t tell.